
How to scale on Rhino
One of the most useful functions to use on Rhino is to be able to scale. Even though it may seem like a small simple task, becoming seamless in this frequently used tool will increase your workflow efficiency. It particularly comes in handy when you are doing three-dimensional modelling and you import digital model pieces to include in your work, when drawing in 2D and you want to use a scaled reference image and at the end of your work production when you are exporting onto a page. This post is going to cover the different ways you can scale step-by-step and how you can scale your final Rhino drawings and views onto a desired page size on a layout rather than scaling all the components individually.
The concept of scaling is pretty simple. When you scale in one dimension (1D - not one direction), you change the size of an object in one plane and the proportions change, i.e if you scale a square in 1D selecting the length, the dimension of the width will remain the same, and only the length will change. This will no longer be a square but a rectangle. When you scale in two dimensions (2D), the object that you are enlarging or reducing in size will change uniformly on two planes, i.e if you scale a square in 2D, regardless of if you select the length or the width, they will both change in proportion with each other. This object will remain as a square. Lastly, scaling in three dimensions (3D) means you are changing the size of an object on three planes, uniformly with each other, i.e if you have a cube and you select the command to scale in 3D, the height, depth and width (the x, y, and z axis) will all enlarge or reduce in proportion with each other without changing the shape origin. It will remain a cube, but larger or smaller in size. Working on Rhino, you will typically use ‘Scale2D’ and ‘Scale’ the most.
Scaling 2D Objects
When using Rhino’s 2D interface there are two ways to scale. The first is to scale by matching an existing dimension and the second is to use a scale factor. Both of these methods can be used to scale closed curves and imported reference images.
Matching an Existing Dimension
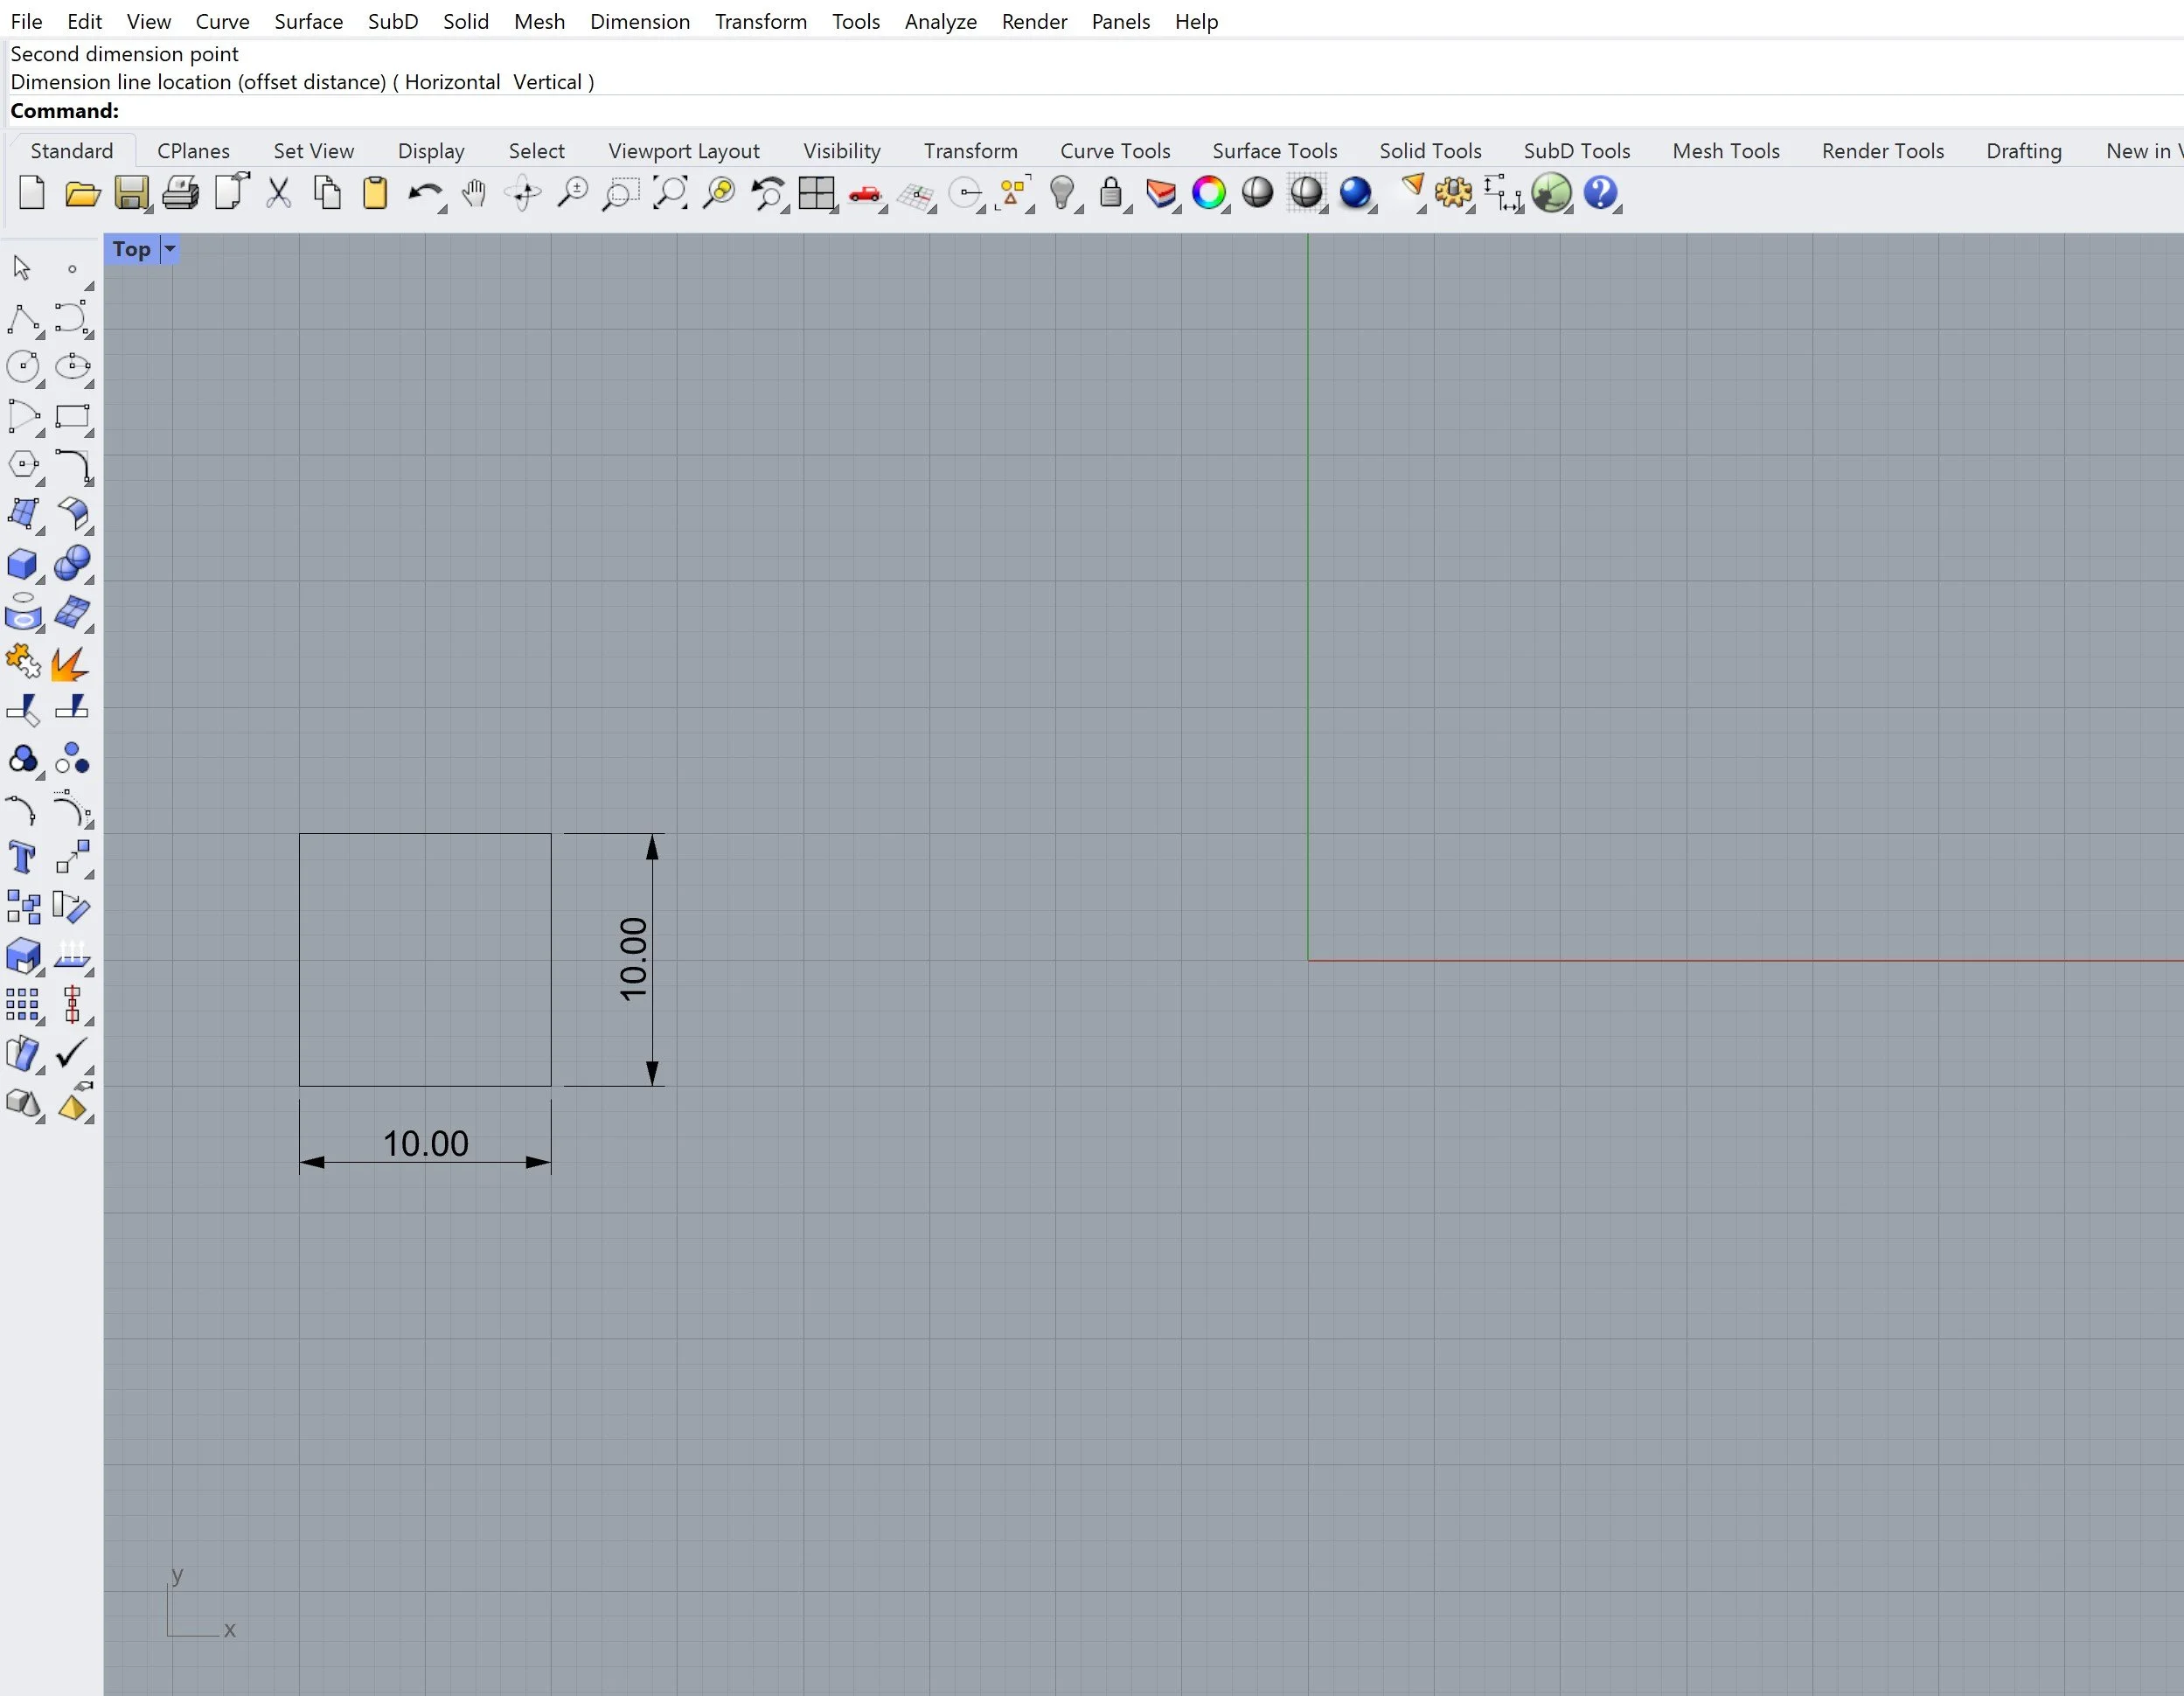
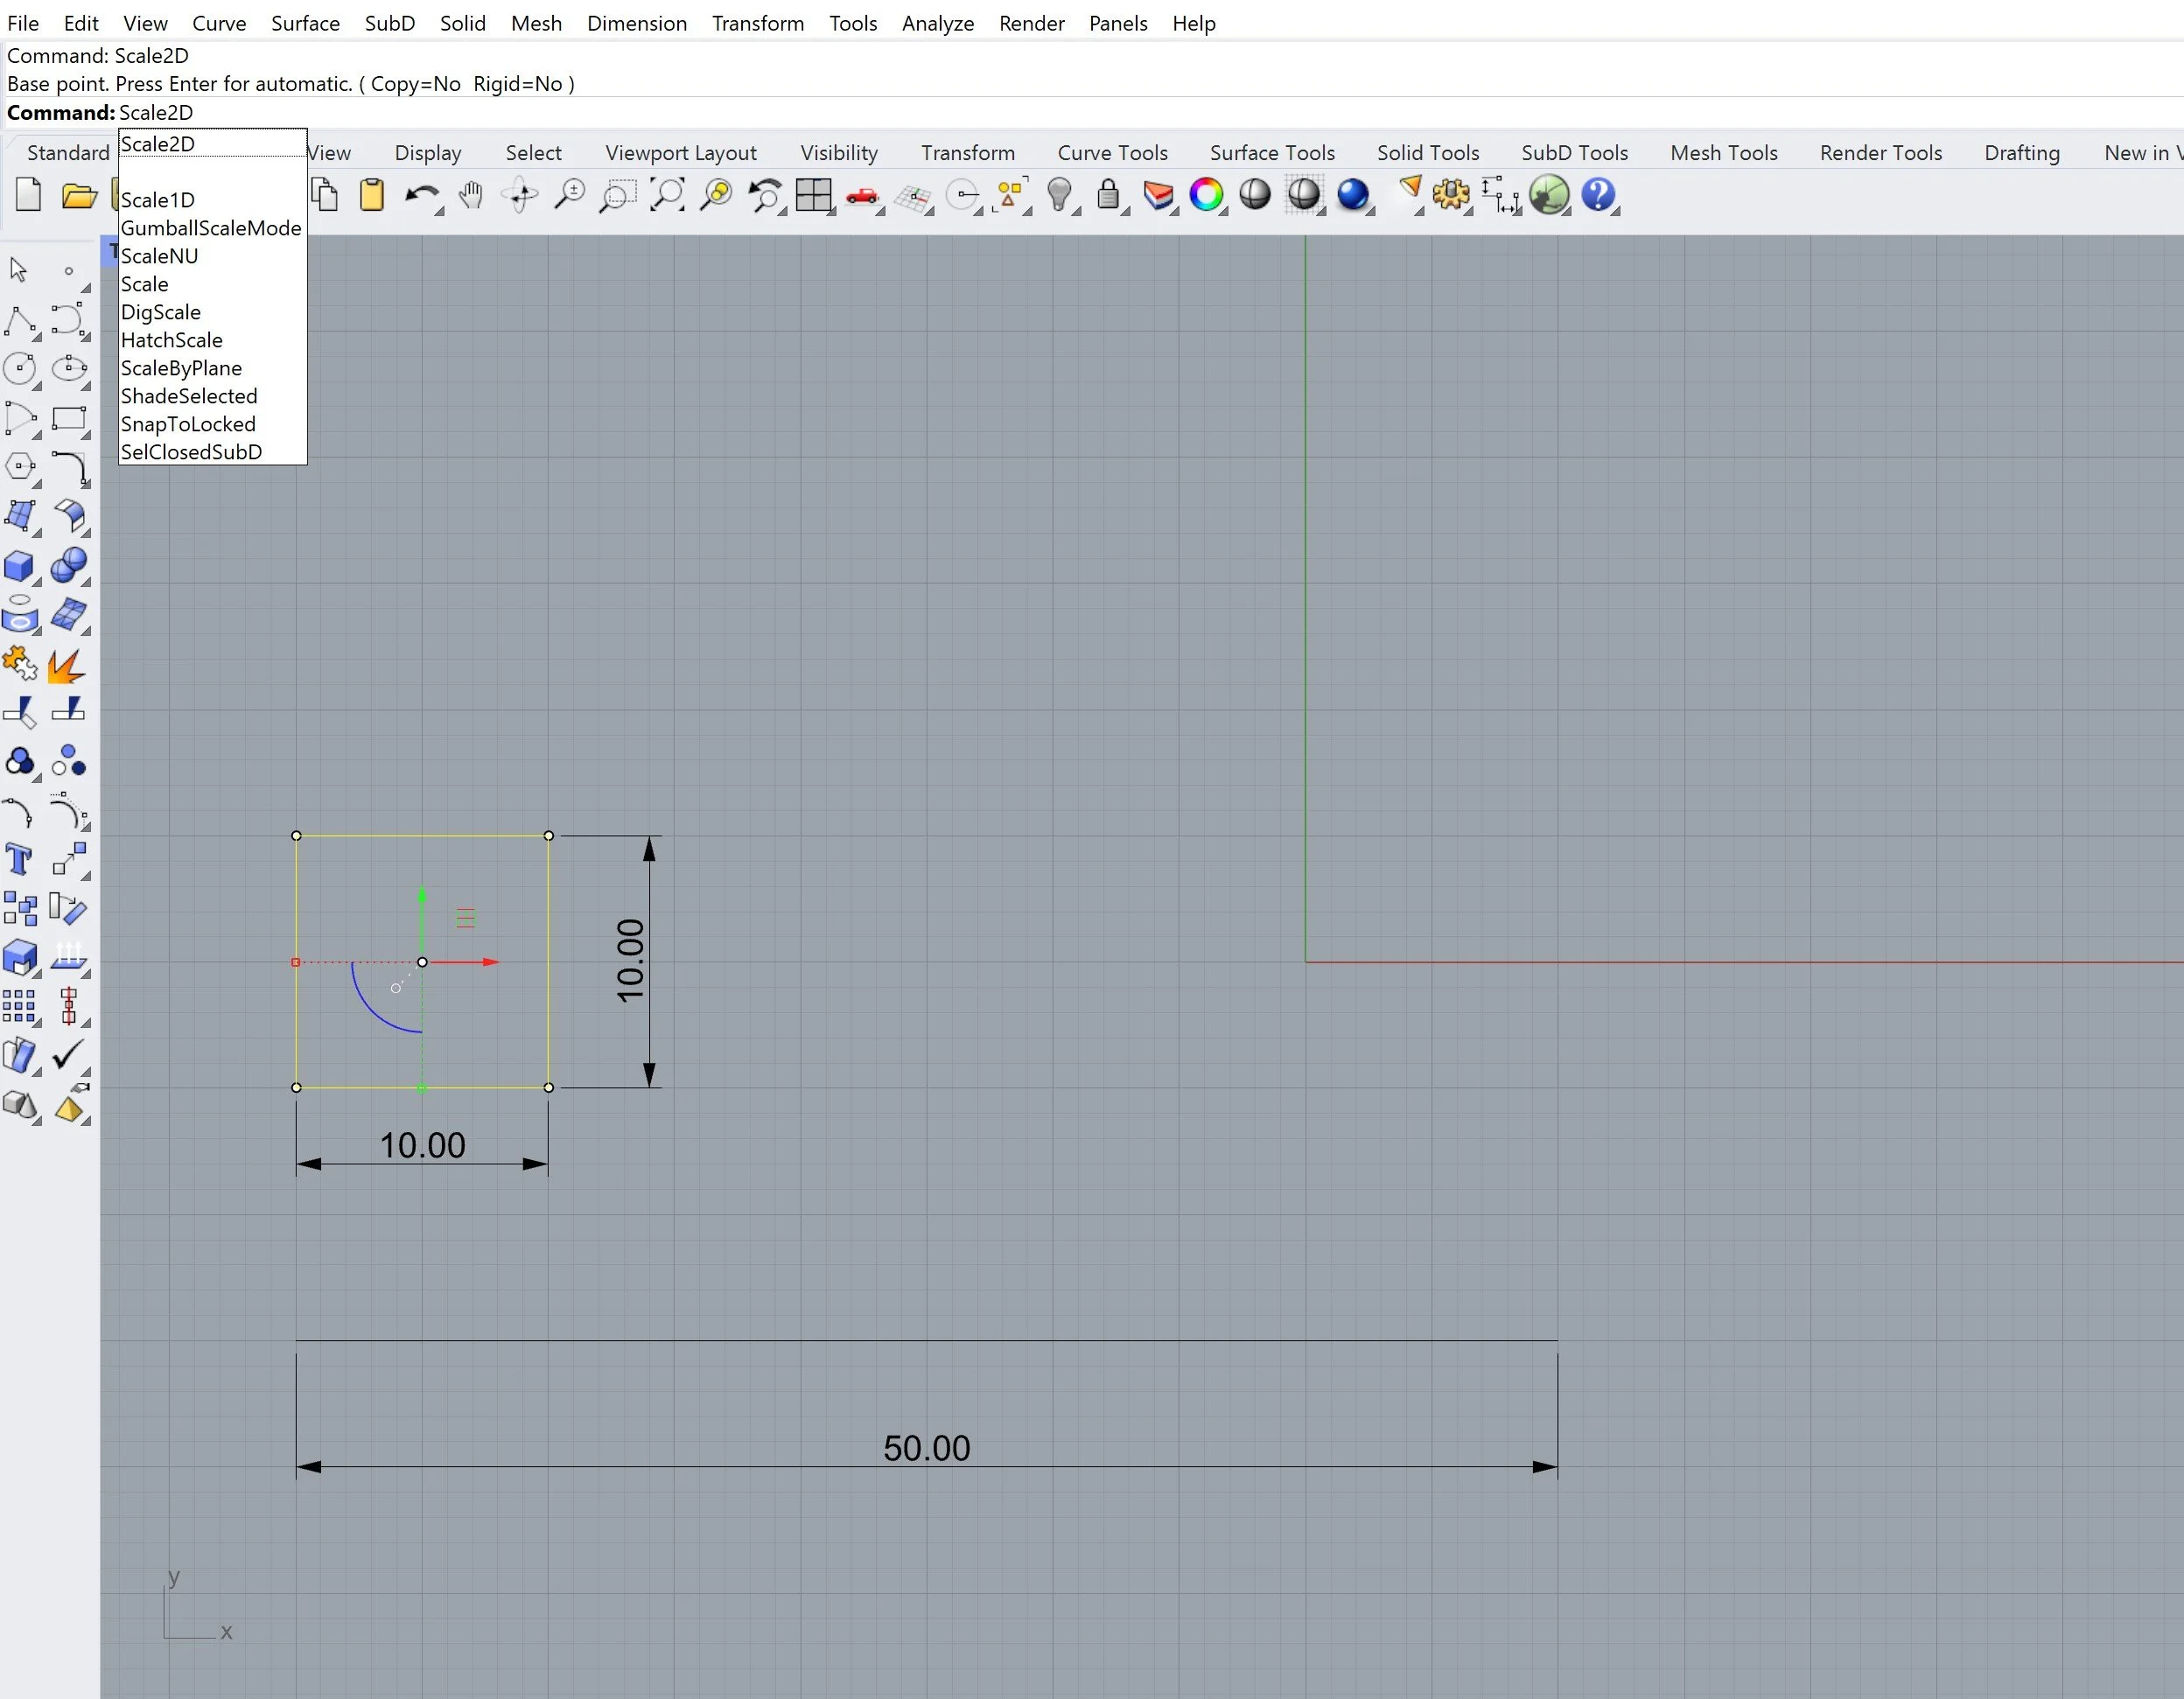
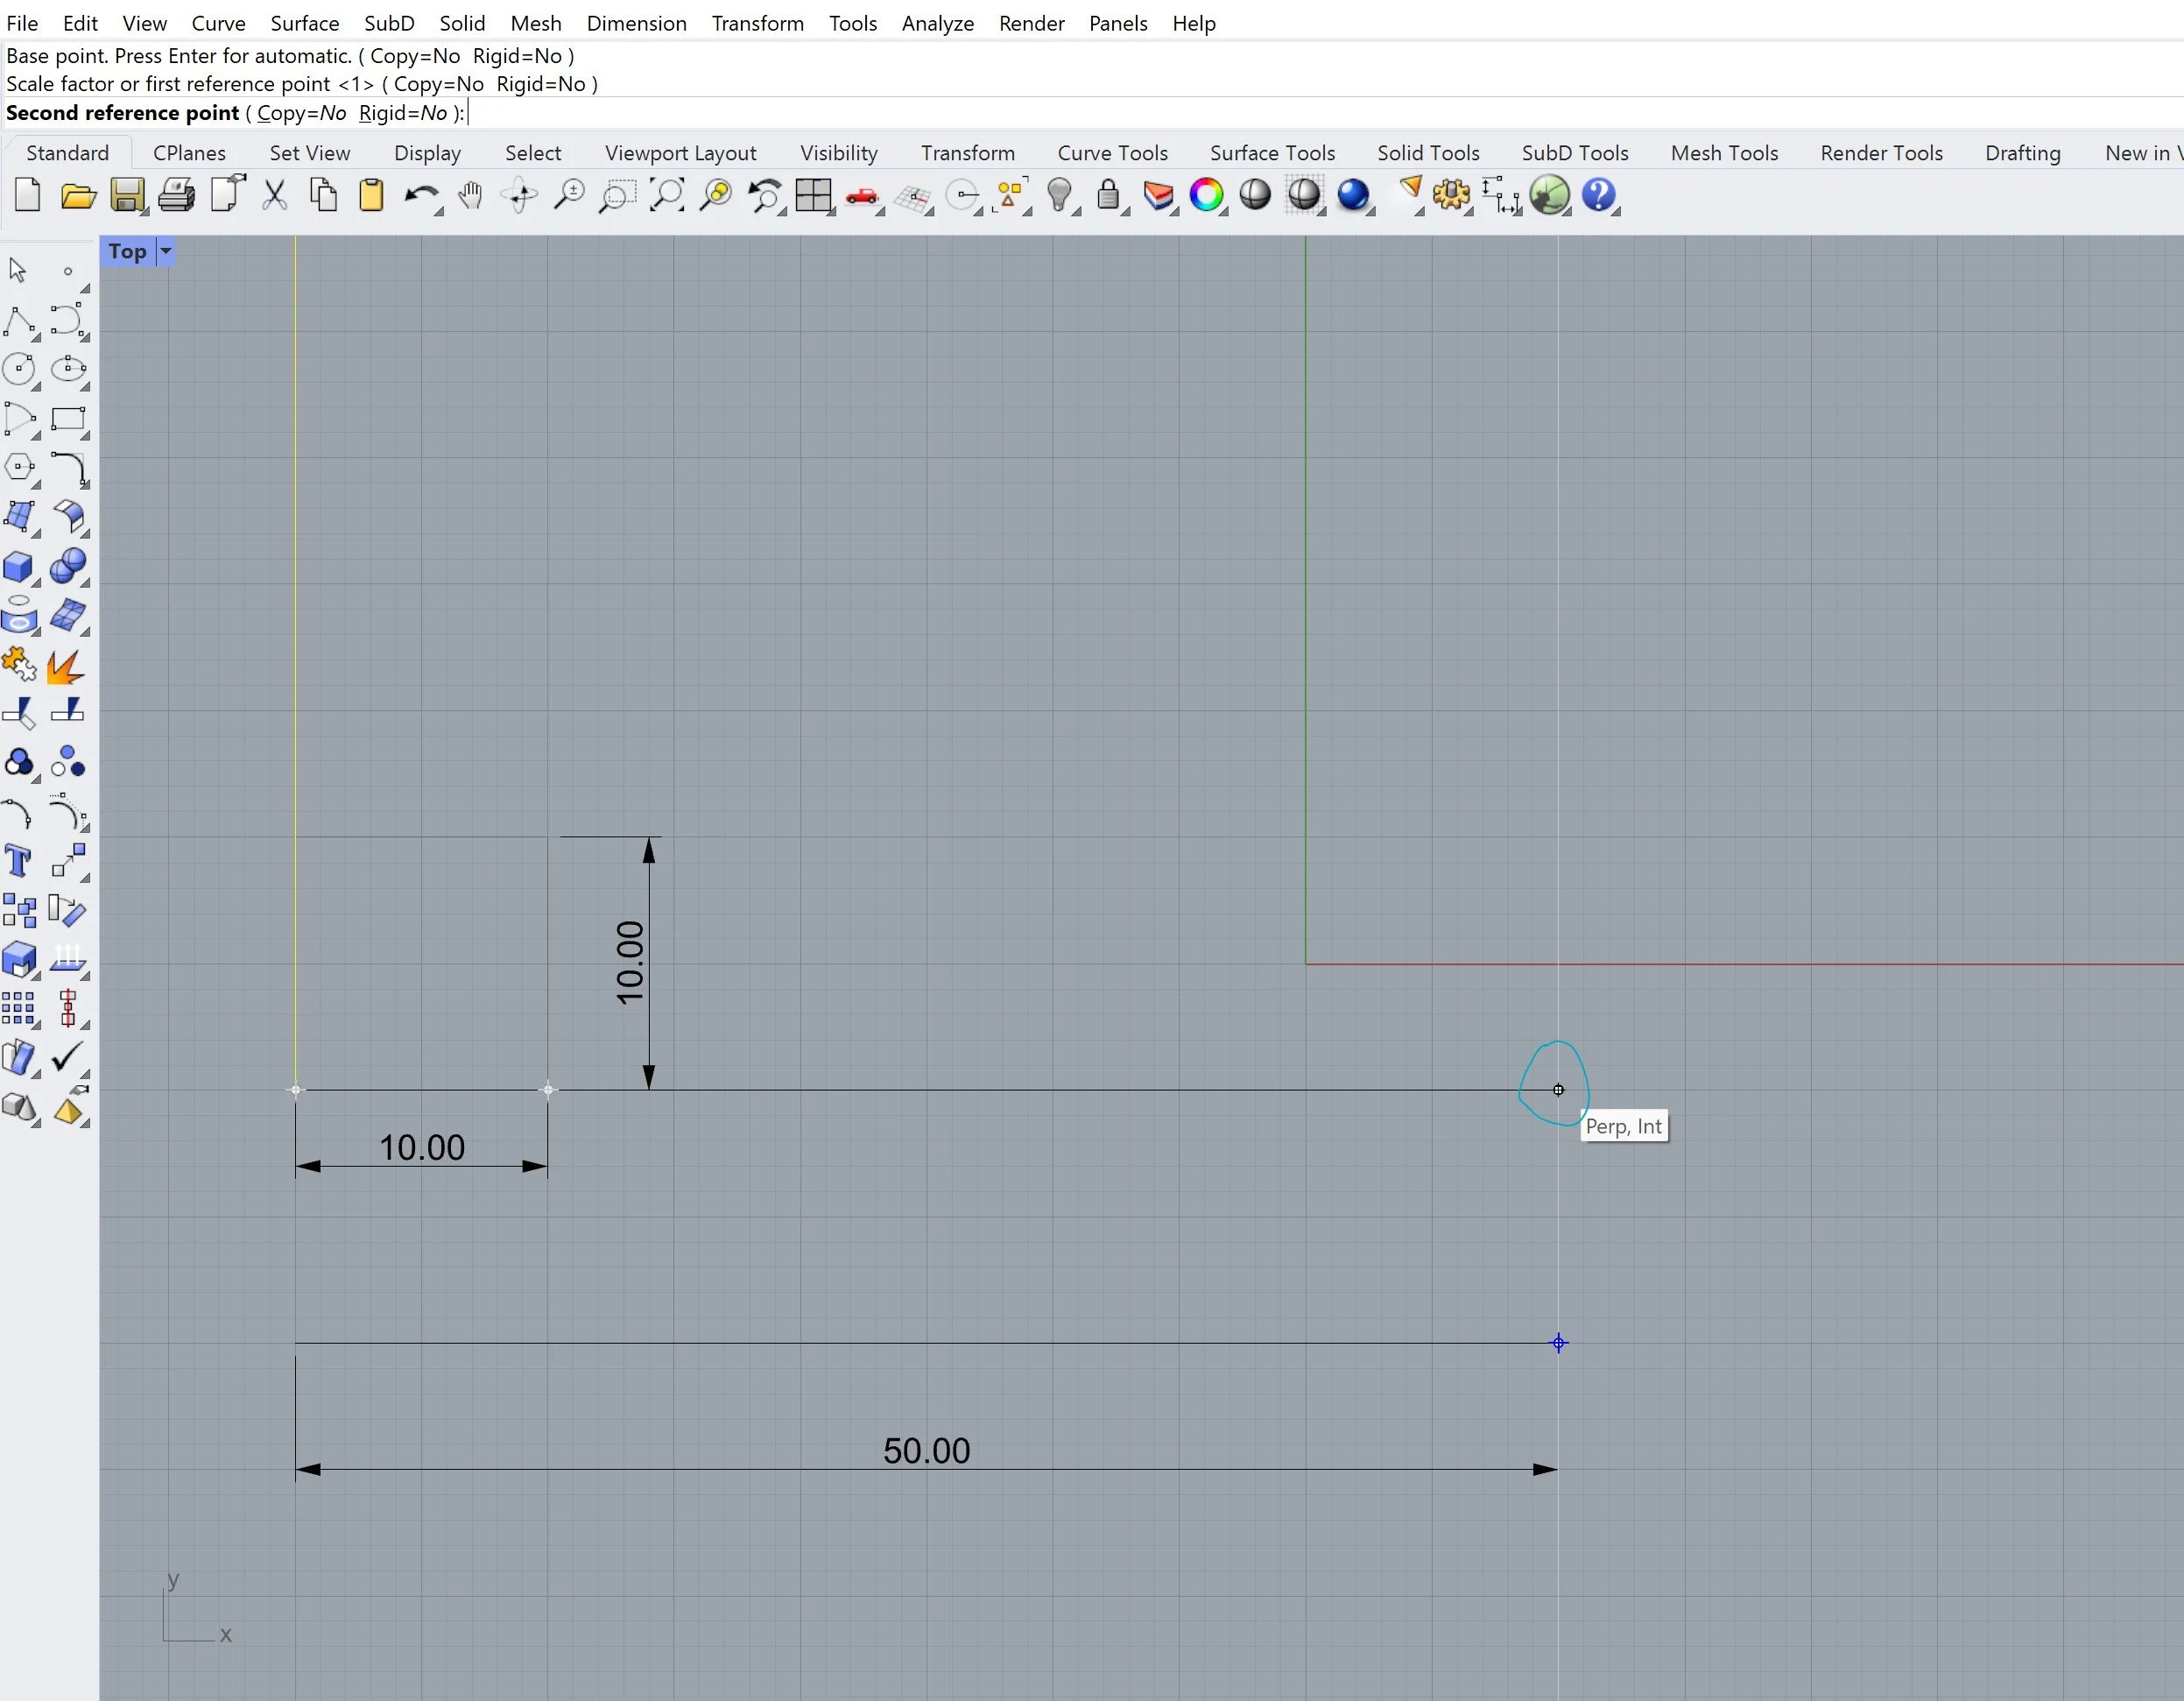
In the first image [1] you can see I am working with a square on the 2D interface that measures 10mm x 10mm. I want to scale this up so the length x width becomes 50mm x 50mm. In order to do this I draw a line that is 50mm, aligning the start with the bottom corner of the square [2]. Then, selecting the closed curve you want to change the scale of, type in the ‘Scale2D’ command [3].
1

2
3
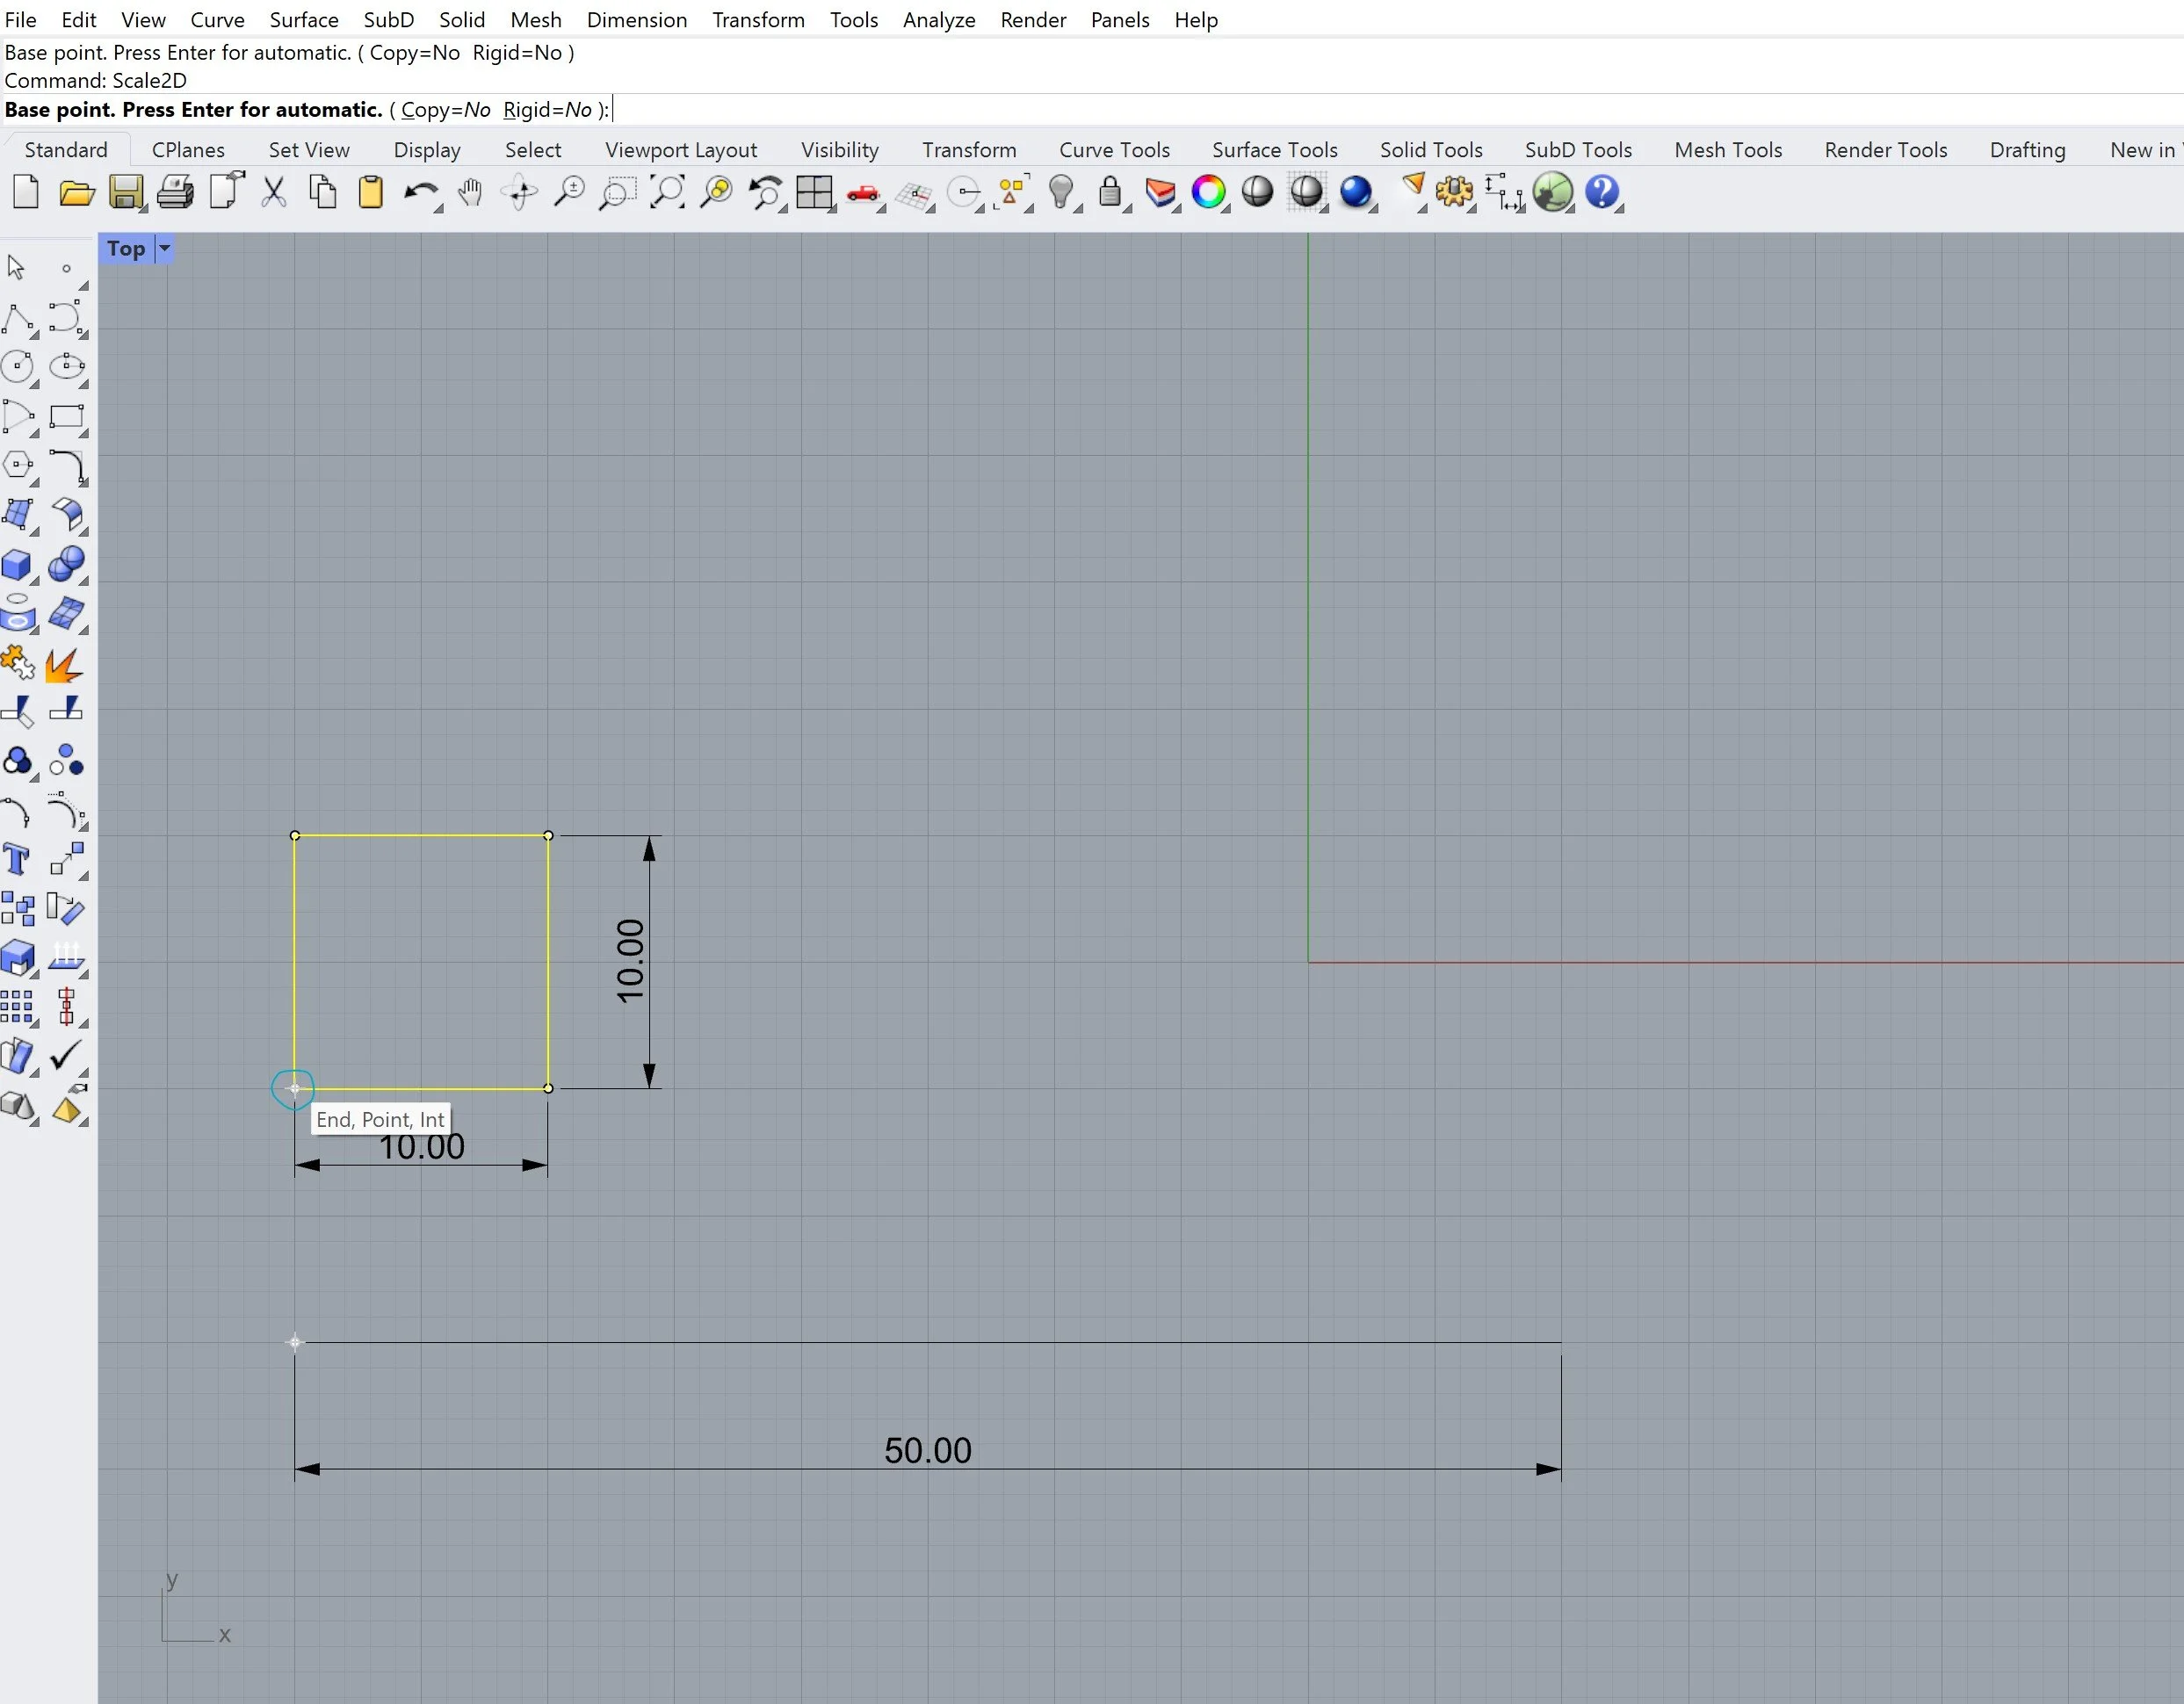
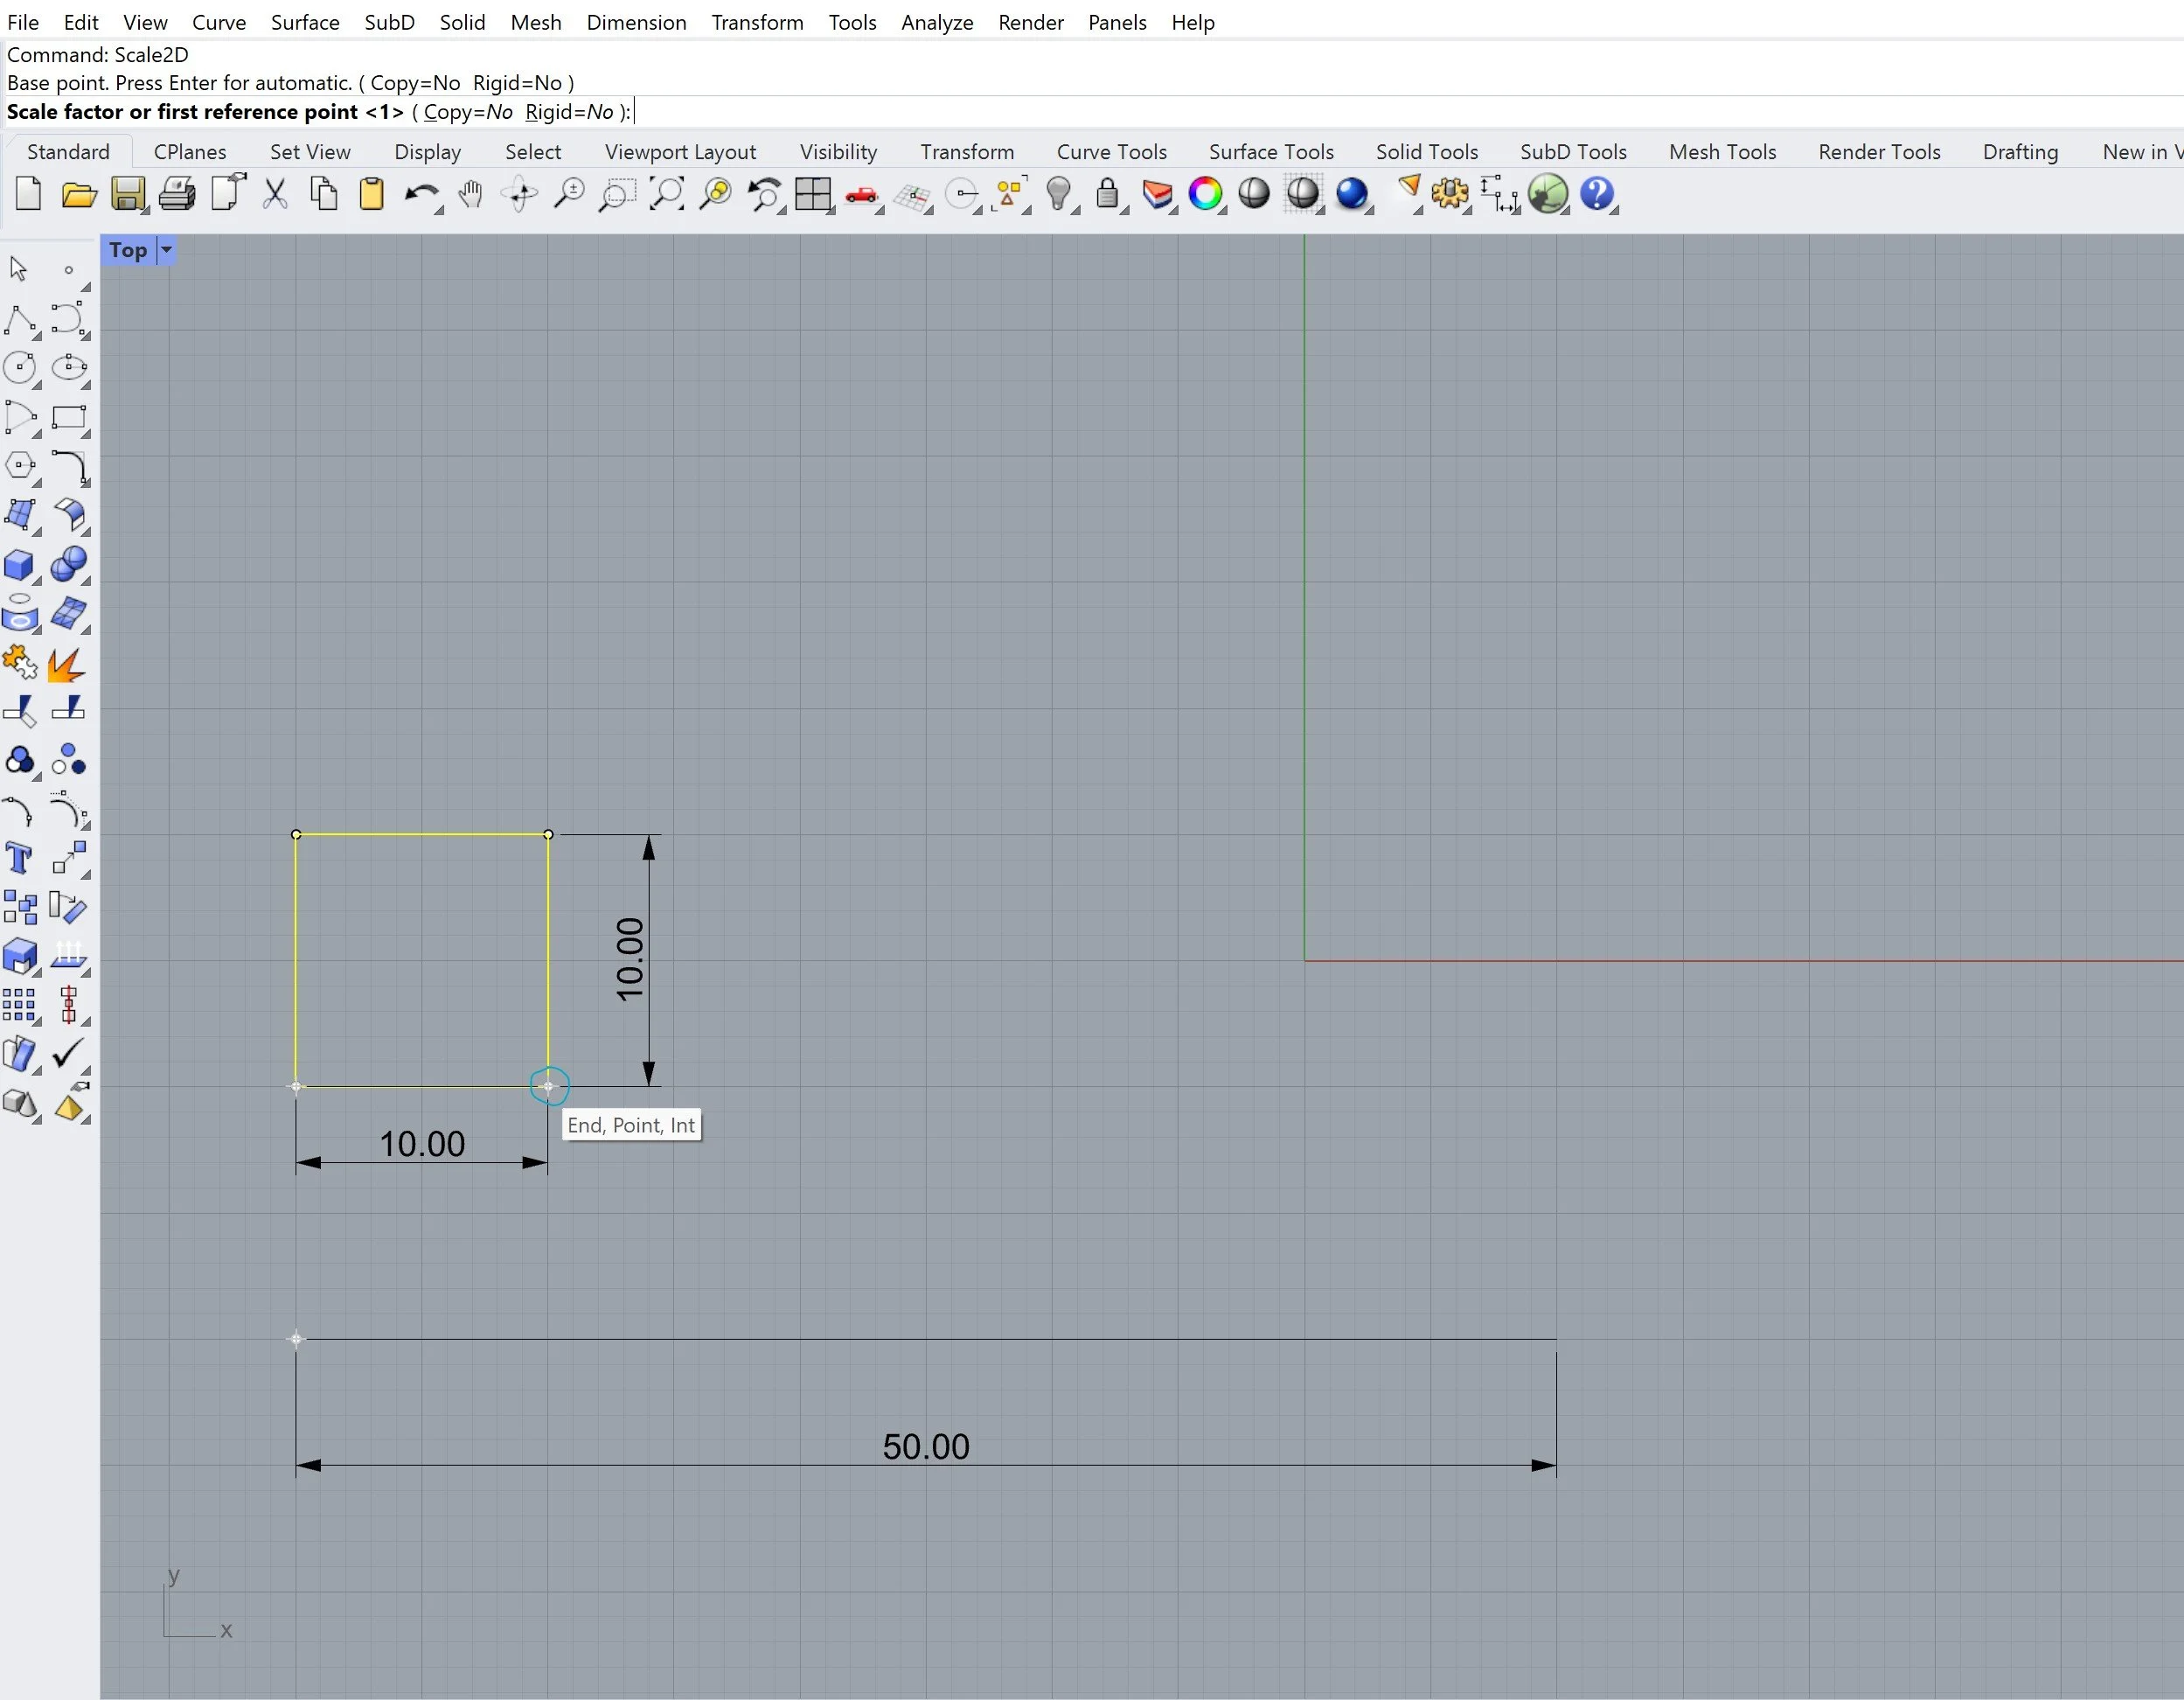
Now that the command is active, first select the left corner of the square as the base point [4 - inline with the 50mm line you drew] and then click on the opposing corner of the square as the first reference point. [5]. This has now selected the boundary of lines that you want to scale. Hovering your cursor over the end of the 50mm line you previously drew, move the square to a position that’s vertically in line with the end of the line and click [6].
4
5
6
You should now have a 50mm x 50mm square scaled from a 10mm x 10mm square!
Using a Scale Factor
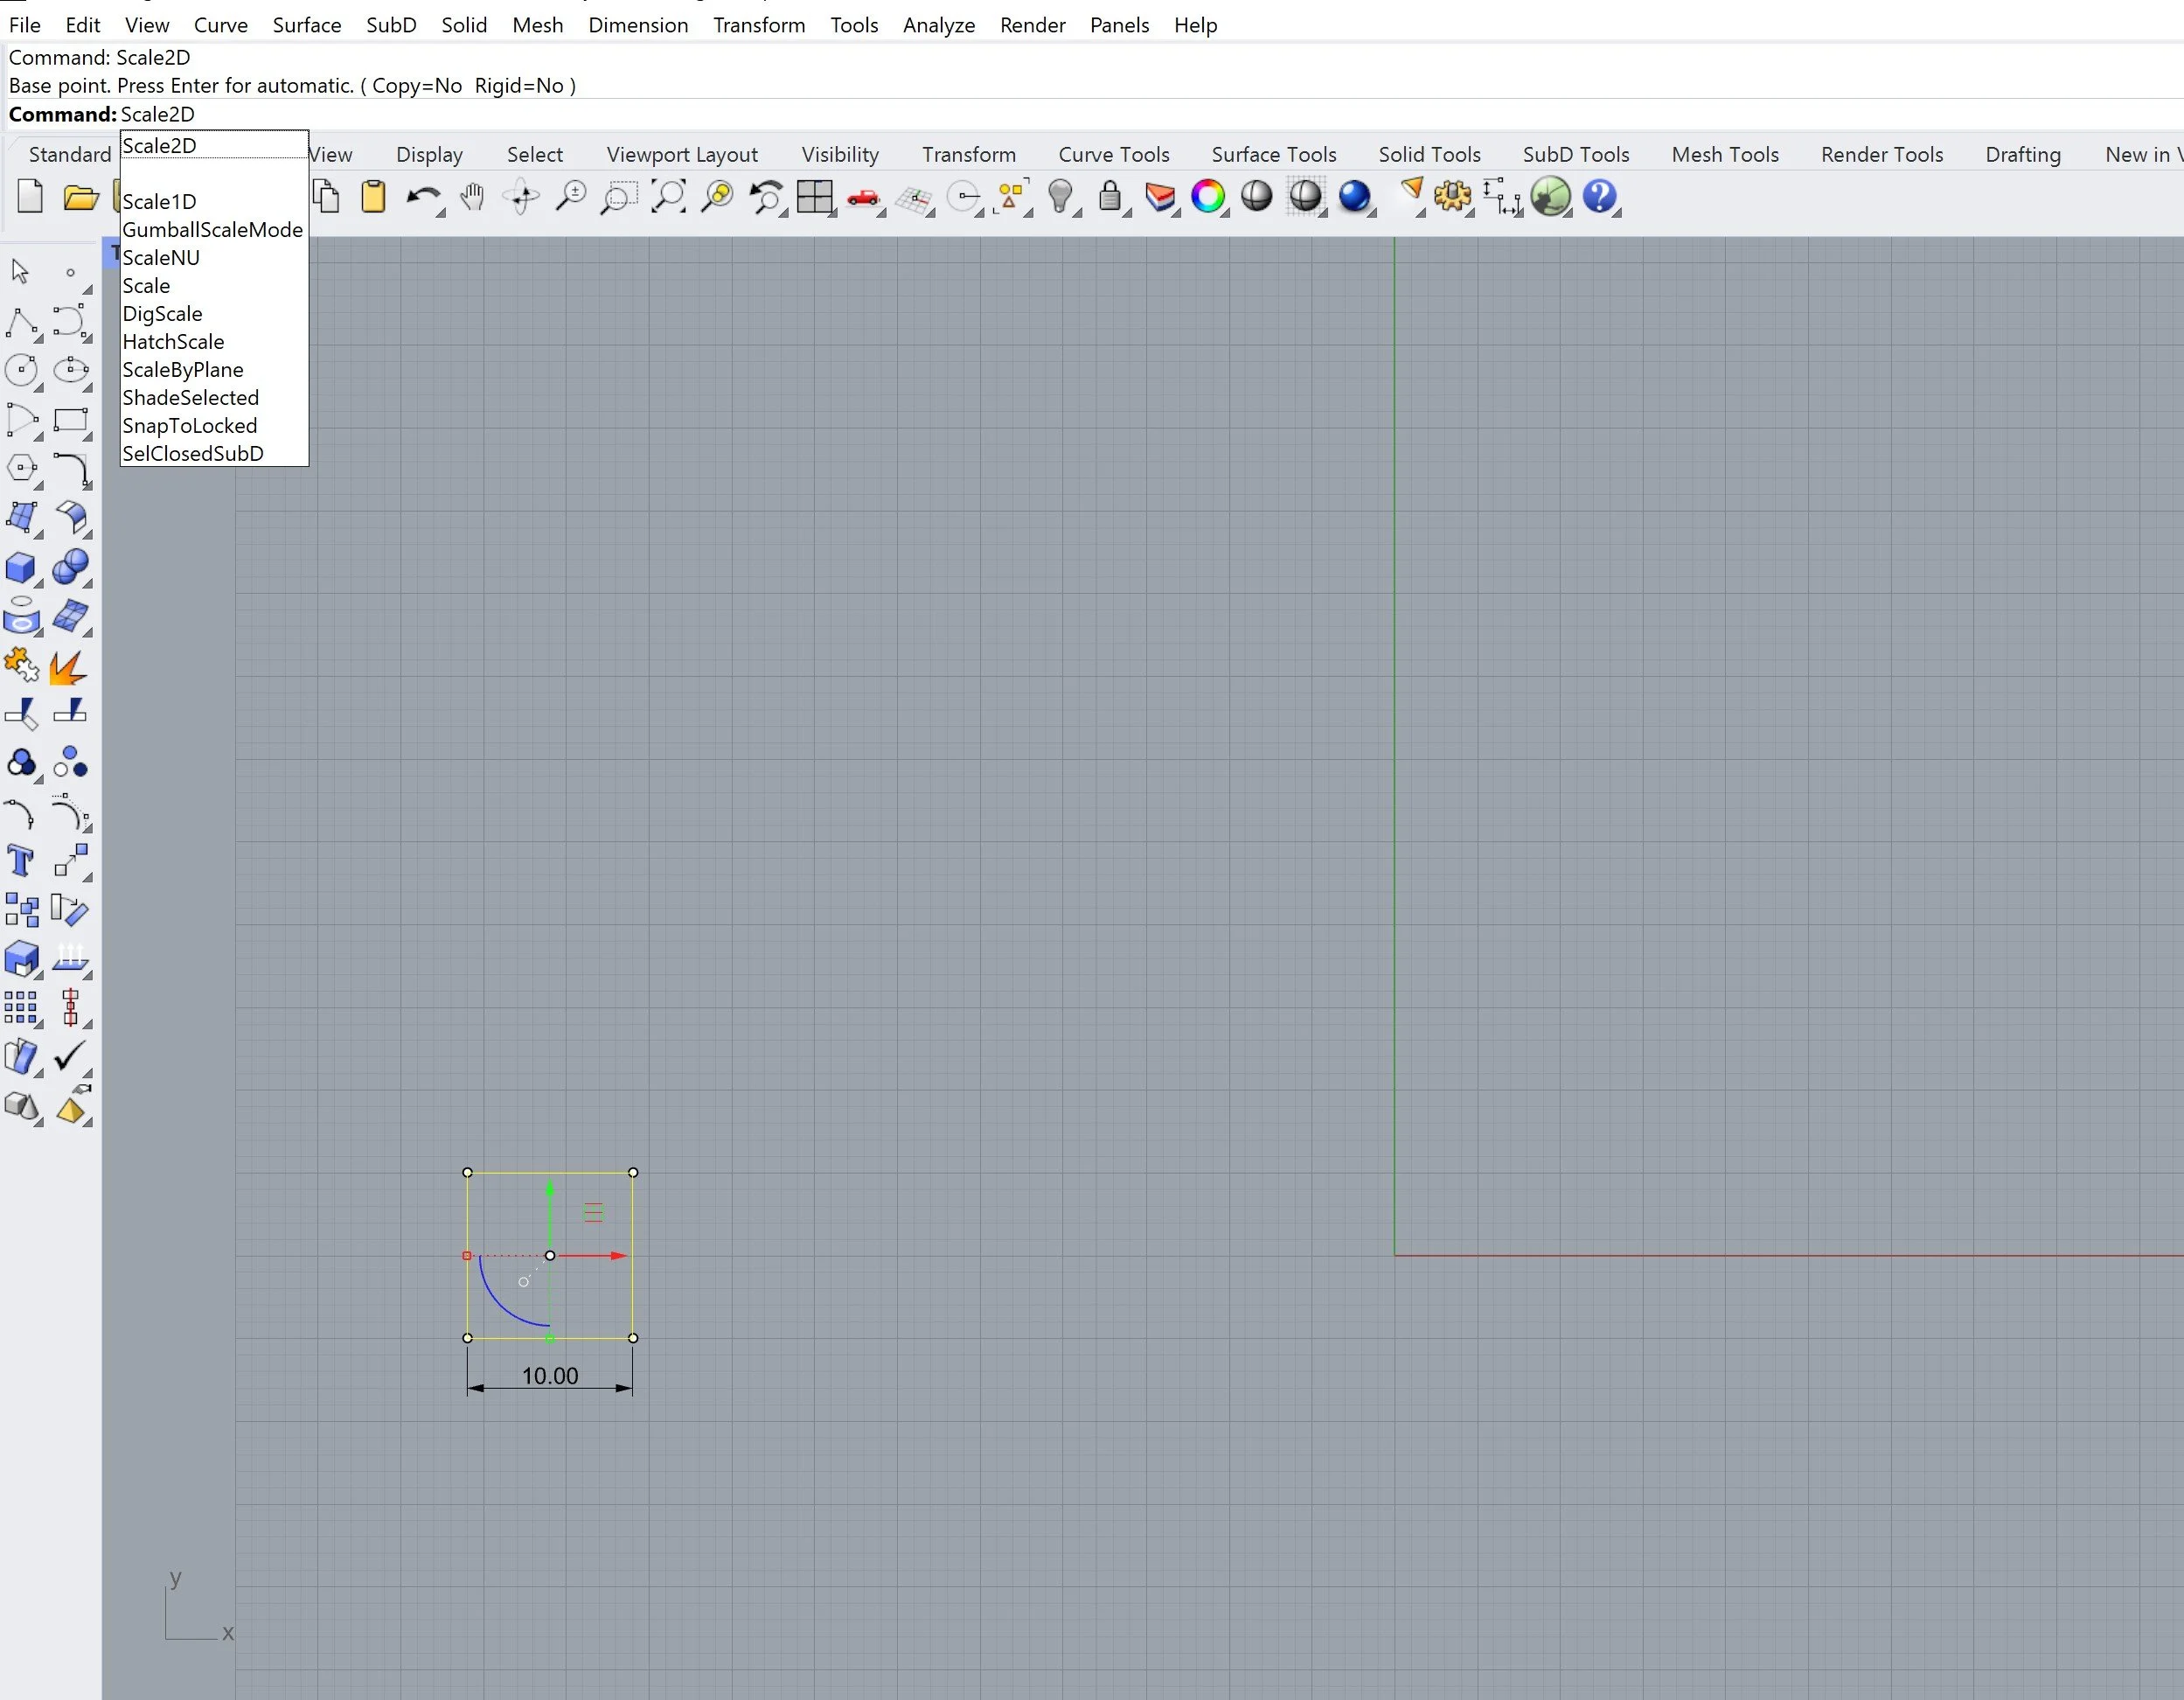
Similarly to the last method, I am starting with a square on the 2D interface that measures 10mm x 10mm [1]. I want to scale this up so the length x width becomes 50mm x 50mm. Firstly, I select the closed curve and type ‘Scale2D’ command into Rhino [7].

1
7
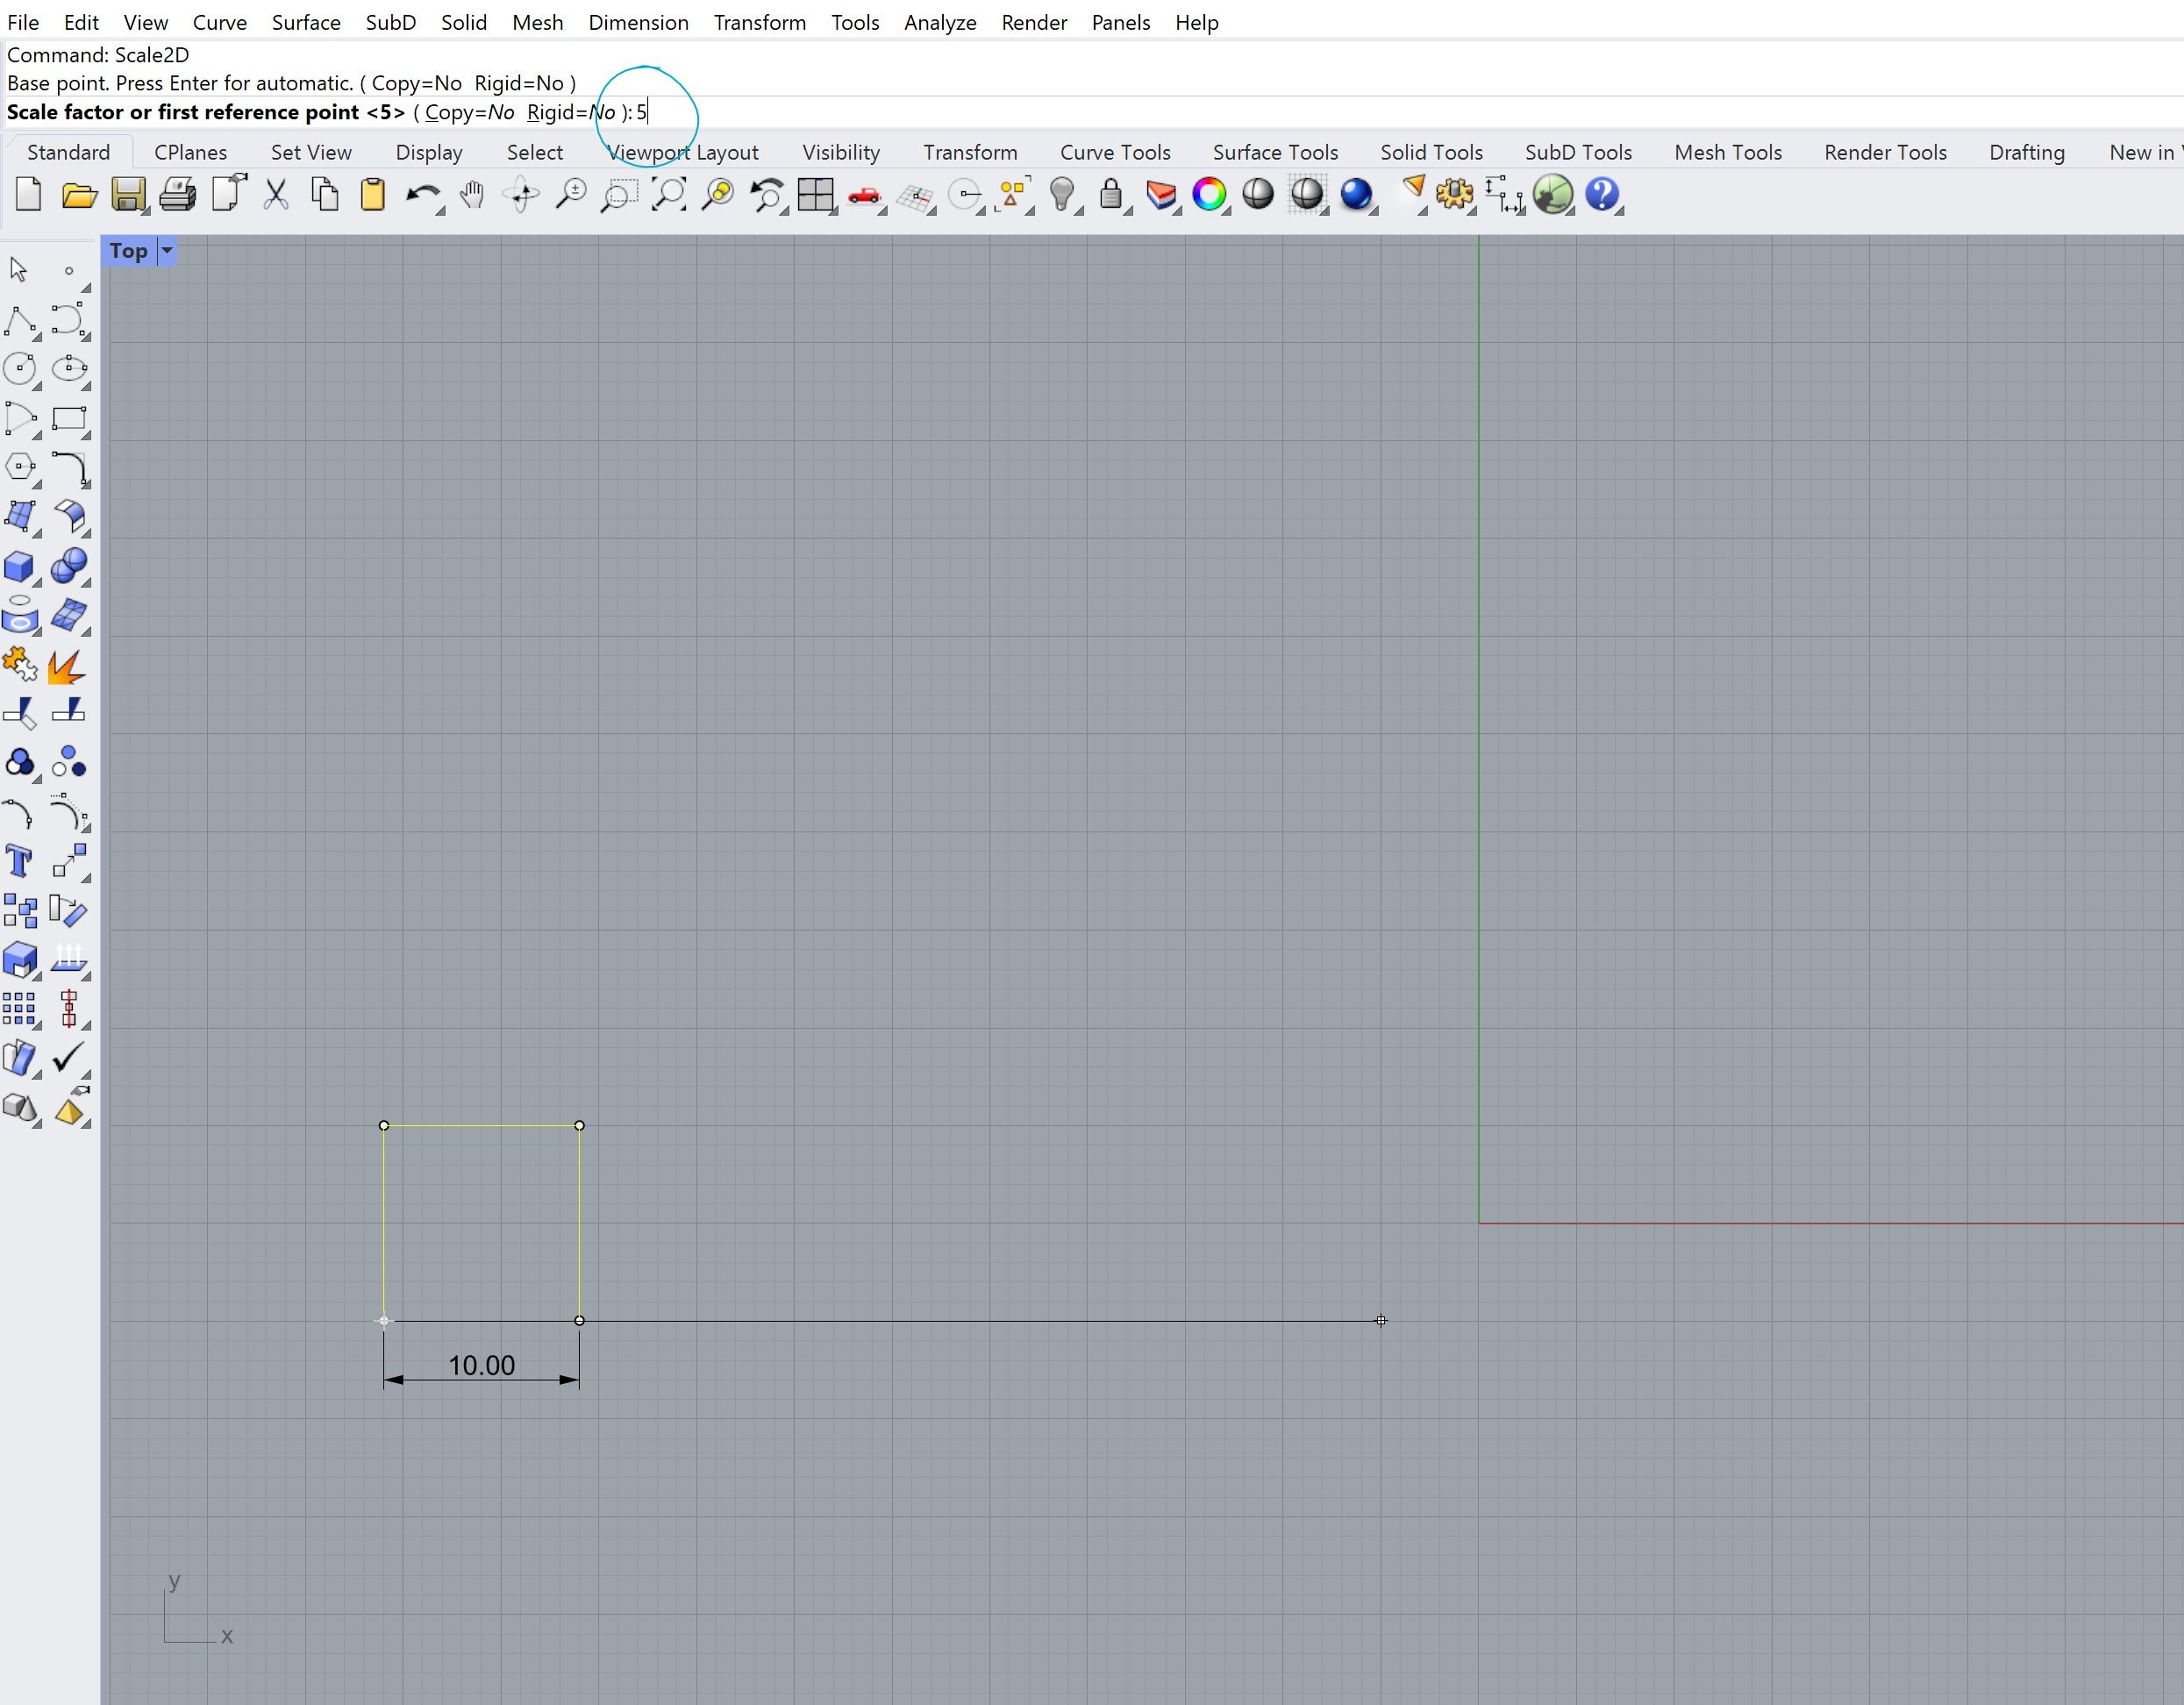
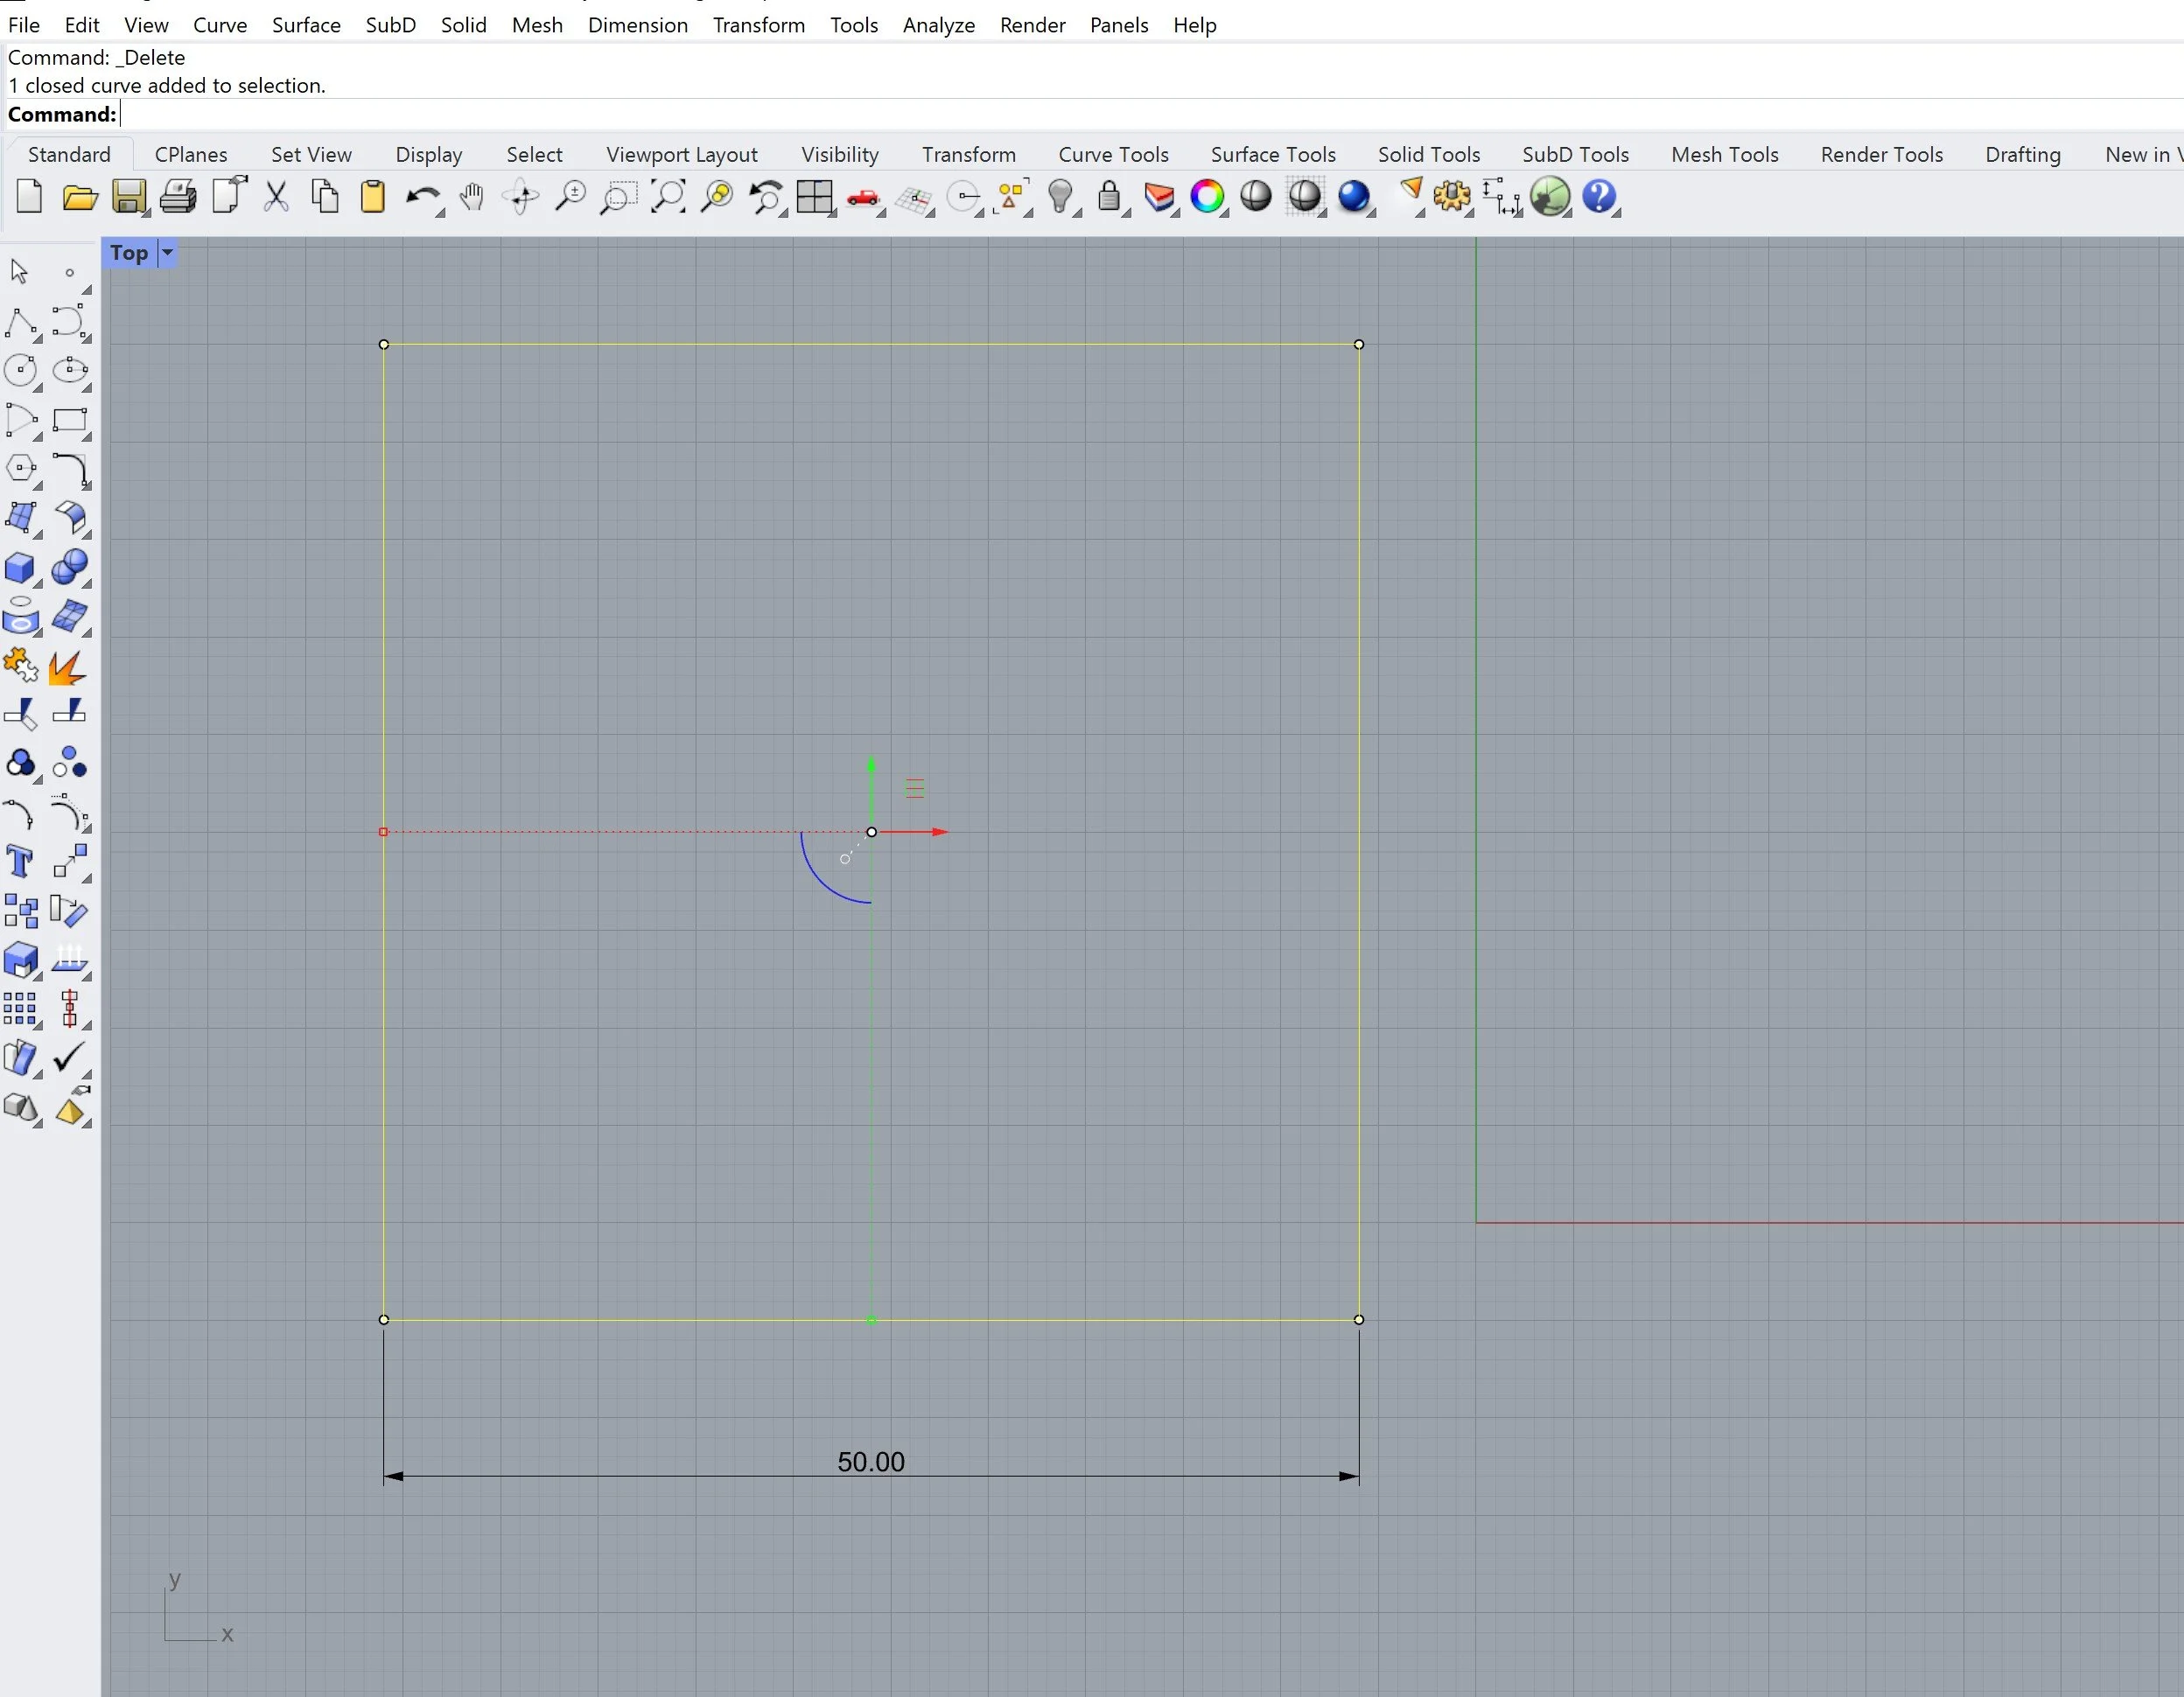
You’ve now activated the command and need to select the base point, which I’m selecting as the bottom left corner of the square [8]. Without clicking anywhere else, I enter the scale factor. In this case I am enlarging the square by a scale factor of 5, to go from 10mm to 50mm in length, and click enter [9]. You now have a 50mm x 50mm square! [10]. If you’re unsure about what the scale factor is, you can always work it out by dividing the desired dimension by the existing dimension i.e if you have a 1347mm x 1347mm square and you want it to be 4041mm x 4041mm, the scale factor will be 4041/1347 which is 3.

8
9
10
Scaling 3D Objects
When scaling in 3D the Rhino command used is ‘Scale’. Be careful to avoid getting confused as there is no Scale3D command unlike Scale2D and Scale1D. This is the biggest difference between enlarging and reducing dimensions with two/three planes. The process of sizing an object is the same as it would be in 2D. You can scale with a dimension or a scale factor and it will enlarge or reduce the object proportionally in height, depth and length.
Other ways to scale in 3D would be using the commands ‘ScaleNU’ and ‘ScaleByPlane’. Whilst both of these commands are different from each other, they both scale unproportionally, unlike ‘Scale’ which enlarges and reduces size uniformly.
ScaleNU
With the command ‘ScaleNU’, you can scale an object across all three planes with different scale factors and therefore you are no longer limited to only scaling an object by one factor in all three dimensions. For example, if you have a cube which reads 60mm x 60mm x 60mm but you want it to become a cuboid that is 100mm x 200mm x 50mm, you can use the ‘ScaleNU’ command.
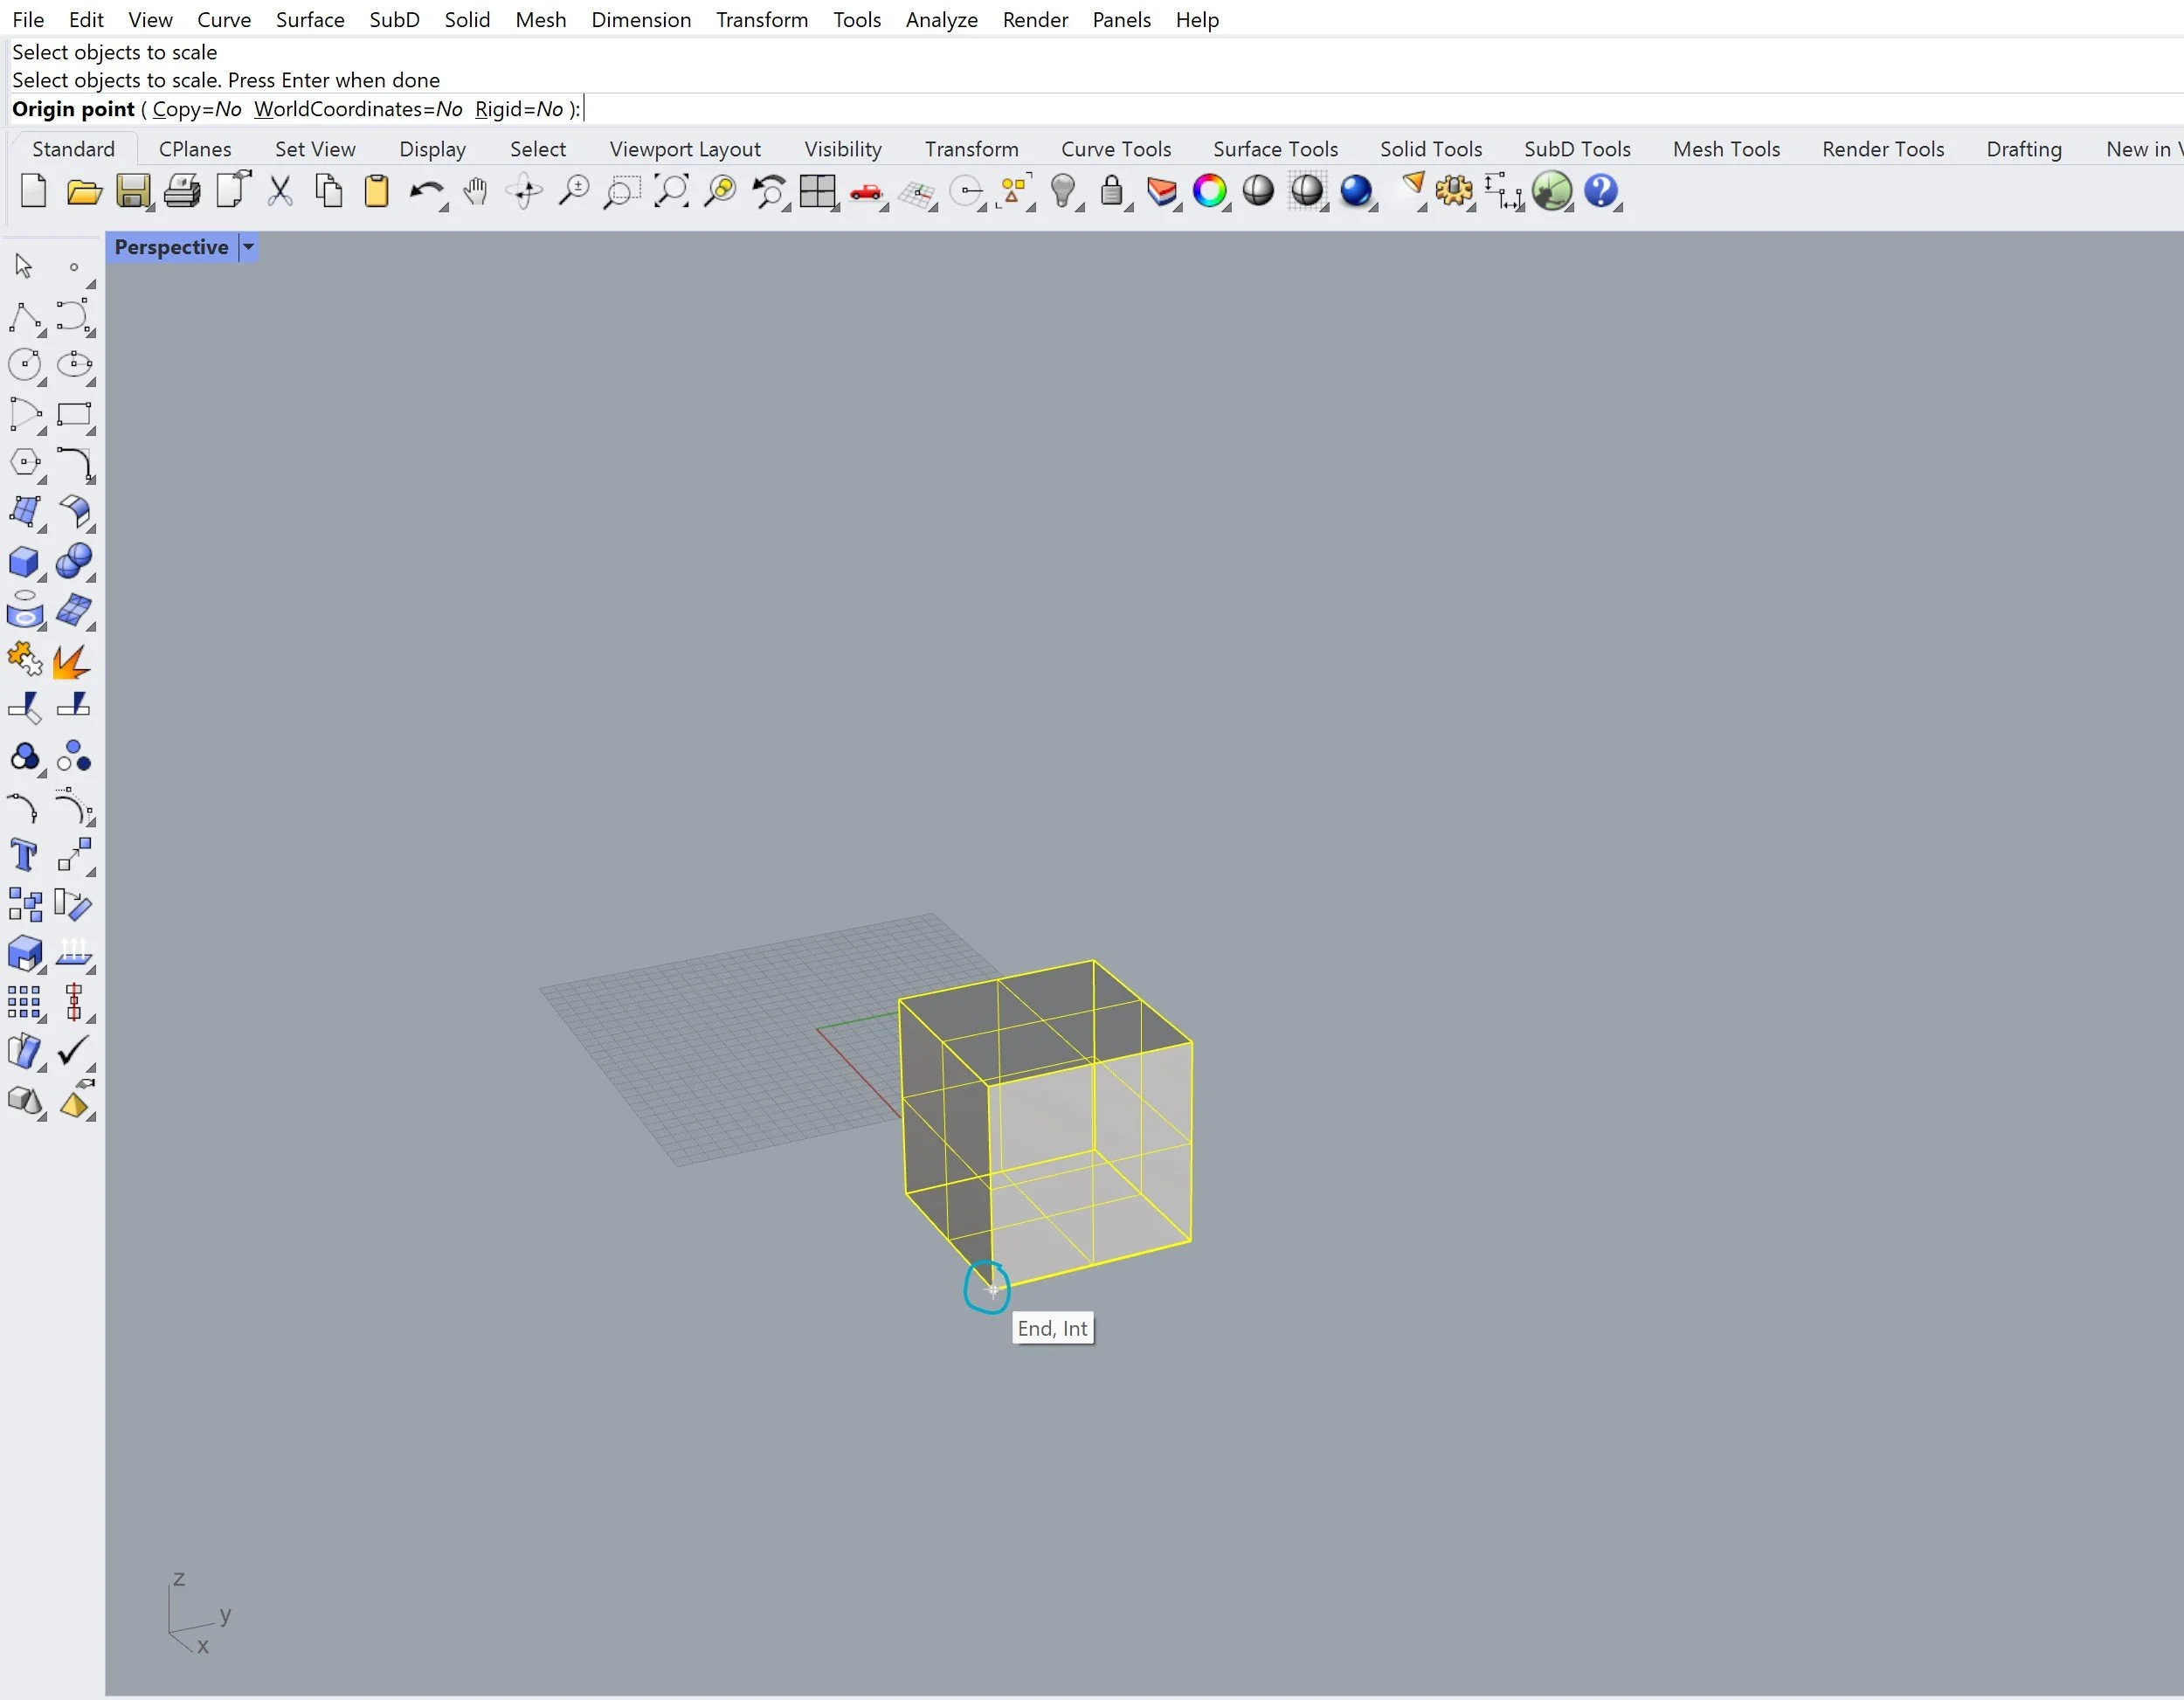
Beginning with a 60mm x 60mm x 60mm cube, select the object and type ‘ScaleNU’ into the command bar [11]. One you’ve entered the command, you need to choose an origin point [12] For this example, I’m going to select the bottom vertex.
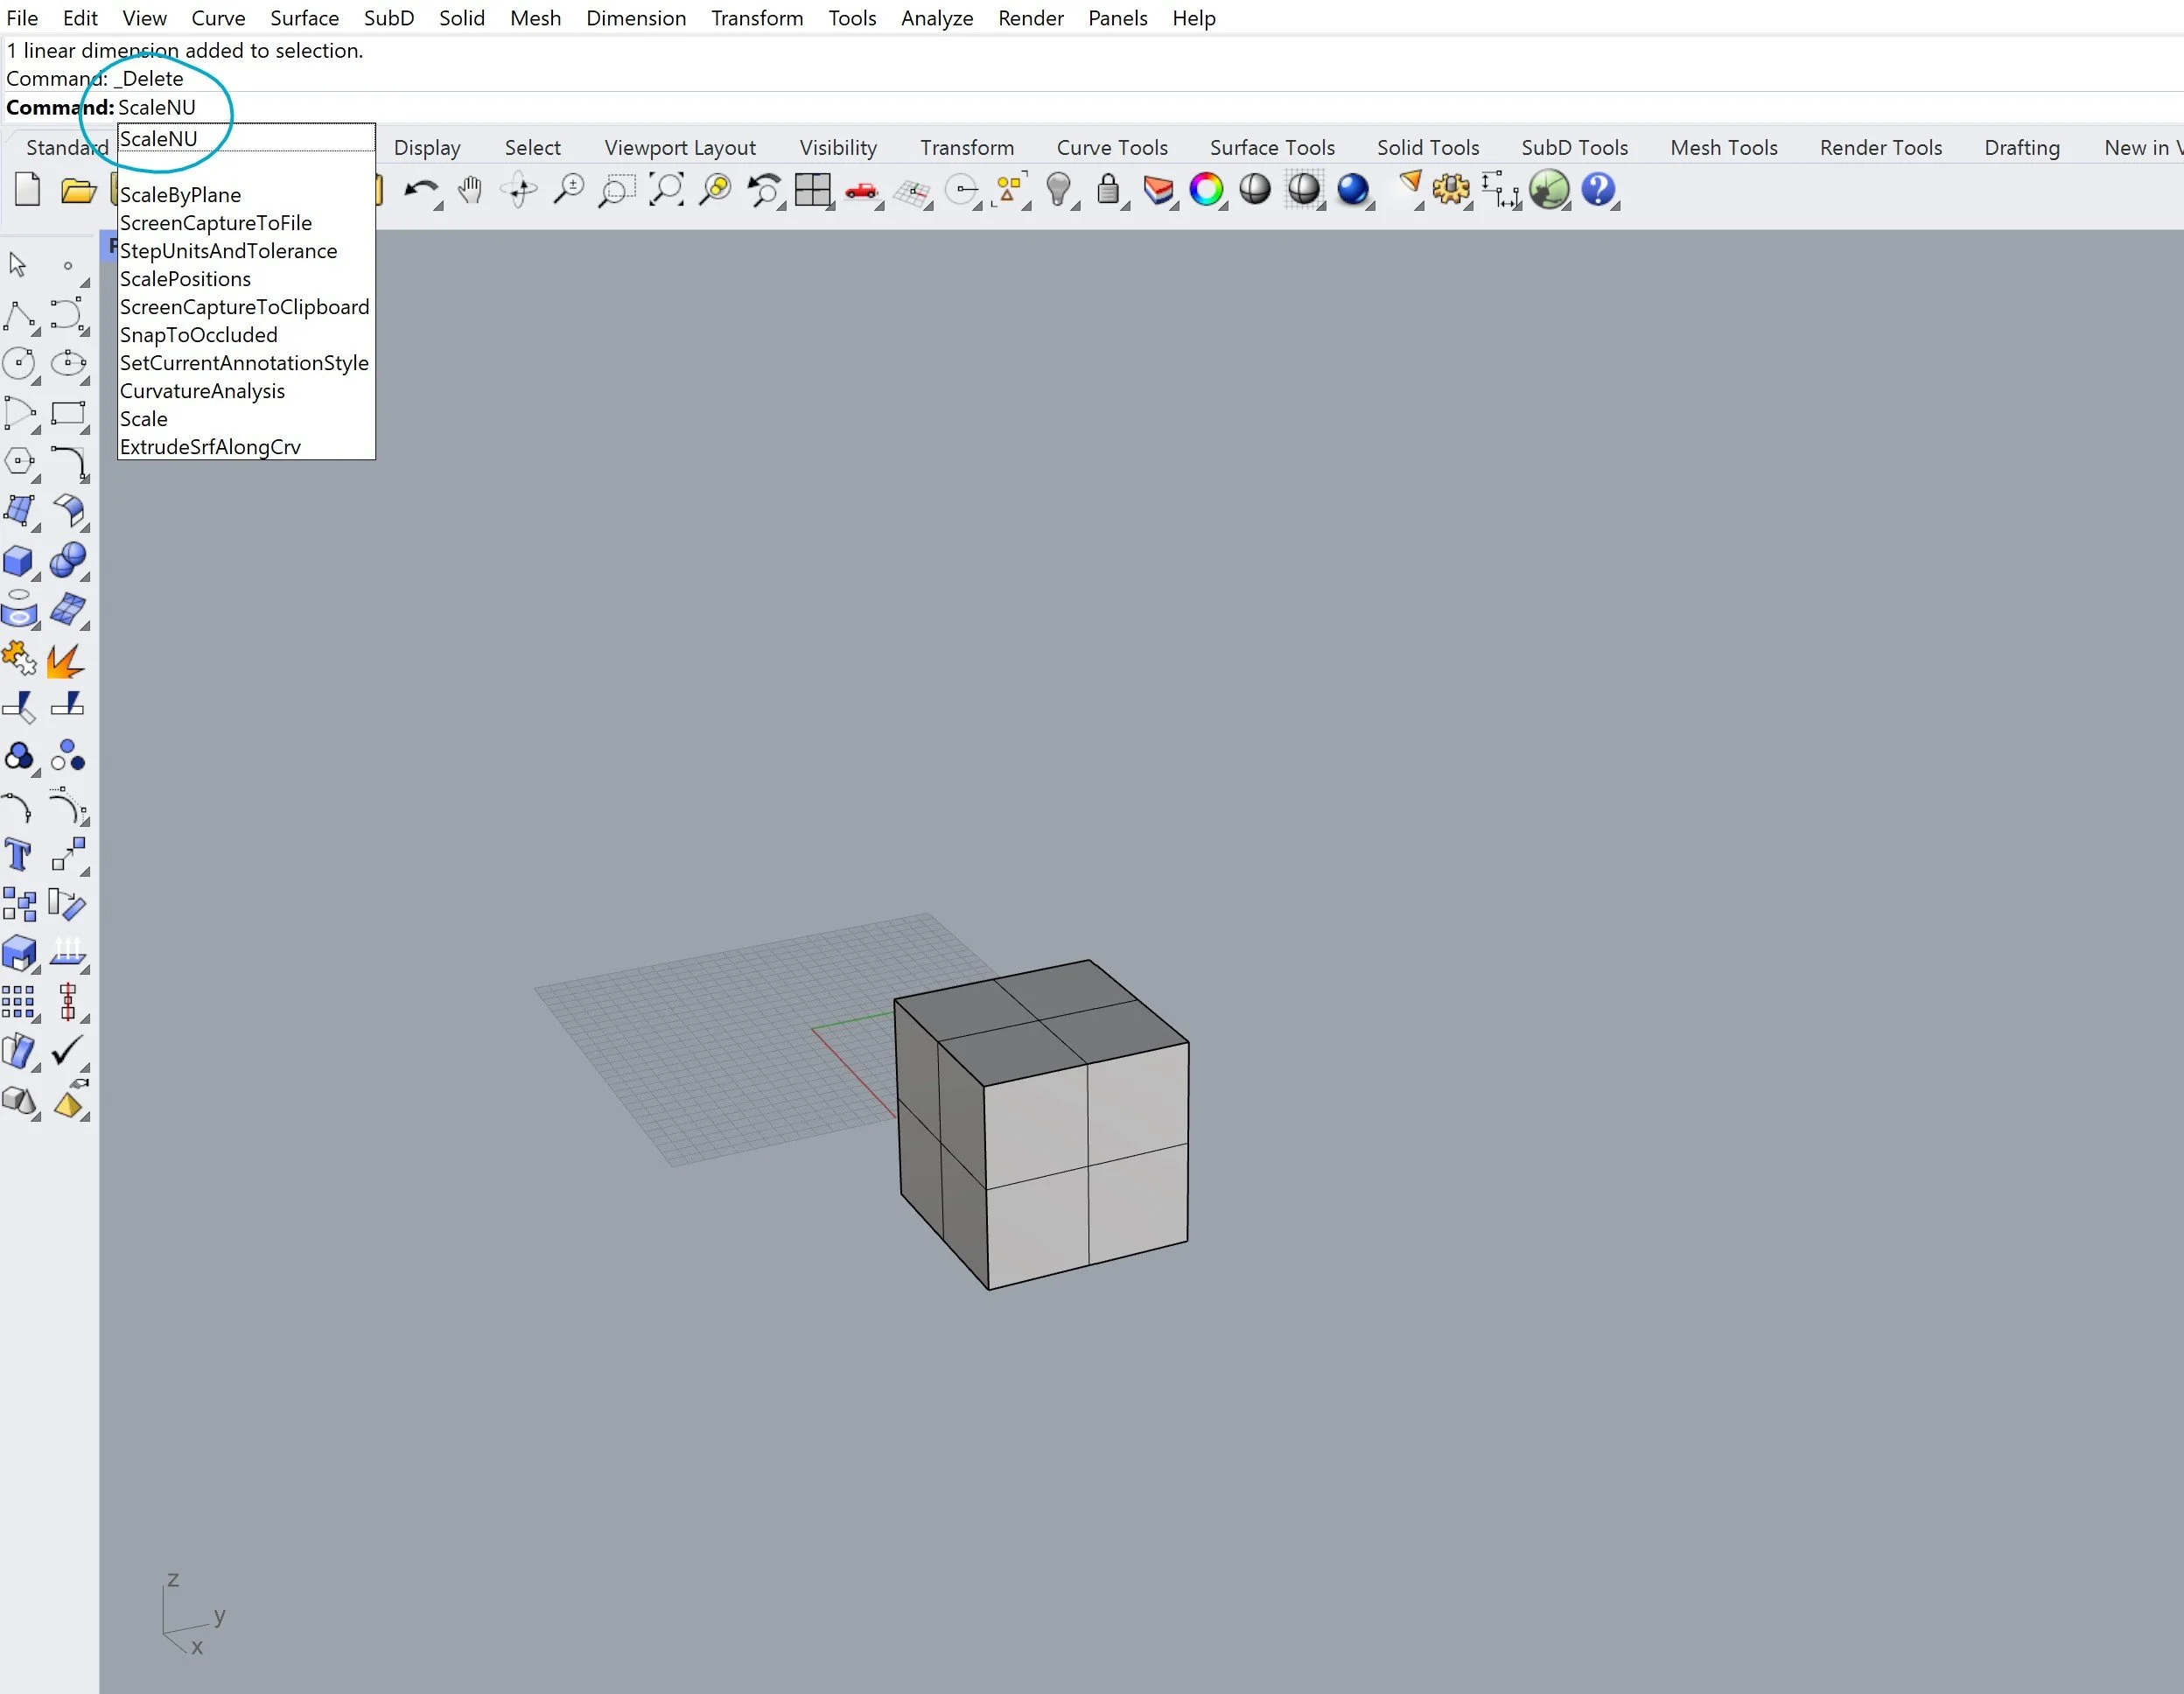
11
12
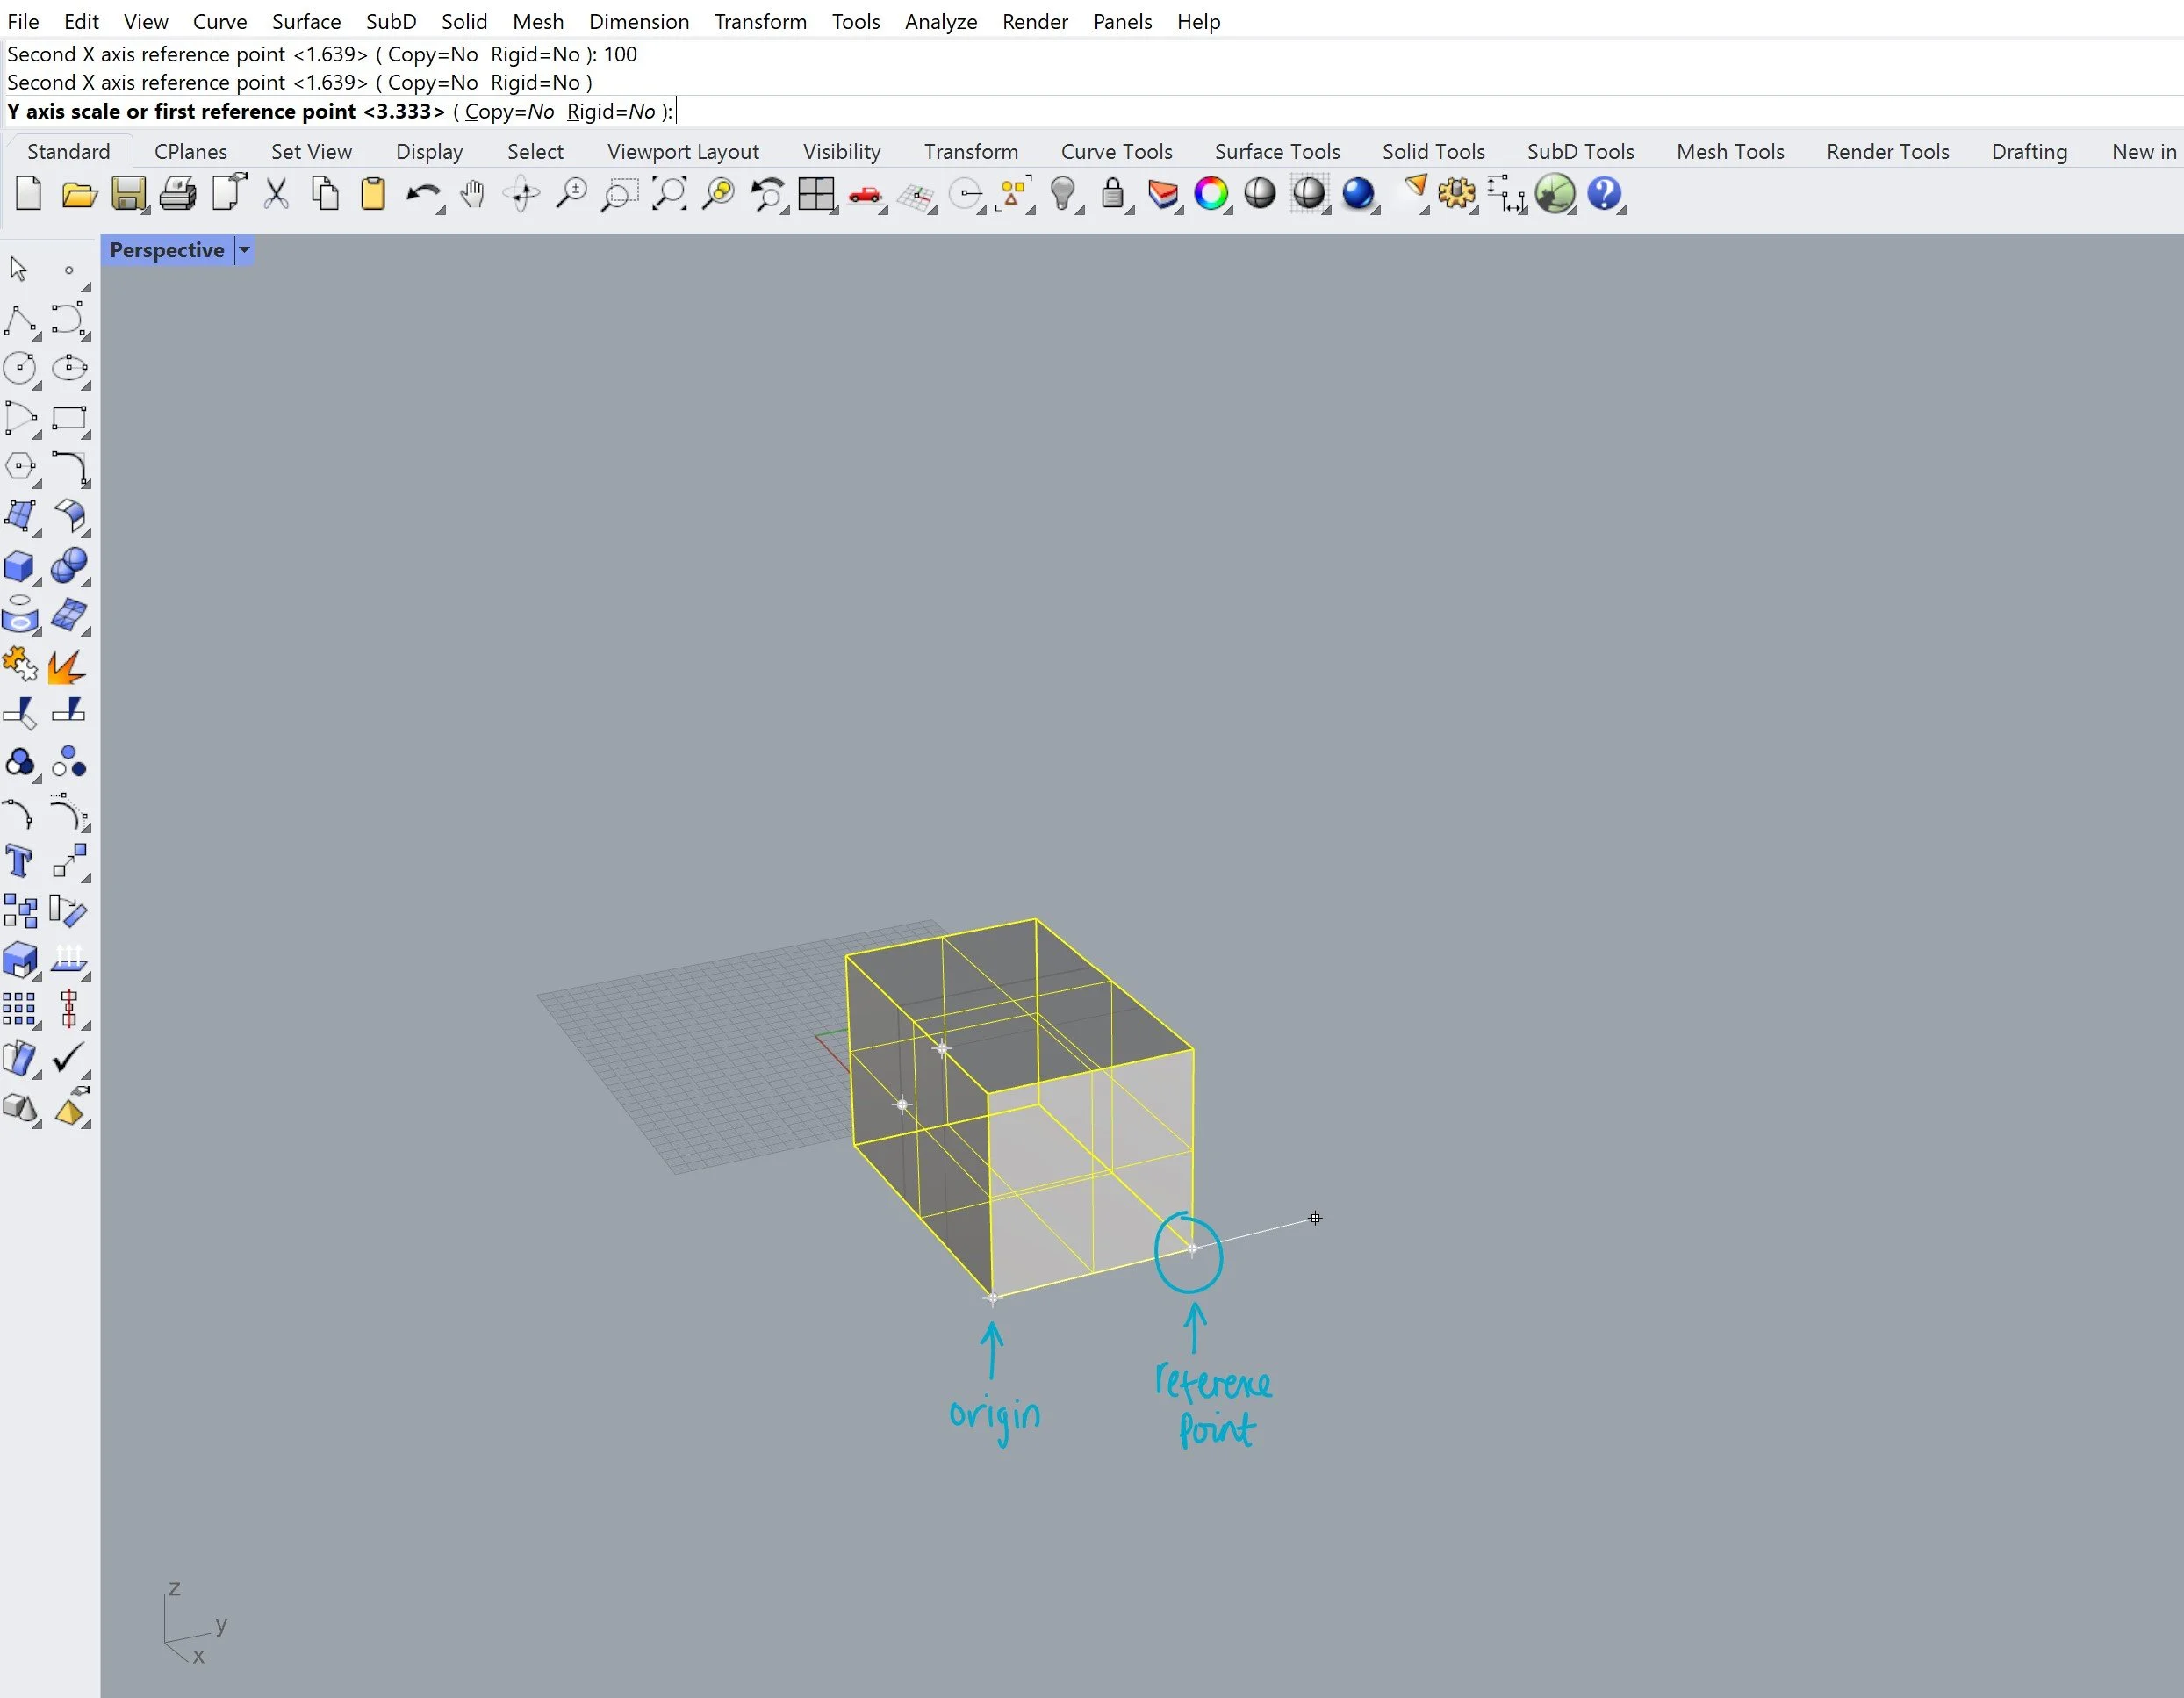
Then we begin to scale our object on the X-axis. So you need to pick the first reference point, which for us, will be the only other vertex than the origin that we have on the X-axis [13]. Once selected, we are now only working with extruding on the X-axis so we enter a dimension of 100mm [14].
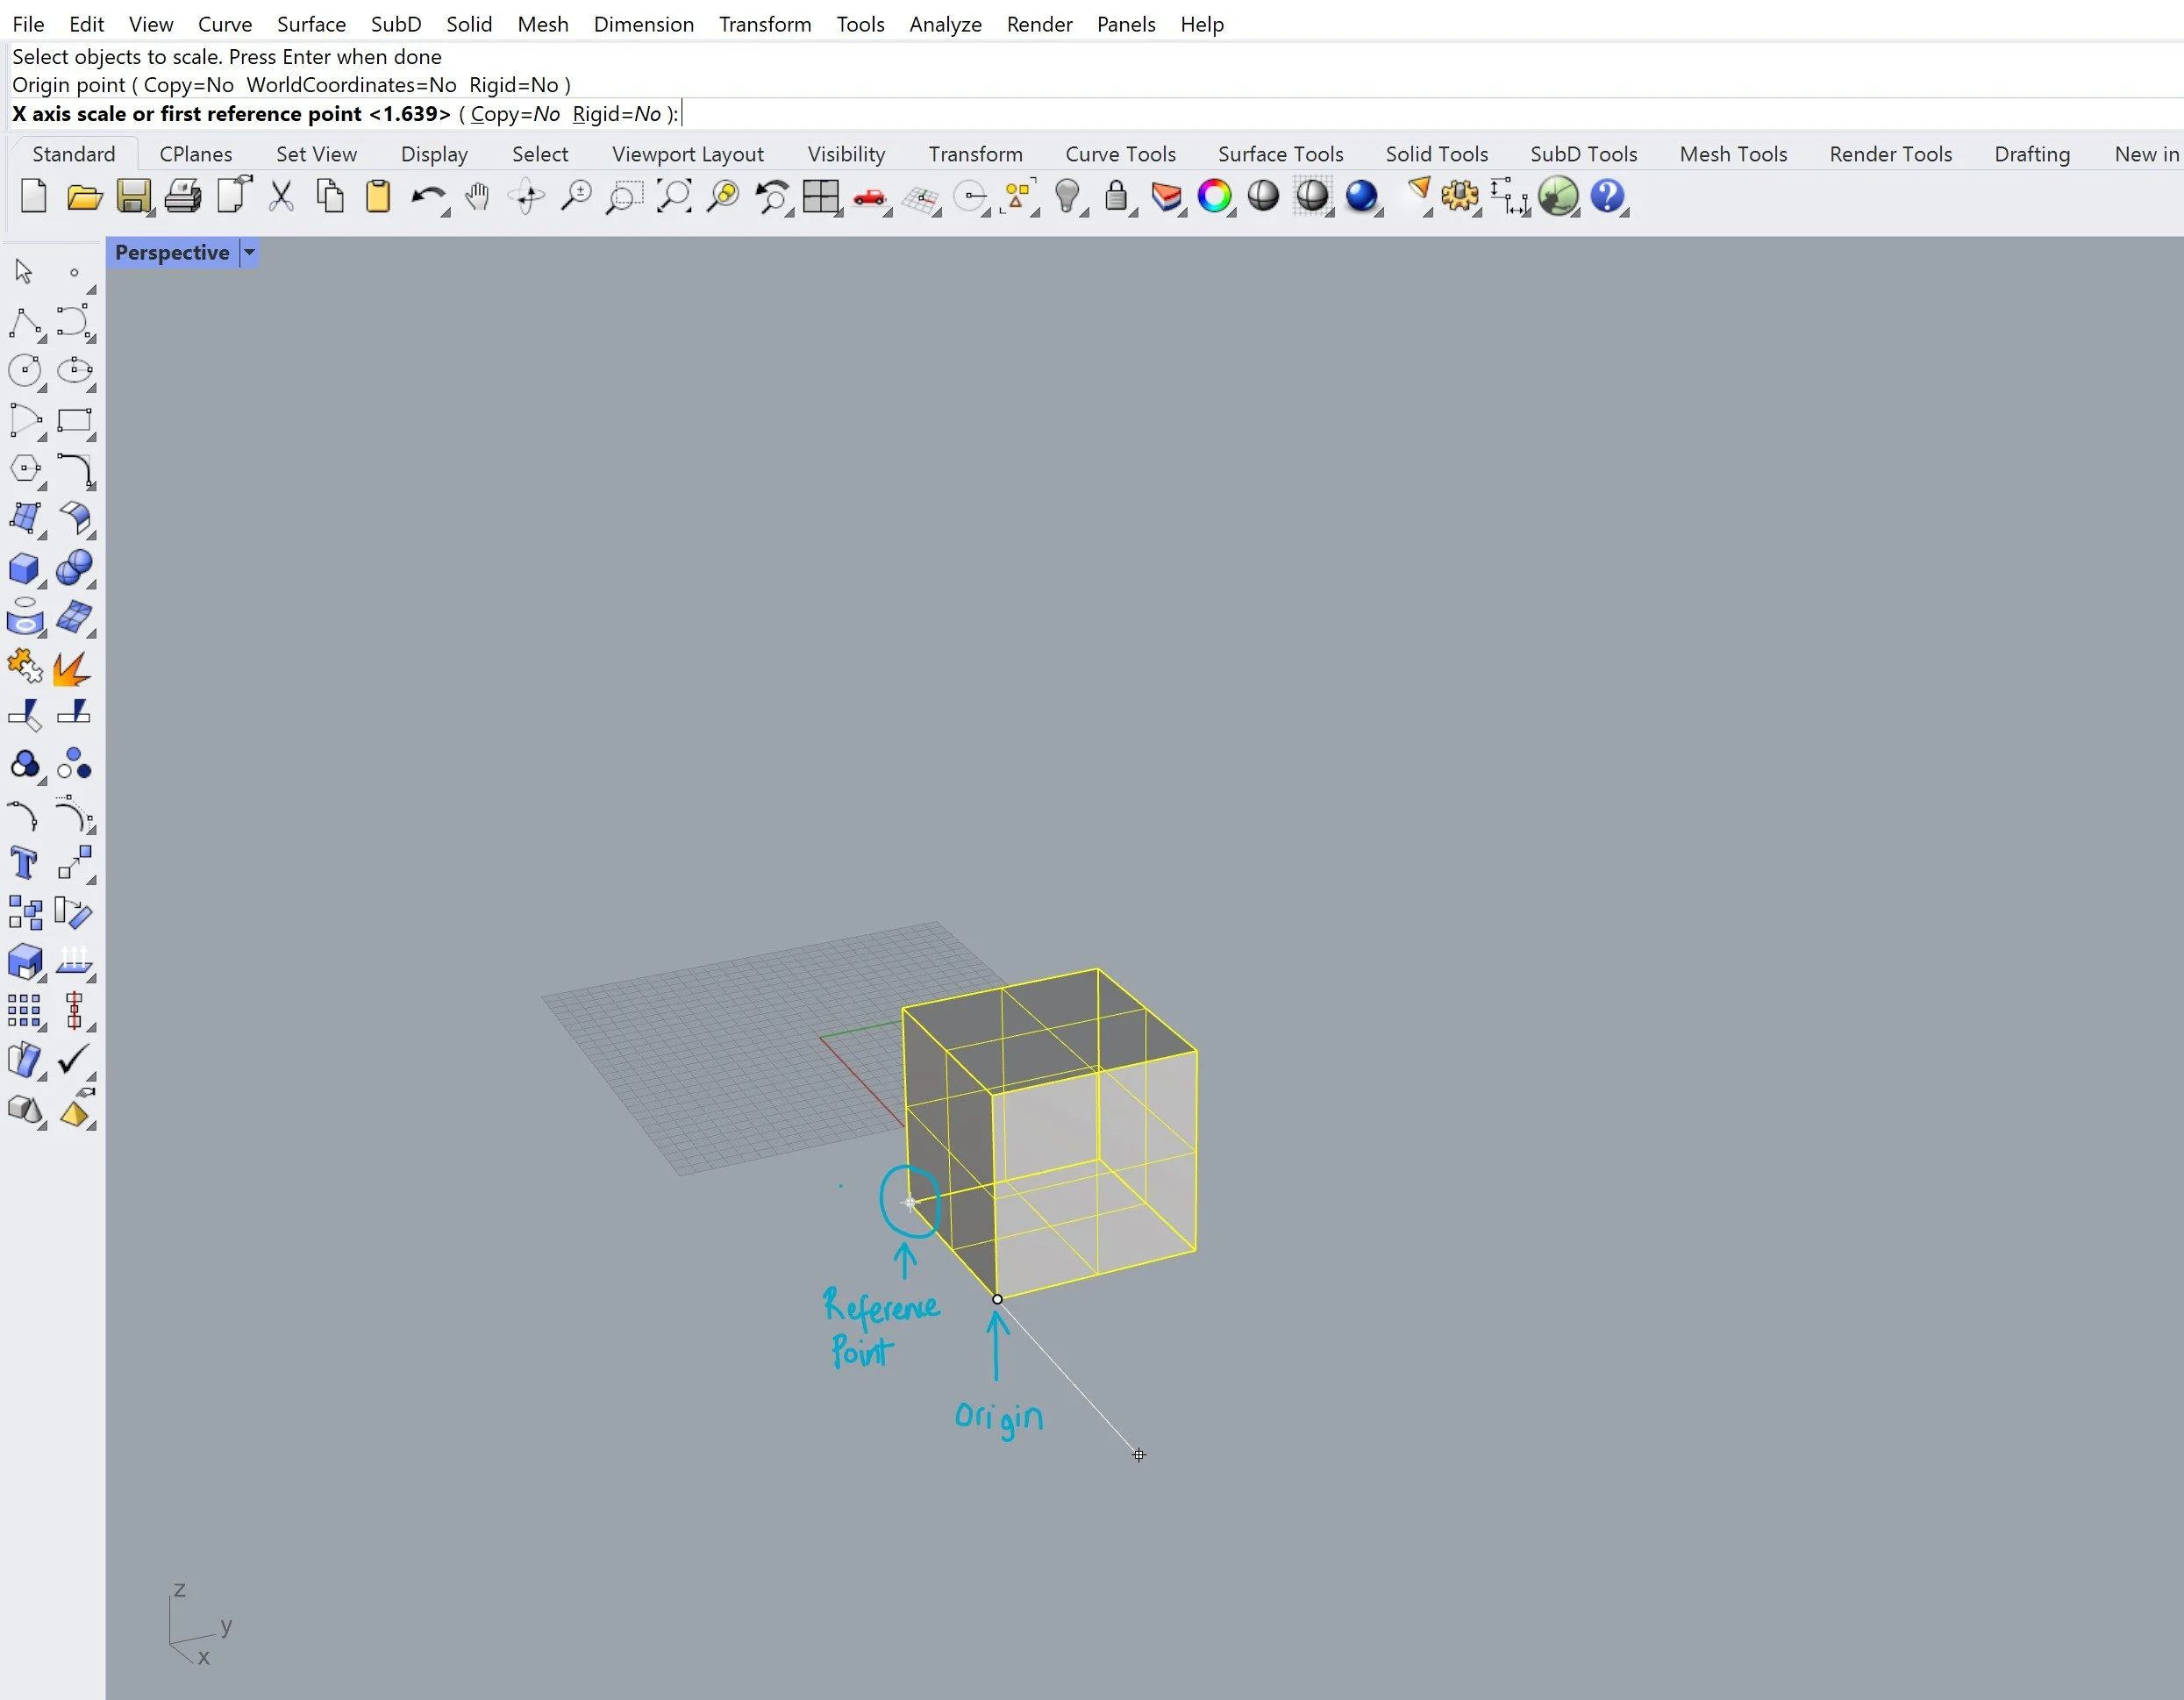
13
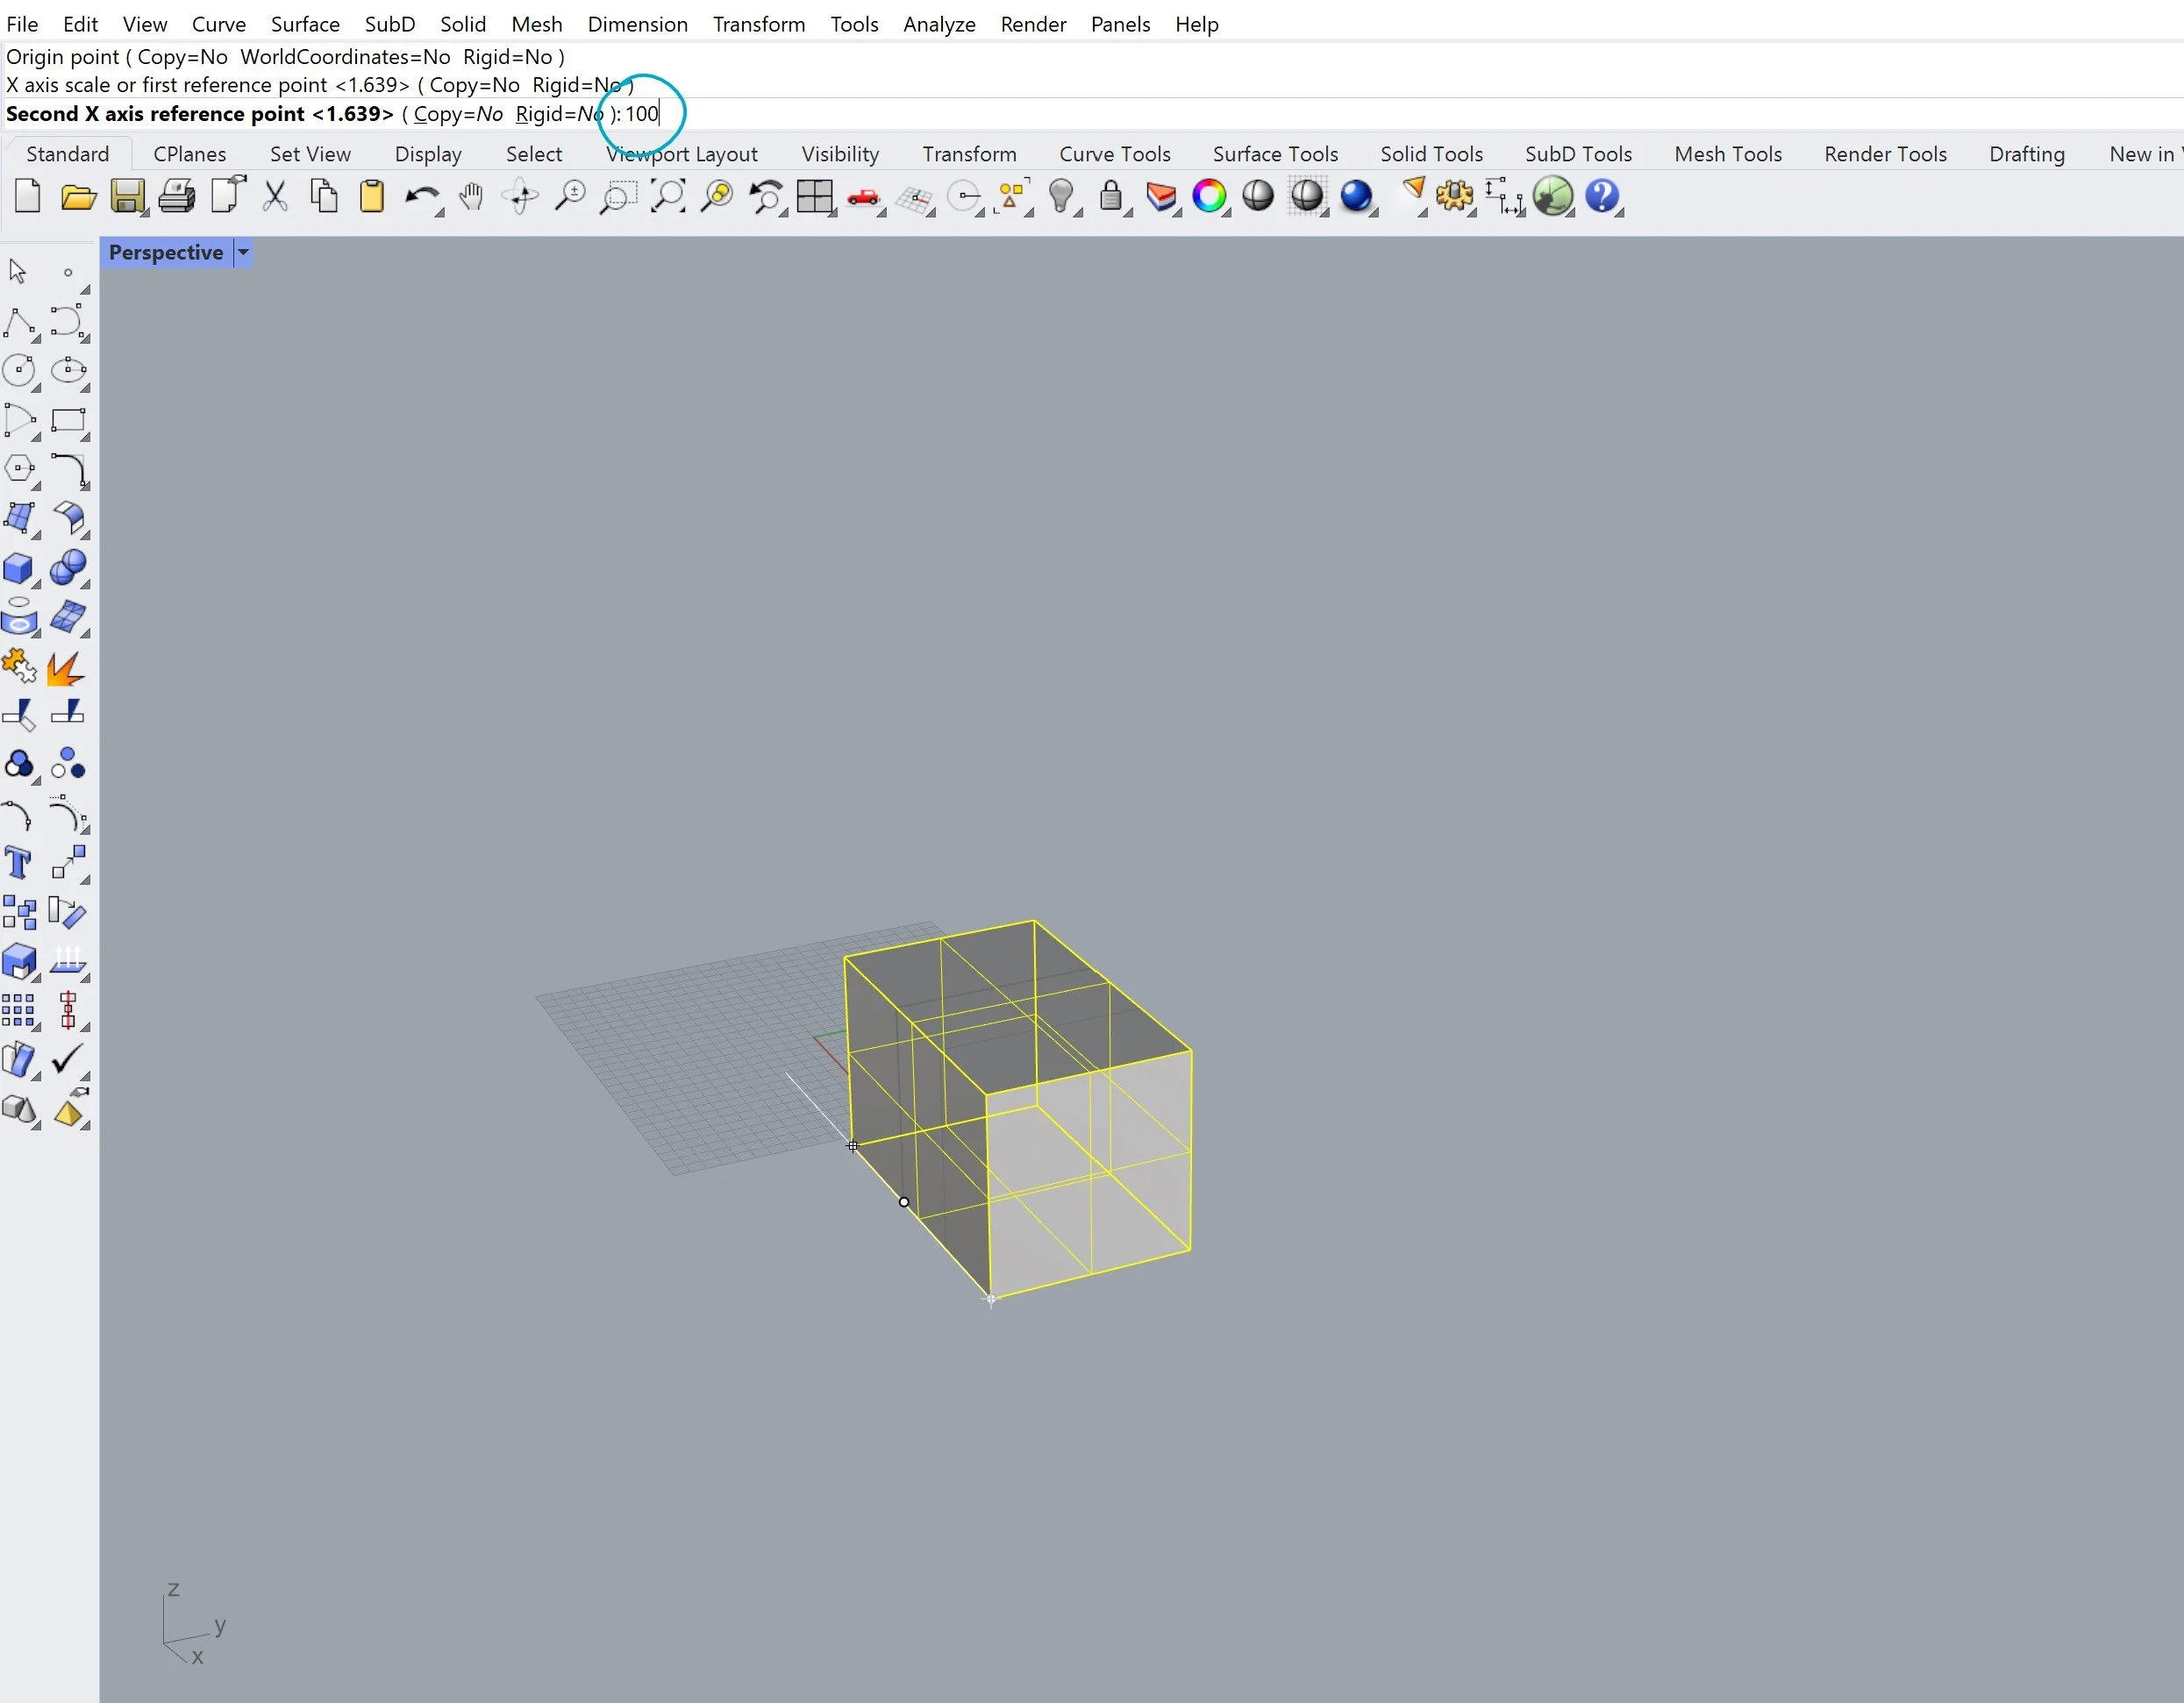
14
After scaling the X-axis, Rhino will automatically move onto the Y-axis by drawing your pointer back to the origin. Now you need to select your reference point on the Y-axis, in this case this is the opposing vertex of the object [15] and type 200mm into the command bar [16].
15
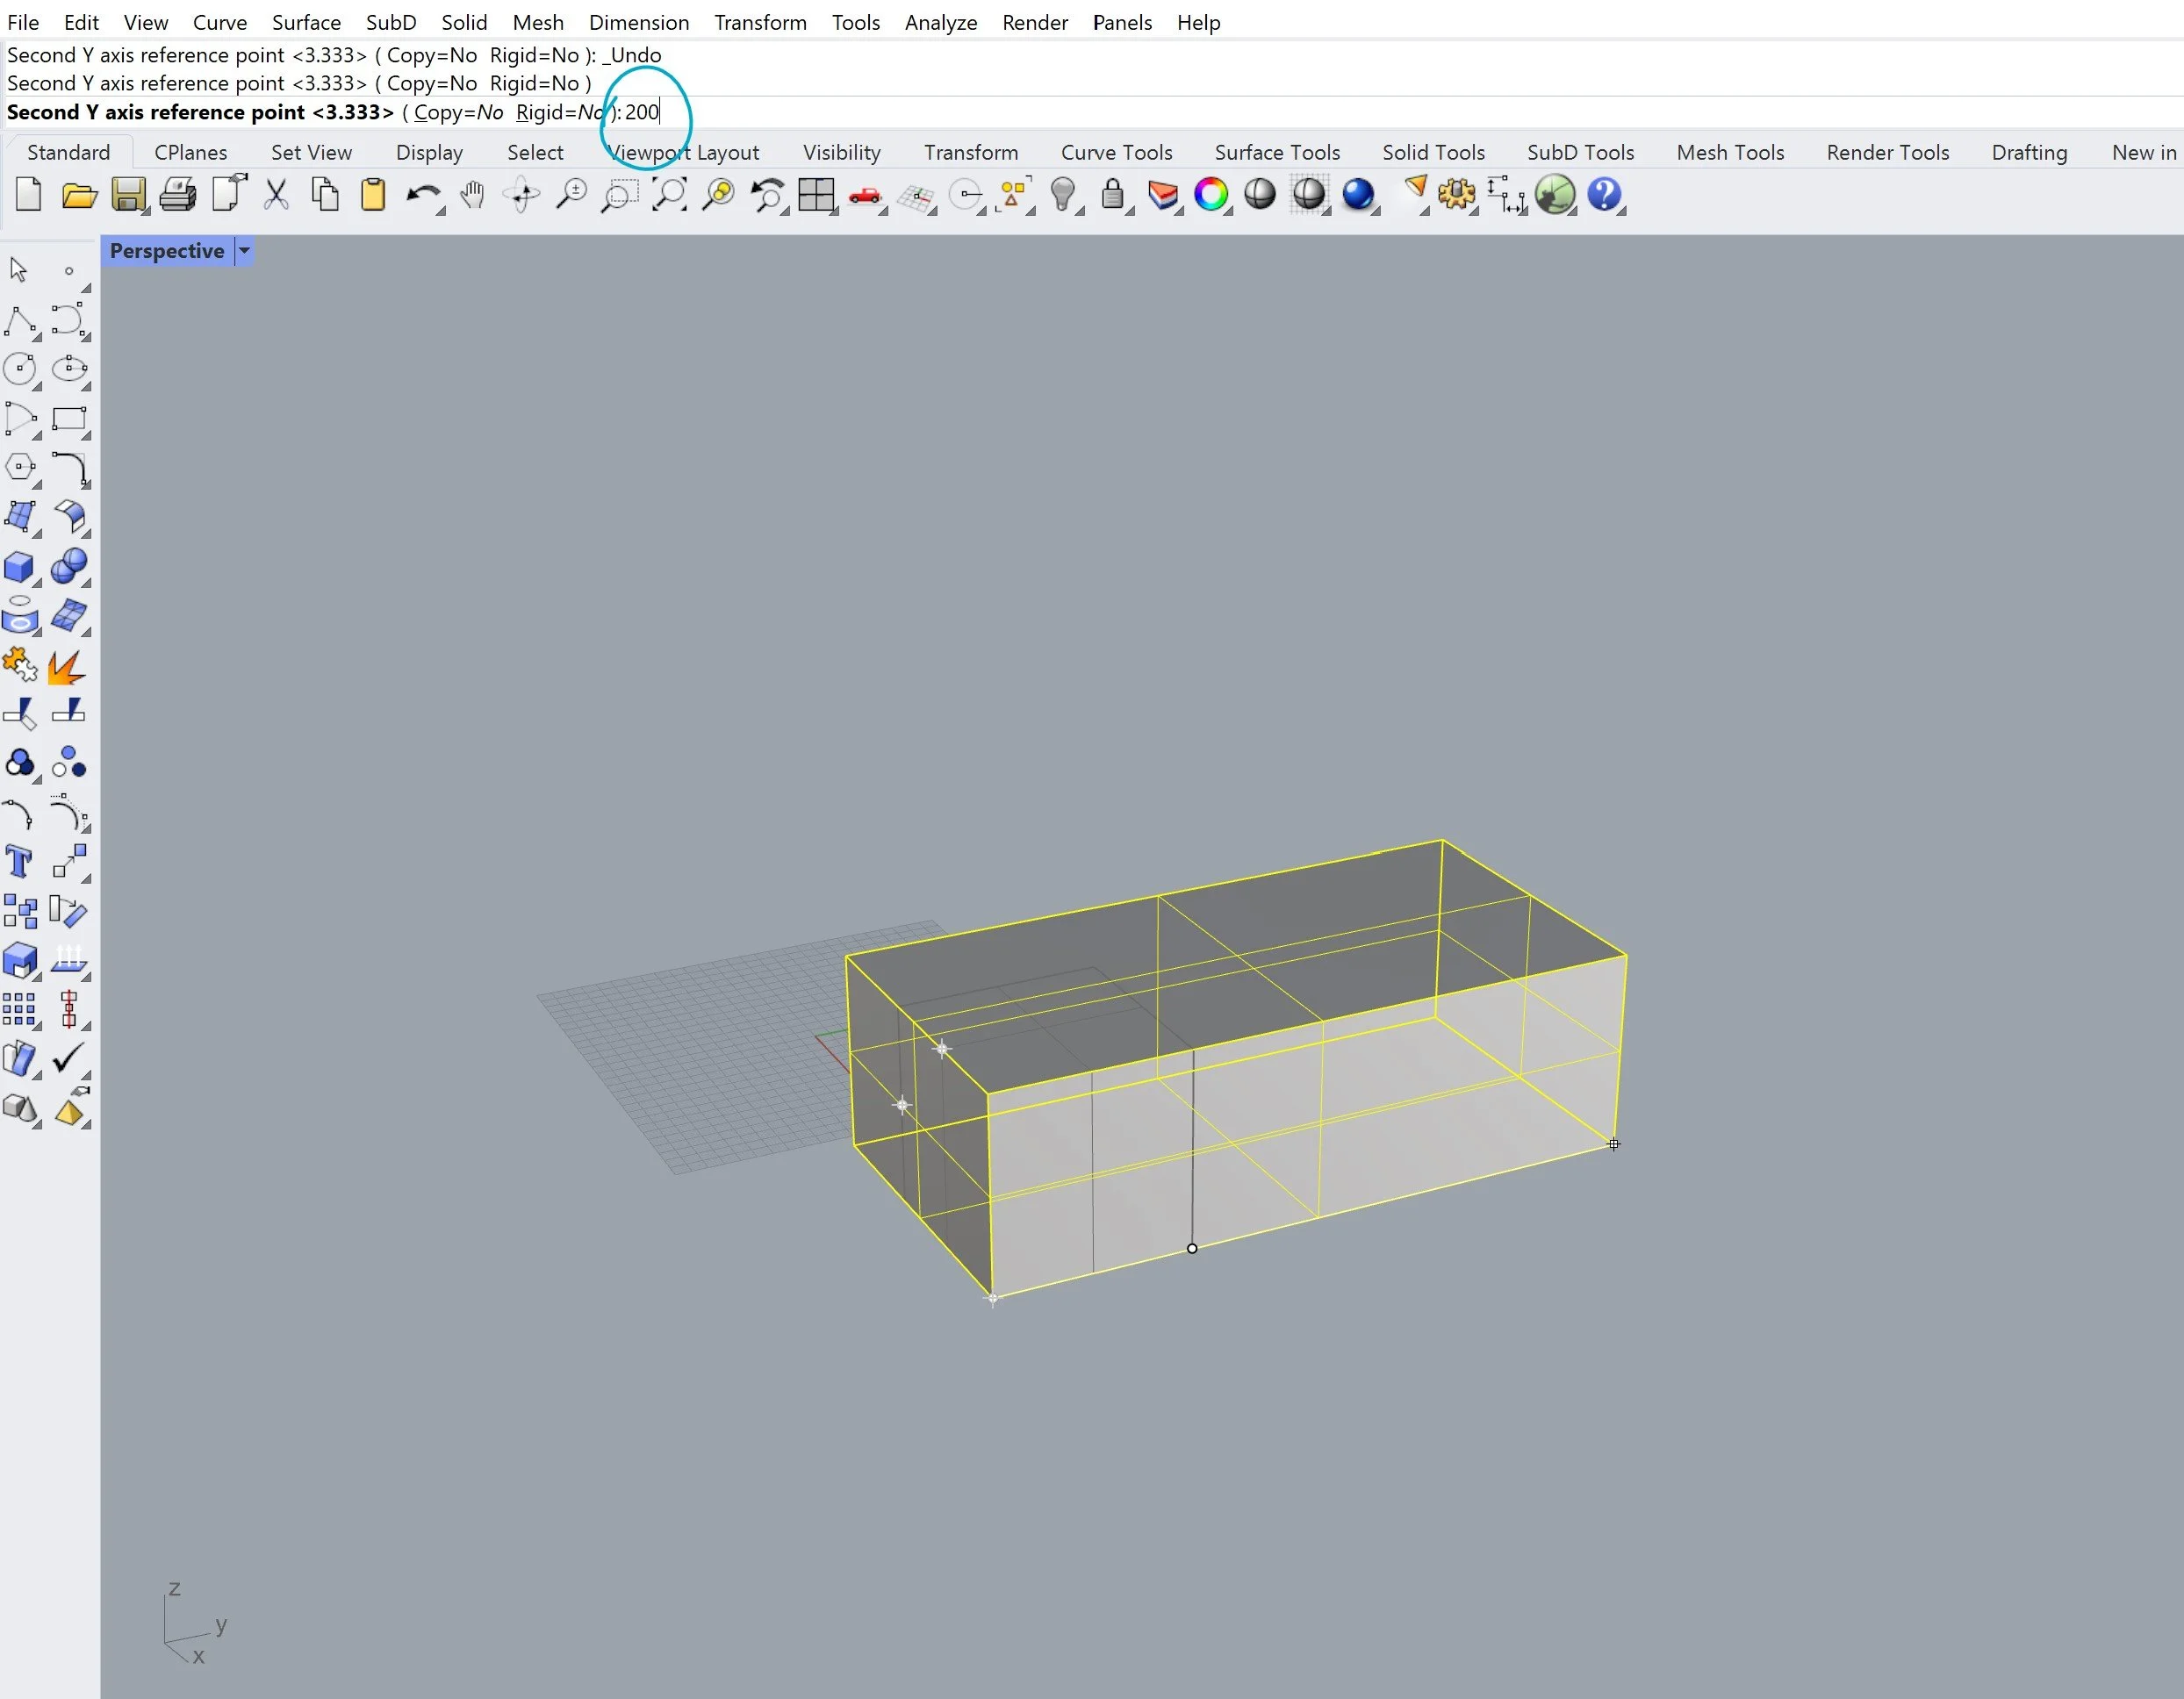
16
Lastly, your cursor will automatically move onto the Z-axis, which is the height of the object. Here, we select the first reference point which is the vertex above the origin point [17] and type in 50mm into the common bar [18] and that’s it! You have scaled an object at different scales across all three planes.
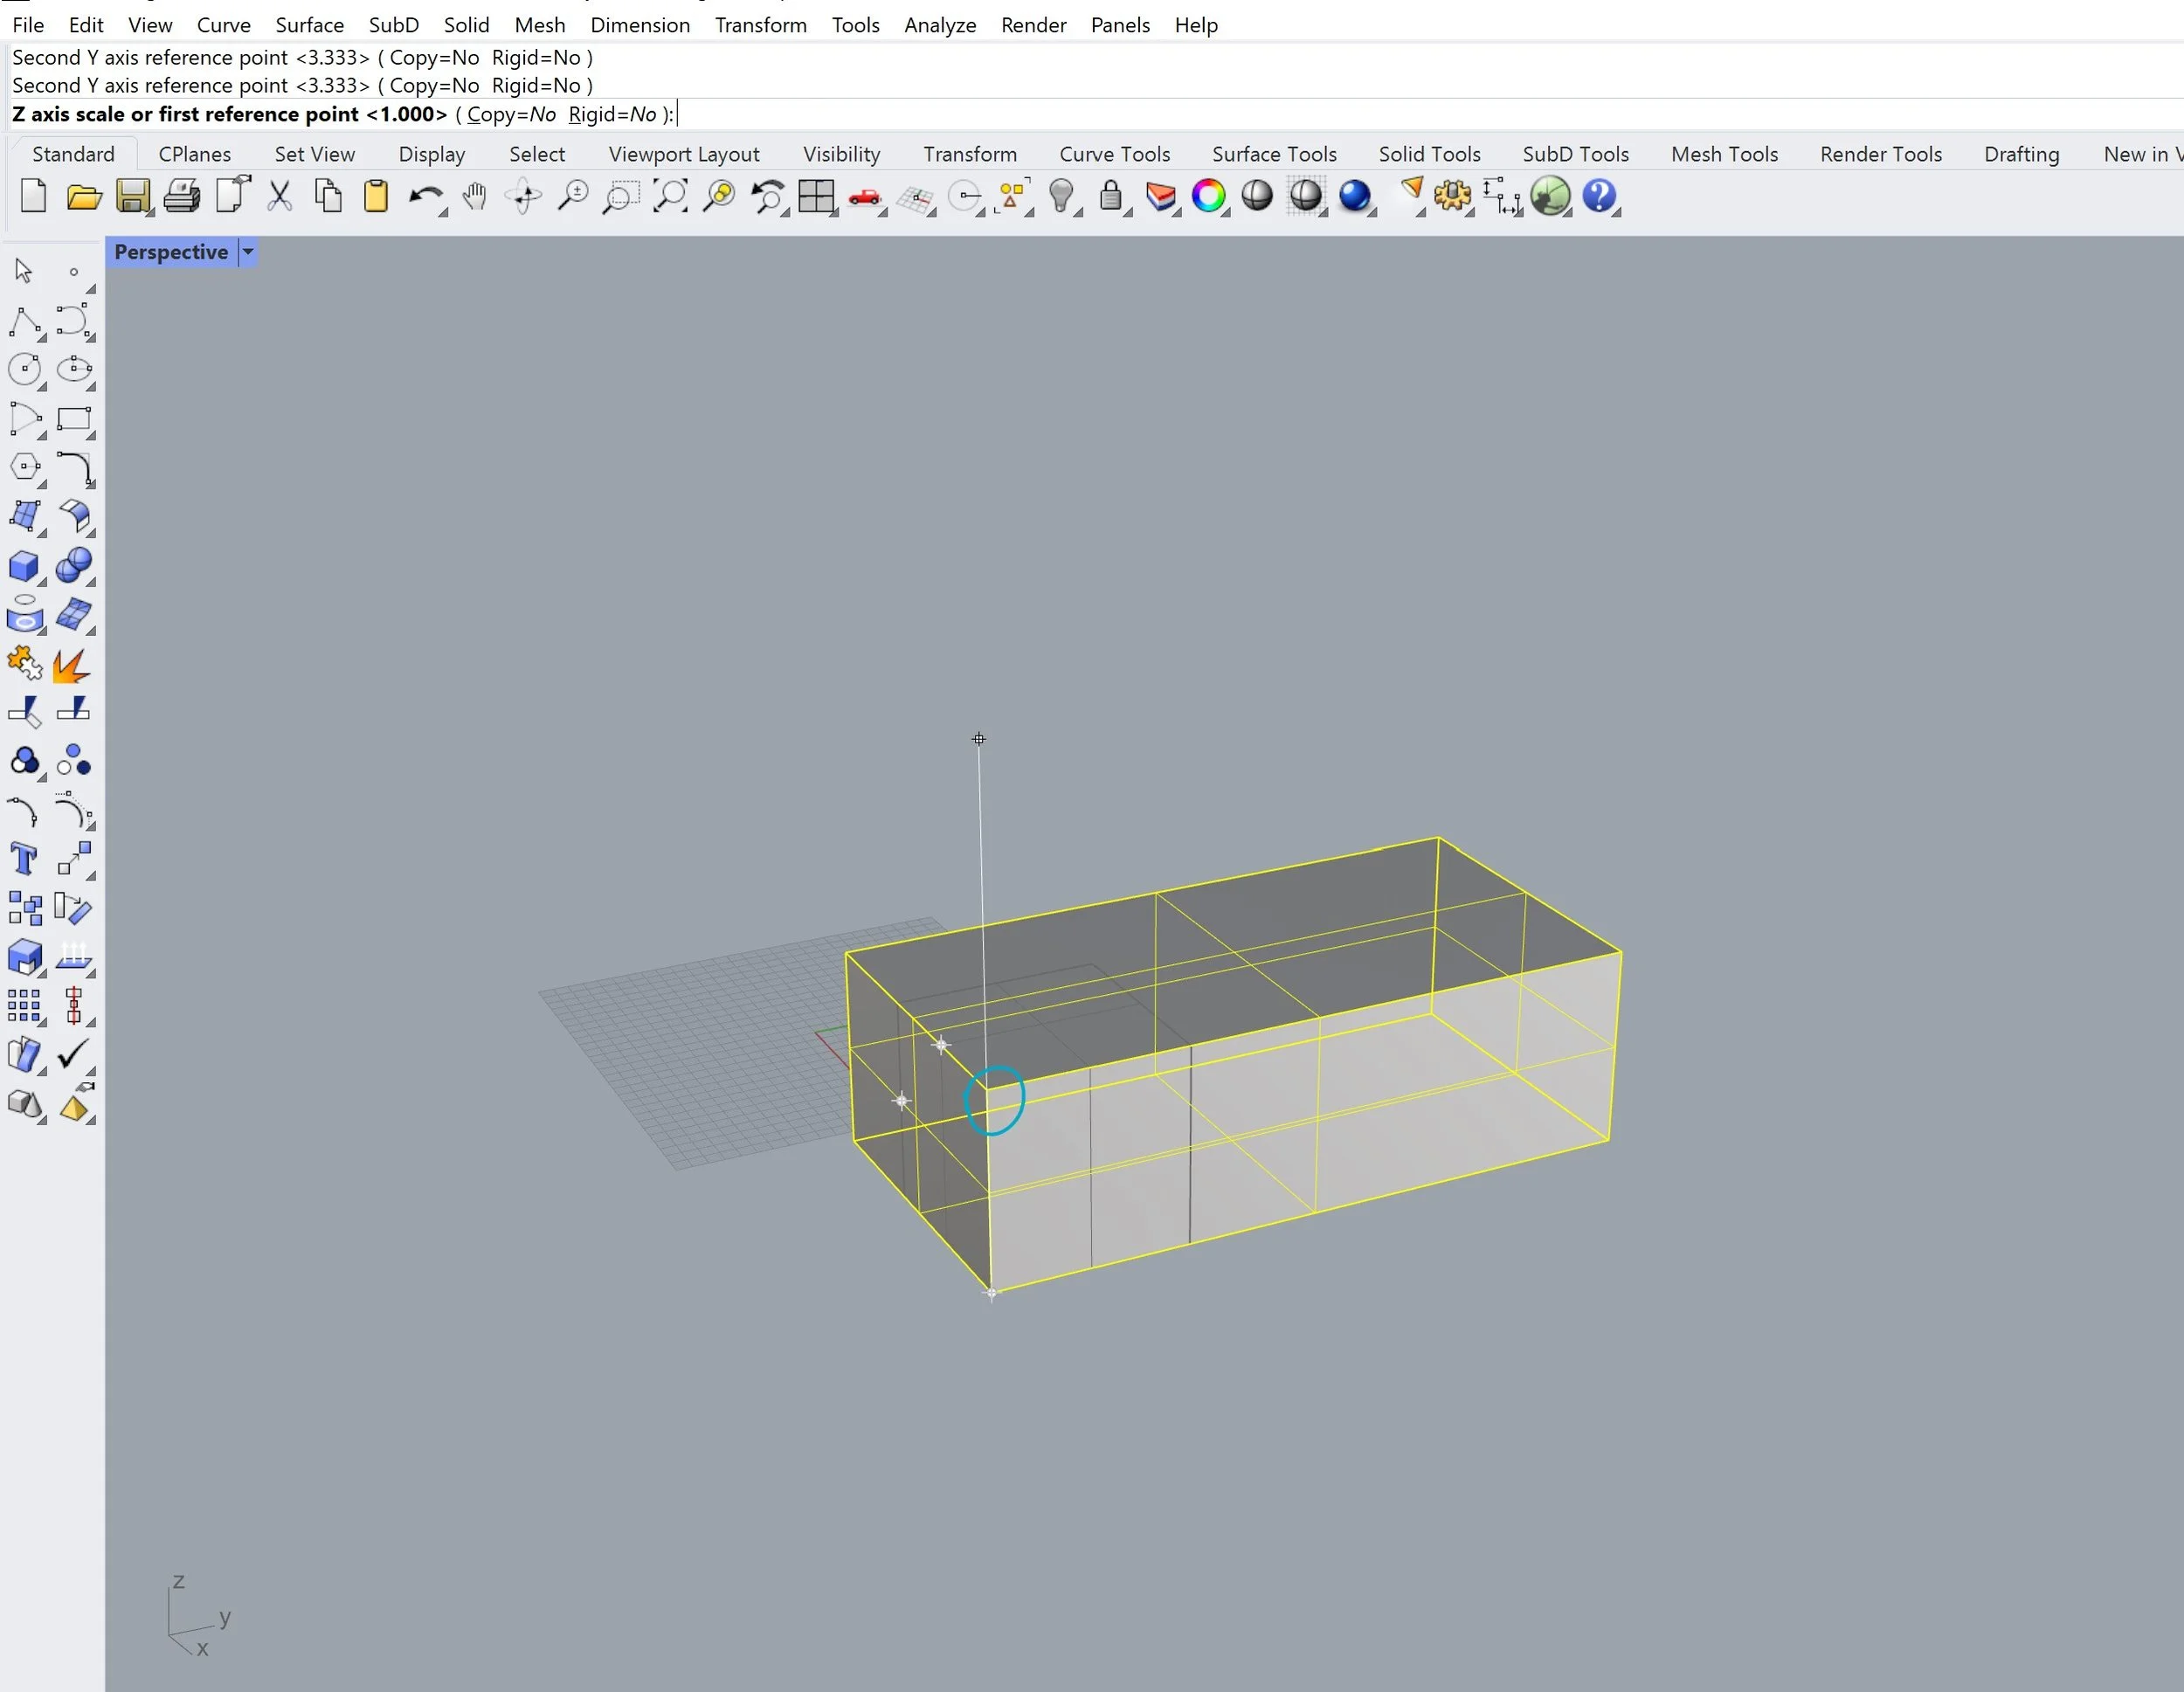
17

18
ScaleByPlane
Similar to ScaleNU, we are going to use this command to scale an object in one dimension only. Starting with the 60mm x 60mm x 60mm cube again, we want to only change the Z-axis to be 180mm. First select the object and type in the command ‘ScaleByPlane’ [19] activating the command and select the origin point for the scaling [20]. Then you select the reference point in the direction of the axis that you want to change.
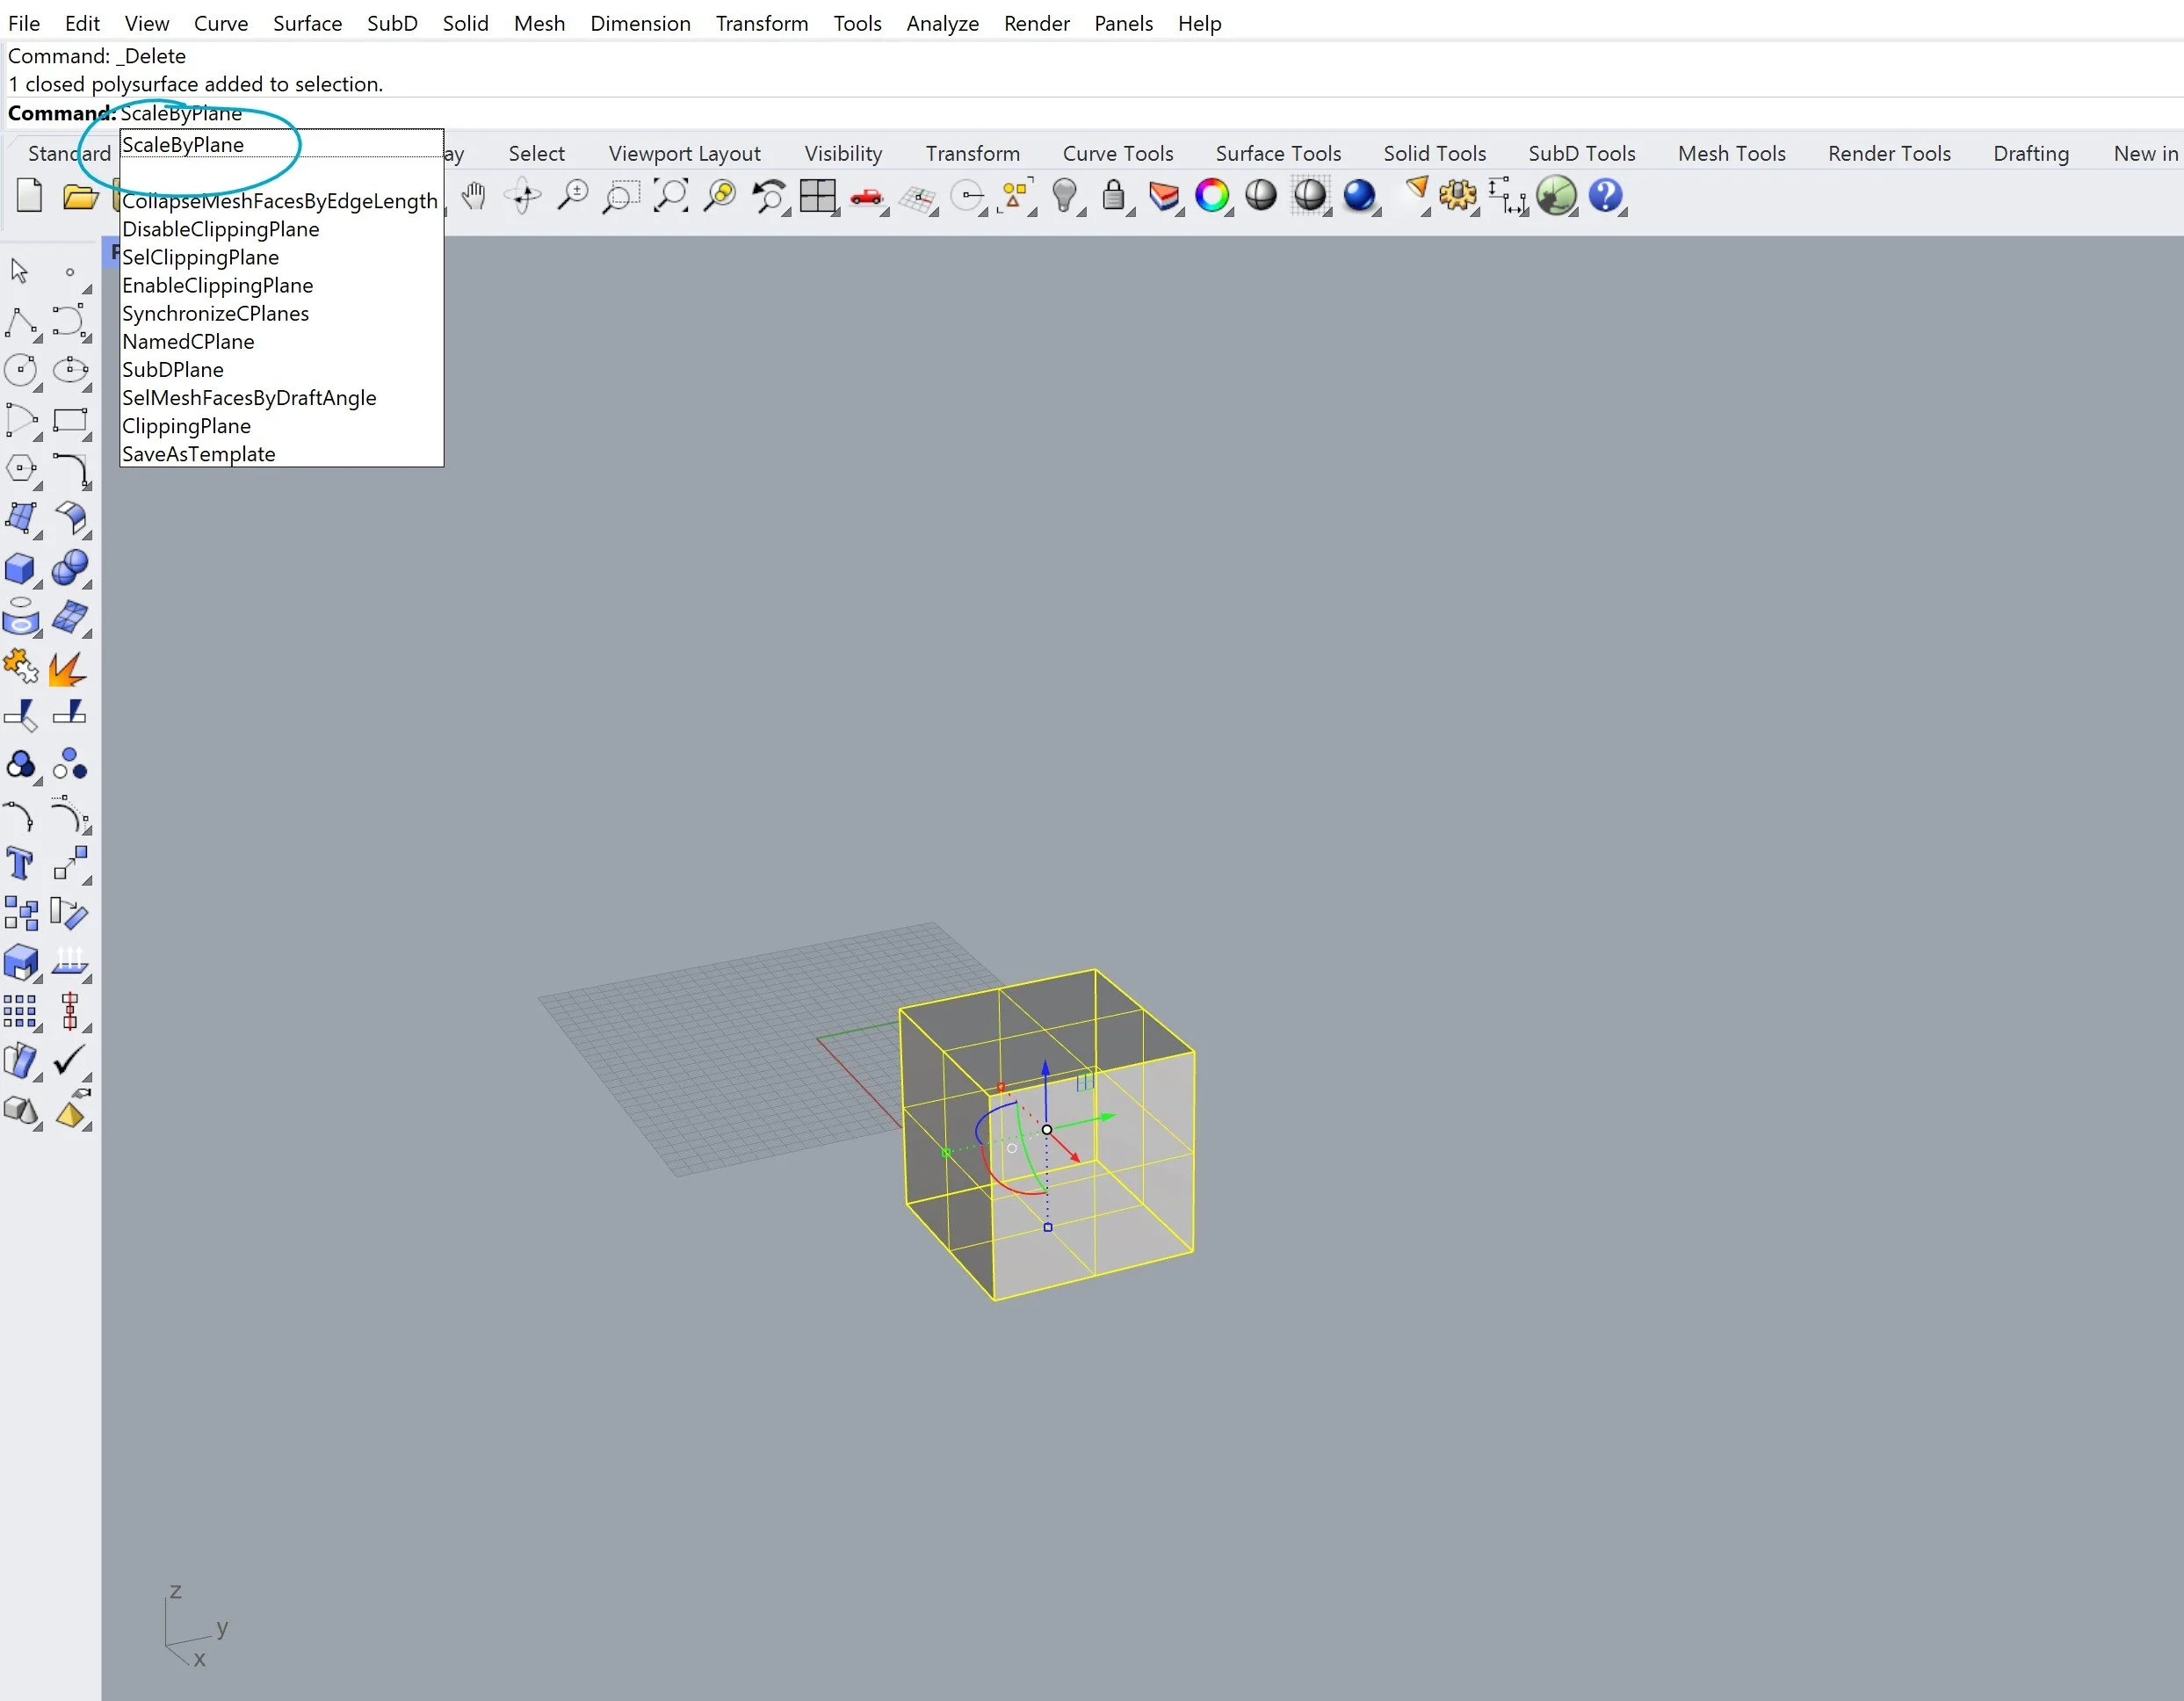
19
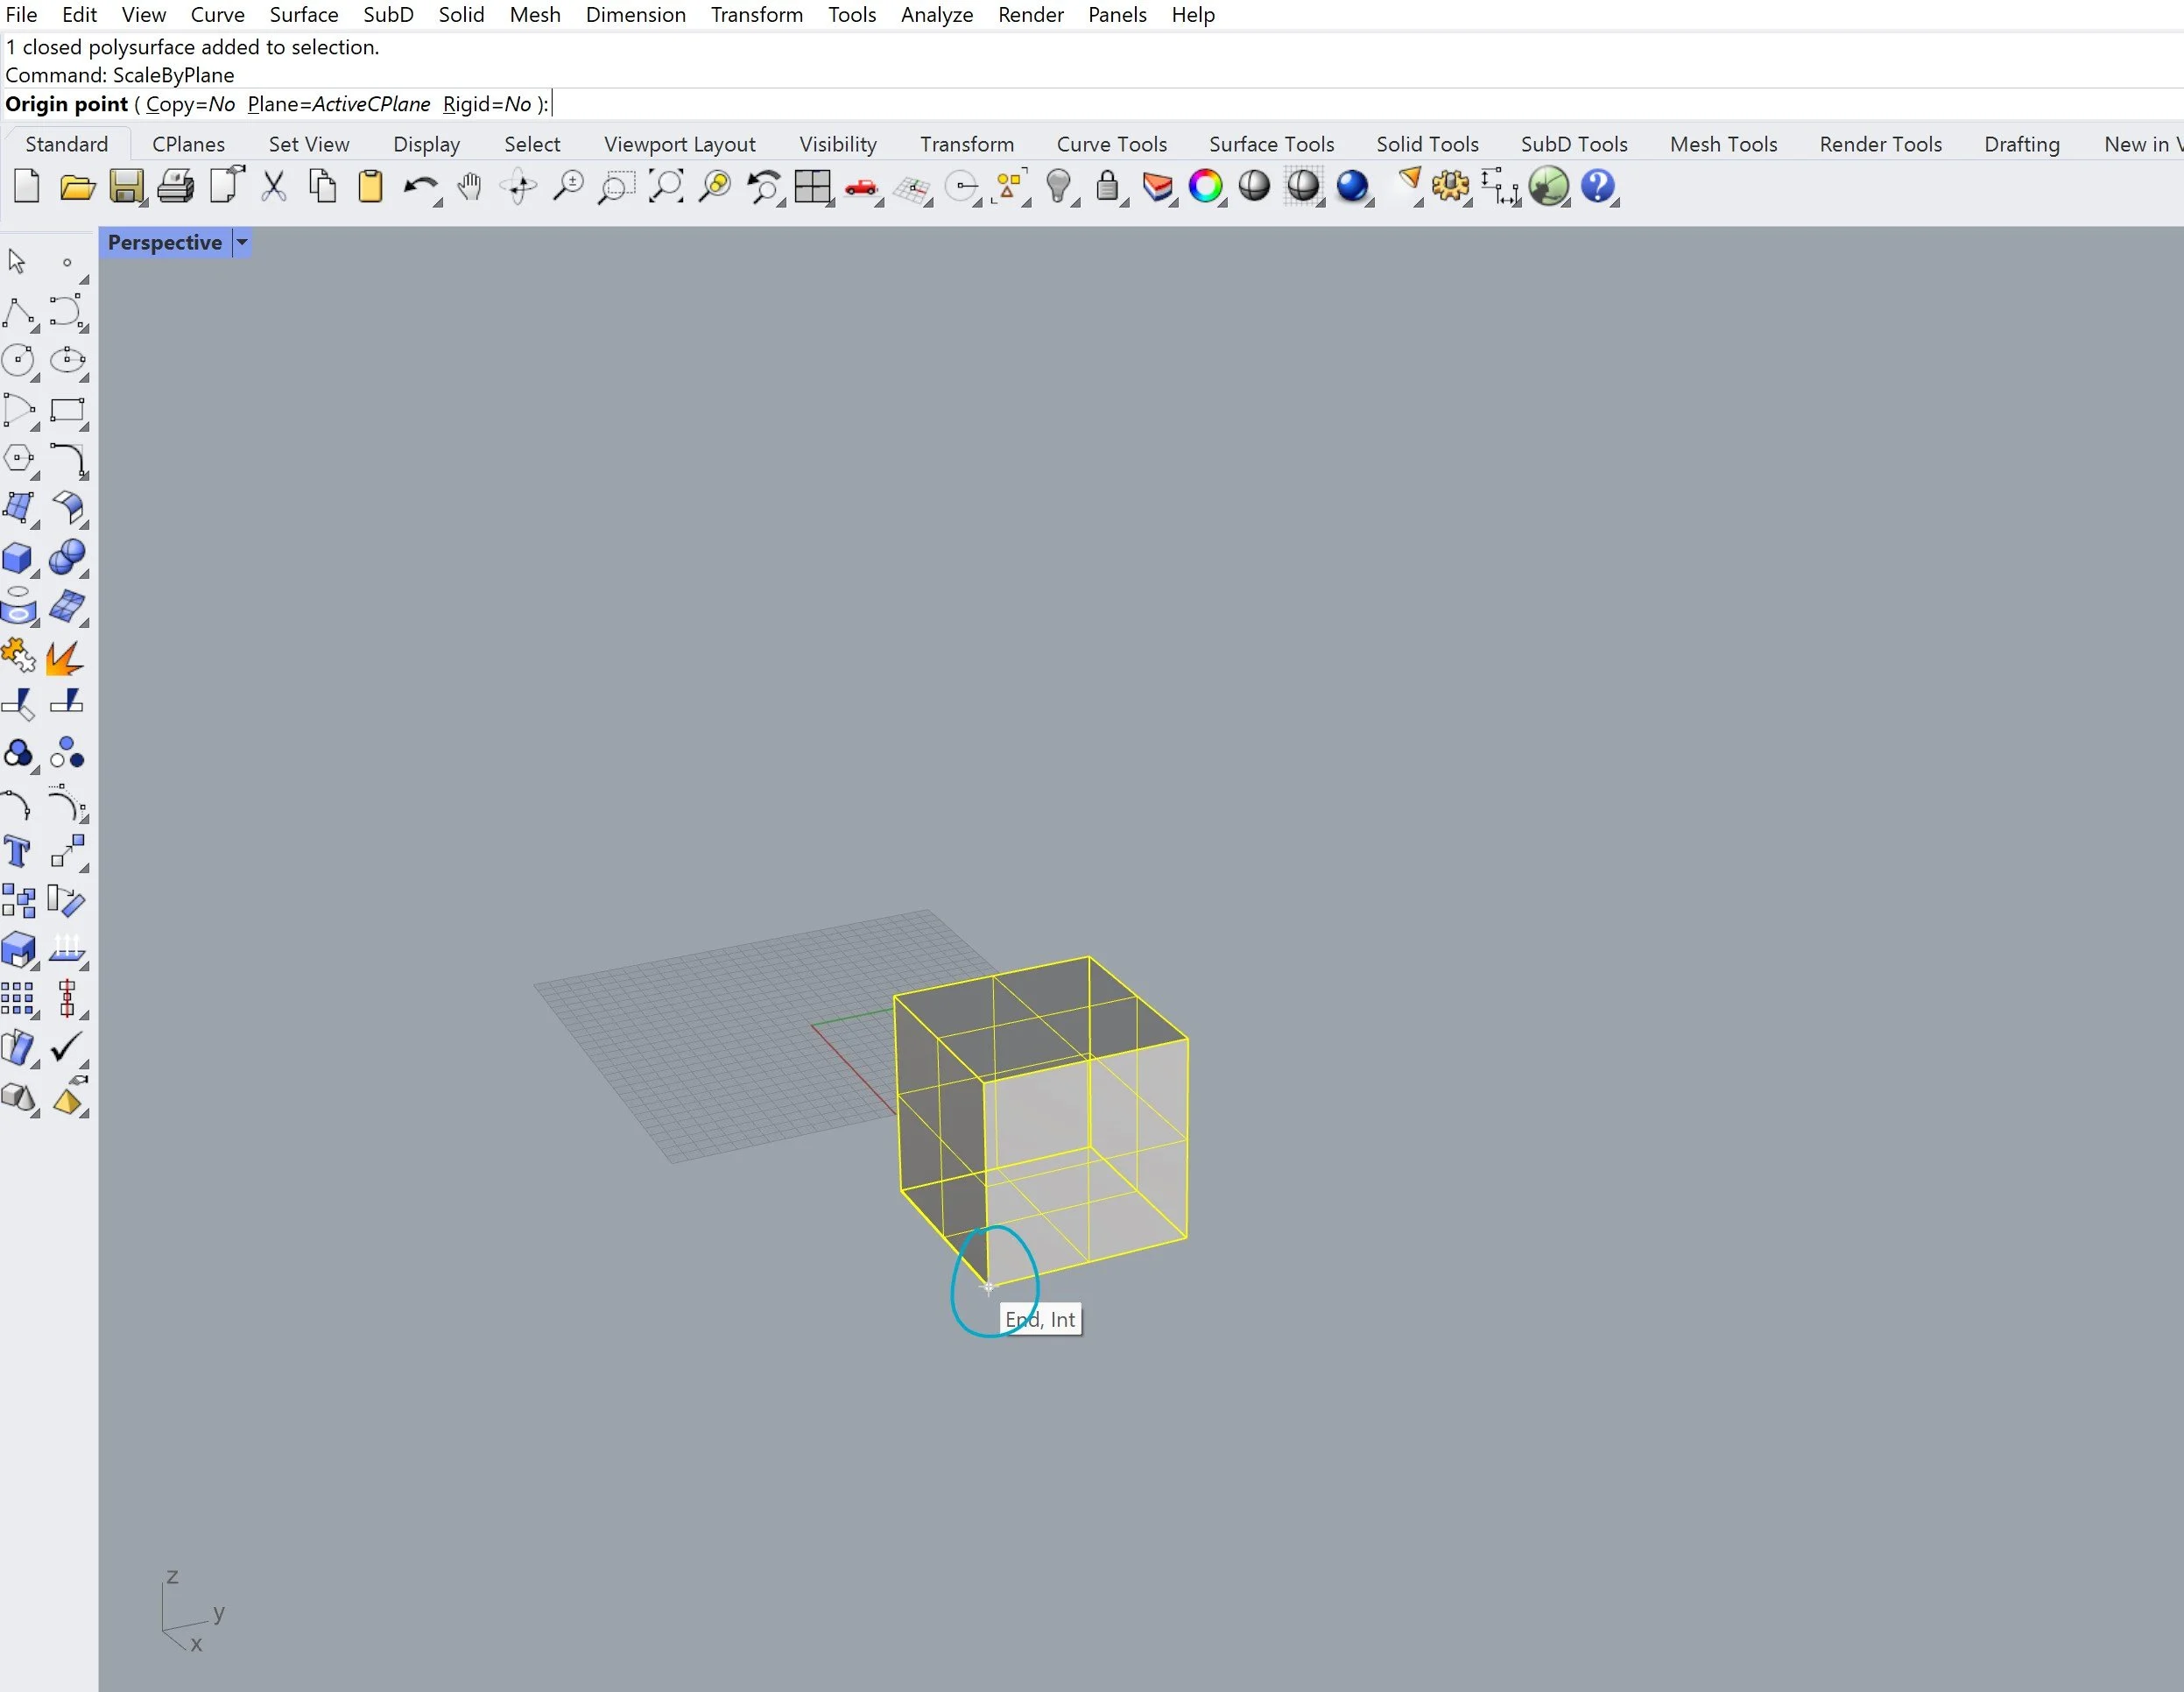
20
We want to change the scale of the Y-axis so we select the vertex on that axis [21]. Here we move the reference point to the 180mm mark to change the scale [22]. That's all there is to scaling by plane!
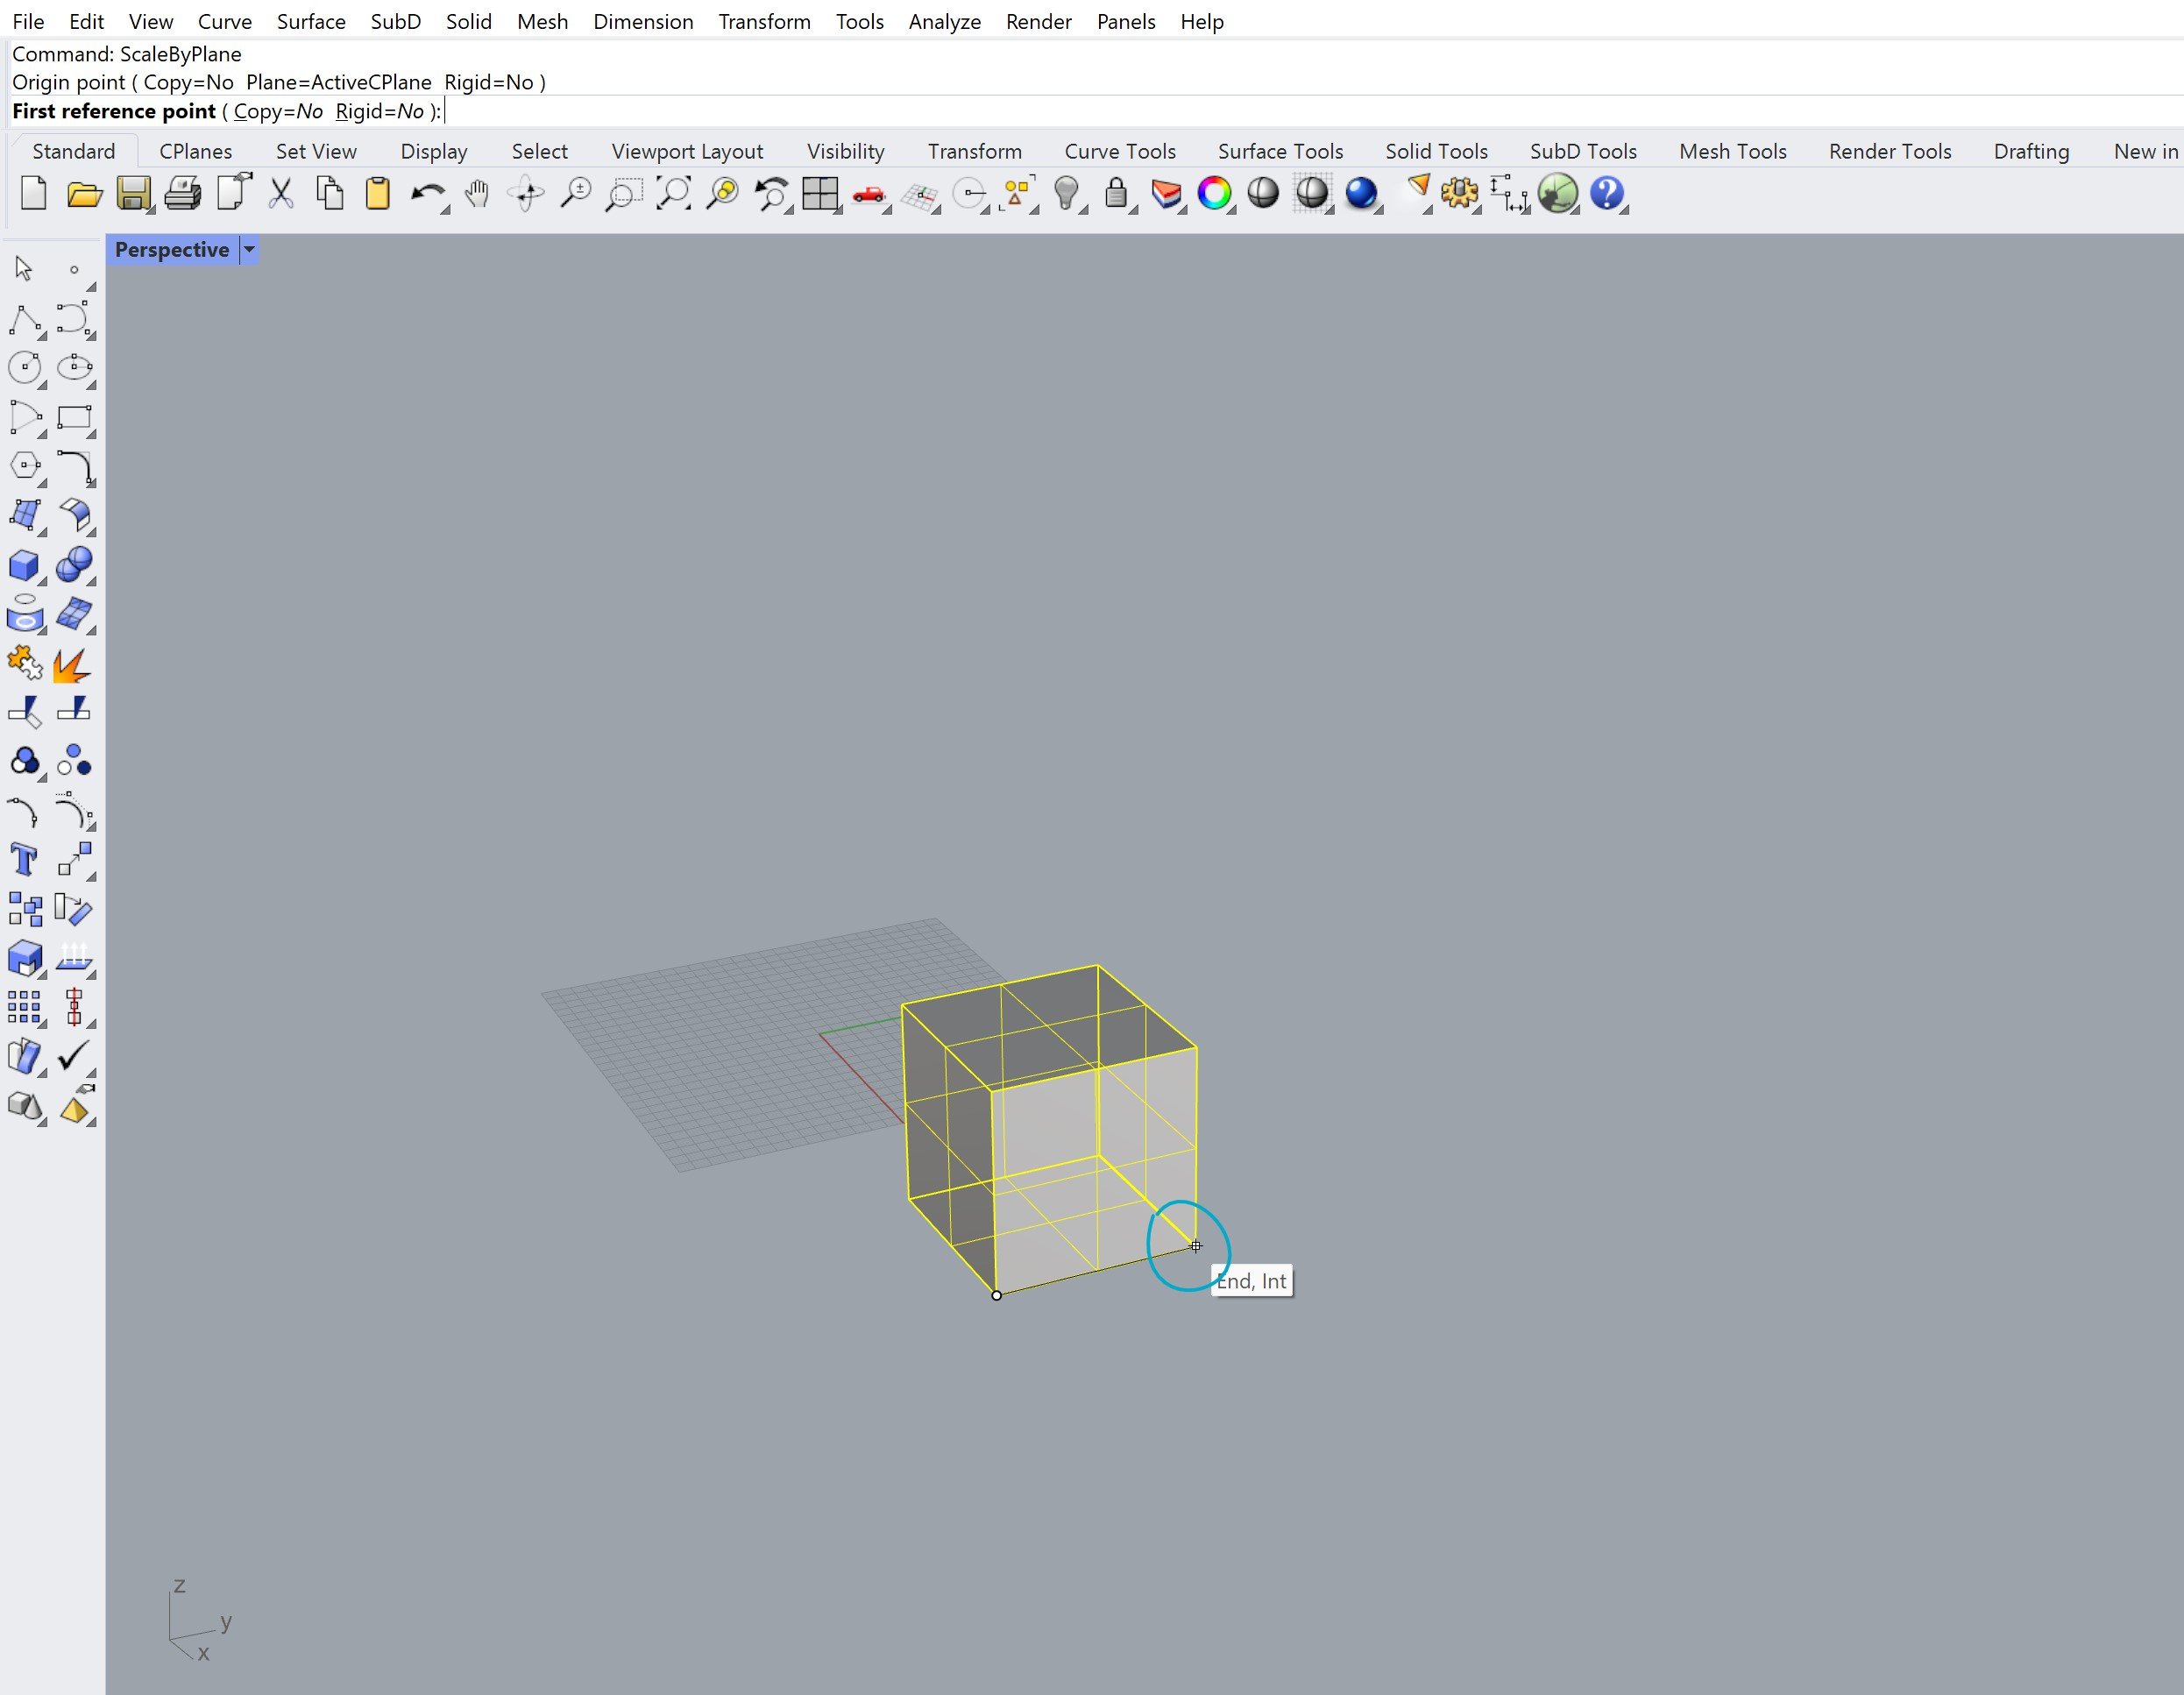
21
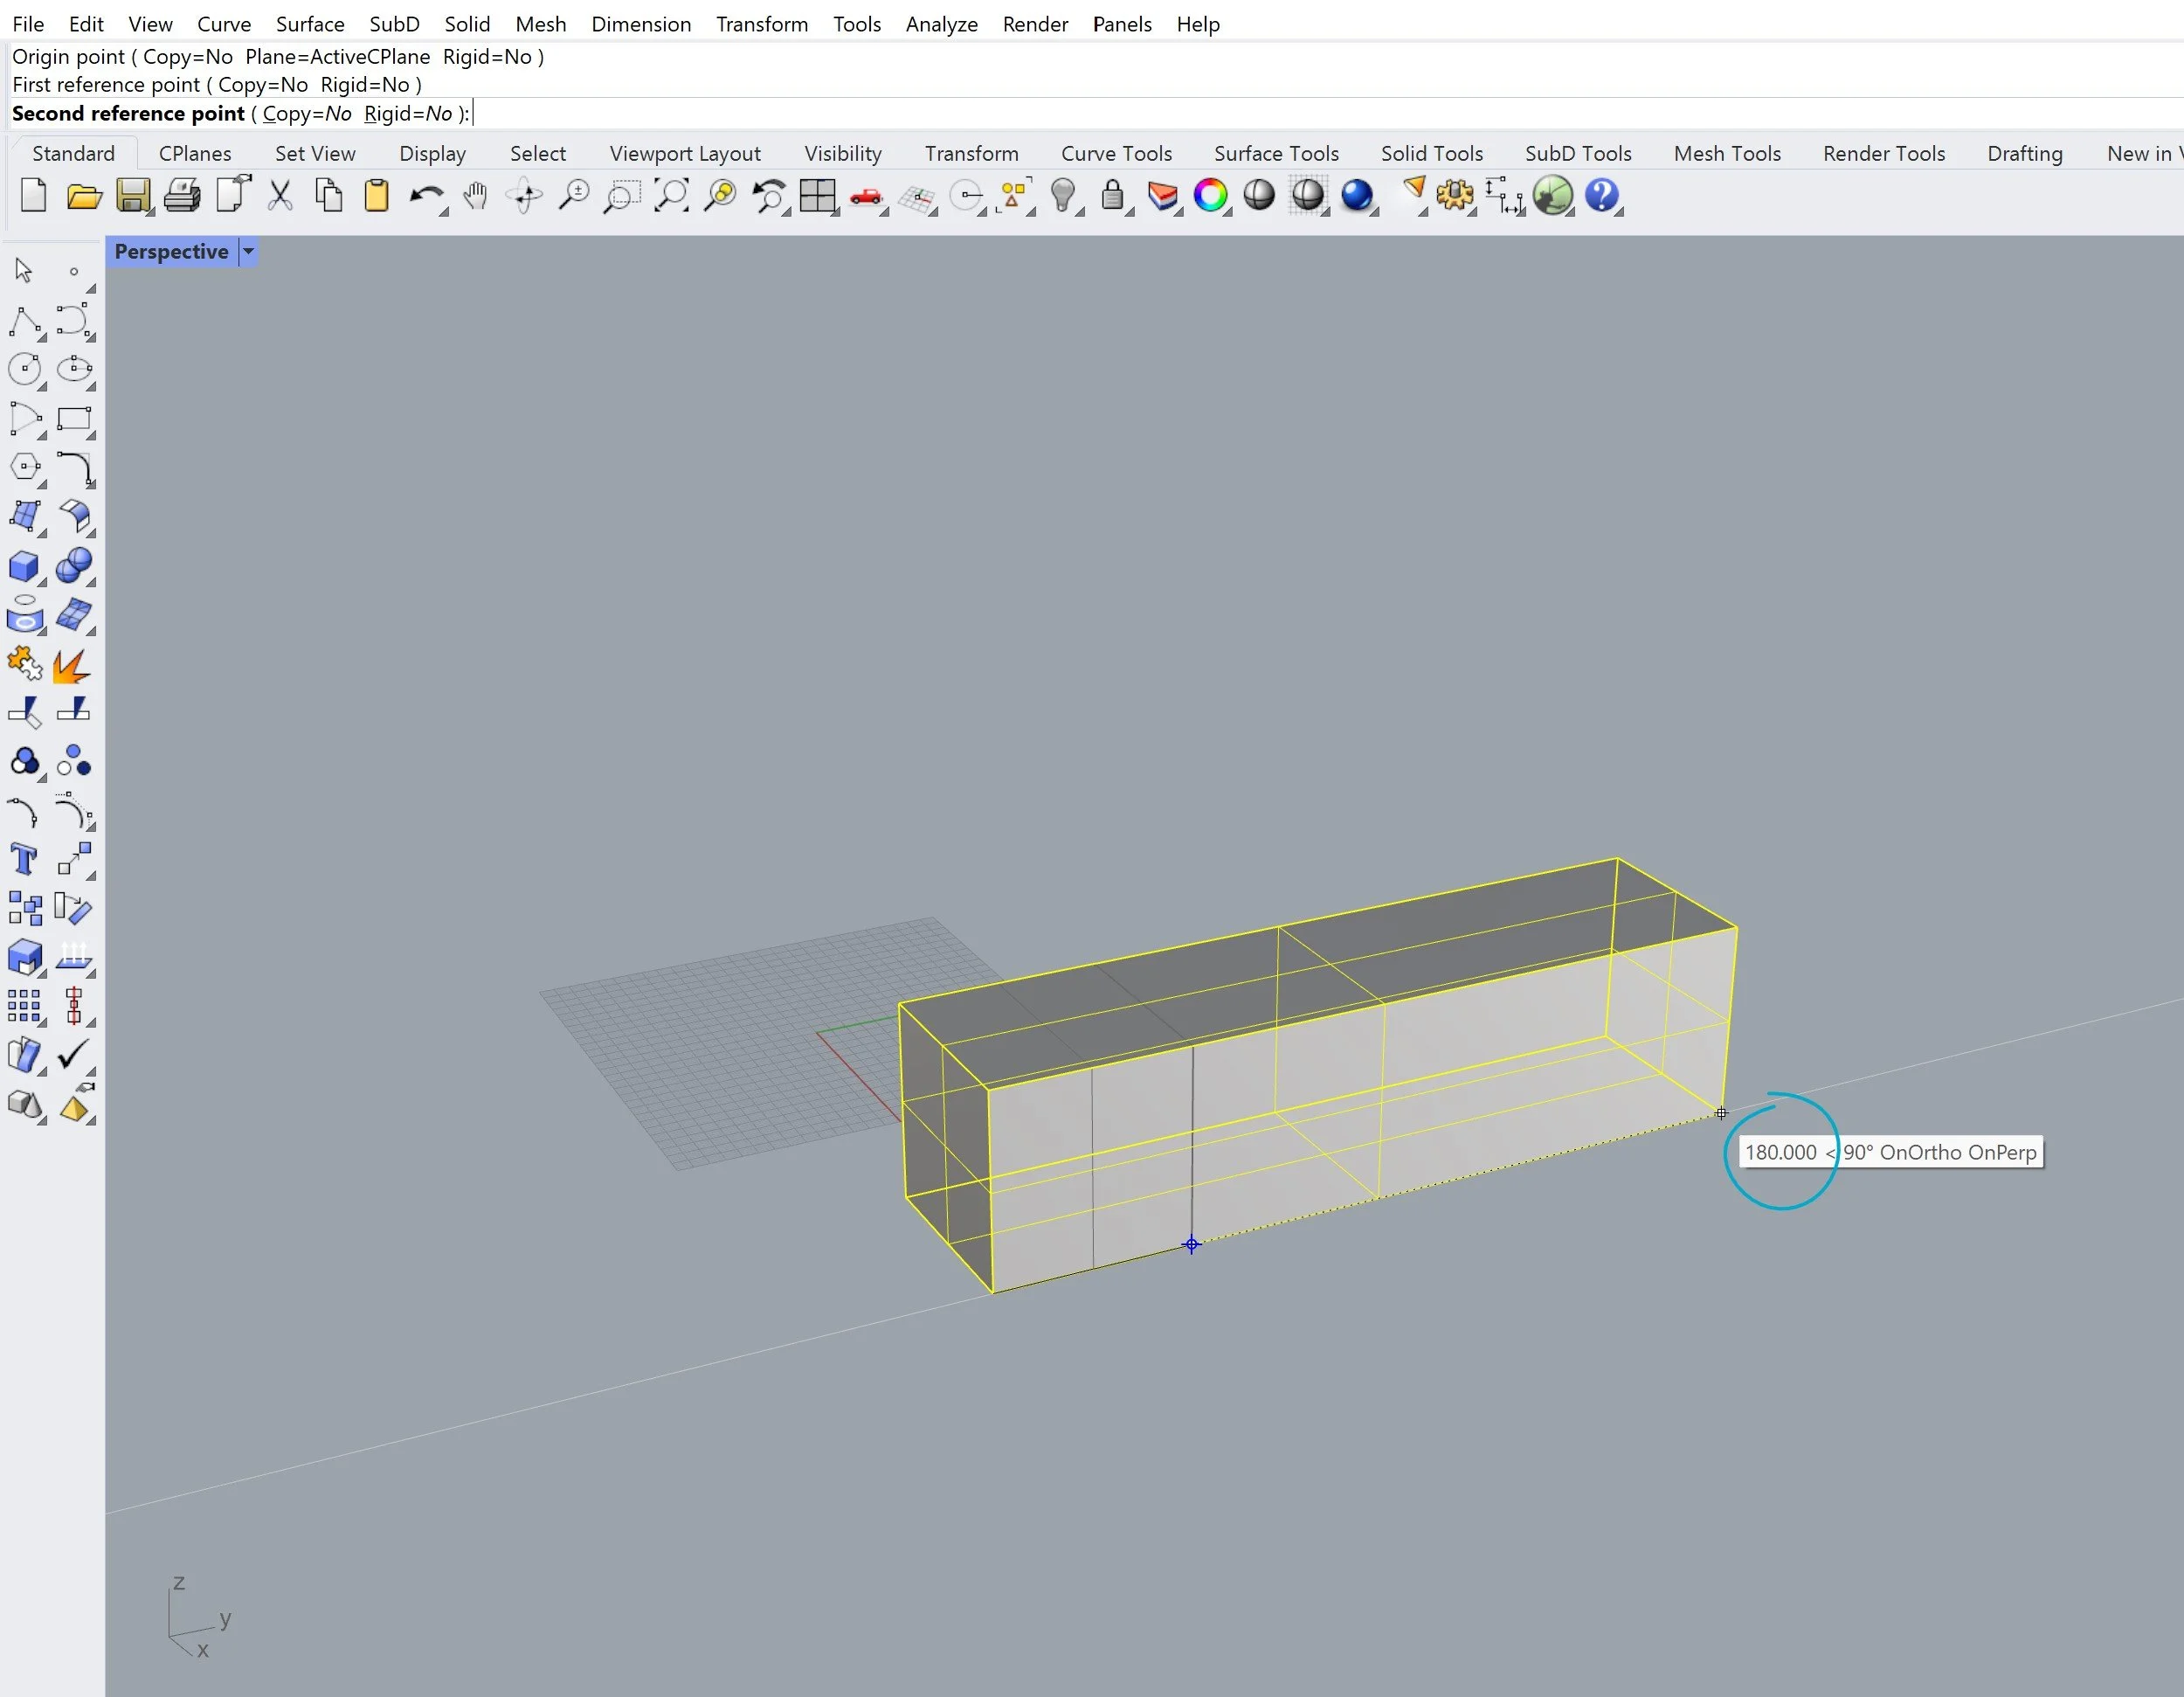
22
Scaling Drawings to Export
Once you’ve completed your drawing or you’ve generated a view from your 3D model, you would clean this up and go to export it out of Rhino. A very time efficient way of doing this is by creating a layout.
With your finished drawing on your view, start typing the command layout into the task bar [23]. Once entered this will open up a new window that lets you set the properties of that page [24]. Here you can change the properties of the page as you wish. I chose A2 page dimensions, landscape view and I renamed the layout to ‘Final Drawing’.
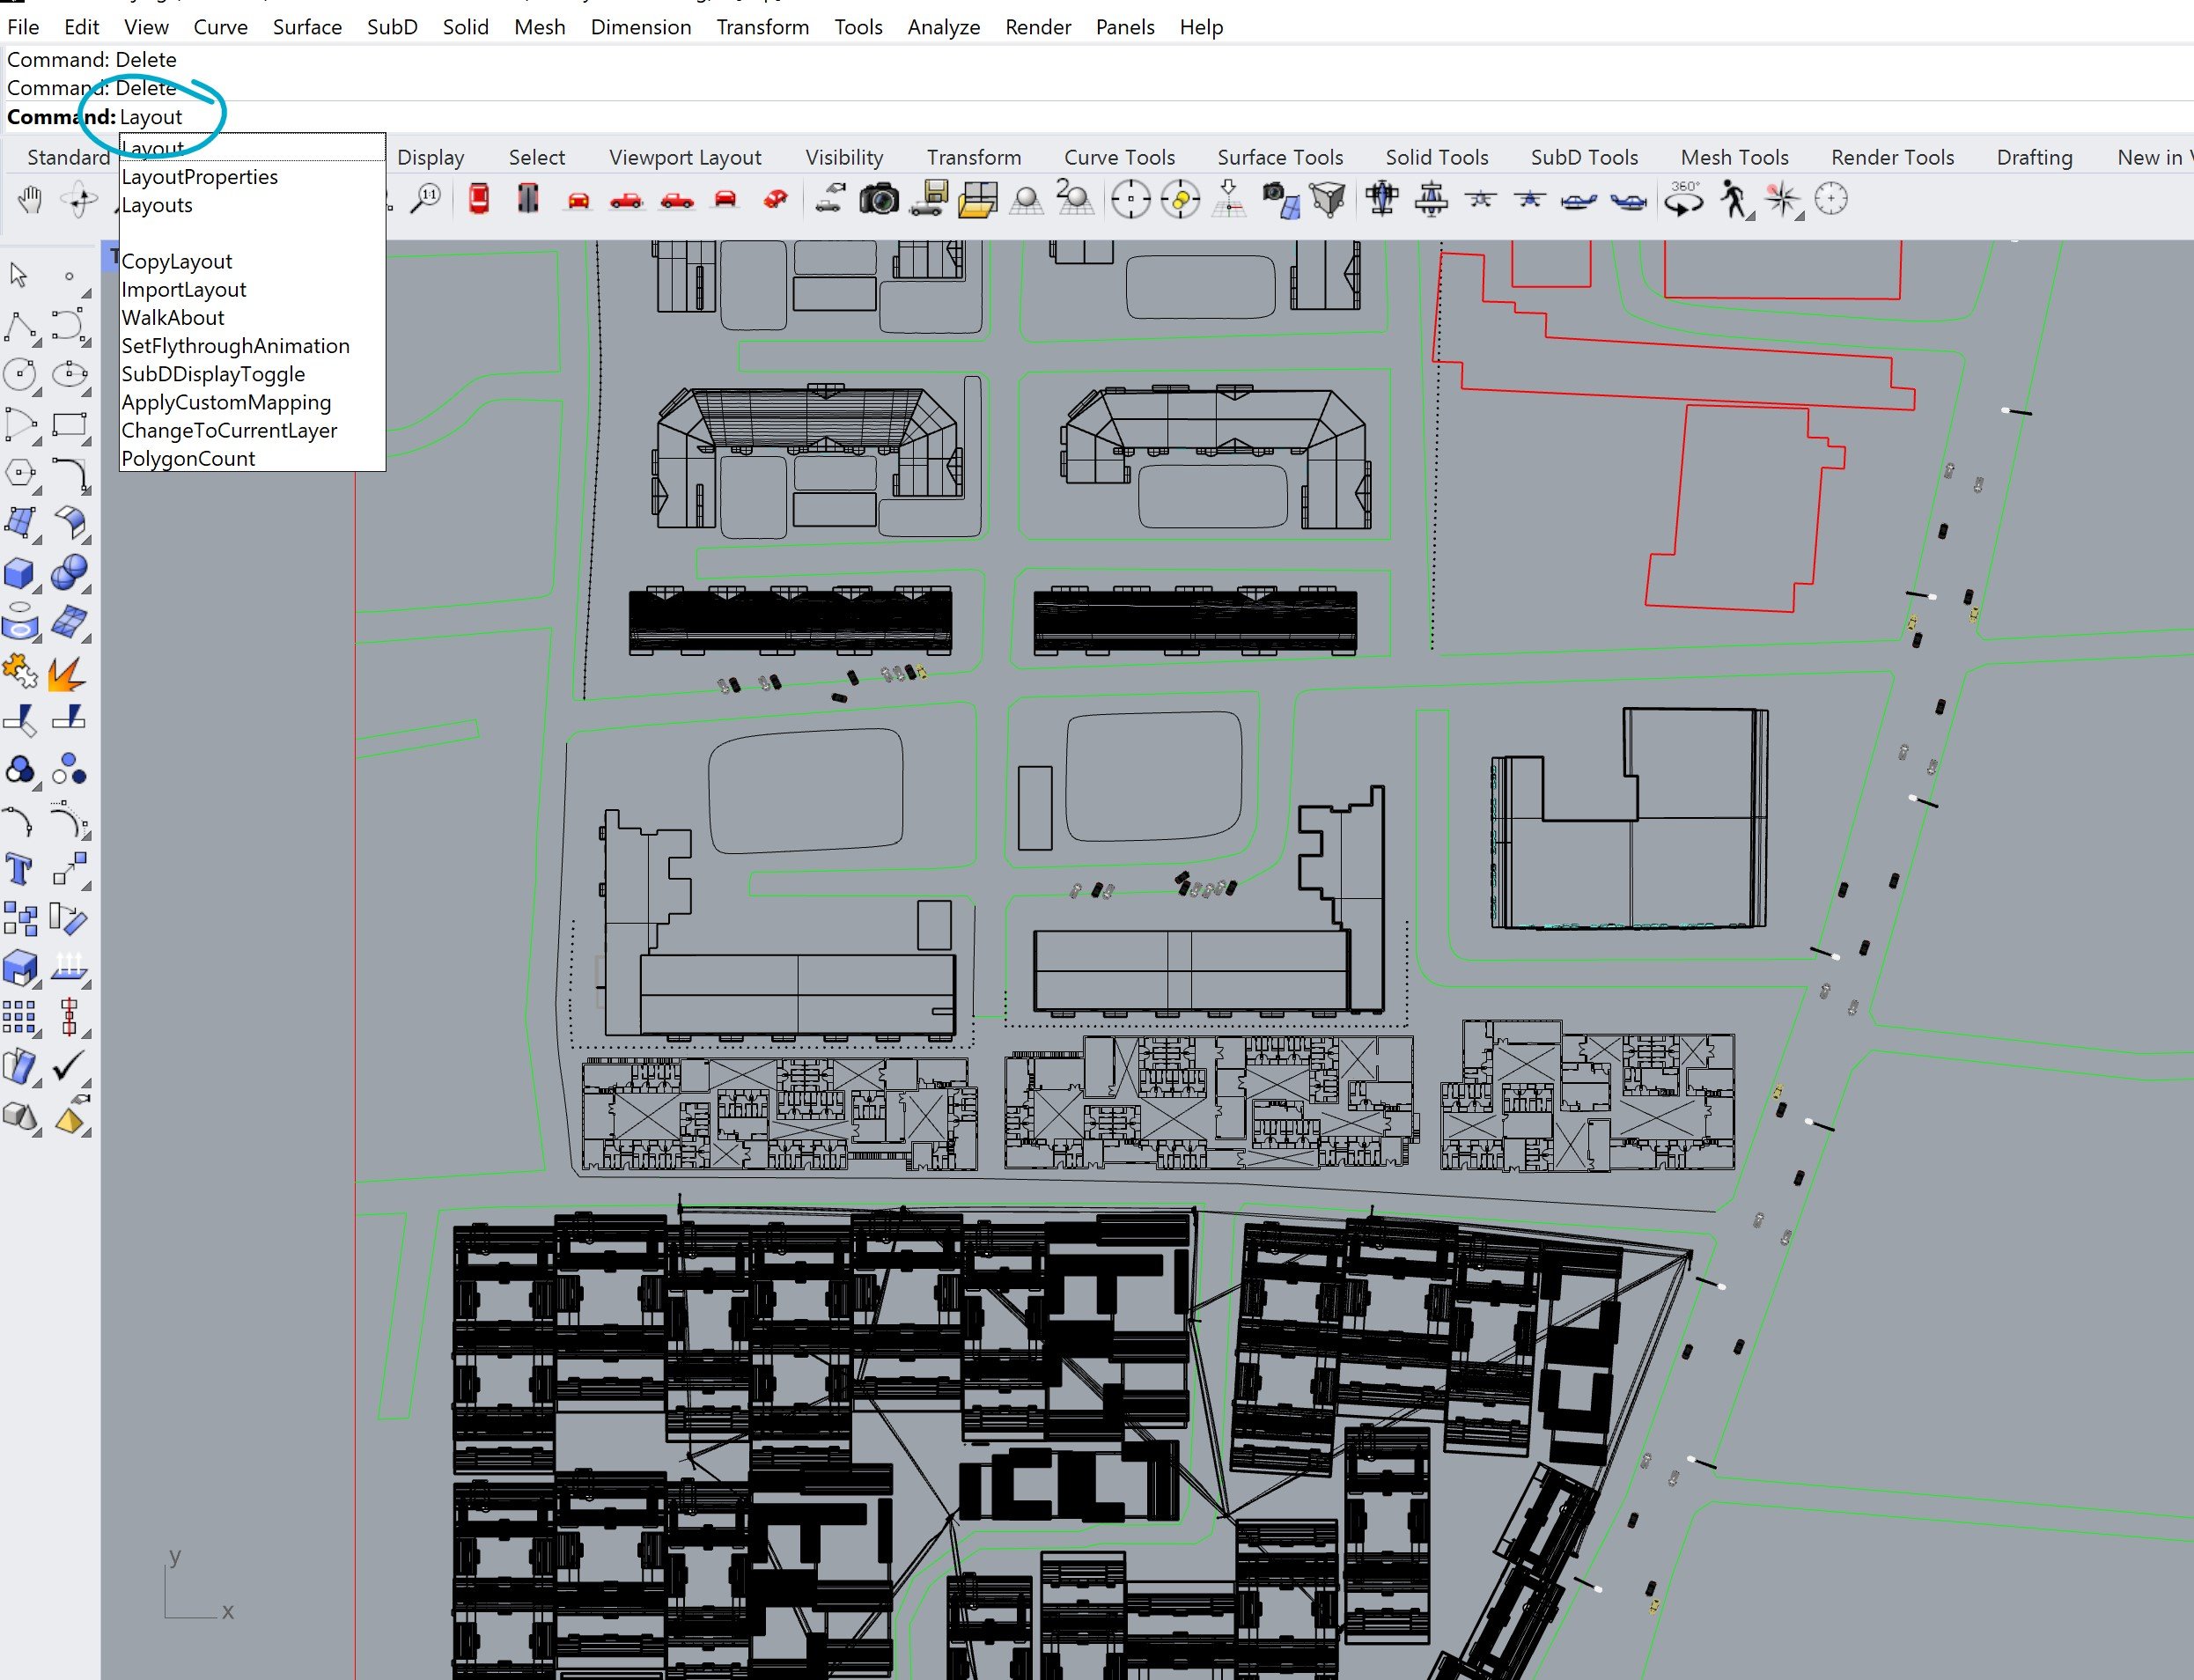
23
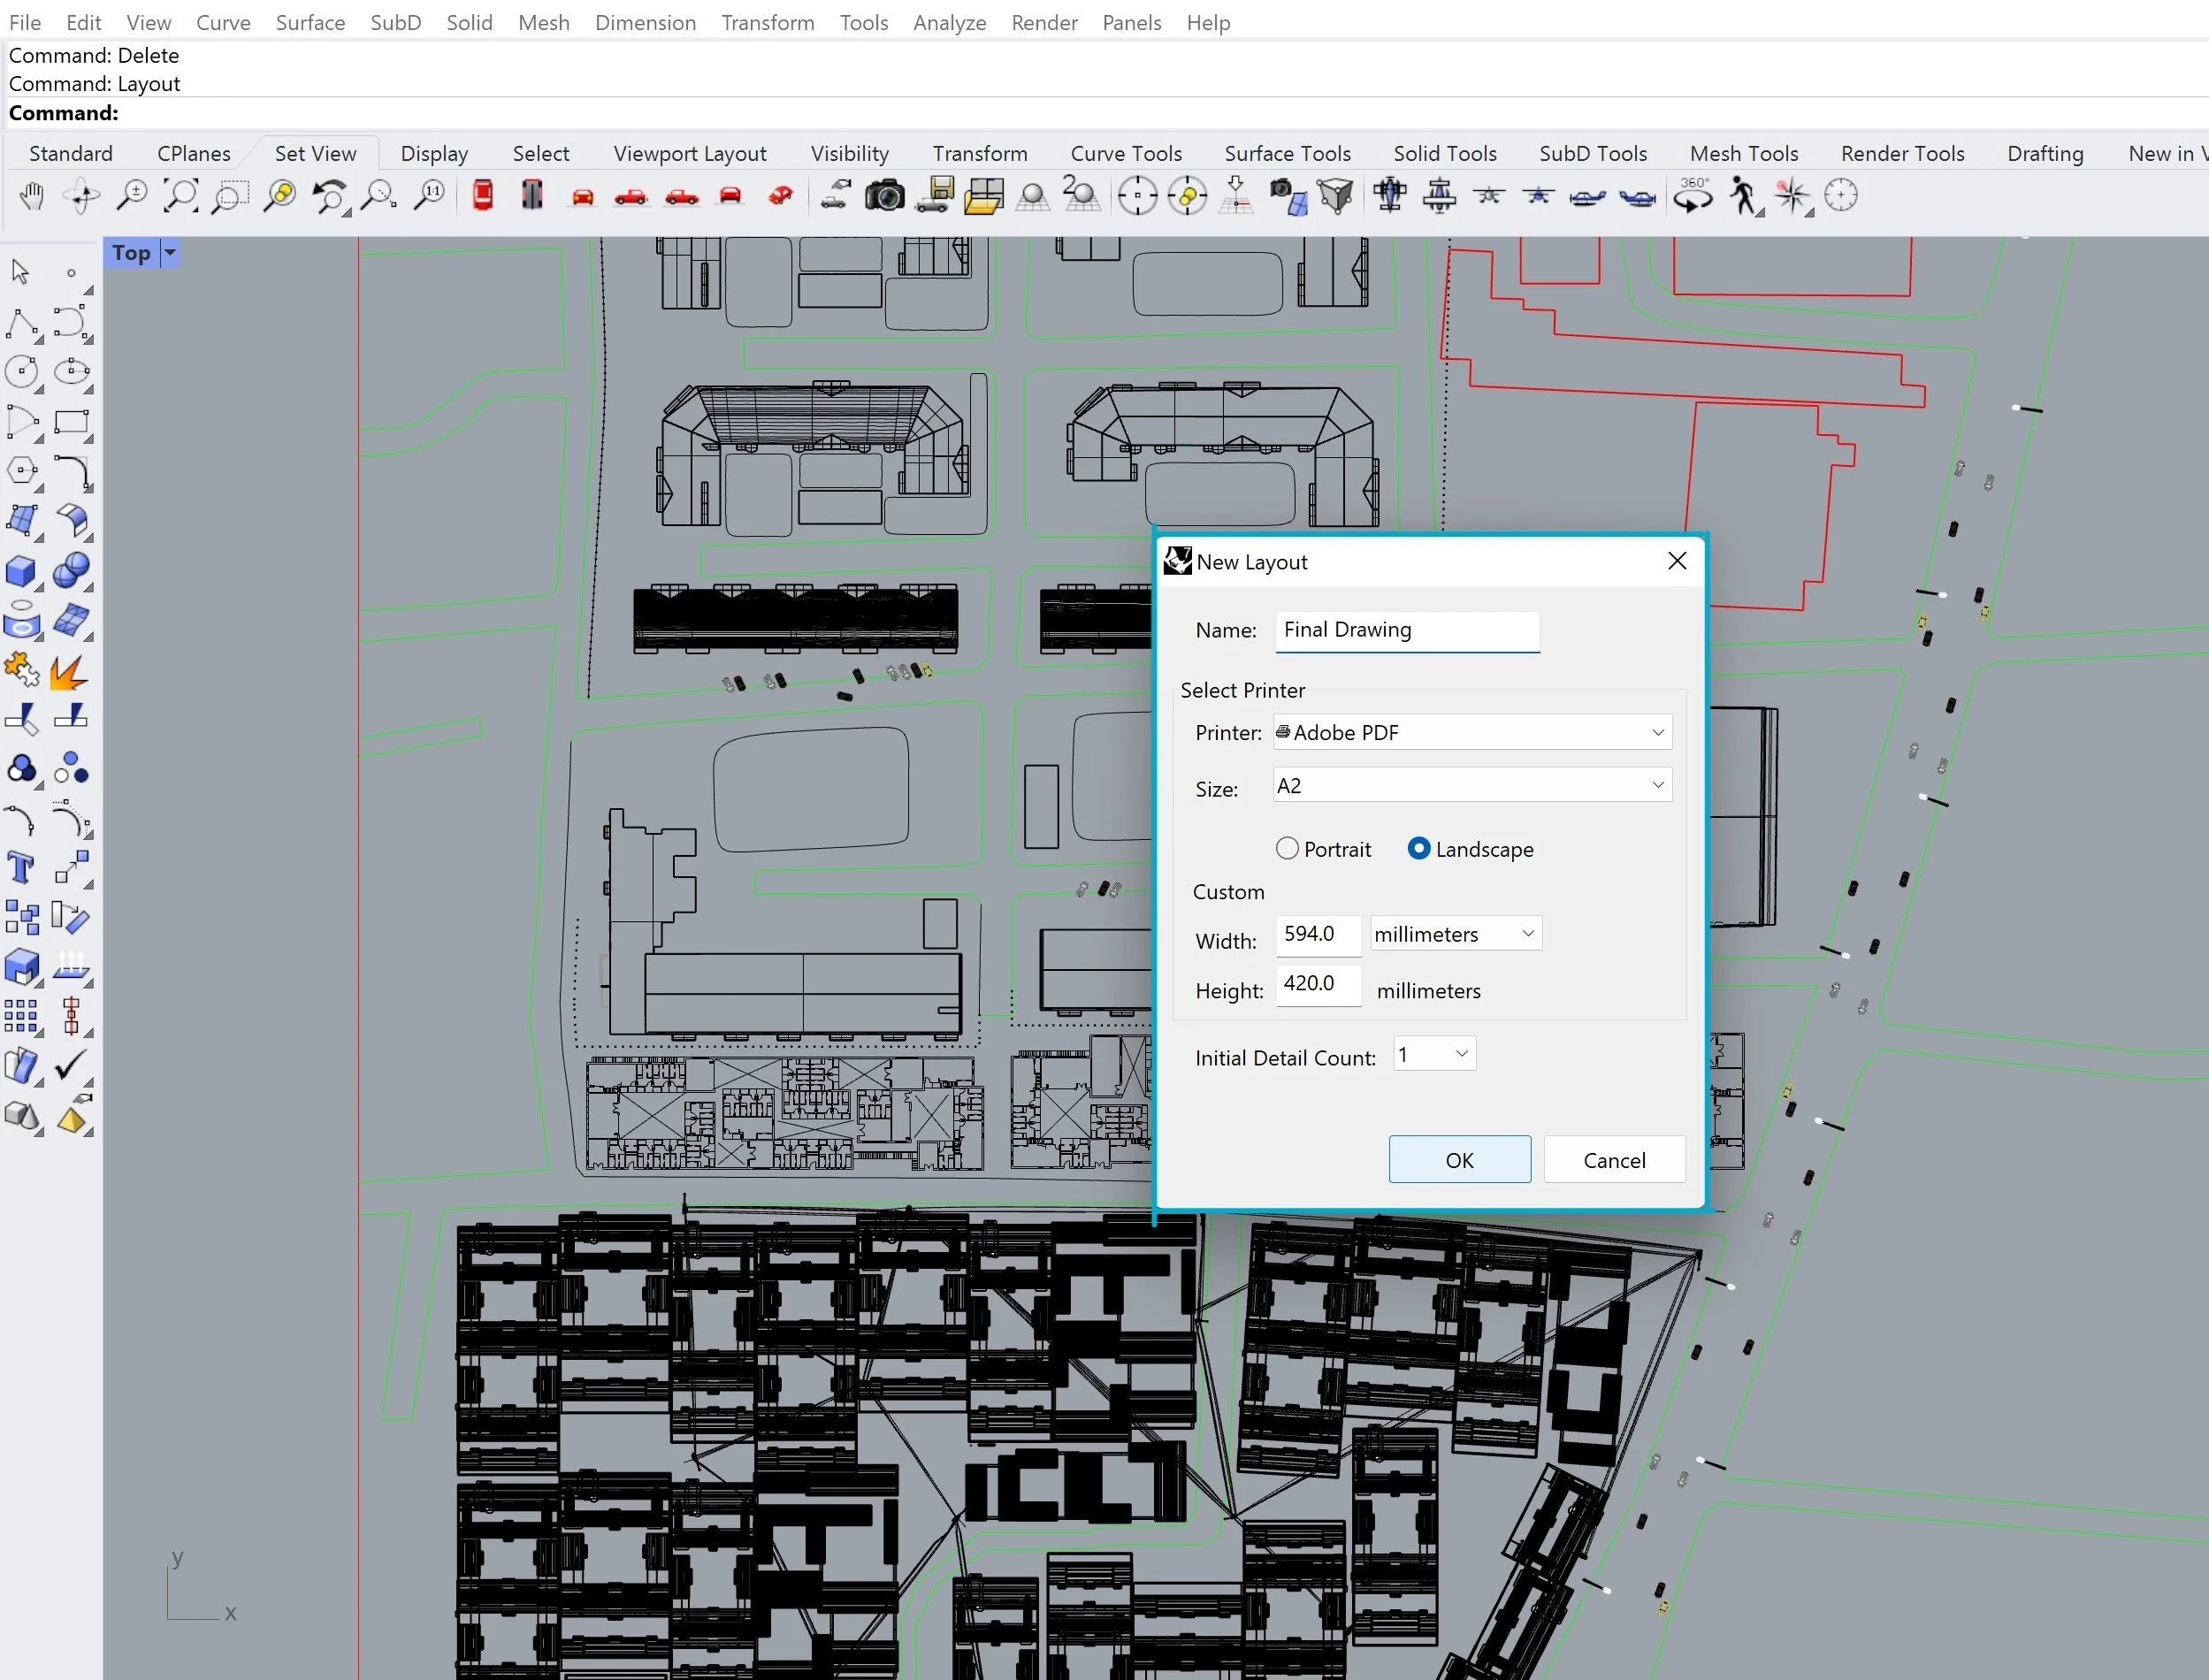
24
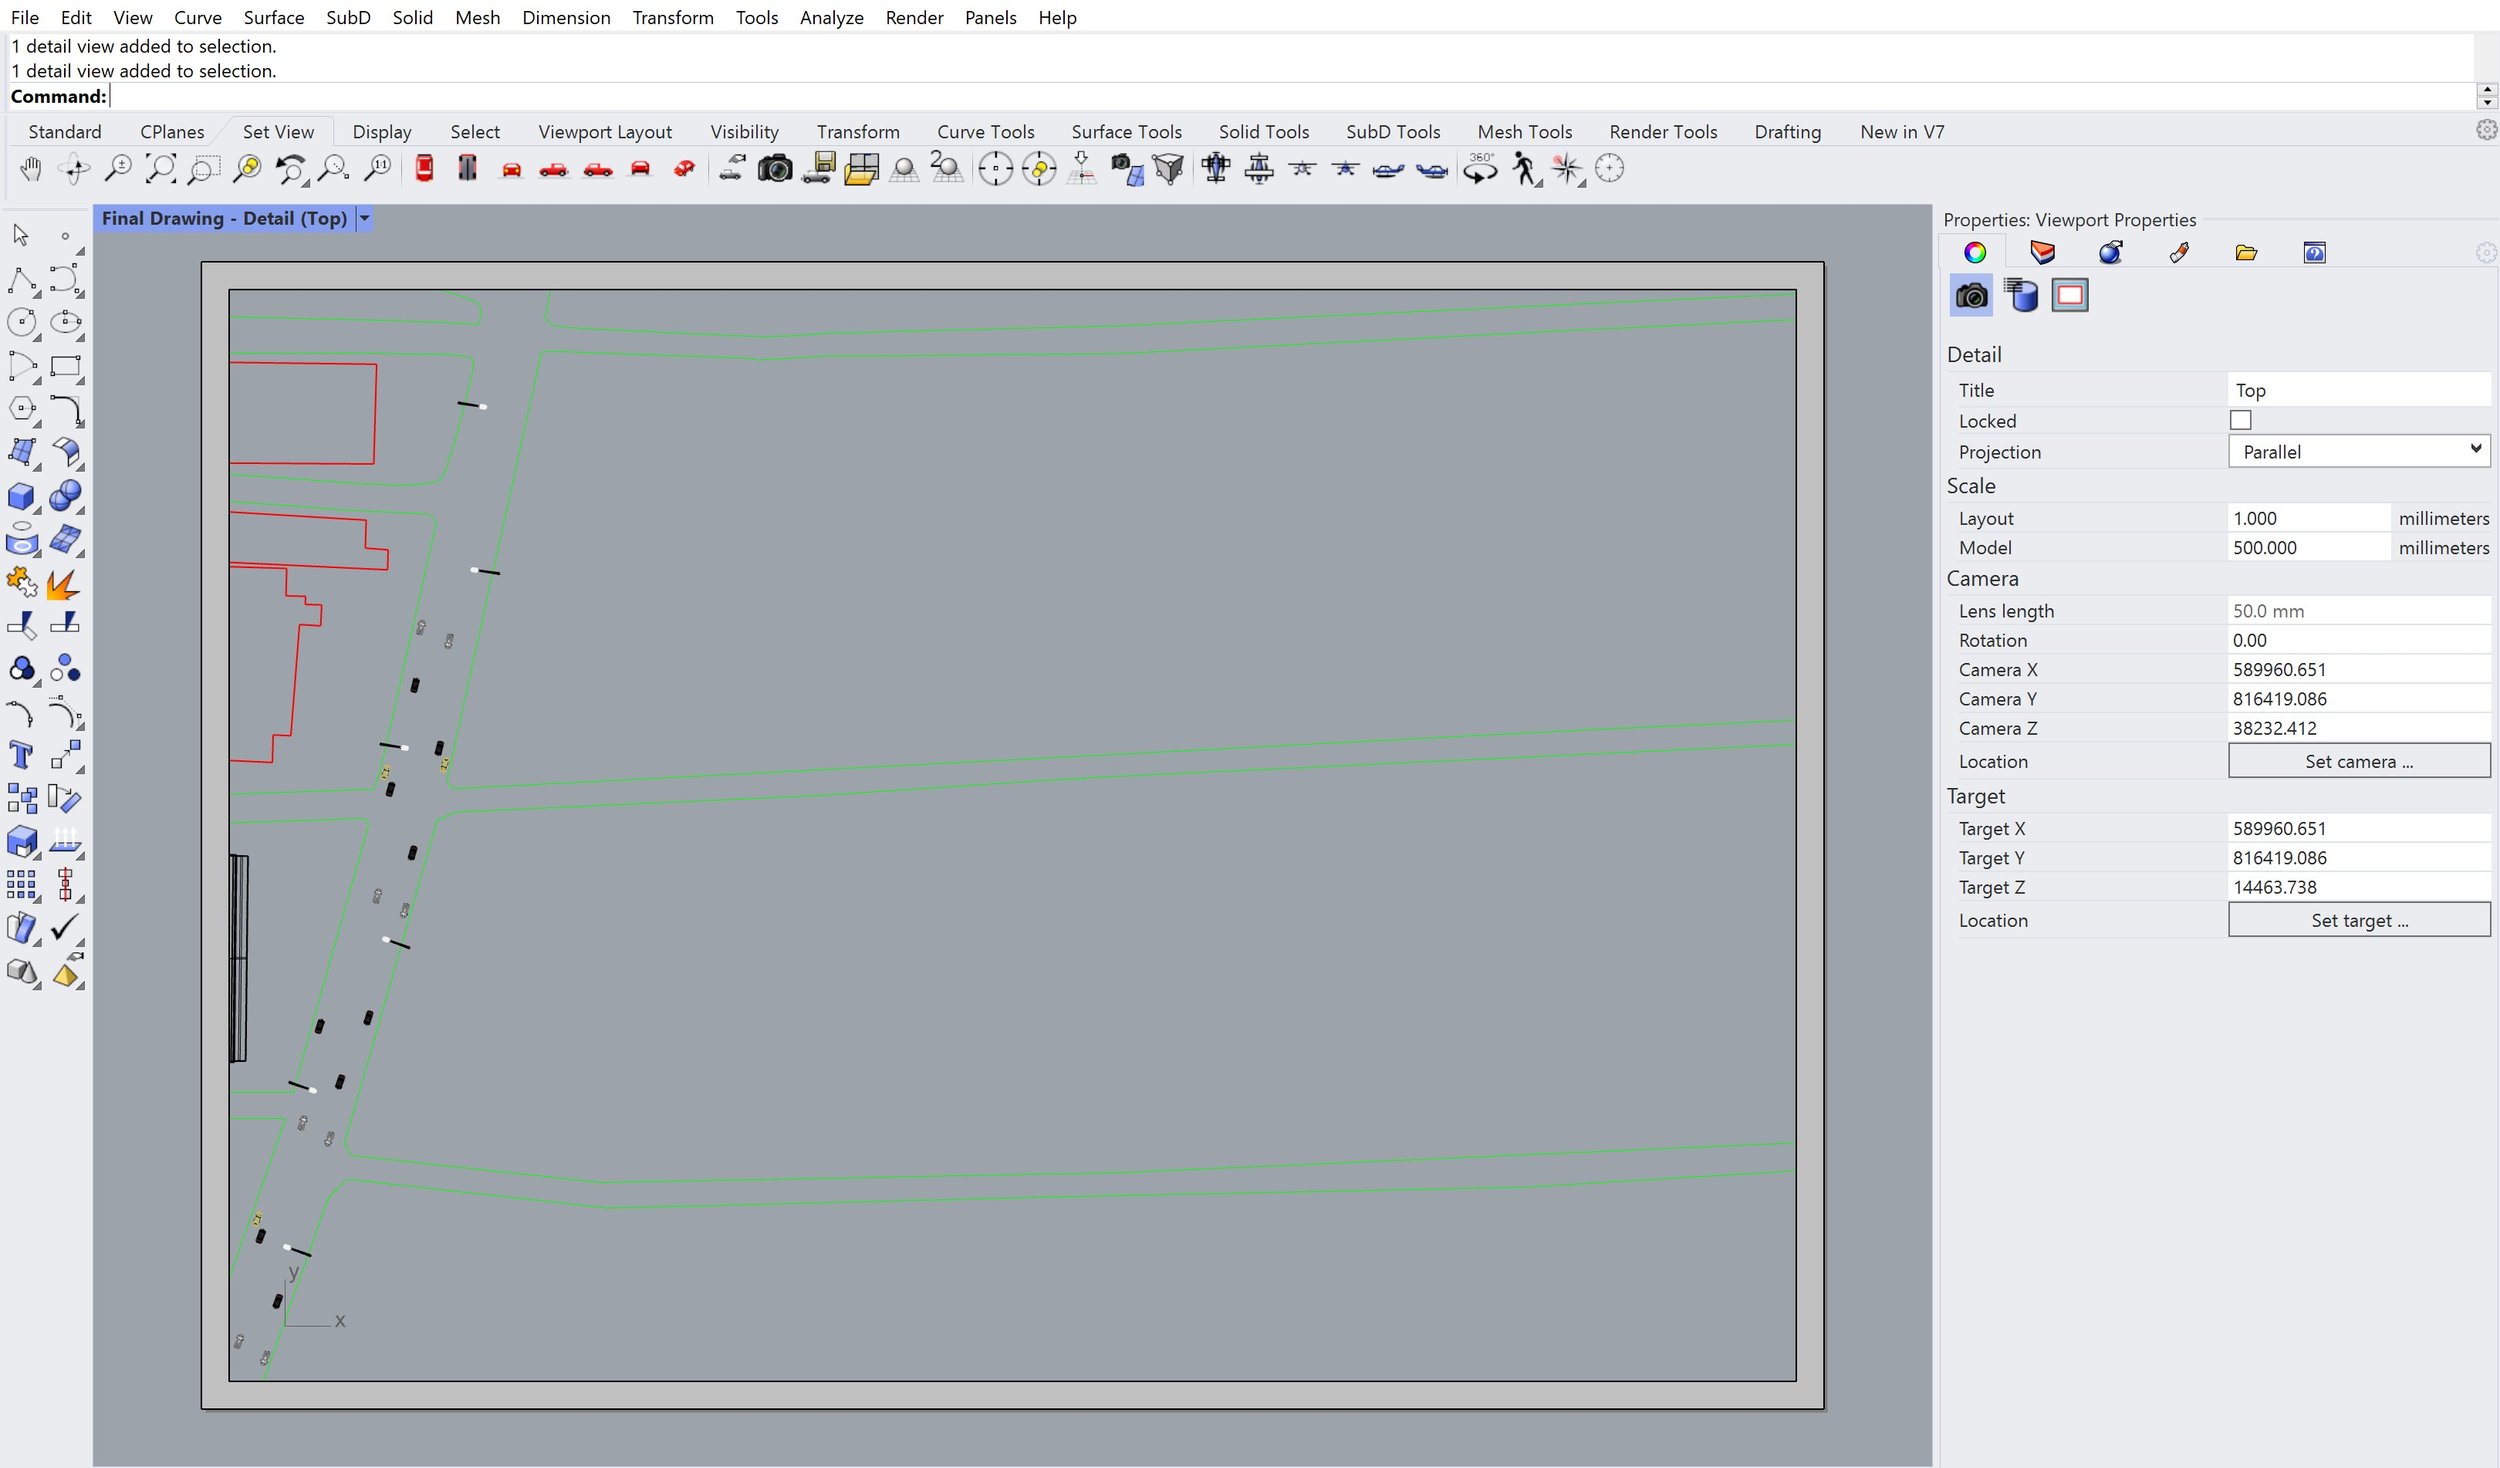
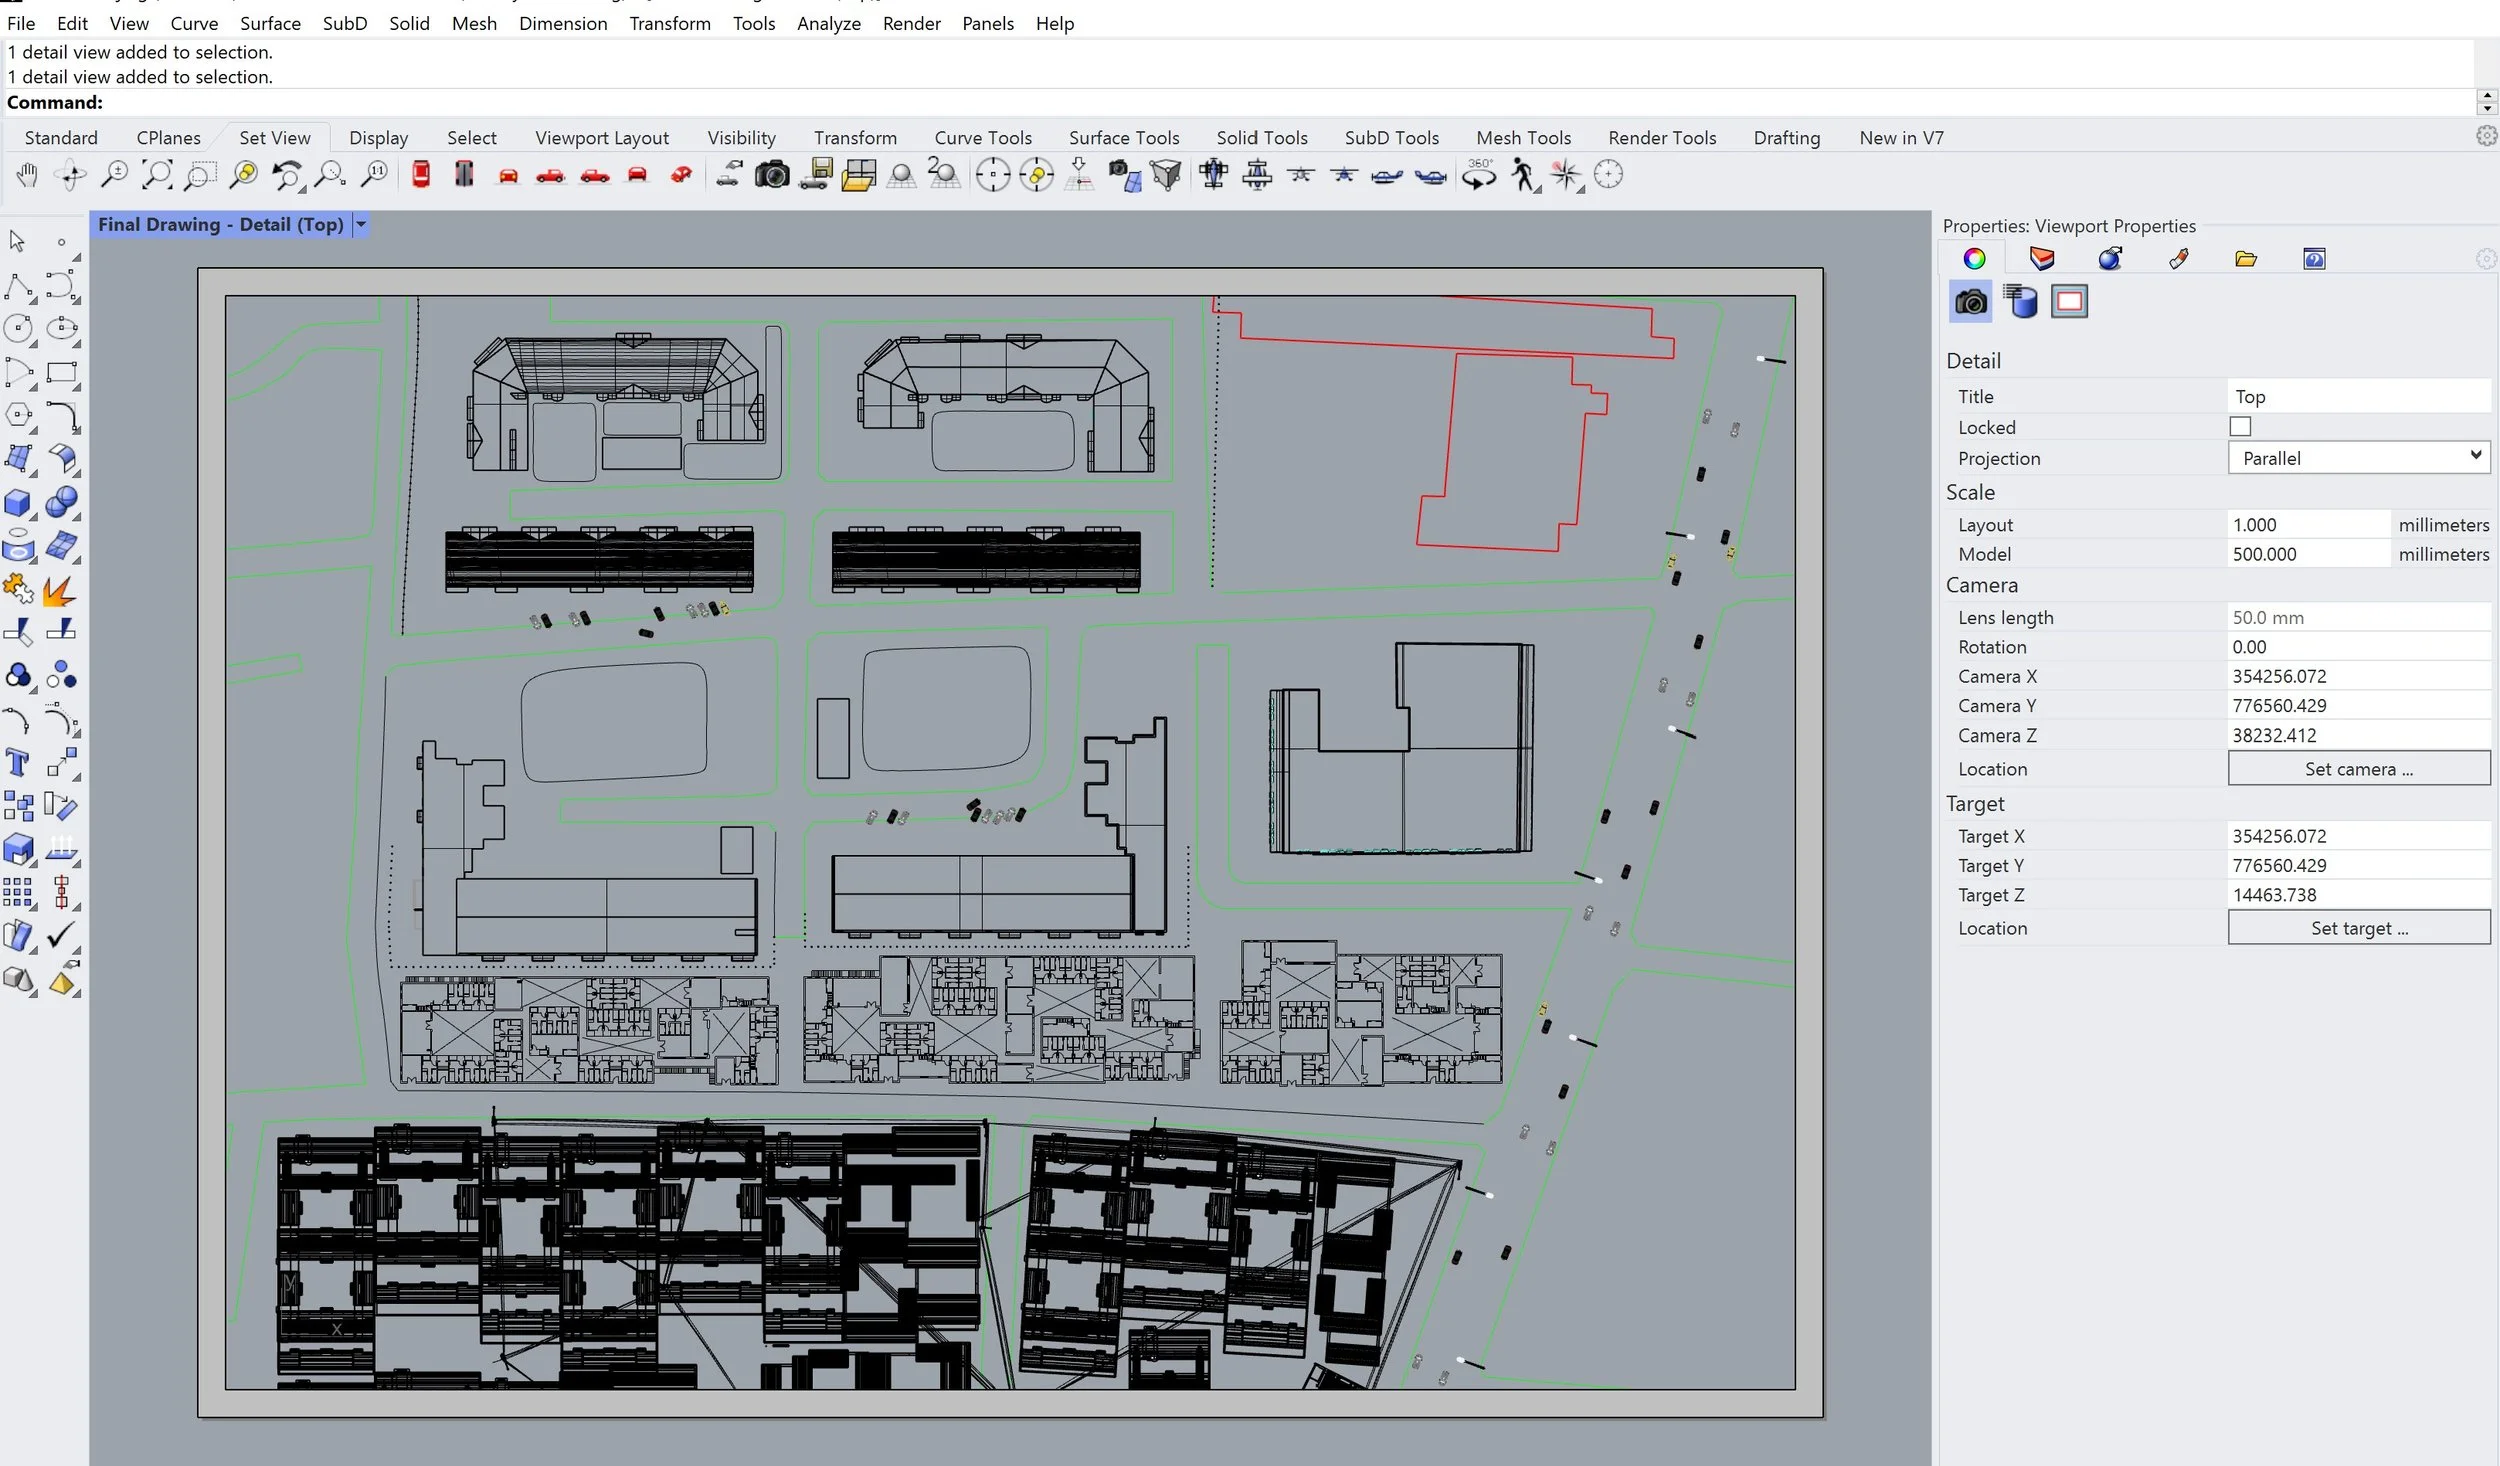
When you select ‘OK’, it will take you to a page layout that has the dimensions you placed into the properties box [25]. For me that’s an A2 page, however it’s not difficult to notice that your drawing now has no scale to it. This can be easily resolved by selecting the thin black border on the page (blue arrow pointing to border) and typing in the new scale in the properties bar [26]. This will automatically scale your drawing to that page dimension [27].
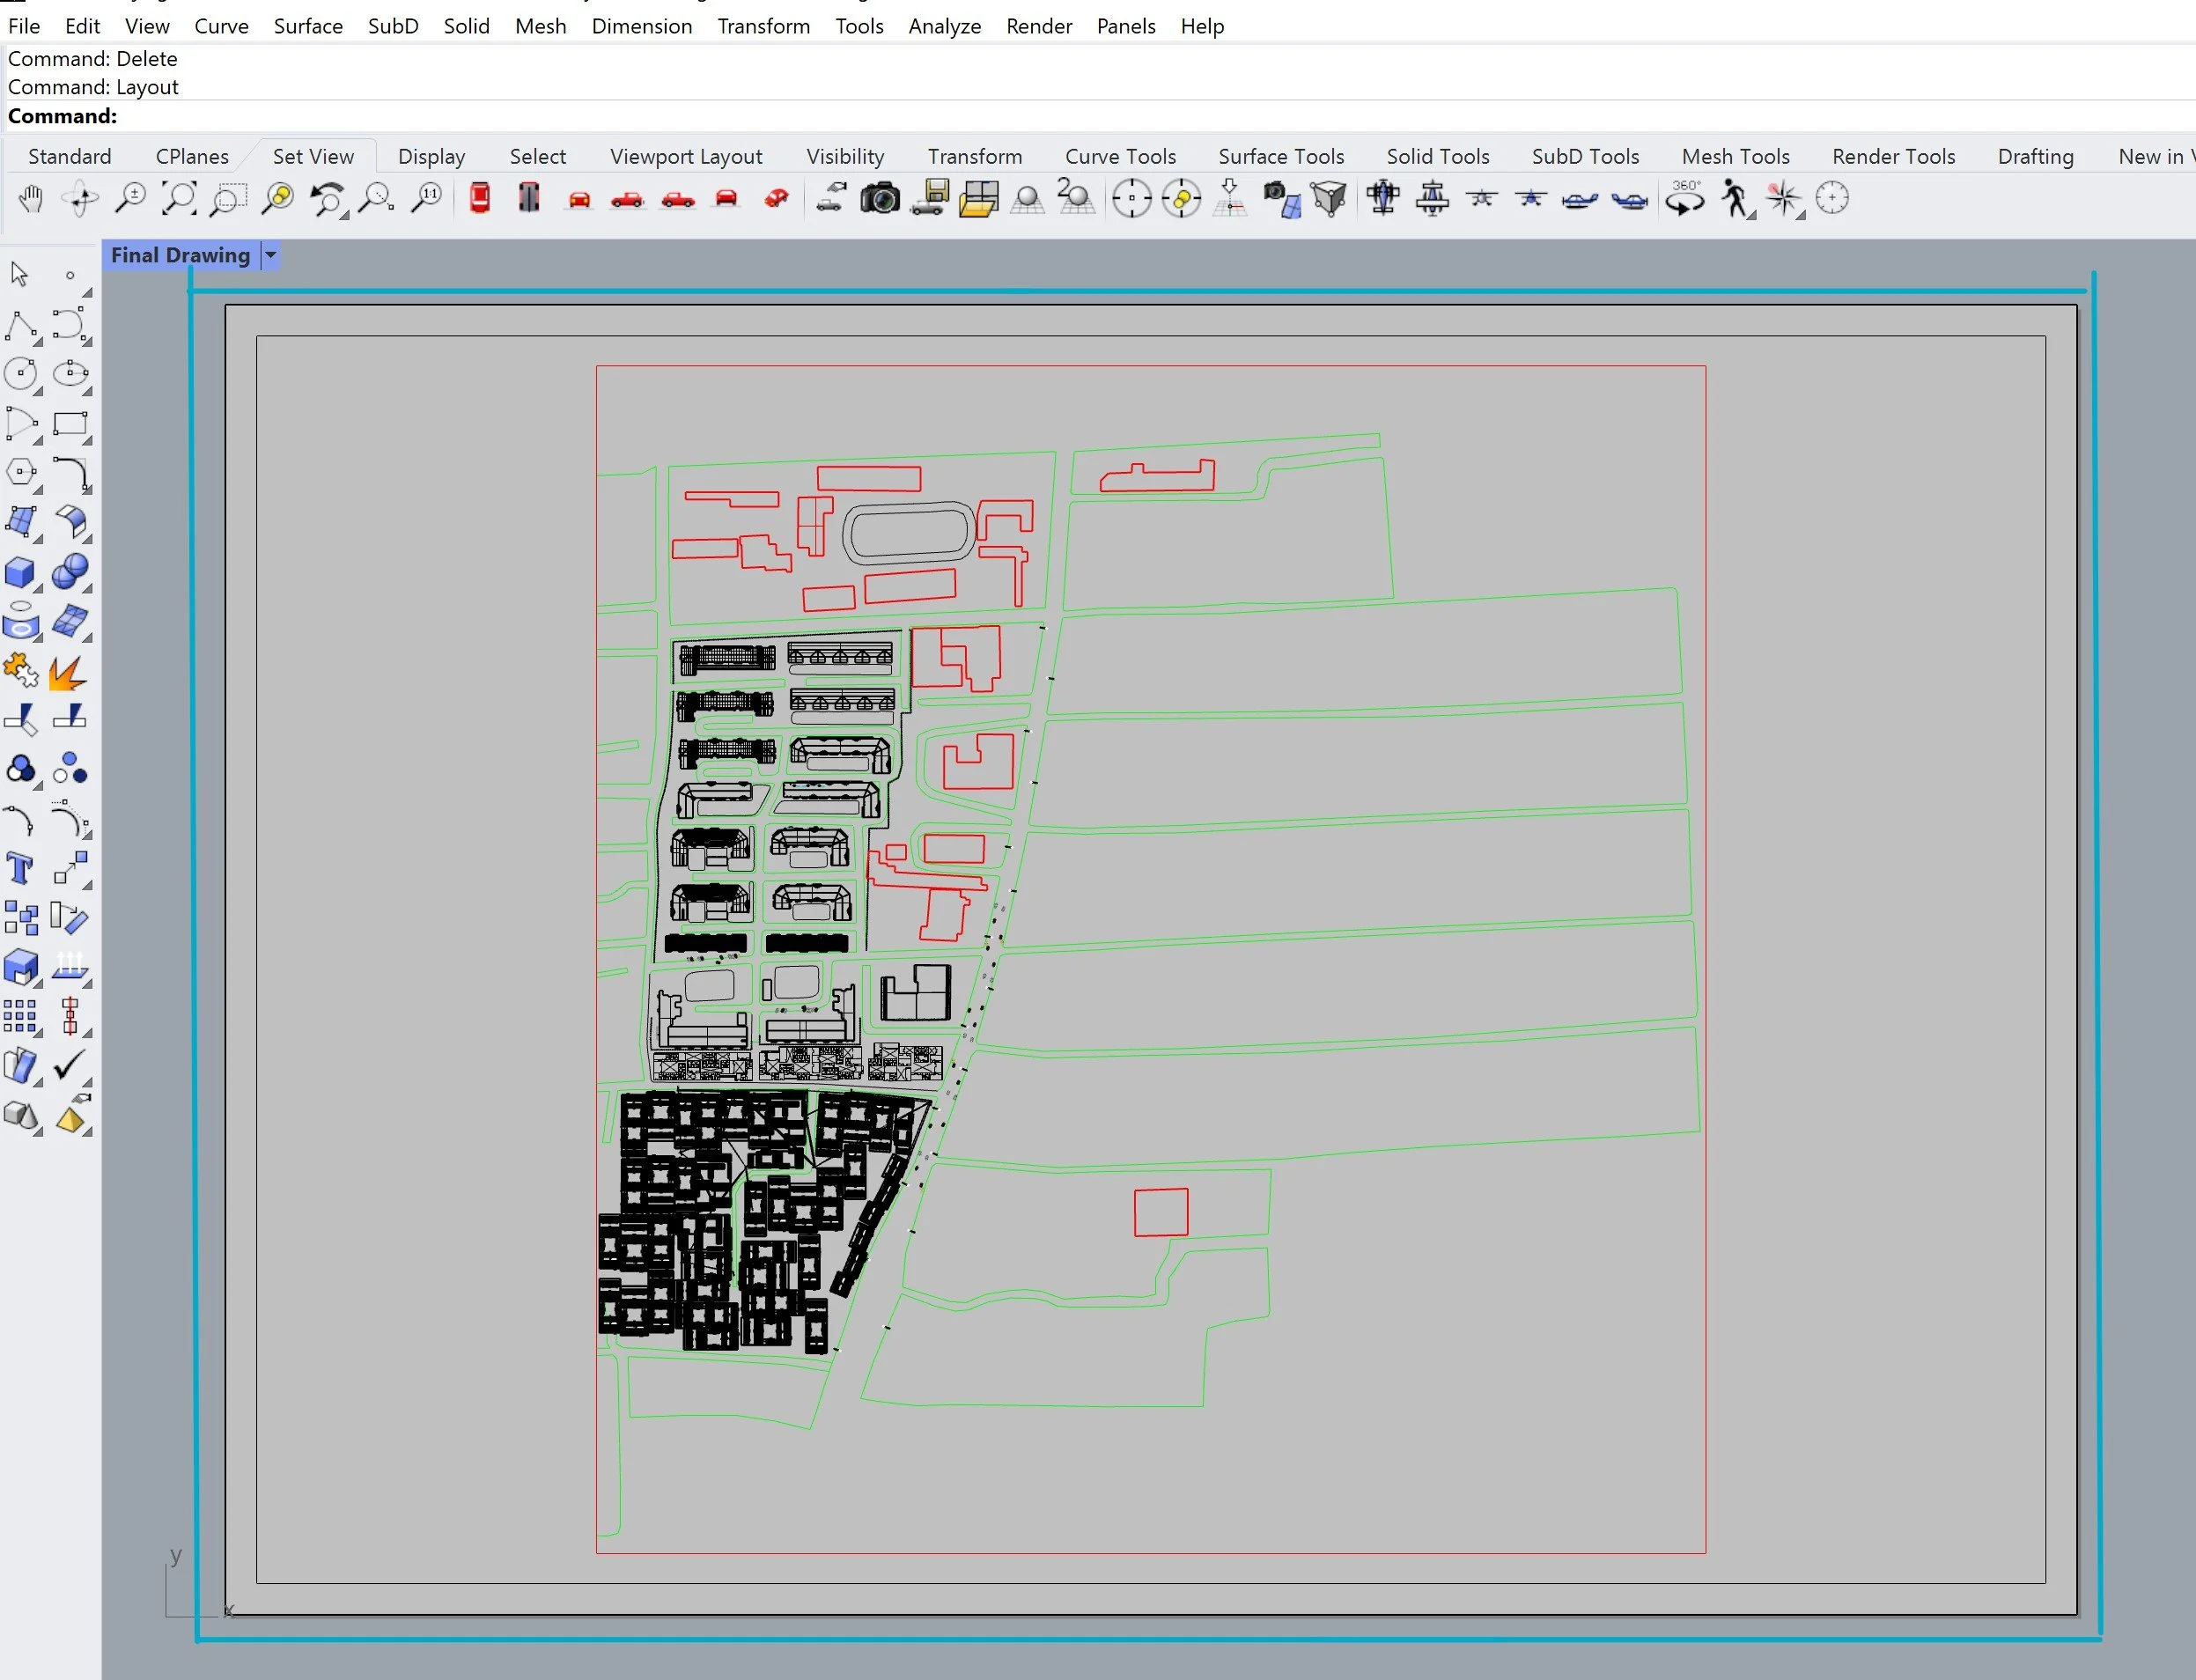
25
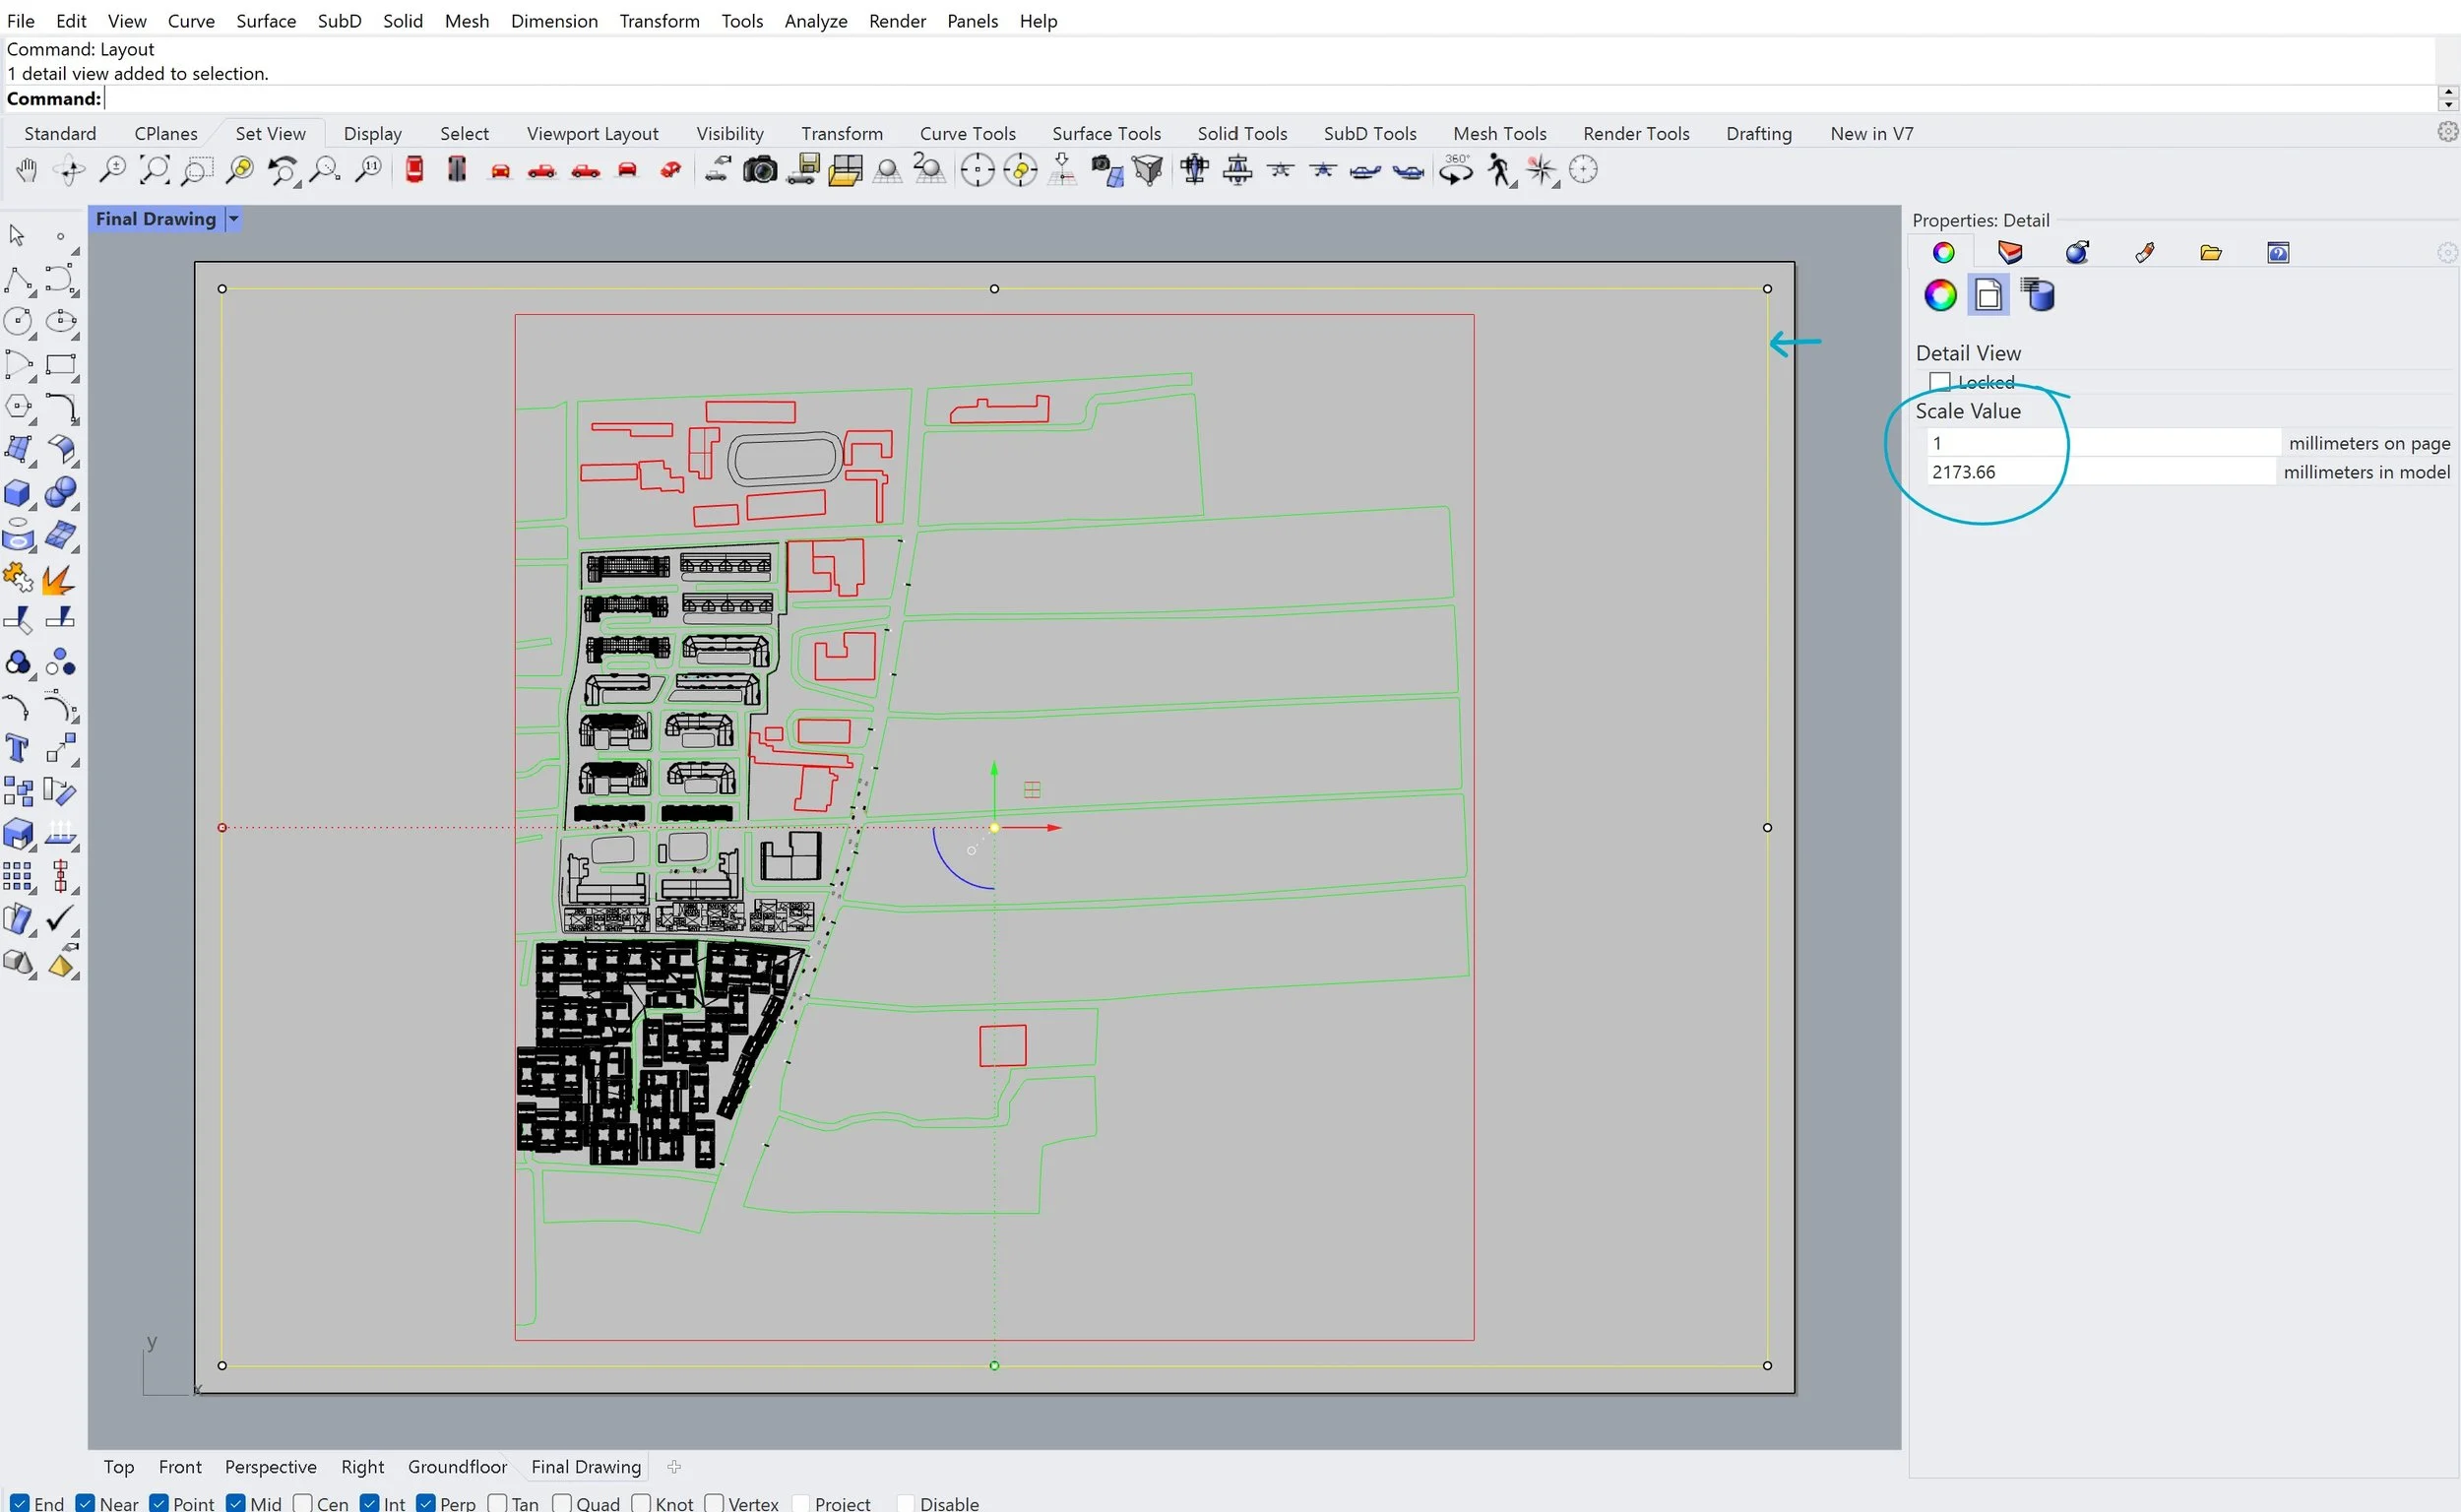
26
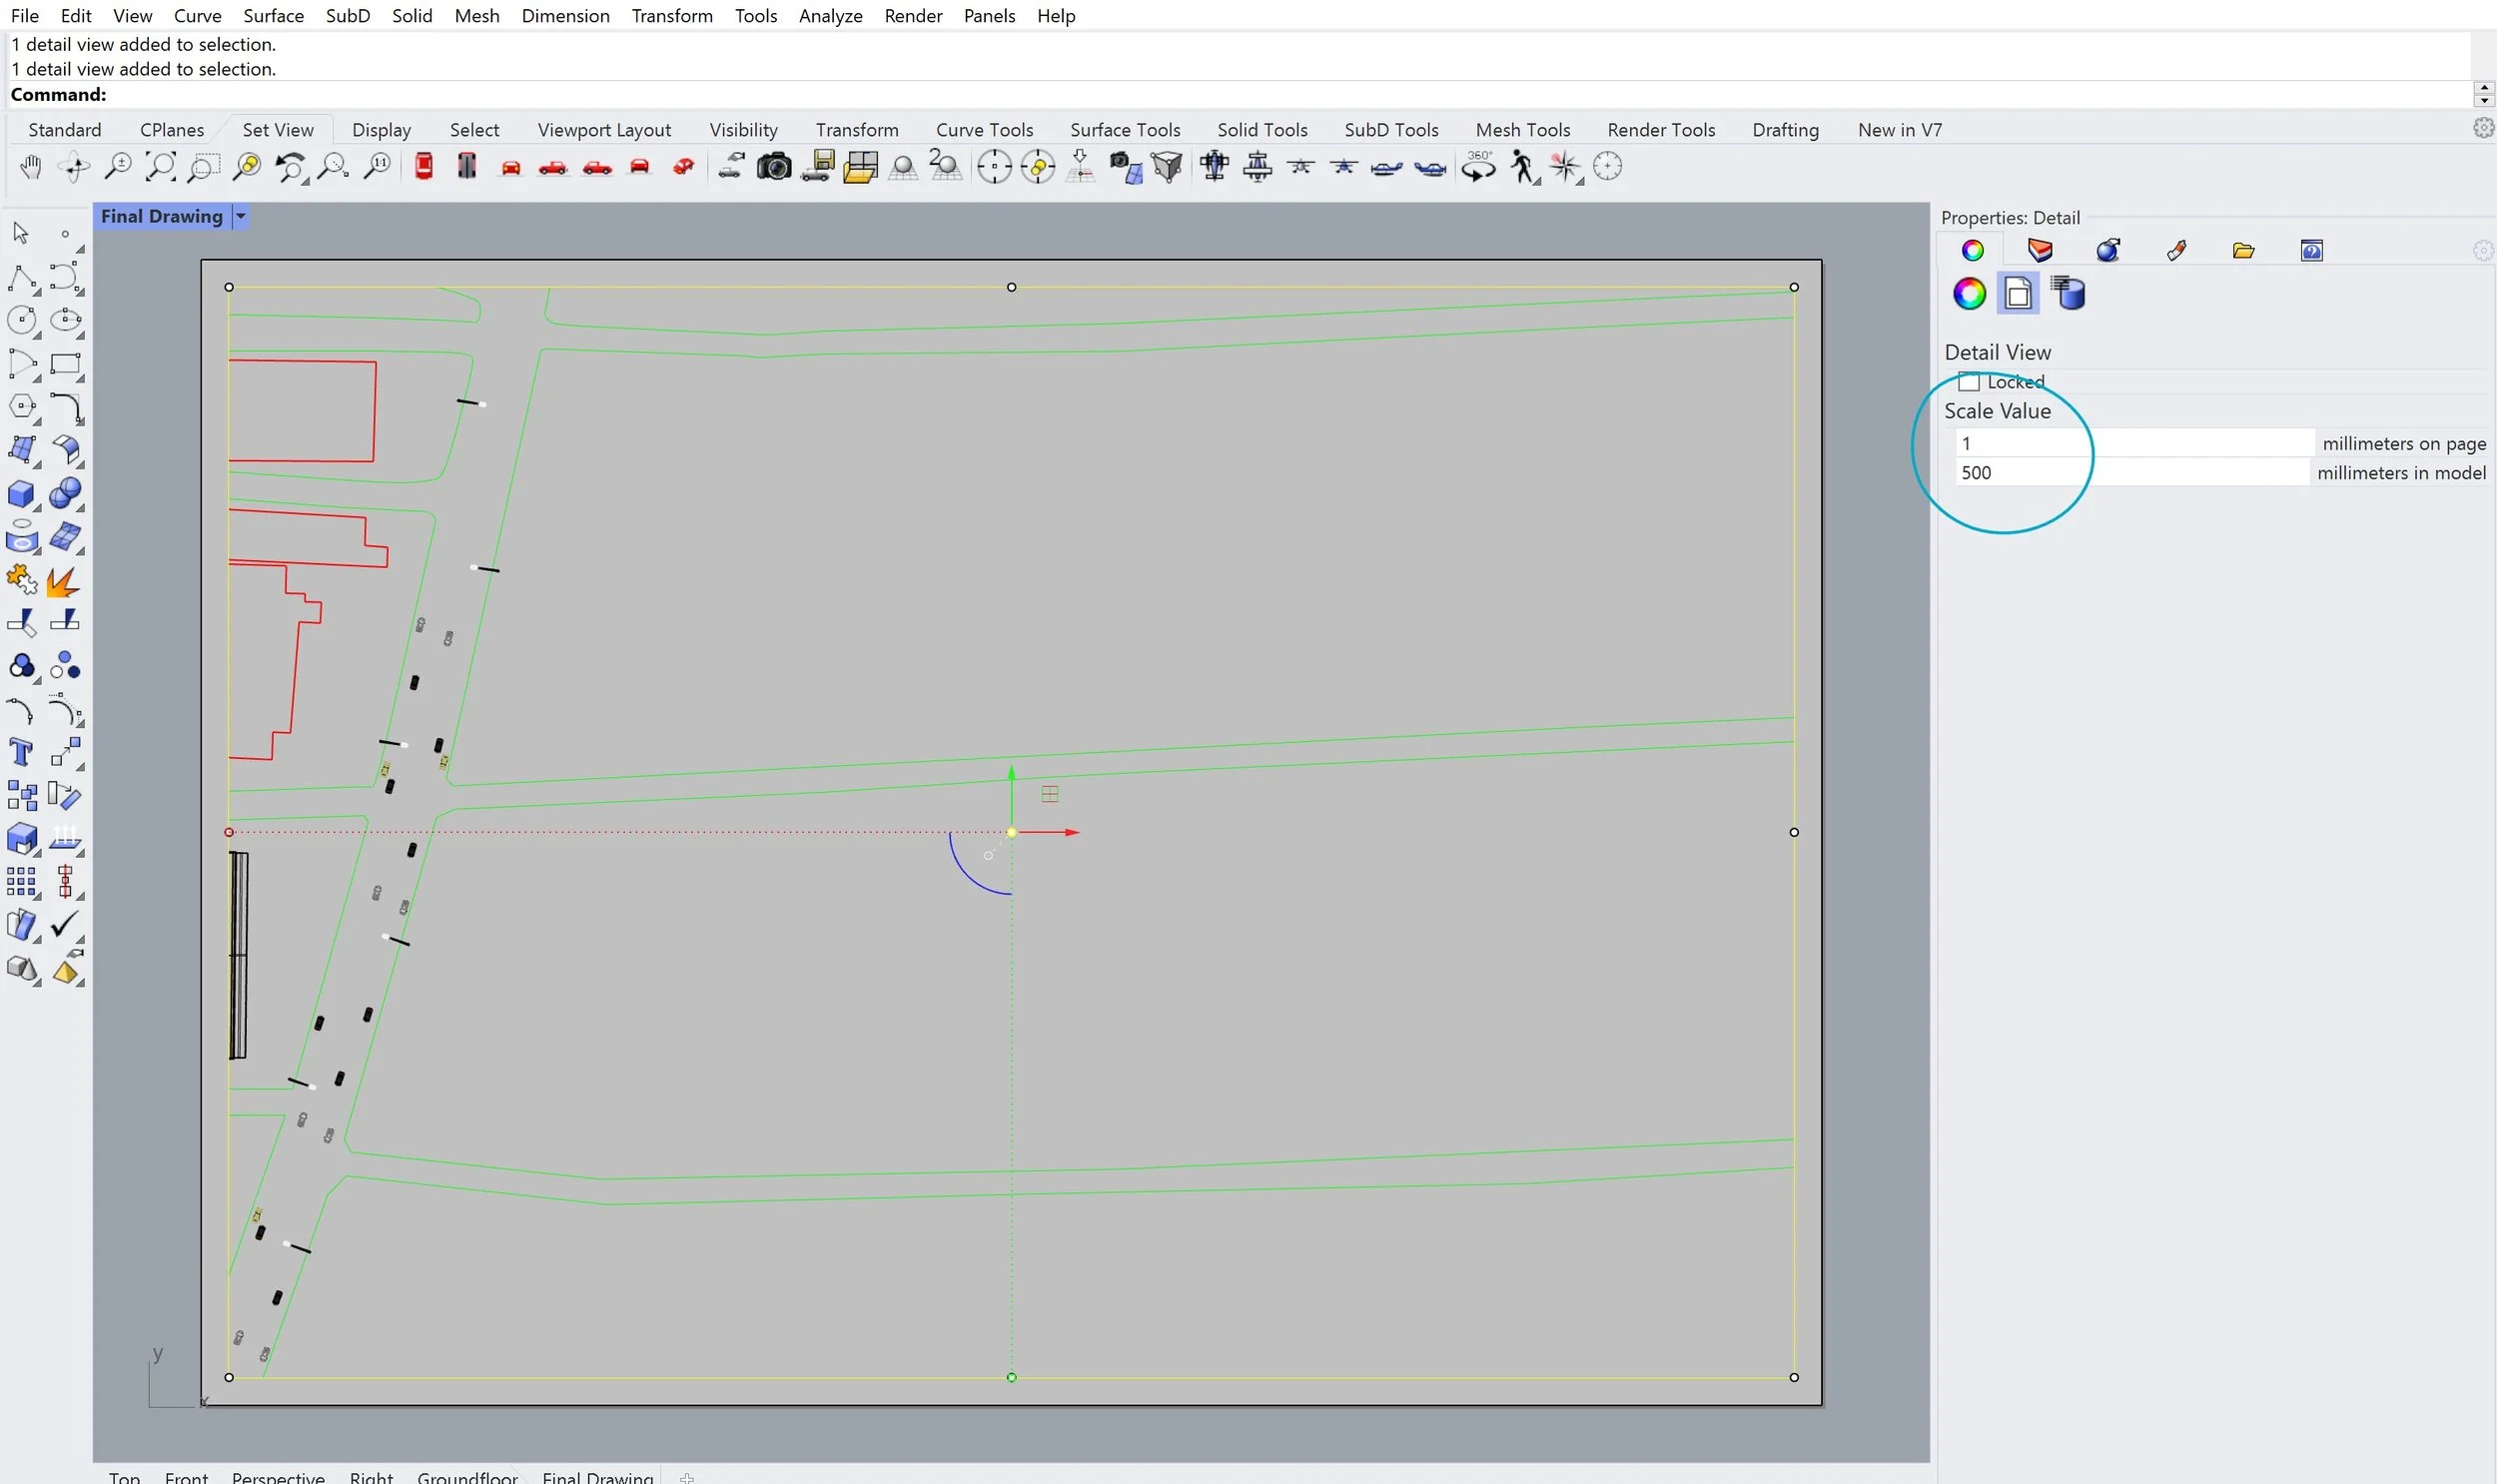
27
Now that it’s scaled to the page, how can you move your drawing to centre it on the page? All you have to do is double click on the page, which will activate it, turning the same grey as the background [28]. You can now move the screen as you would usually, right clicking on your mouse [29]. When you’re done, double-click outside of the page to make it a layout again
Tip: Avoid zooming in or out when the page is active and you are centring your drawing as this will alter the scale. If you accidentally zoom in or out, you can either undo or by double clicking the thin black border you can re-enter the scale.
28
29
Now that your page is ready, you can type ‘Print’ into the command bar [30] which will open up a new window [31]. Here you can change the properties if you want to alter anything and select print. This will open another window where you select where to save the PDF that will print [32].

30
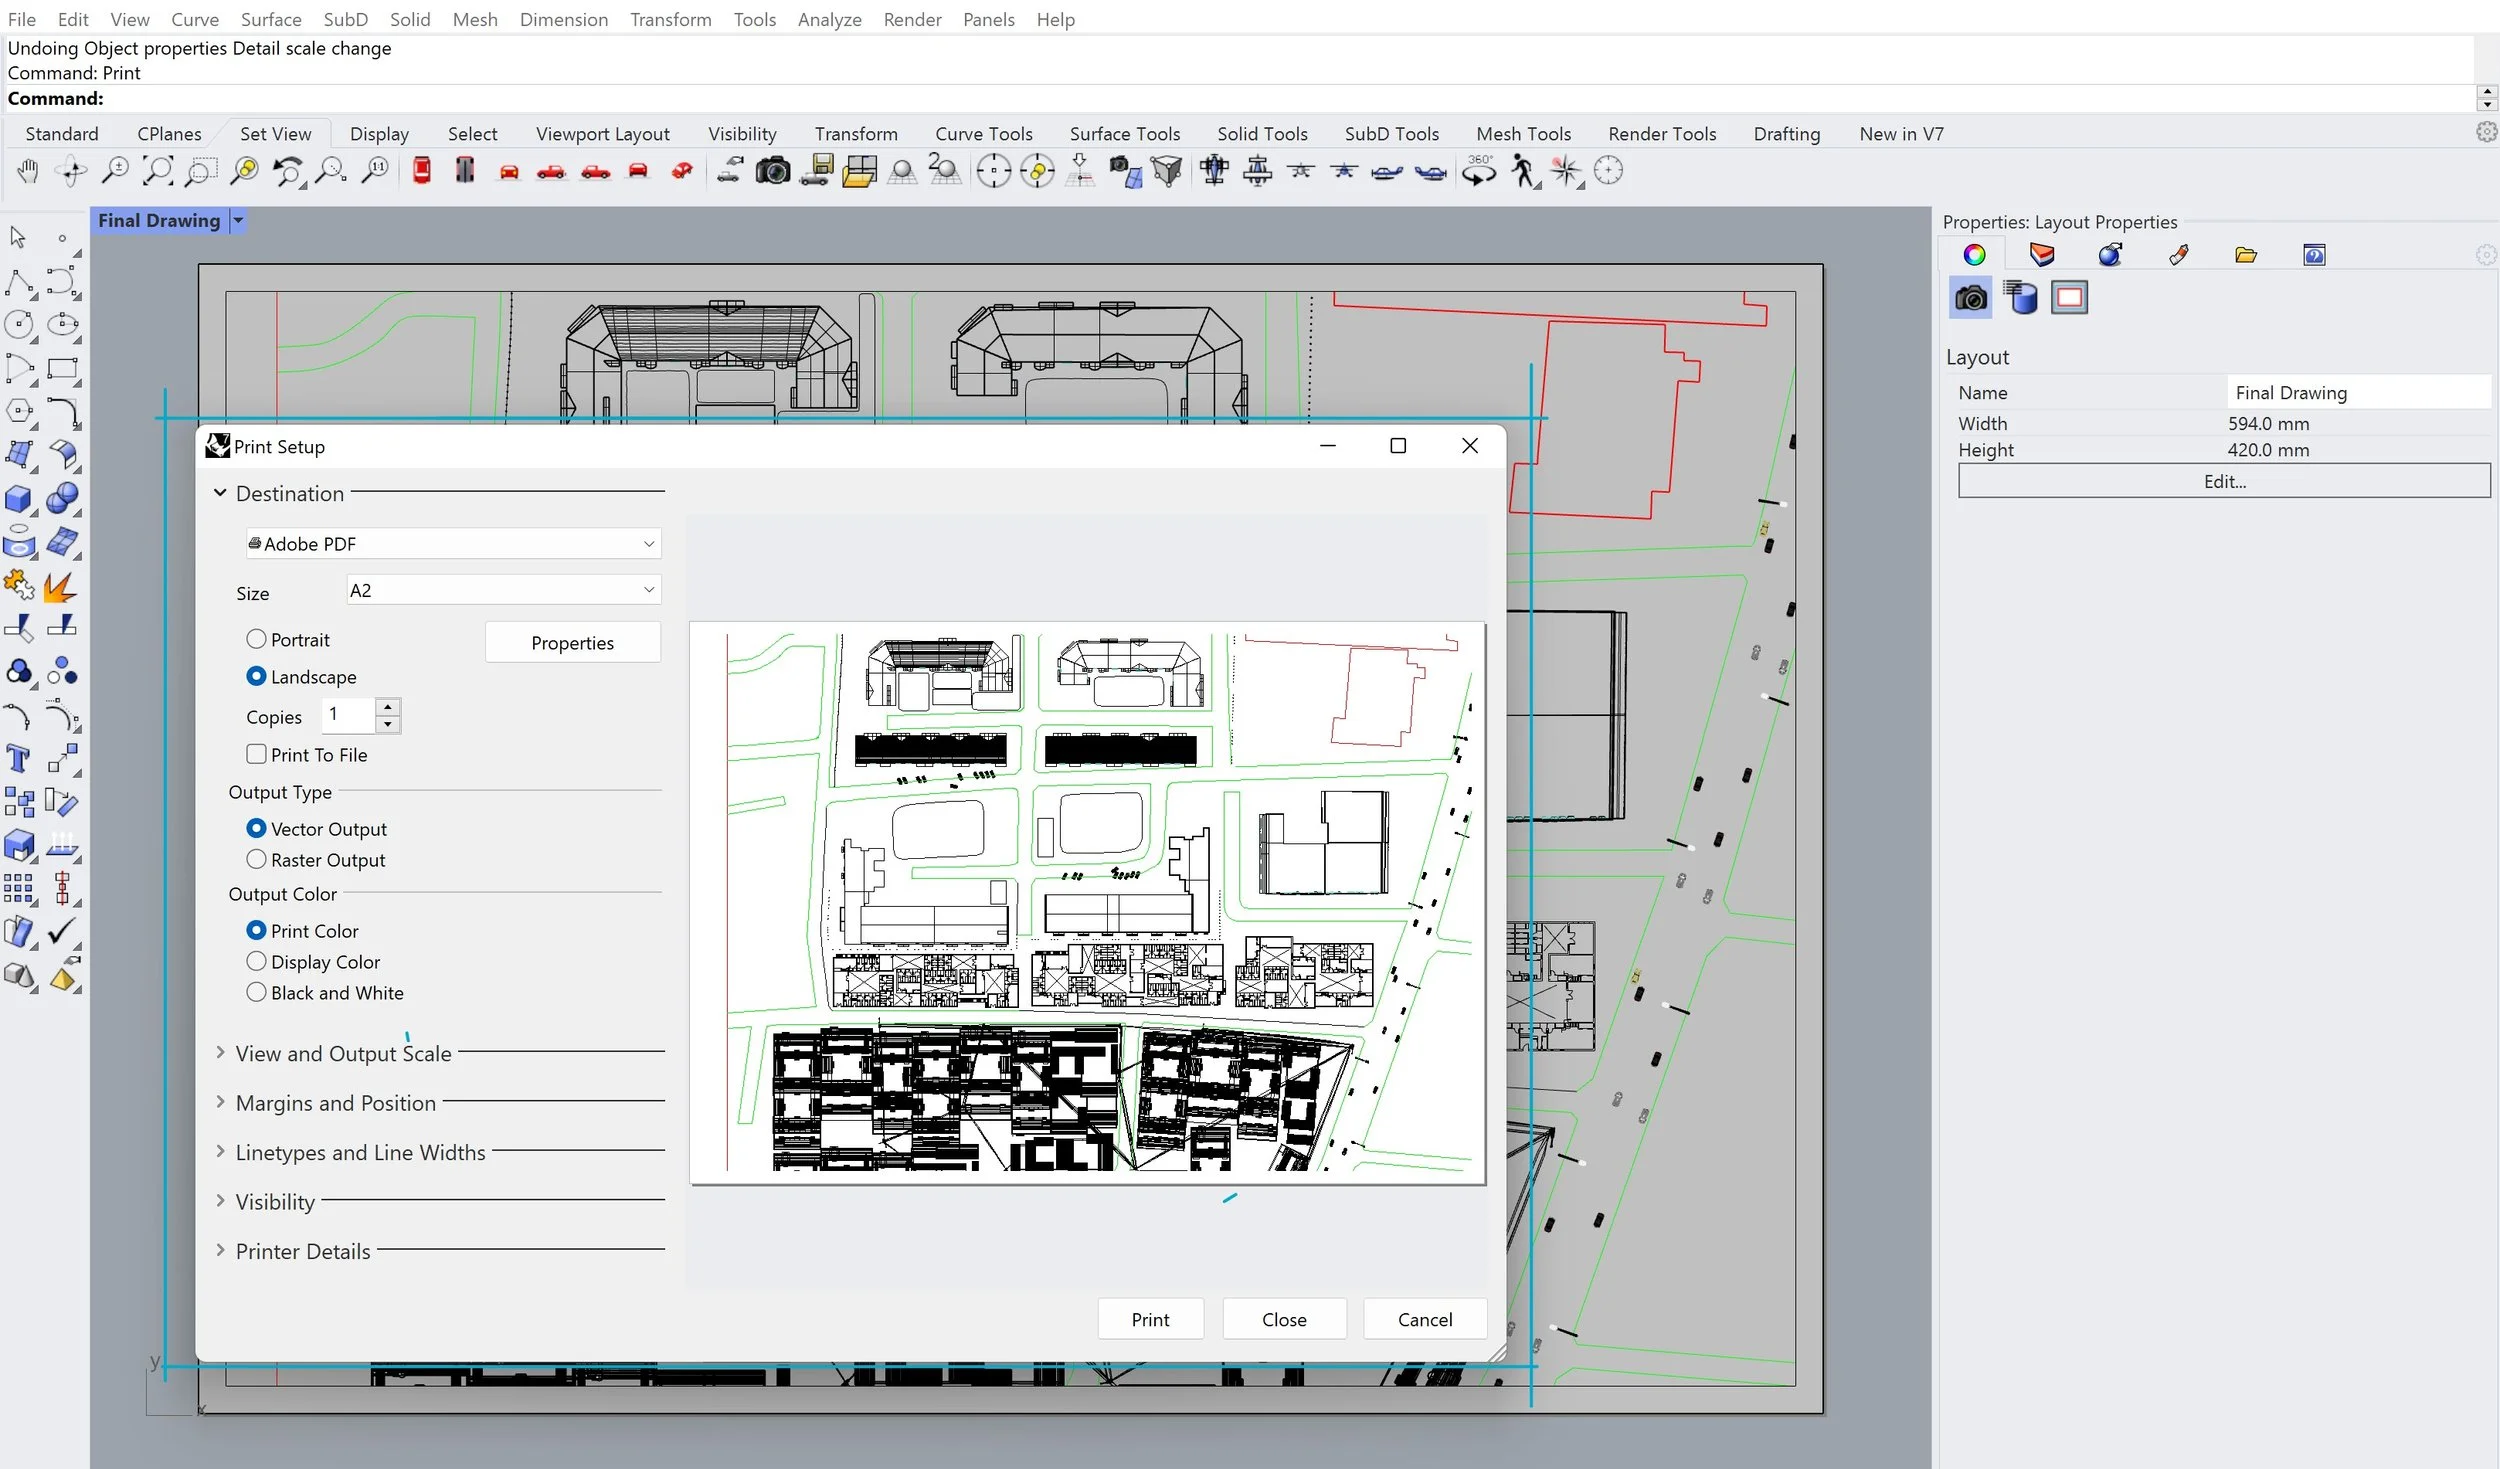
31
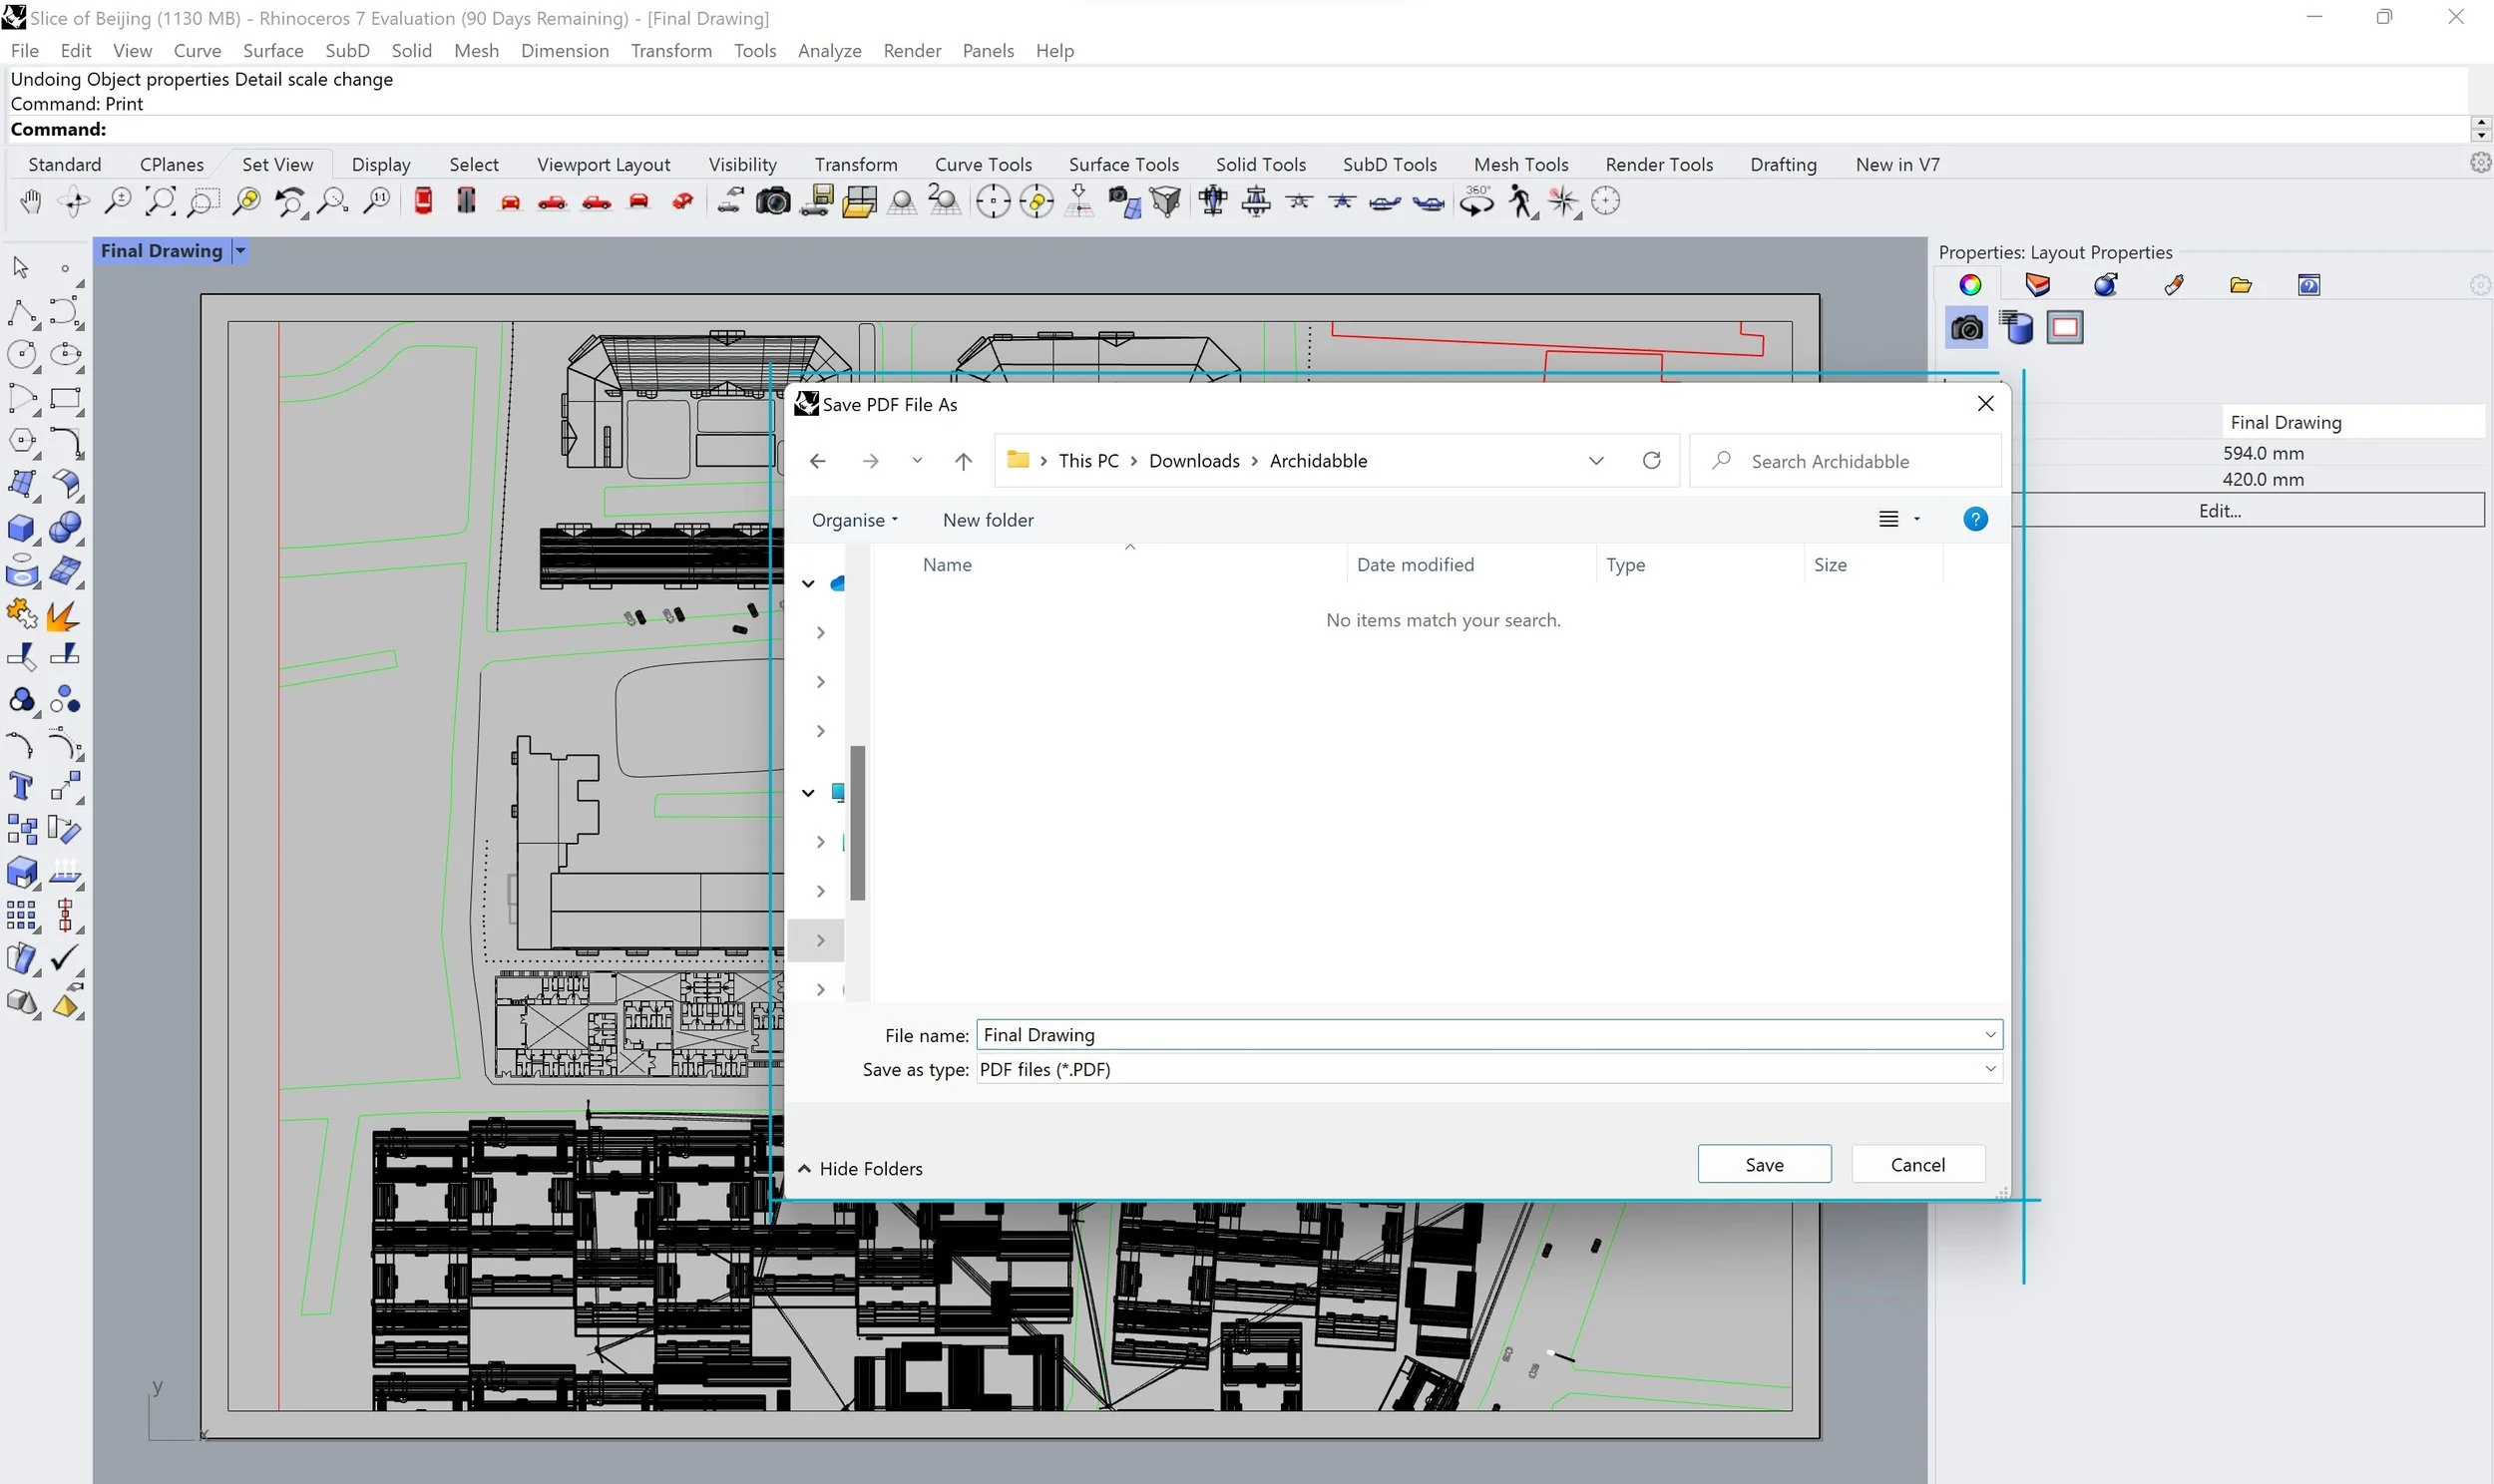
32
You’re all done! You have successfully generated an A2 PDF from Rhino with your drawings scaled to 1.500.
We hope this post is helpful to those of you that are starting out new in the Rhino interface learning how to scale and for everyone else finding more efficient ways to scale and export! Don’t forget to check out our other software tutorials on our site, and browse through our Instagram for bite-sized tips and tricks to enhance your digital workflow.