
External Photoshop Render Walkthrough
If you’ve kept up with us over on our Instagram, you will know what we will be up to today! Or if you’ve simply read the title of the blog post… haha.
It’s common for architecture schools to have at least taught the basics of Adobe Photoshop but when we were students, we would find ourselves still lacking in producing good quality visuals that encapsulate space, light, materiality and the overall atmosphere which is key to show these things simultaneously in an orthographic can be difficult and visually unpleasant.
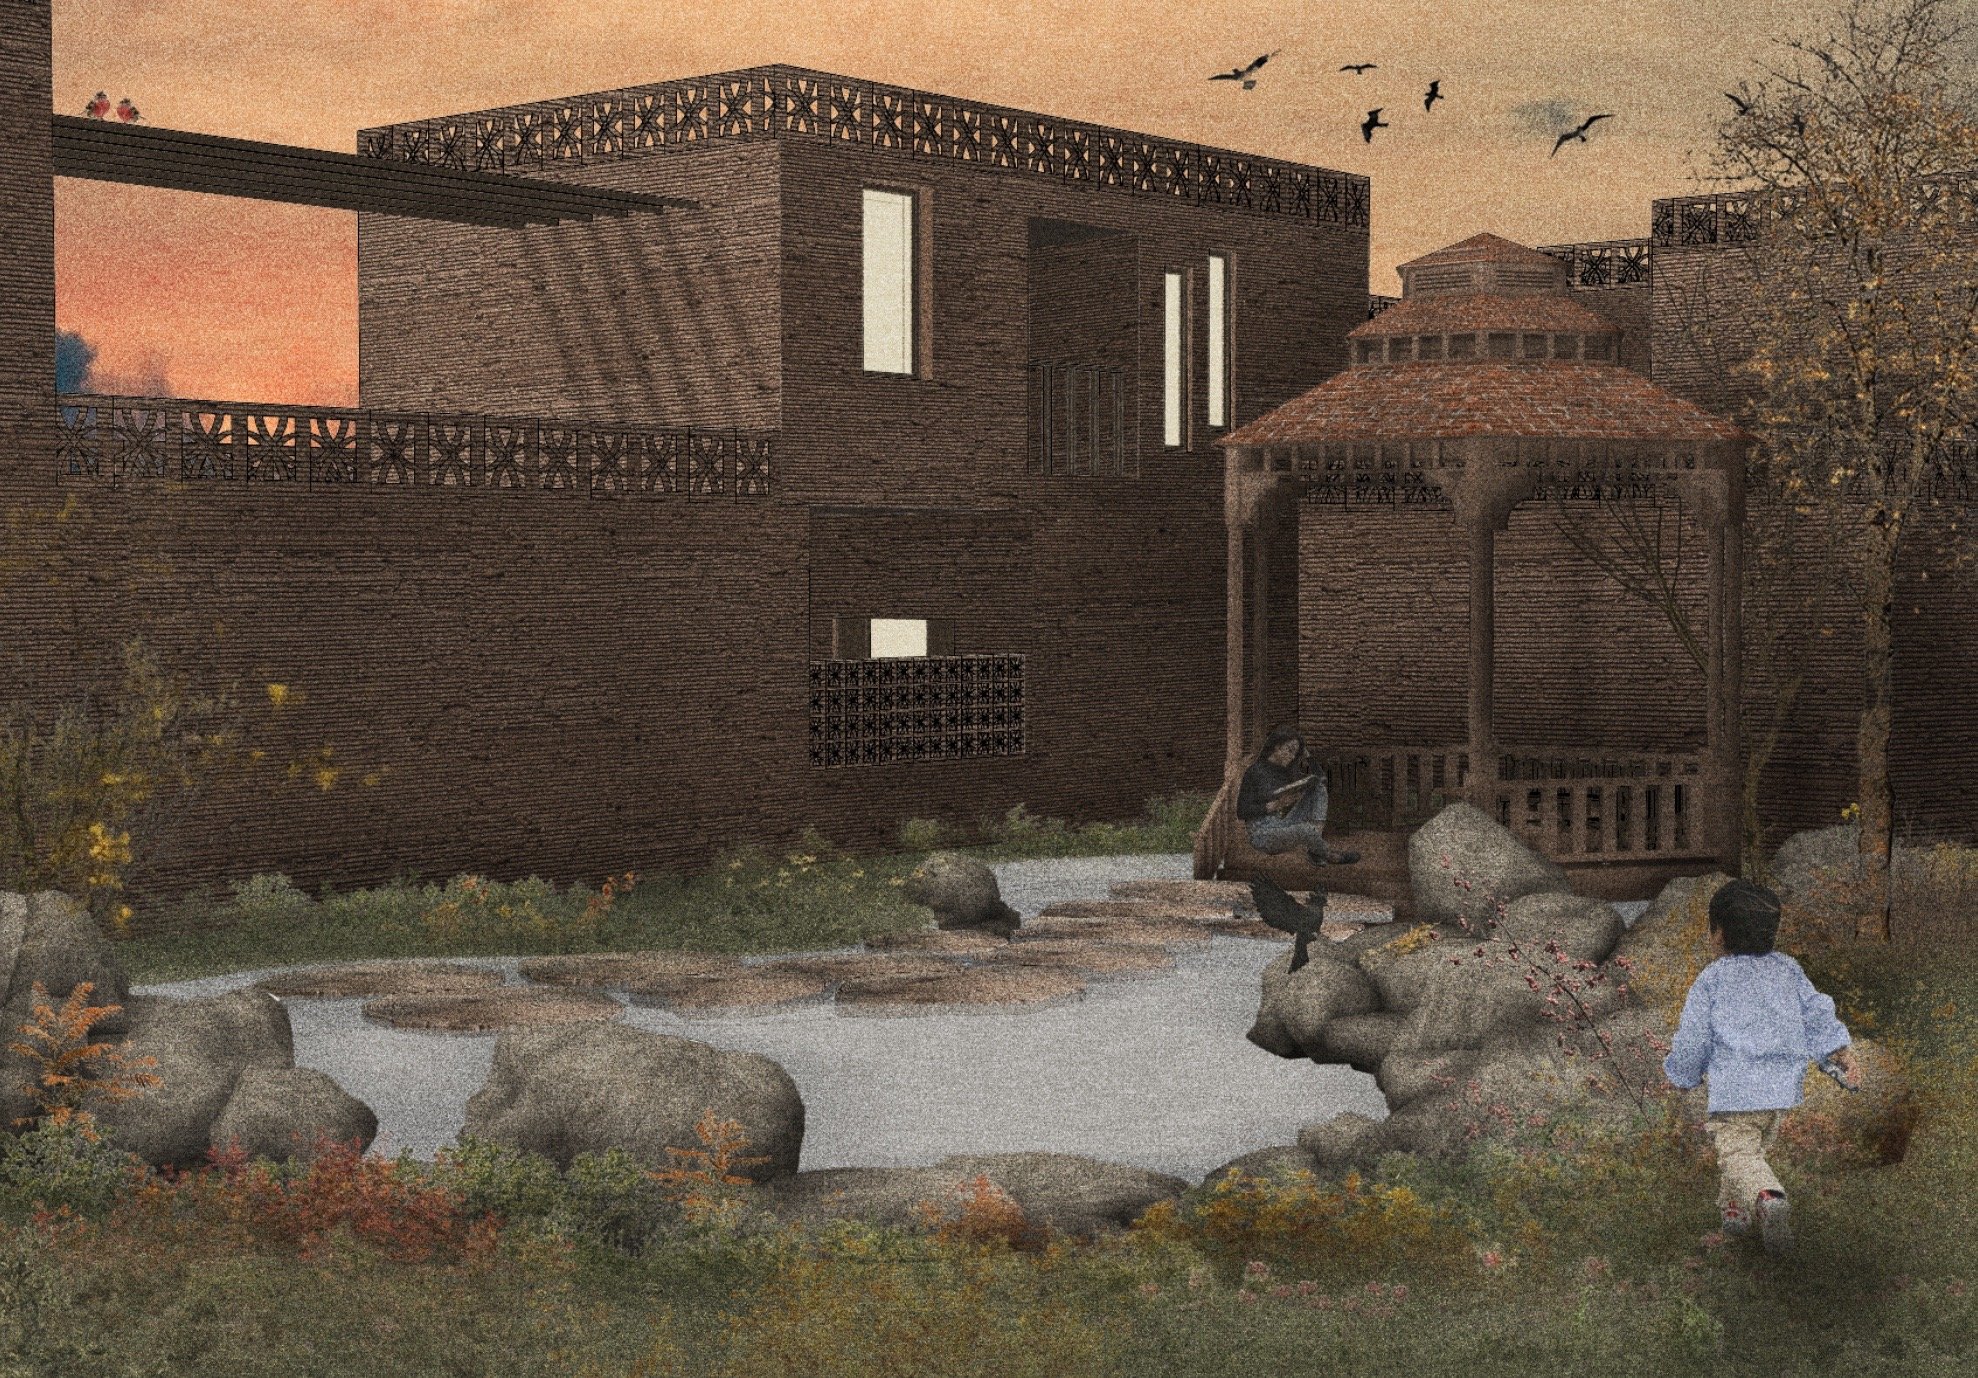
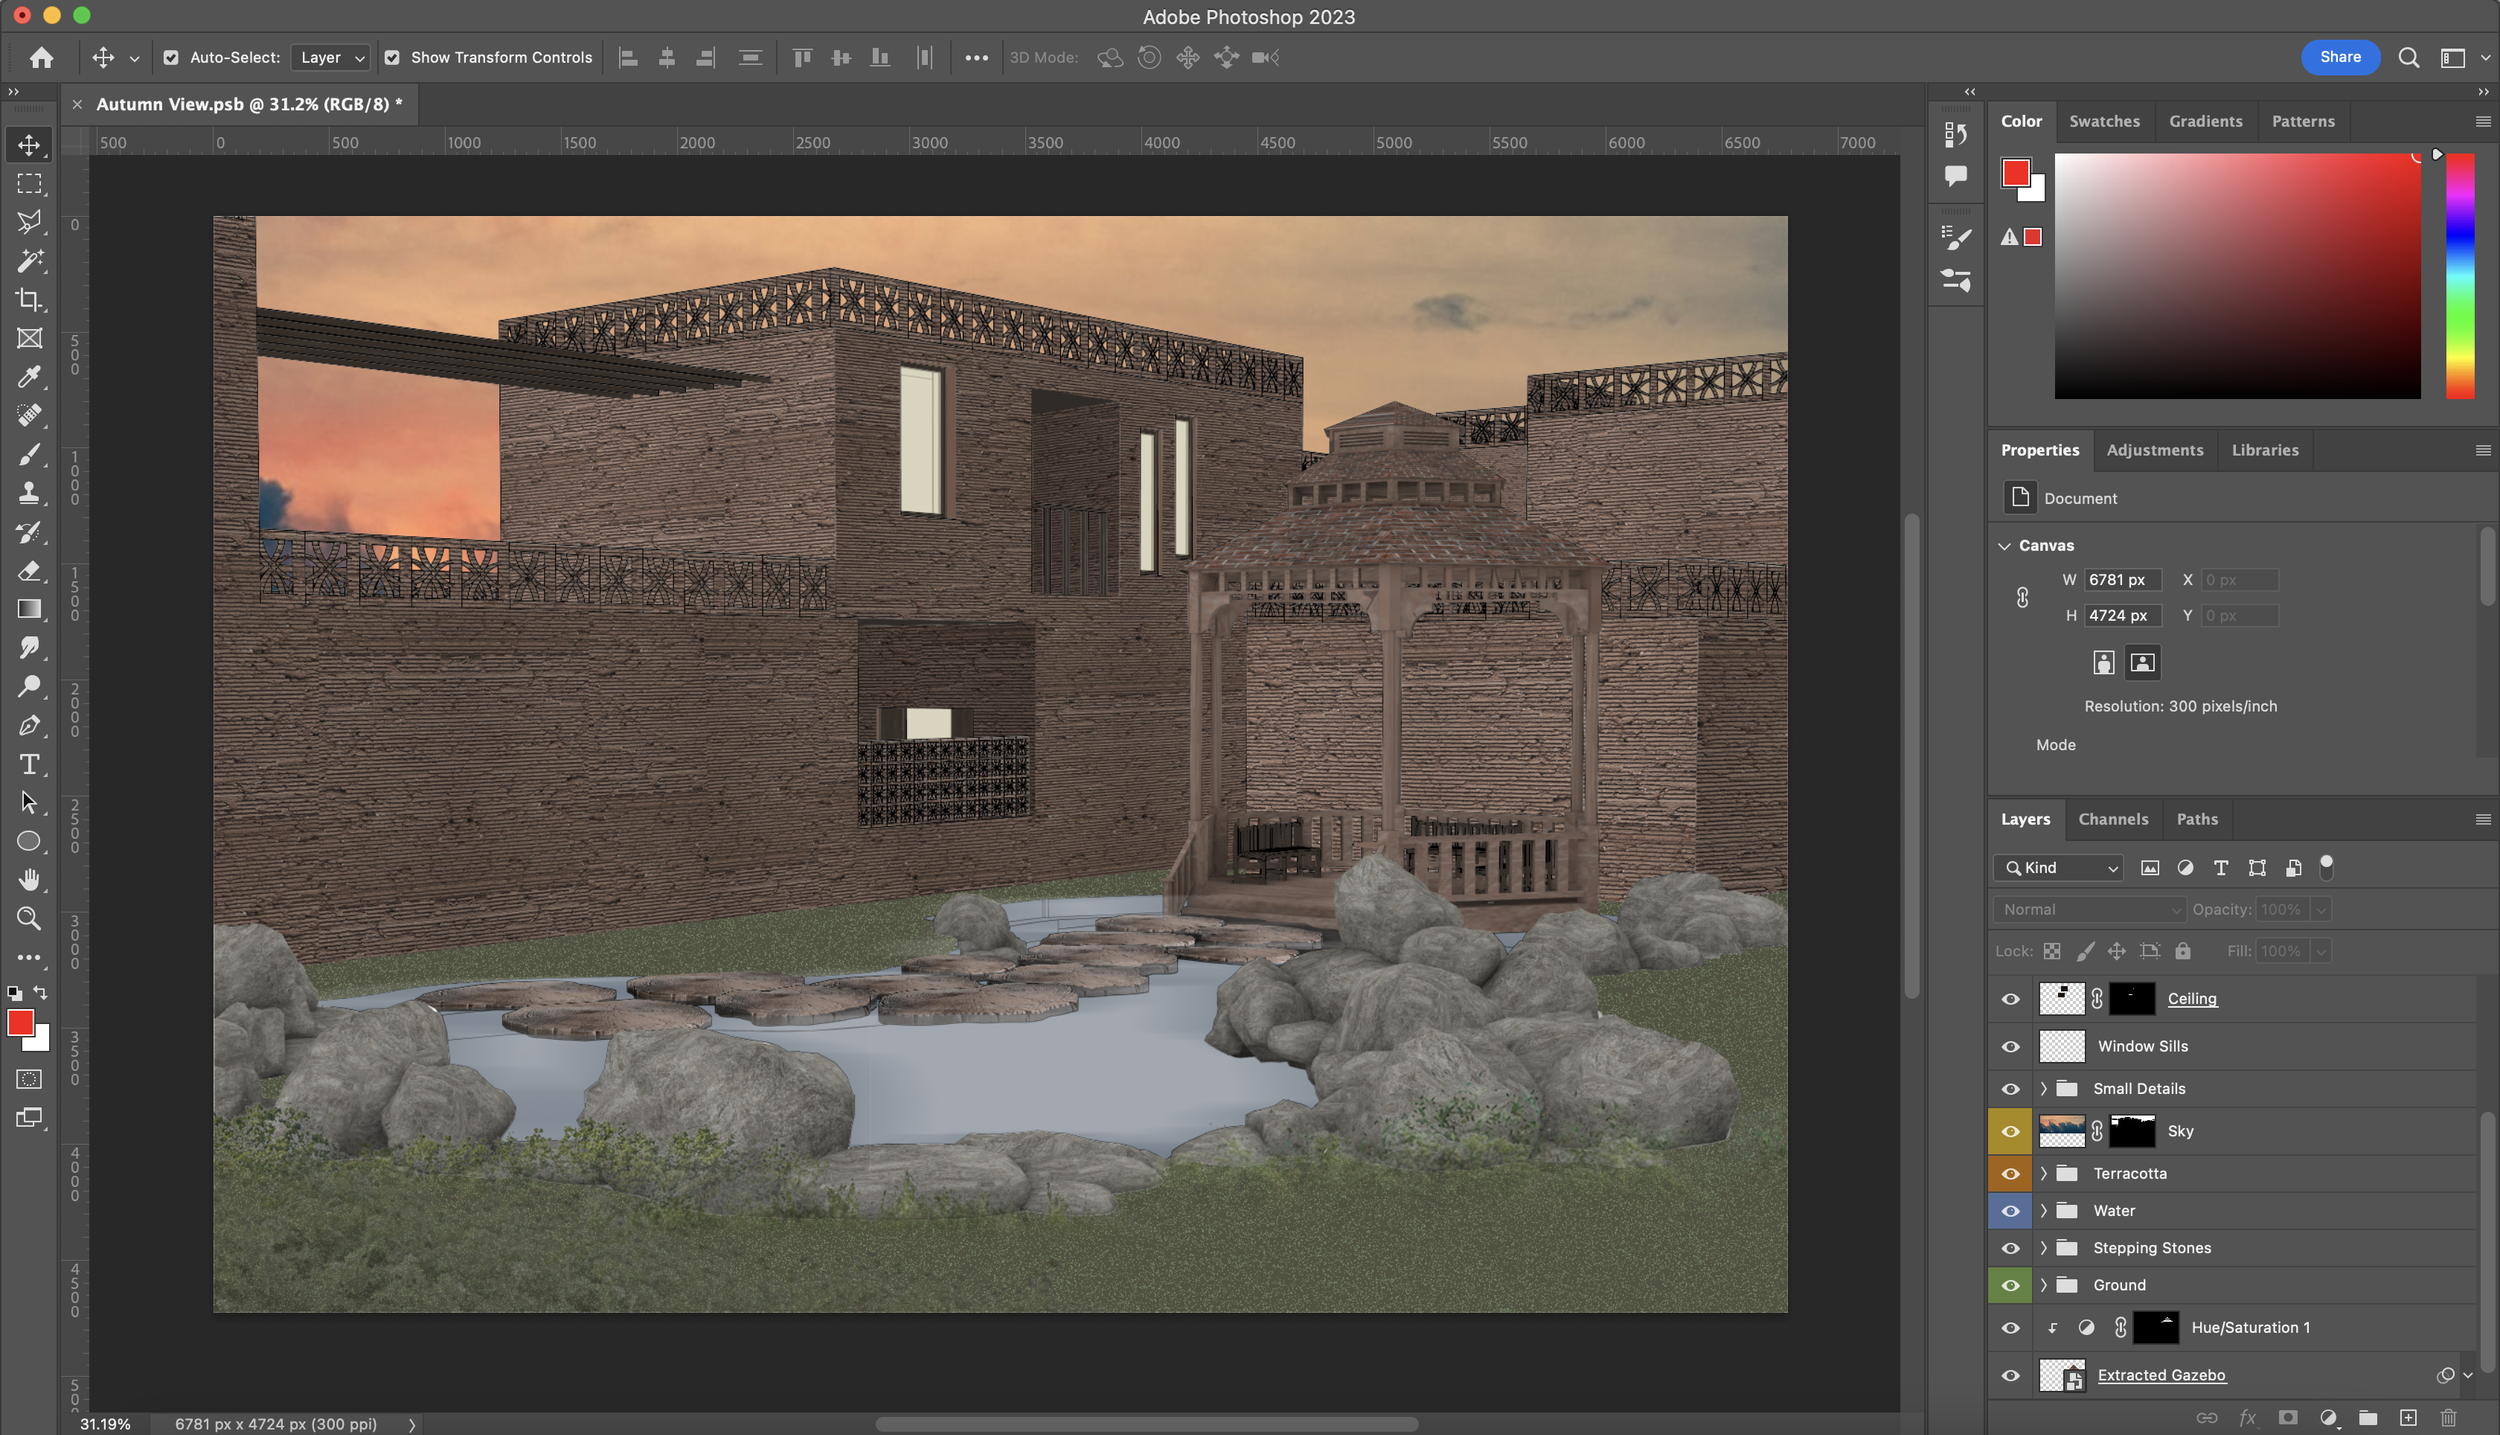
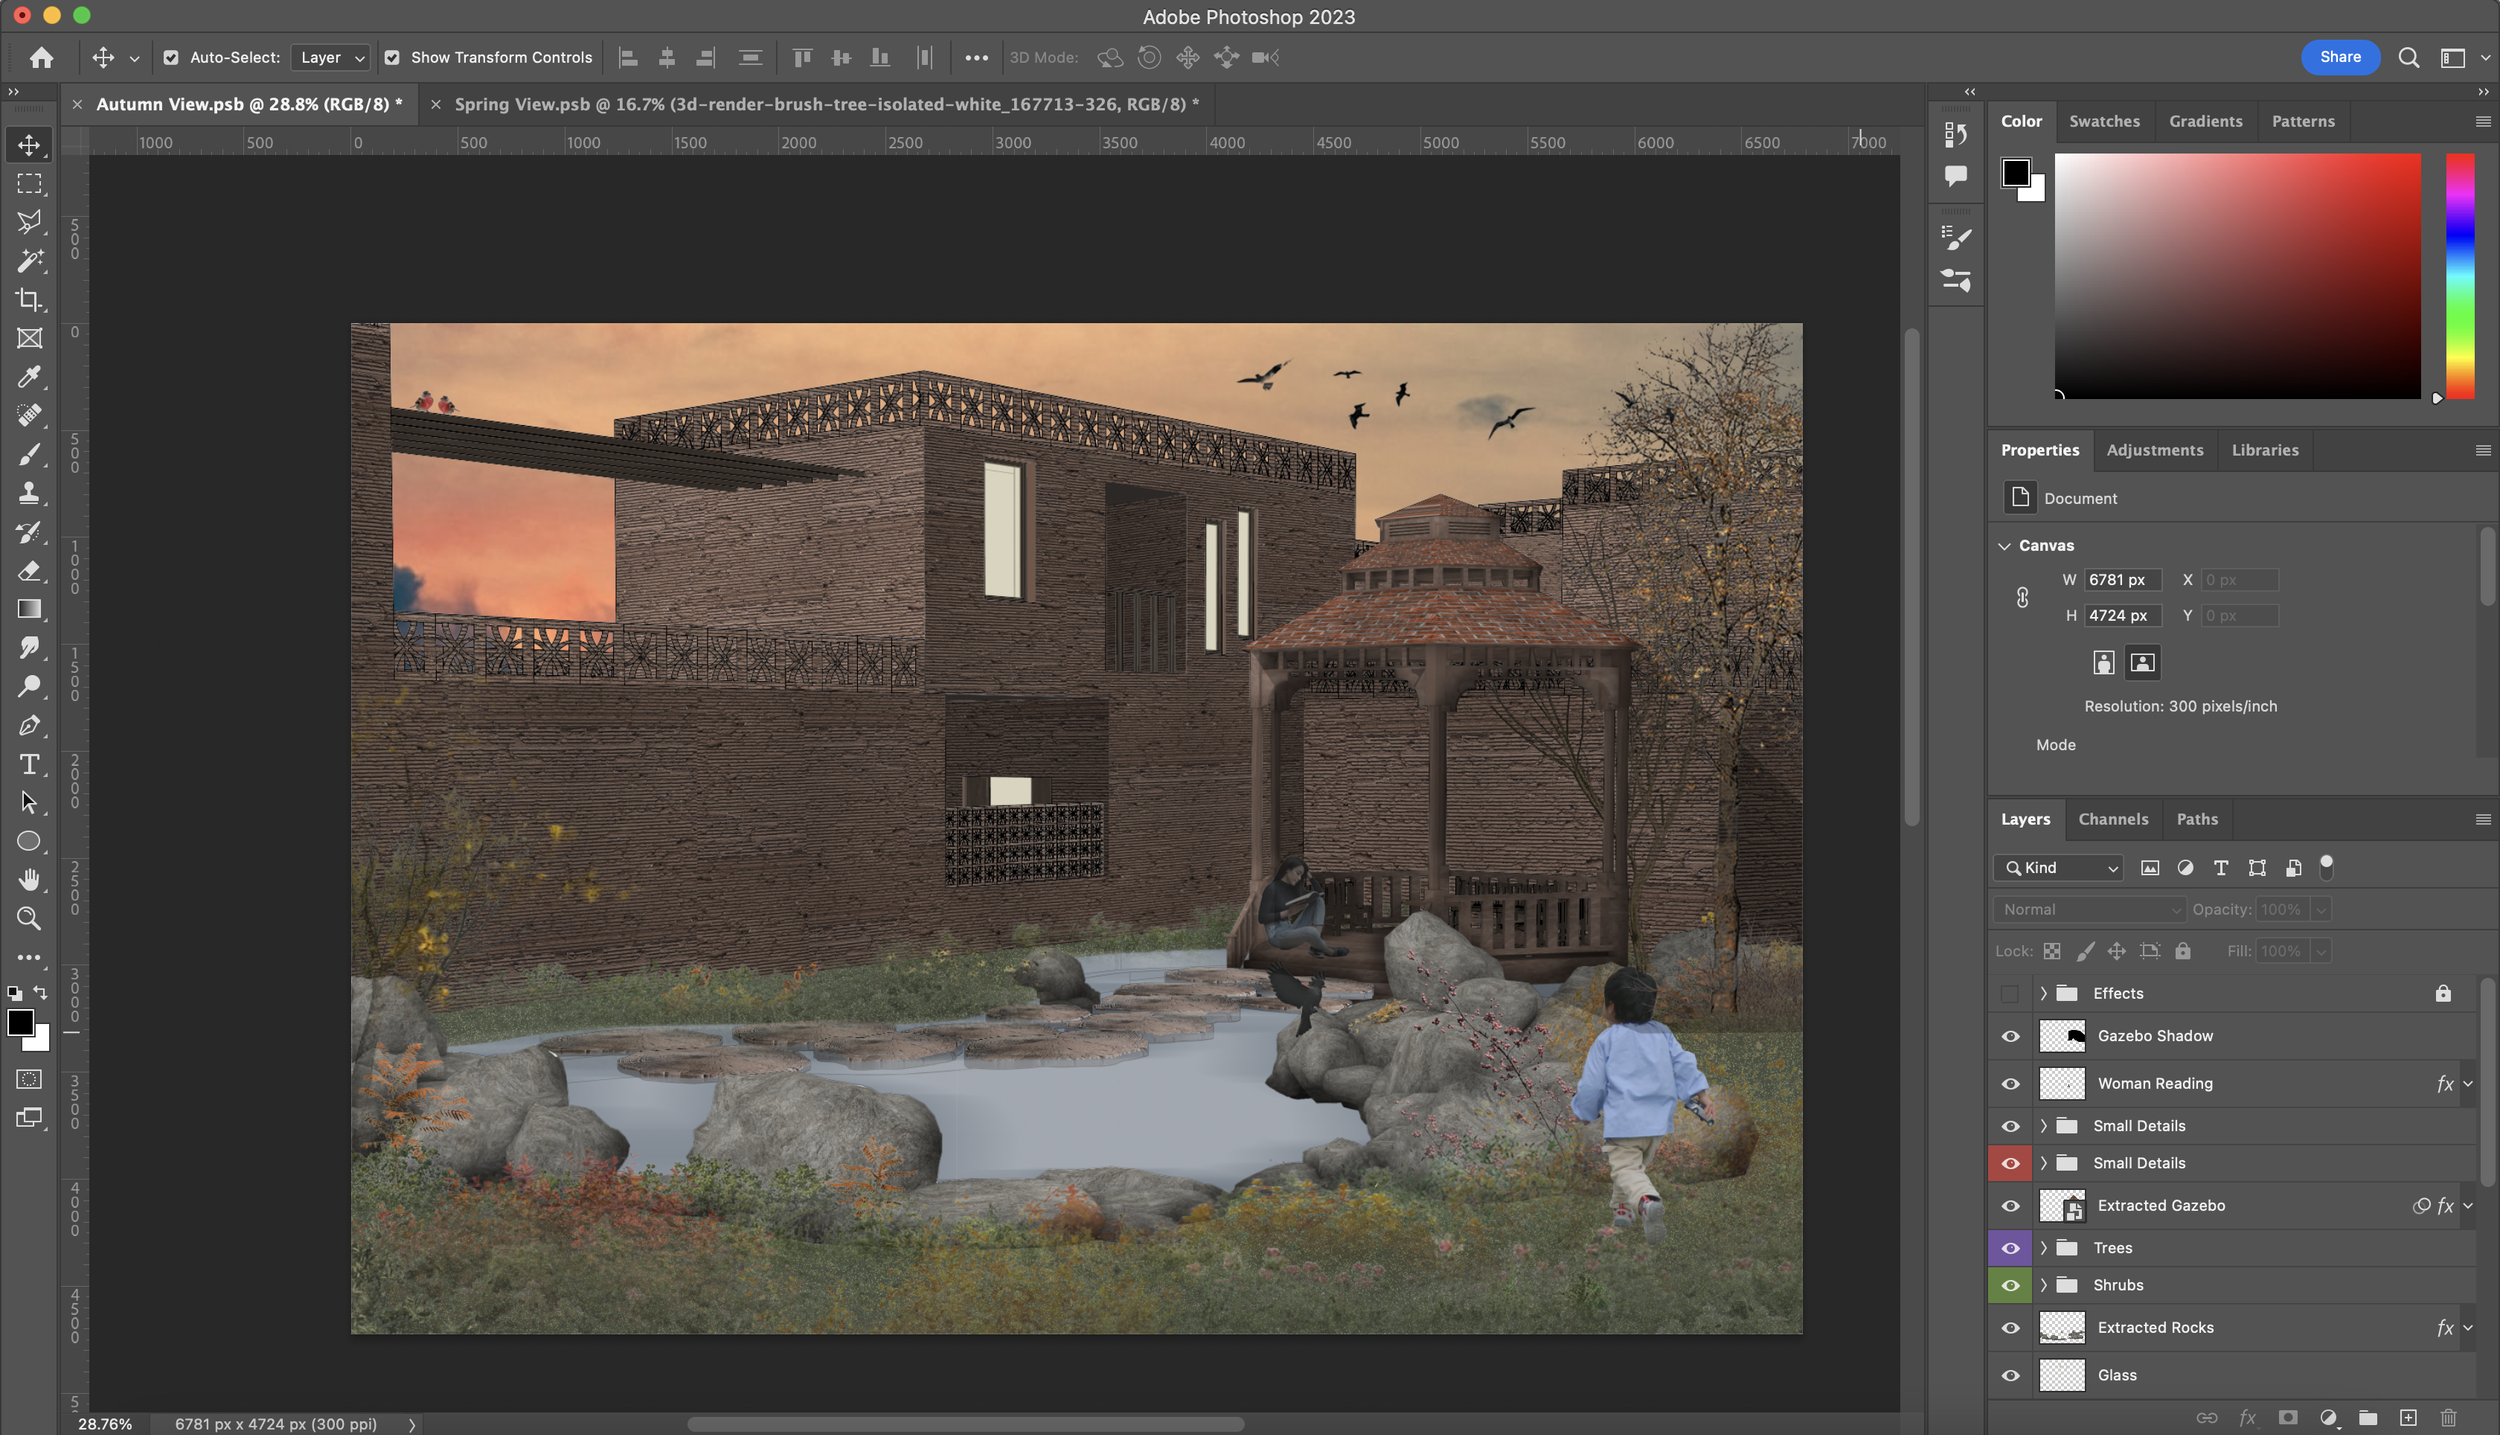
As you can see below, today we’ll be taking a simple view from a 3D model and turning it into a rich visual with the power of Photoshop.

Step-by-step explanations incoming…
How do we Begin?
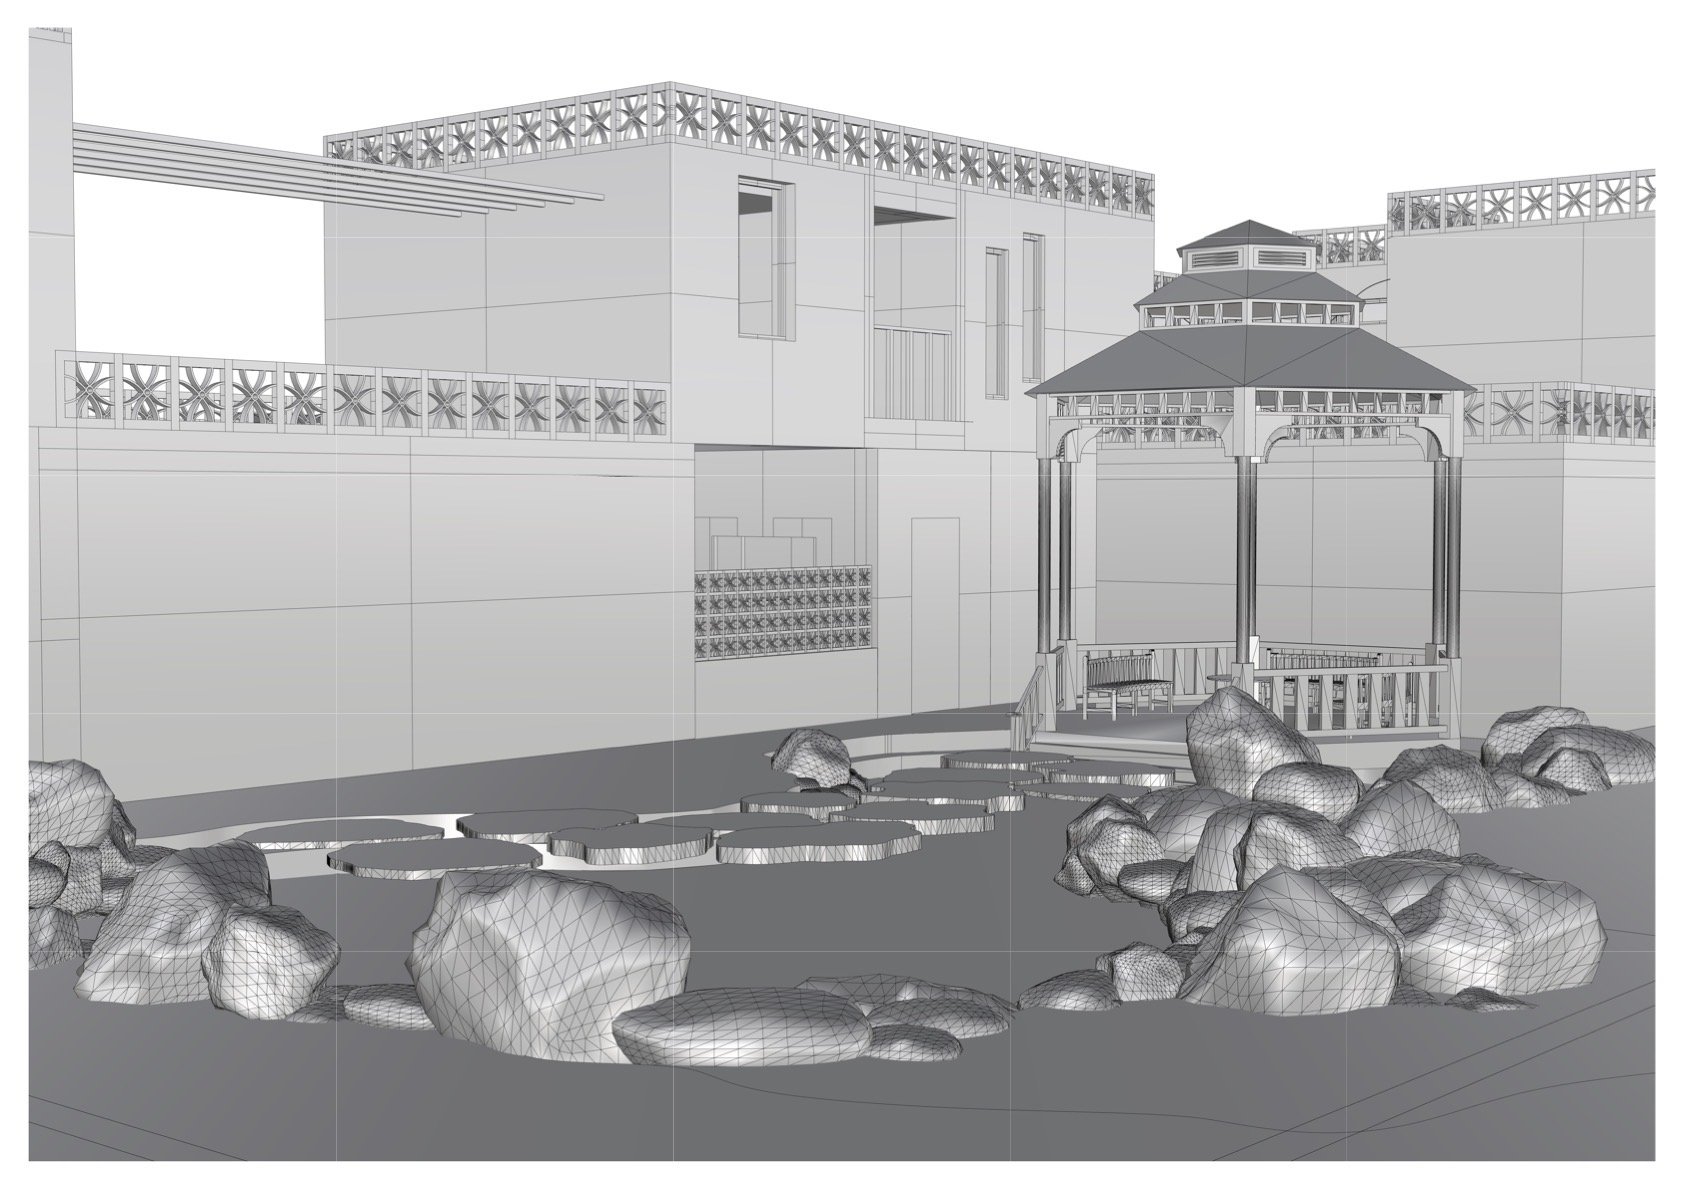
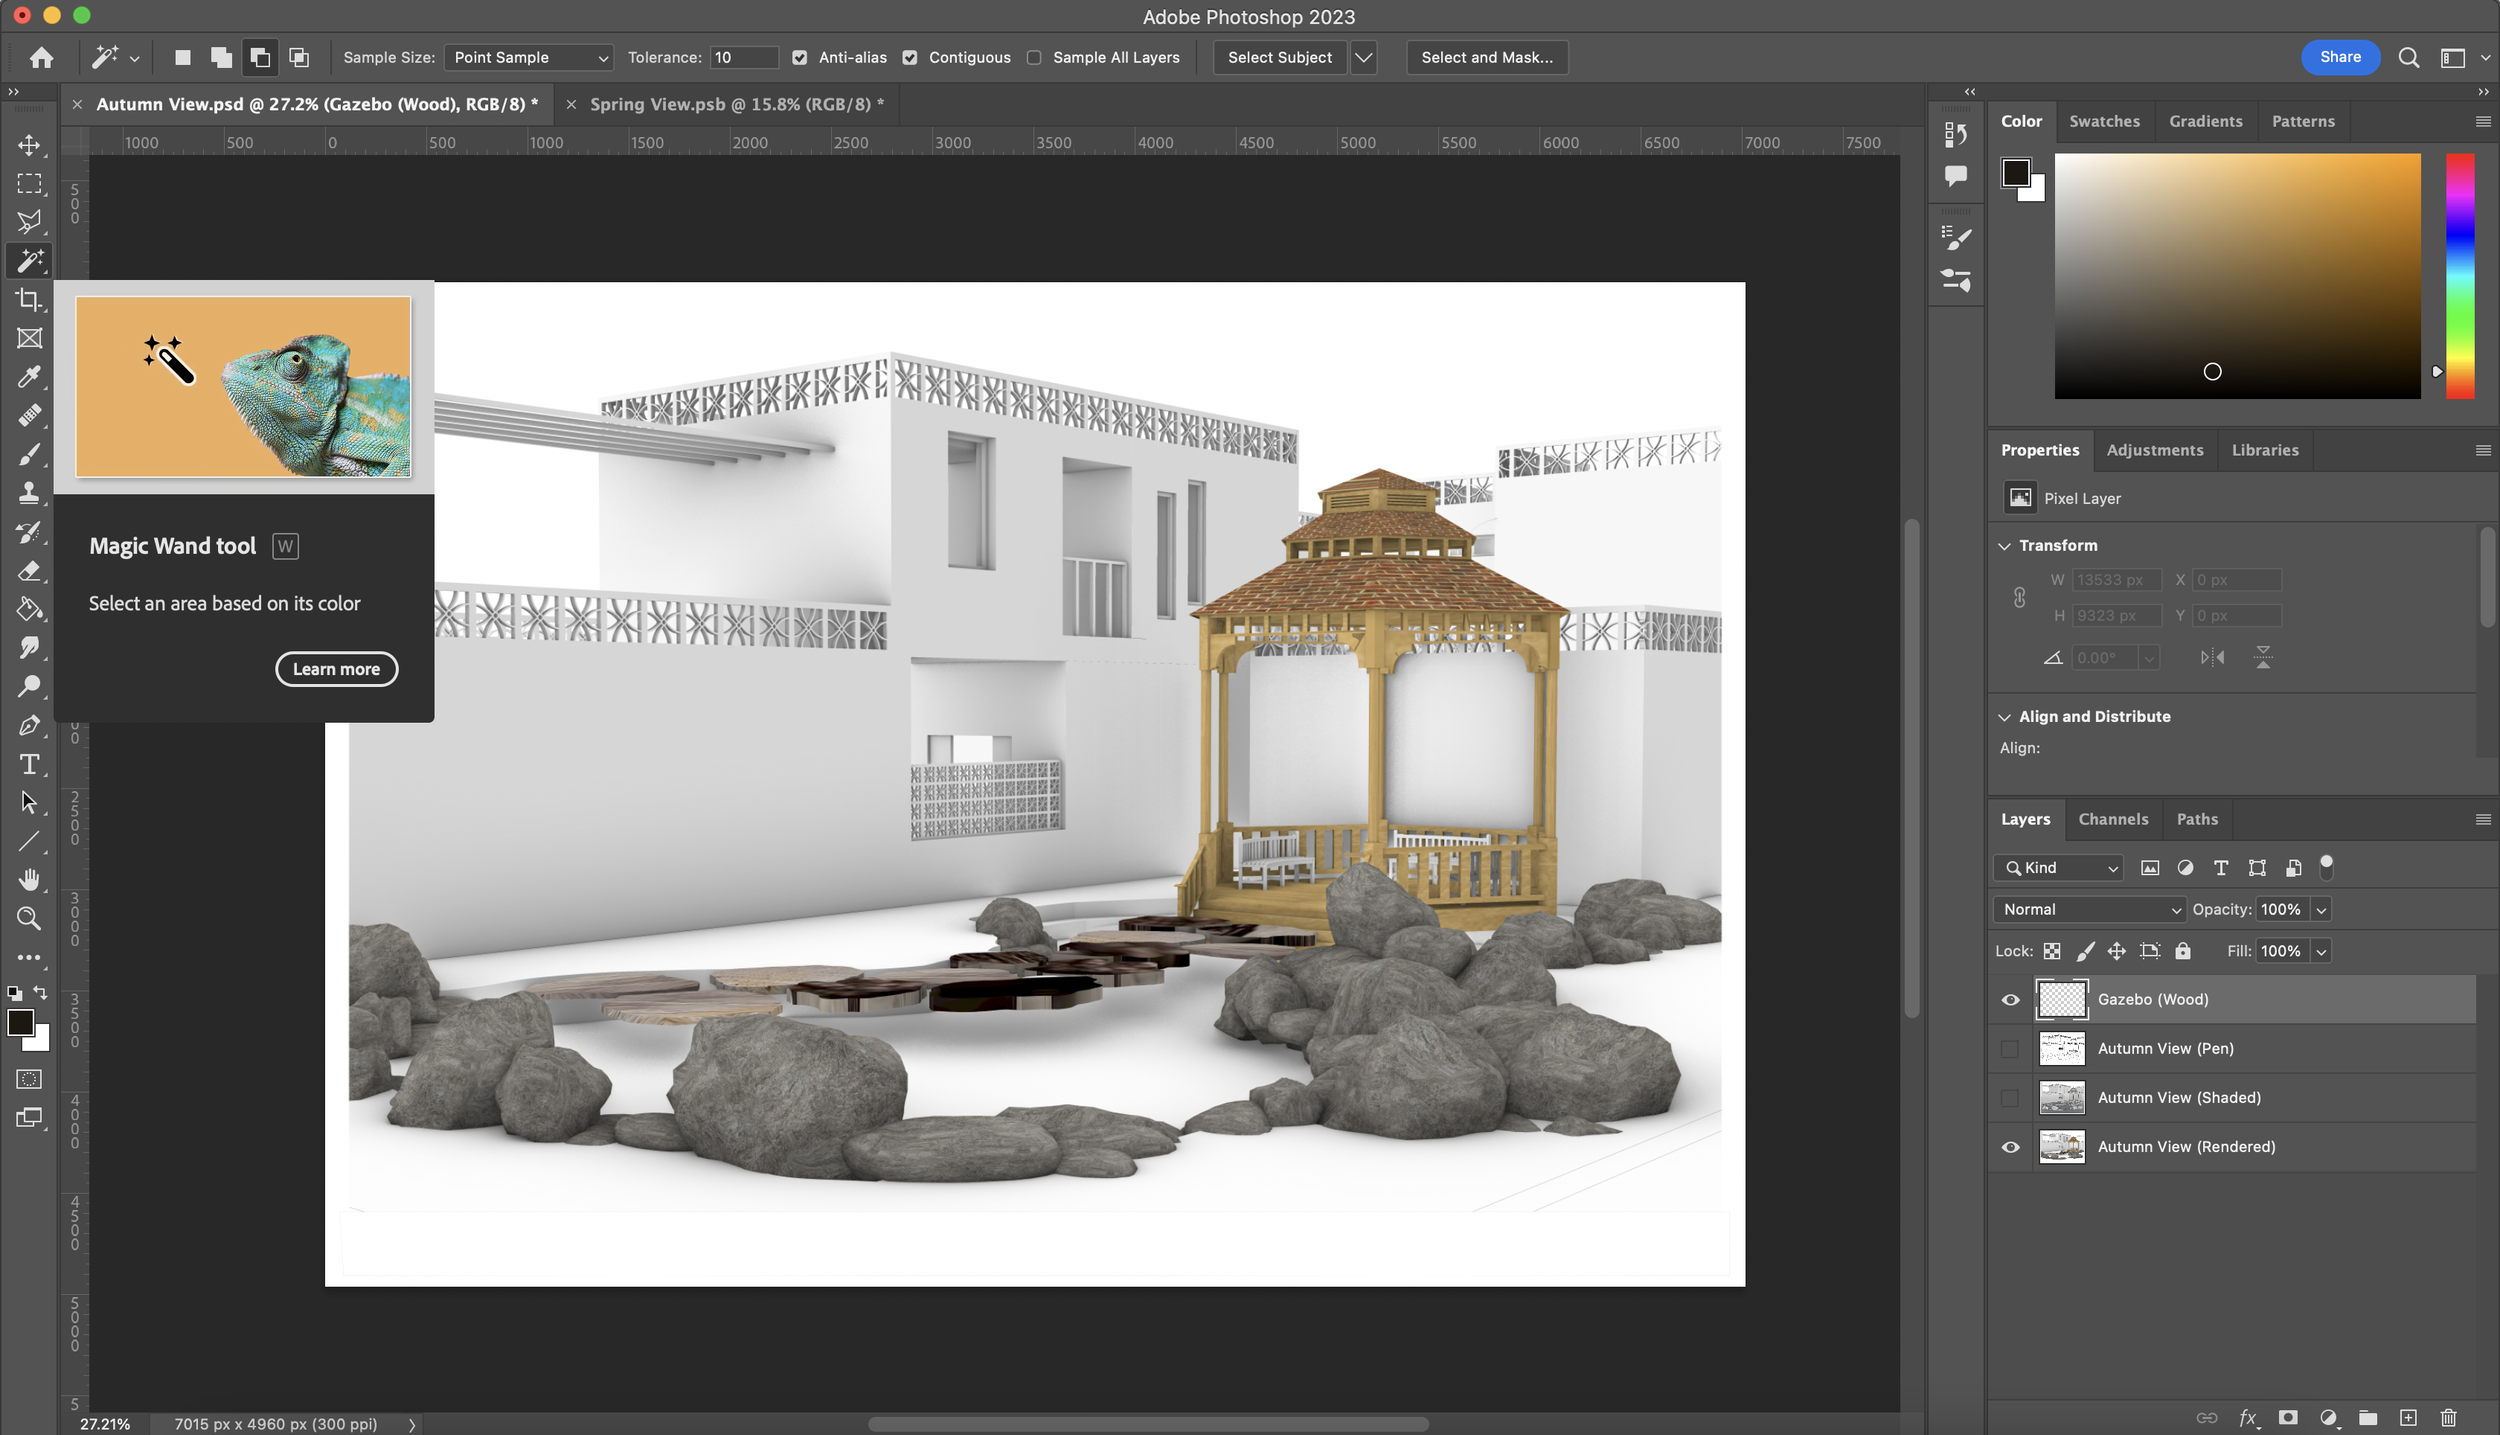
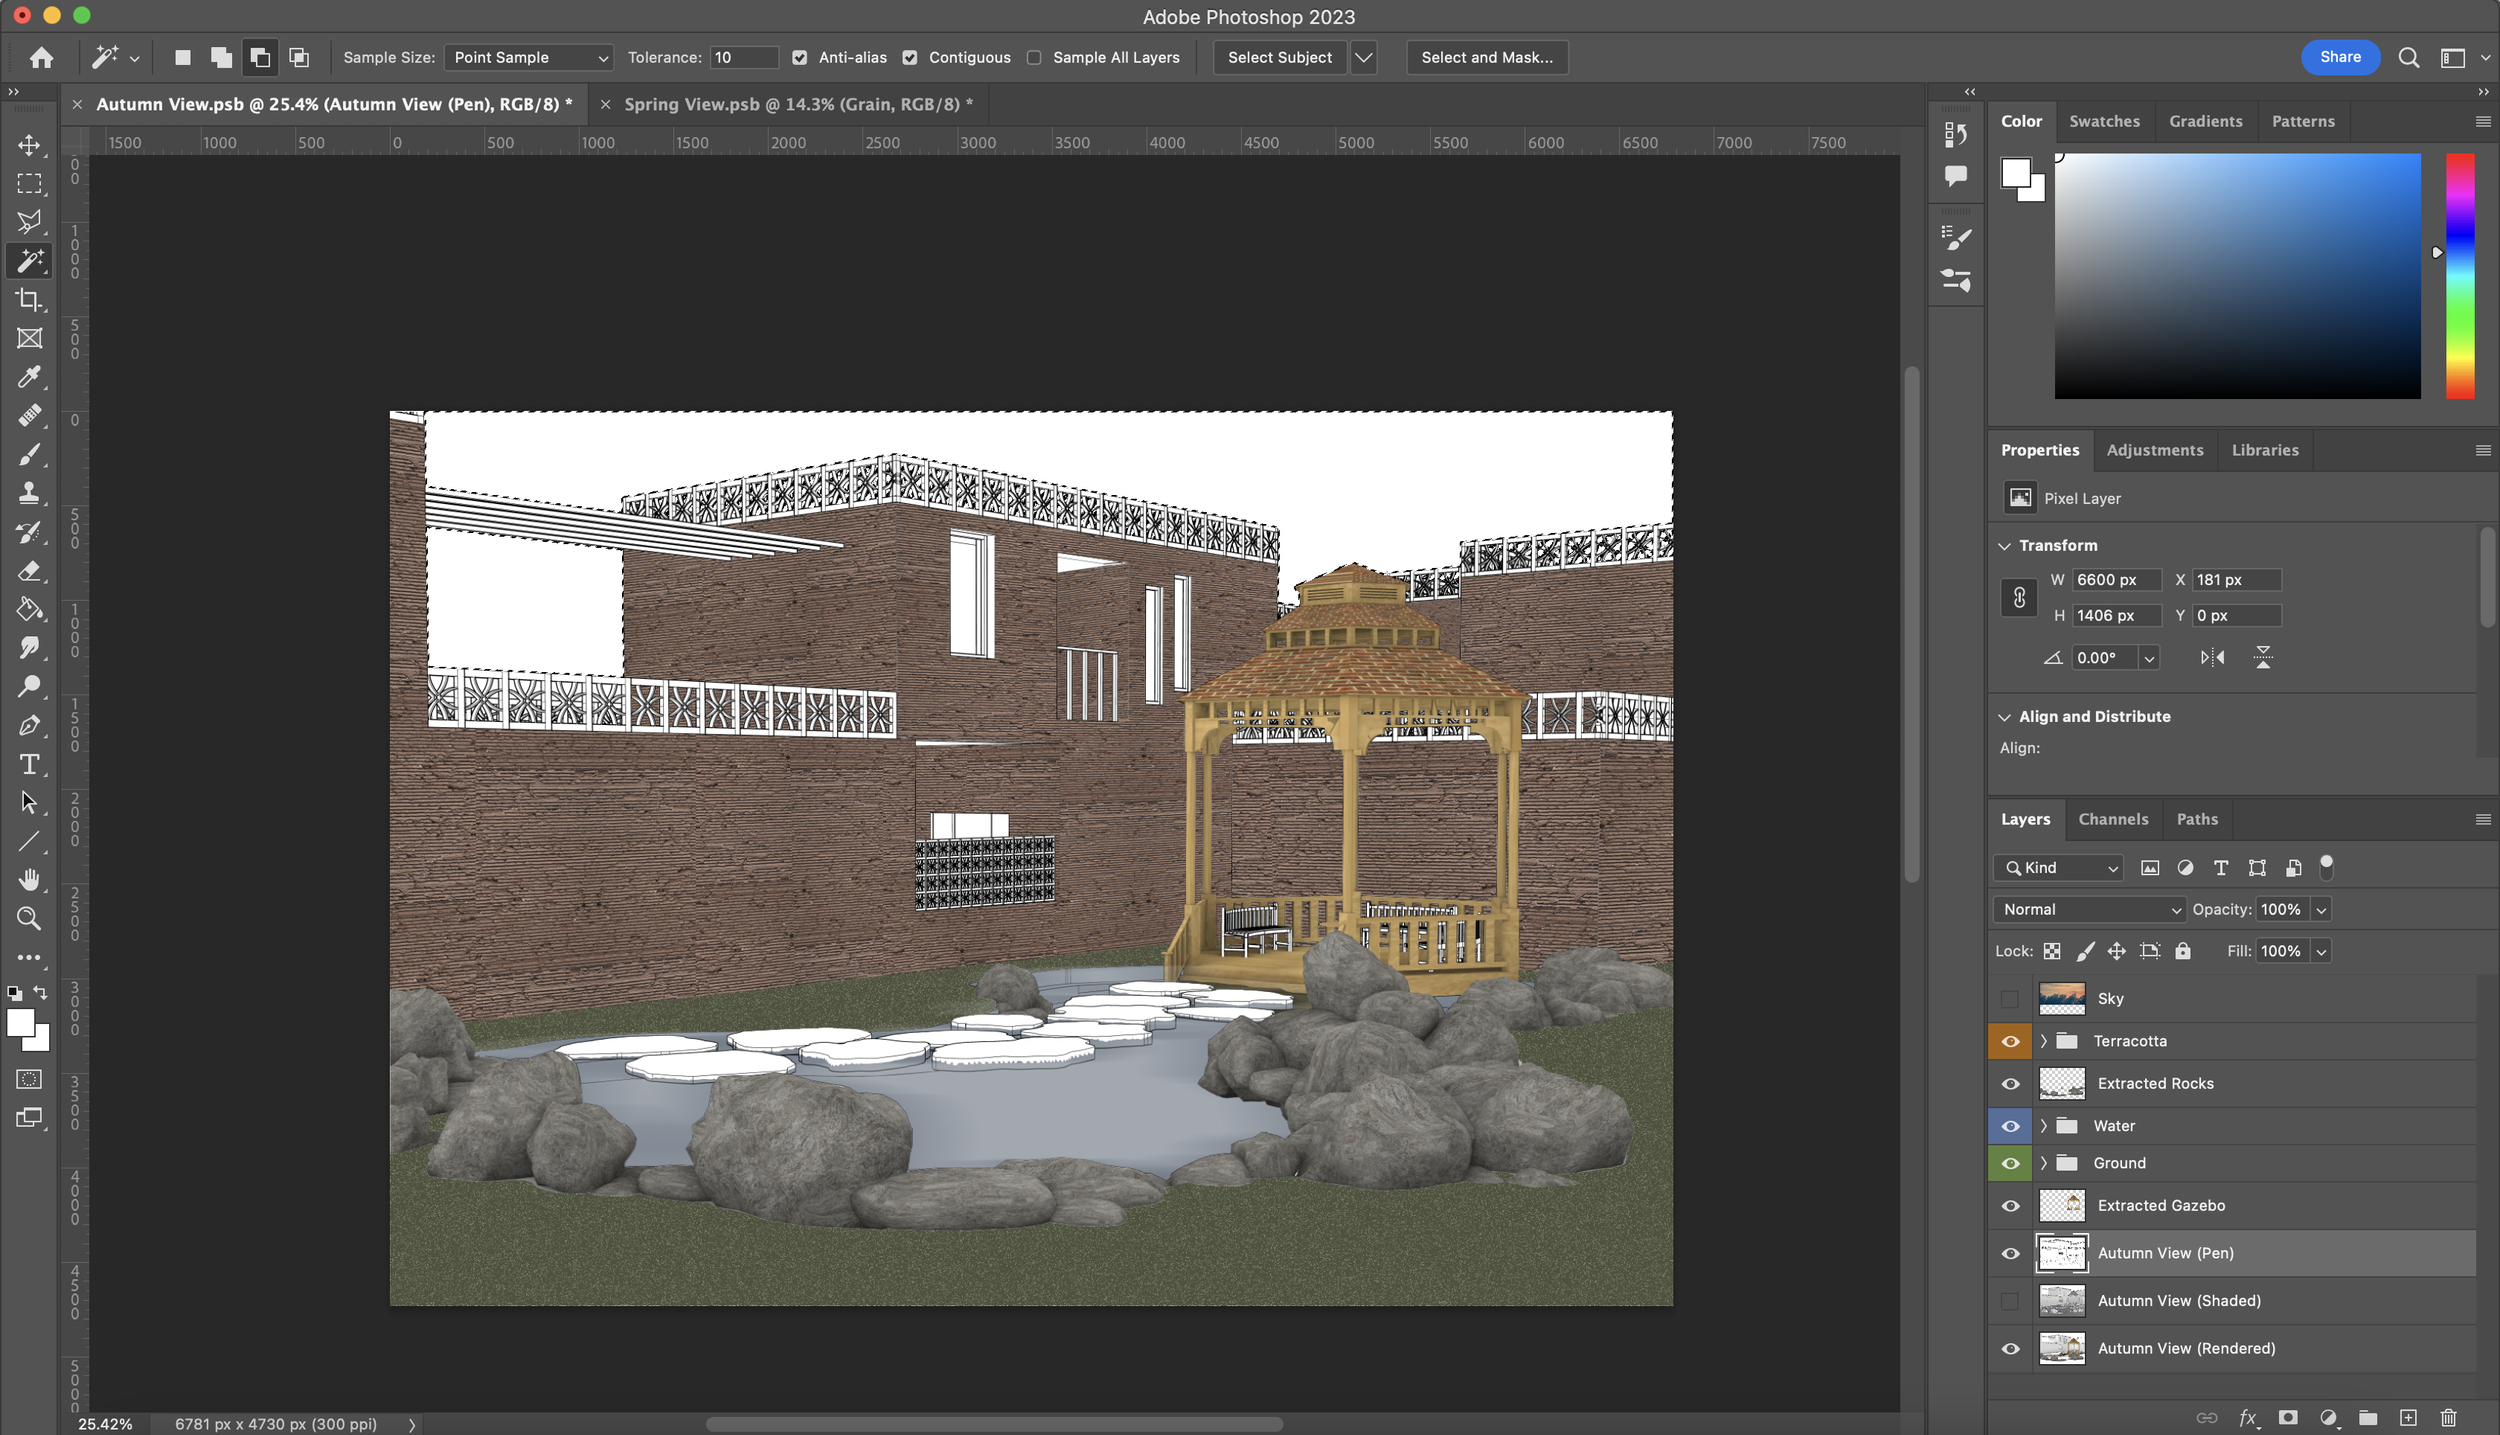
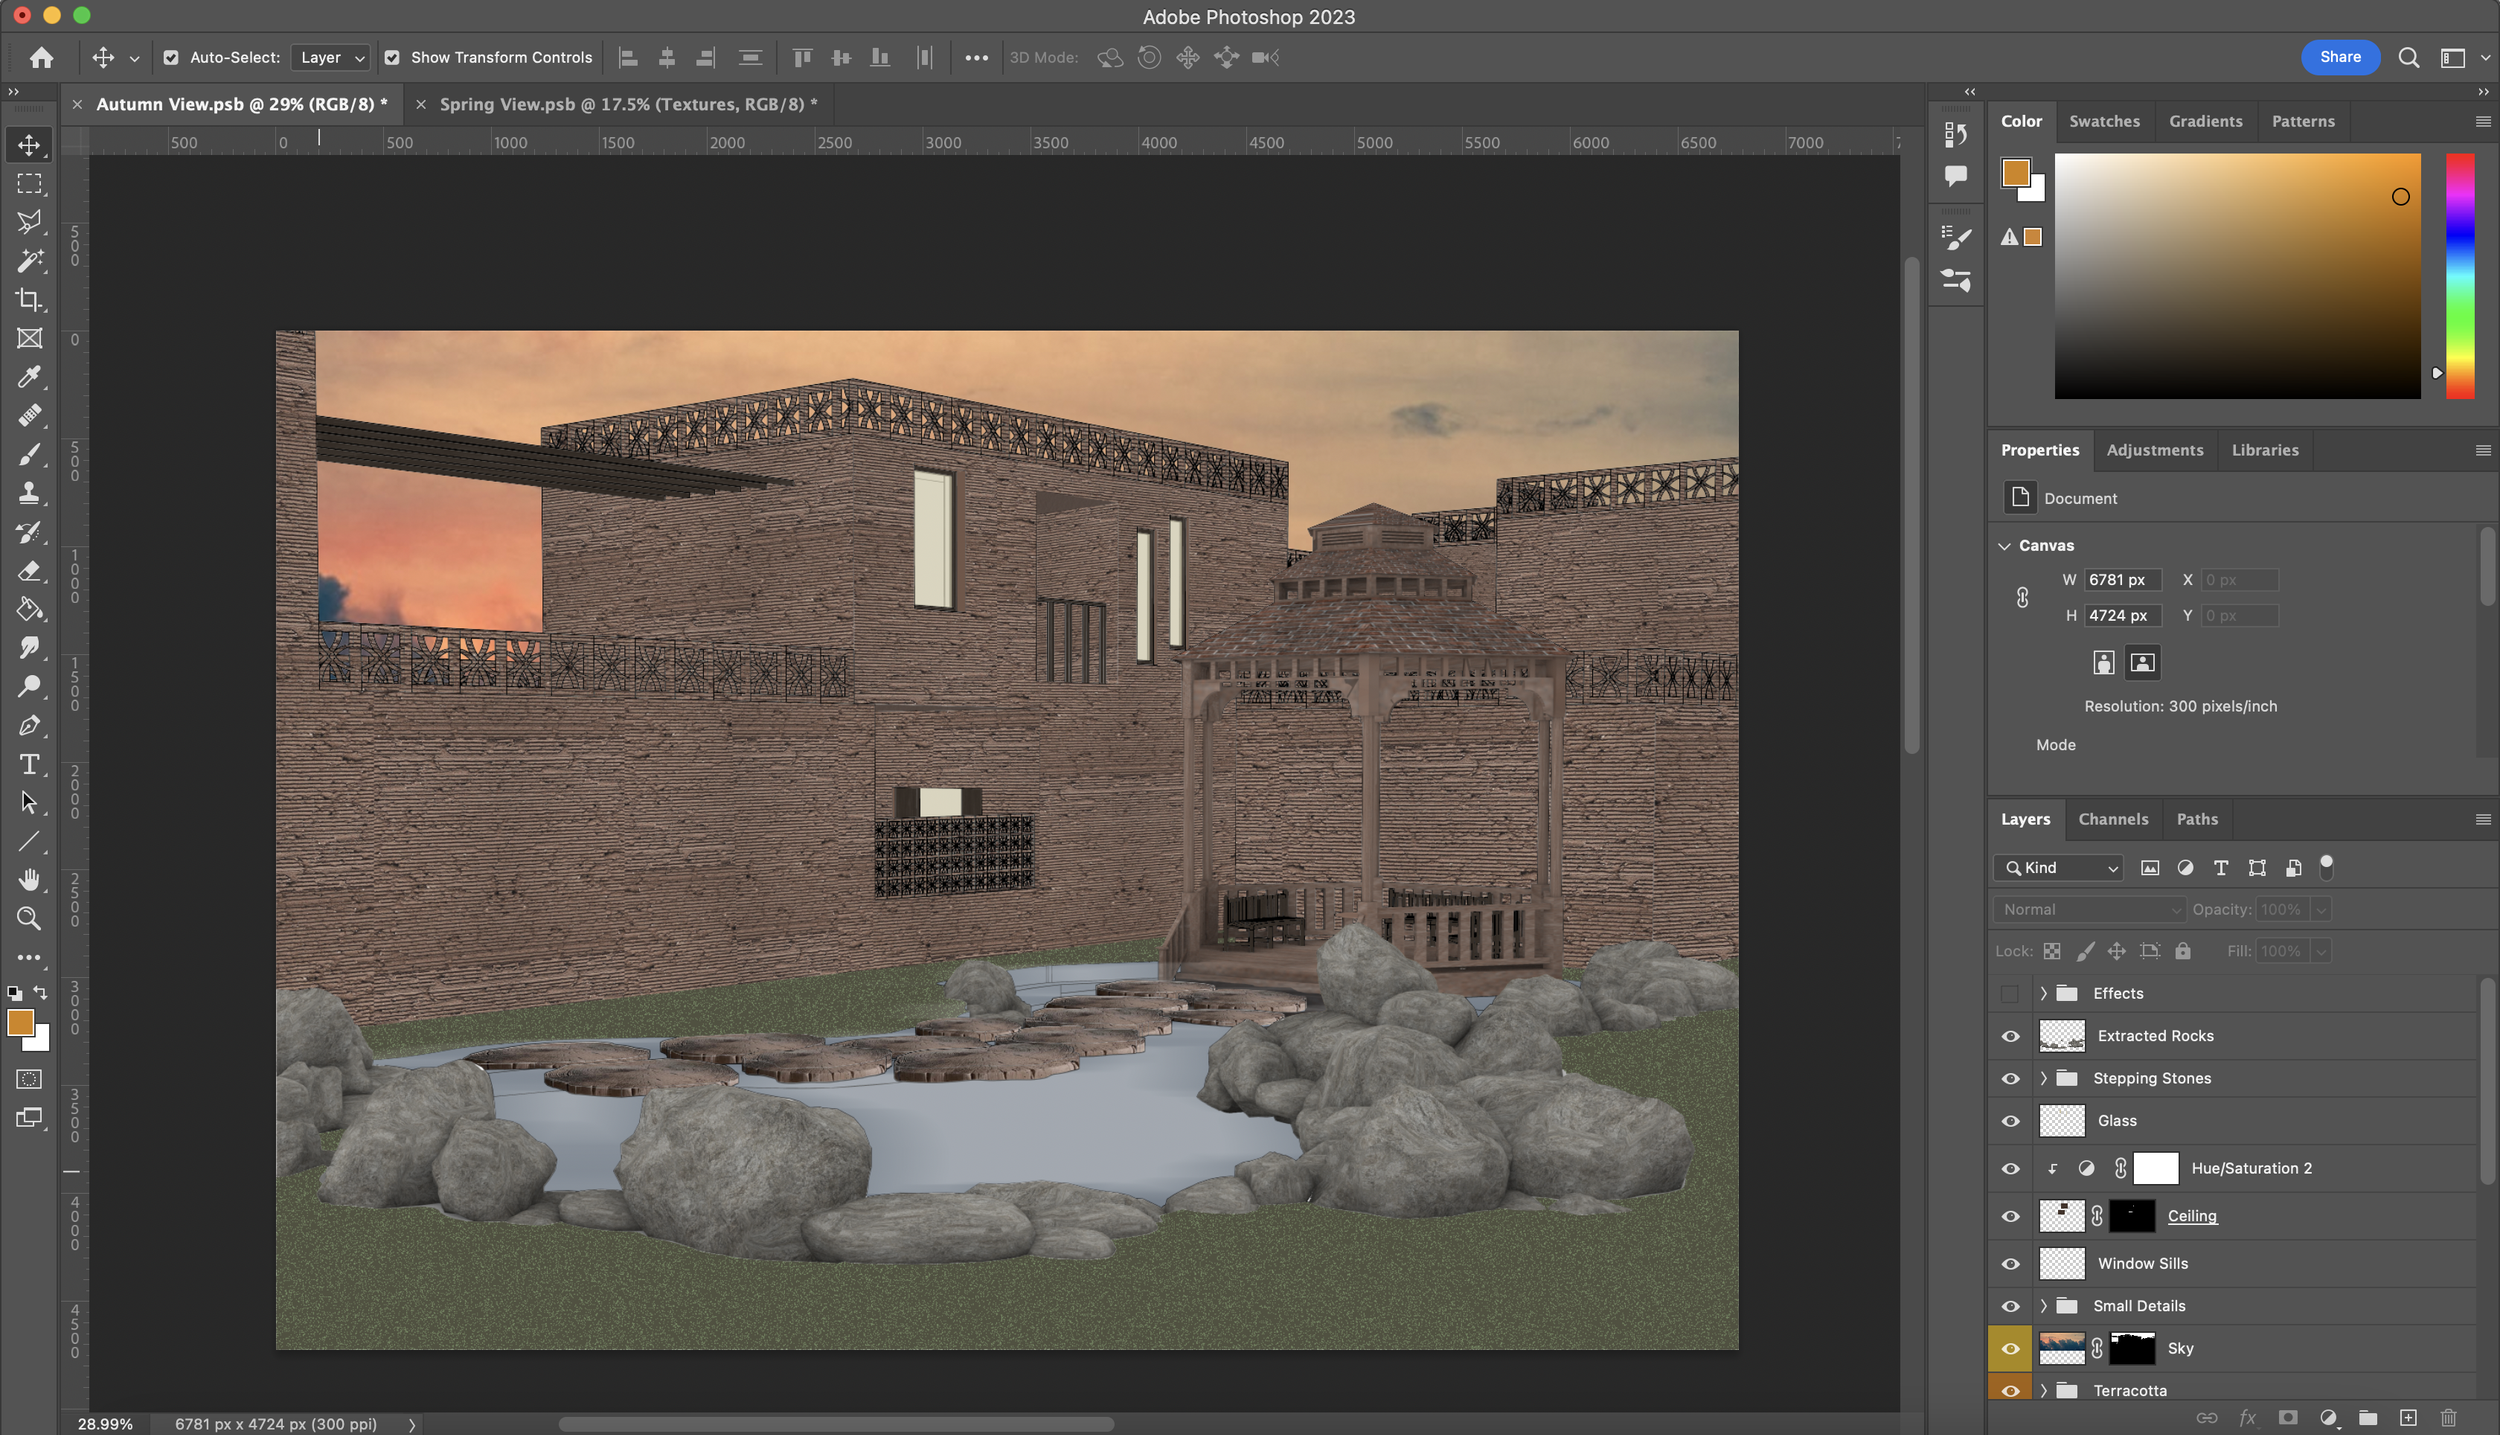
First, you will need a 3D view of what you want to process in Photoshop. For this tutorial, I have taken a view from my final year design project which was heavily influenced by seasonal gardens. You can take any type of view from any type of 3D model and apply the same techniques that will be displayed in this tutorial. Here is our first tip of the day; Taking multiple versions of the same view will come in very handy. What I mean by this is the different rendering/viewing styles that most if not all 3D modelling software have to offer - vectorial, simple shading, rendered, technical, etc. For reference, I have exported my views from Rhino 3D in ‘Shaded’, ‘Pen’ and ‘Rendered’ view.
The logic behind taking multiple versions of the same view into photoshop is for numerous reasons. Firstly, the ‘Pen’ view is for ease of selection. This is a trick I learnt during my work experience at Glenn Howells Architects. Sometimes it may be easier to select something in the ‘Shaded’ view too if the ‘Pen’ view has some lines missing due to a mishap in the model. The ‘Rendered’ view comes in handy when I want to use a texture off of an imported object as a starting point in the visual. In this case, I will be using the gazebo and rocks from the rendered view.

Extracting from ‘Rendered’ View
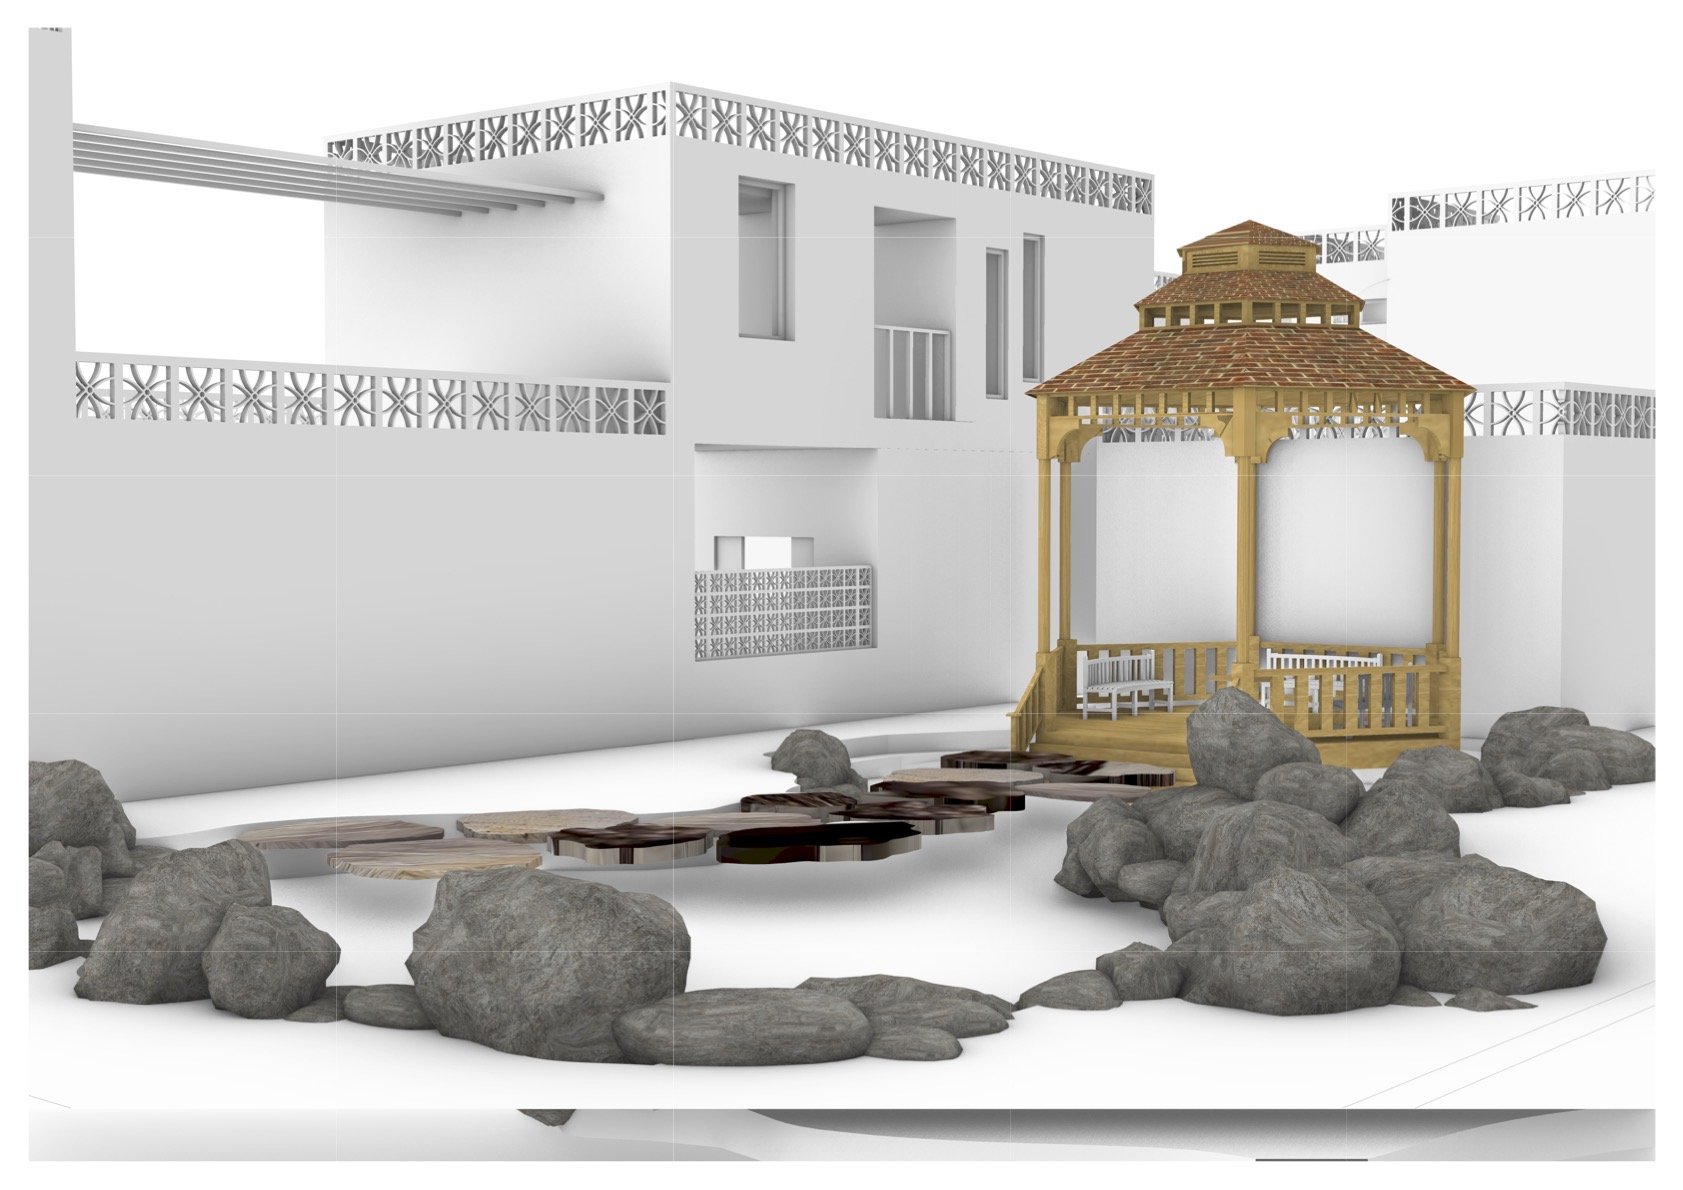
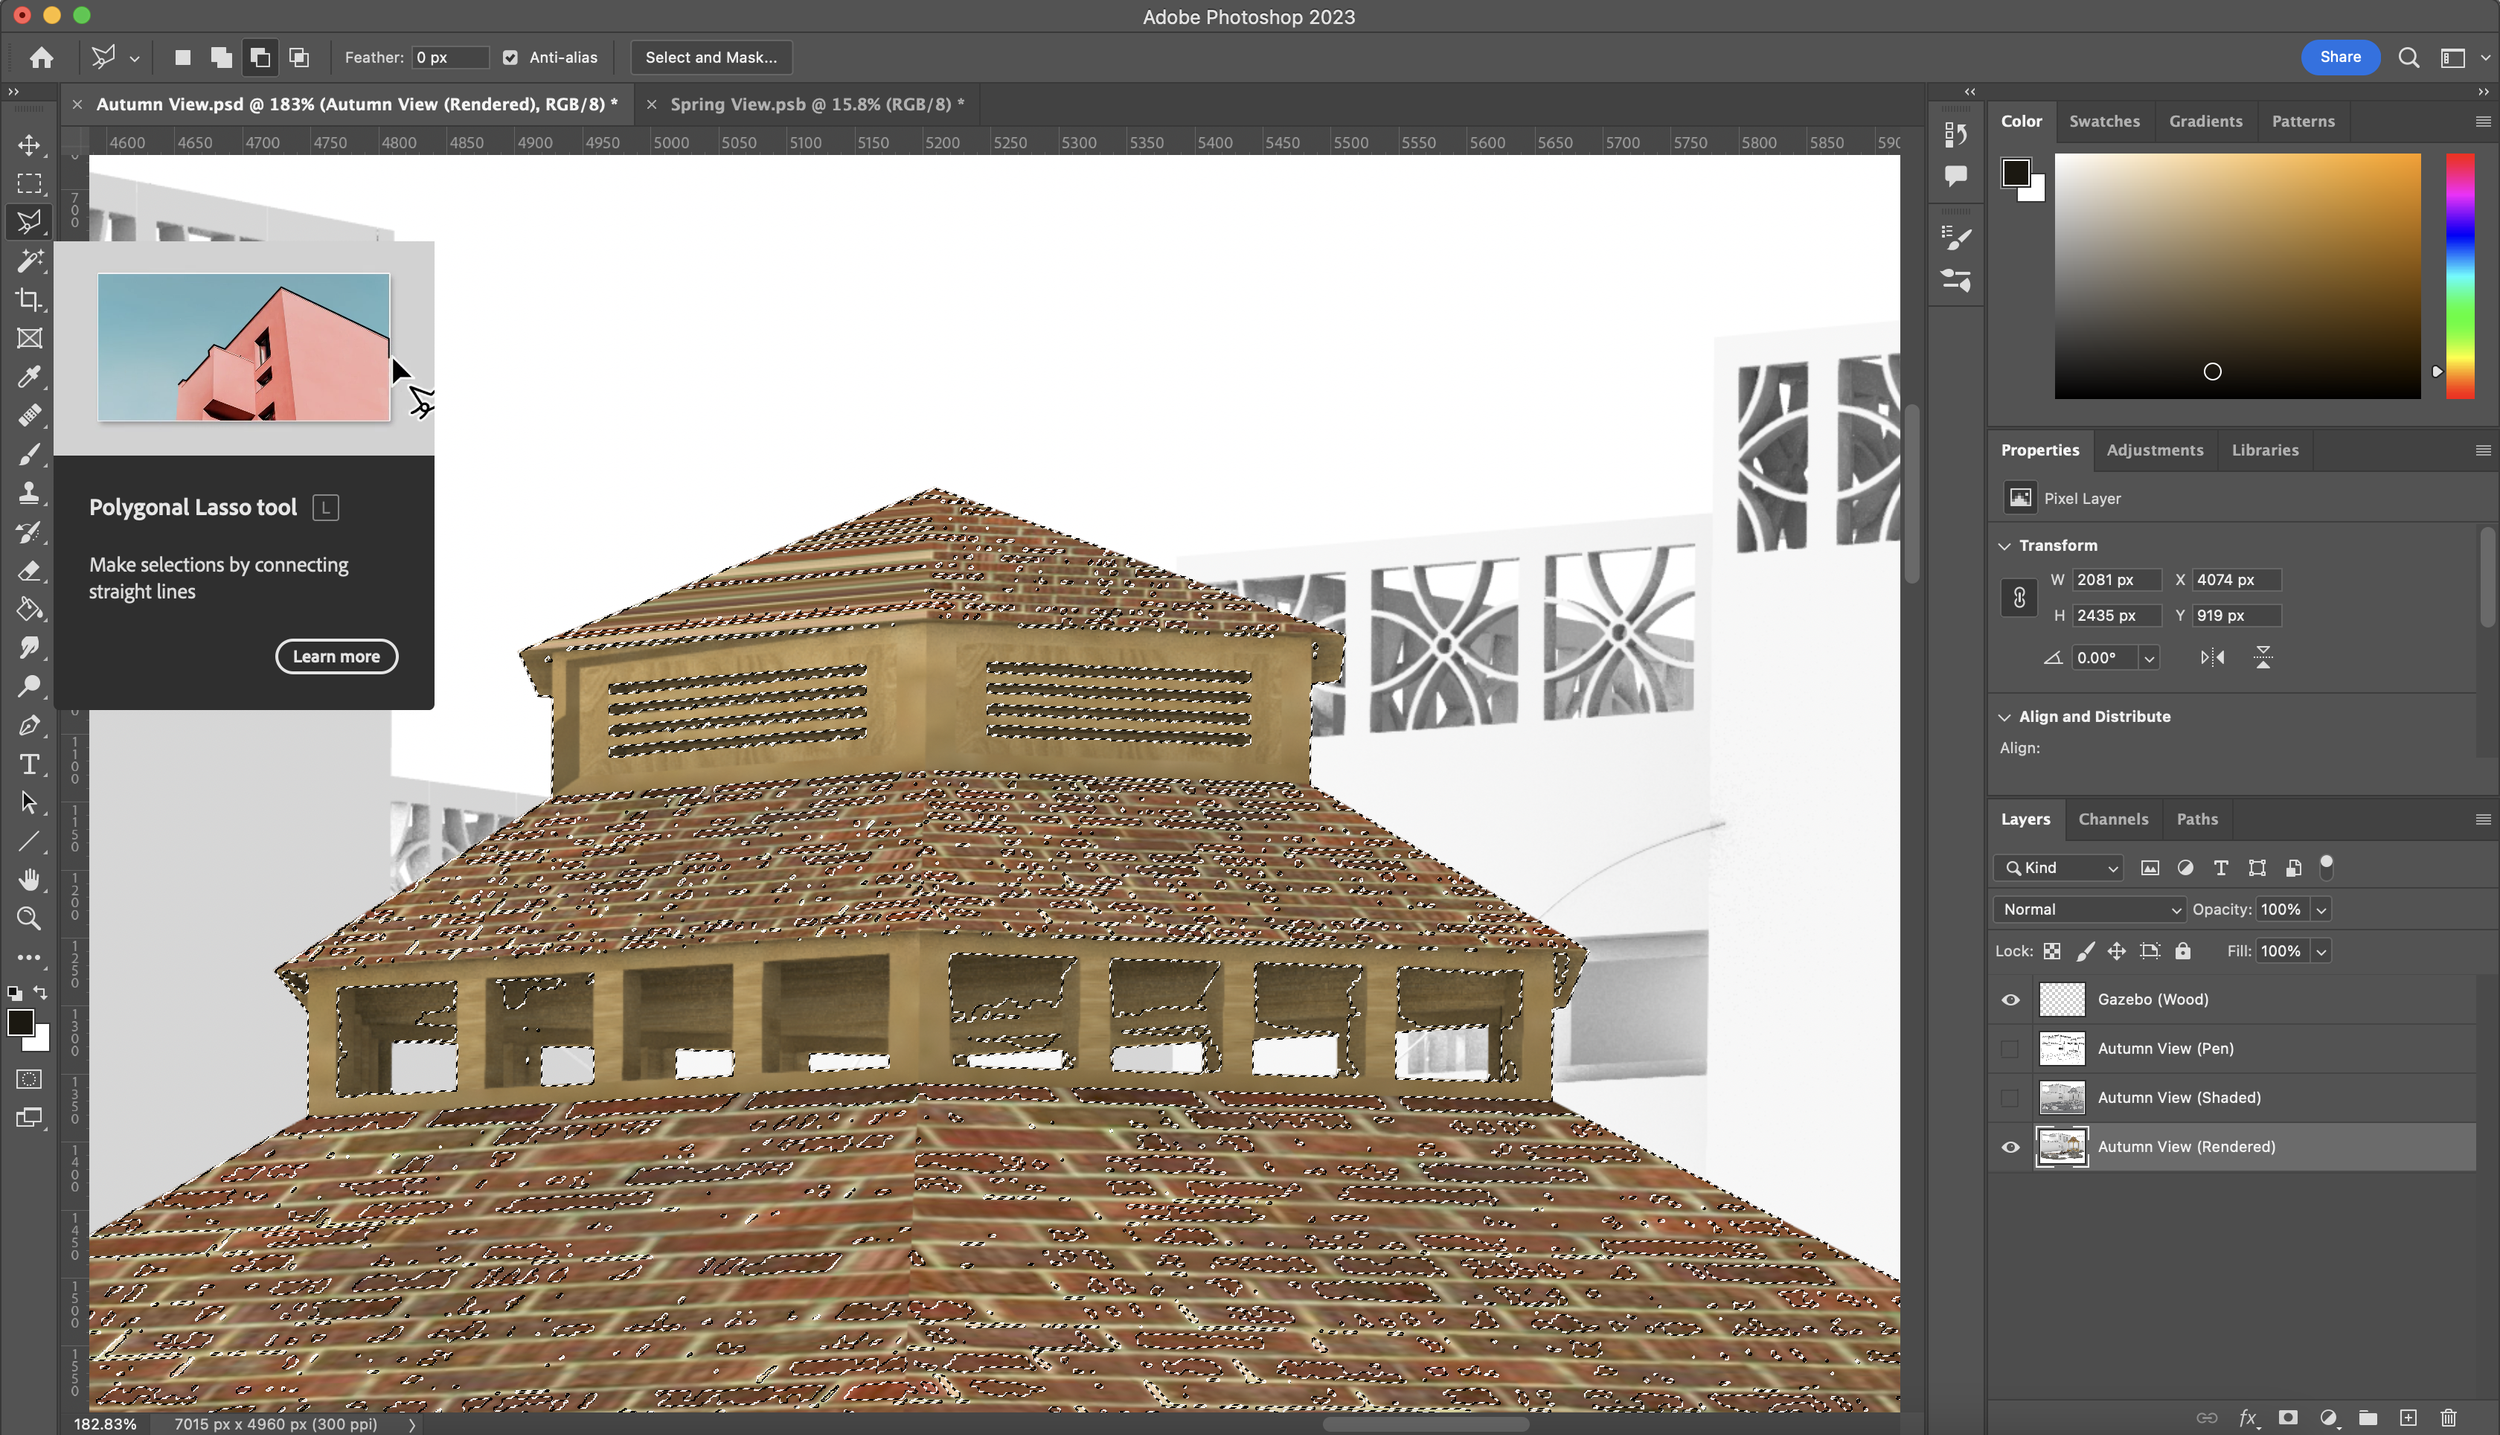
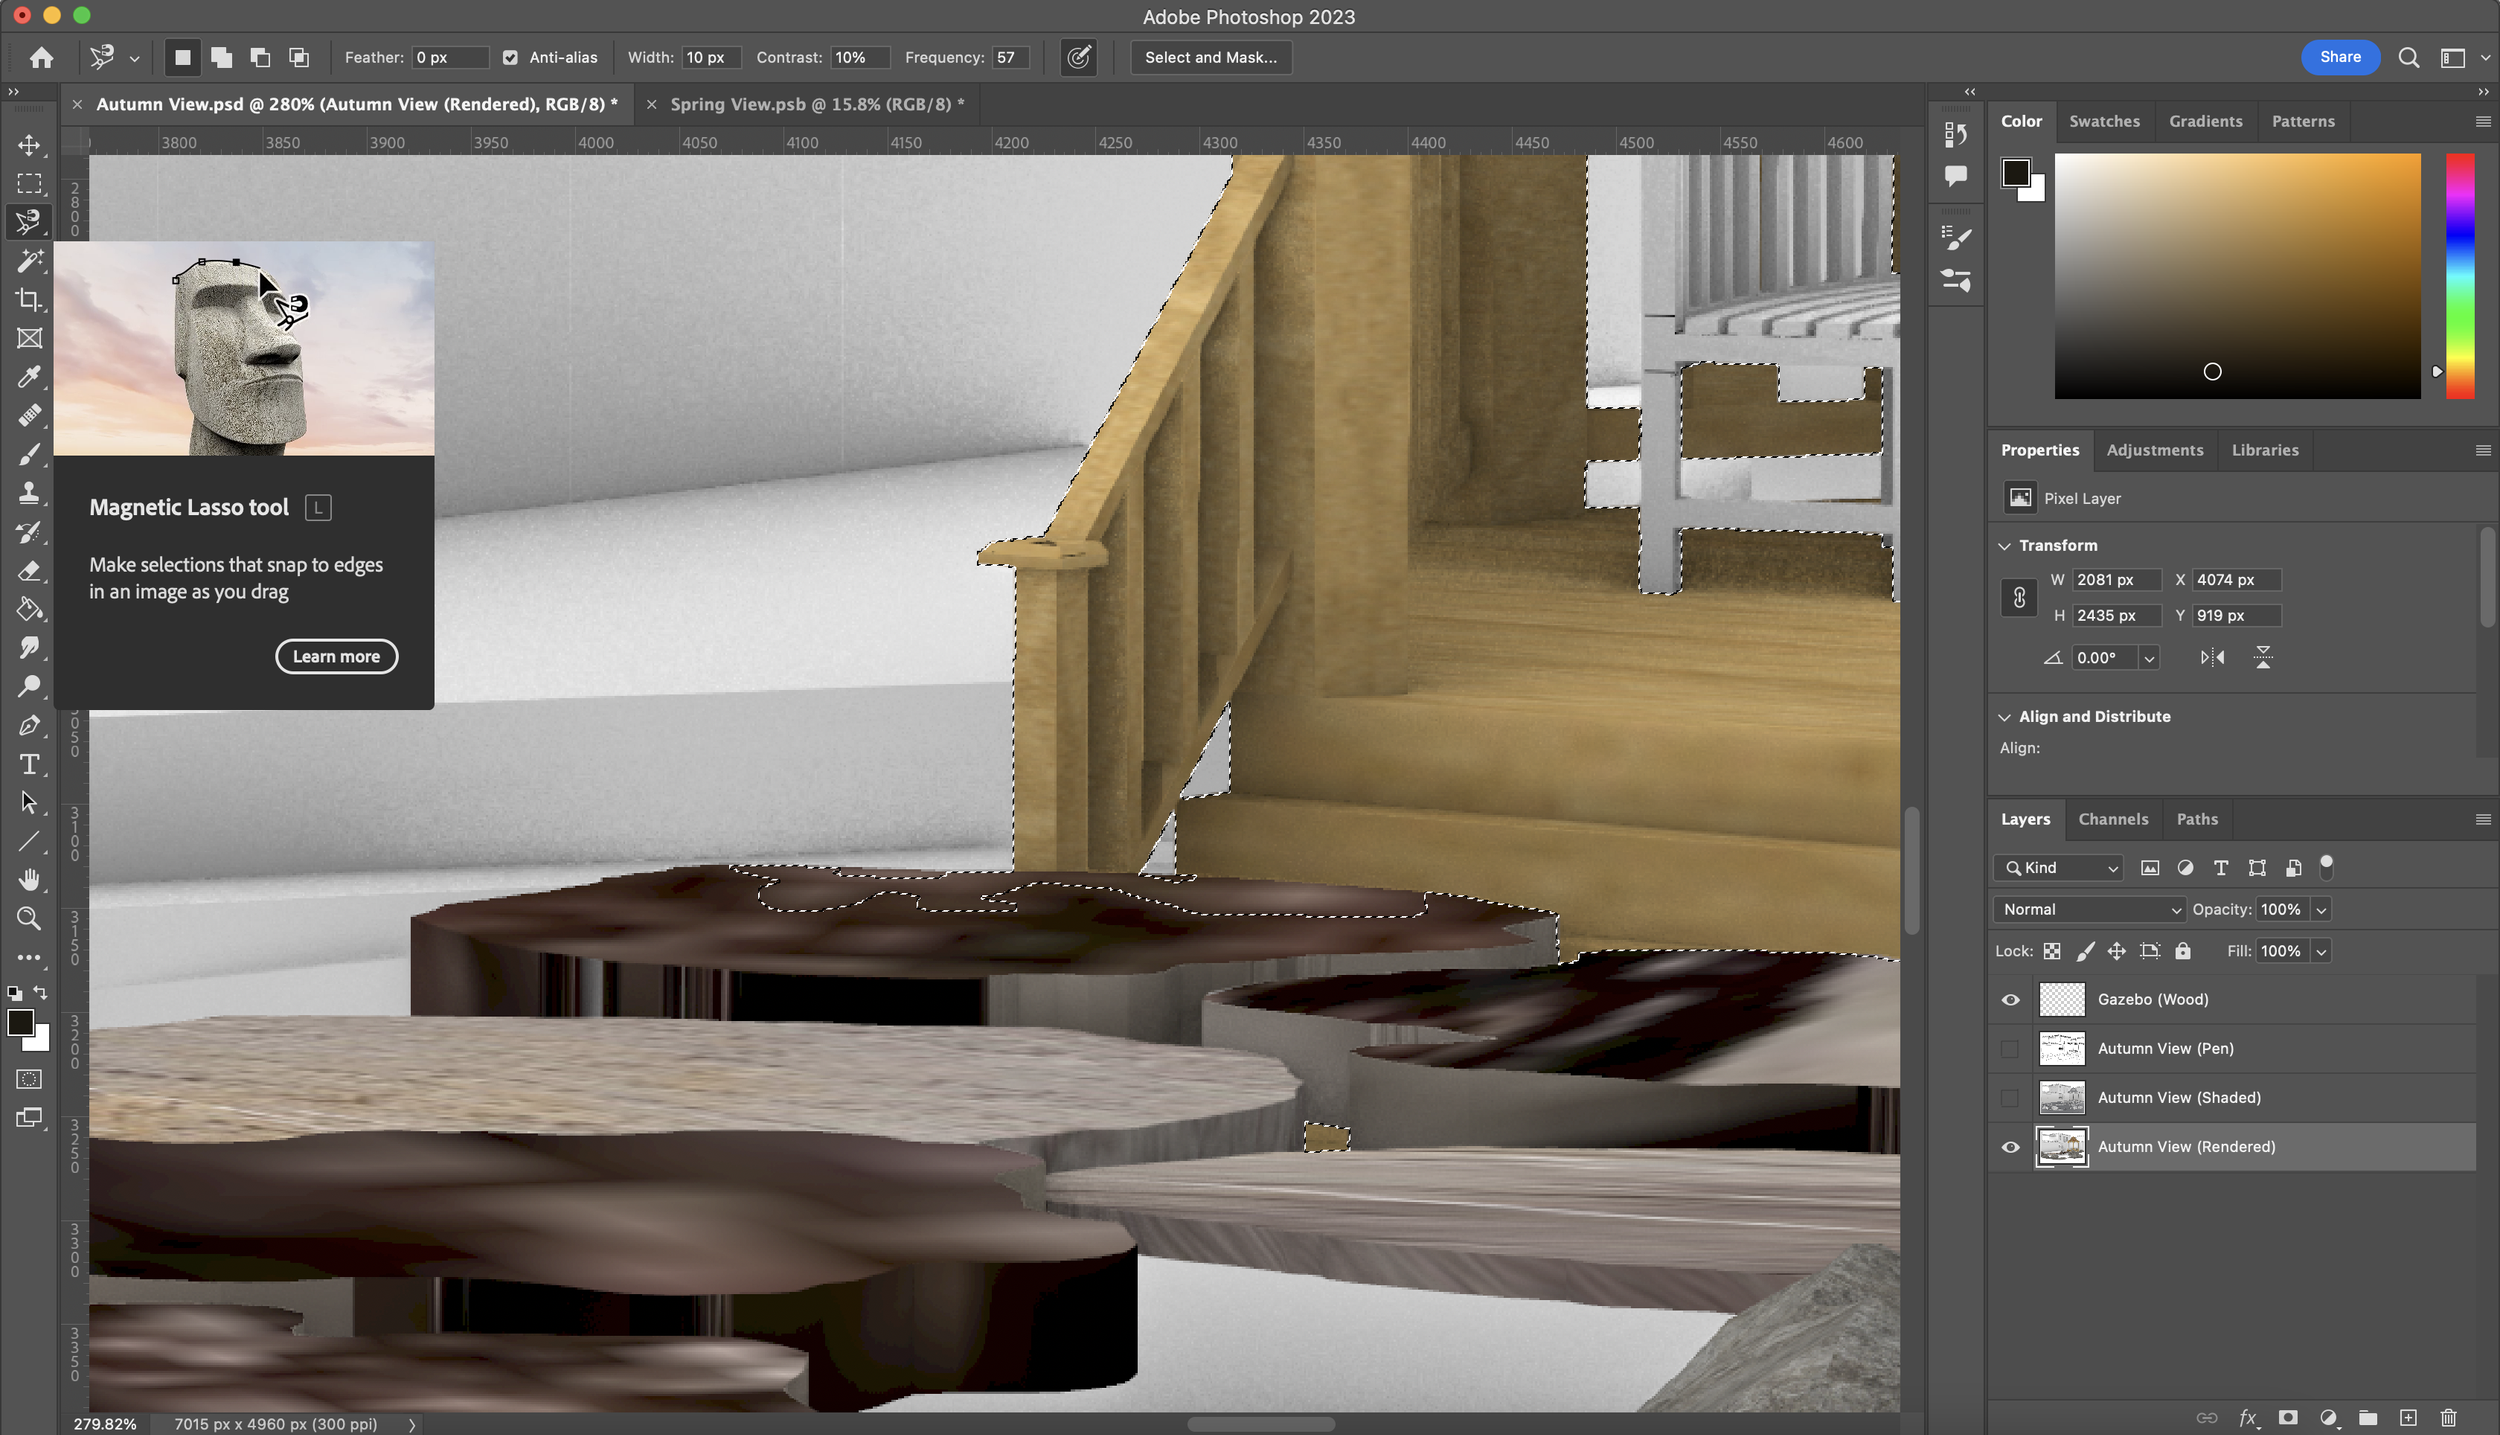
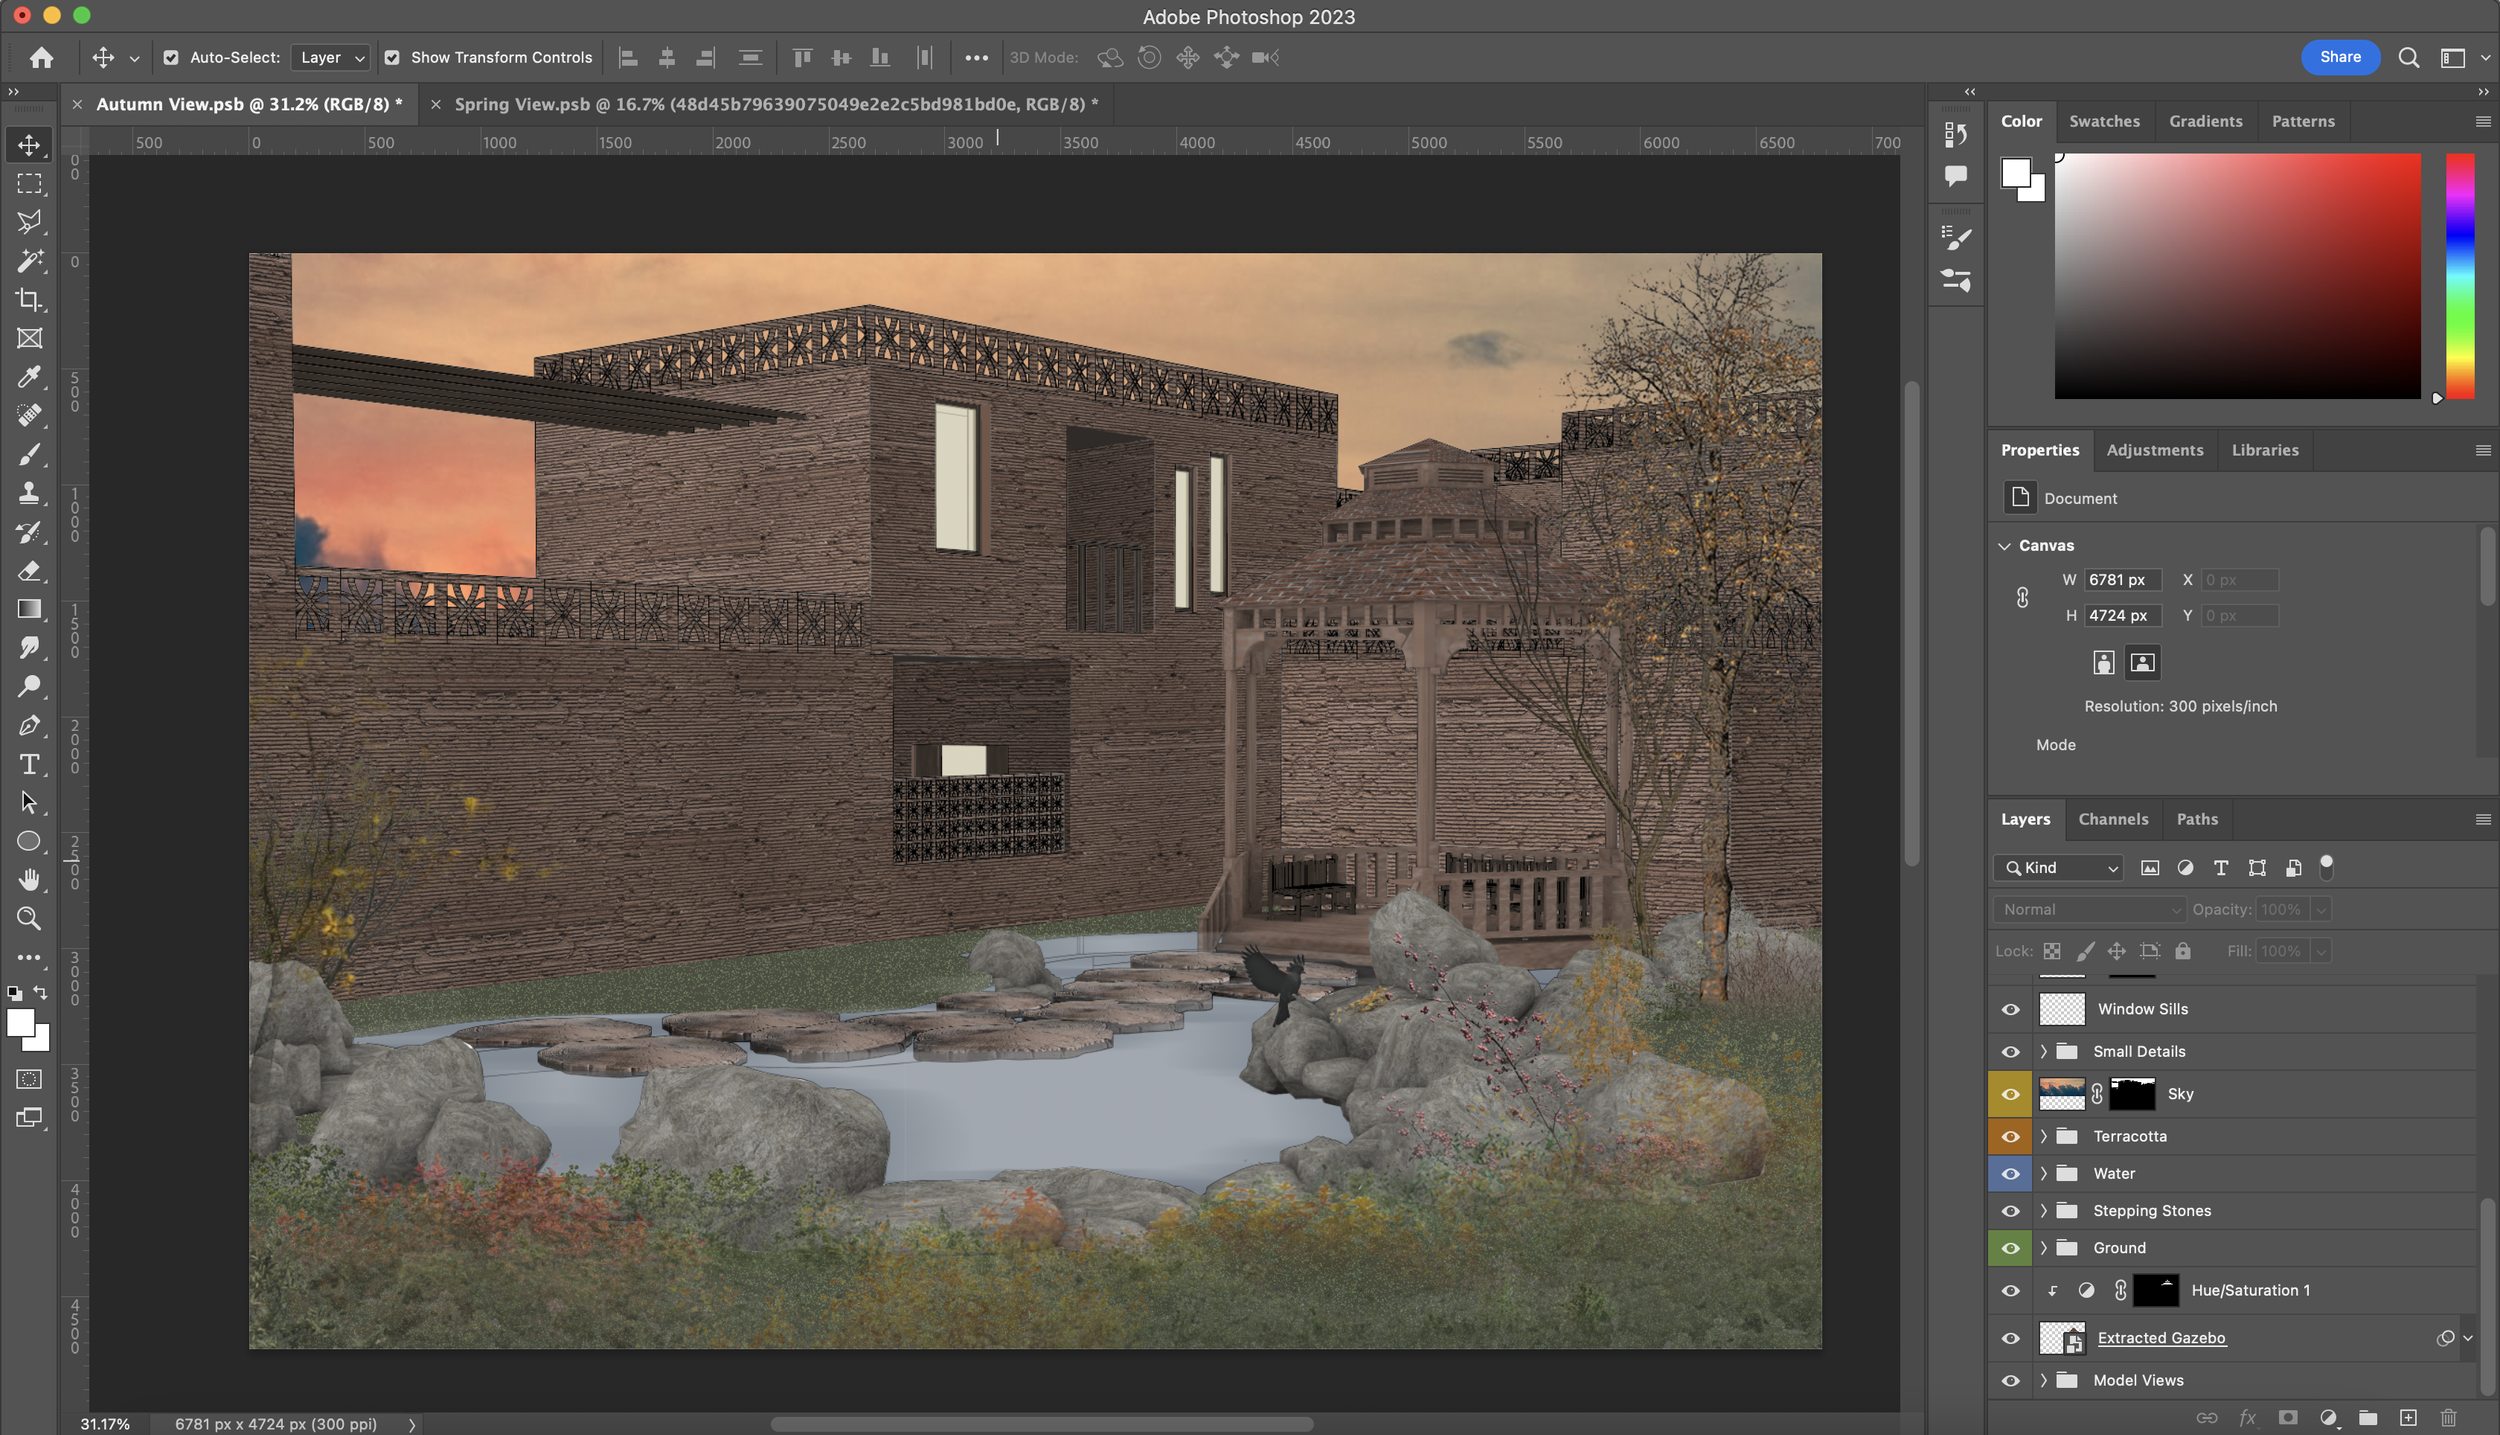
As I mentioned, one of the first things I’d like to do is extract anything I know I’ll want to keep once I’ve edited. In this example, the rocks and gazebo are great starting points instead of me working with the ‘Pen’ version and textures to reach something similar.
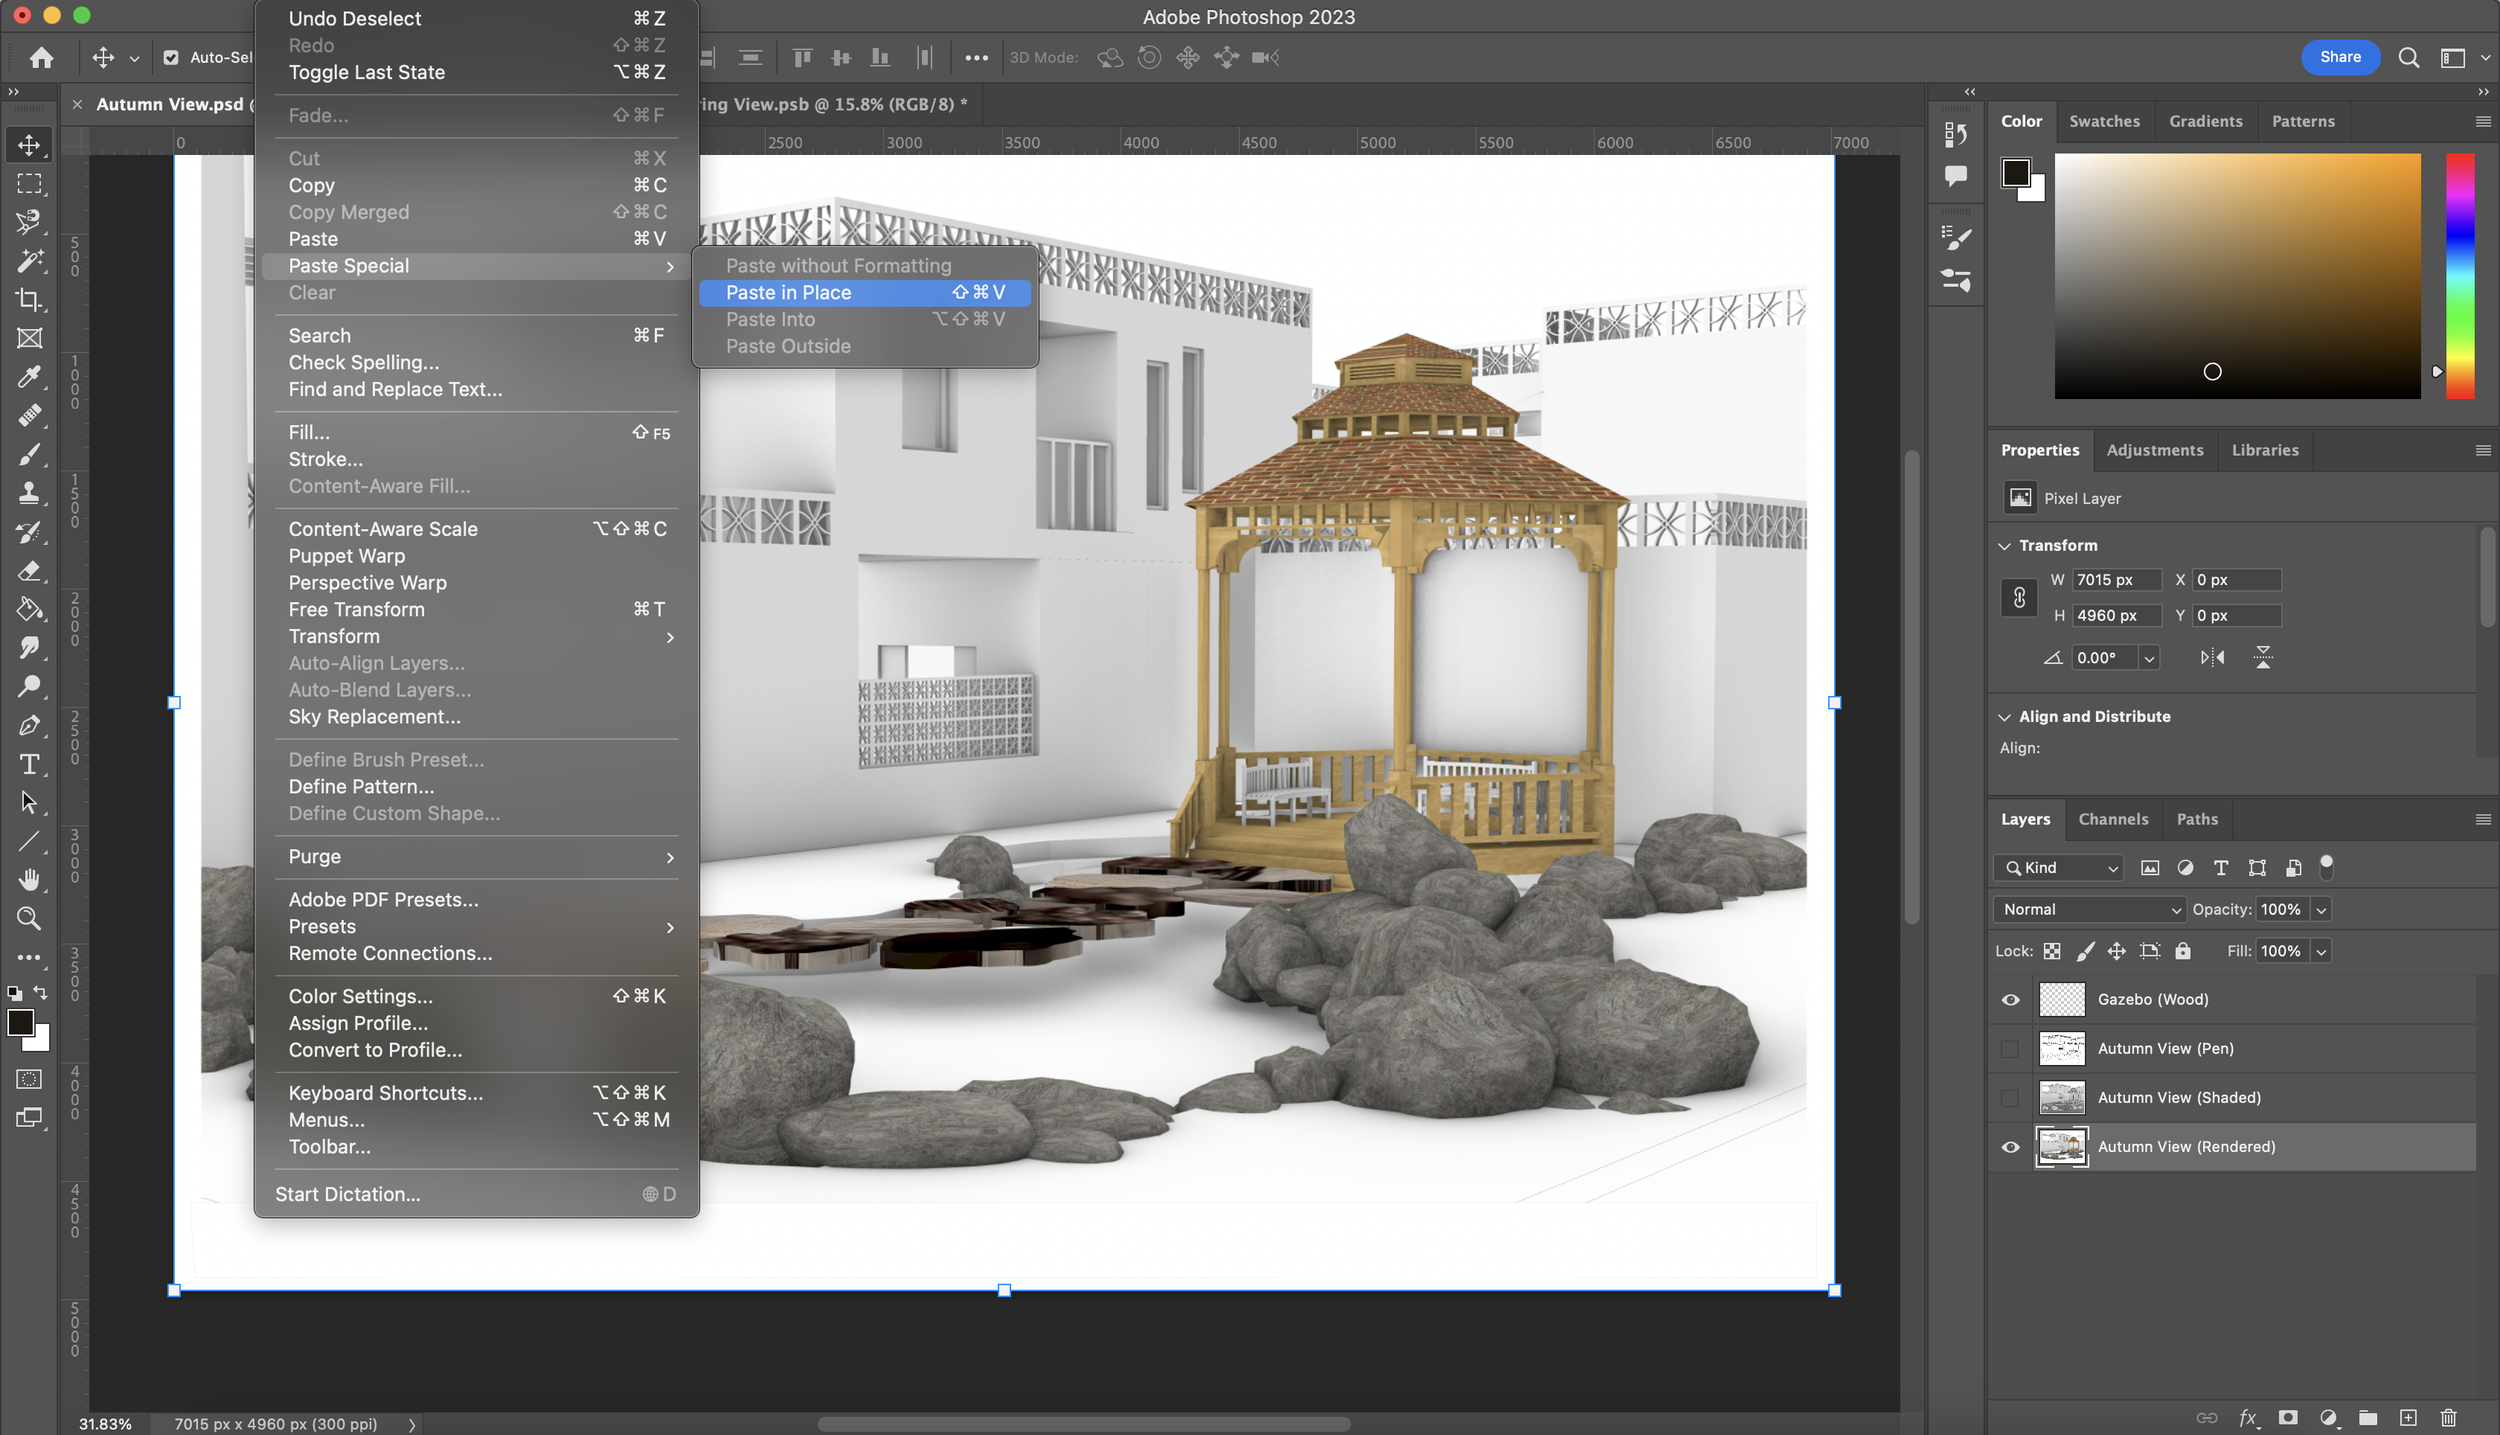
To do this, I’ll be using a combination of the ‘Magic Wand Tool’, ‘Polygonal Lasso Tool’ and ‘Magnetic Lasso Tool’ to select the gazebo. Once selected, I’ll be copying using ‘Ctrl + C’ or ‘Cmd + C’ depending on if you’re a PC or Mac user. Then go into Edit -> Paste Special -> Paste in Place to ensure it is in the exact same location as the ‘Rendered’ view behind. The extracted gazebo will be placed on a different layer when you paste. If this is not the case, you can just make sure to create a new layer using the boxed + icon as shown on the bottom right in the ‘Layers’ panel before pasting.
I’ll be using the same method to extract the rocks too.
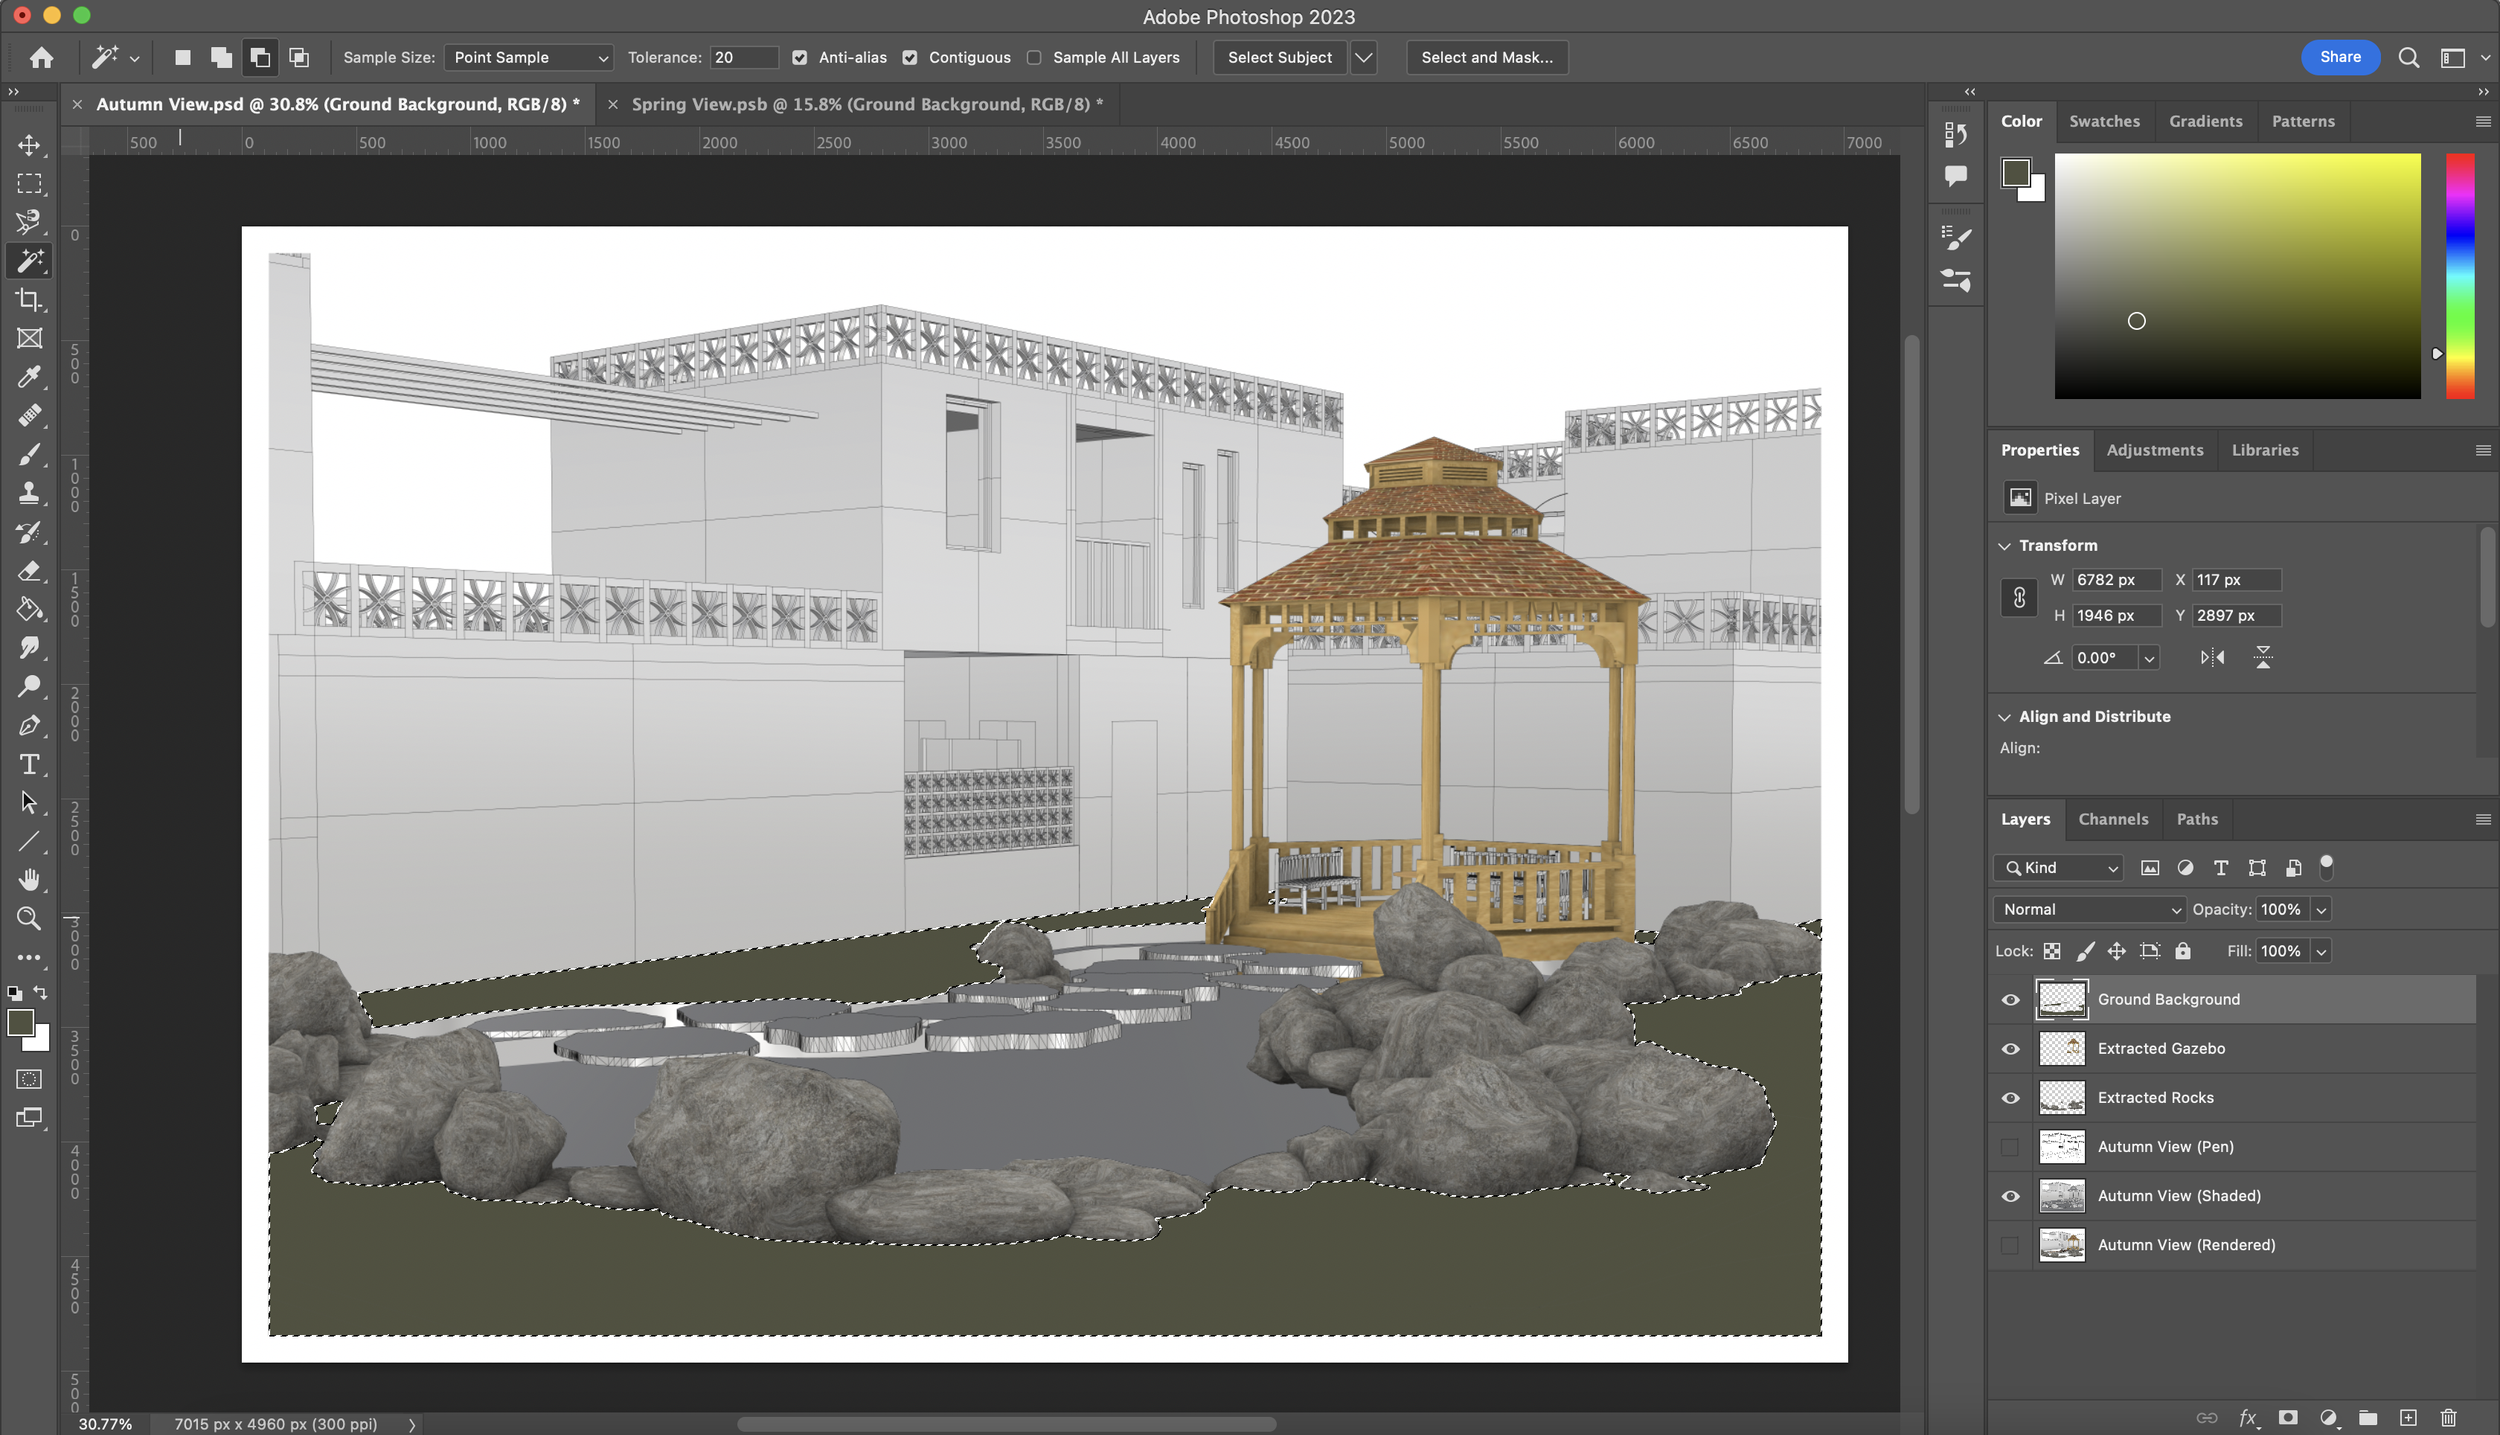
Setting out the Basic Ground
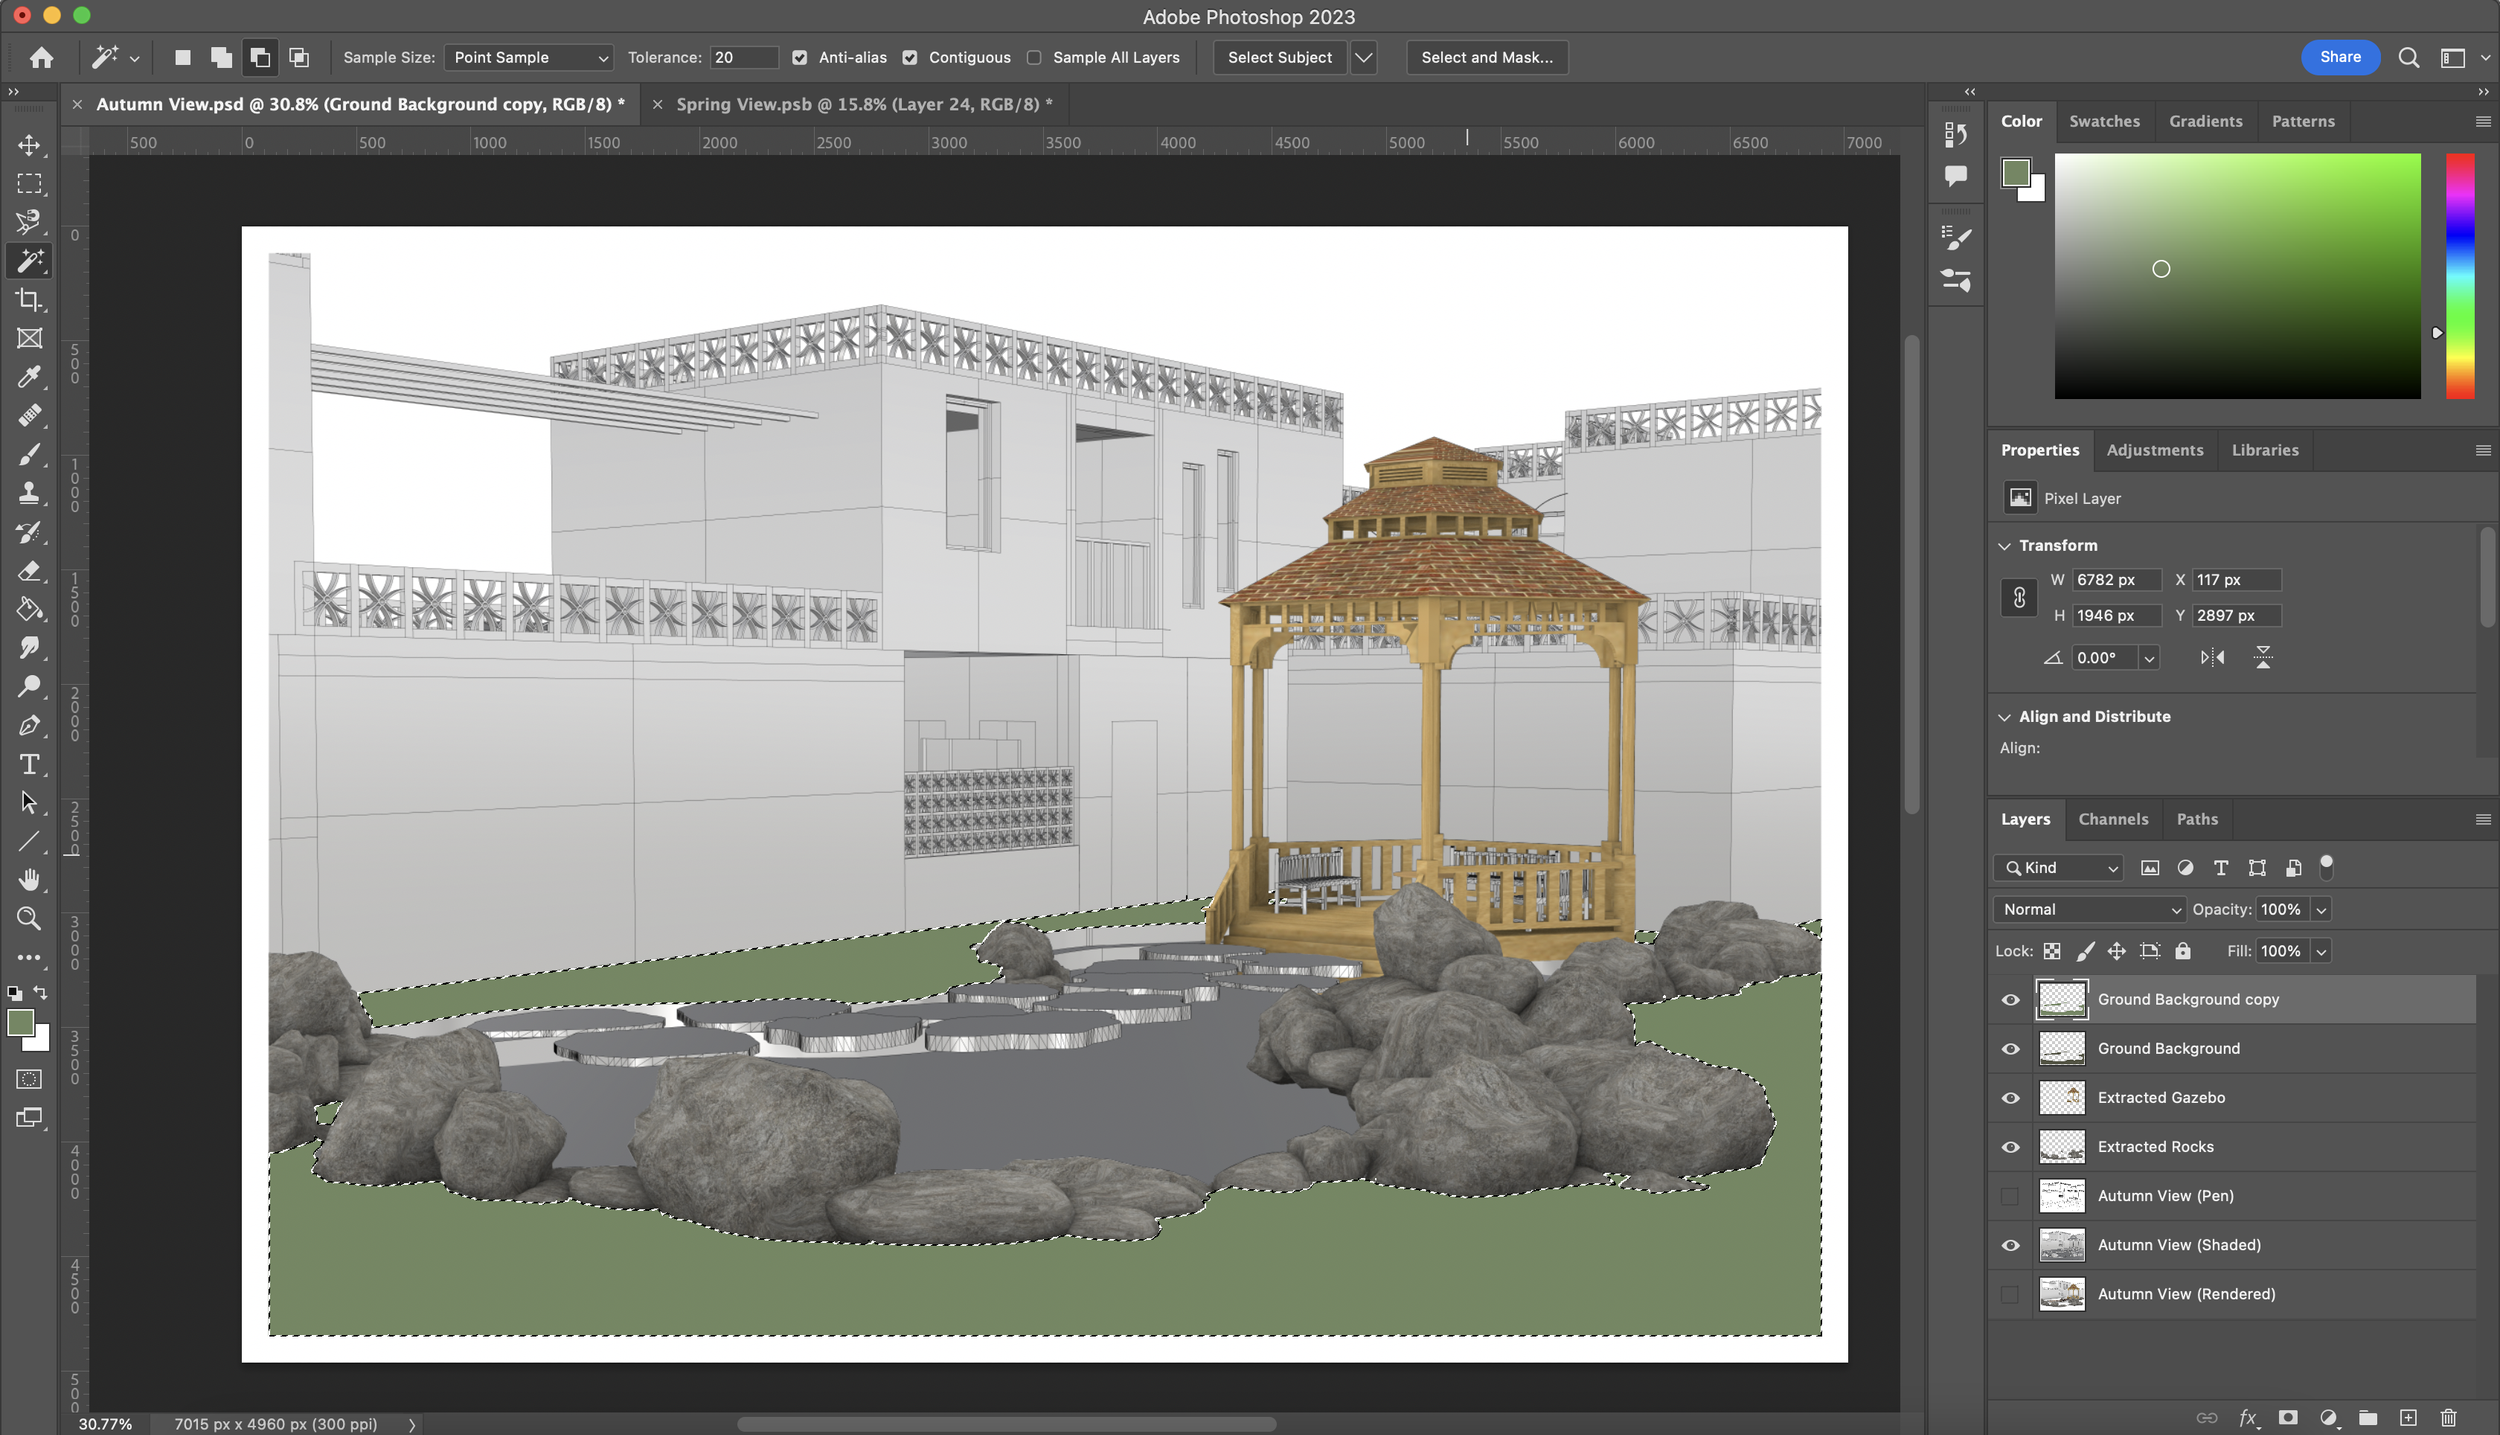
Next, I’ll be sharing another trick taught by a Master's student a few years ago that I still use to this day to create imitation grass on Photoshop. You will need to select using the most efficient model view layer that’ll quickly select the ground using the ‘Magic Wand Tool’, create a new layer whilst everything is selected and select a dark green colour using the Colour panel as shown on the top right. The RGB colour code that I have used is R: 74 G:77 B:62
Now that you have chosen your green colour, we will fill the selected area by pressing ‘Ctrl + Backspace’ or ‘Cmd + Delete/Backspace’. This will automatically fill in the selected area. We’ll also be creating the same layer again but with a lighter green option so create another layer and make the selection process a lot quicker, since we have already done it once, you can hover over the darker green preview box next to the layer name, hold ‘Ctrl’ or ‘Cmd’ and click the preview box. This will automatically select everything that is on that layer. Switch back to the new layer that we created and fill it in using a lighter green the same way we did for the dark green fill. The RGB colour code that I have used is R:113 G: 135 B: 96
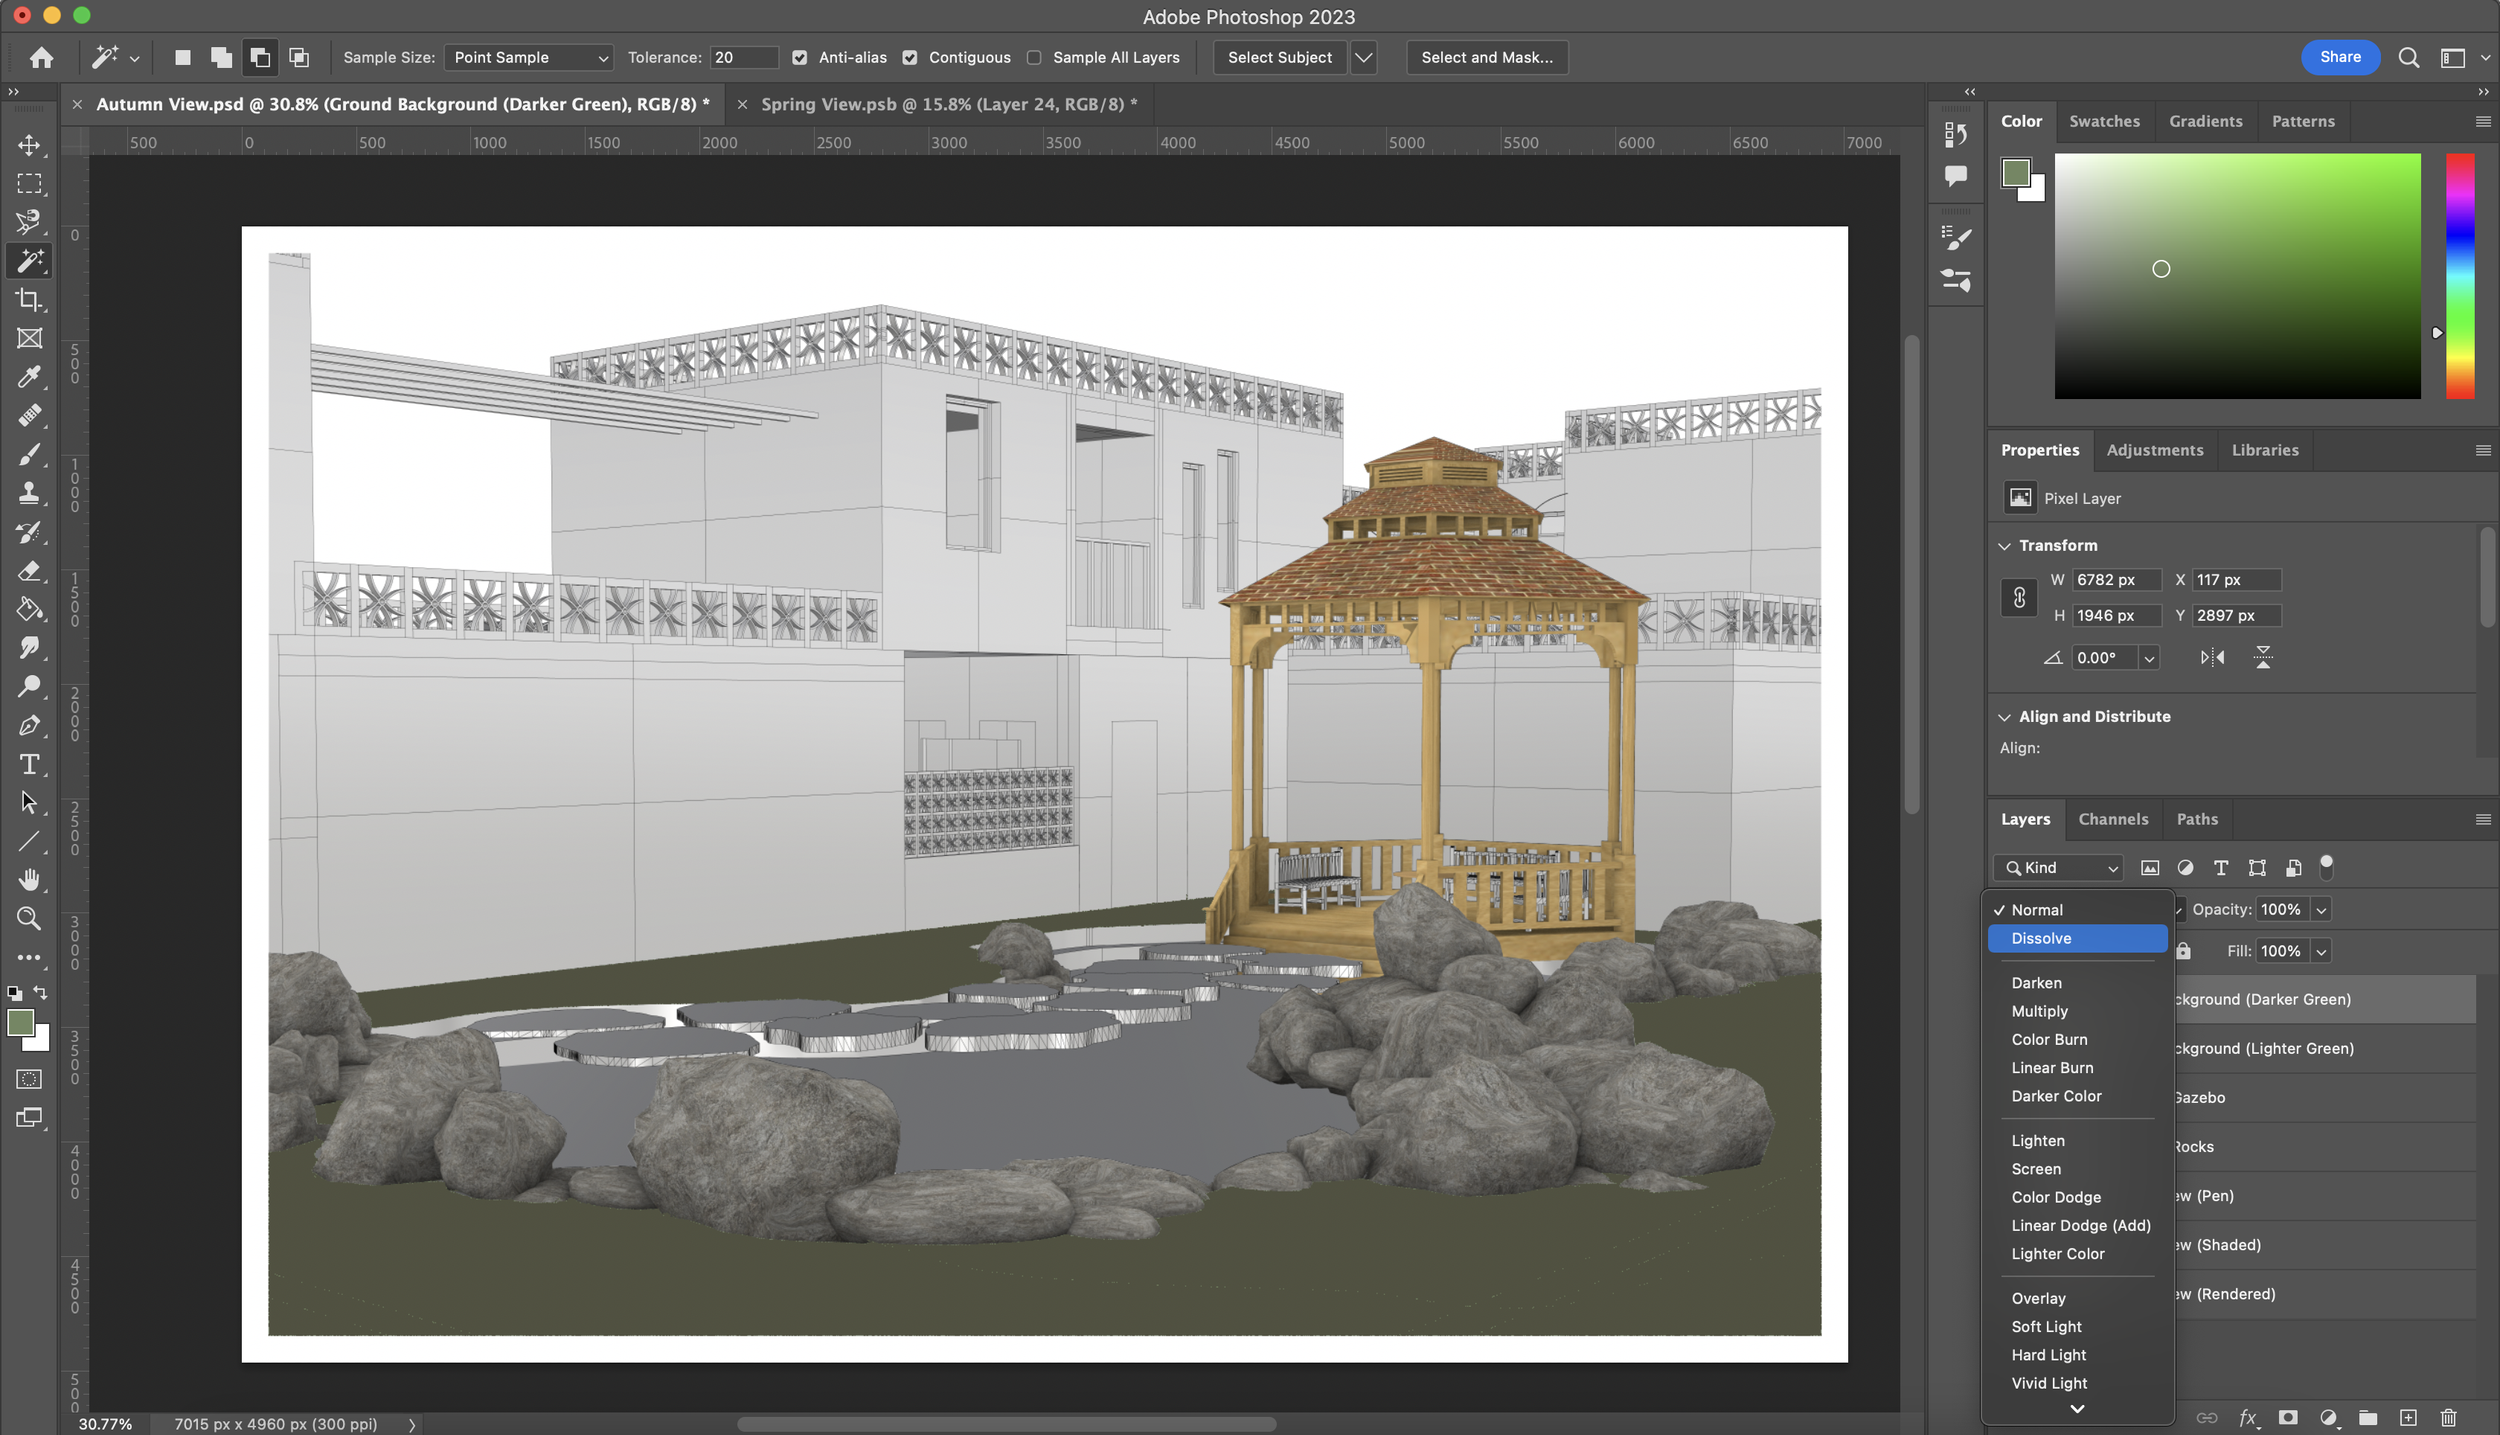
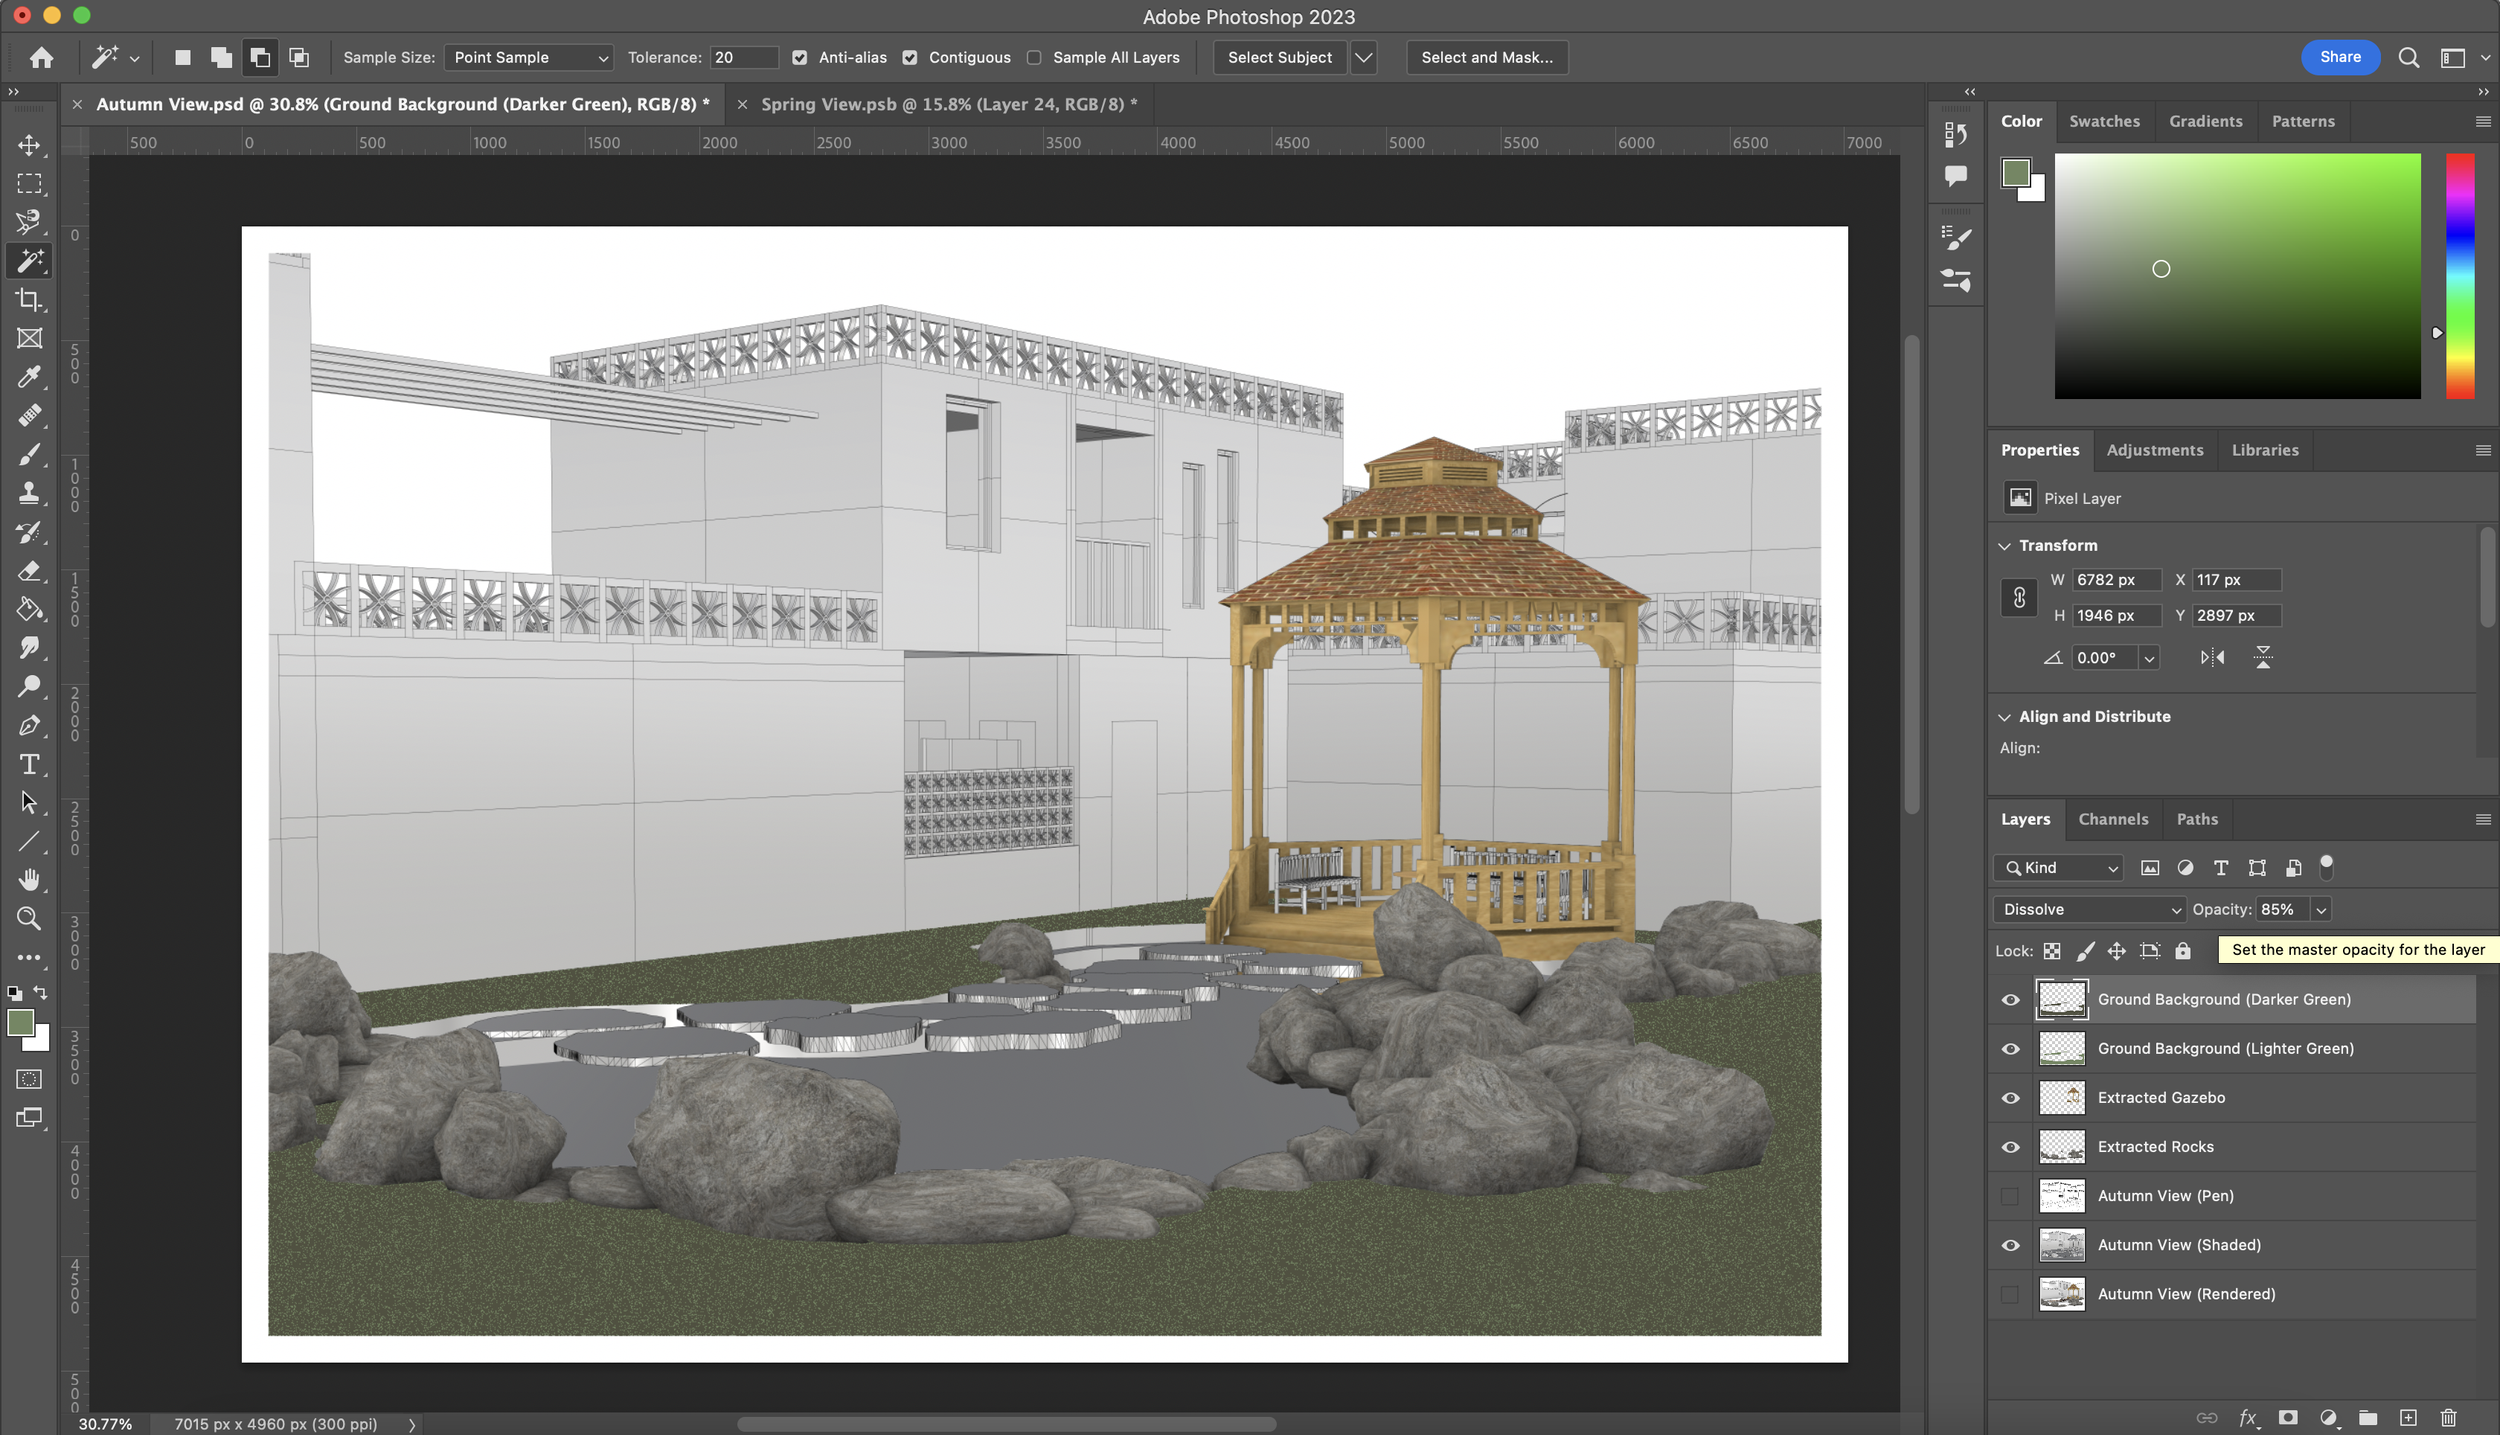
This is the fun part. Making sure the darker green layer is on top of the lighter green layer, change the blend mode option of the darker green layer to ‘Dissolve’ and reduce the opacity to around 85%. You will see a noise effect appear which is what we will be using as the base for the ground until we add details such as plants/shrubs/trees/etc.
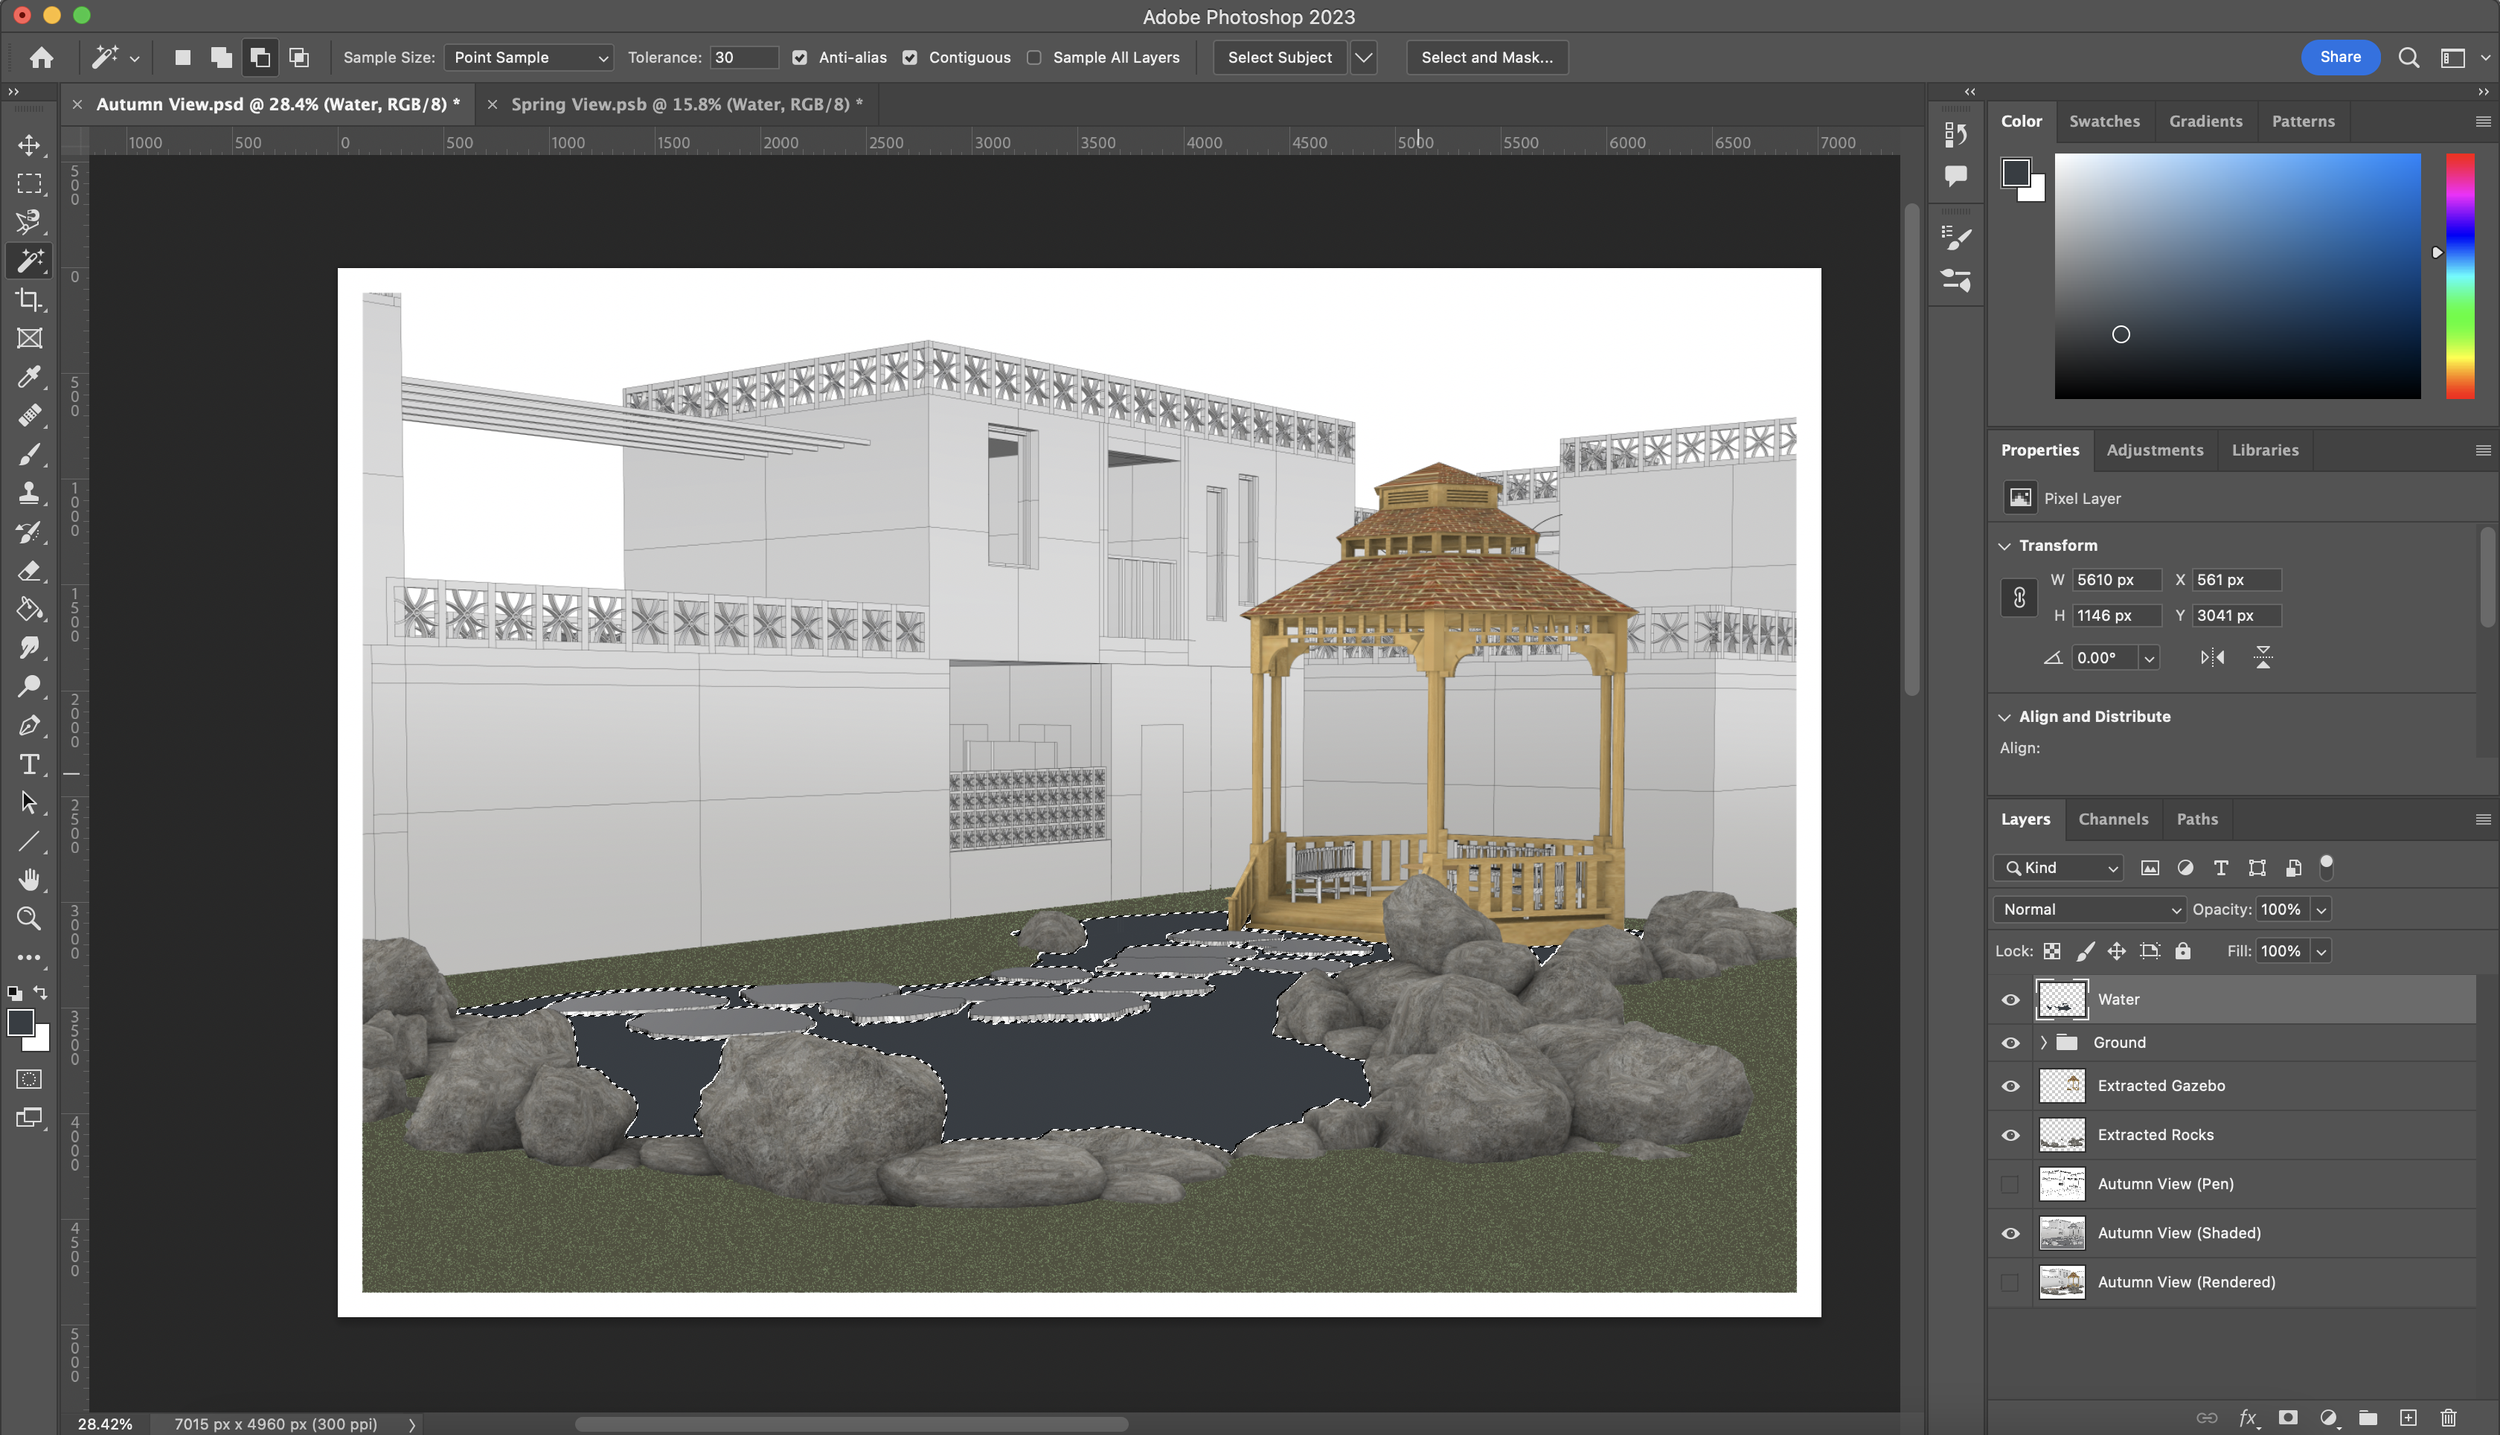
Body of Water
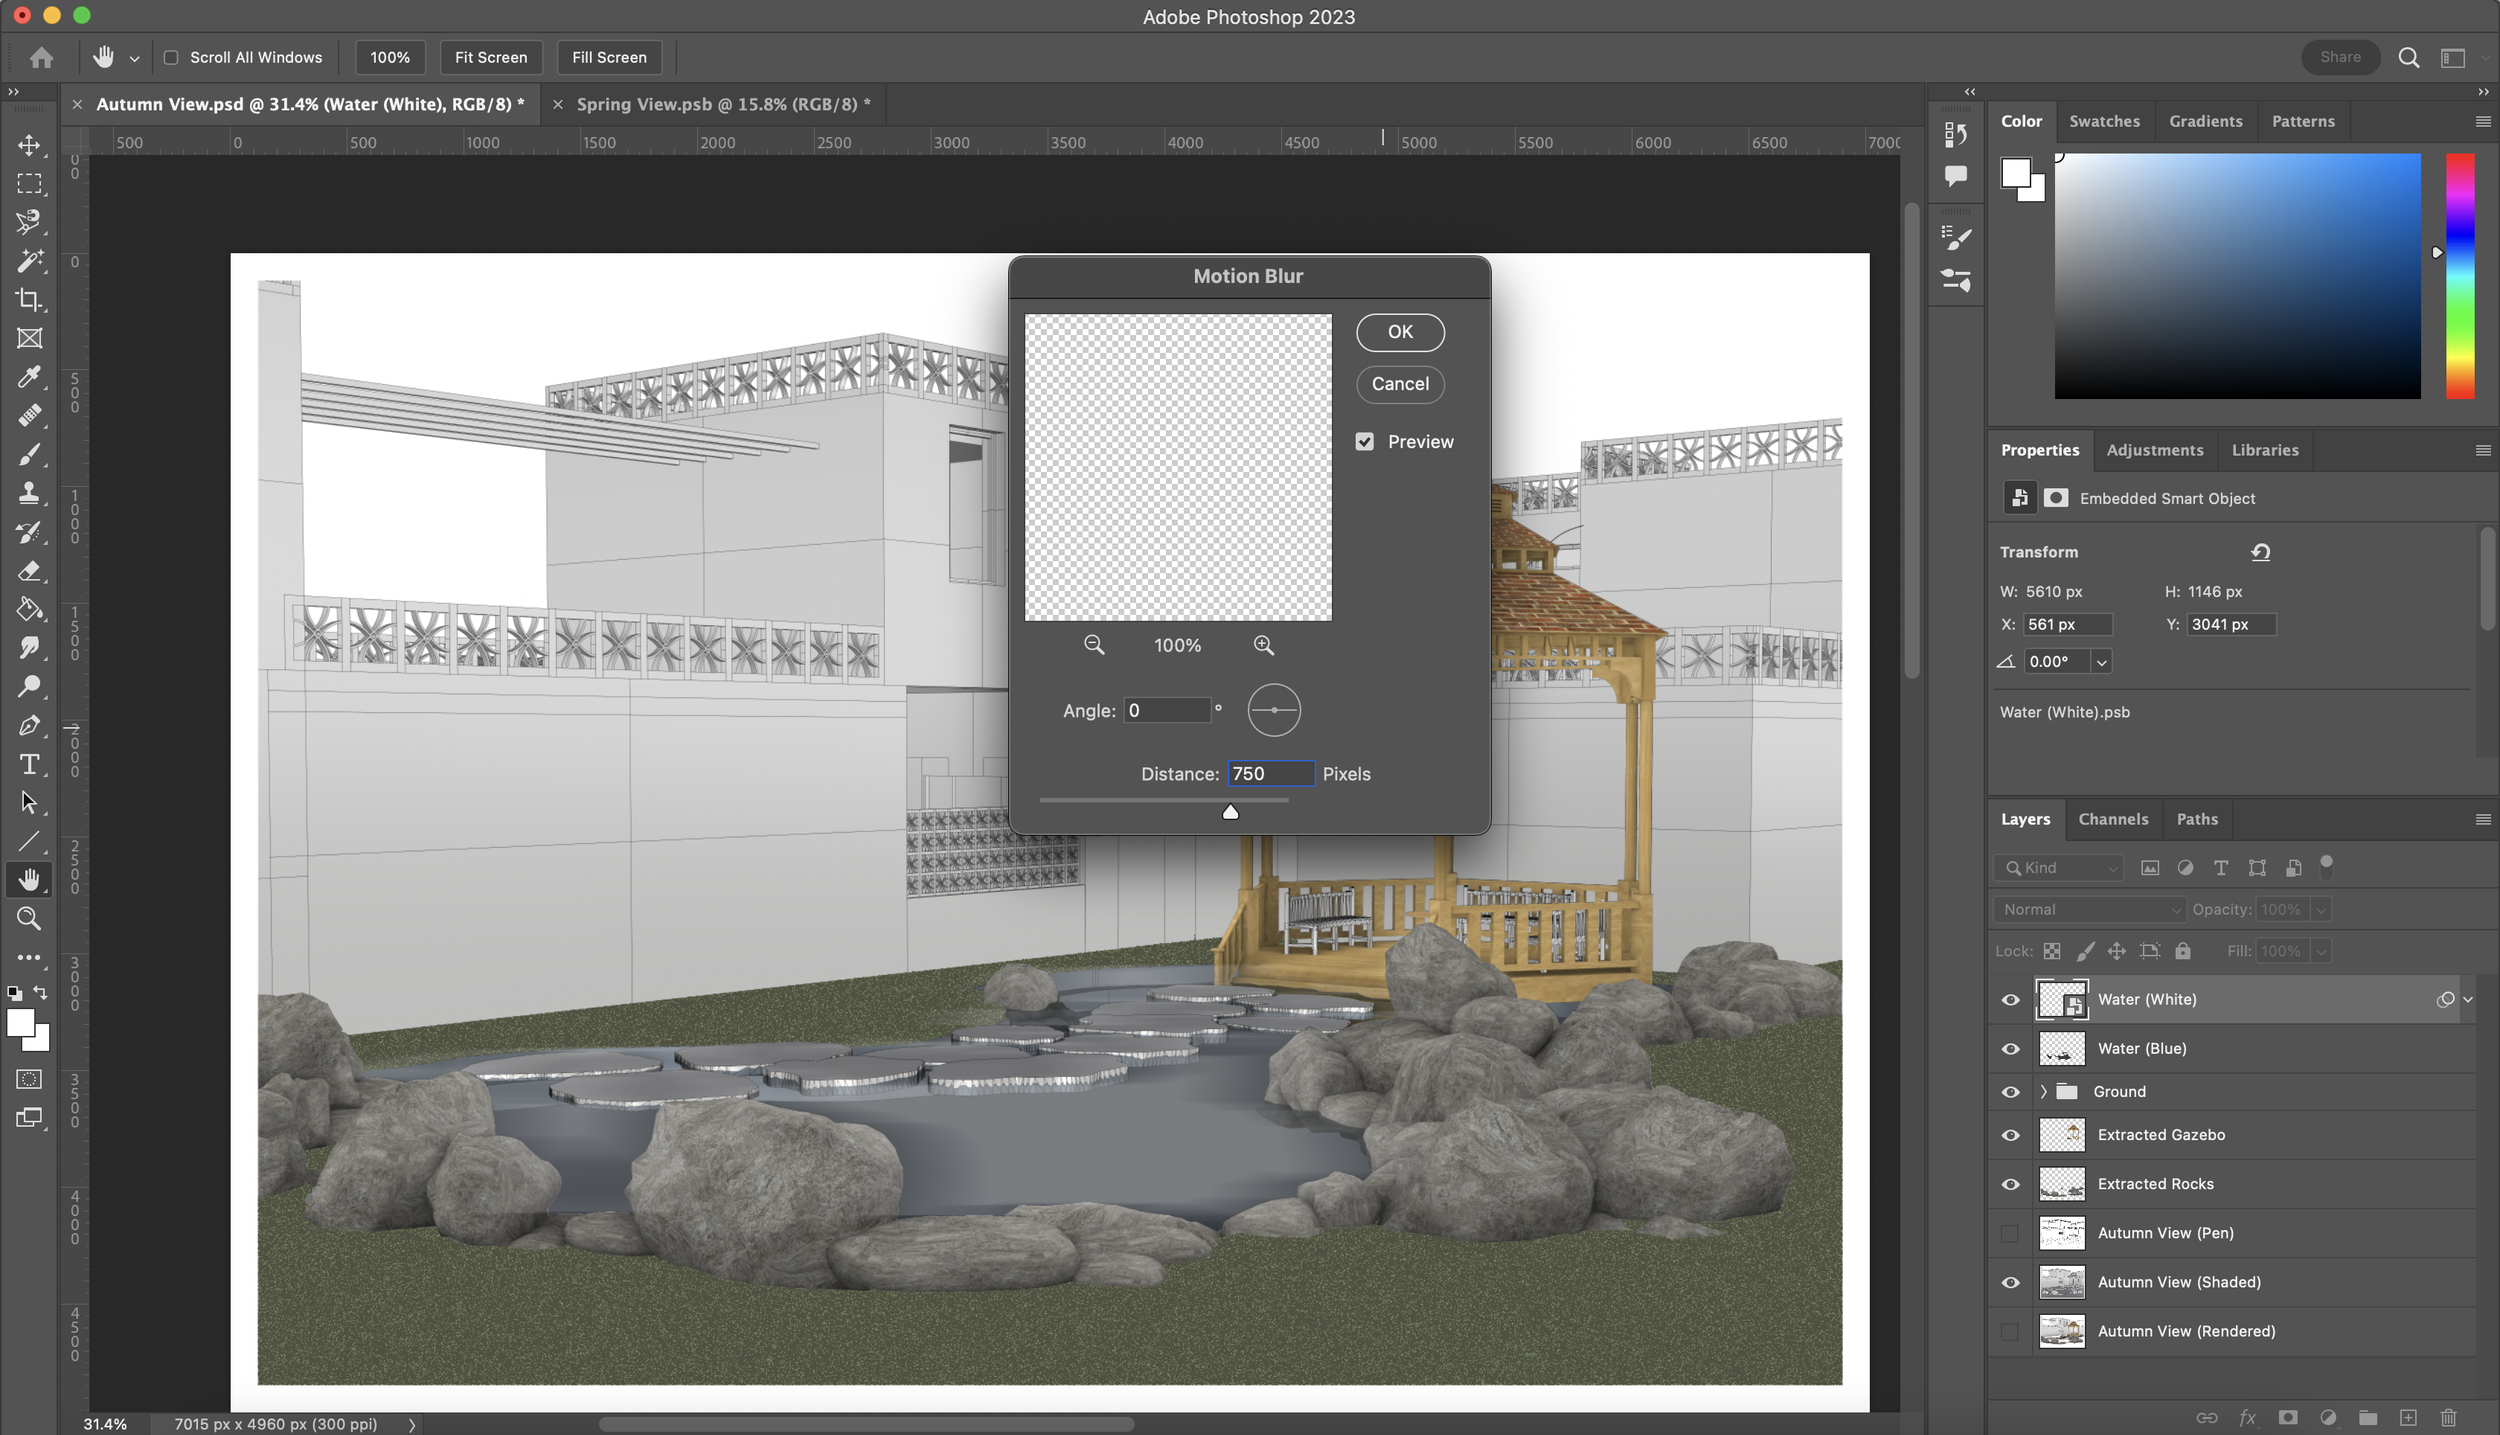
In this view, you can also see that there is a pond. A water effect might seem difficult to do and most tend to opt for a texture which sometimes looks quite tacky and bad in comparison to the rest of the view. This is how I’ve tackled creating a water effect using Photoshop tools. Select your area that’ll be filled with water using the best model view layer and a selection tool. In my case, I resorted back to using the ‘Magic Wand Tool’ and ‘Magnetic Lasso Tool’. Create a new layer and fill the selected area in a dull navy blue. The RBG colour code that I have used is R:55 G:61 B:67
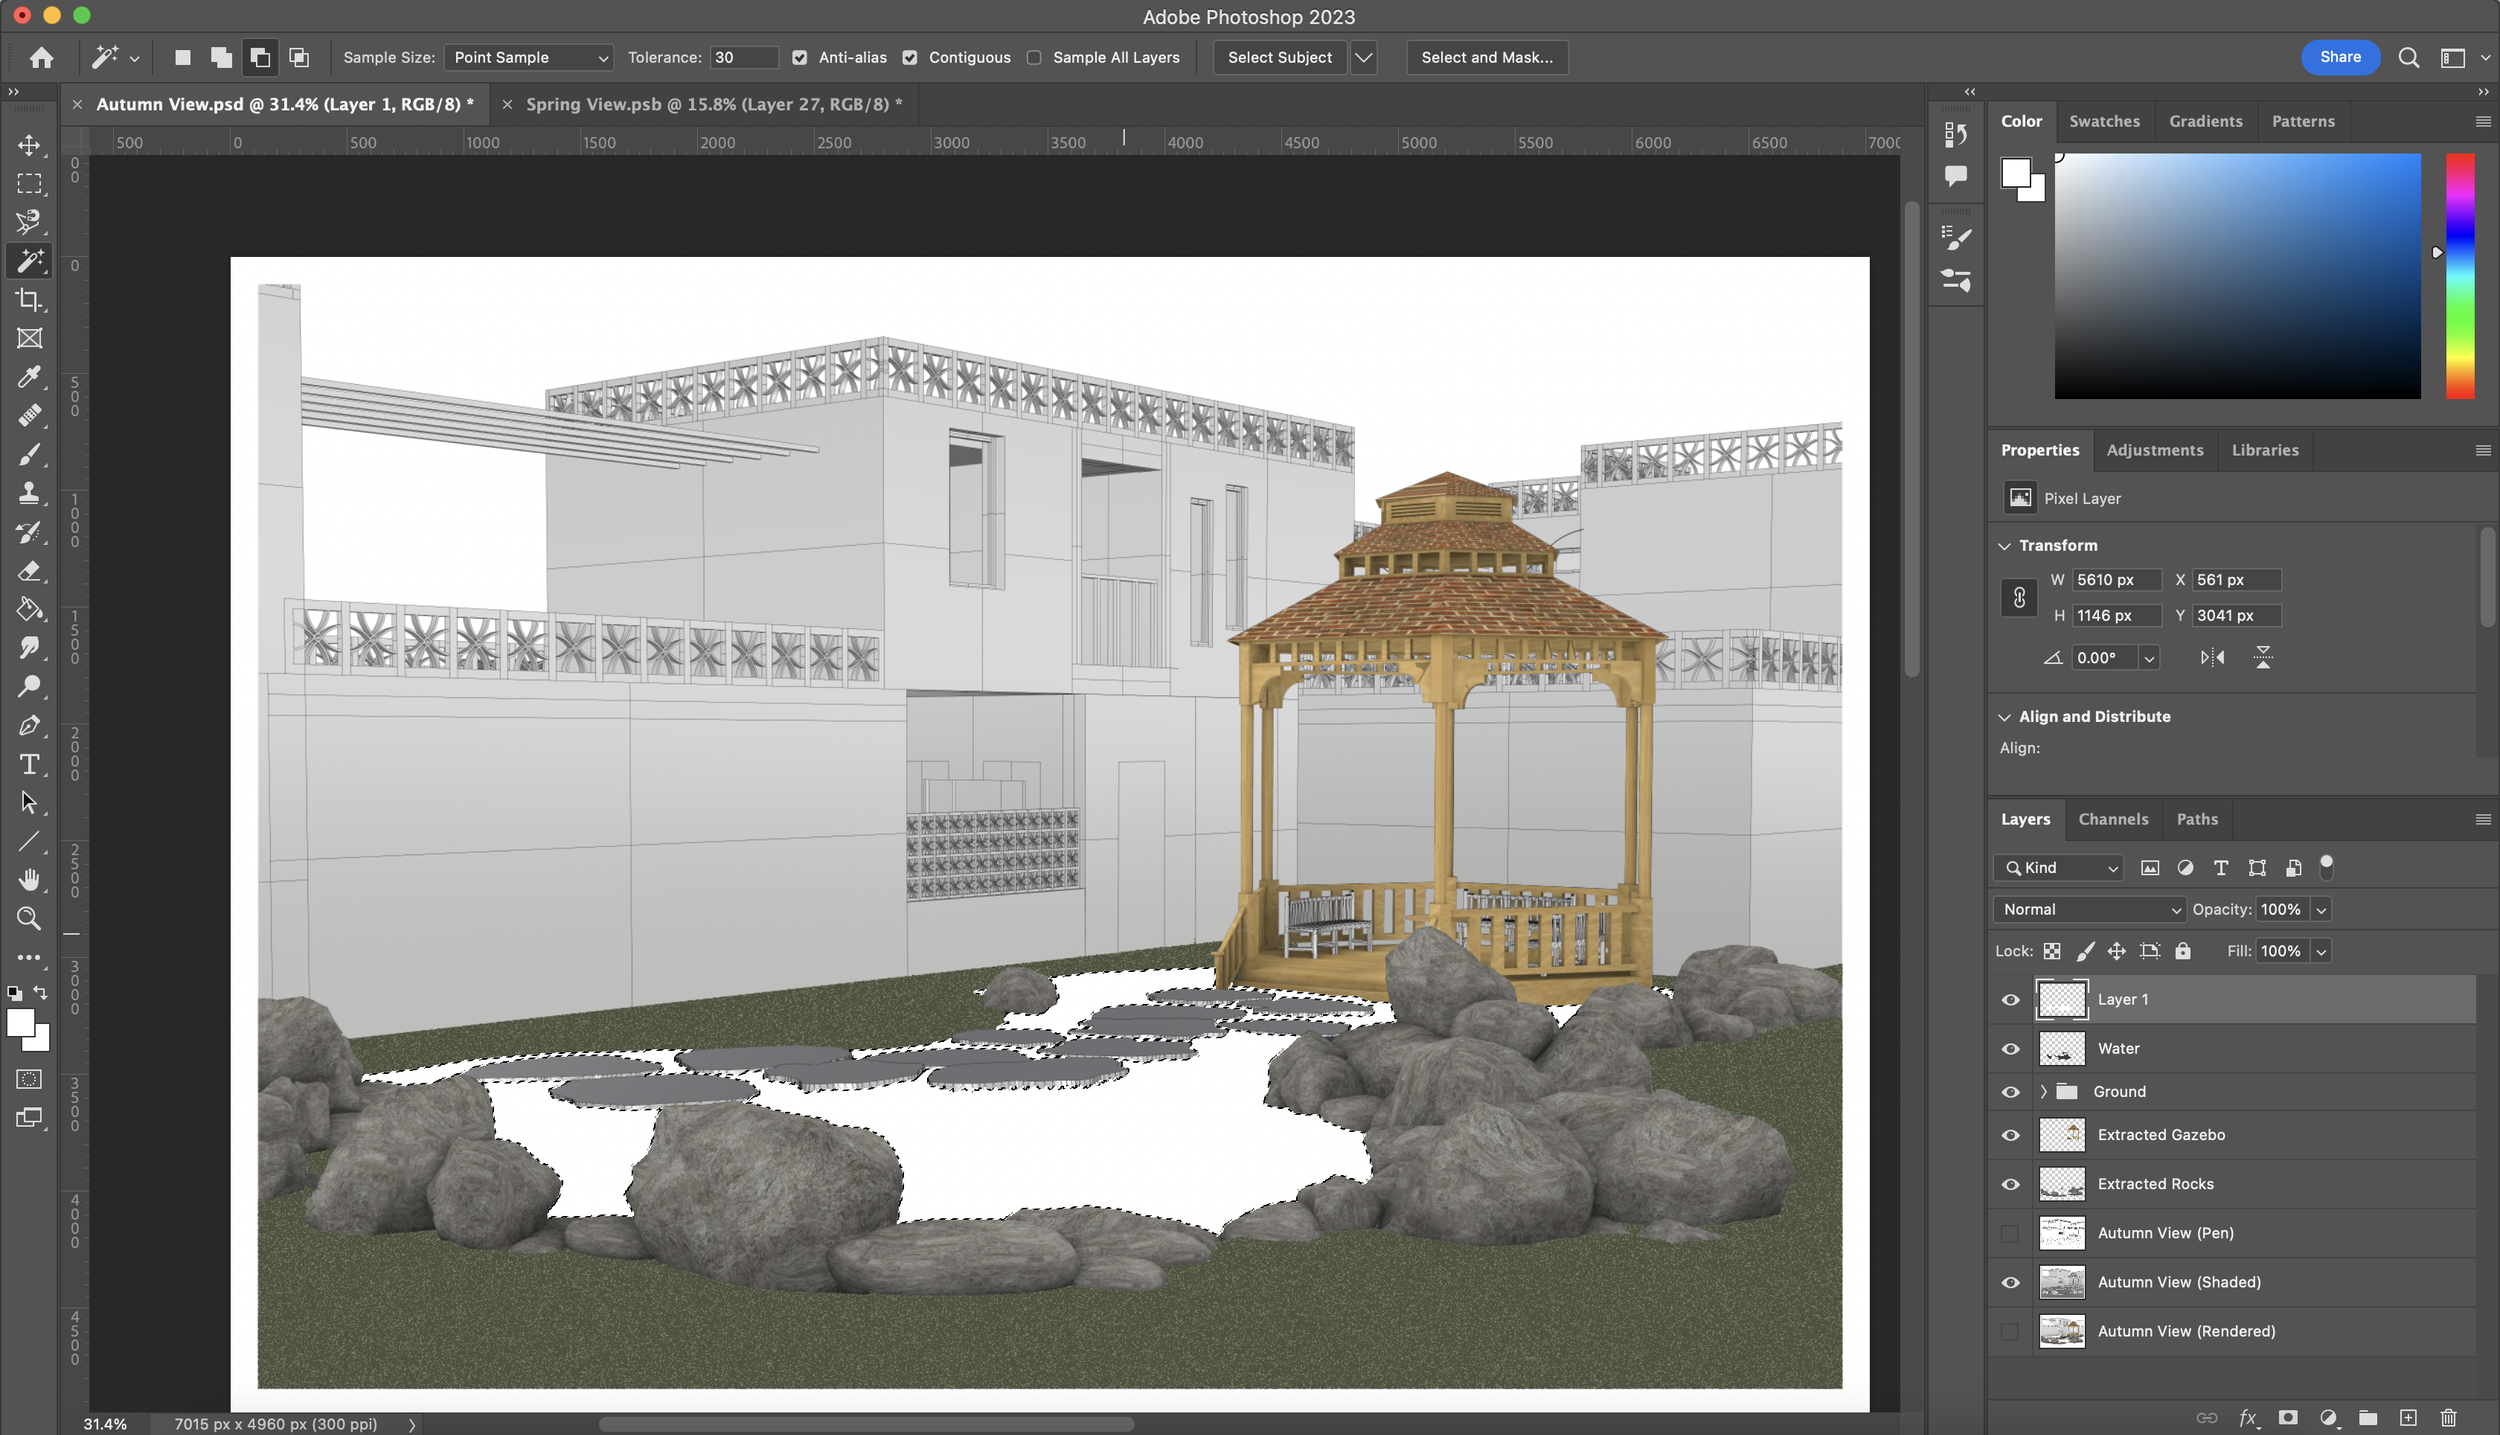
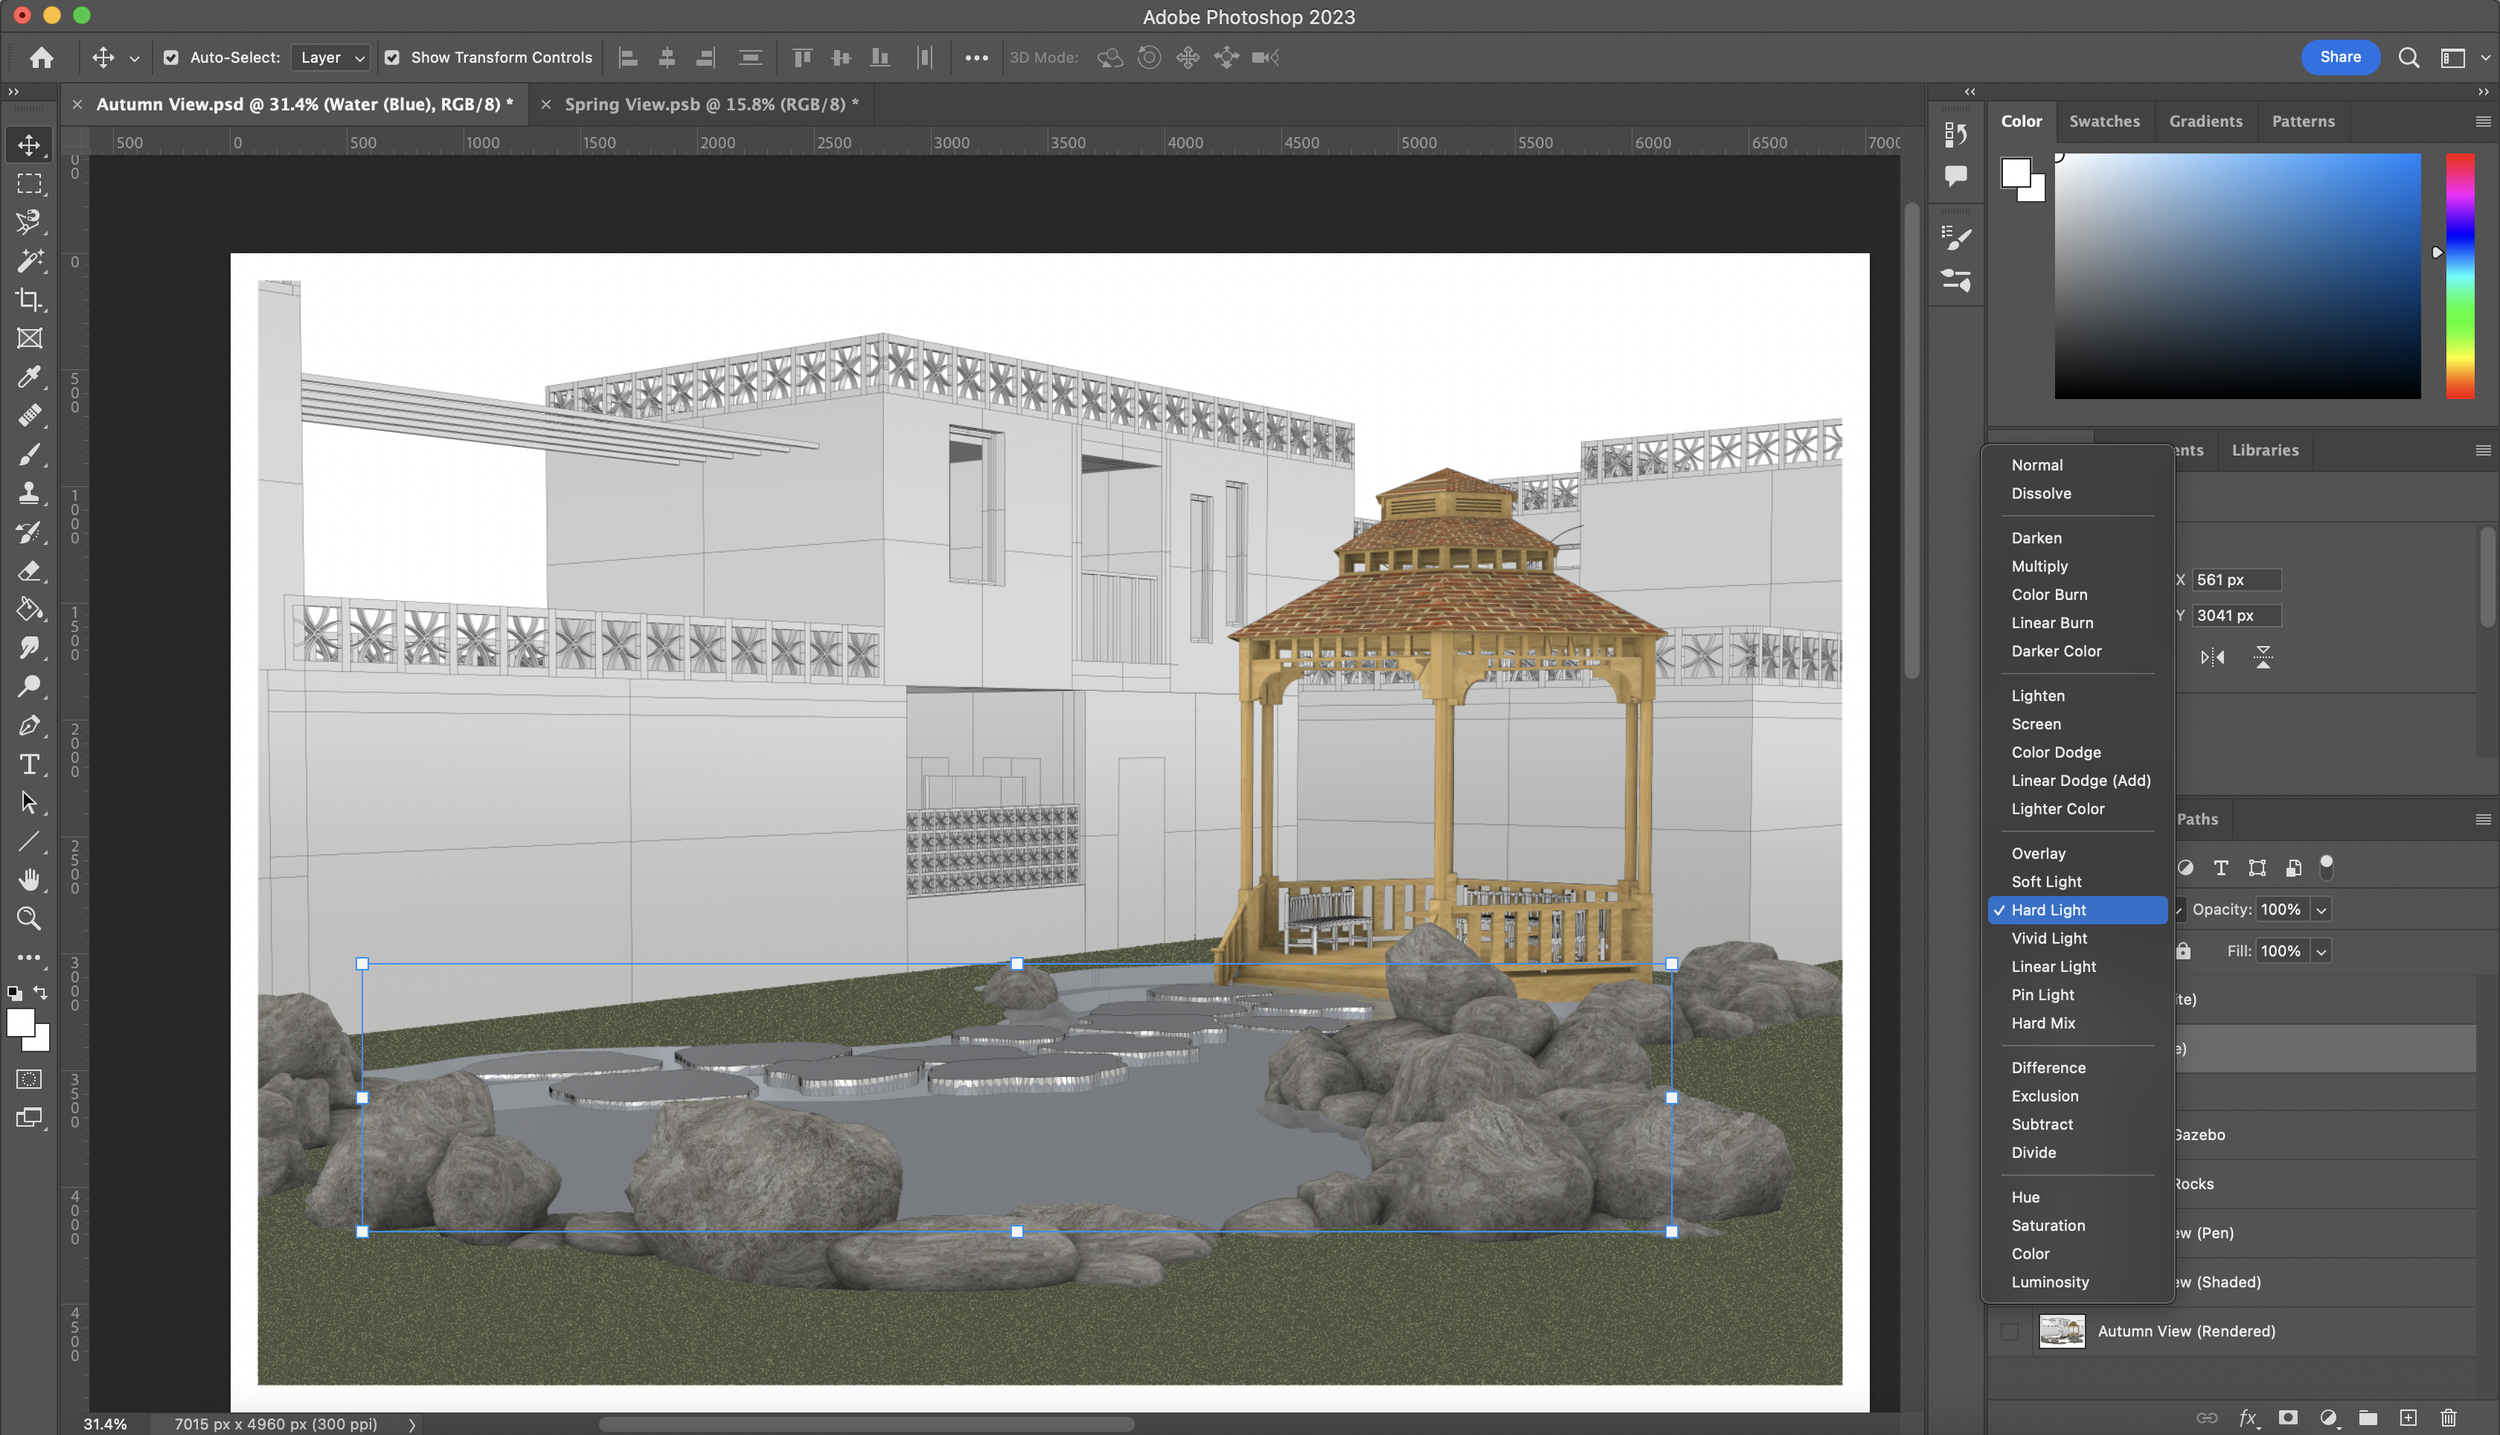
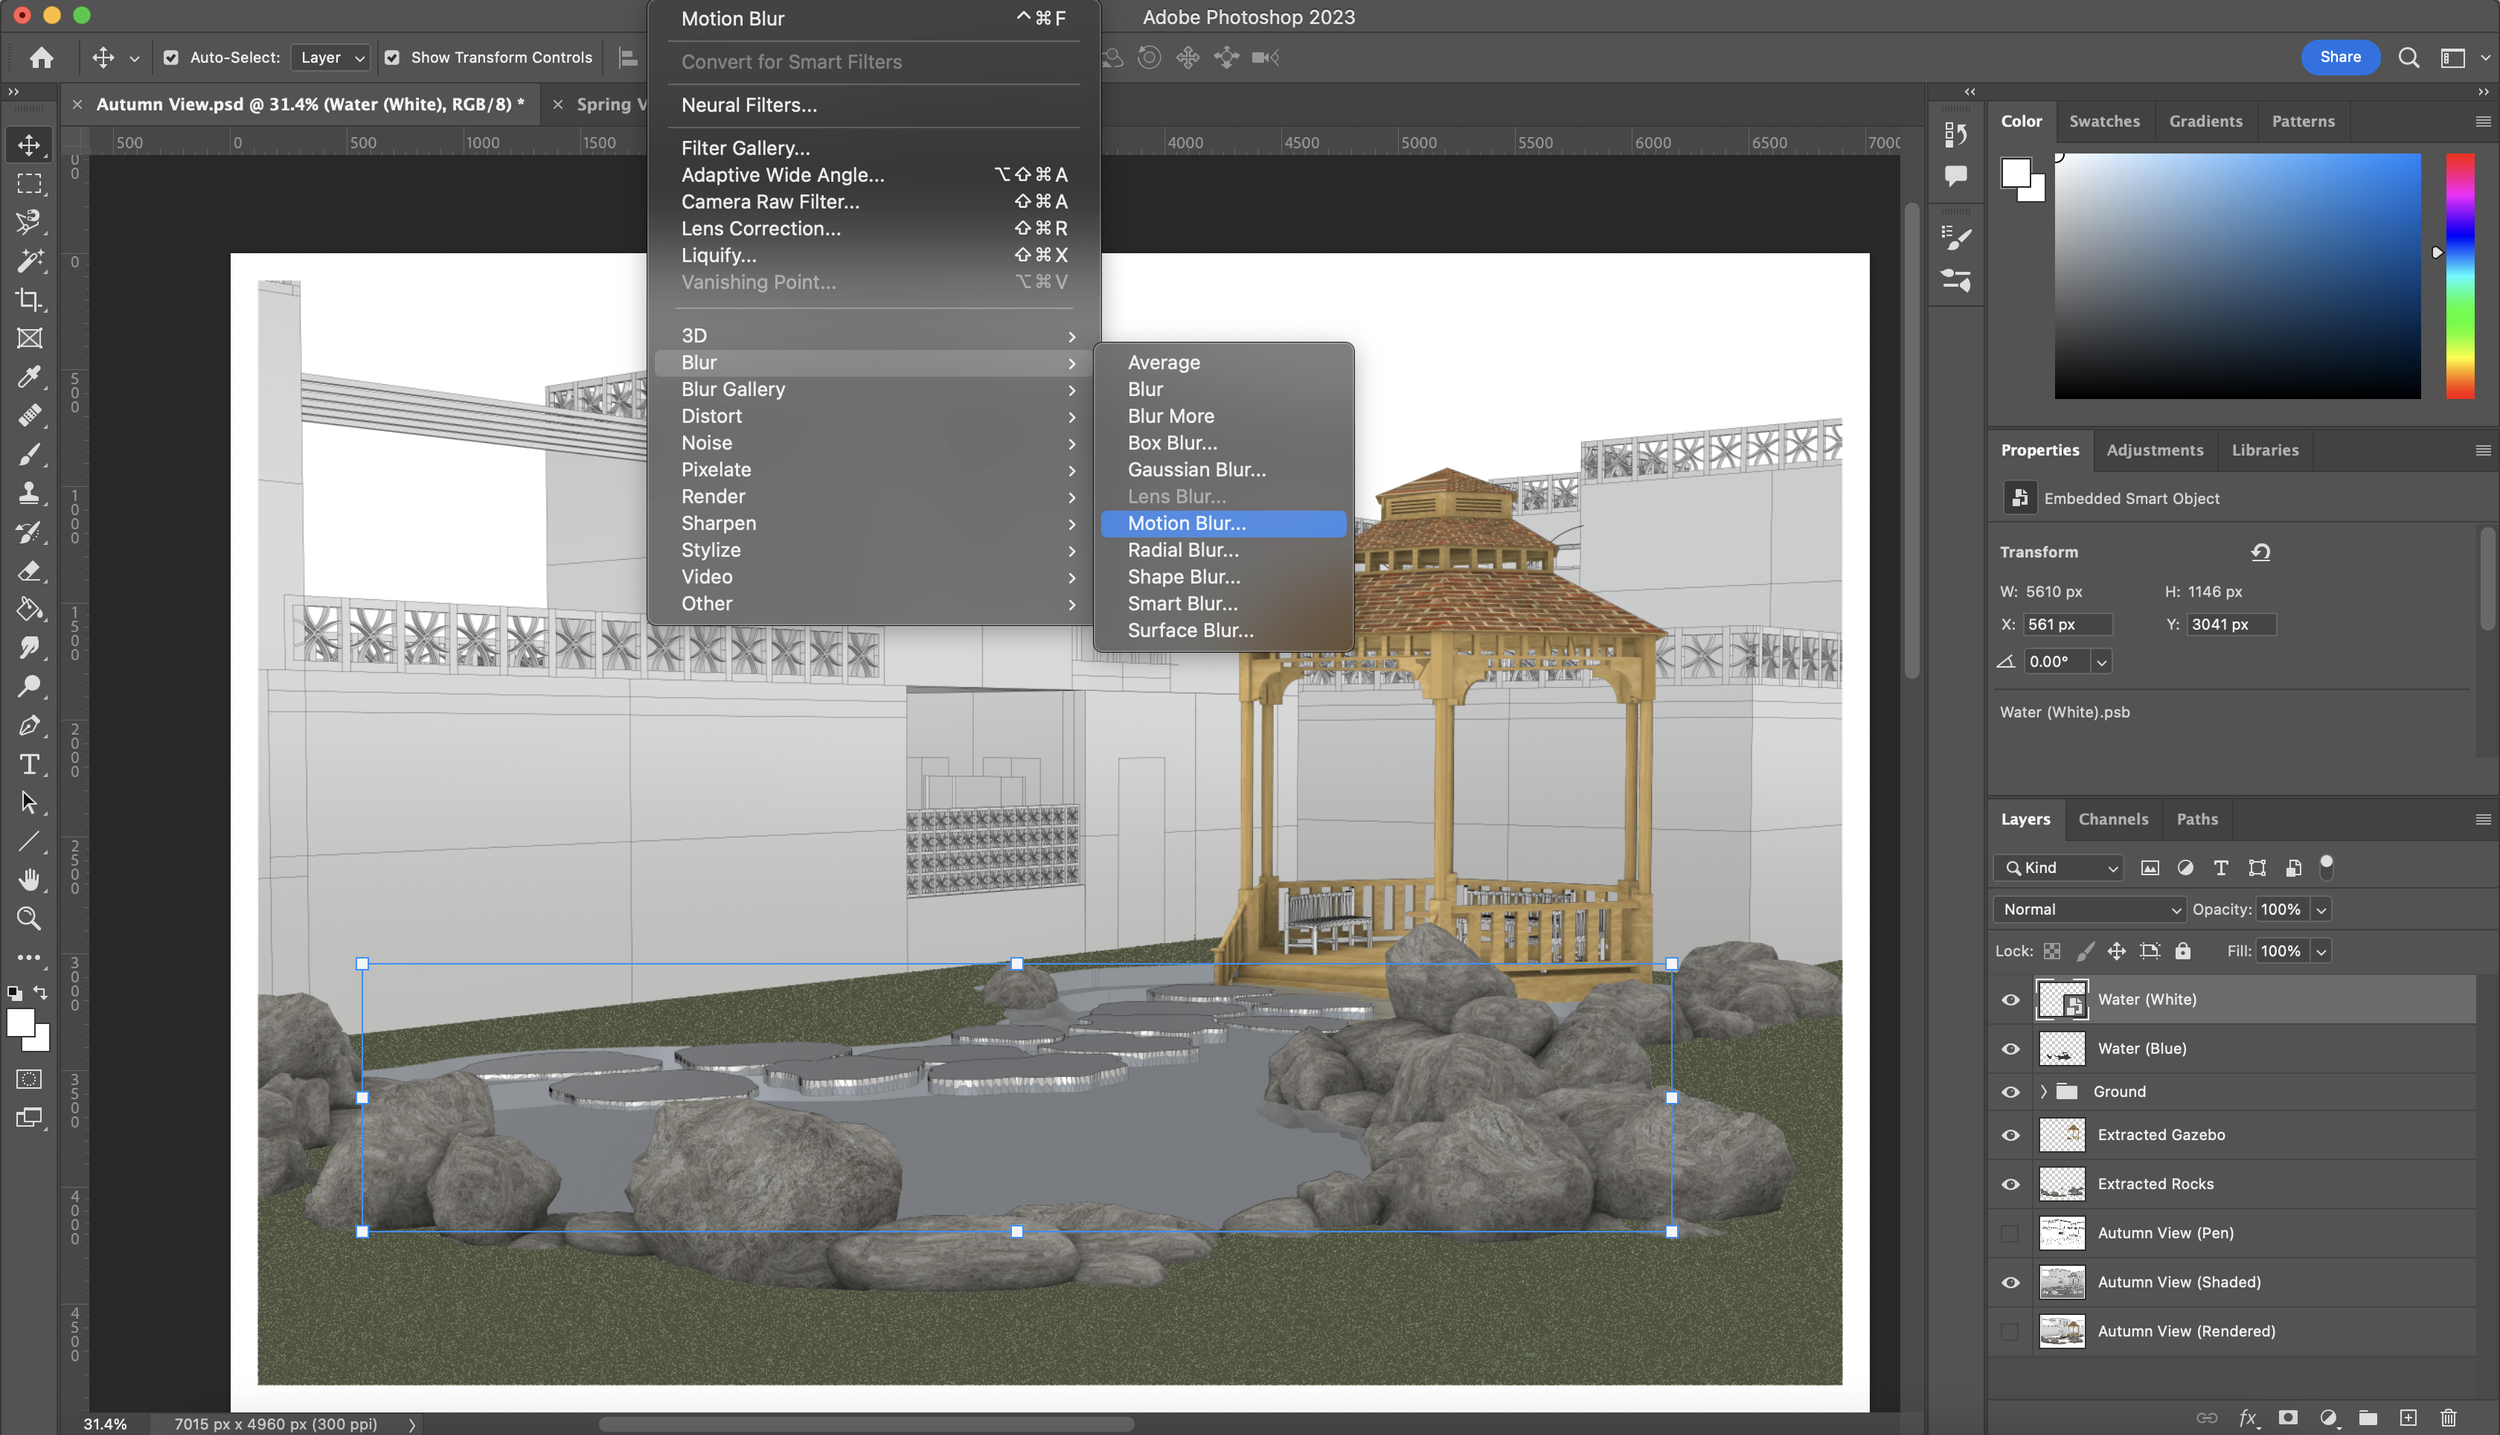
Next, create another layer of the same fill but this time in white using the same quick selection technique we used for the ground. Change the blend mode of the navy water fill into ‘Hard Light’. Then go back to the white fill layer, go to Filter -> Blur -> Motion Blur and play around with the distance figure until you get something as shown below. What we want to achieve is hues of the navy to come through in areas where the water would naturally be darker i.e. near the rocks since the pond bed is closer to the surface in those areas.
Masking not Deleting
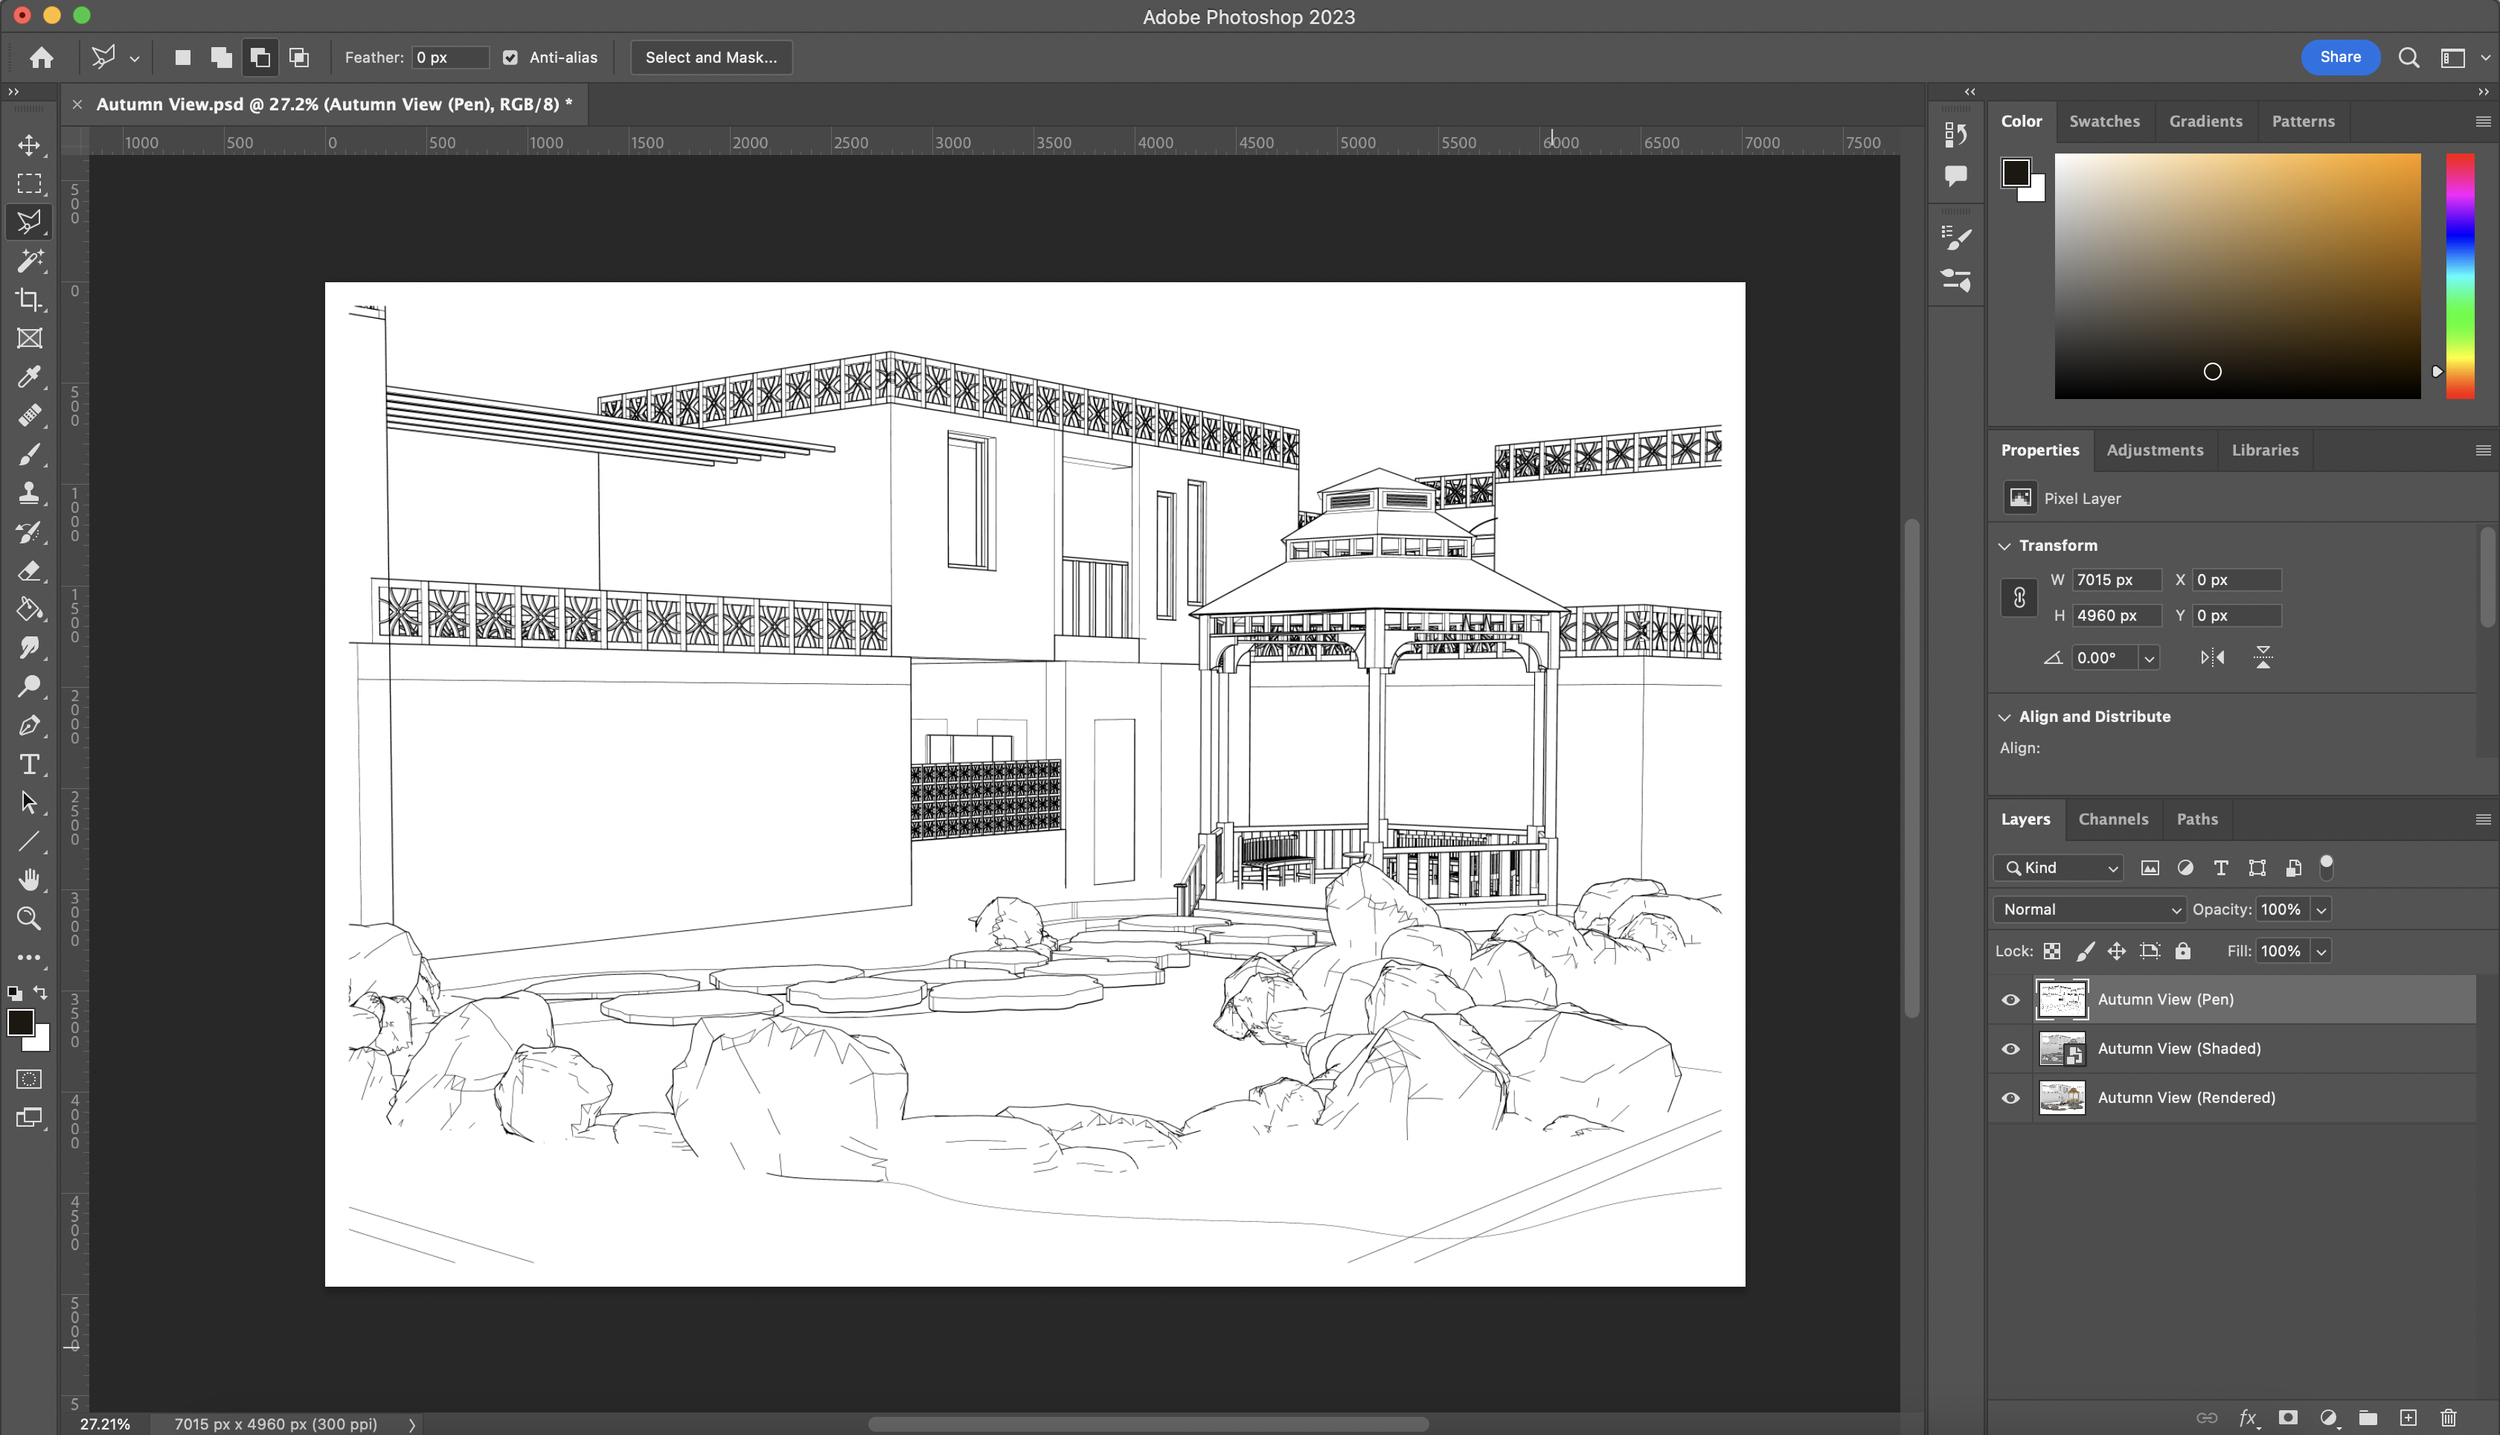
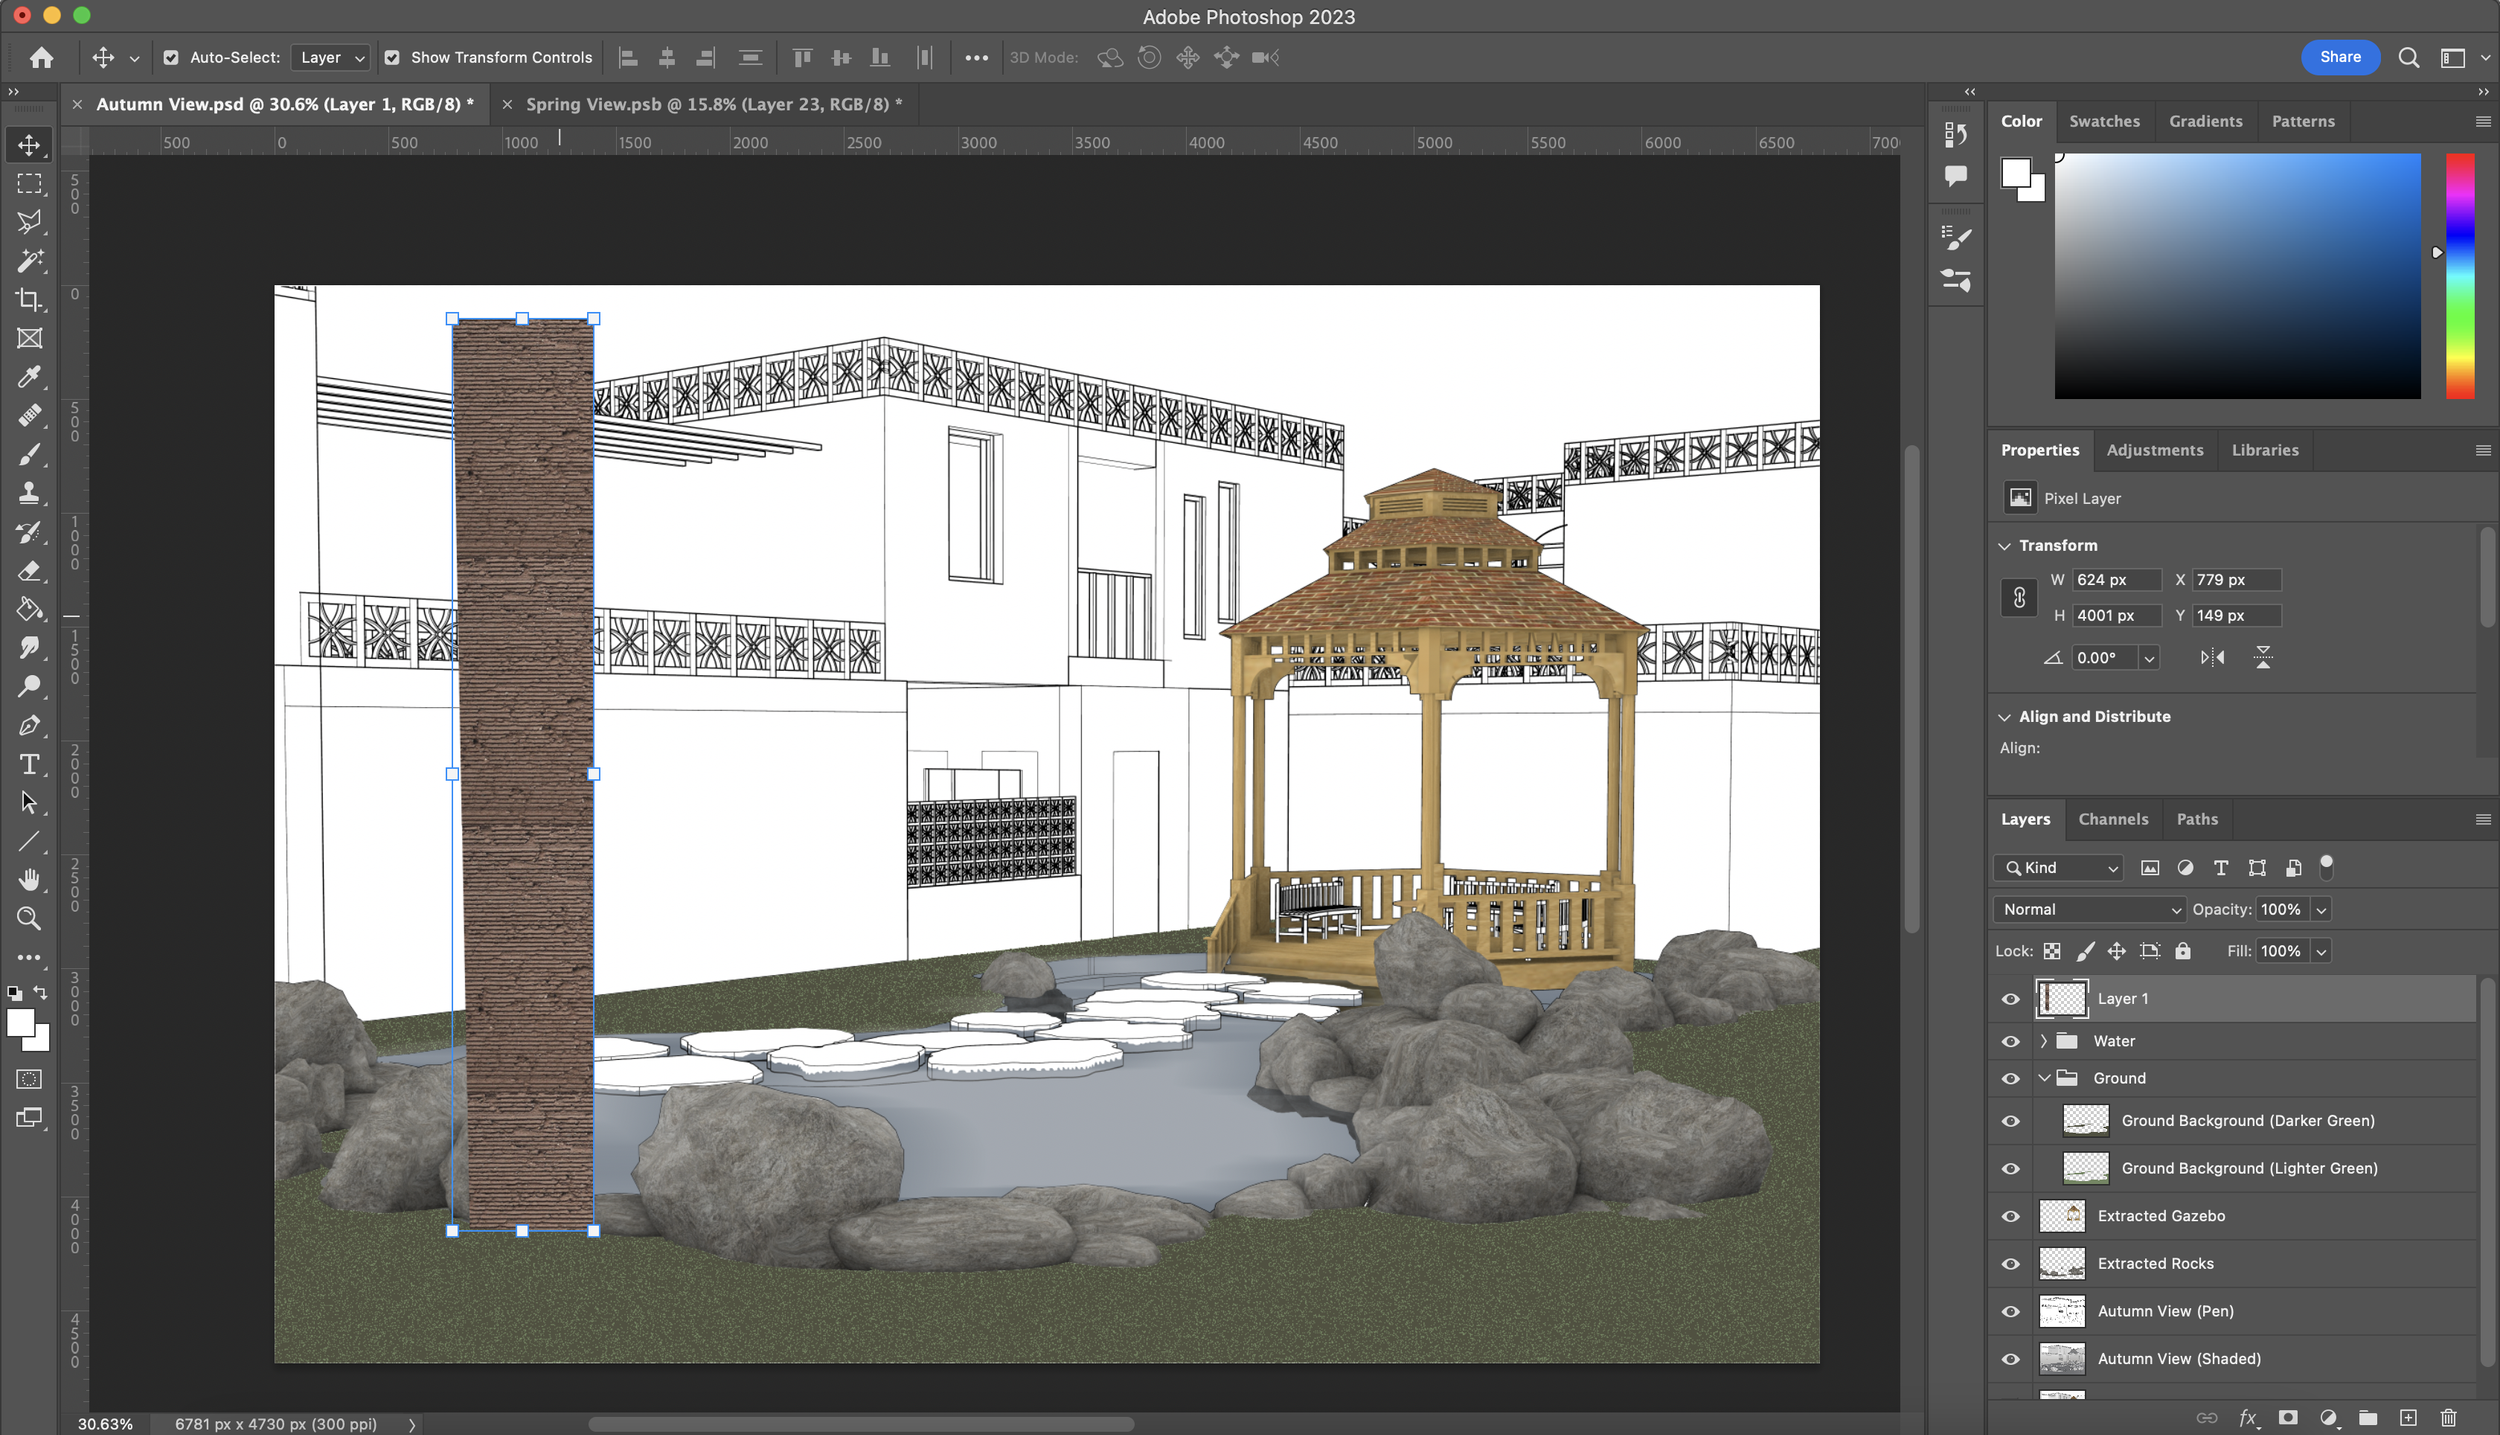
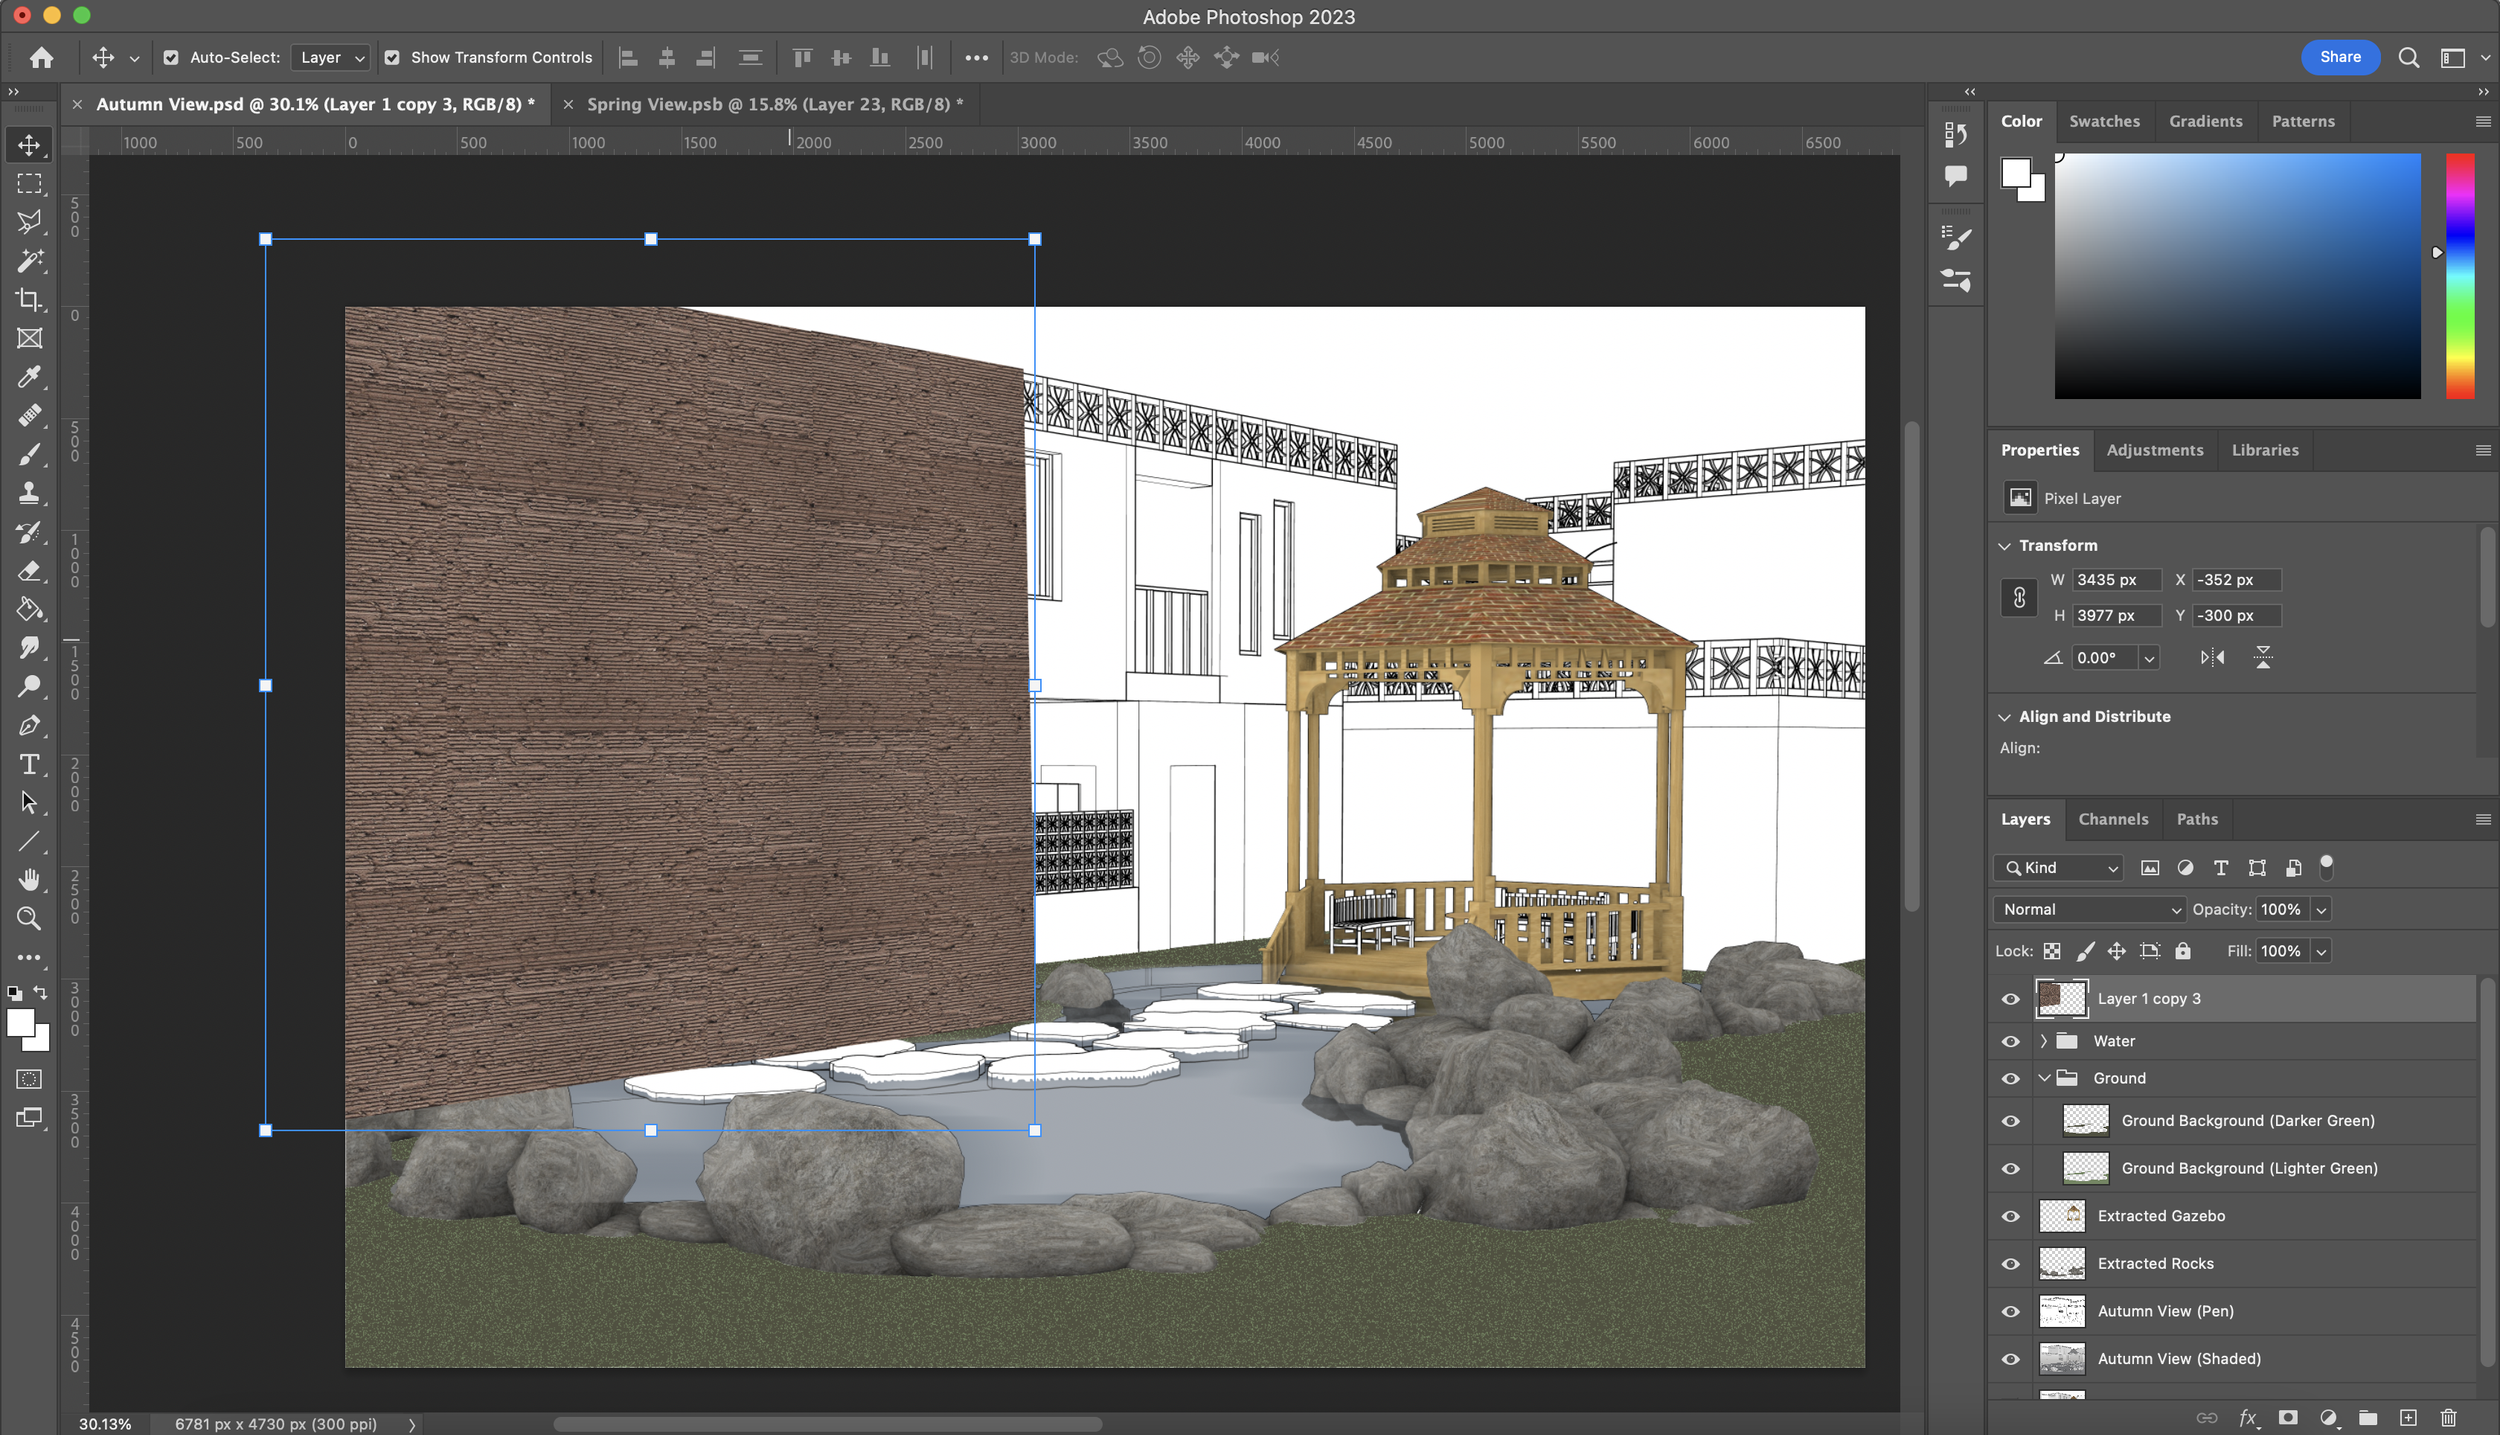
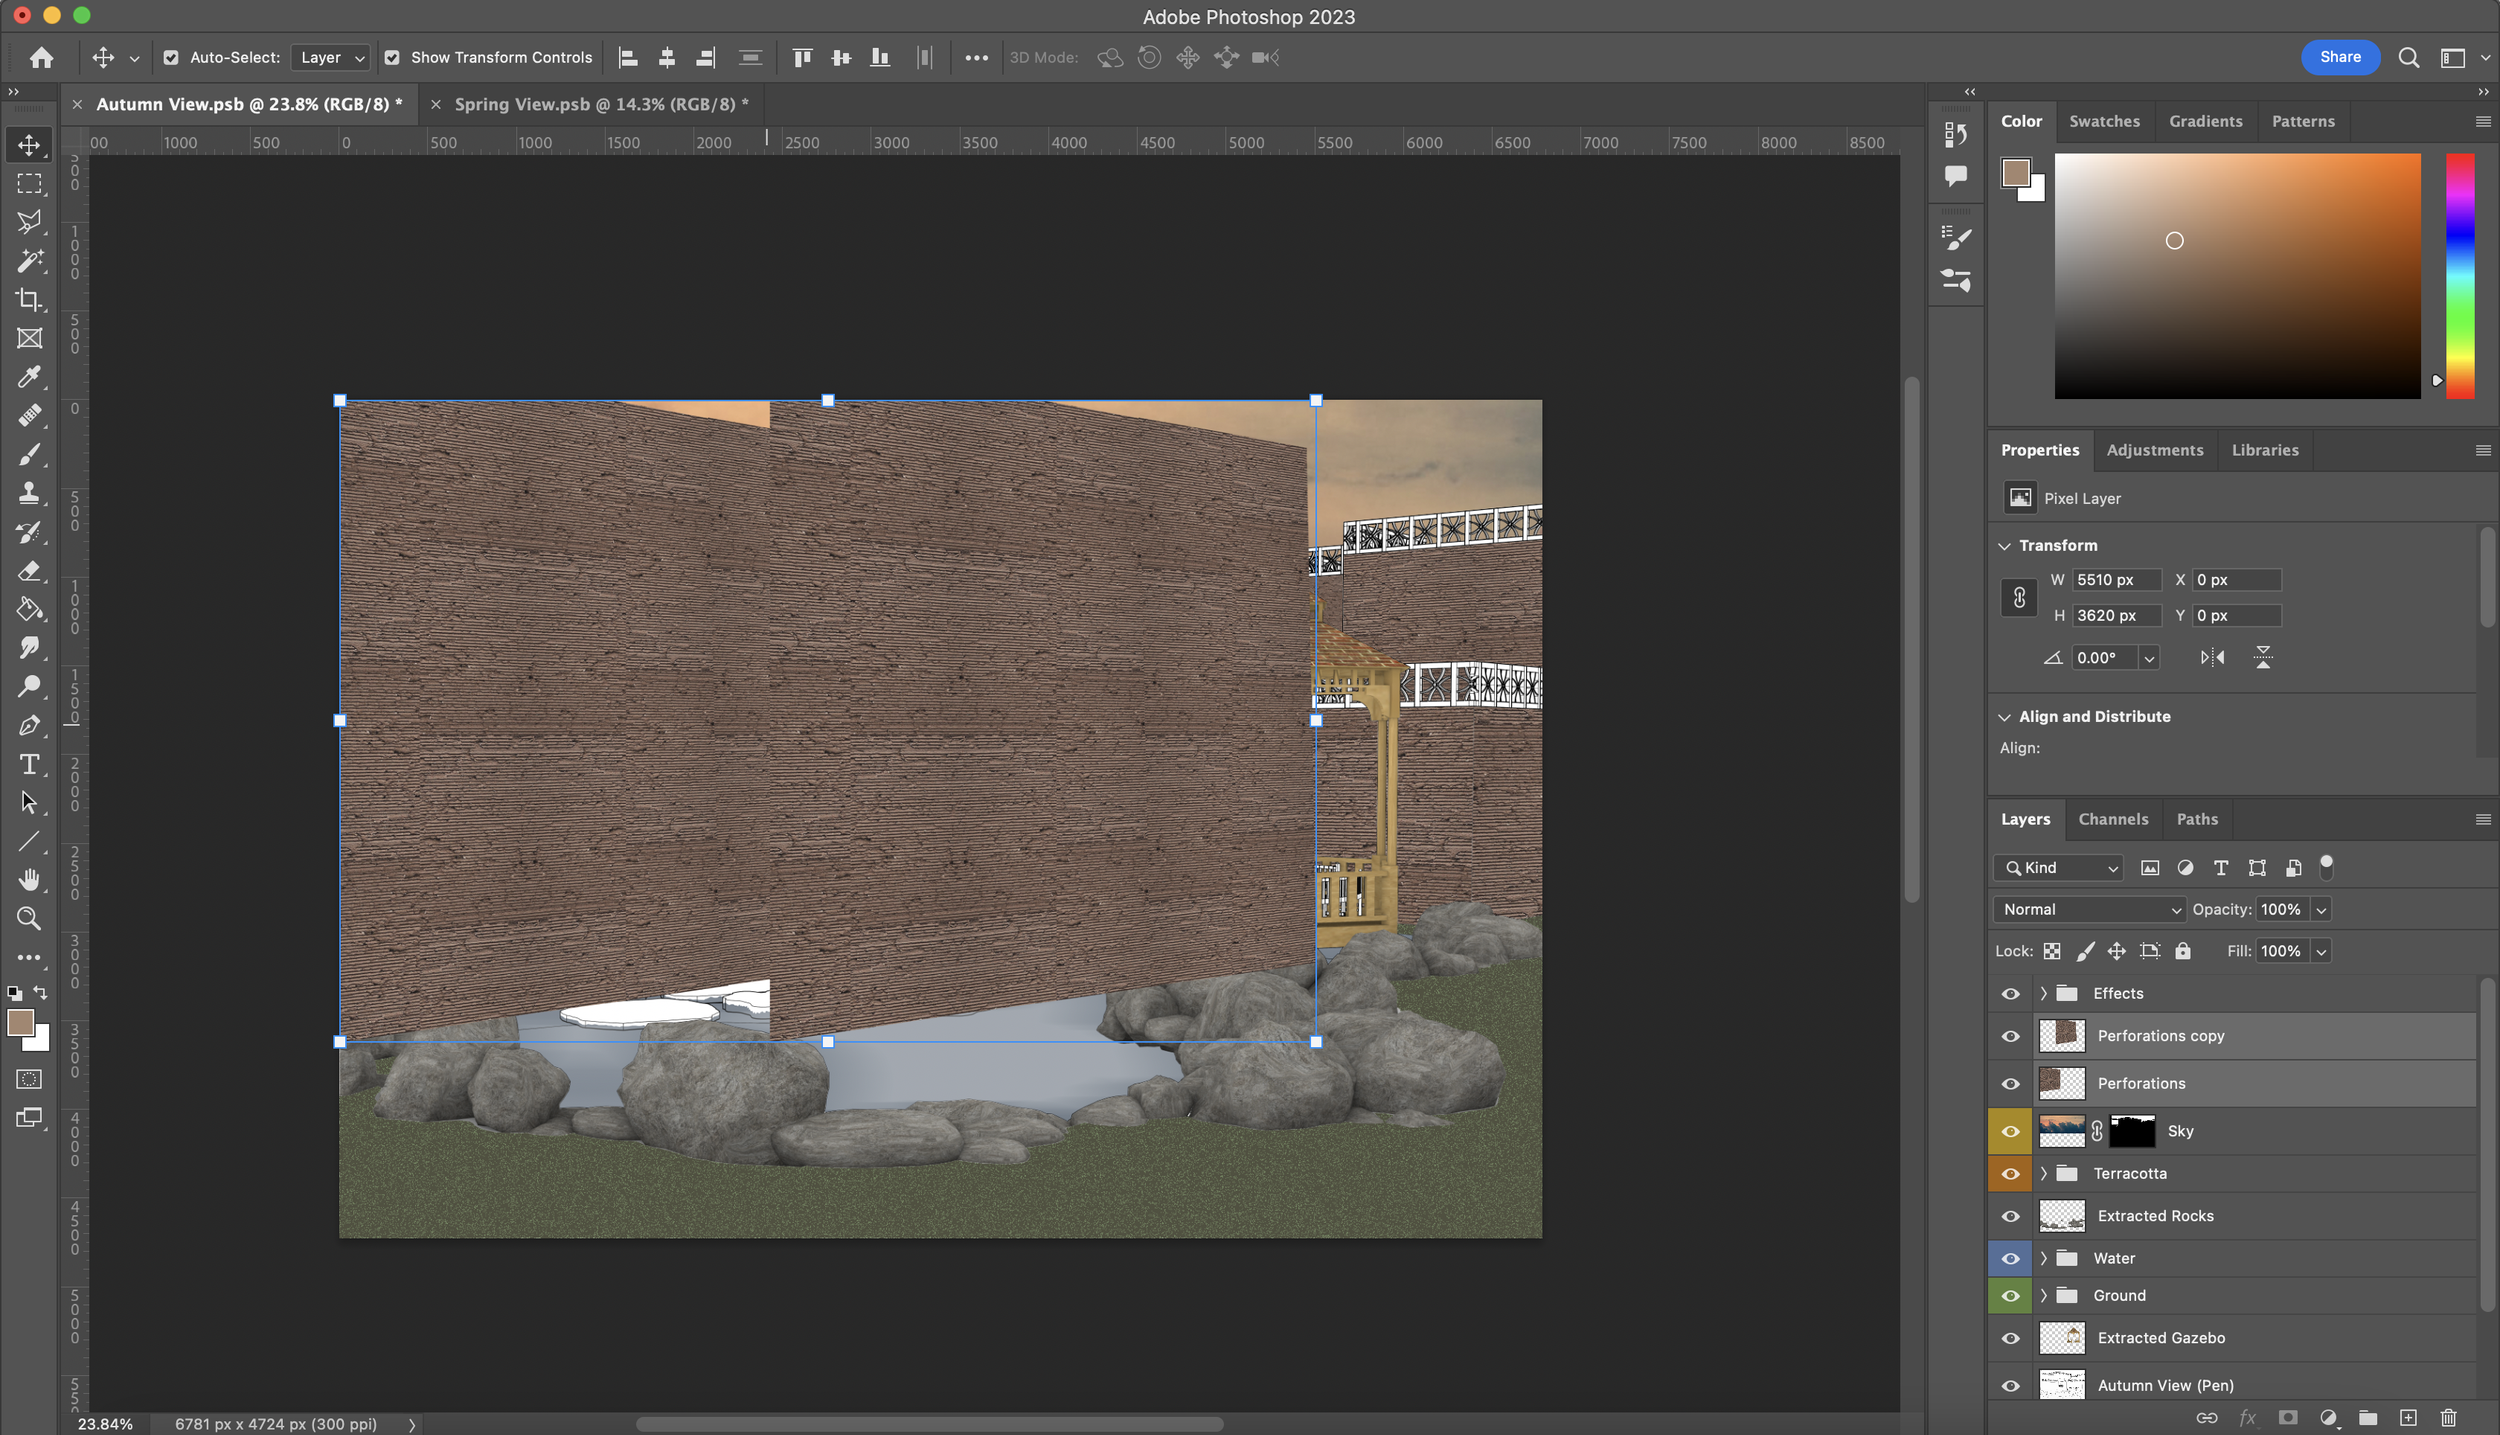
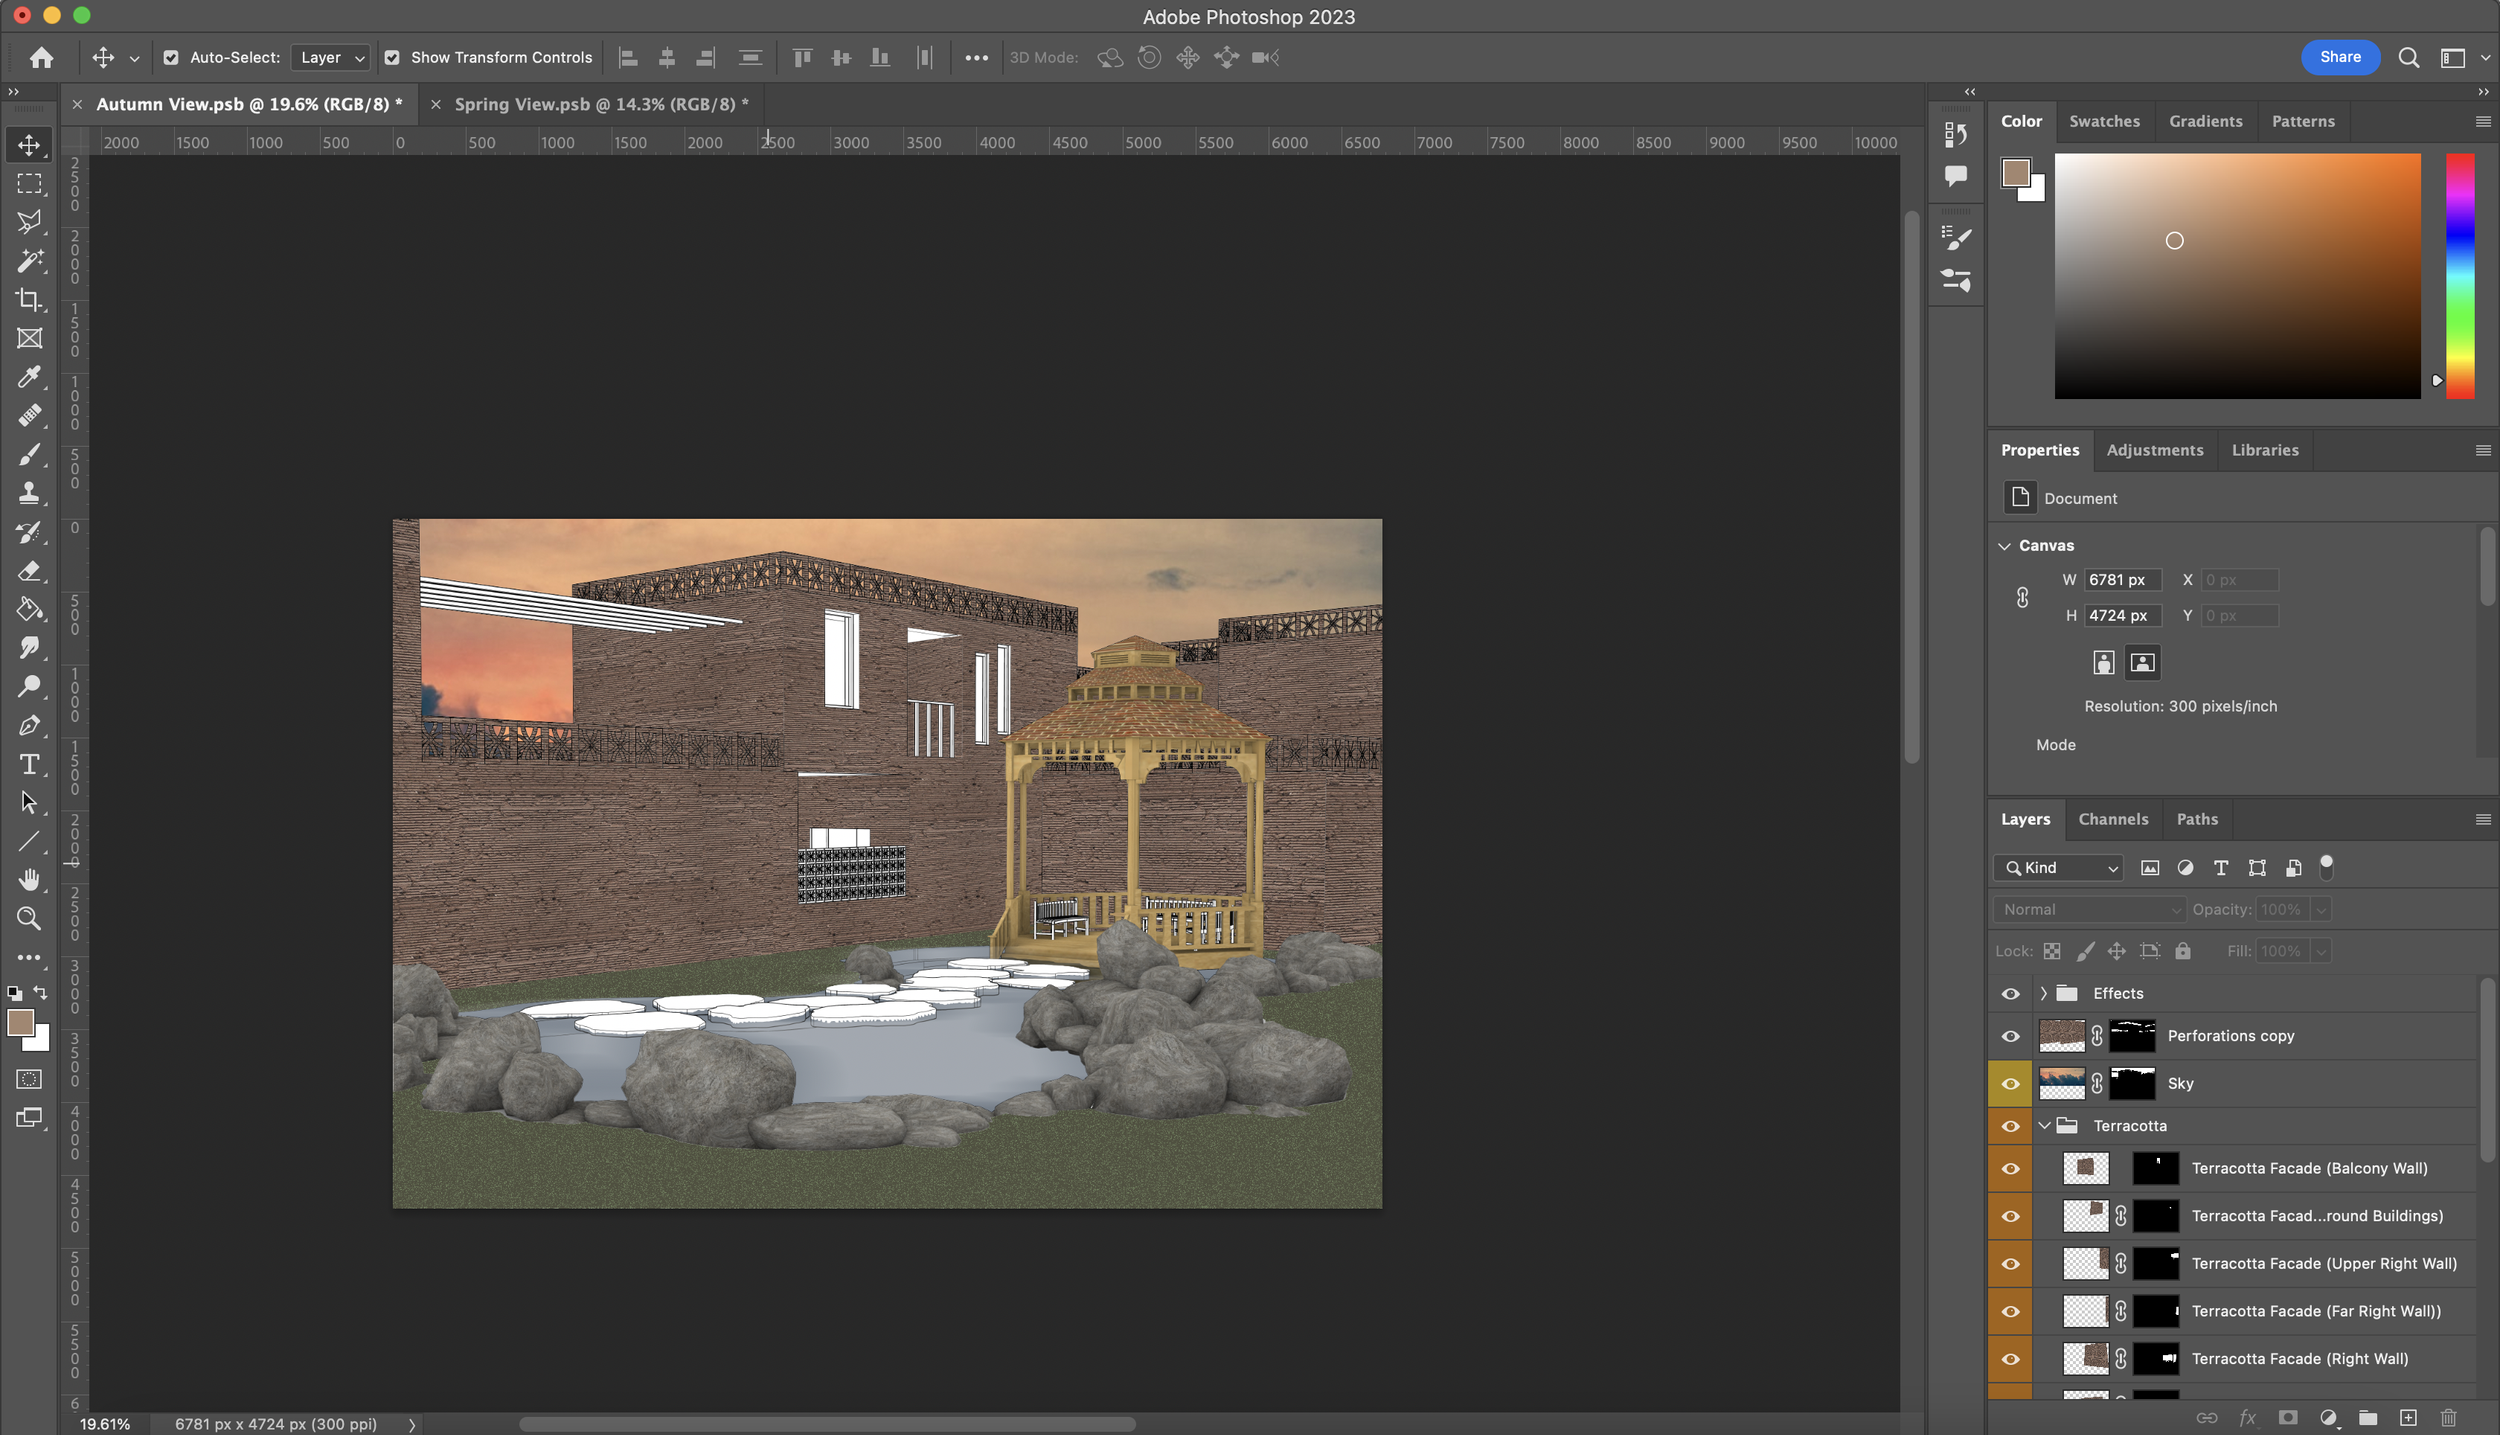
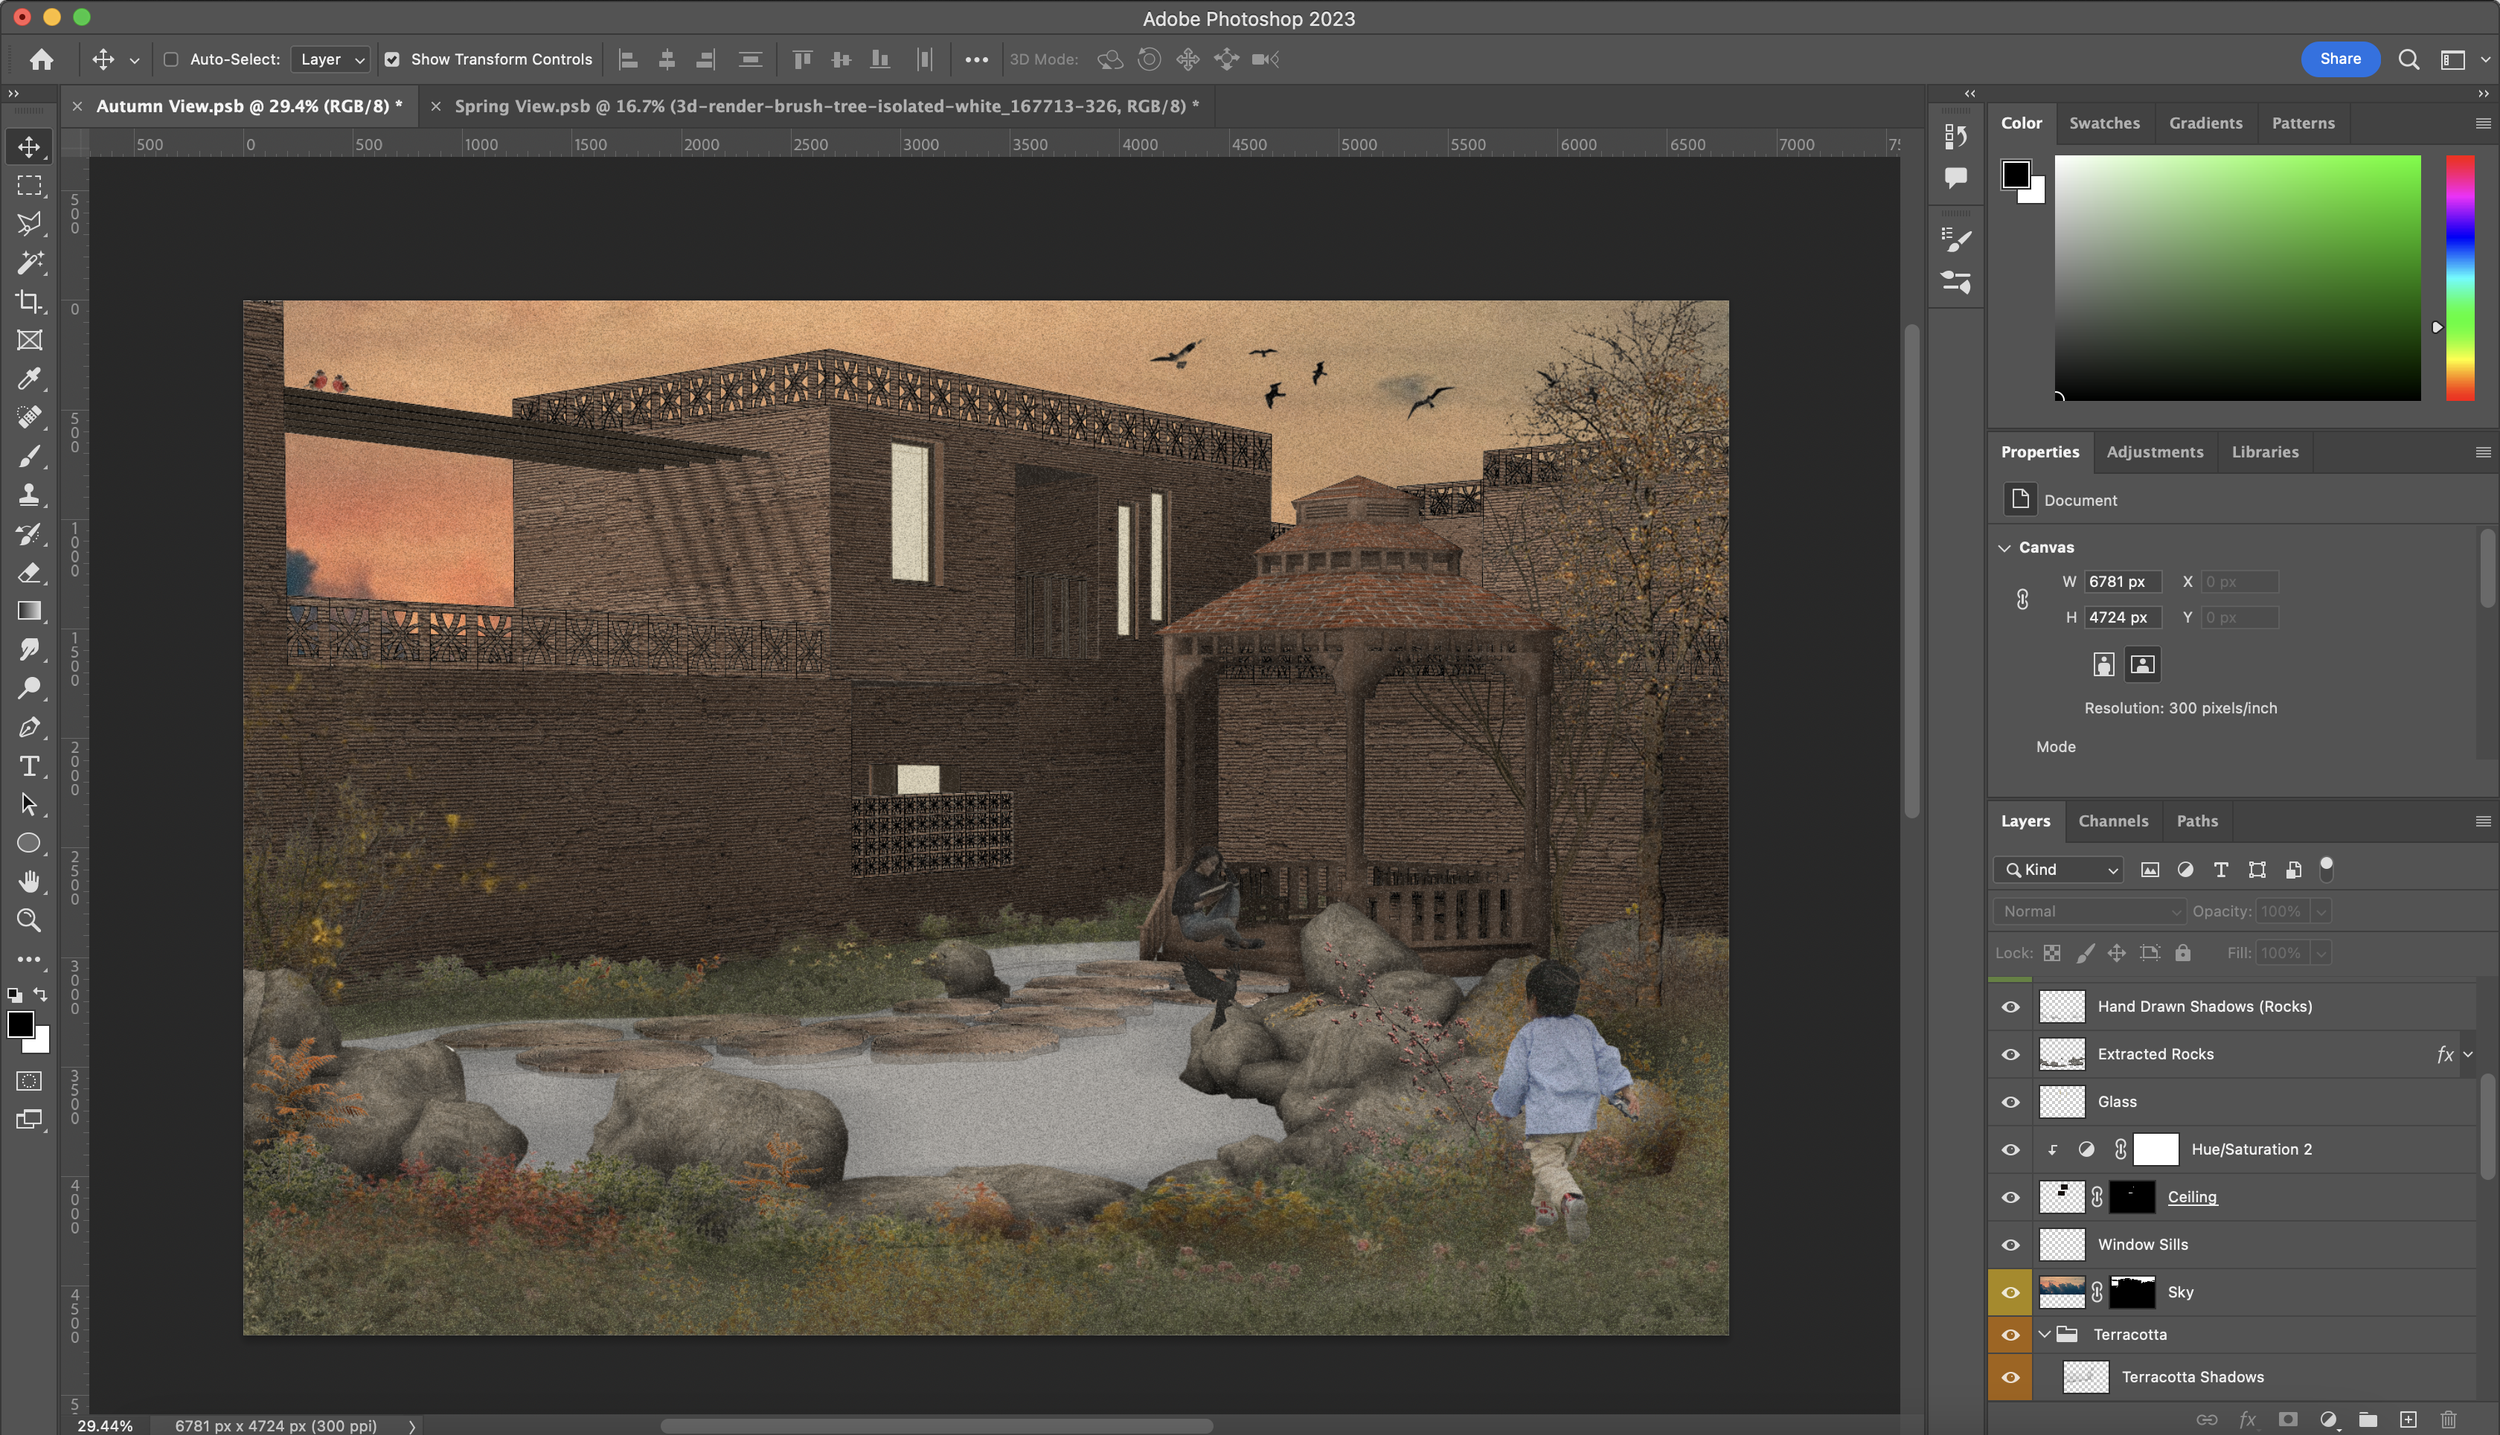
We’ll be moving on to adding textures to the exterior facade. Every texture, and object added to this visual has been found through simple searches on Google Images. With this project, the facade was intended to be combed terracotta which is the texture I’ll be using. Make sure to create and name your new layer. You will see as we go along with the tutorial I’ll be organising, renaming and grouping my layers in order to keep everything organised since Photoshop layers can get messy.
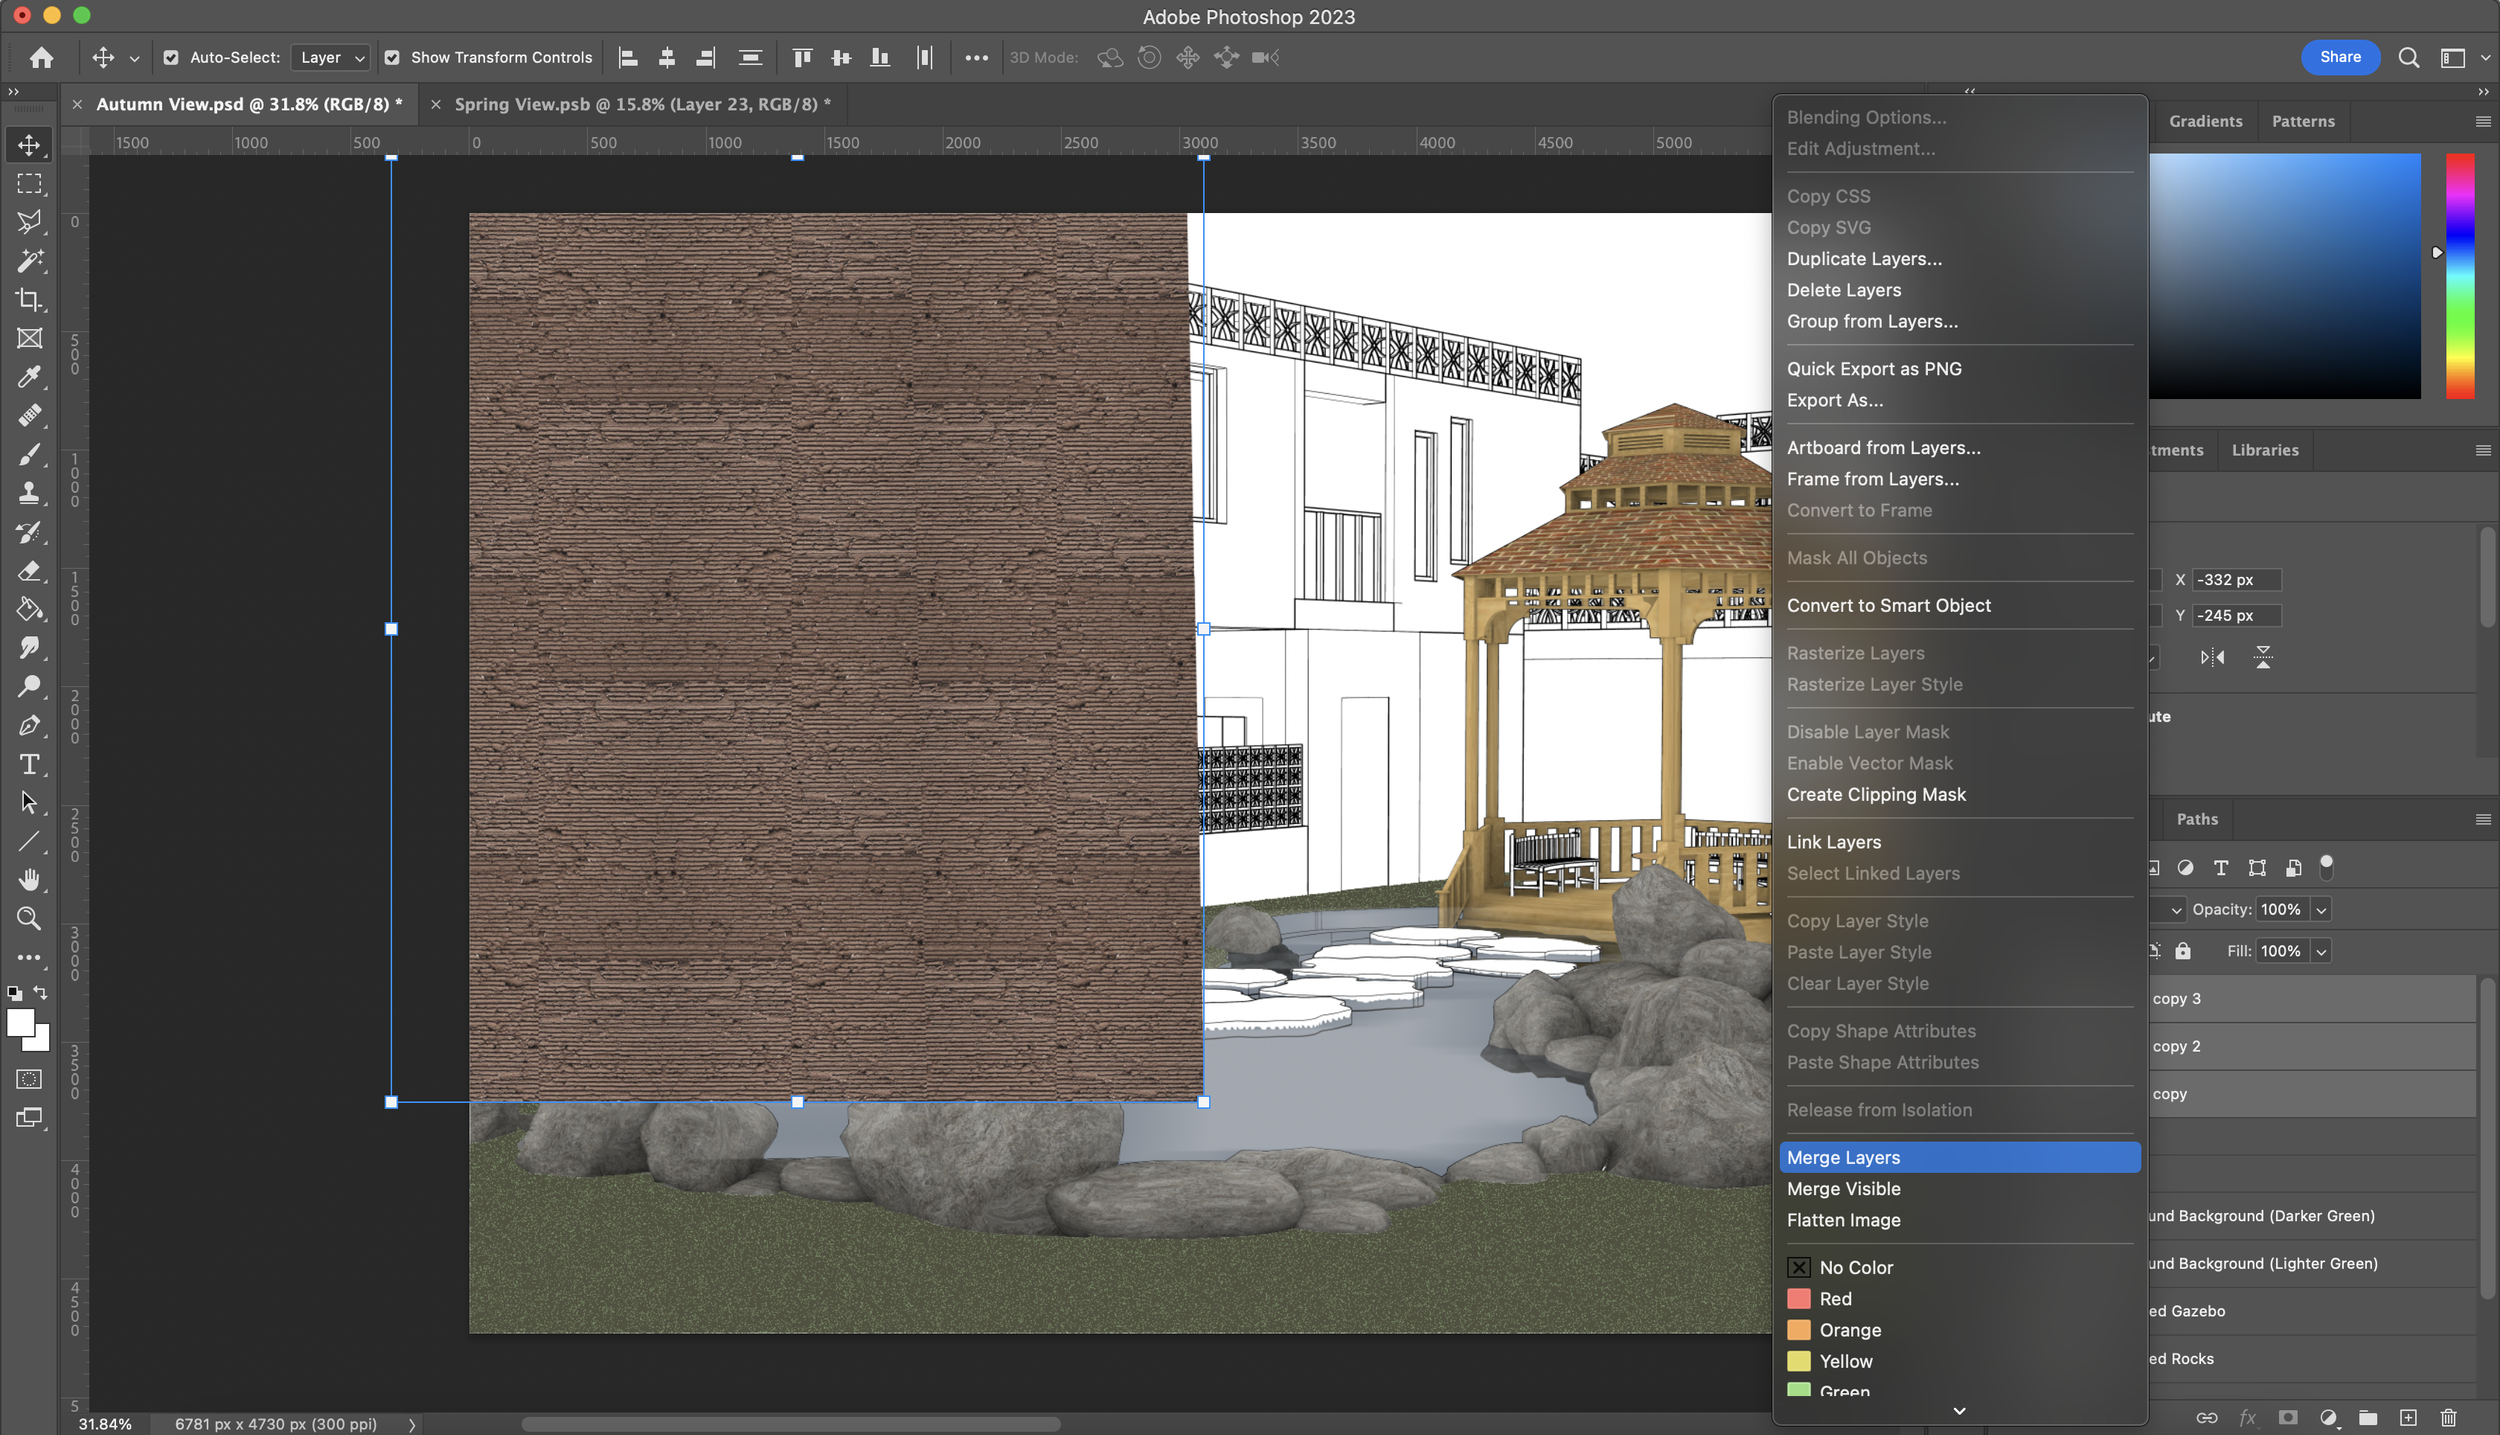
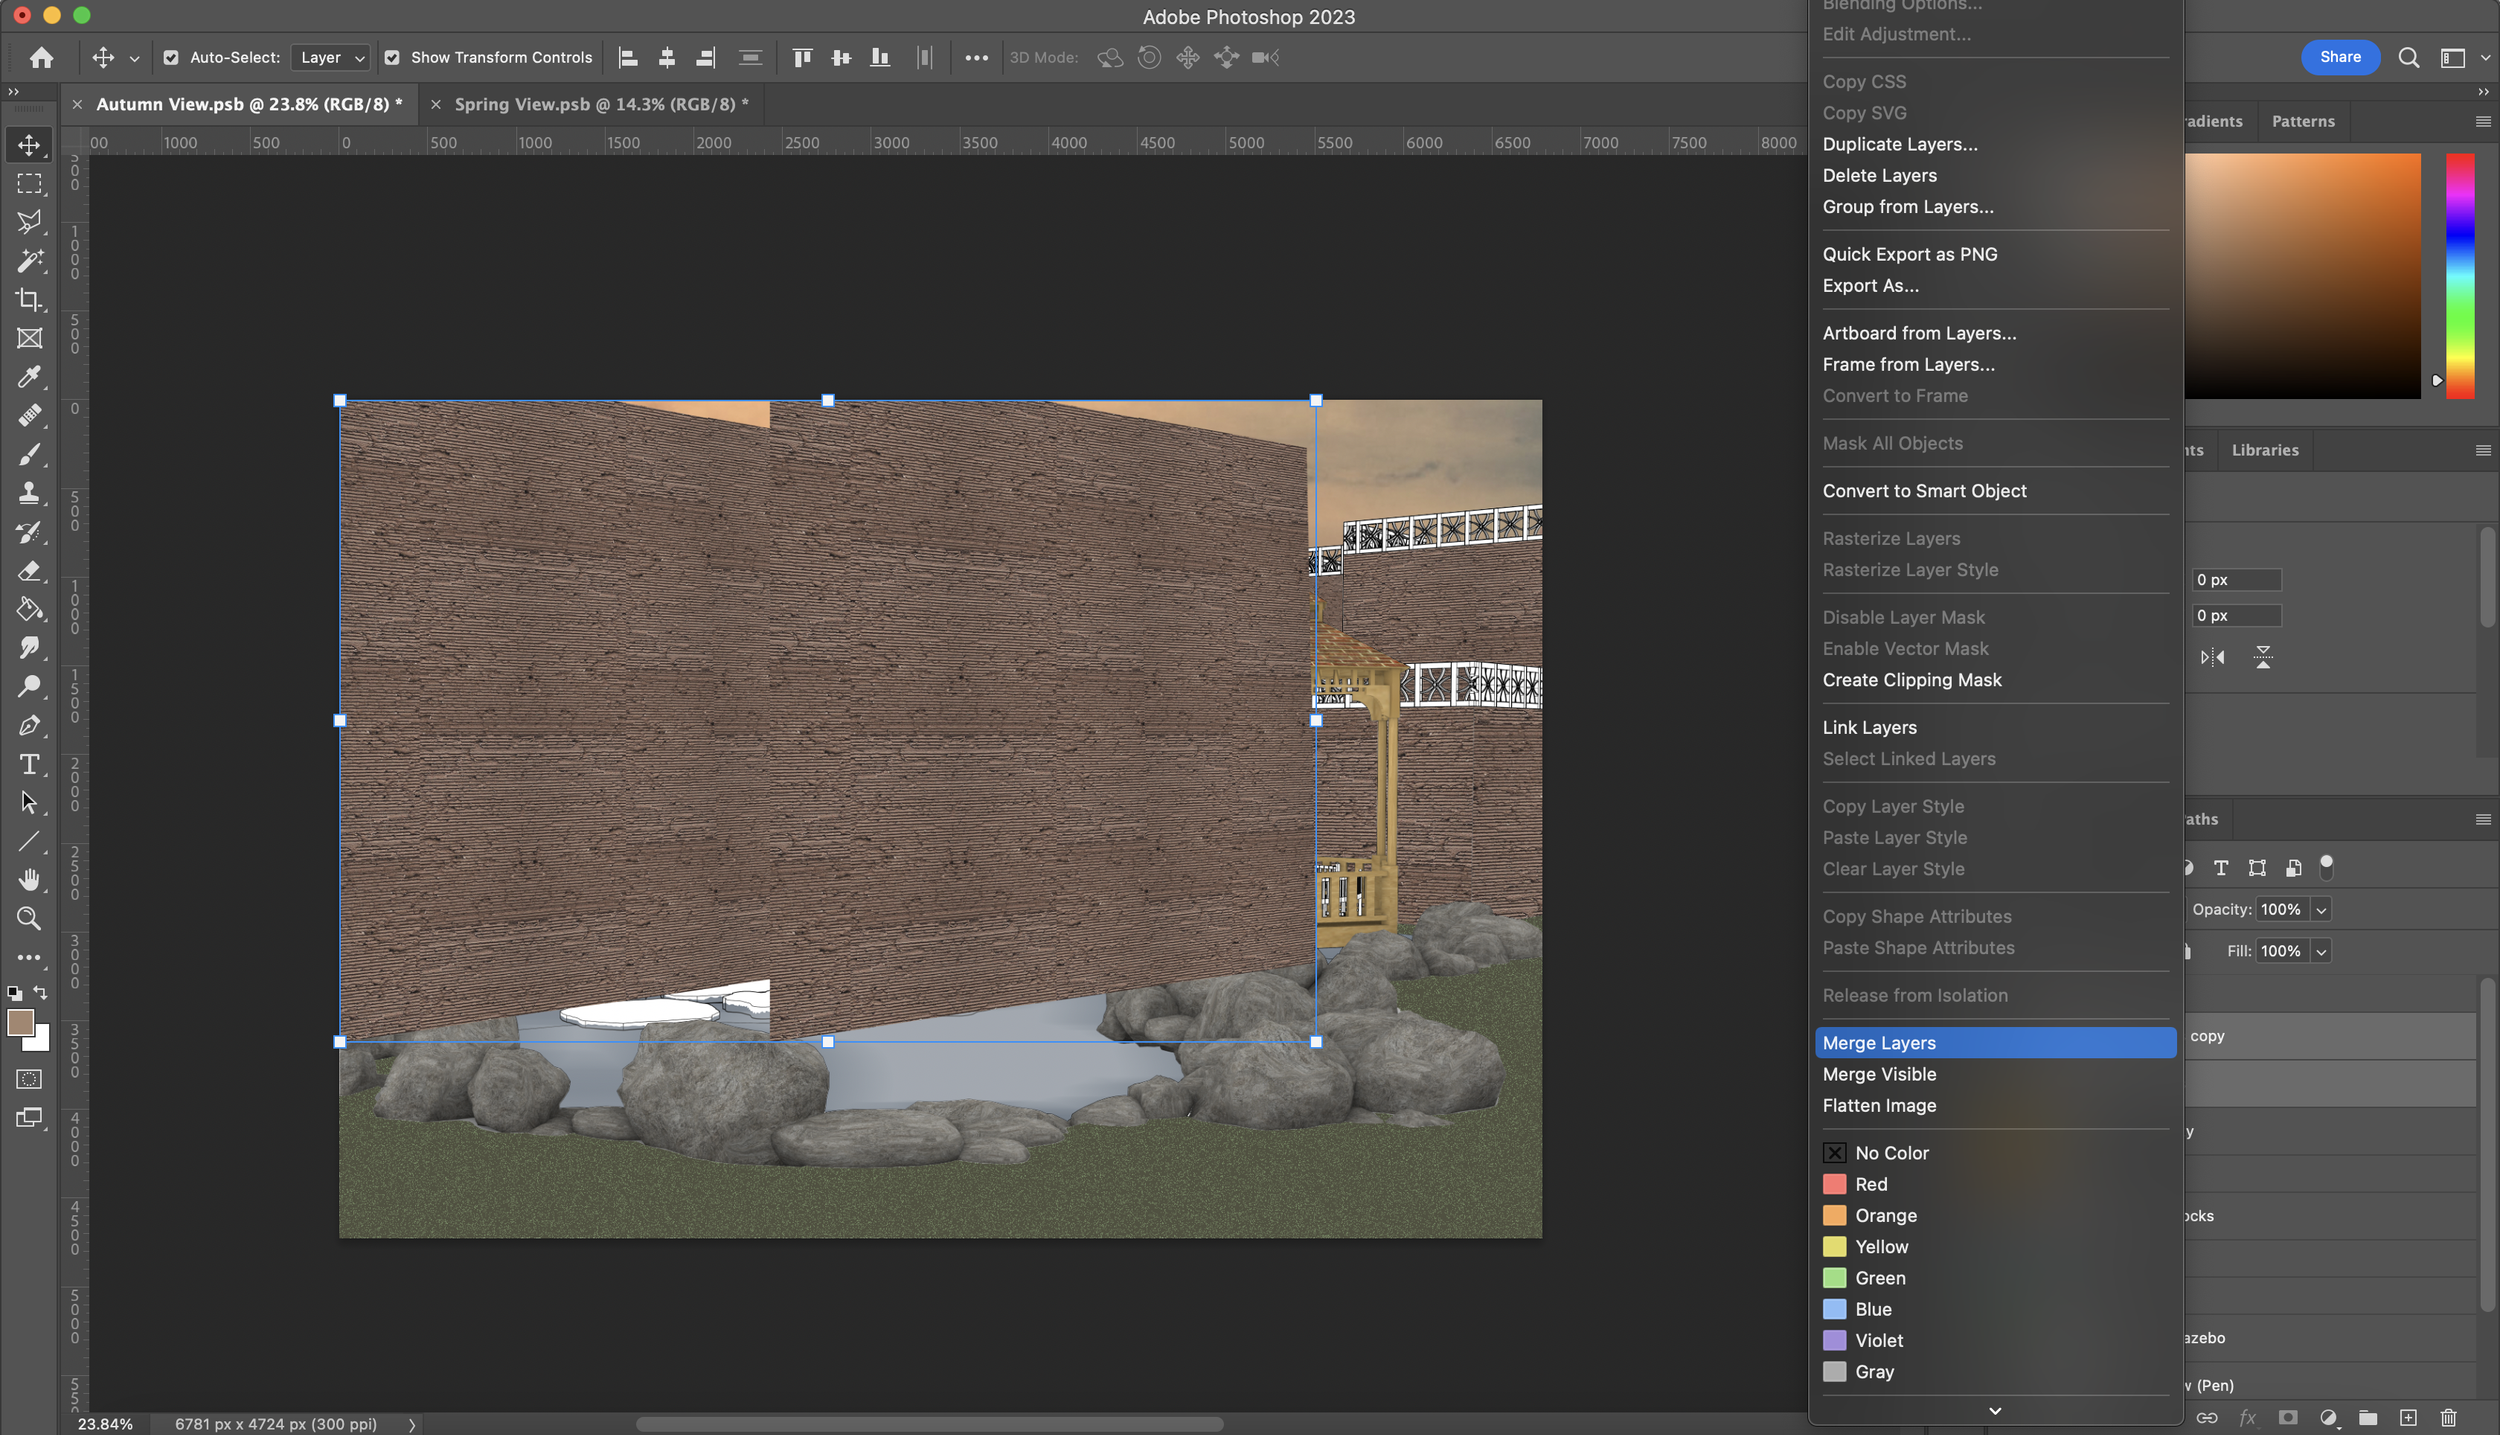
Bring in your texture and using your human scale logic, resize the texture and duplicate it a couple of times as shown below. Then select these duplicated textures in your layers panel, right-click and select ‘Merge Layers’ so we can now cover a larger surface area. A key tip to adding textures to walls is to add them individually. Don’t apply one texture to a large number of different walls as later on, you will find that they all have different lighting conditions and it becomes harder to deal with adding the different conditions onto each one.
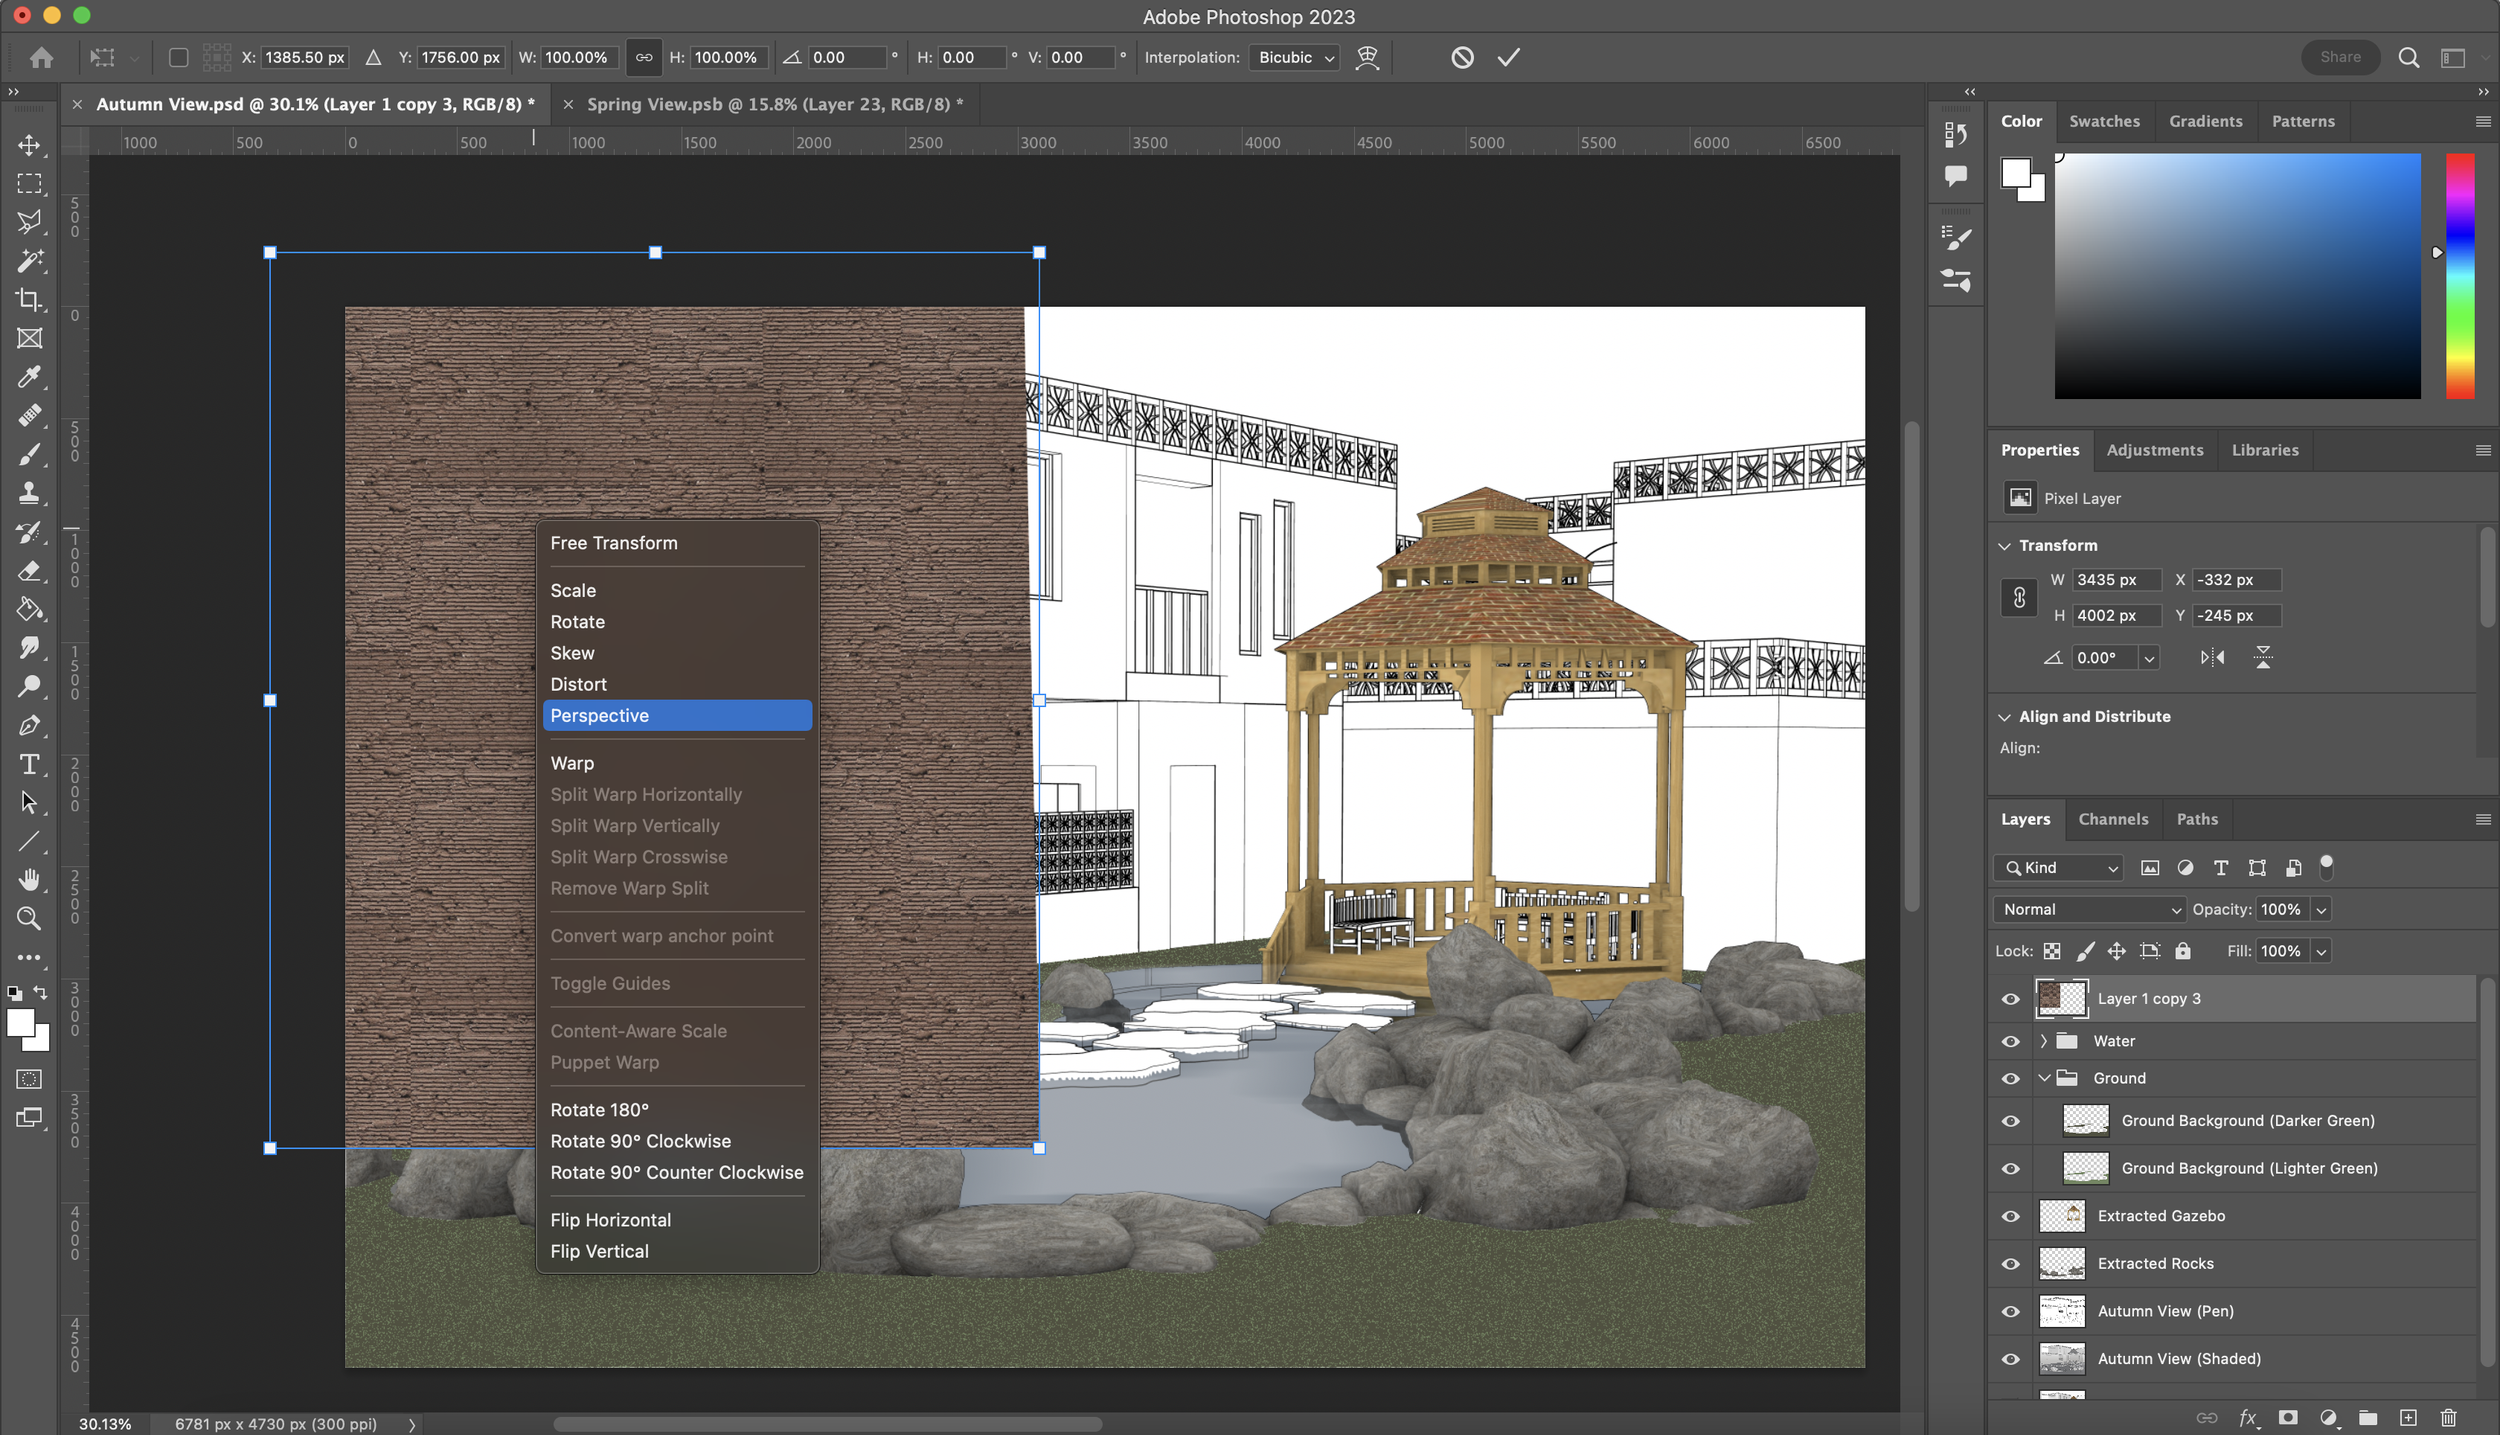
Once merged, we will also be transforming it so it fits the perspective of this wall. A quick way to access your transform options is by pressing ‘Cmd + T’ or ‘Ctrl + T’ and then right-clicking on the texture. You will then see all the transform options of which we will be using ‘Perspective’ in order to match the wall perspective. Using your knowledge of 2-point perspectives, match the texture to the wall and press ‘Enter’ when you’re happy in order to exit transform mode.
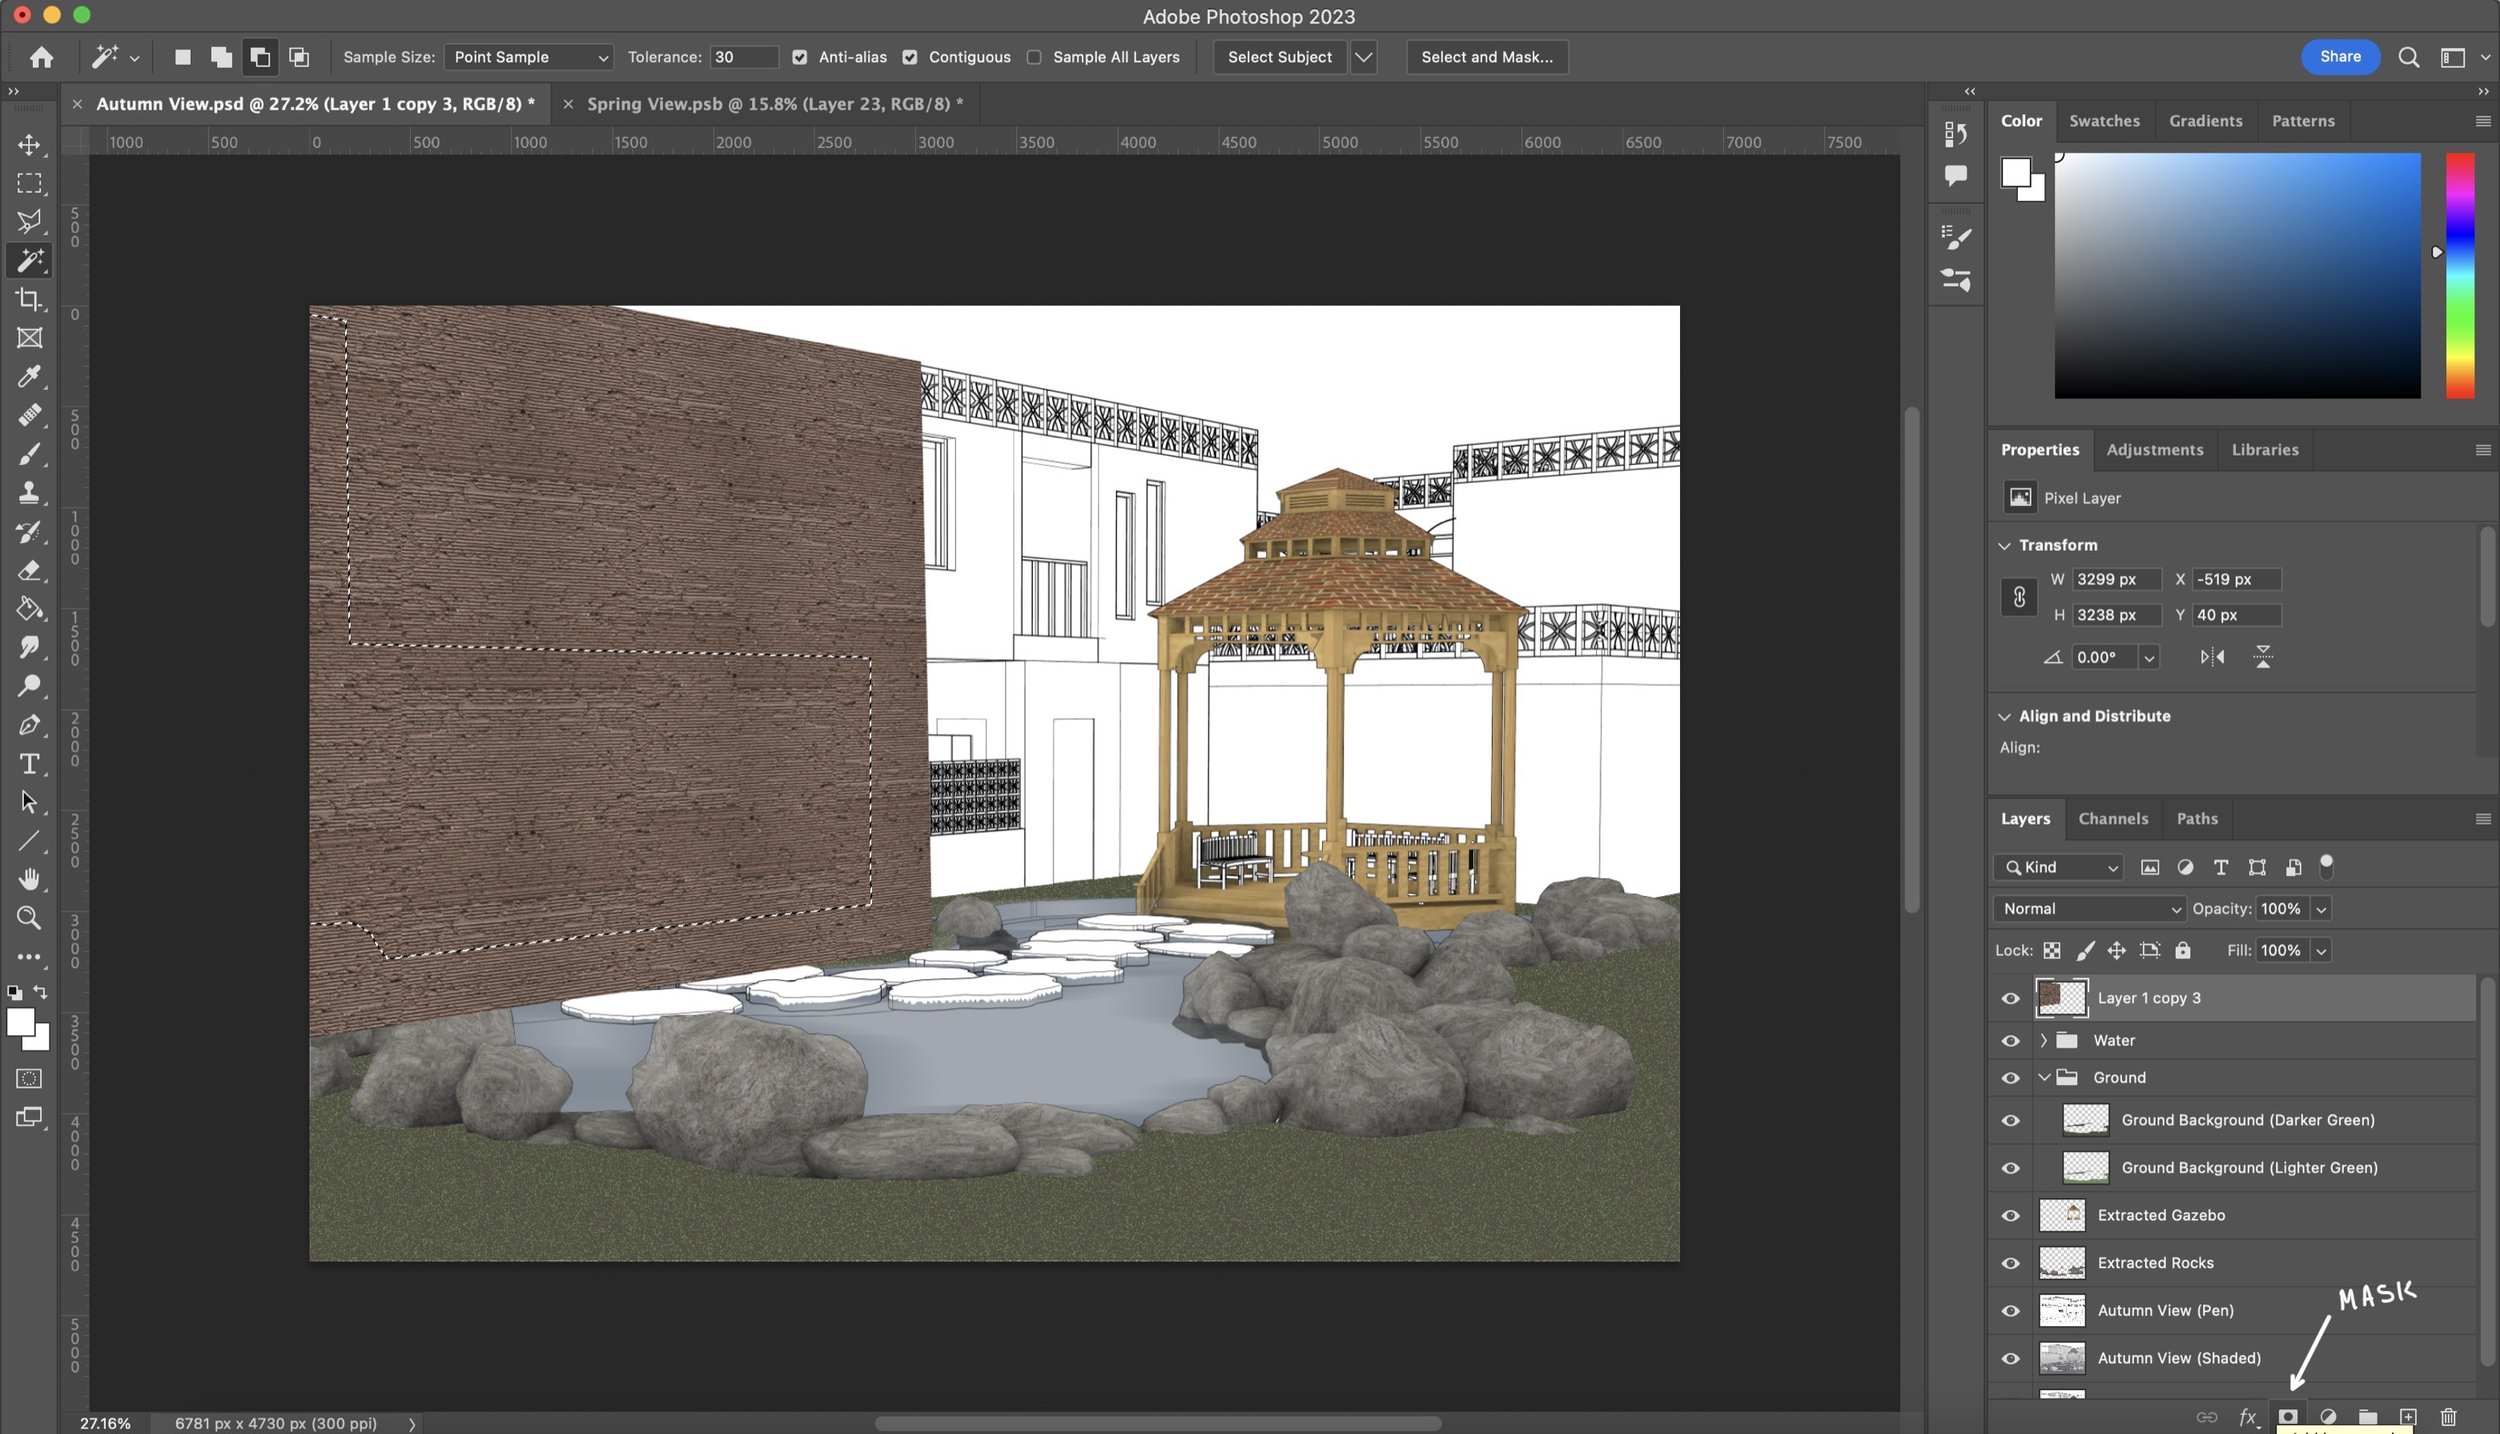
The next step is CRUCIAL and I cannot elaborate on how many times I have seen people make this mistake. So, what a Photoshop beginner, and even some intermediate users, will do is delete the unnecessary parts of the texture and apply them to the wall area. This is a major rookie mistake which makes future adjustments and changes extremely difficult to do because the deleted history of that texture cannot be restored. Instead, you need to always MASK not delete.
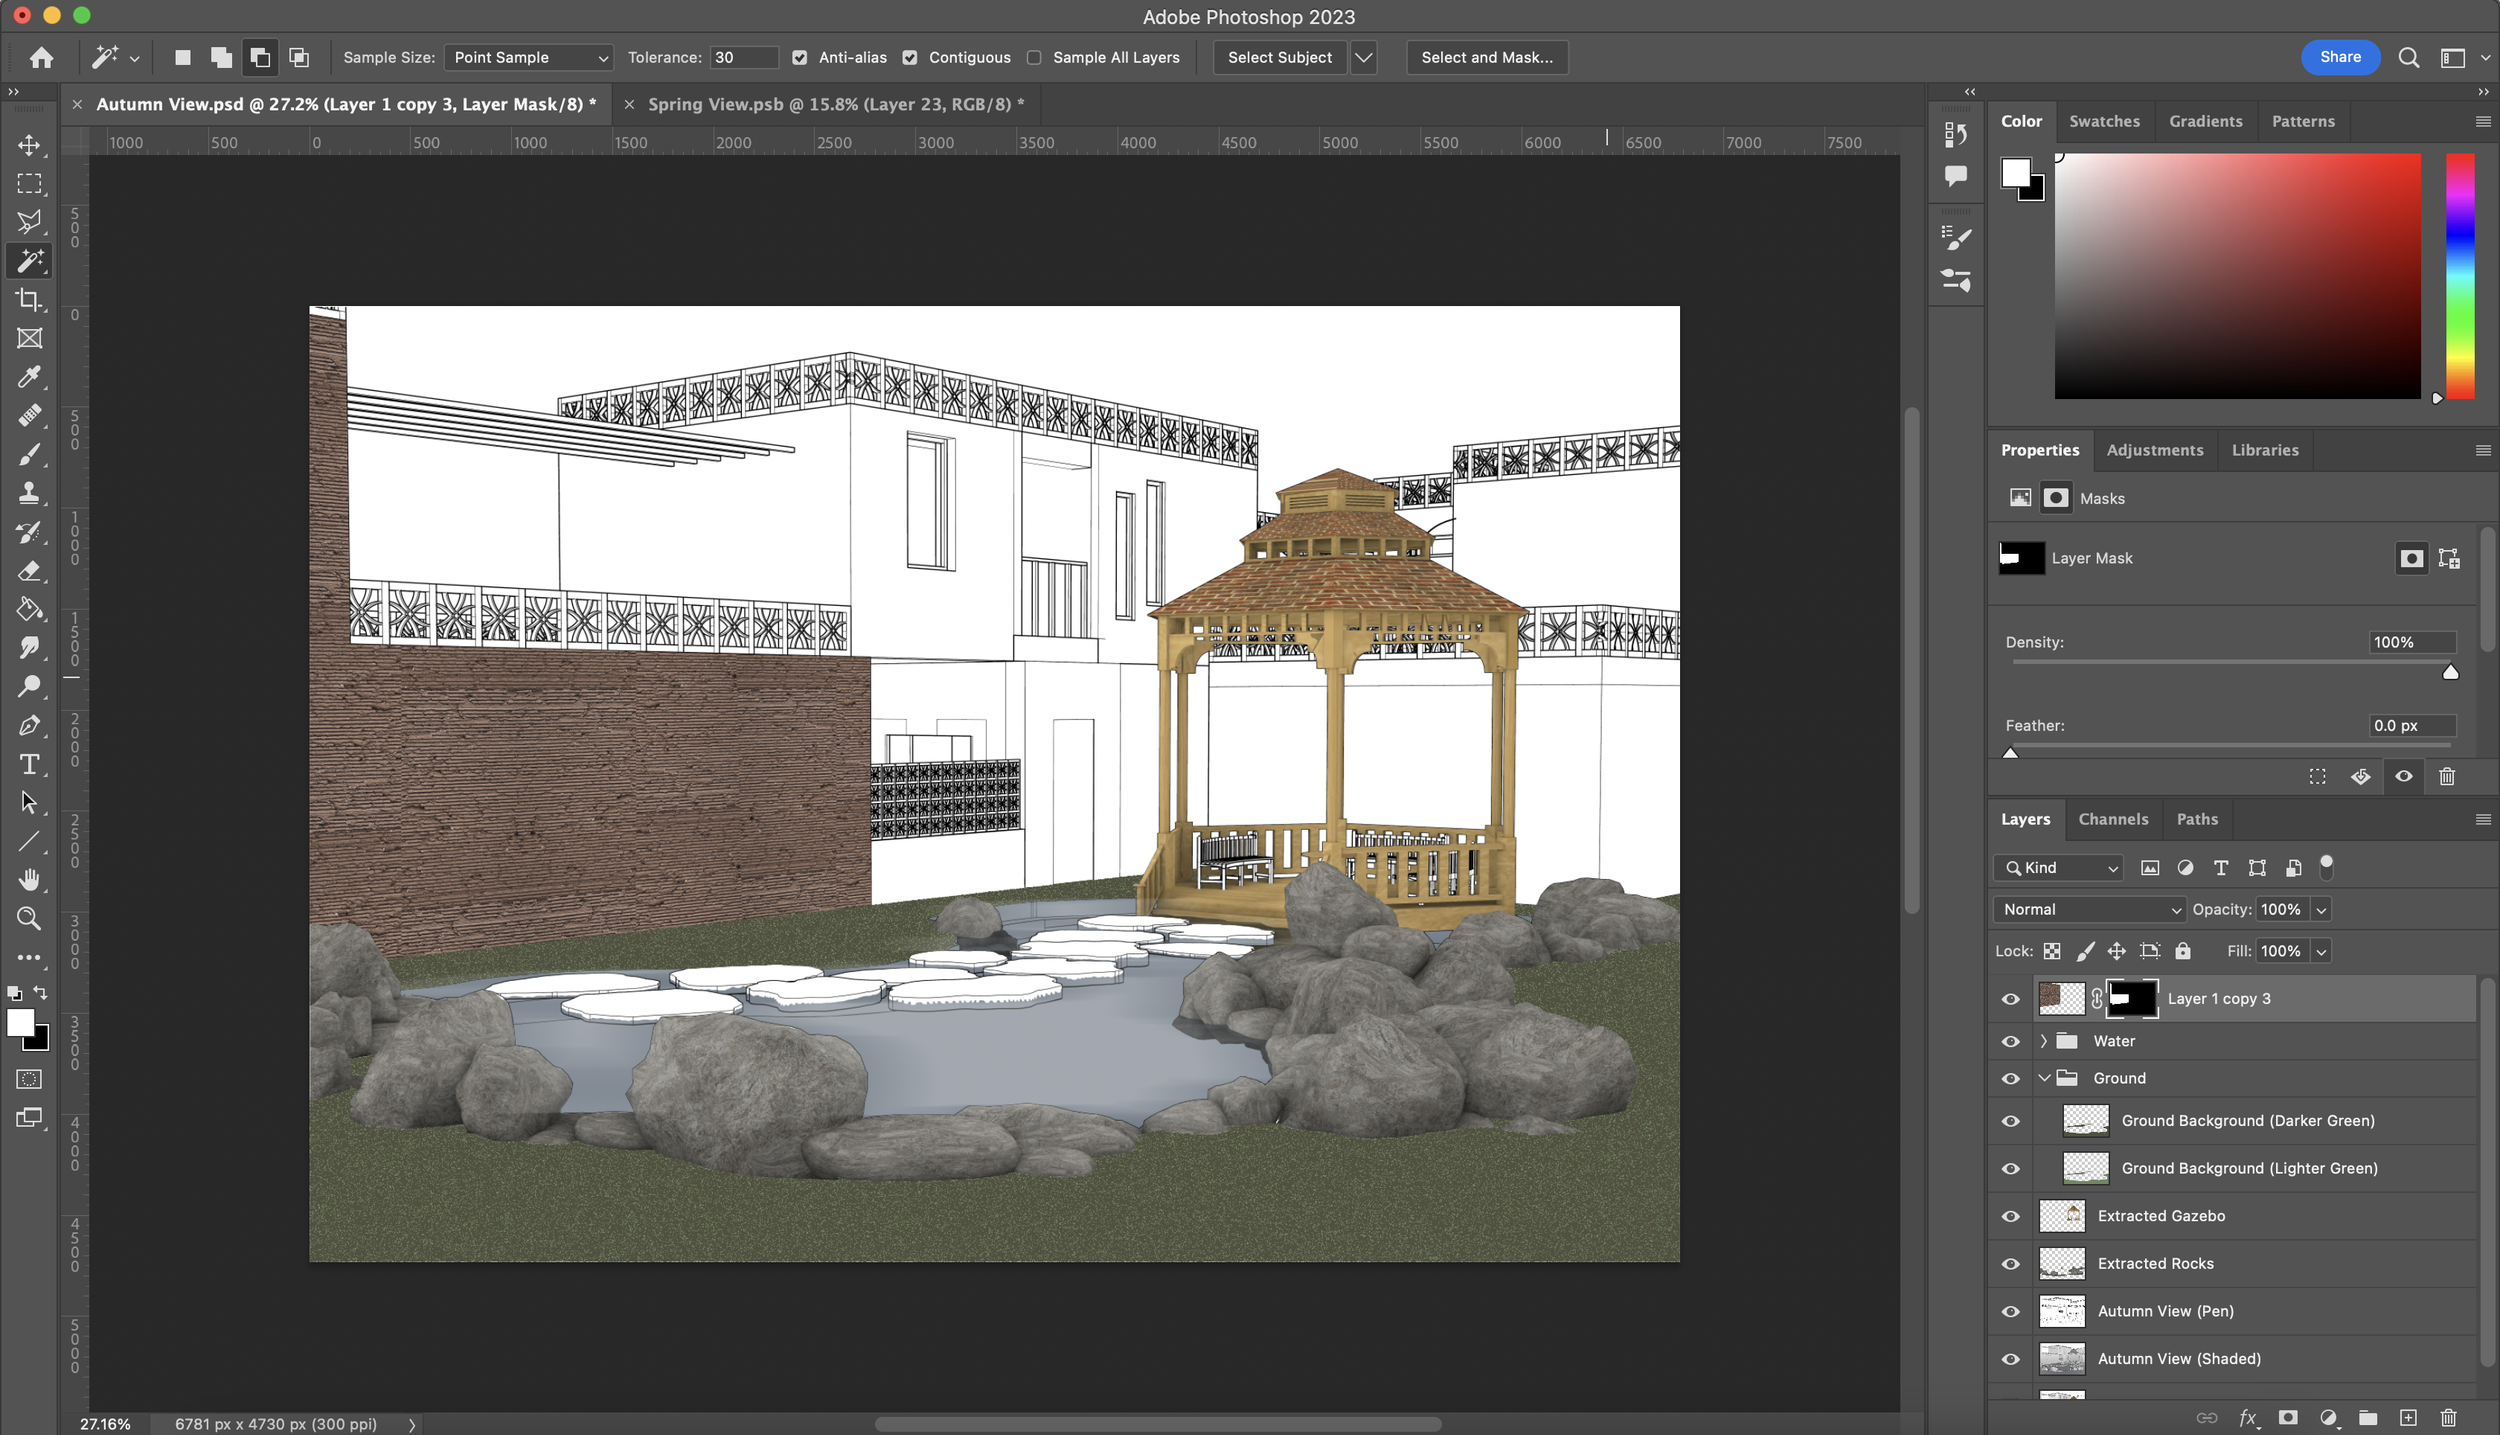
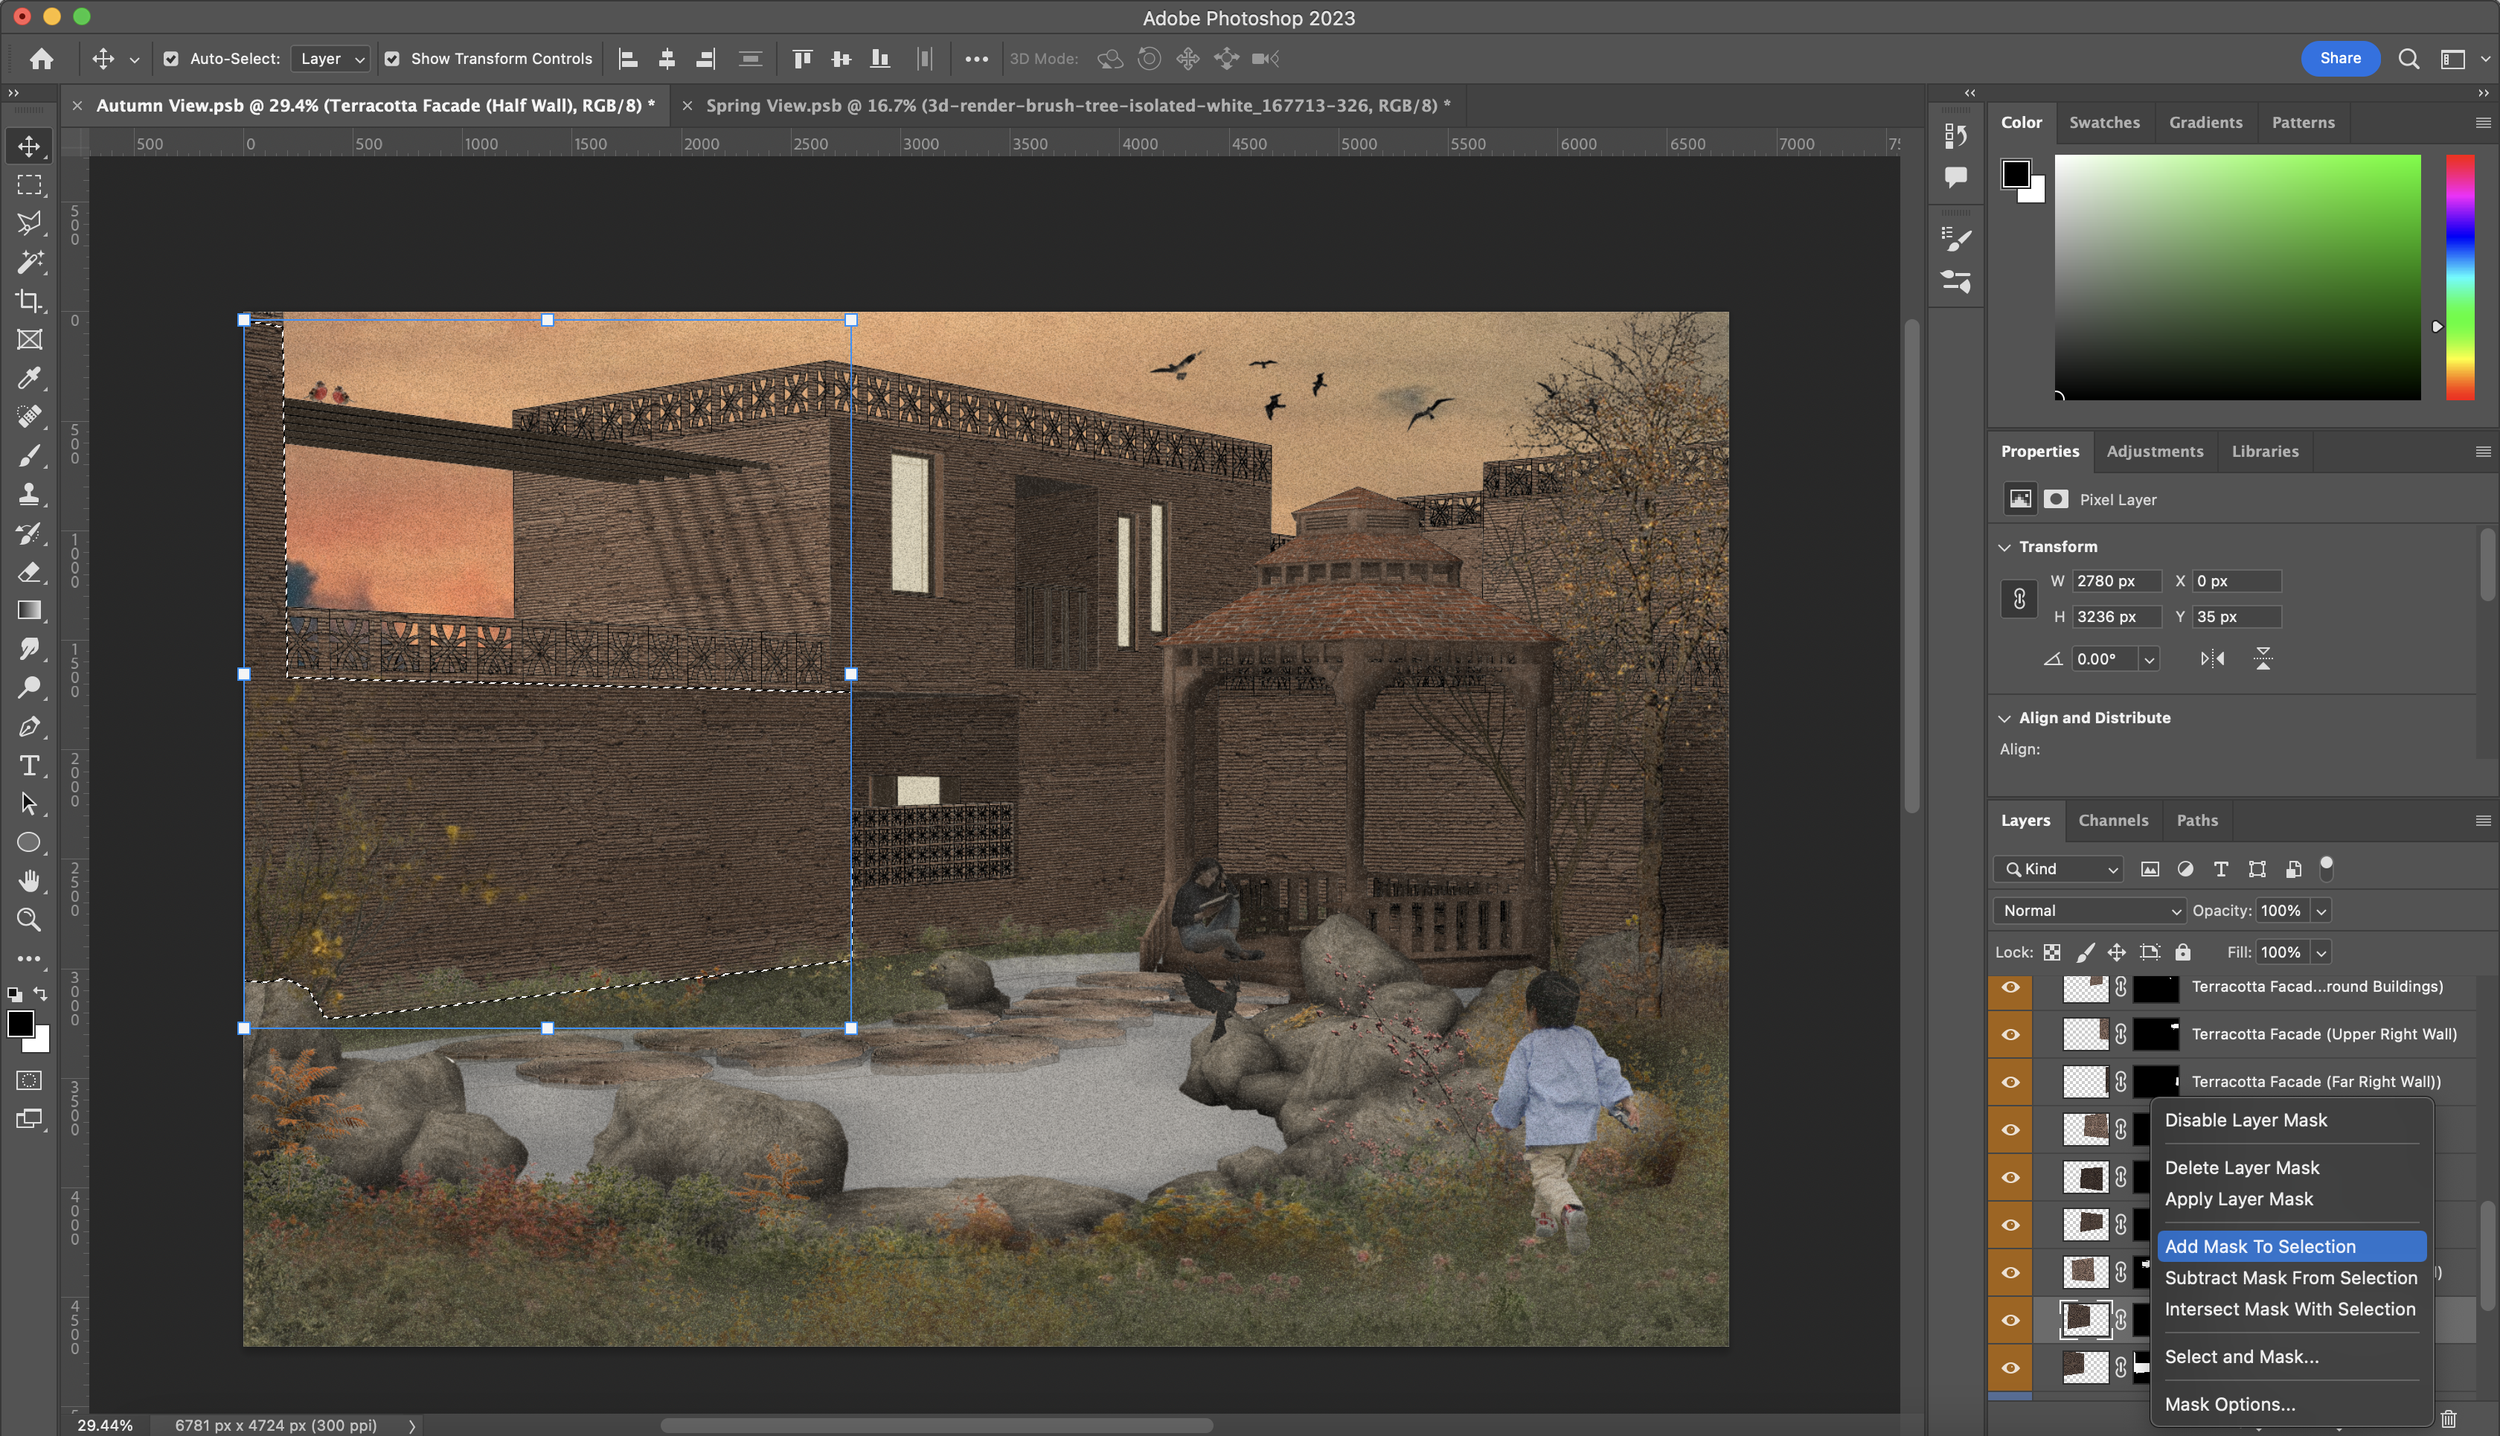
If you are new to masking, this is how to use it. So we now have our texture covering a part of a wall, what we want to do next is select the wall area we want to apply the texture to. You can simply switch the visibility off on the texture for now and go back to one of the model view layers to make your selection. Again, use the previous selection tools and/or other for this process. Once selected, go back onto your texture layer, switch the visibility back on and click the ‘Add Layer Mask’ button at the bottom of the Layers panel (marked in the screenshot below). Now the texture has been masked as the selected areas have been recognised as the positive space (what we want visible and kept) and the negative space is areas of the texture which we do not want to see. The difference between masking and deleting is that when we mask the original form of the texture is kept. If you was to delete the mask off of that layer, you would be back to square one. If in the scenario you would like to move the texture within the layer mask, you can simply unlink the two by clicking the chain icon between the layer preview box and layer mask.
The next step is to do this for all the wall in the remaining visual. Remember to do it in segments and not all in one go.
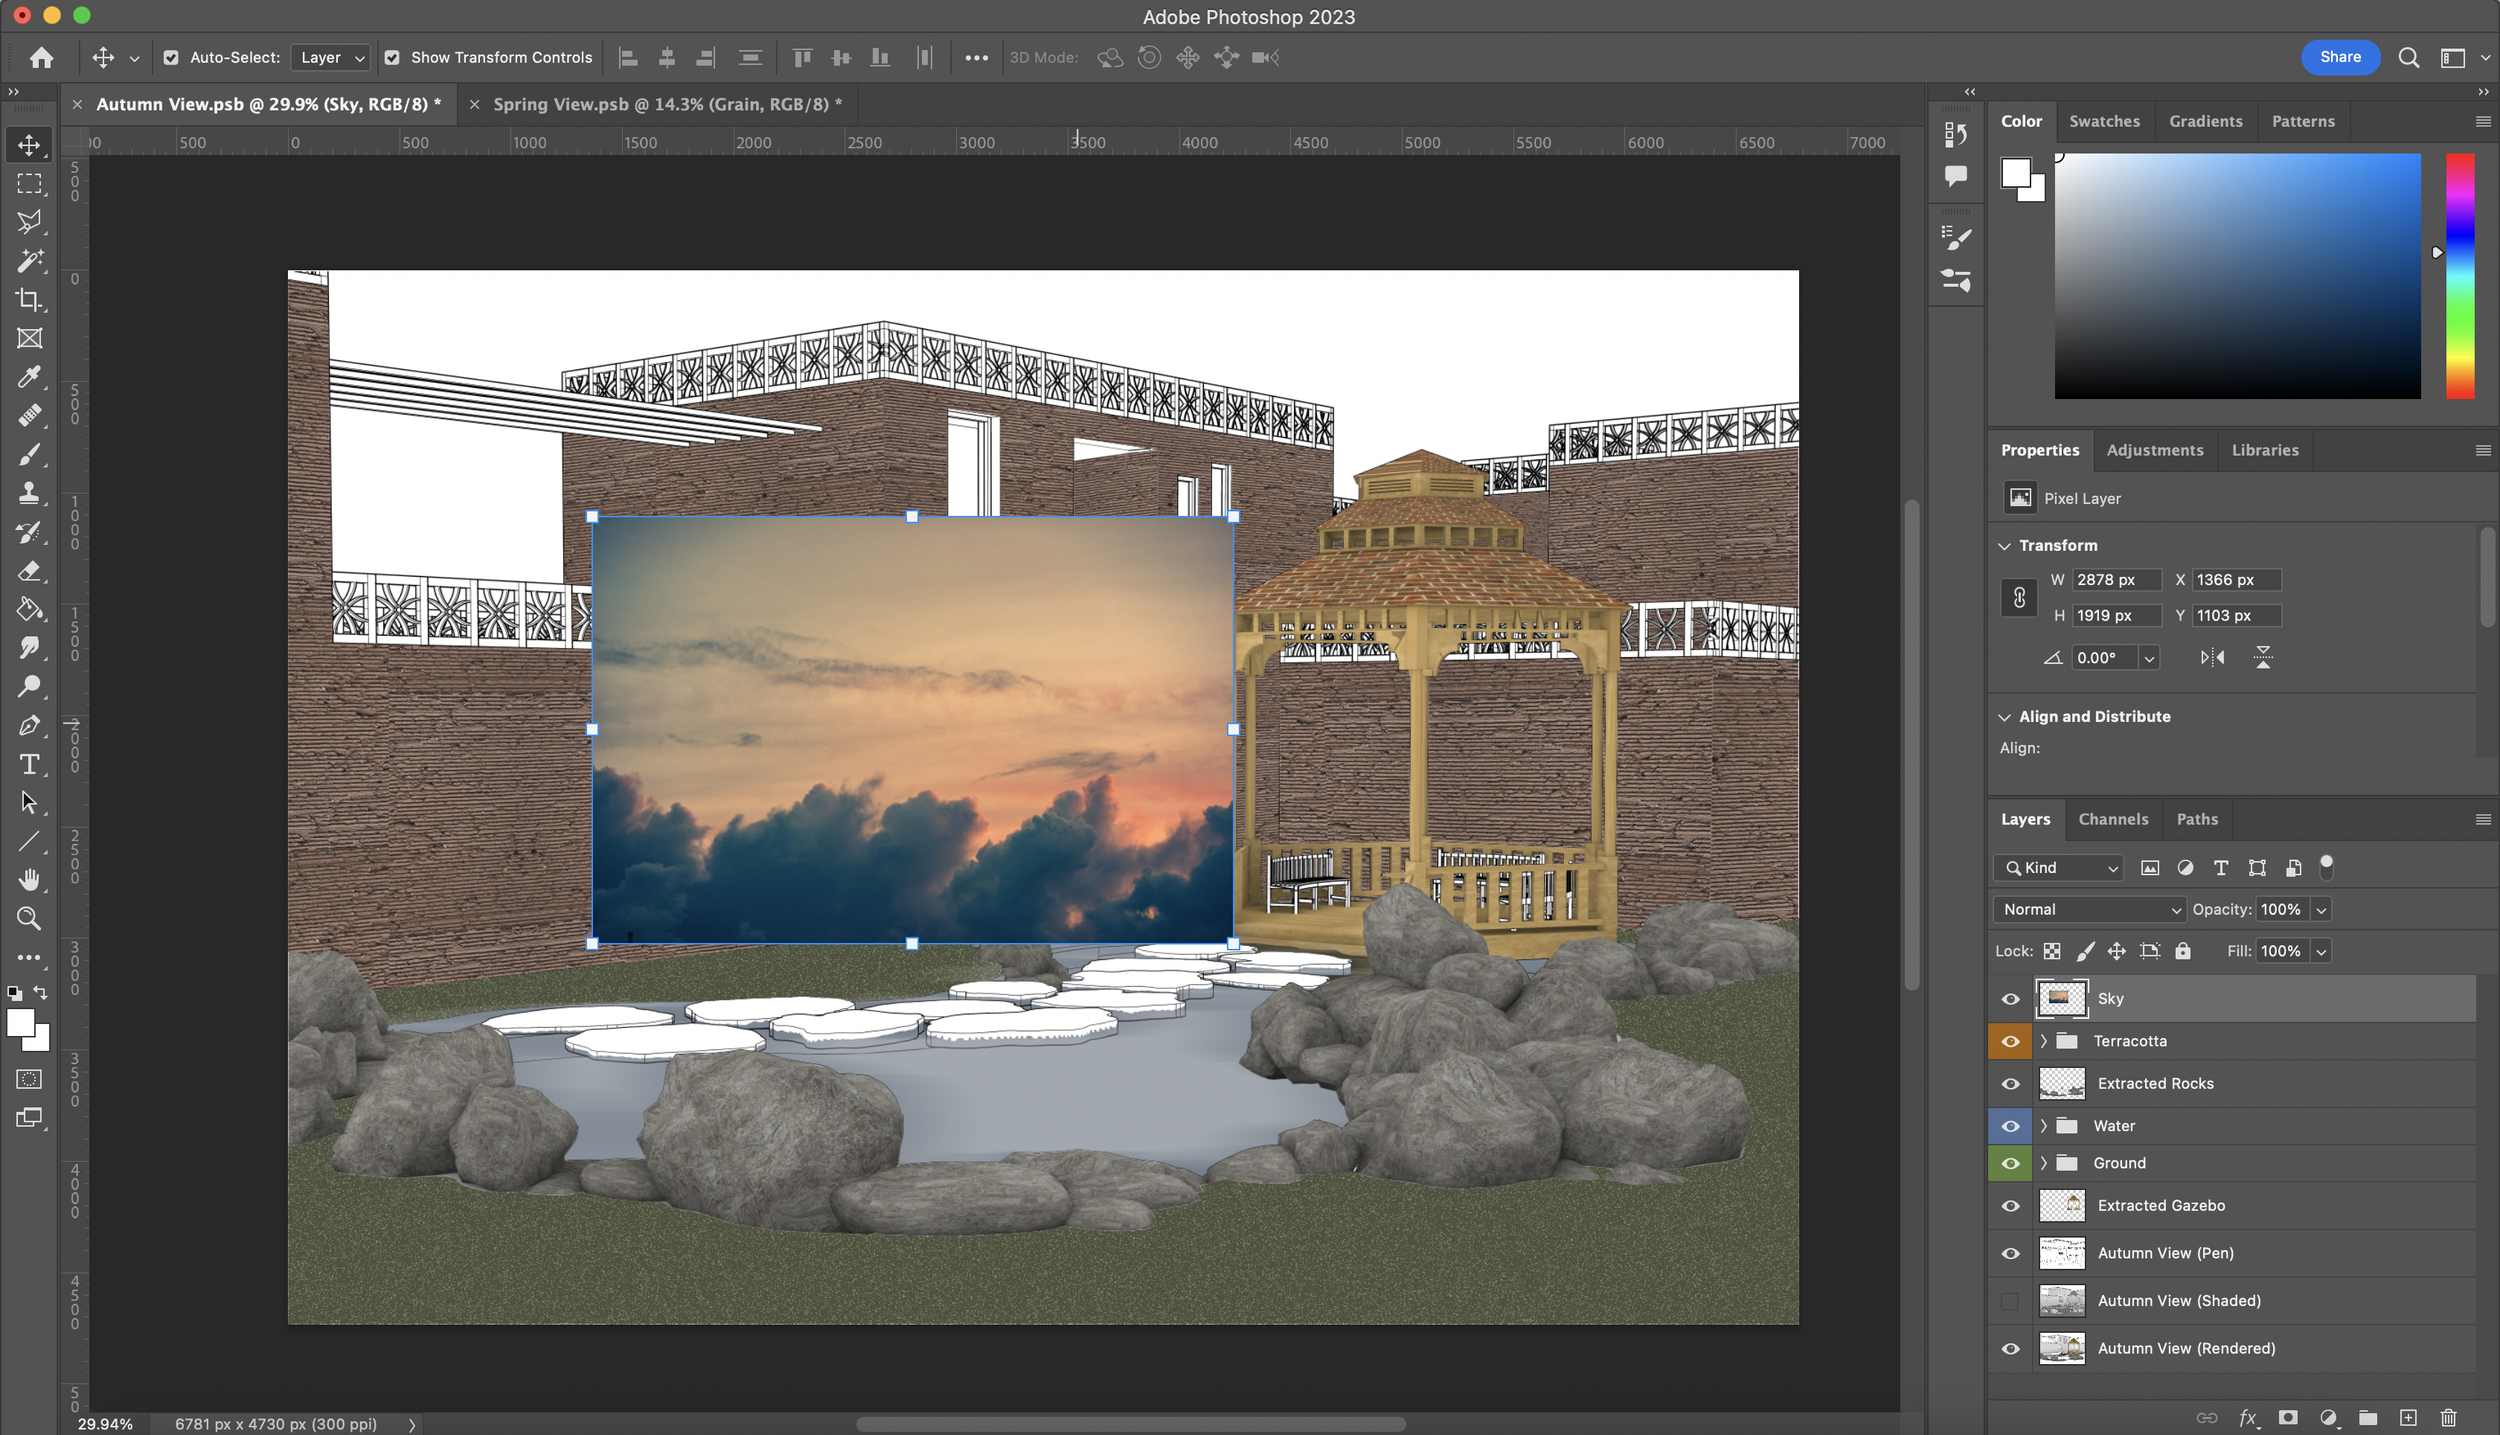
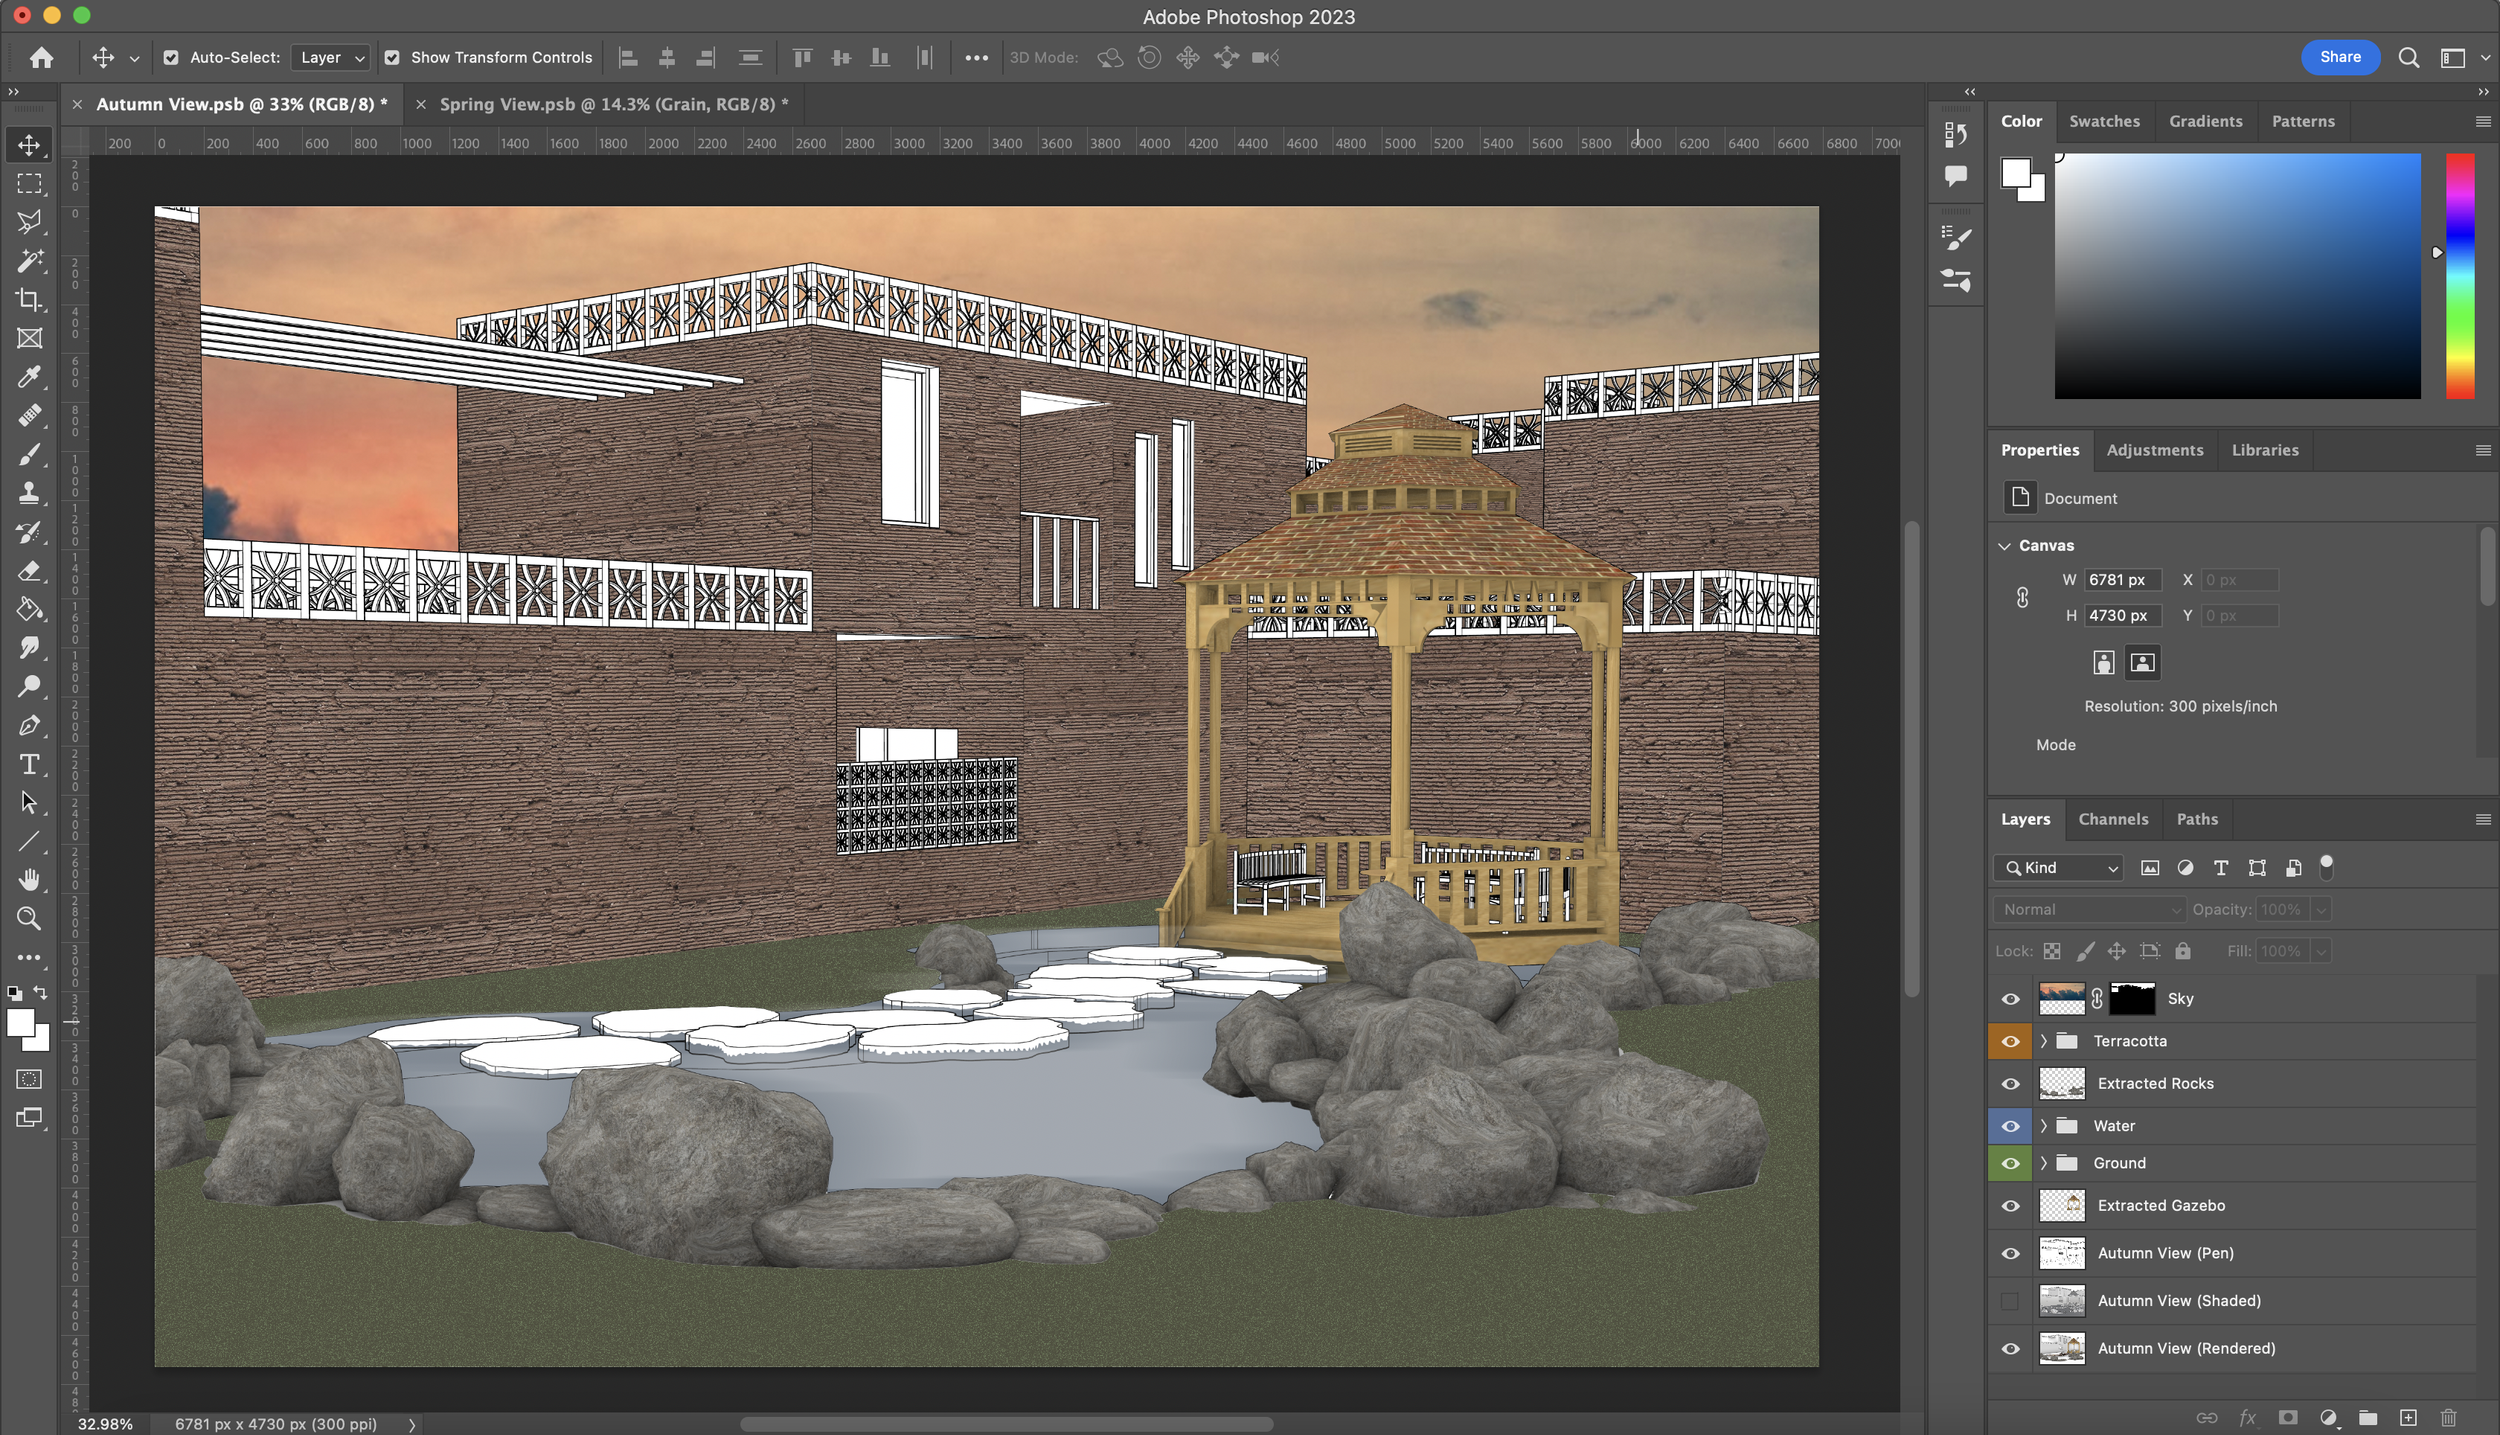
I’ll be using the same techniques mentioned in the last few steps to also apply a sky to this visual. I’d like it to be set in the autumnal season potentially around sunset which is what I searched for on Google images. Using the same selection tools and masking technique, I created a new layer, placed the image in, used my ‘Pen’ view to select the sky and masked the image.
Work Smarter, Not Harder
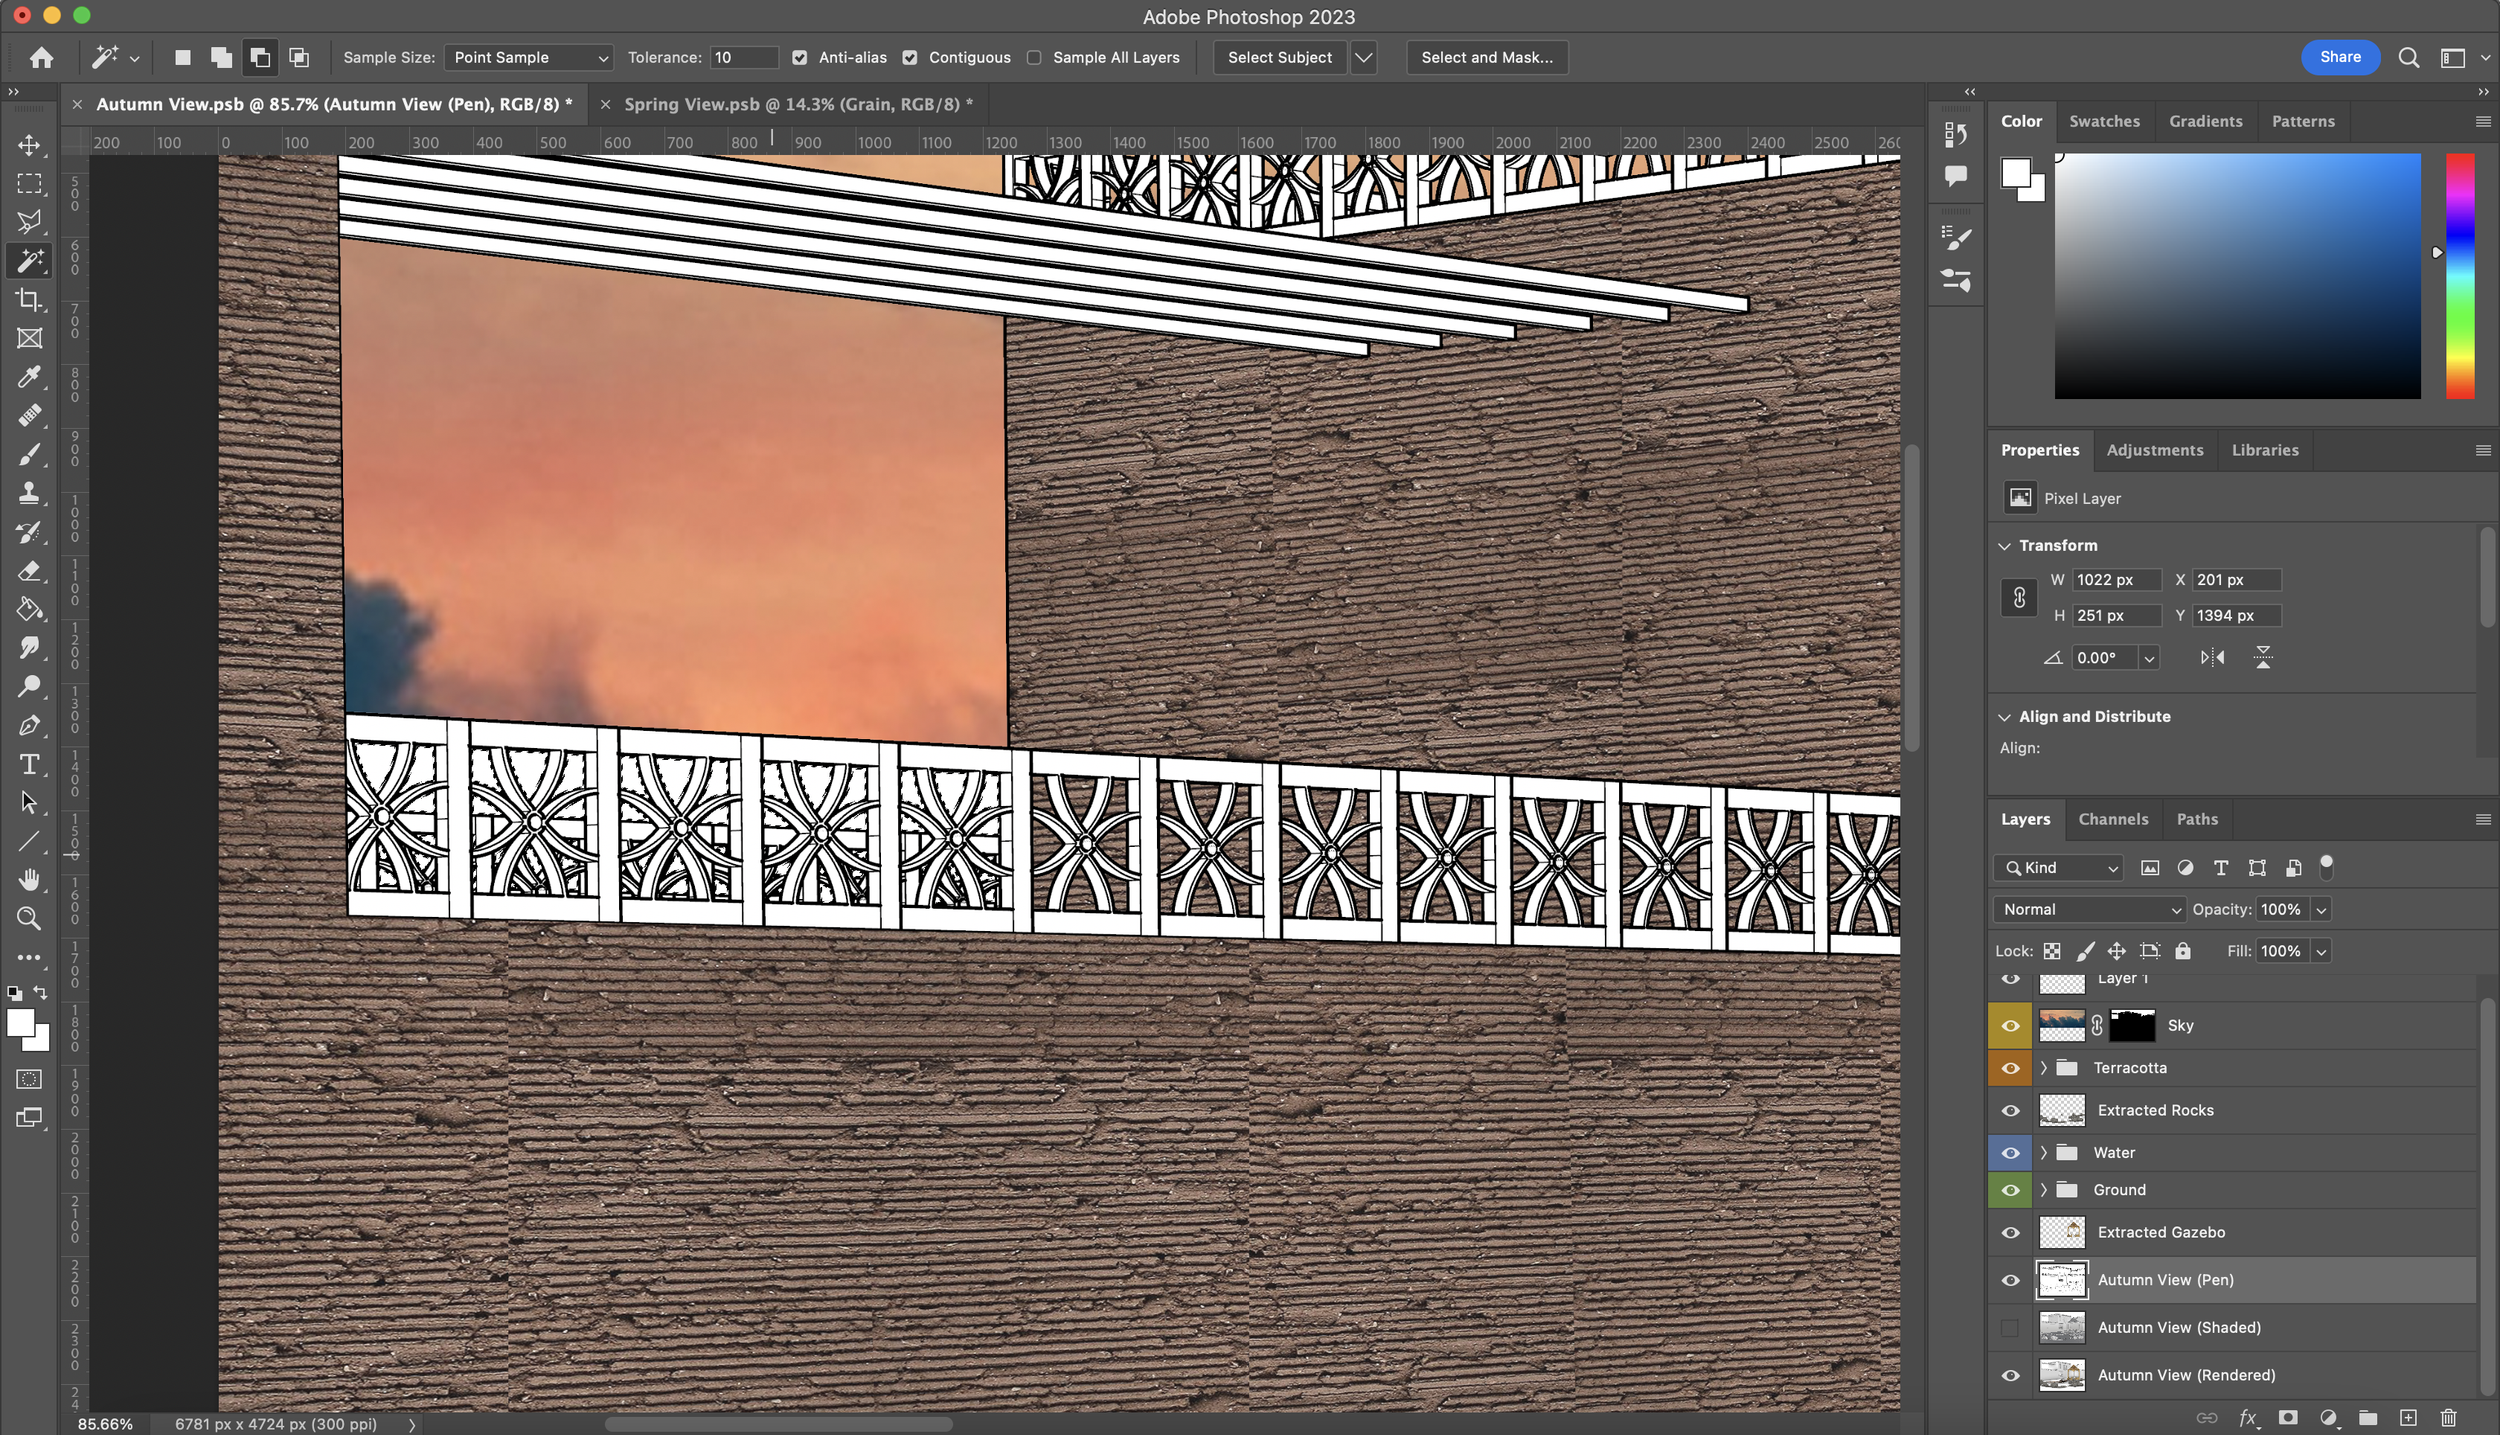
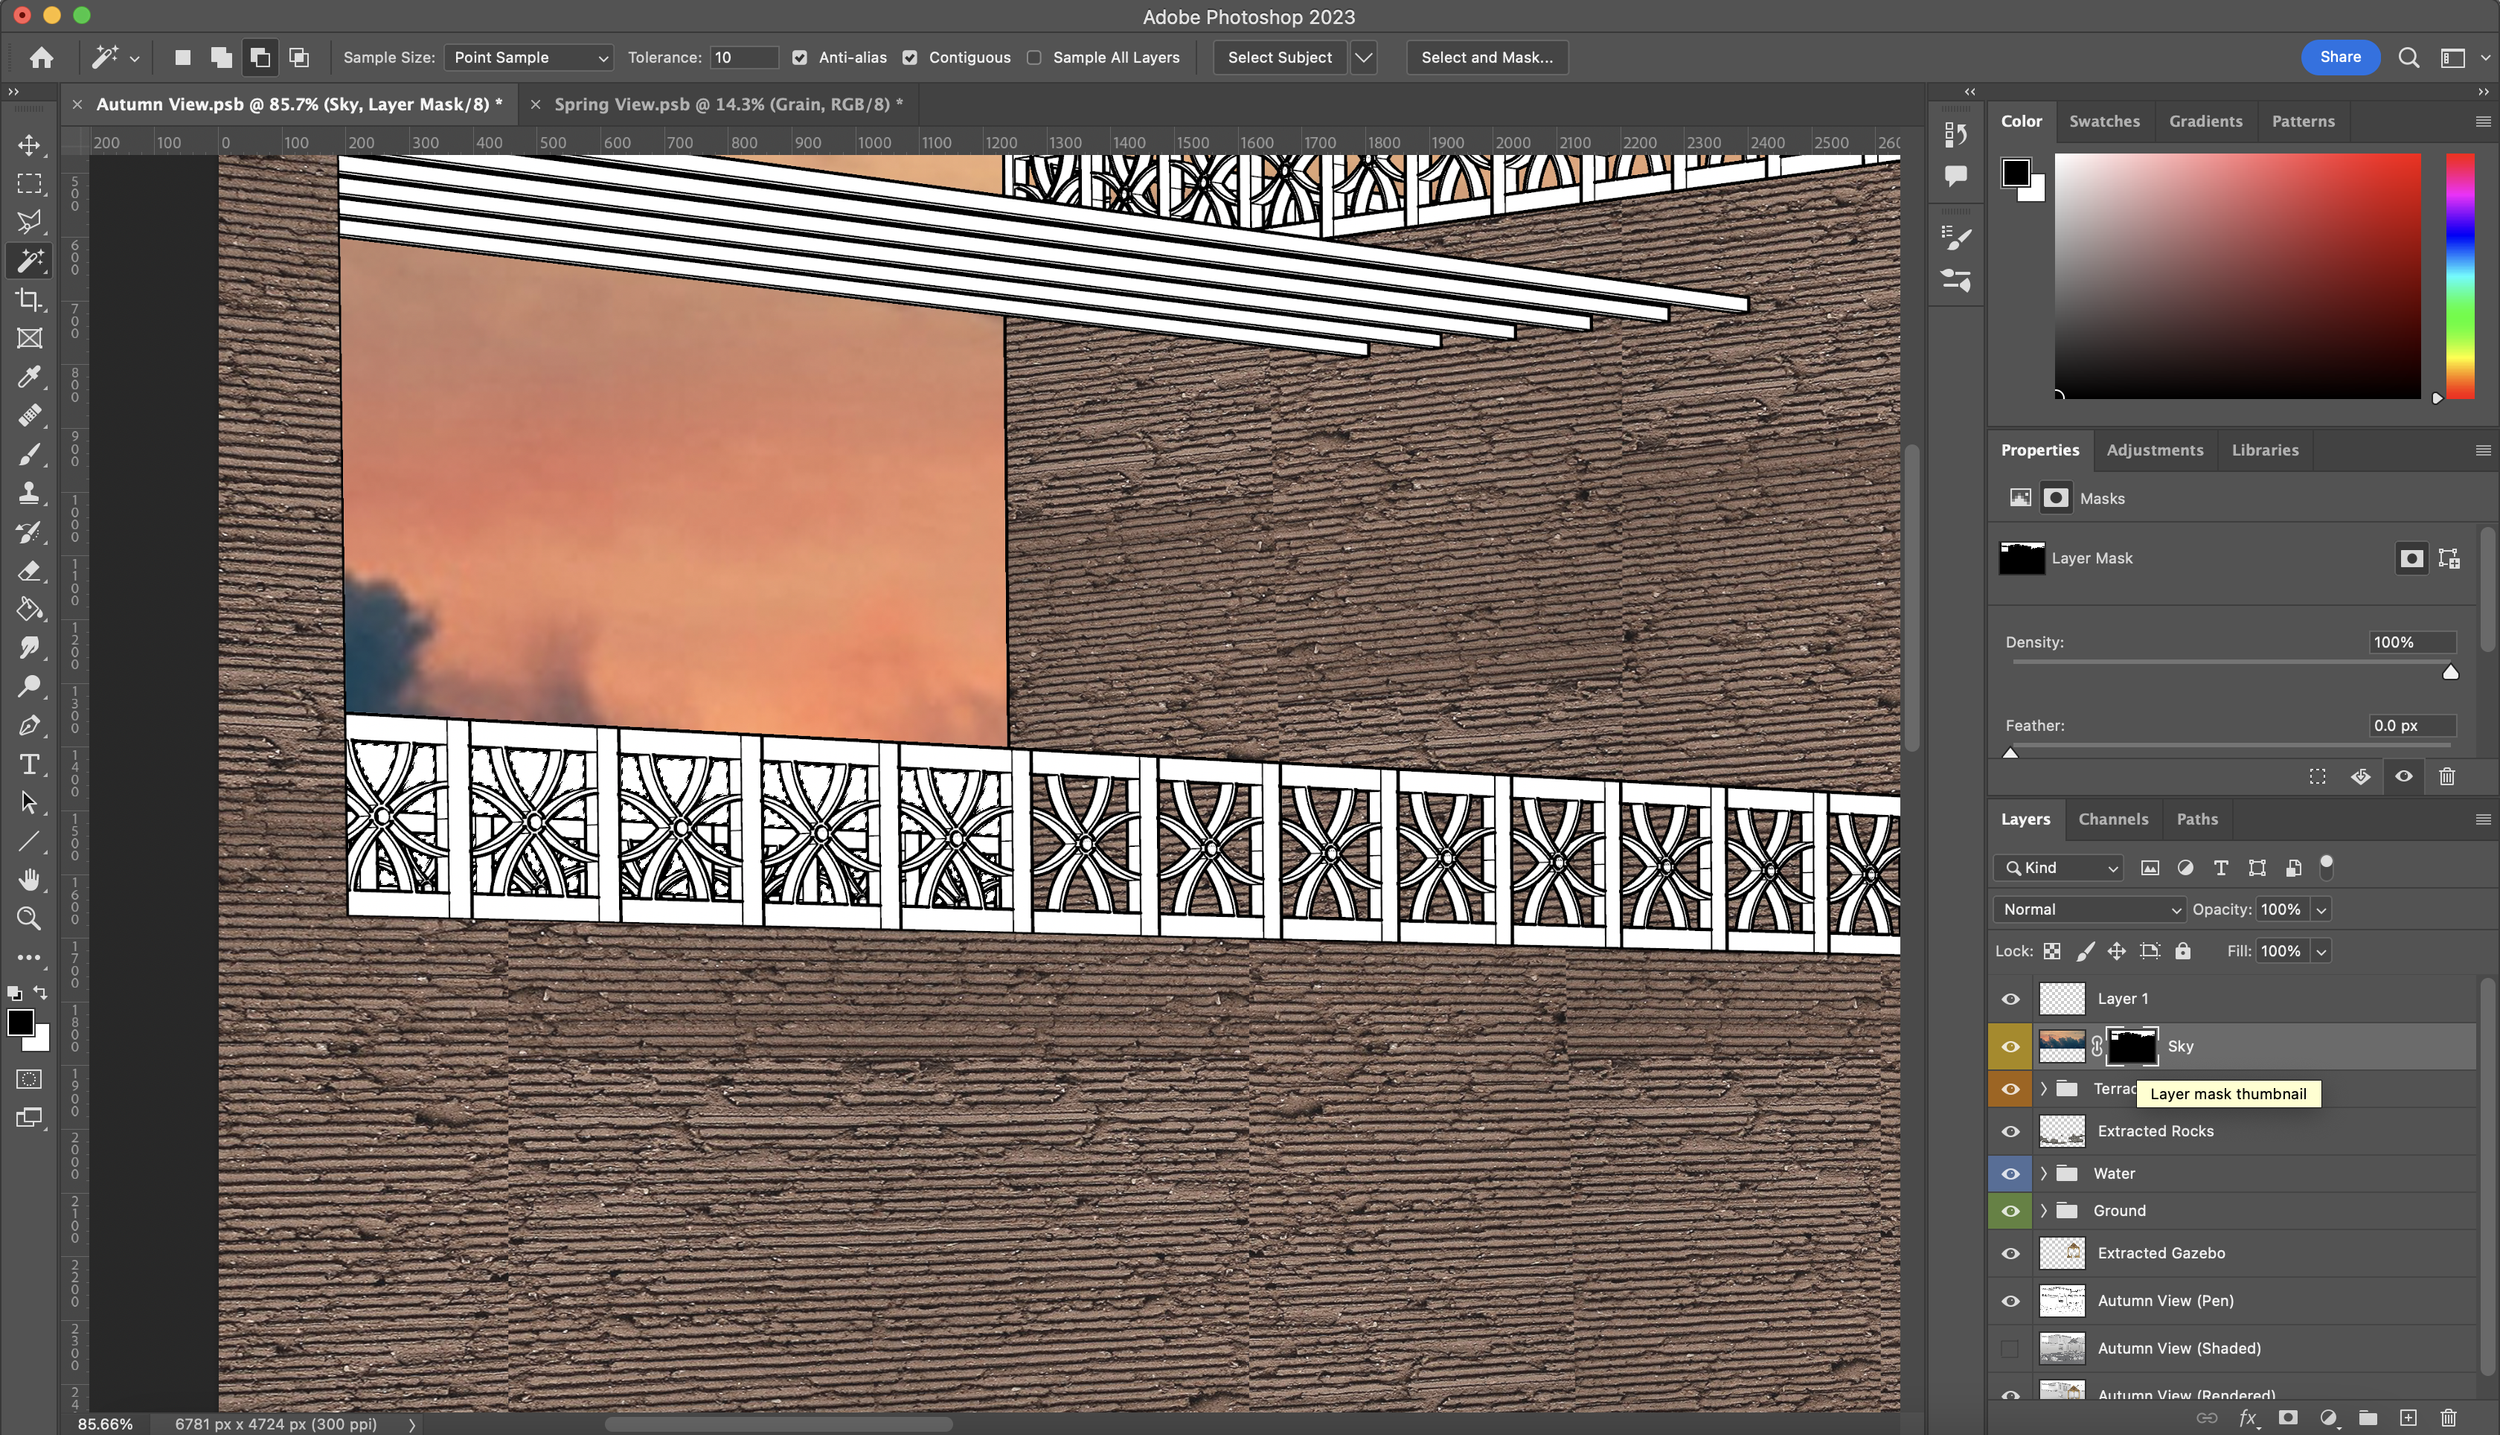
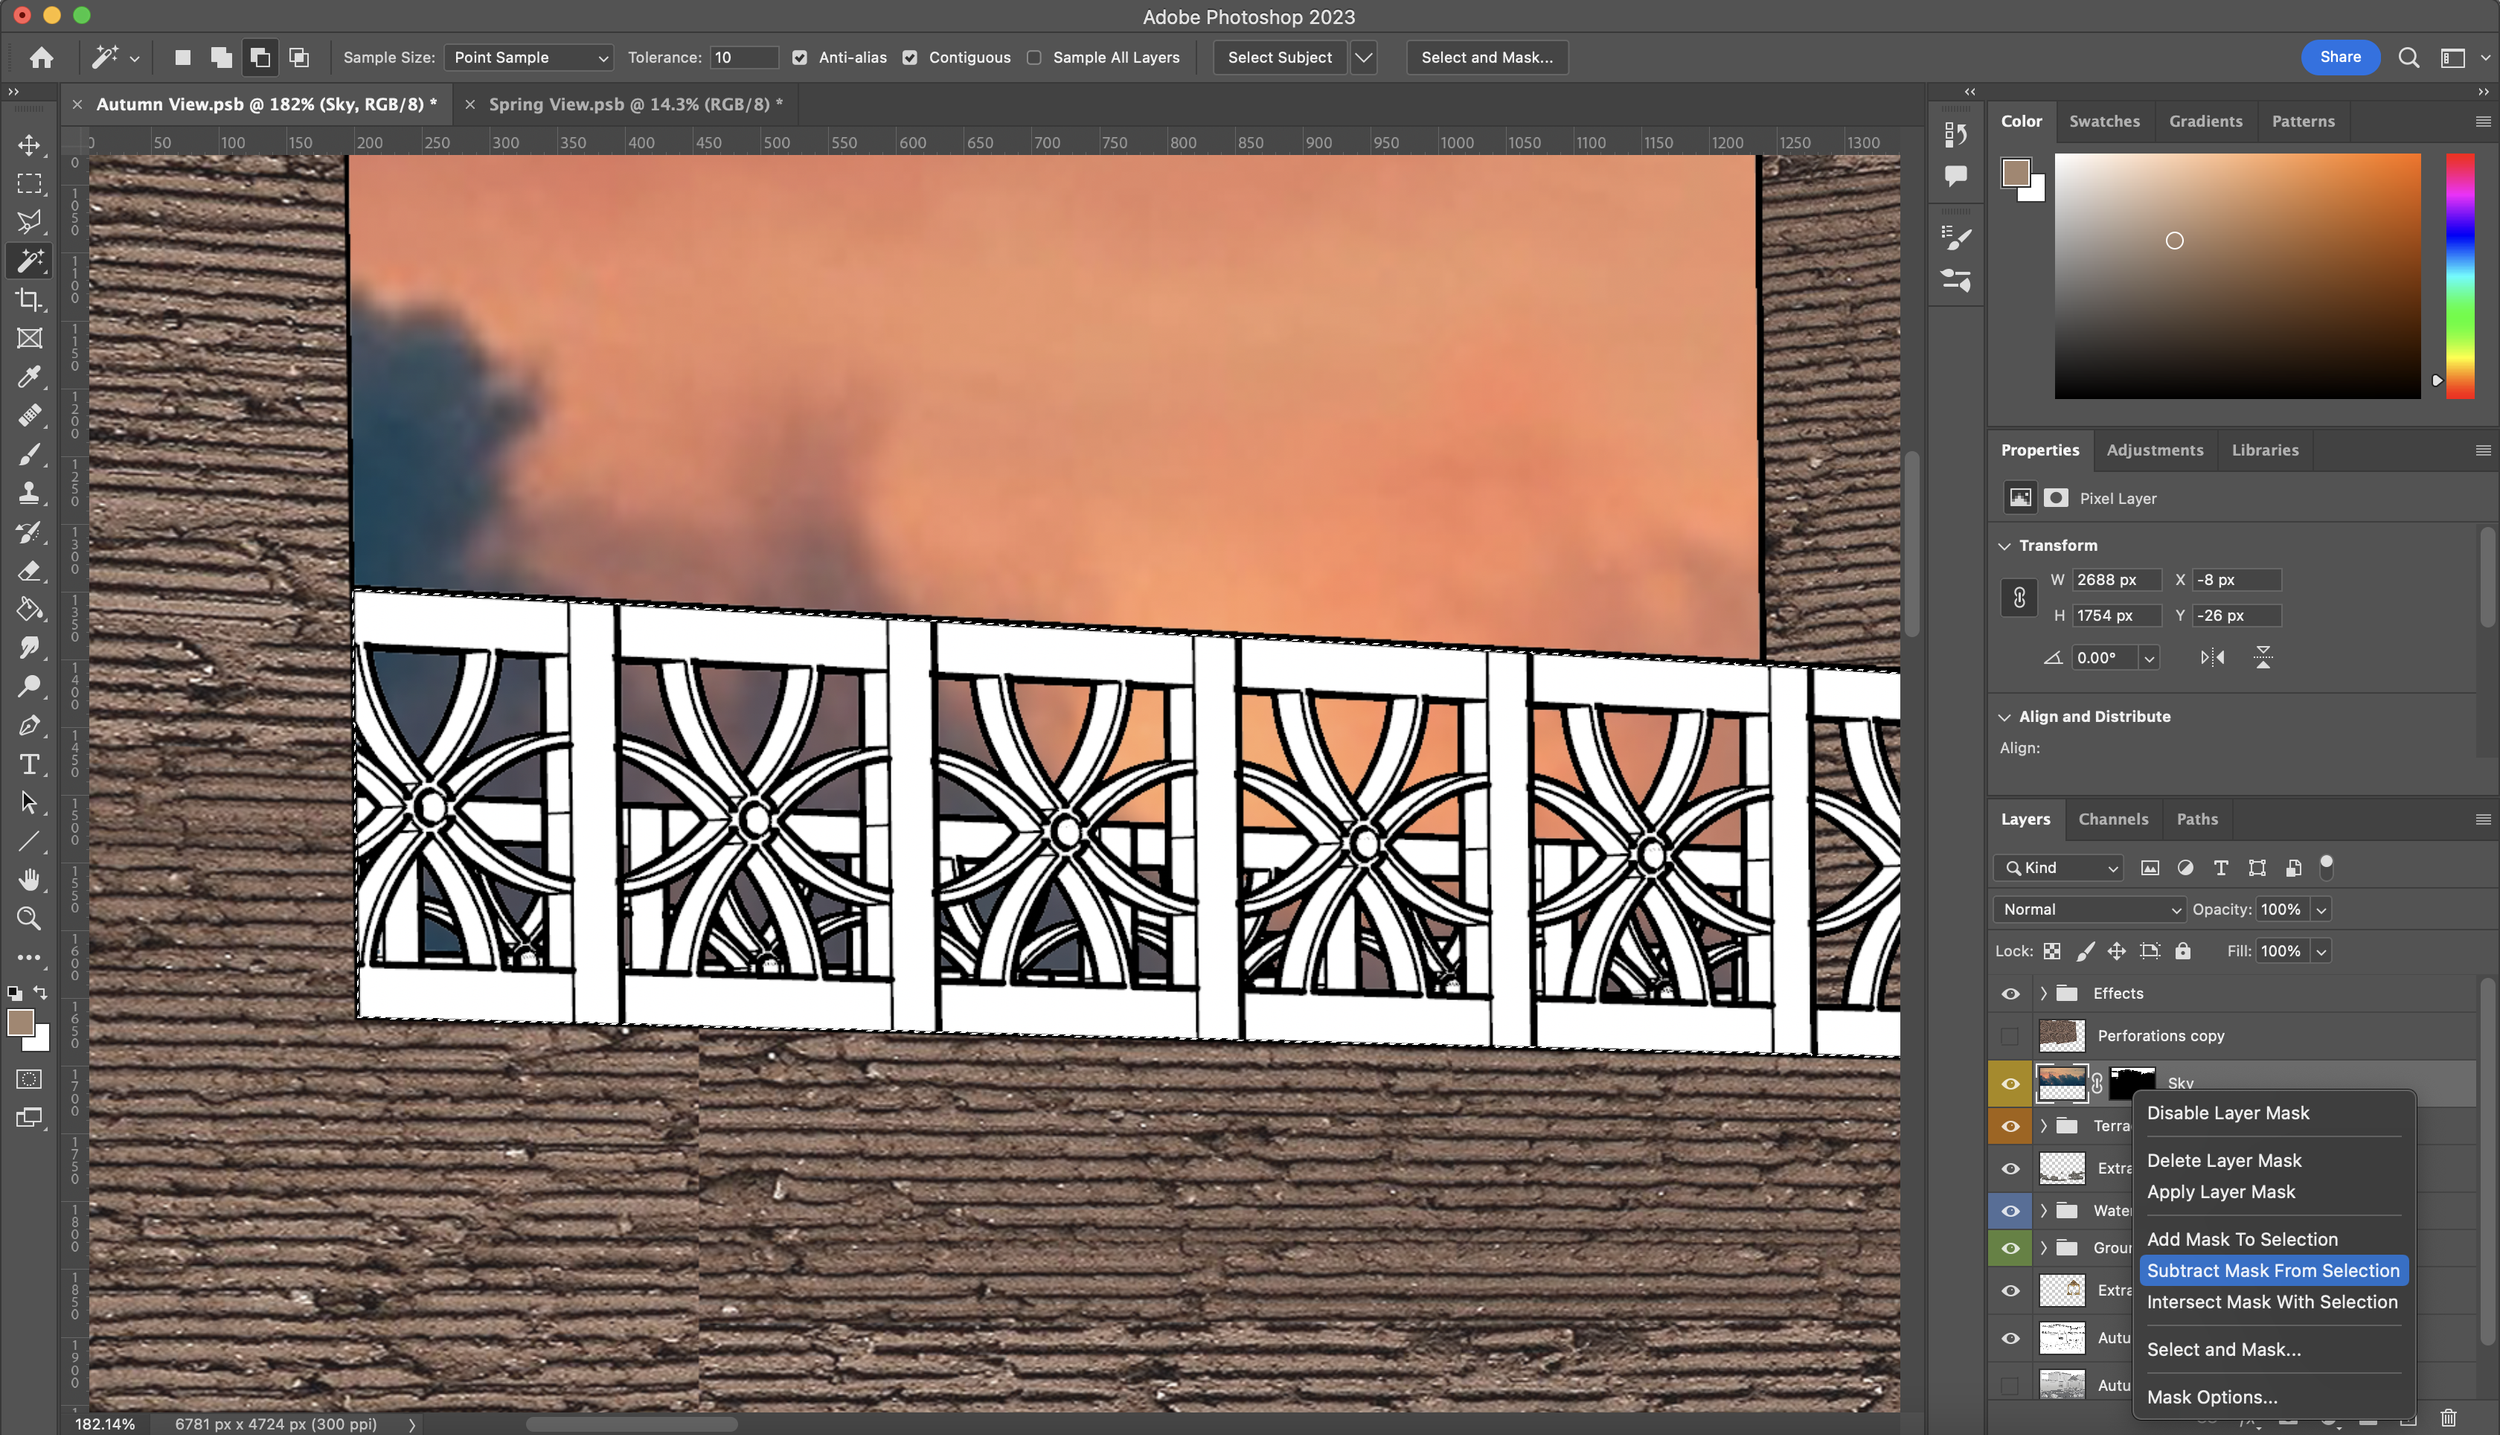
If you haven’t already noticed, there are some awkward shapes in this view - referring to the ornamentation running on the roof of each building. Selecting these all individually without selecting the holes will take extremely long. A rookie Photoshop user will let out a big sigh and turn to the ‘Magic Wand Tool’ and select each segment one click at a time, BUT we know better.
This is where the skill of masking helps us out. Since we have a positive and negative selection of the sky which is what is seen in the holes of the ornamentation, we can use the Sky layer mask to deselect all of those holes. What we want to do is get our texture ready again as we prepared for the walls. Using the ‘Polygonal Lasso Tool’ I selected the outline of the perforation areas and then I have gone to the Sky layer mask and right-clicked on it in order to ‘Subtract Mask from Selection’ and boom… That’s a good 20 minutes saved. Now just go back to the texture for the perforations and mask :D
Adding Textures to Small Details
Continue to use the same masking method to apply textures to the remaining small details. I continued by adding a dark wooden texture to the balcony balustrade, cloth hanging lines and benches as seen in the visual making sure that they all have their own individual layer.
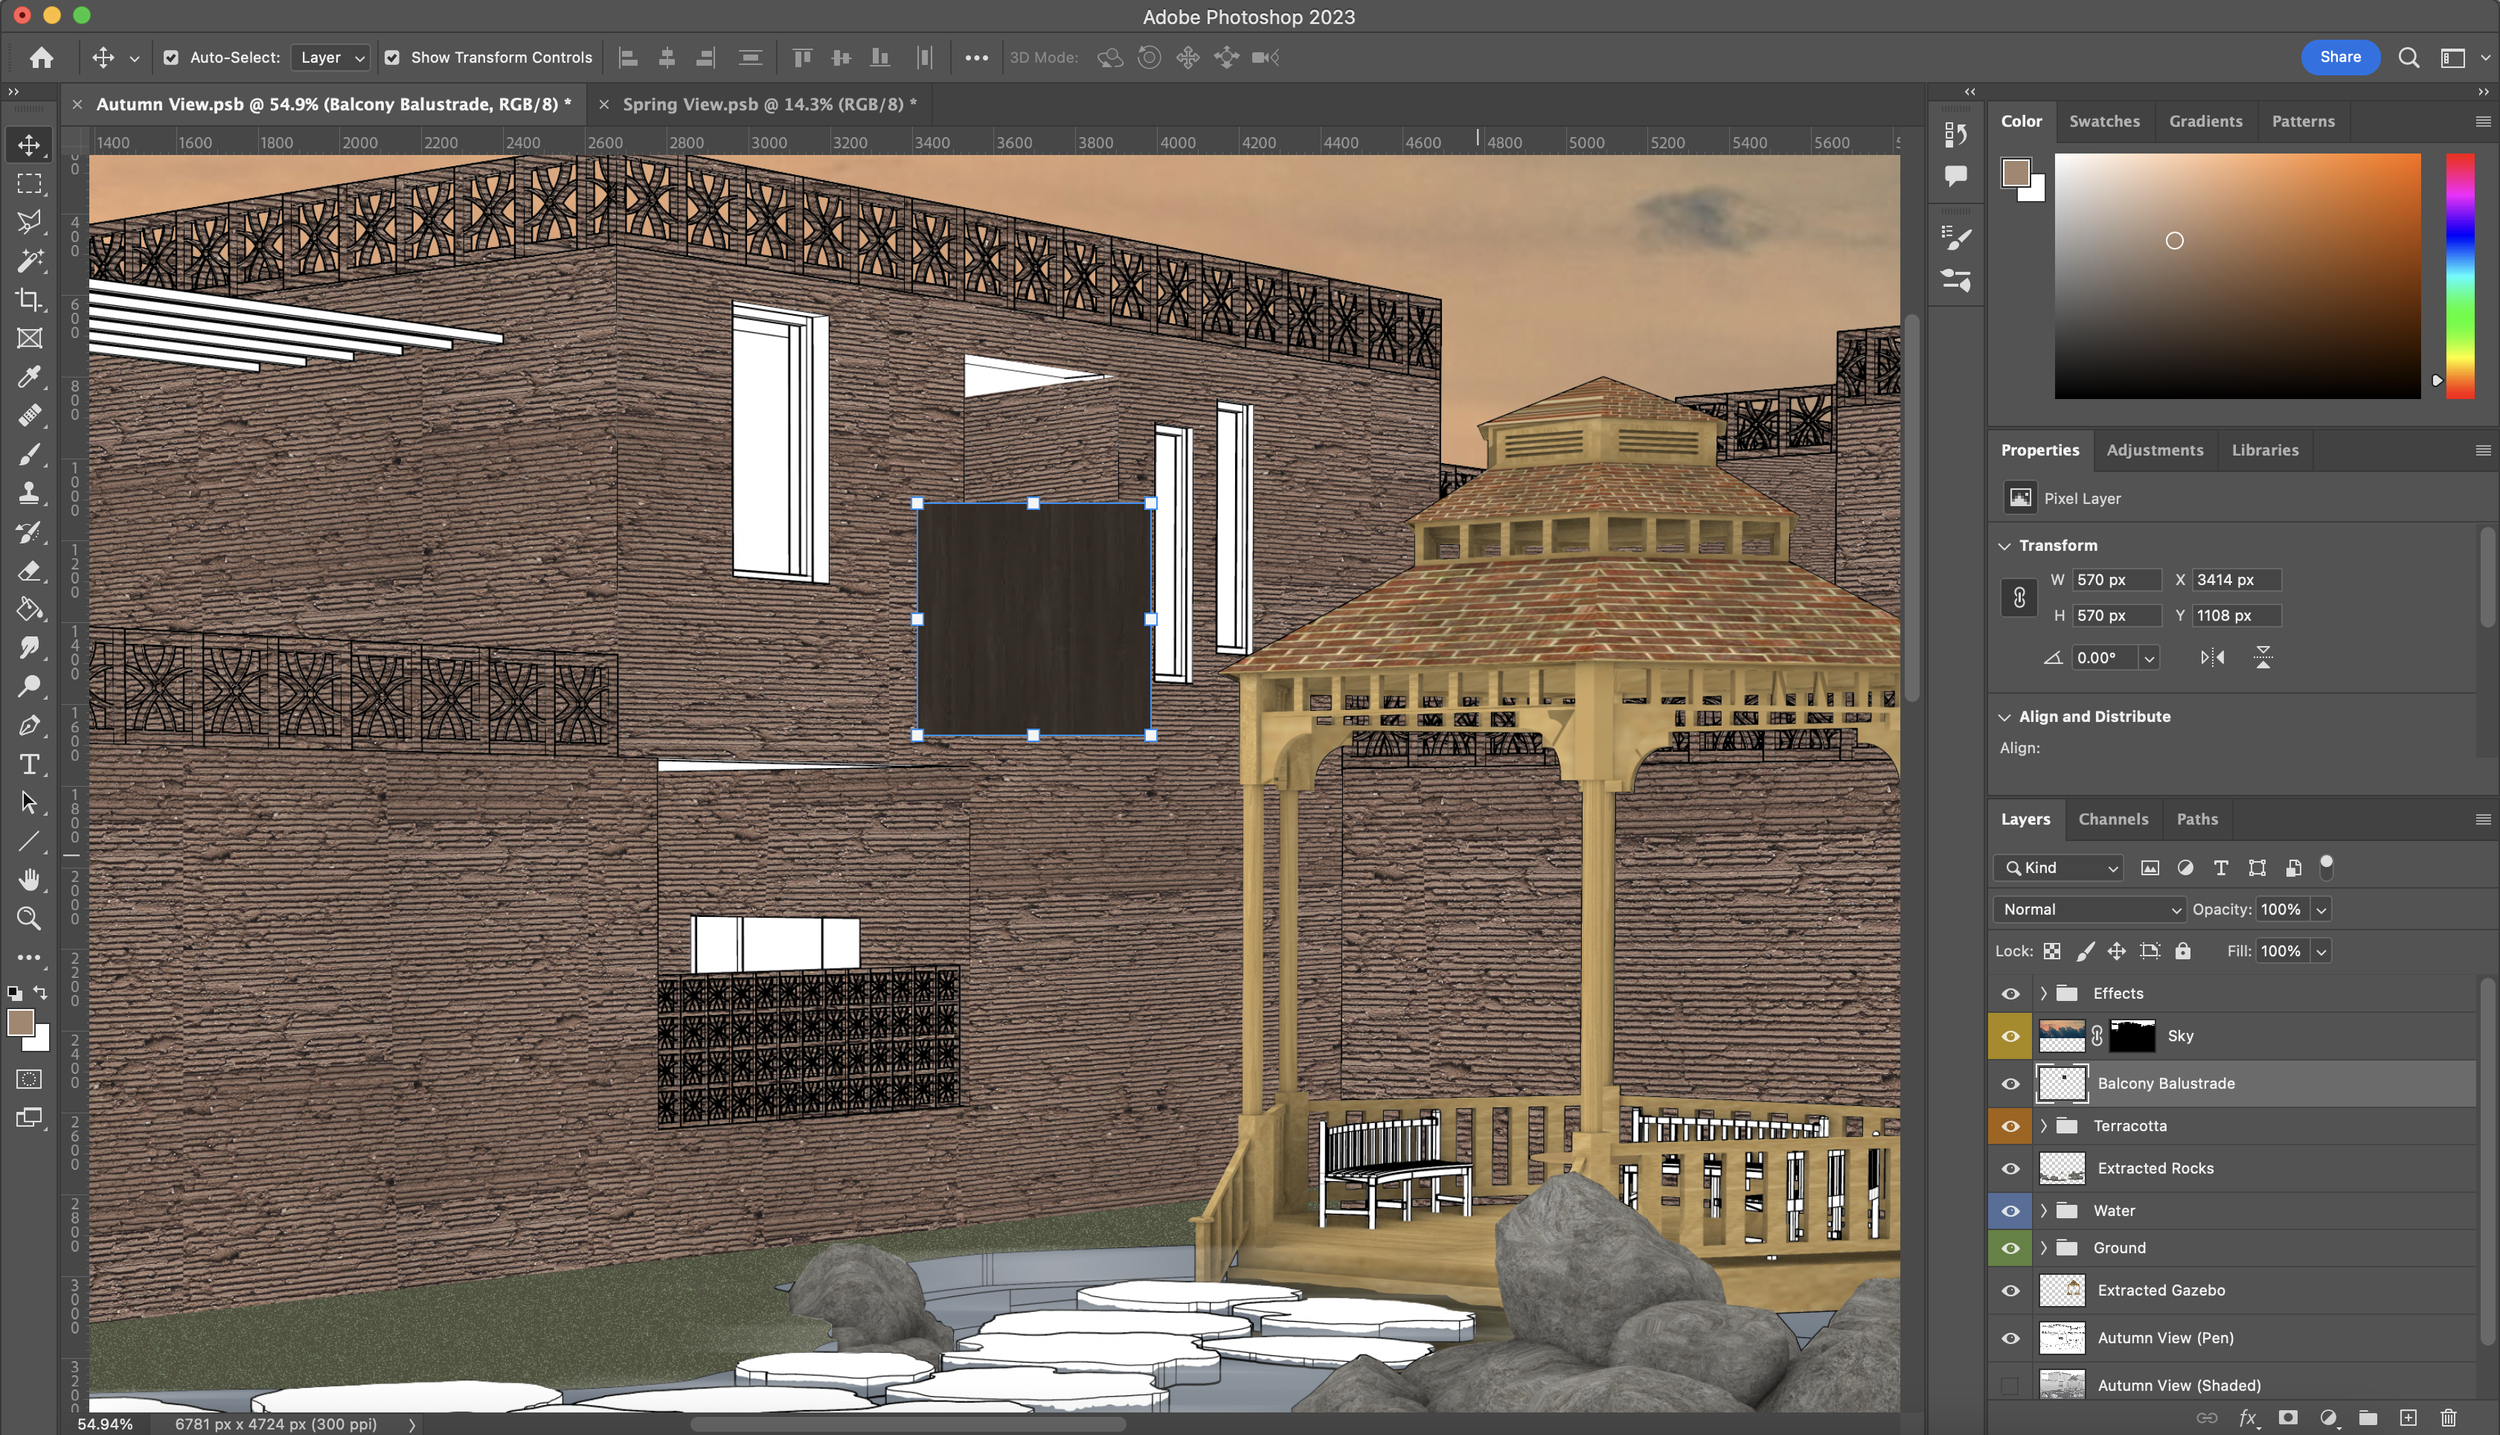
Image Adjustments & Smart Objects
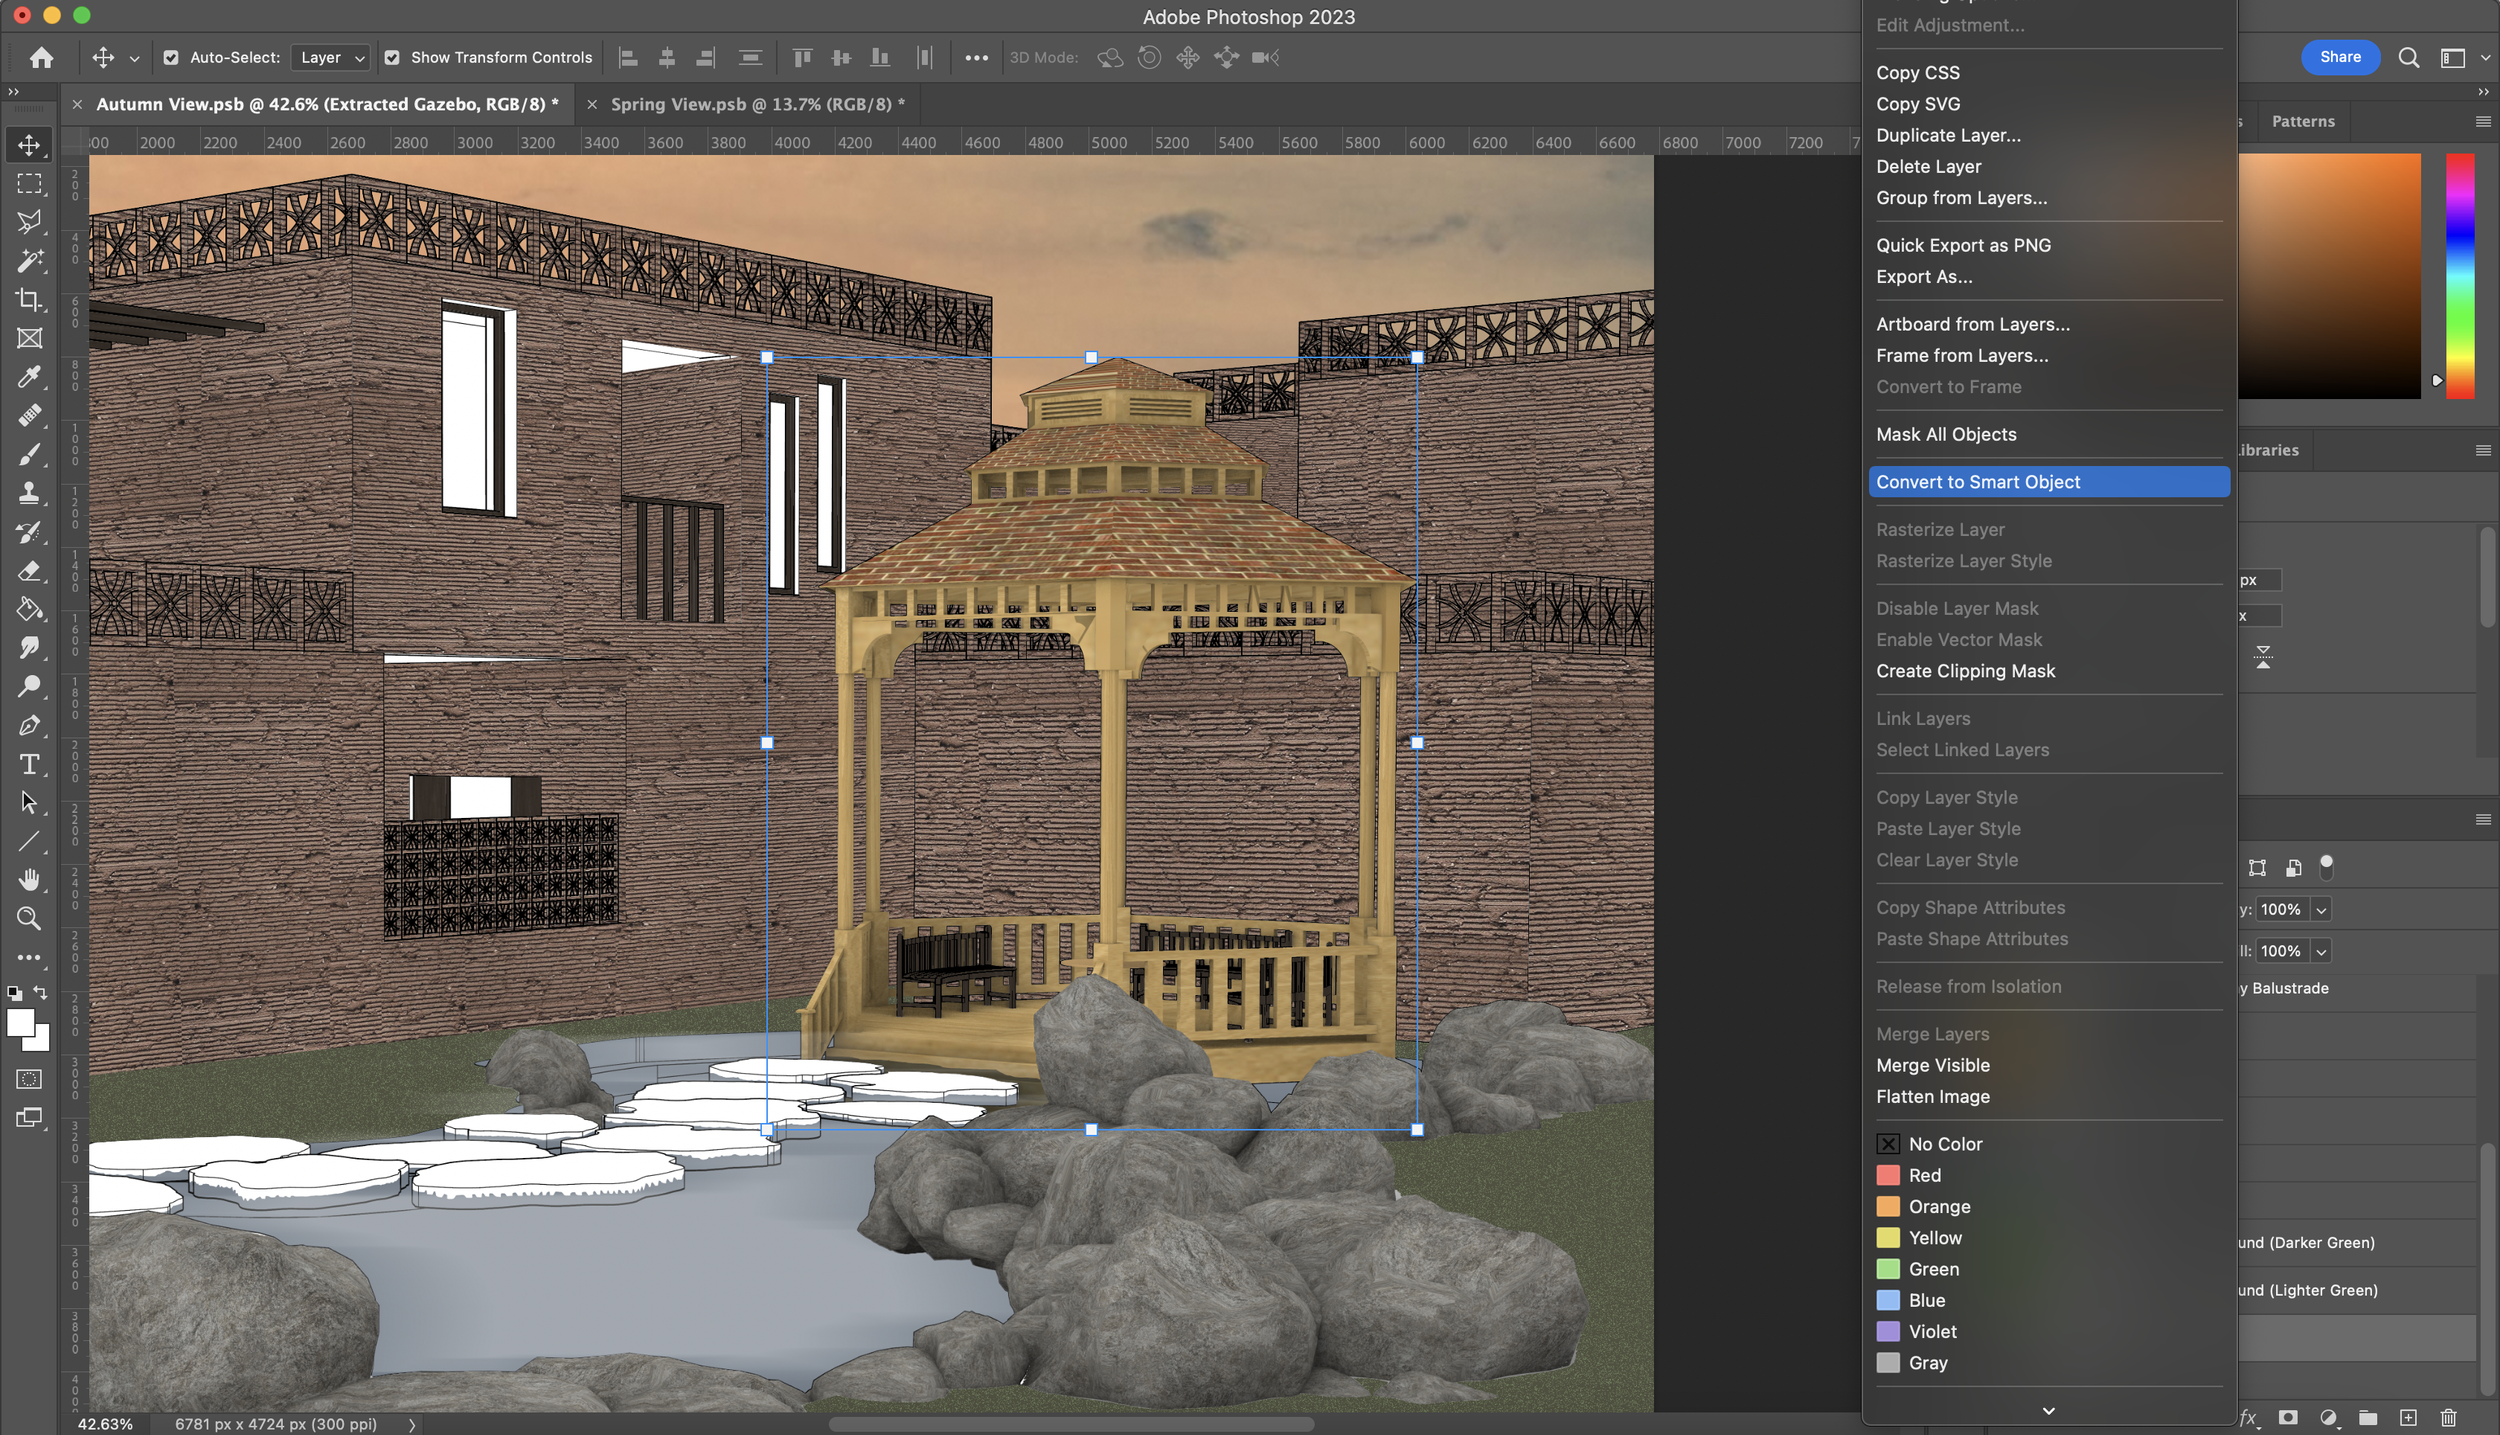
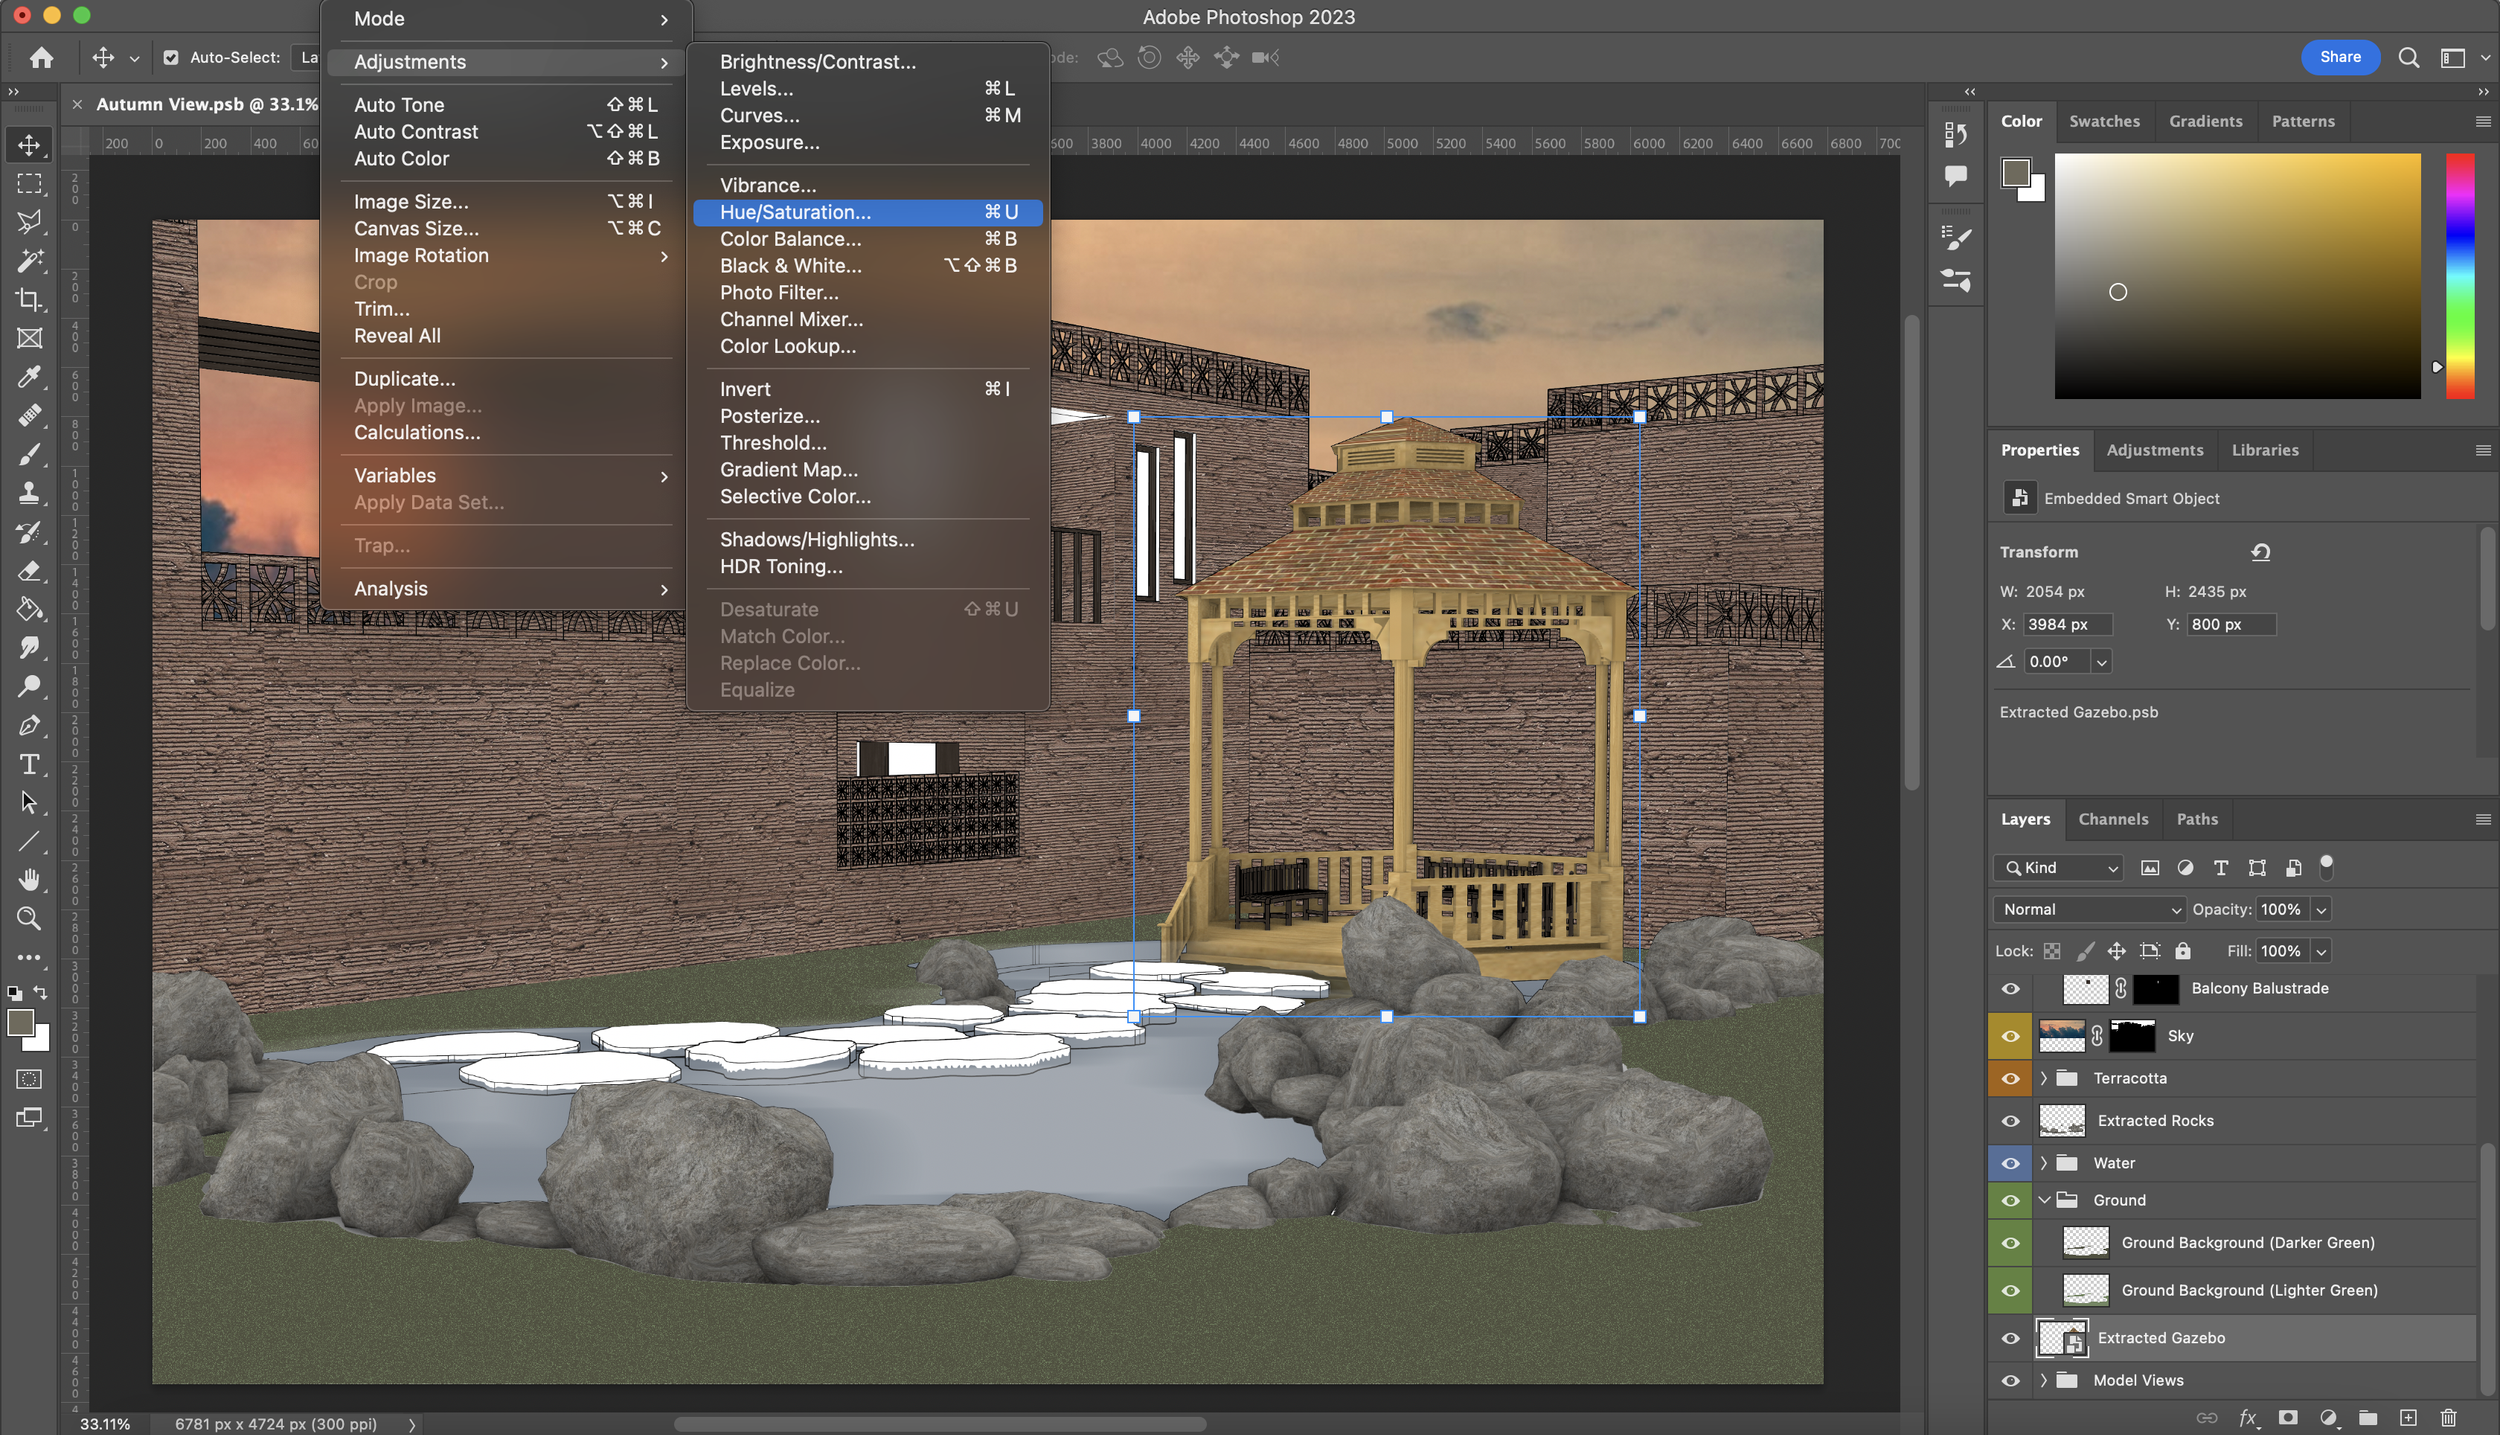
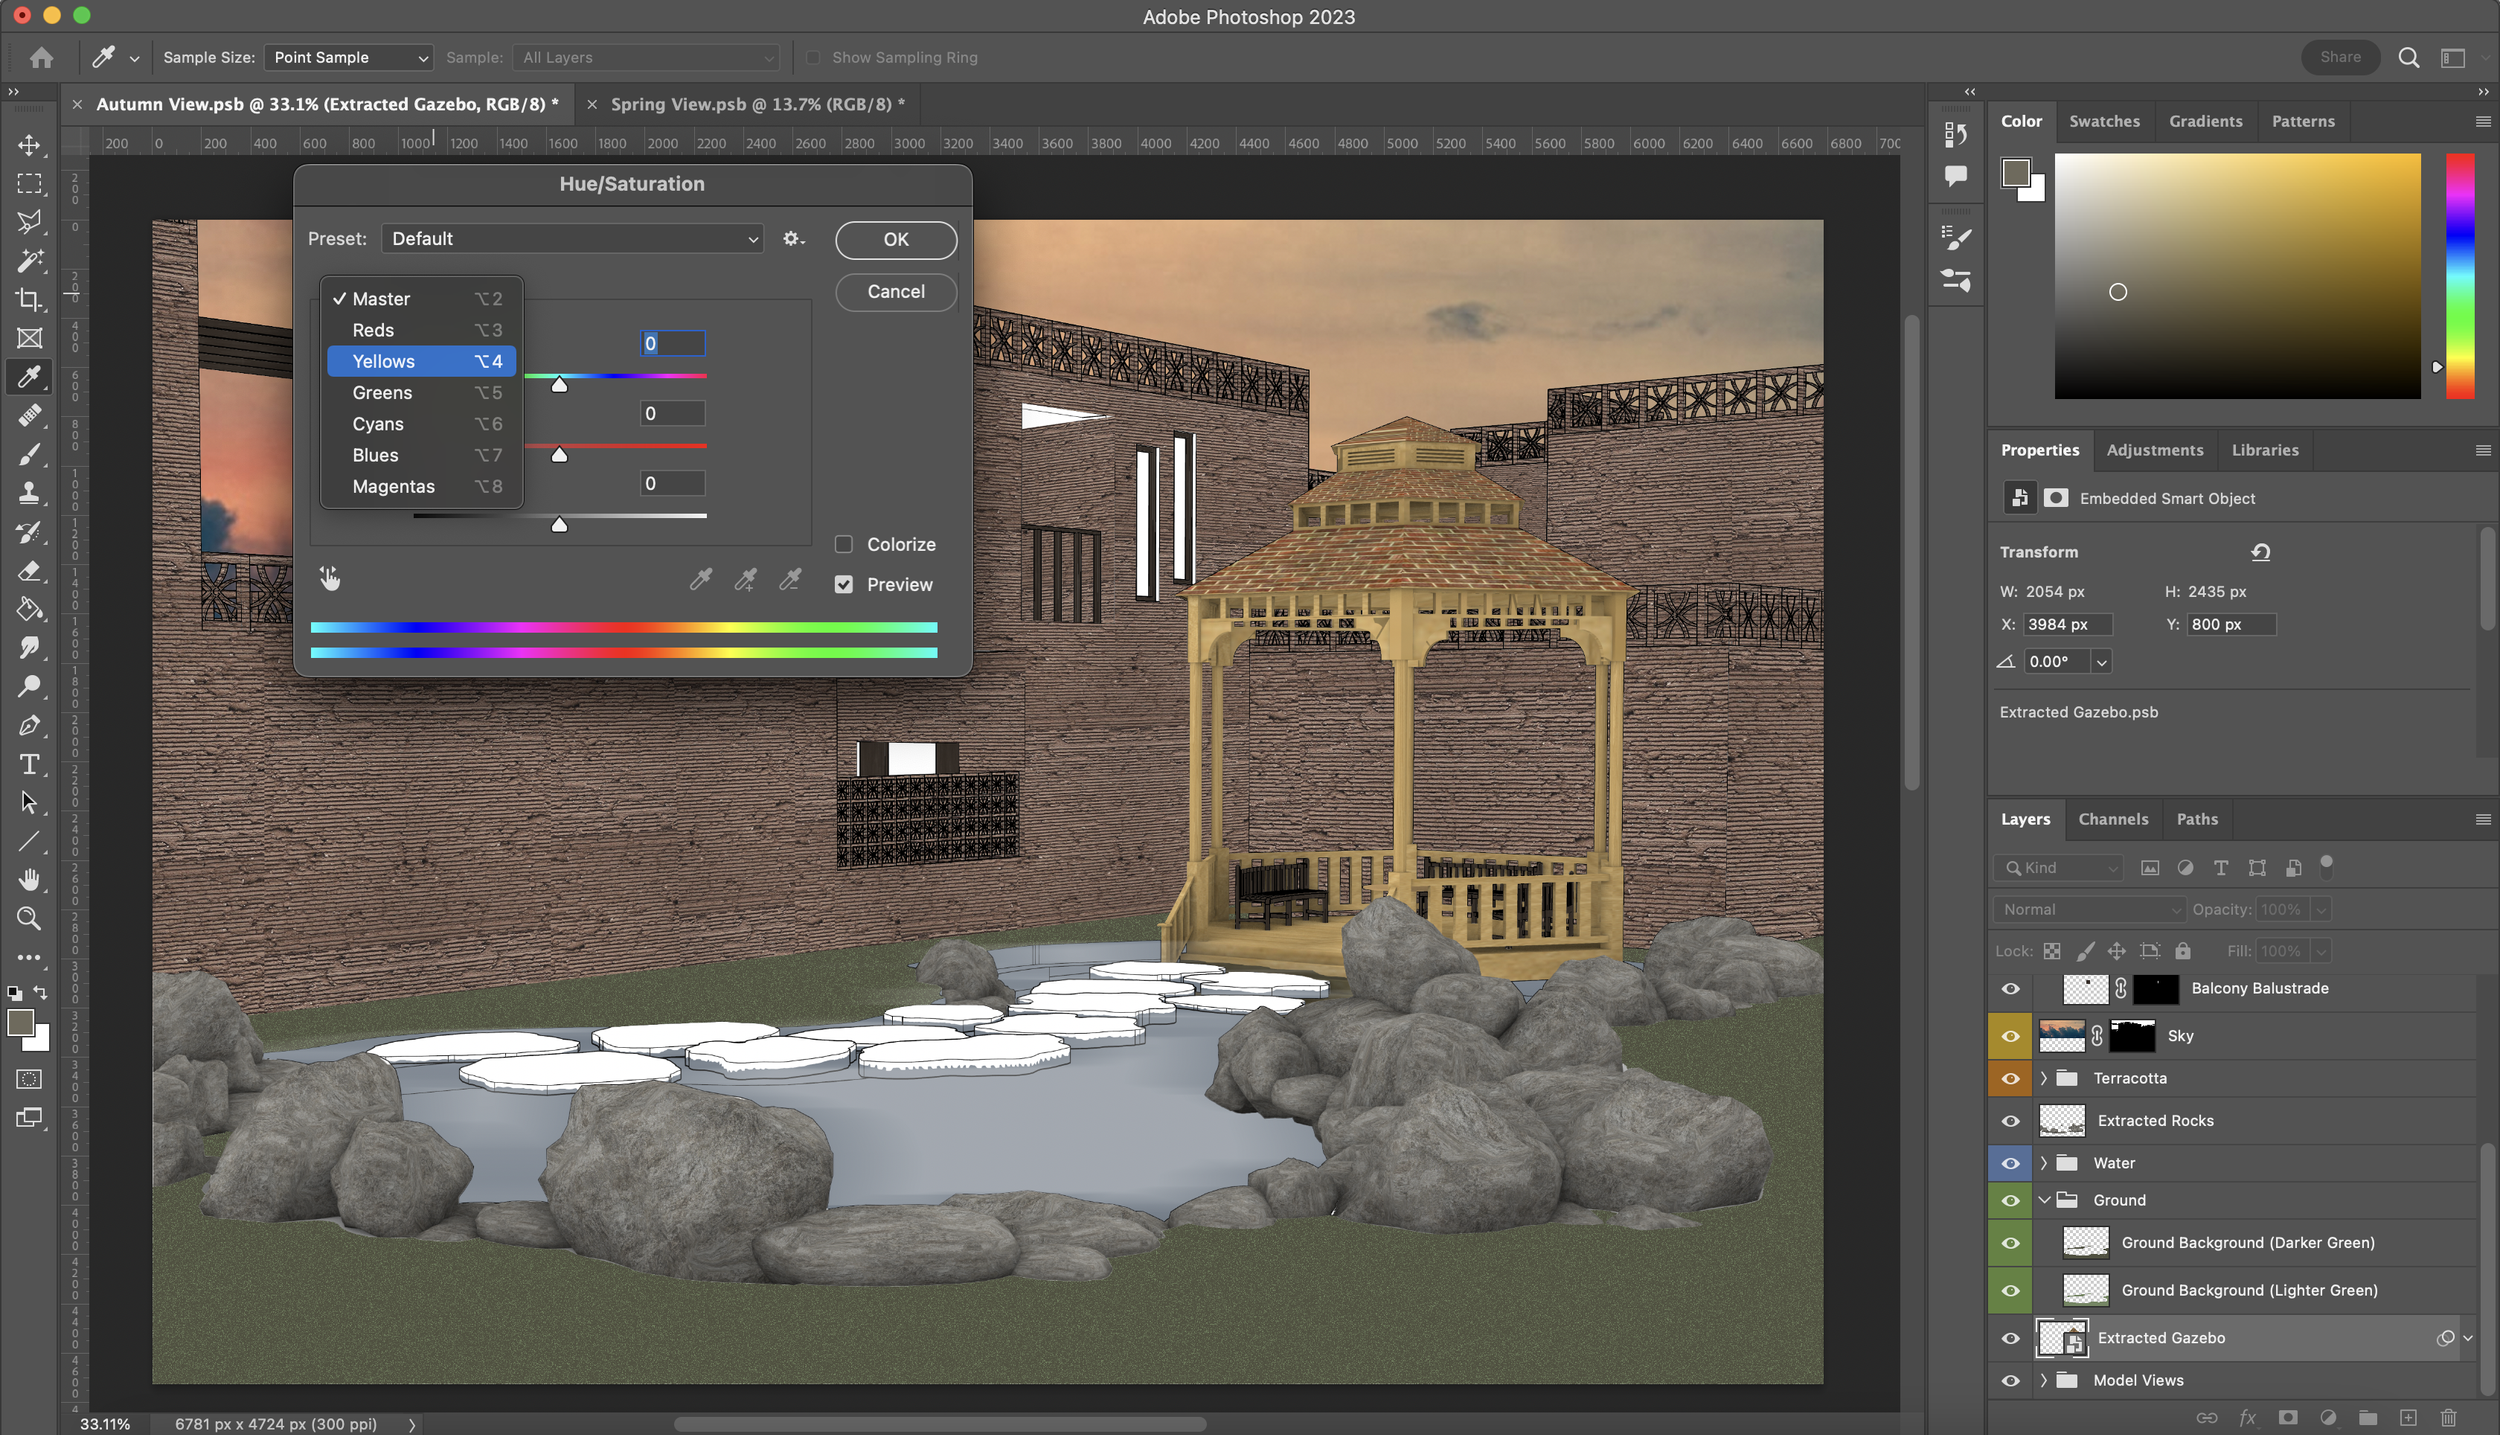
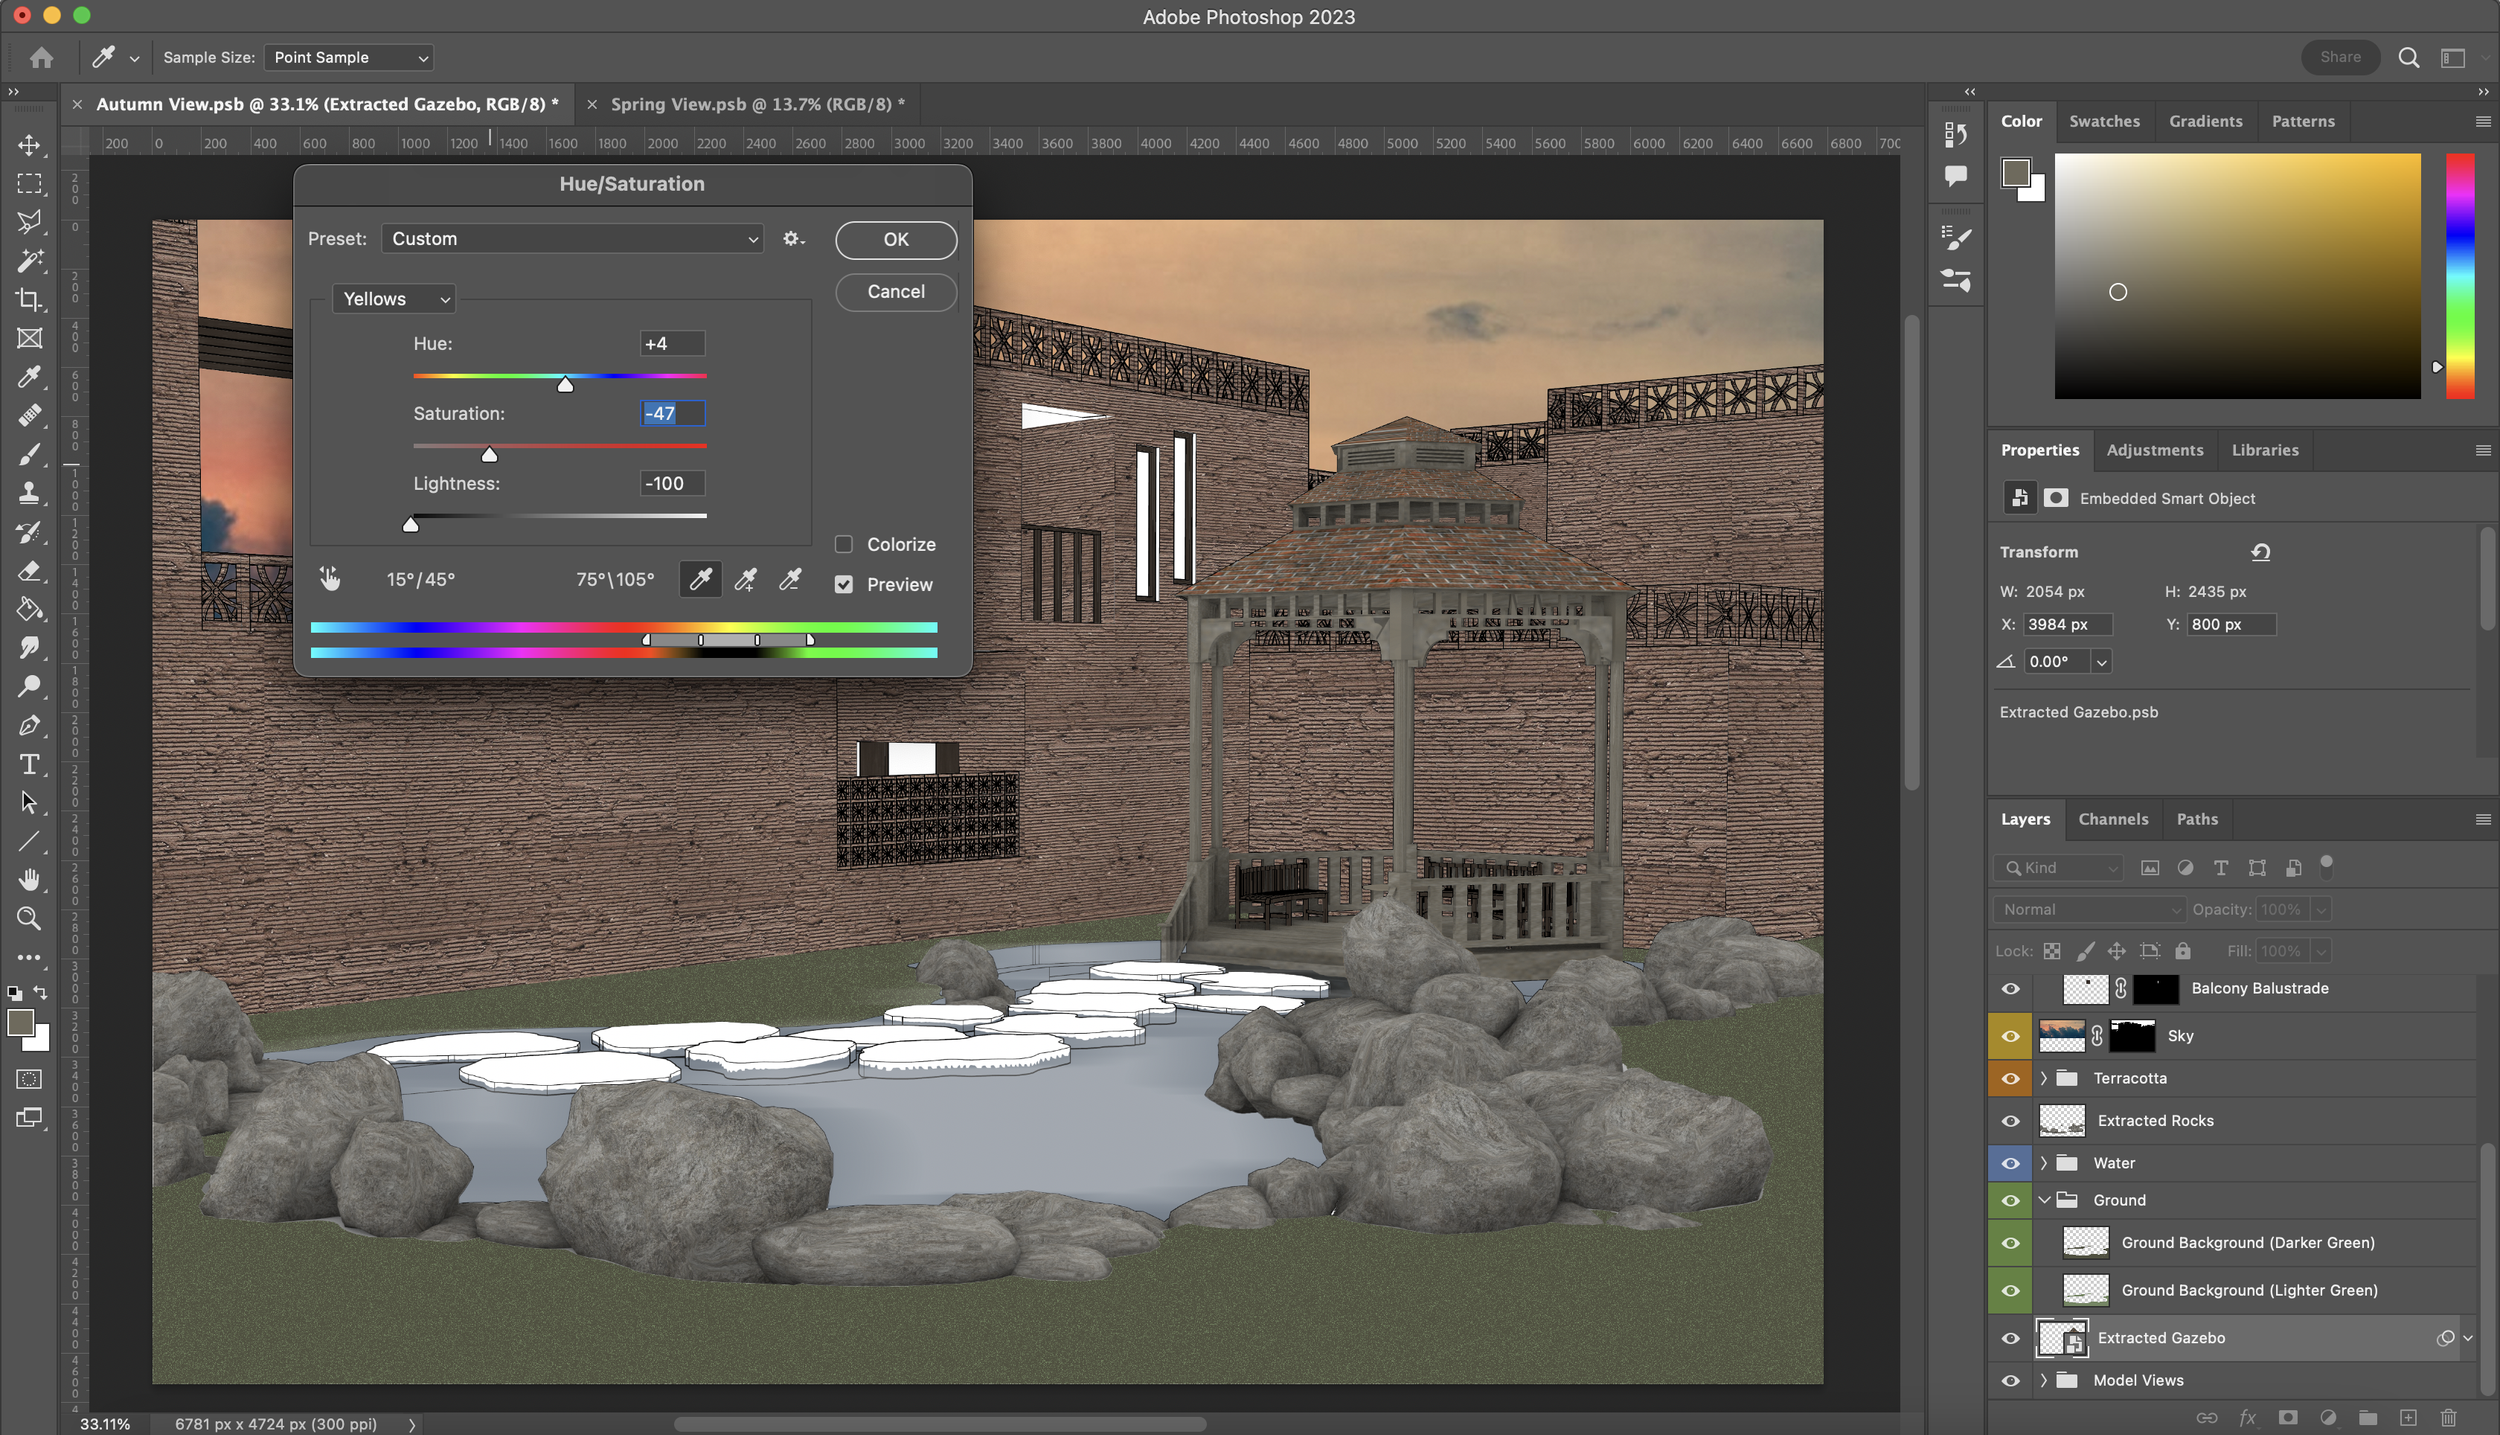
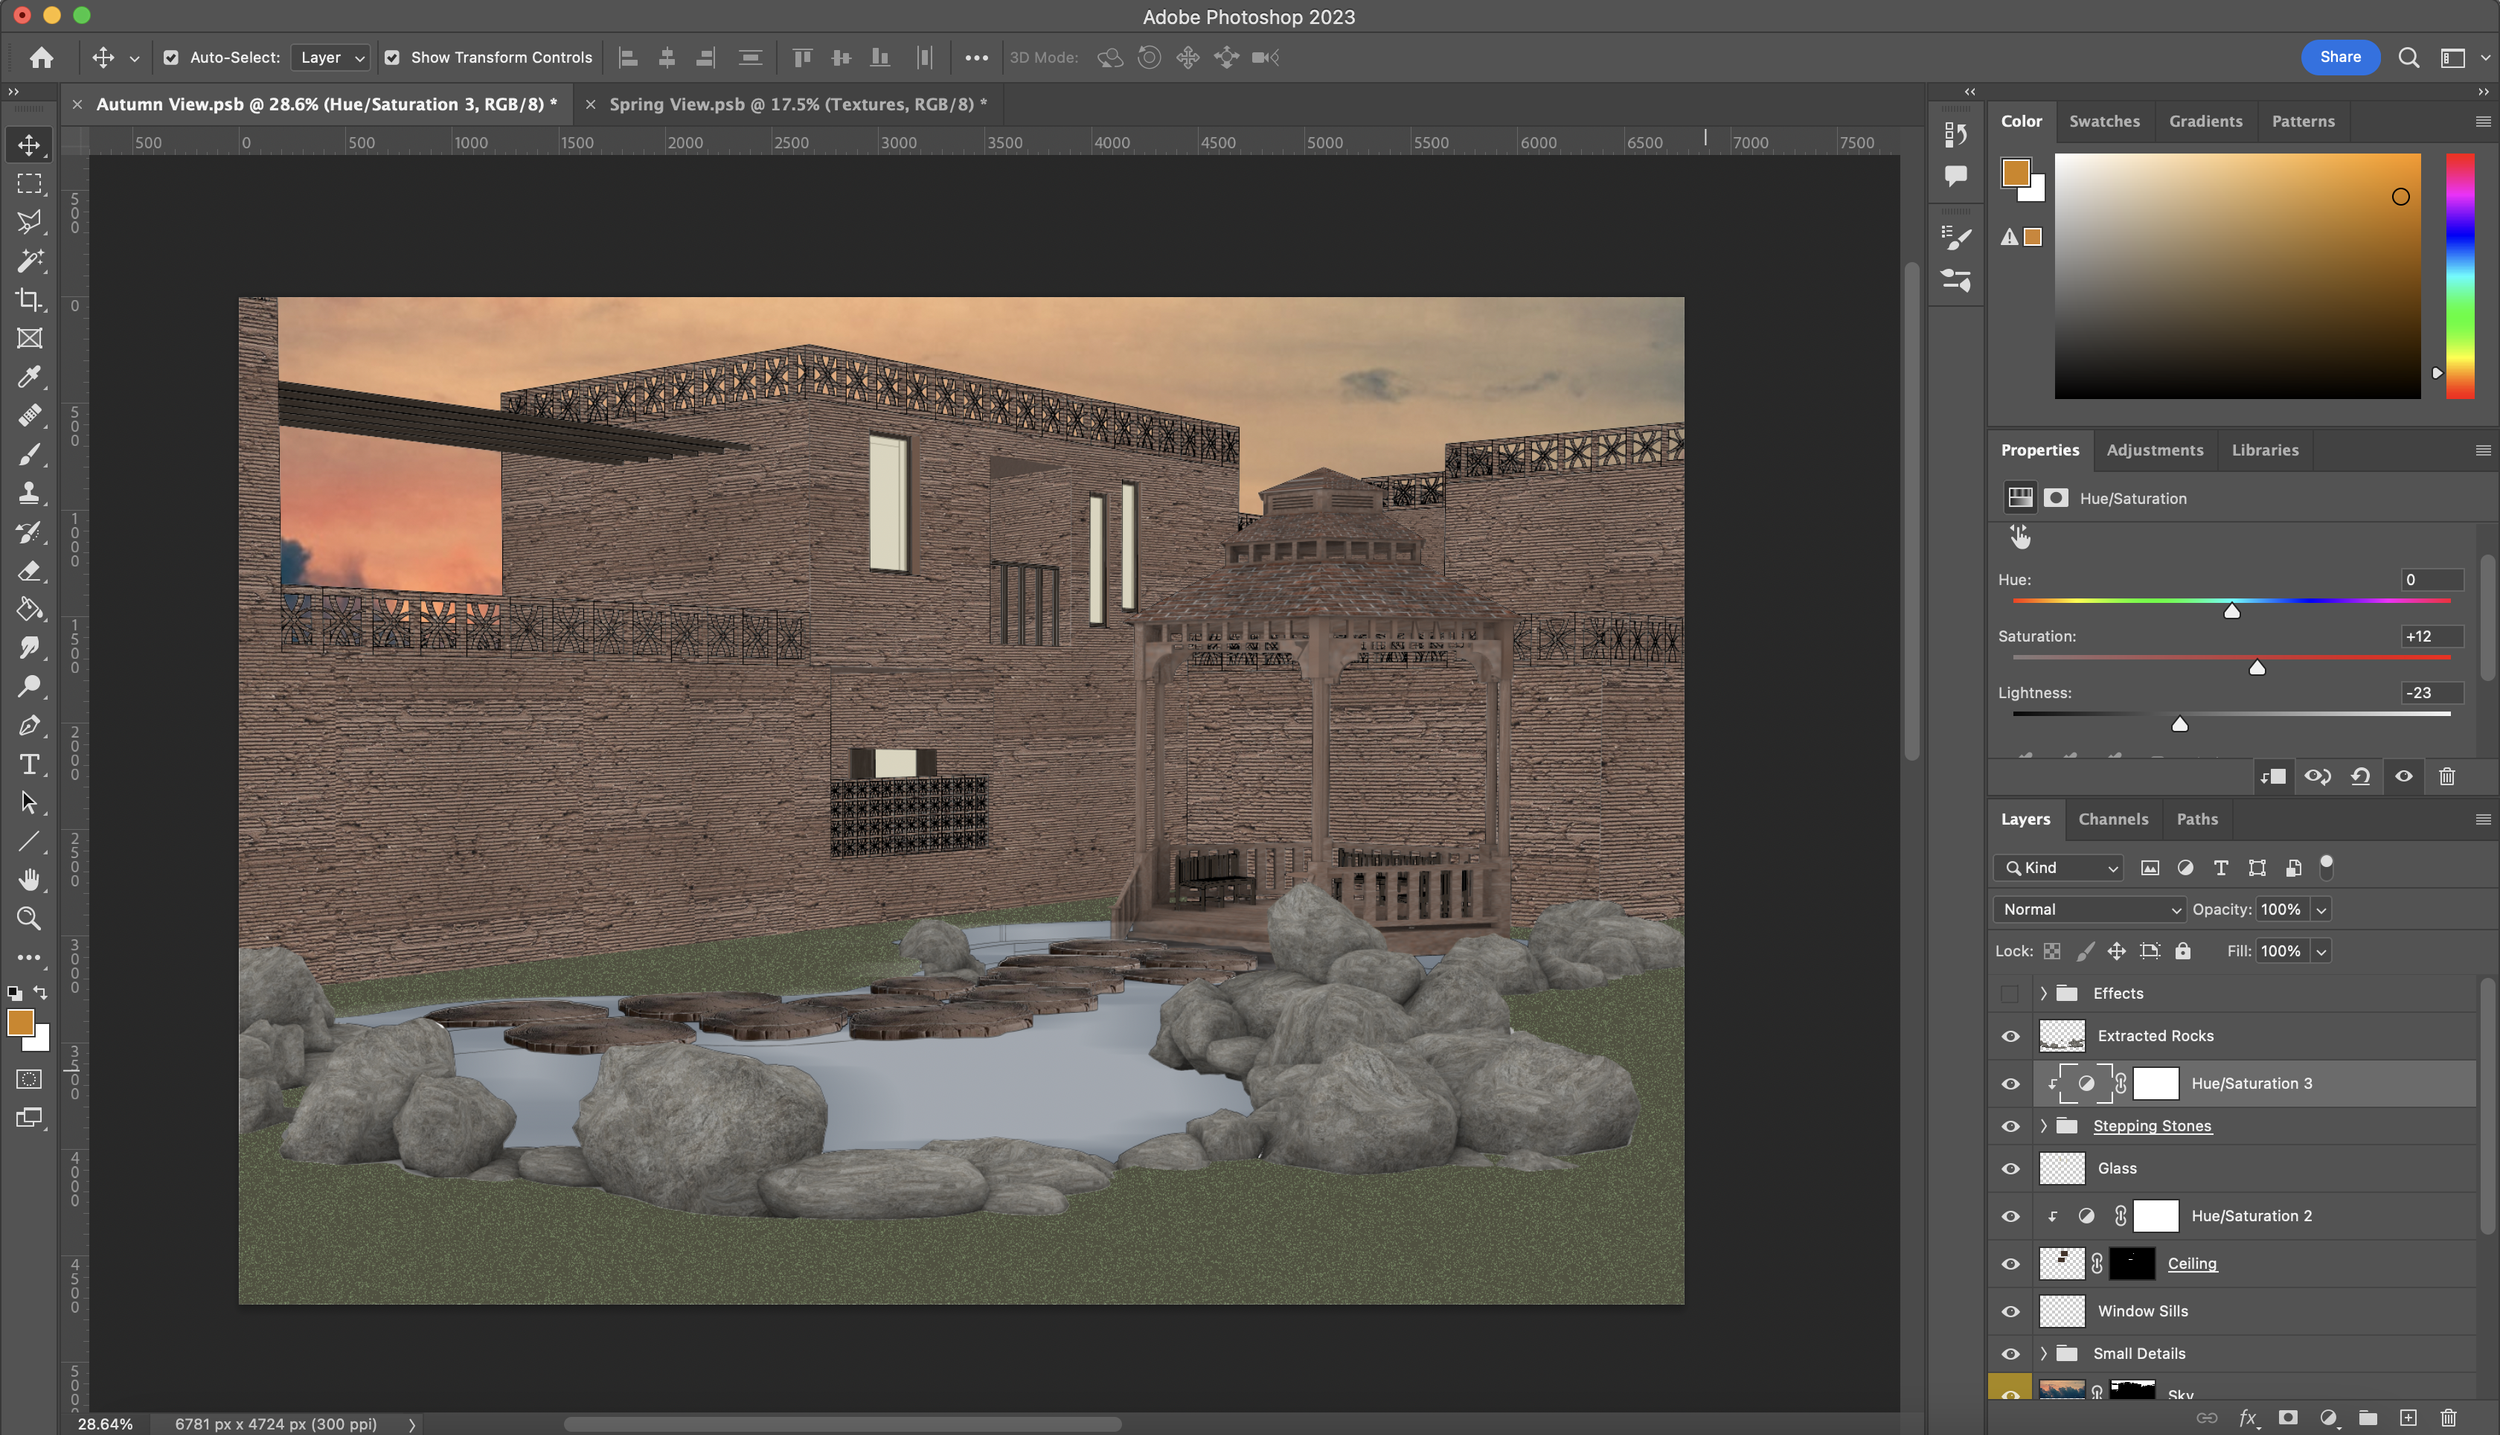
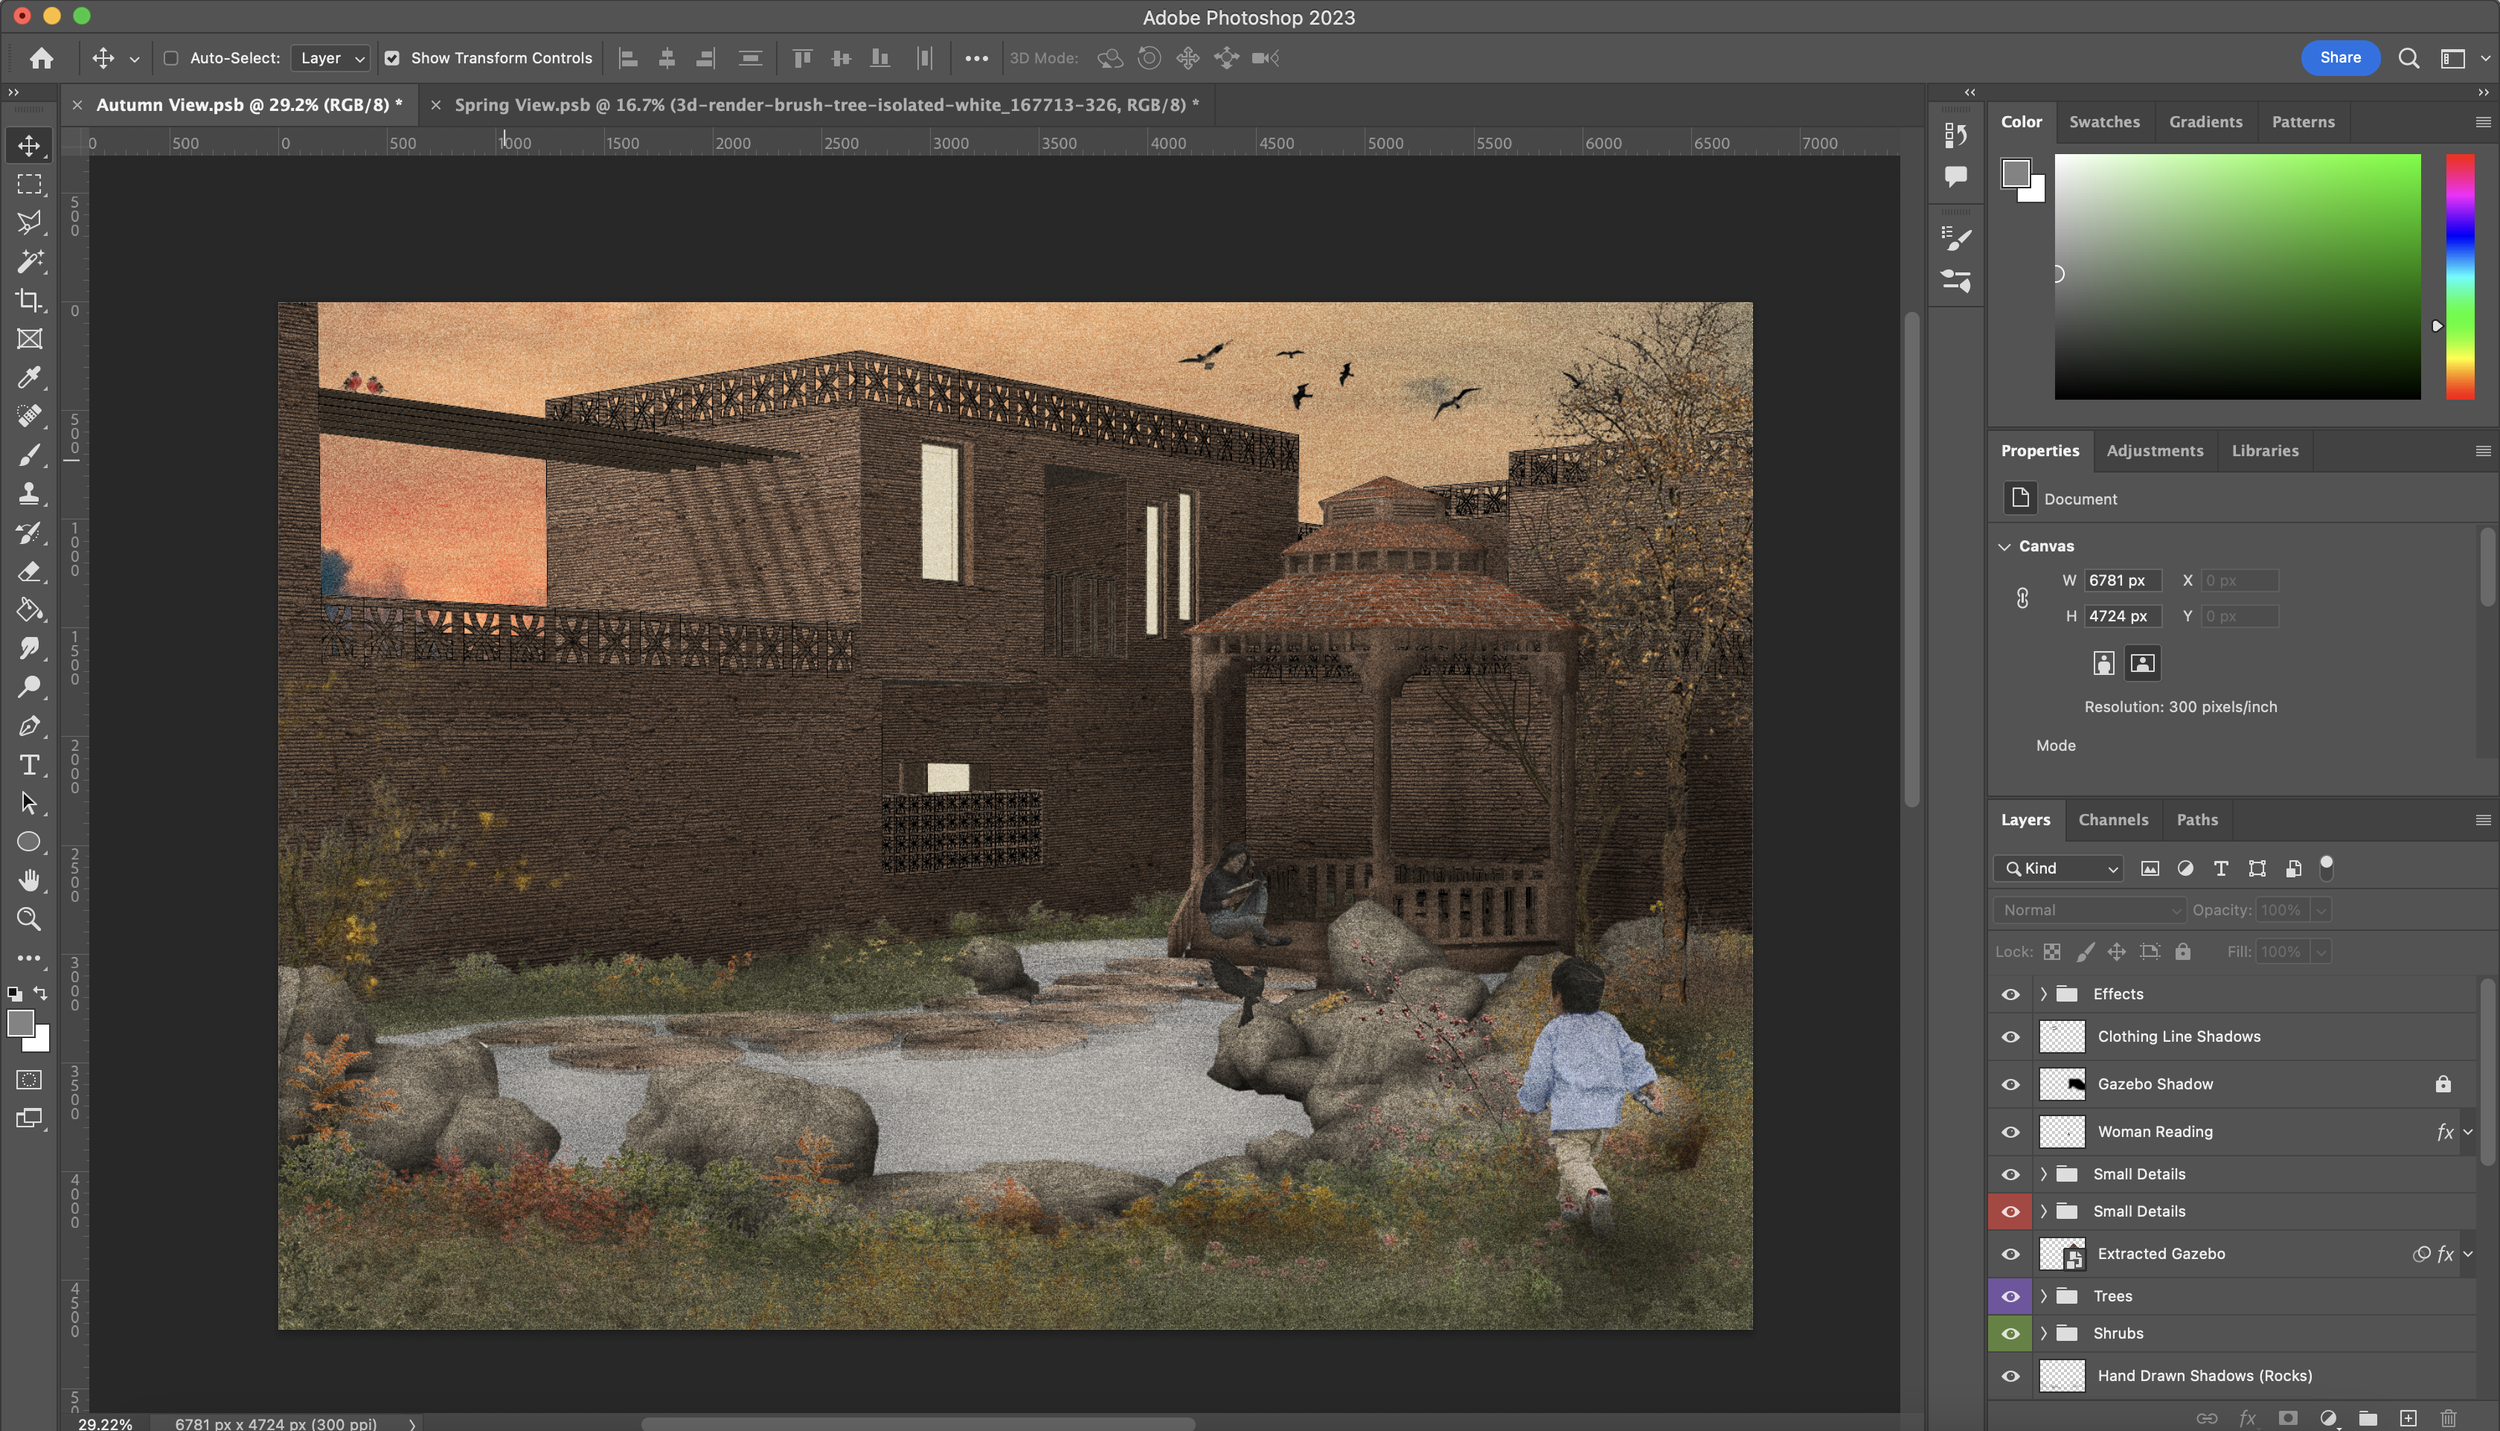
As mentioned at the beginning of the tutorial, I extracted the gazebo from the ‘Rendered’ view because it was a good starting point instead a bedrock start. The first thing I’ll be doing is converting the layer into a Smart Object. What this will allow me to do is switch on/off and/or remove any image adjustments done to the gazebo from here on out. Next, I’ll be going into Image -> Adjustments -> Hue/Saturation whilst having the gazebo layer selected. Using the drop-down menu that says Master, I’ll select the Yellows since the extracted gazebo has a lot of yellow tones in it which I’d like to change into a more worn-down brown as shown in the screenshots below. Then click ok.
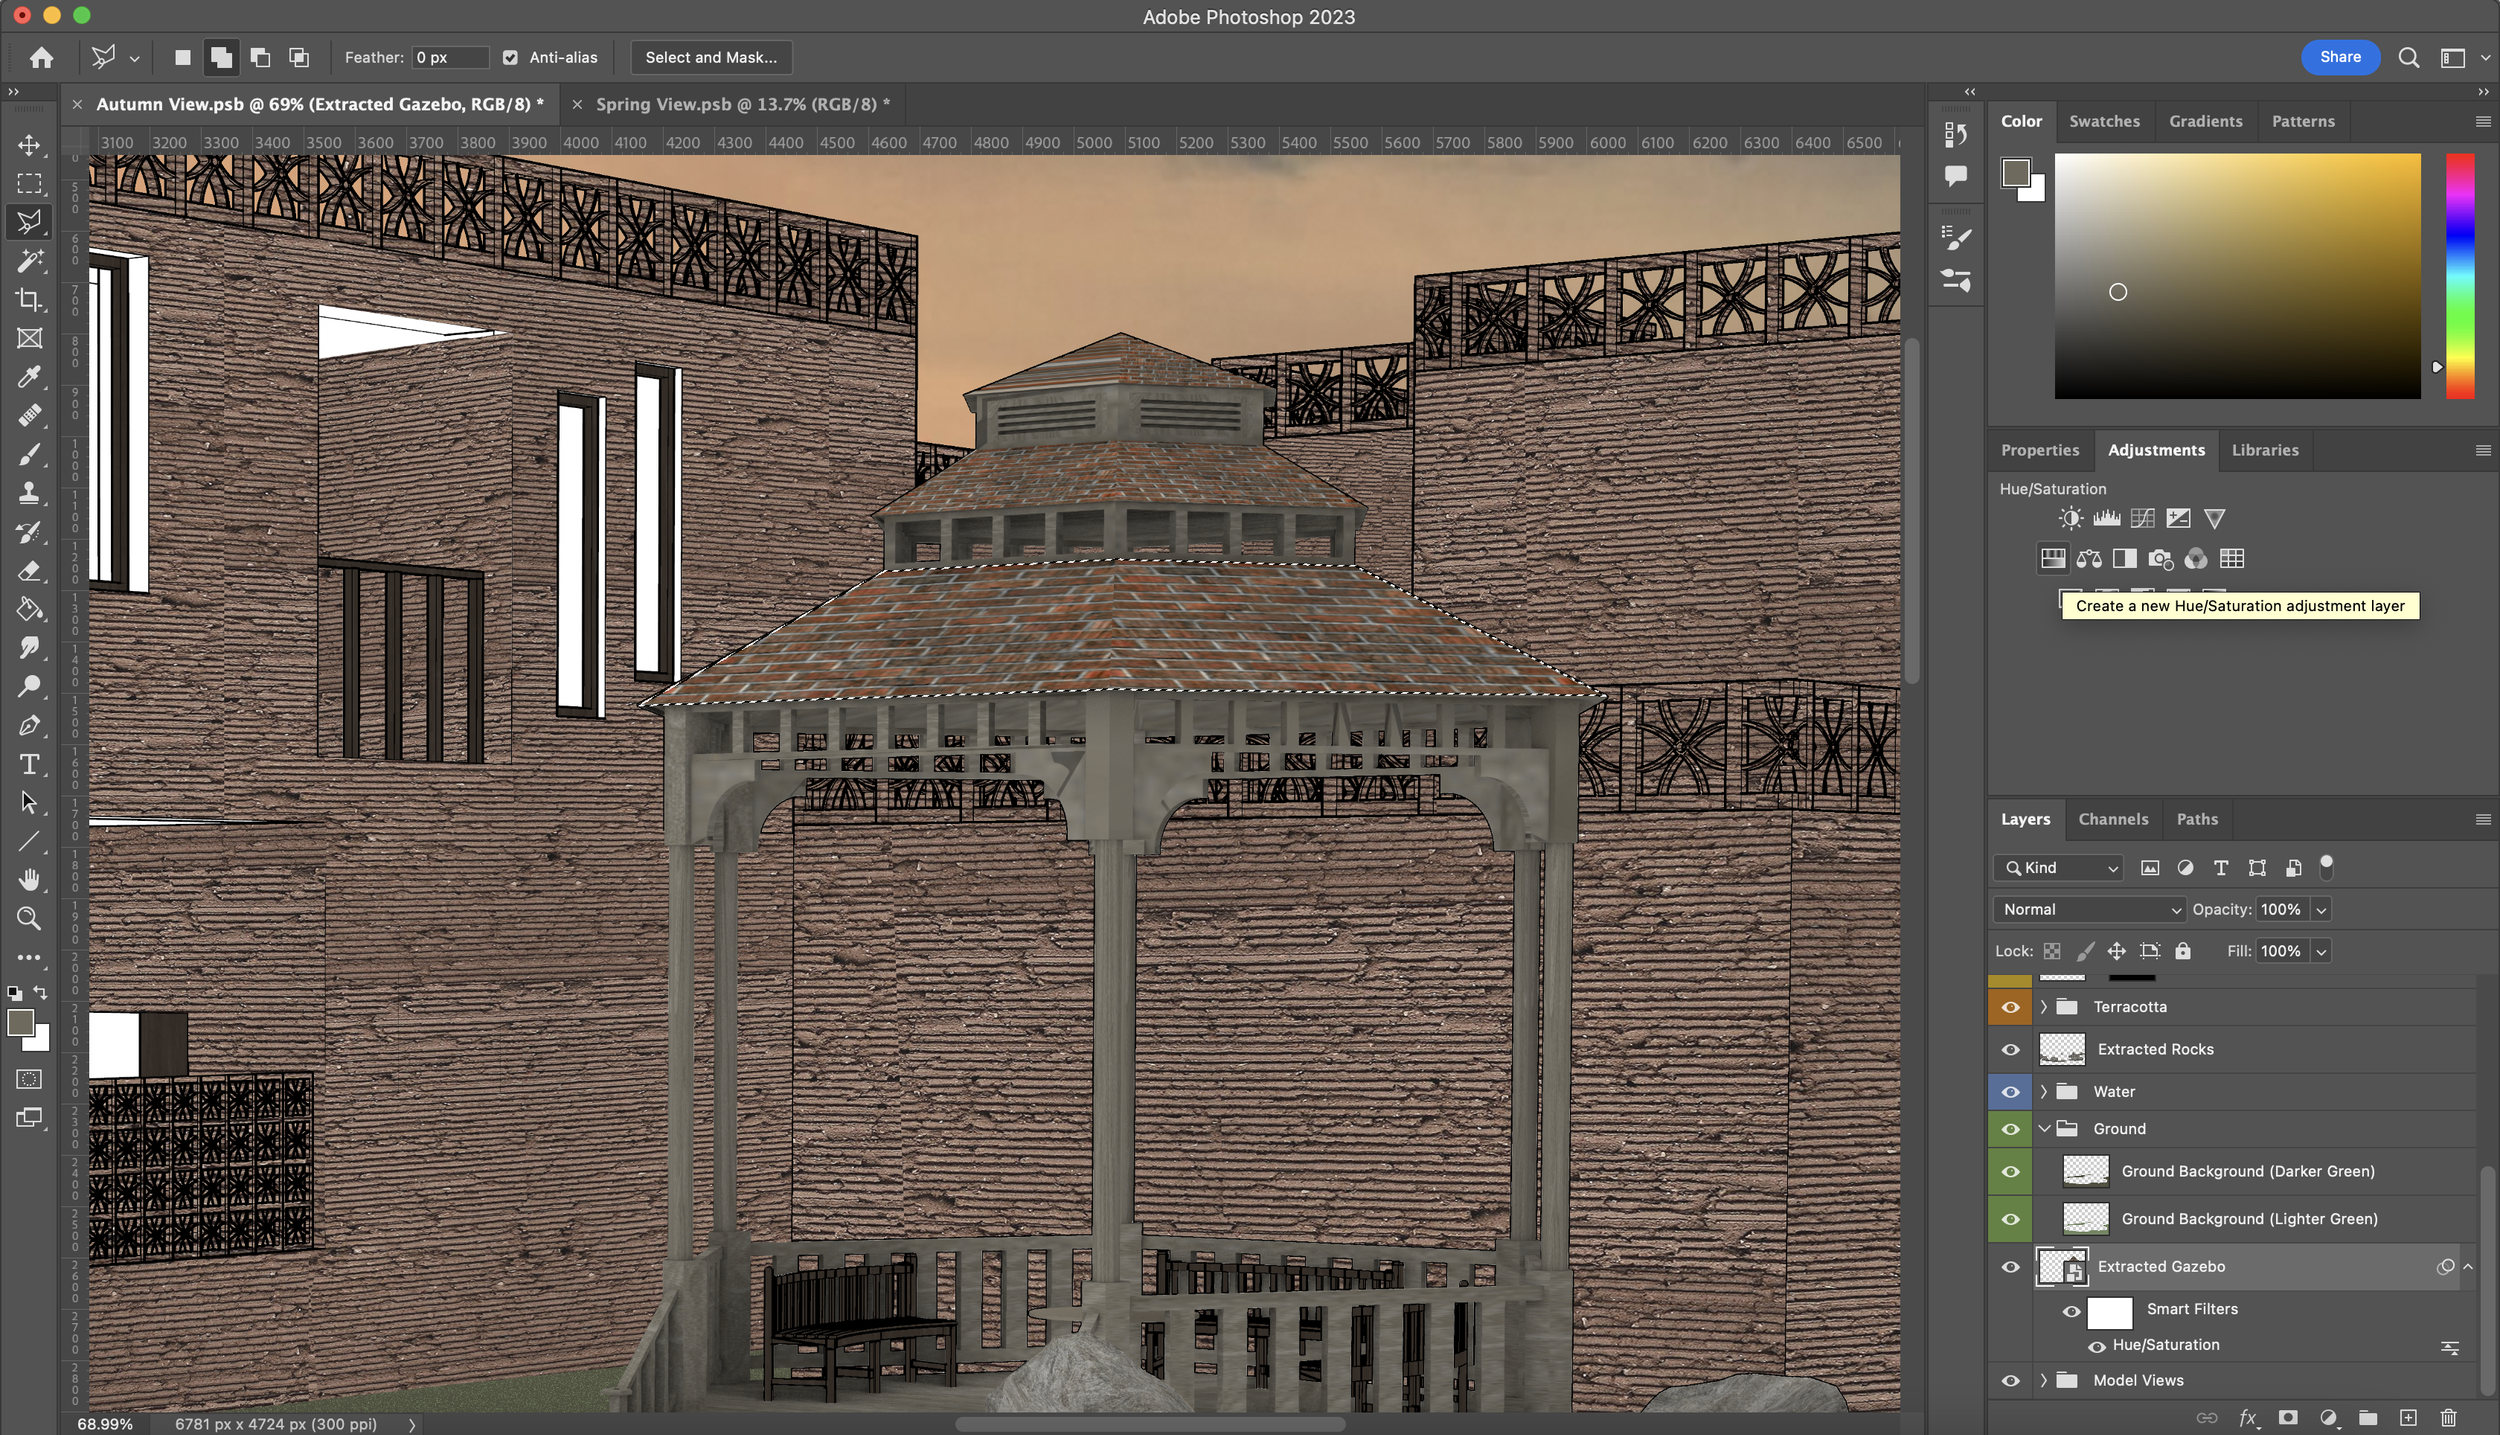
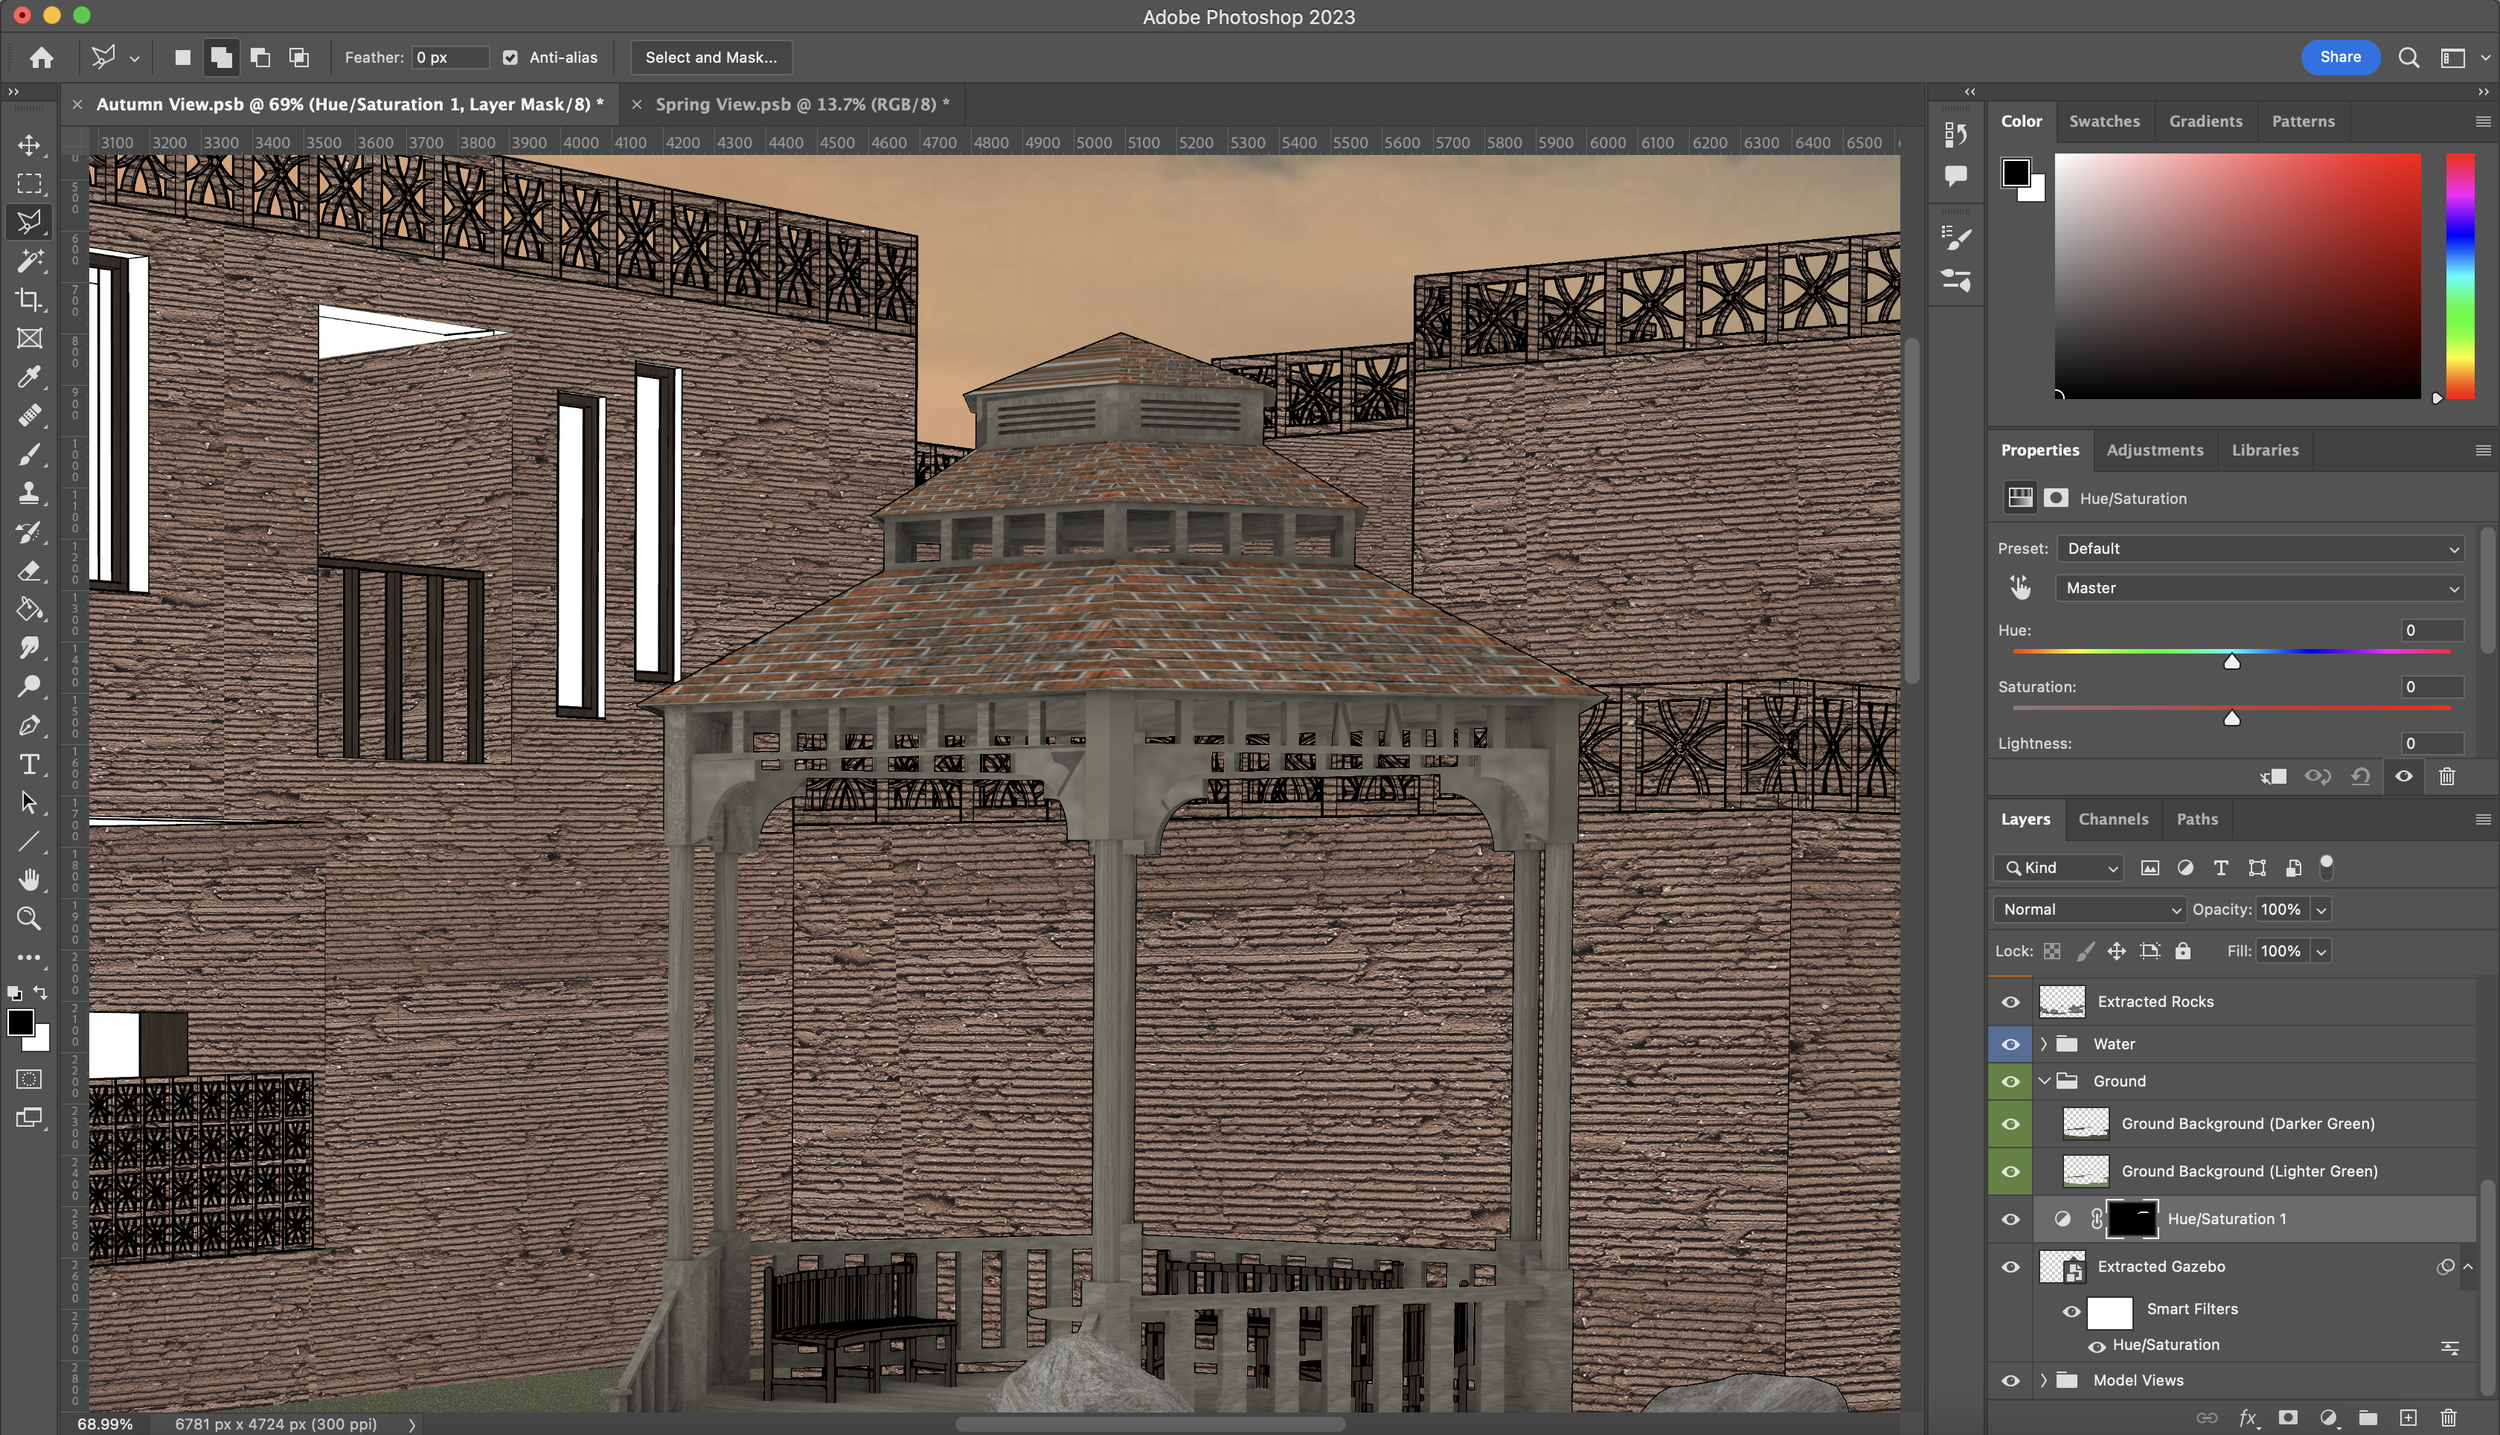
What I realised is that I wanted to continue altering the brickwork on the gazebo roof alone. To do this I used the ‘Polygonal Lasso Tool’ to select the brick roofs, went into the Adjustments panel on the right and created a new Hue/Saturation adjustment layer which will affect the areas selected. Photoshop will create a mask of the gazebo and apply a hue/saturation layer to it. I then continue playing with the setting in the Properties panel. I also linked this Hue/Saturation layer to the Gazebo layer below so it did not affect any other layers later on when layers are moved around. To do this, all you have to do is hold the ‘Option’ key and click between the two layers. From here I continued to play around with the two Hue/Saturation effects, the one applied to the brick work and the other under our smart filters applied to the rest of the gazebo, until I liked it.
Adding Glass Panes + Continuing with Small Details
Potentially one of the simplest things in this tutorial. Using the ‘Polygonal Lasso Tool’ I selected areas with glass and filled them in a light beige tone on a new layer. I then lowered the opacity of the layer to 75%. Since the sky is warm tones it made sense to use a similar tone for the glass panes as they would essentially reflect the colour of the sky rather than a cold light blue hue however depending on the circumstance the glass pane colour always change.
As I go along you’ll see new details being added. You can see that I have added a texture for the stepping stones and yet again, the same technique of selecting and masking has been used here too. I’ve also added a Hue/Saturation Layer to the group of stepping stones to edit the colours.

Texturising the Ground
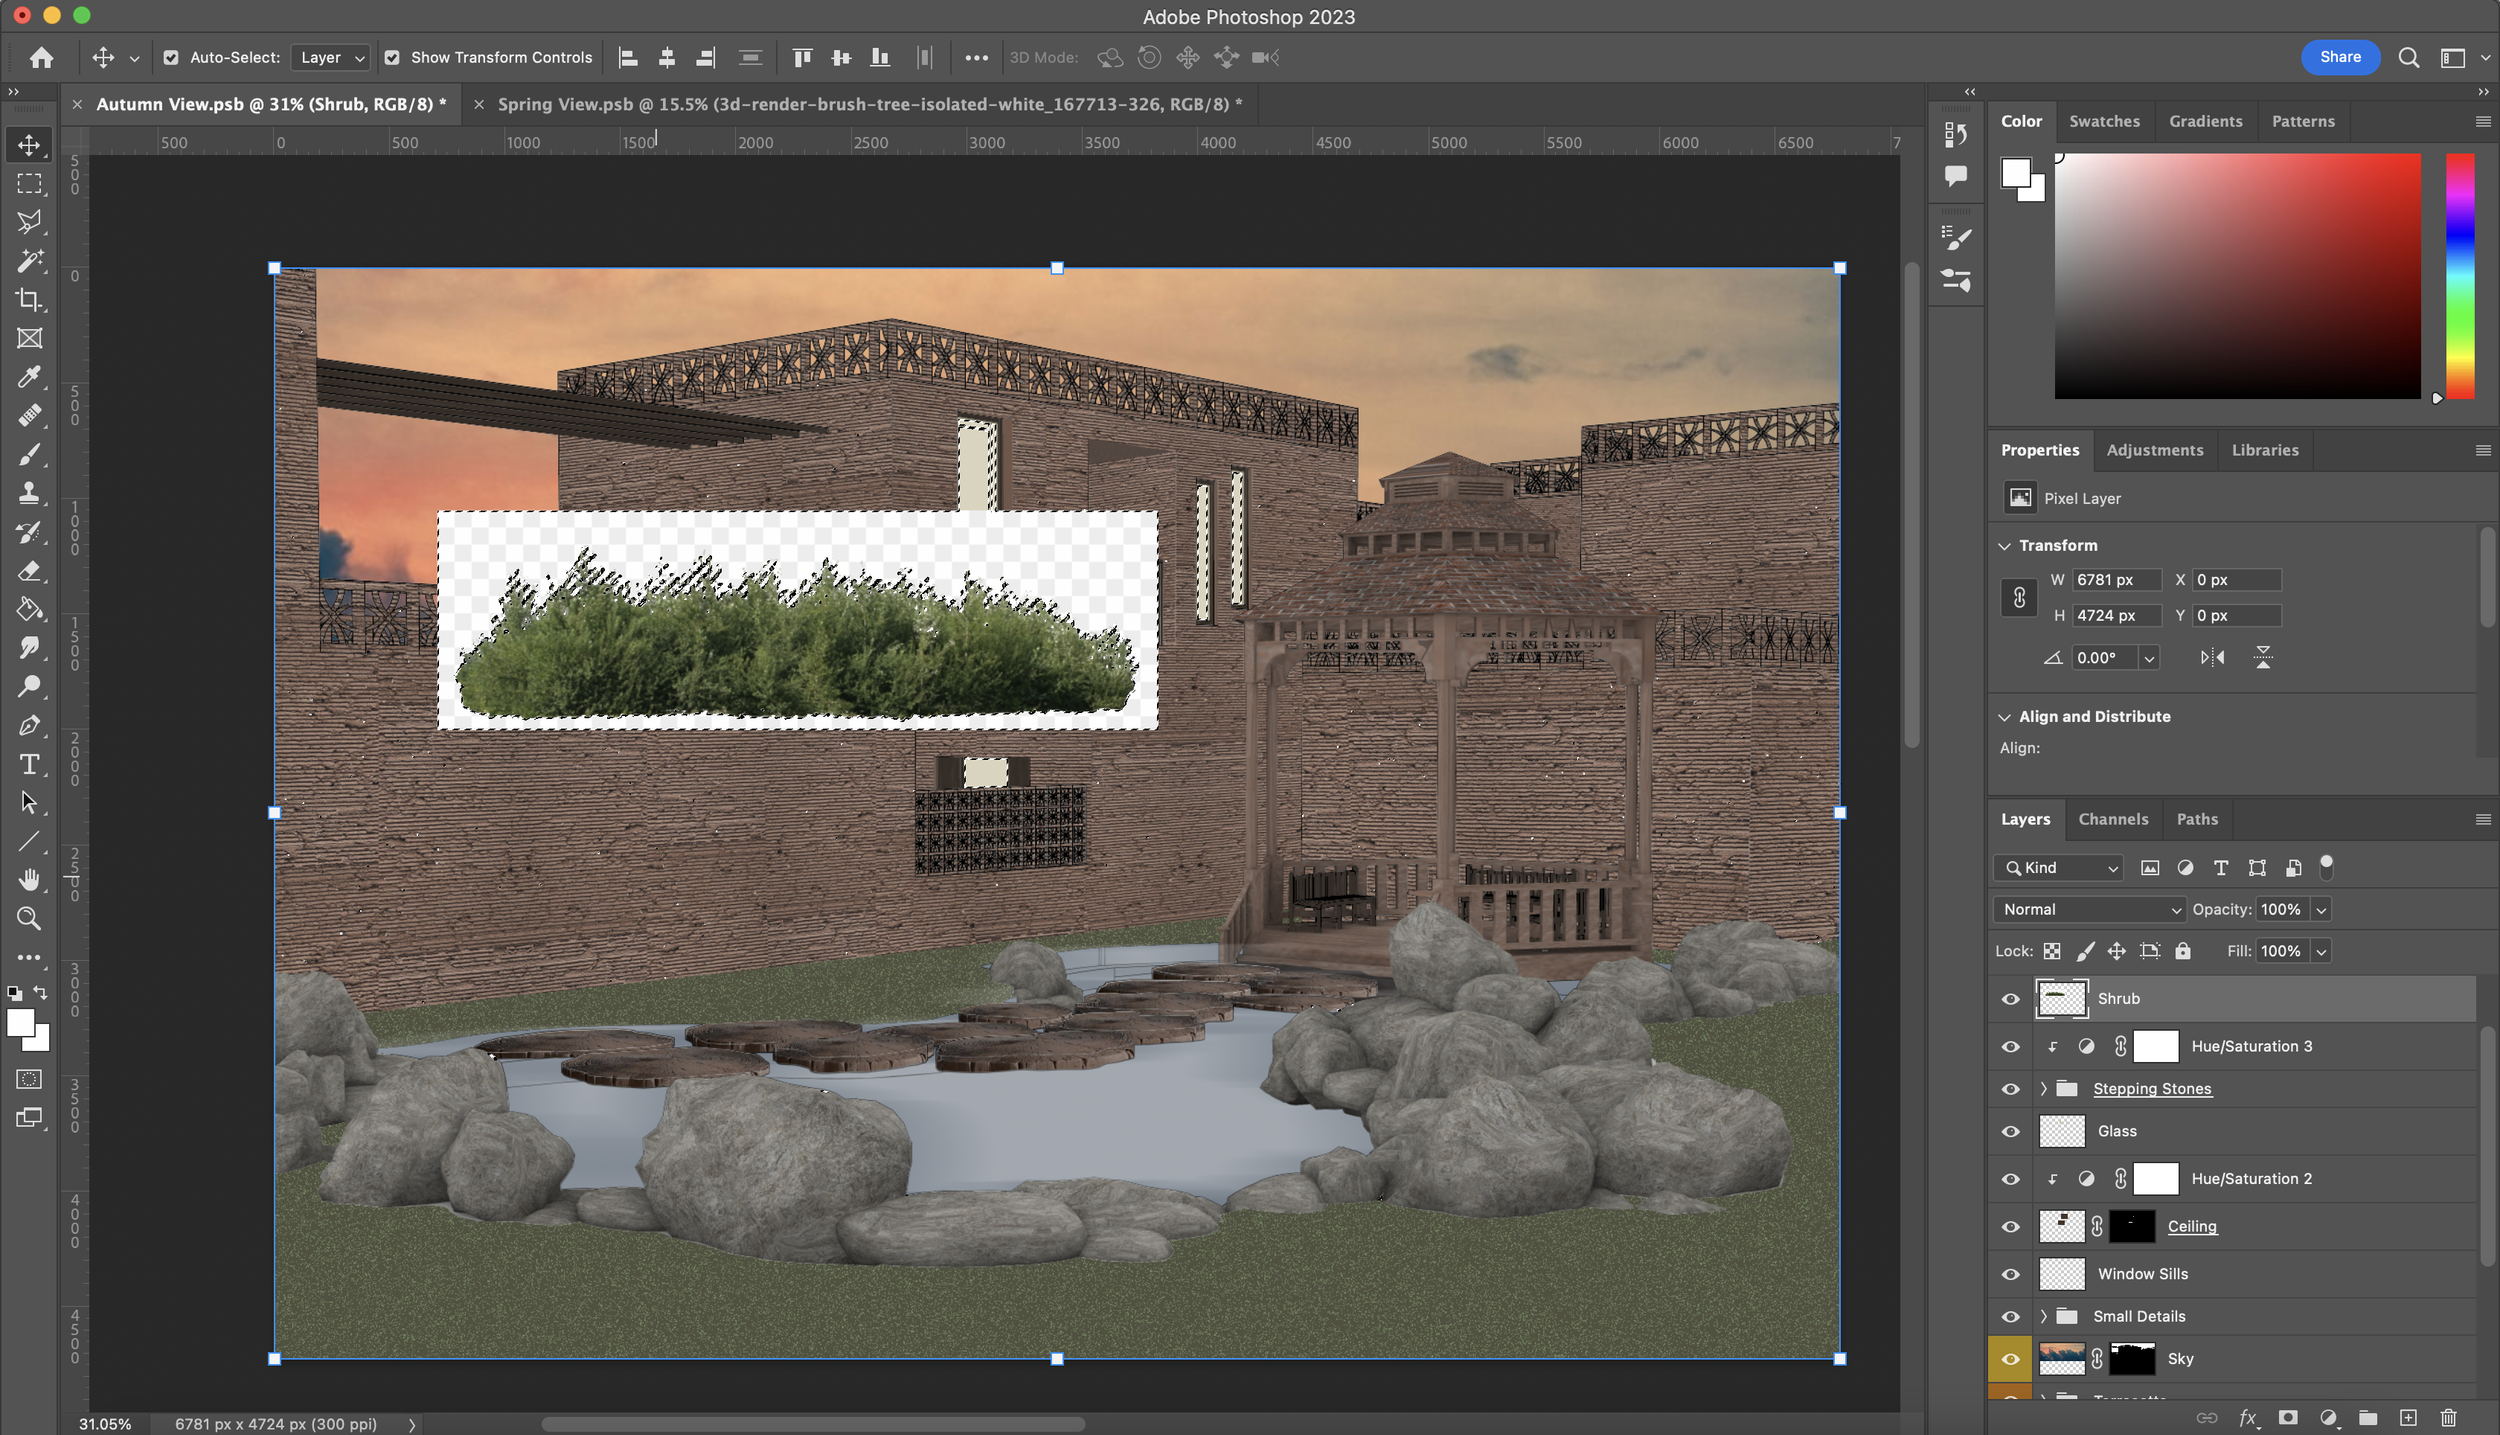
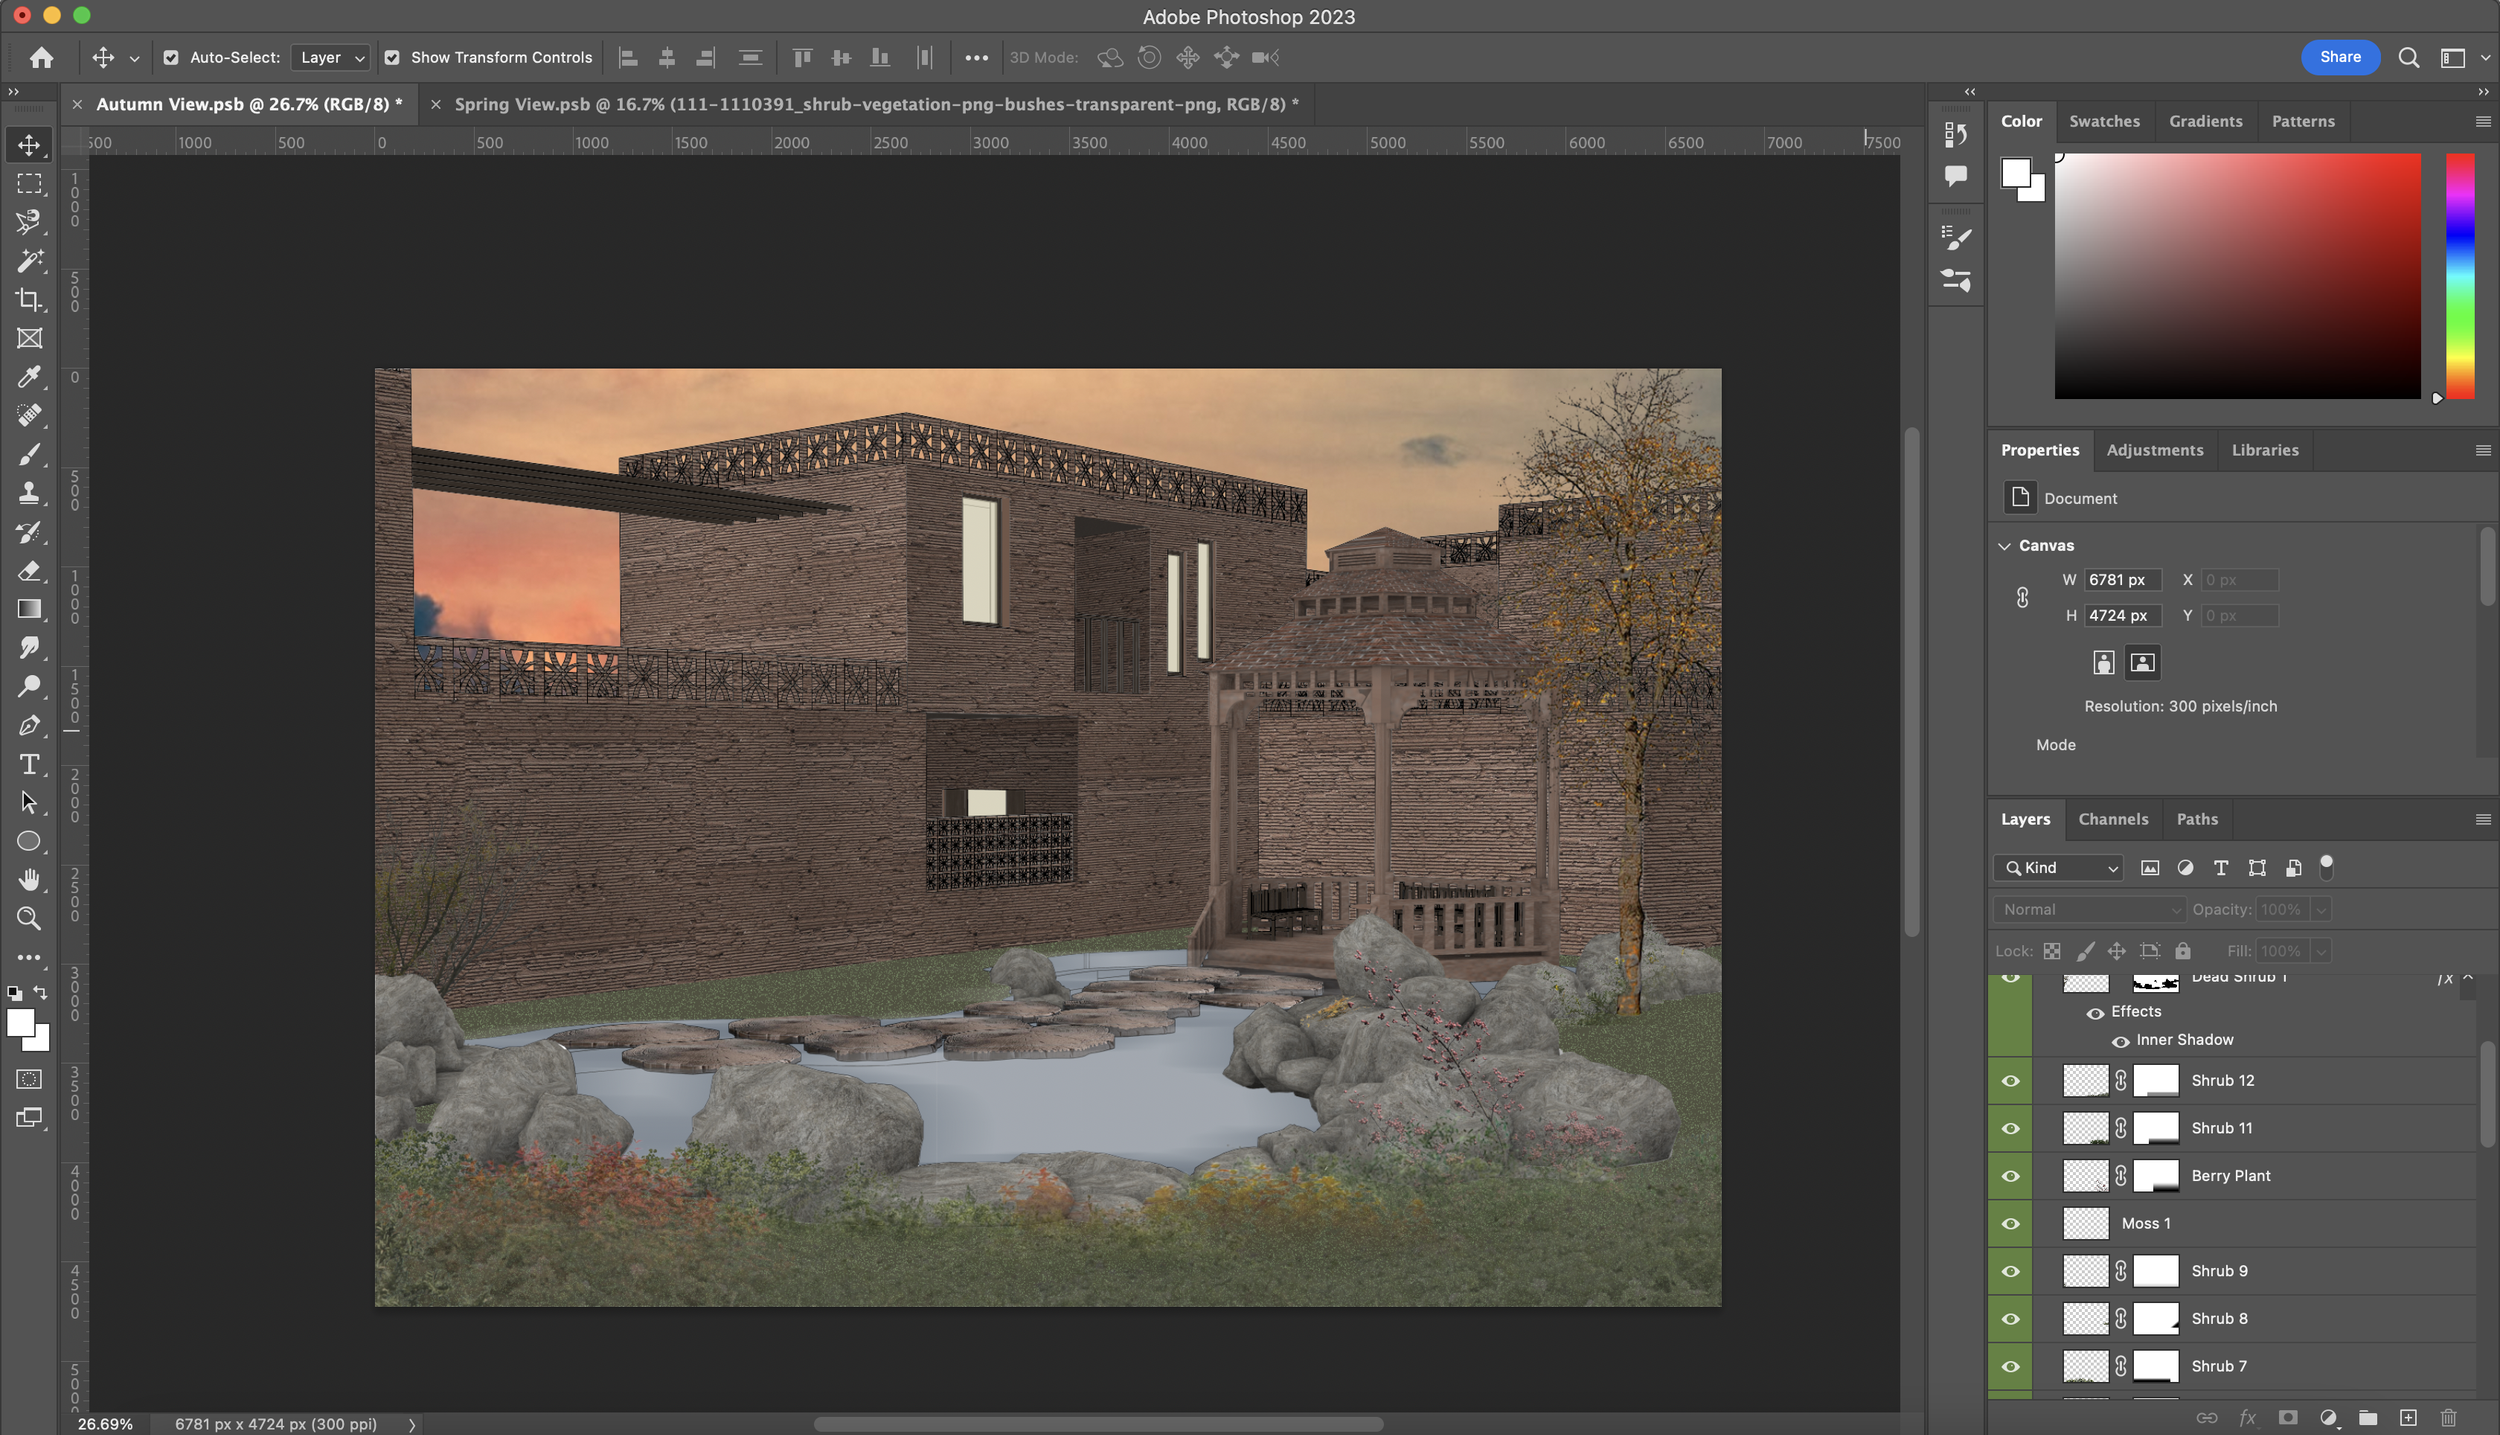
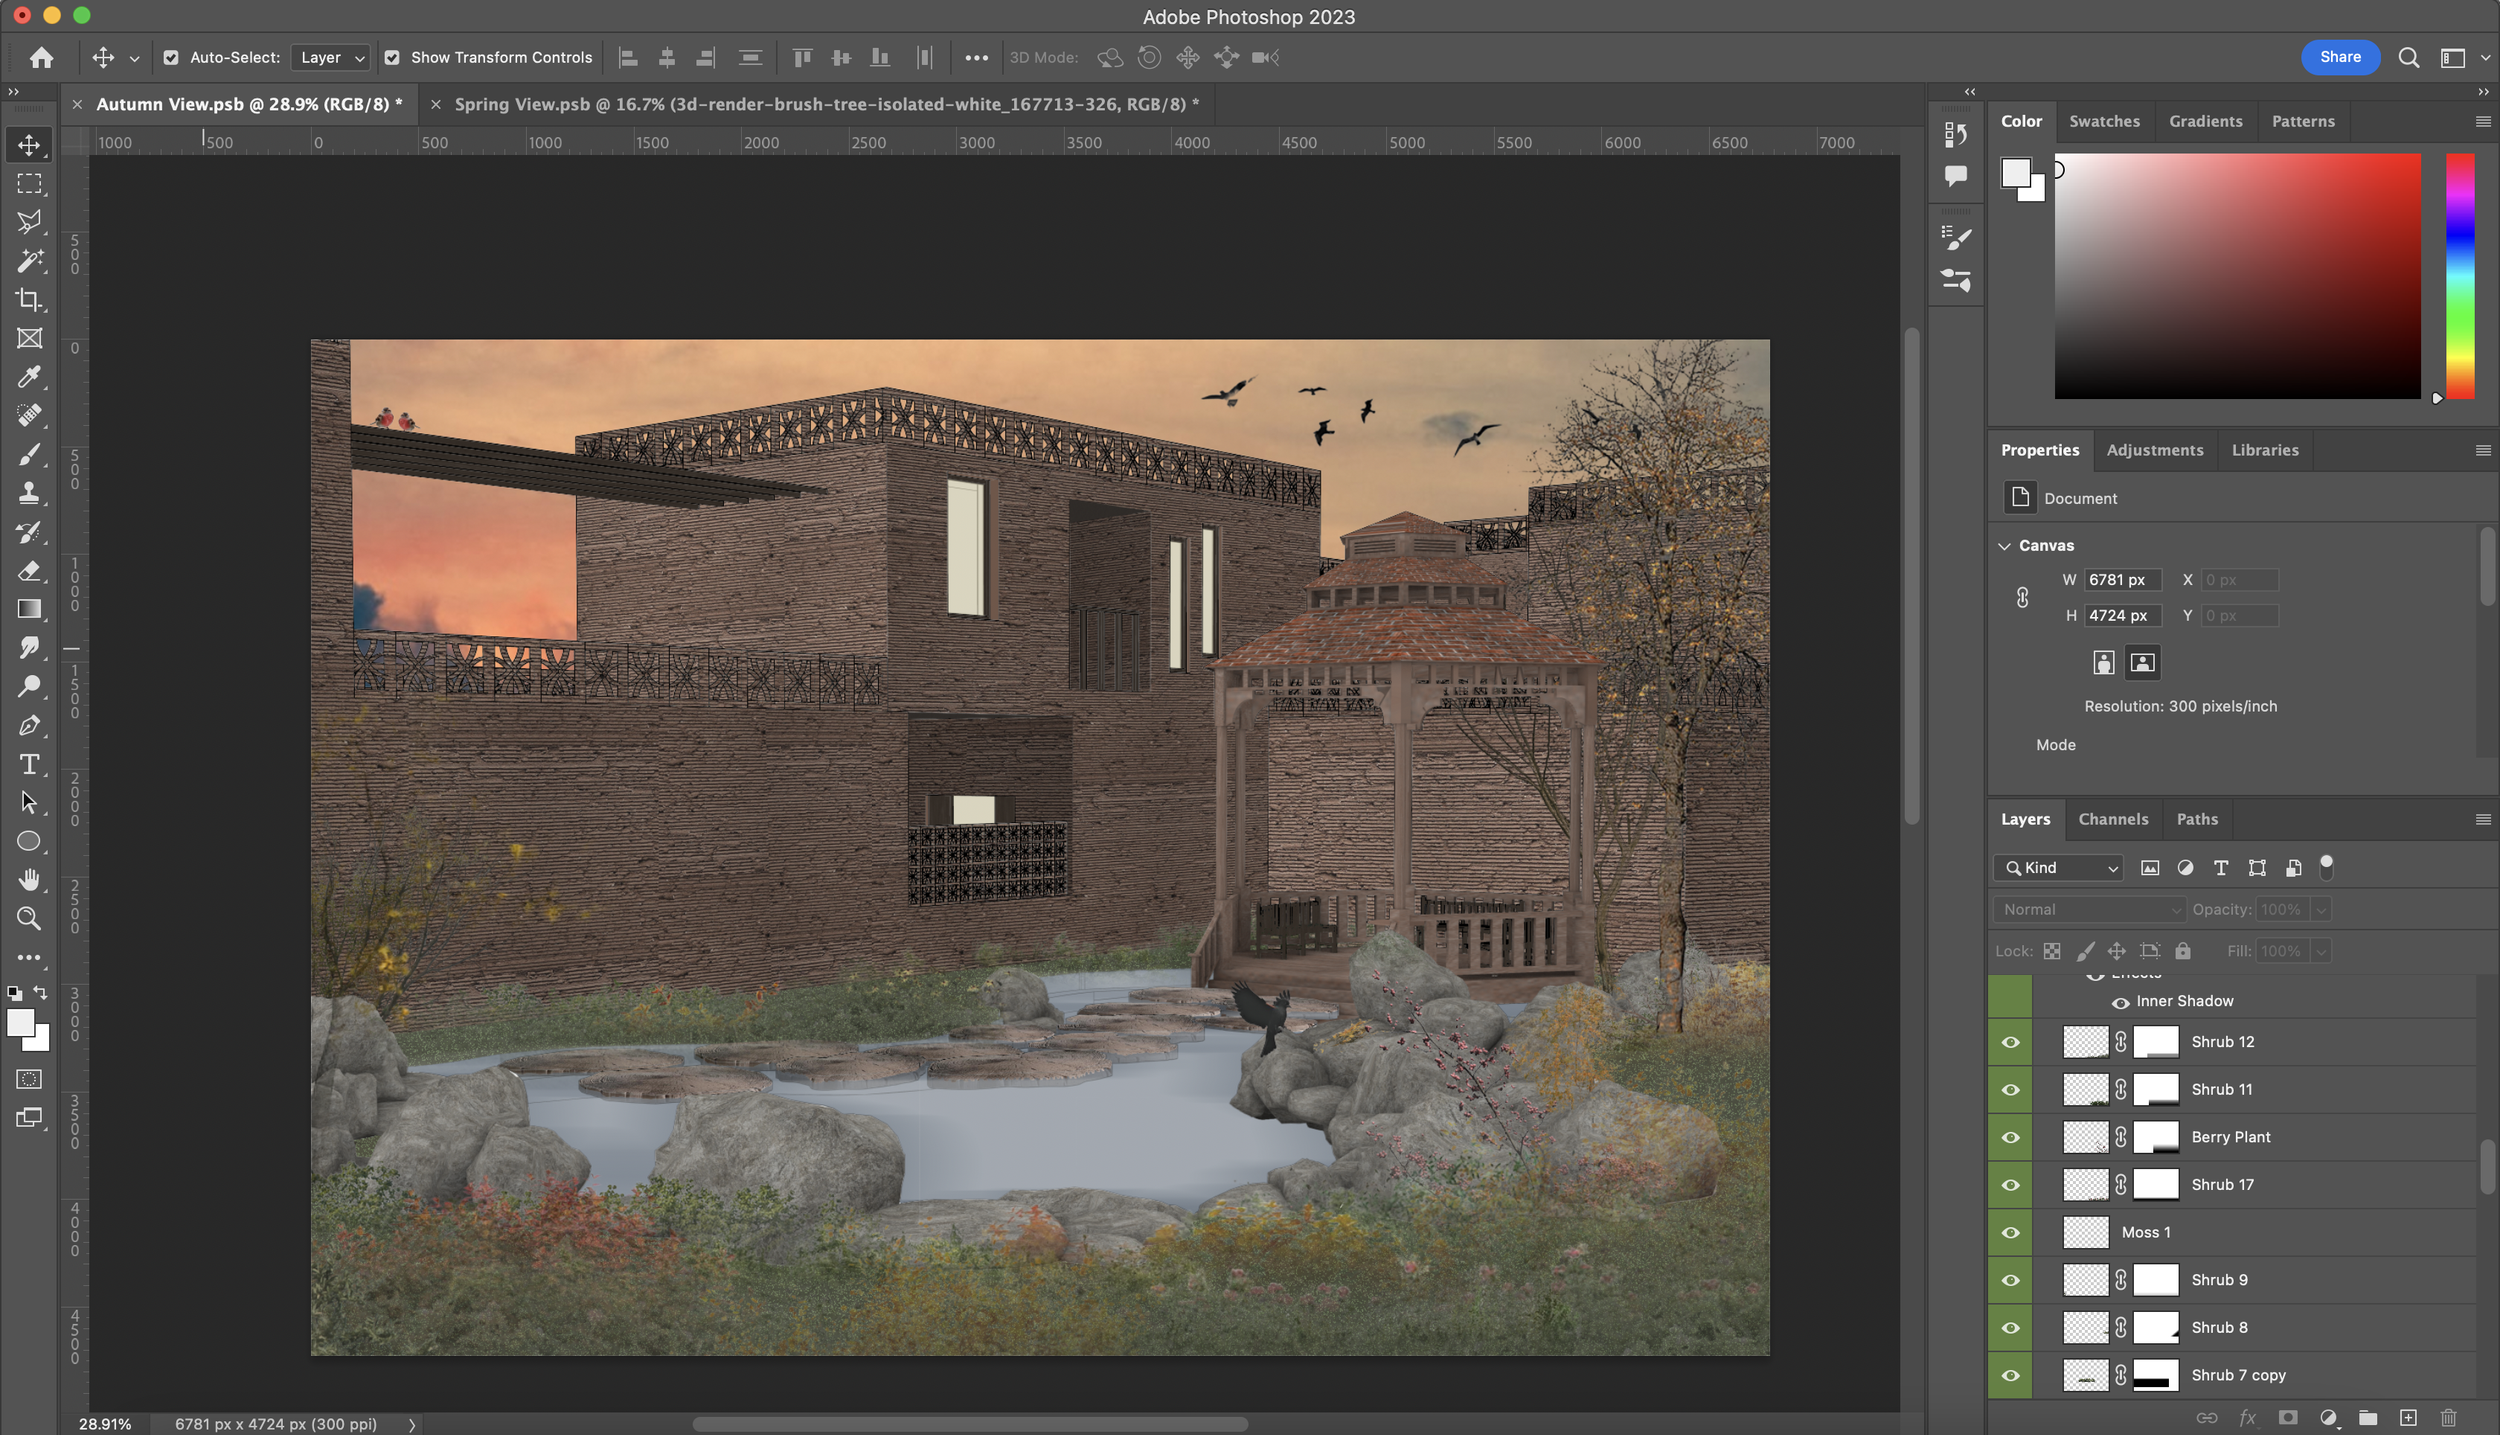
Not too long ago, we shared a video tutorial on our Instagram page on how to effectively remove white backgrounds on feathered objects. This next bit in the tutorial will be using a lot of what was shown in that reel so if you haven’t seen it yet, you can view it here. A common issue that I have found with finding grass textures is that 90% of the time they never look the way I want them to so I have worked around this by adding a transparency gradient onto shrubs and bushes in order to create a grass effect.
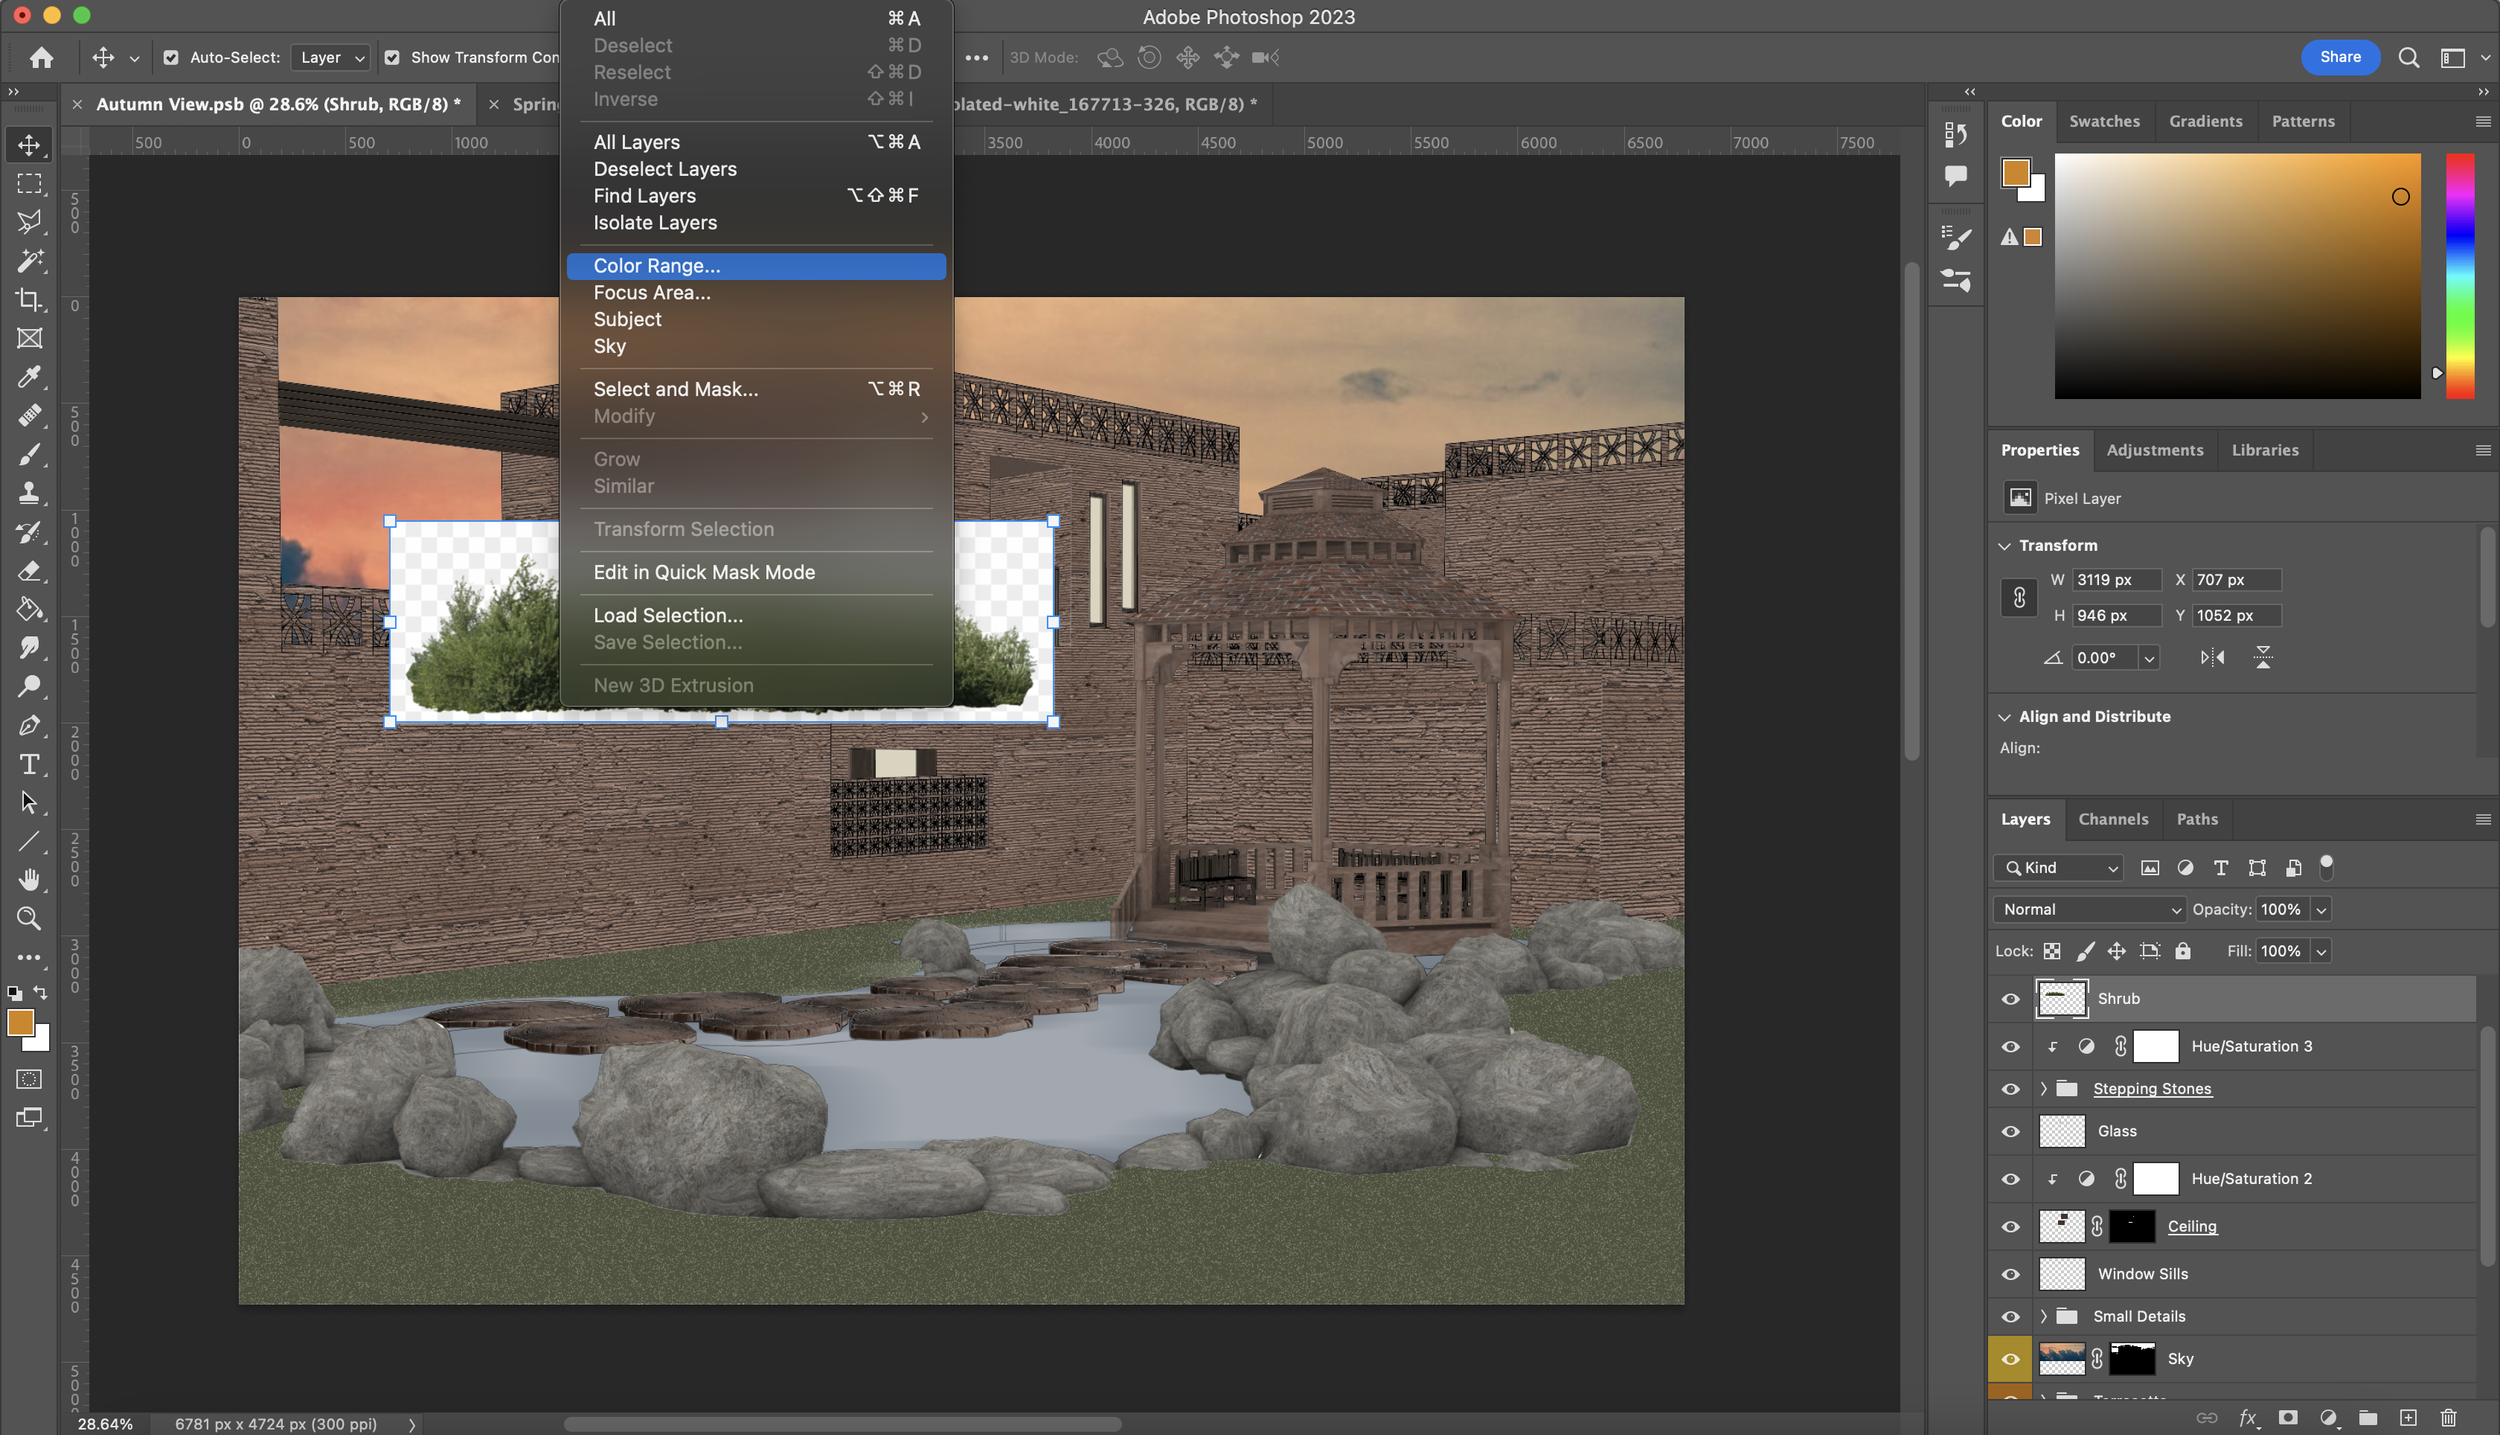
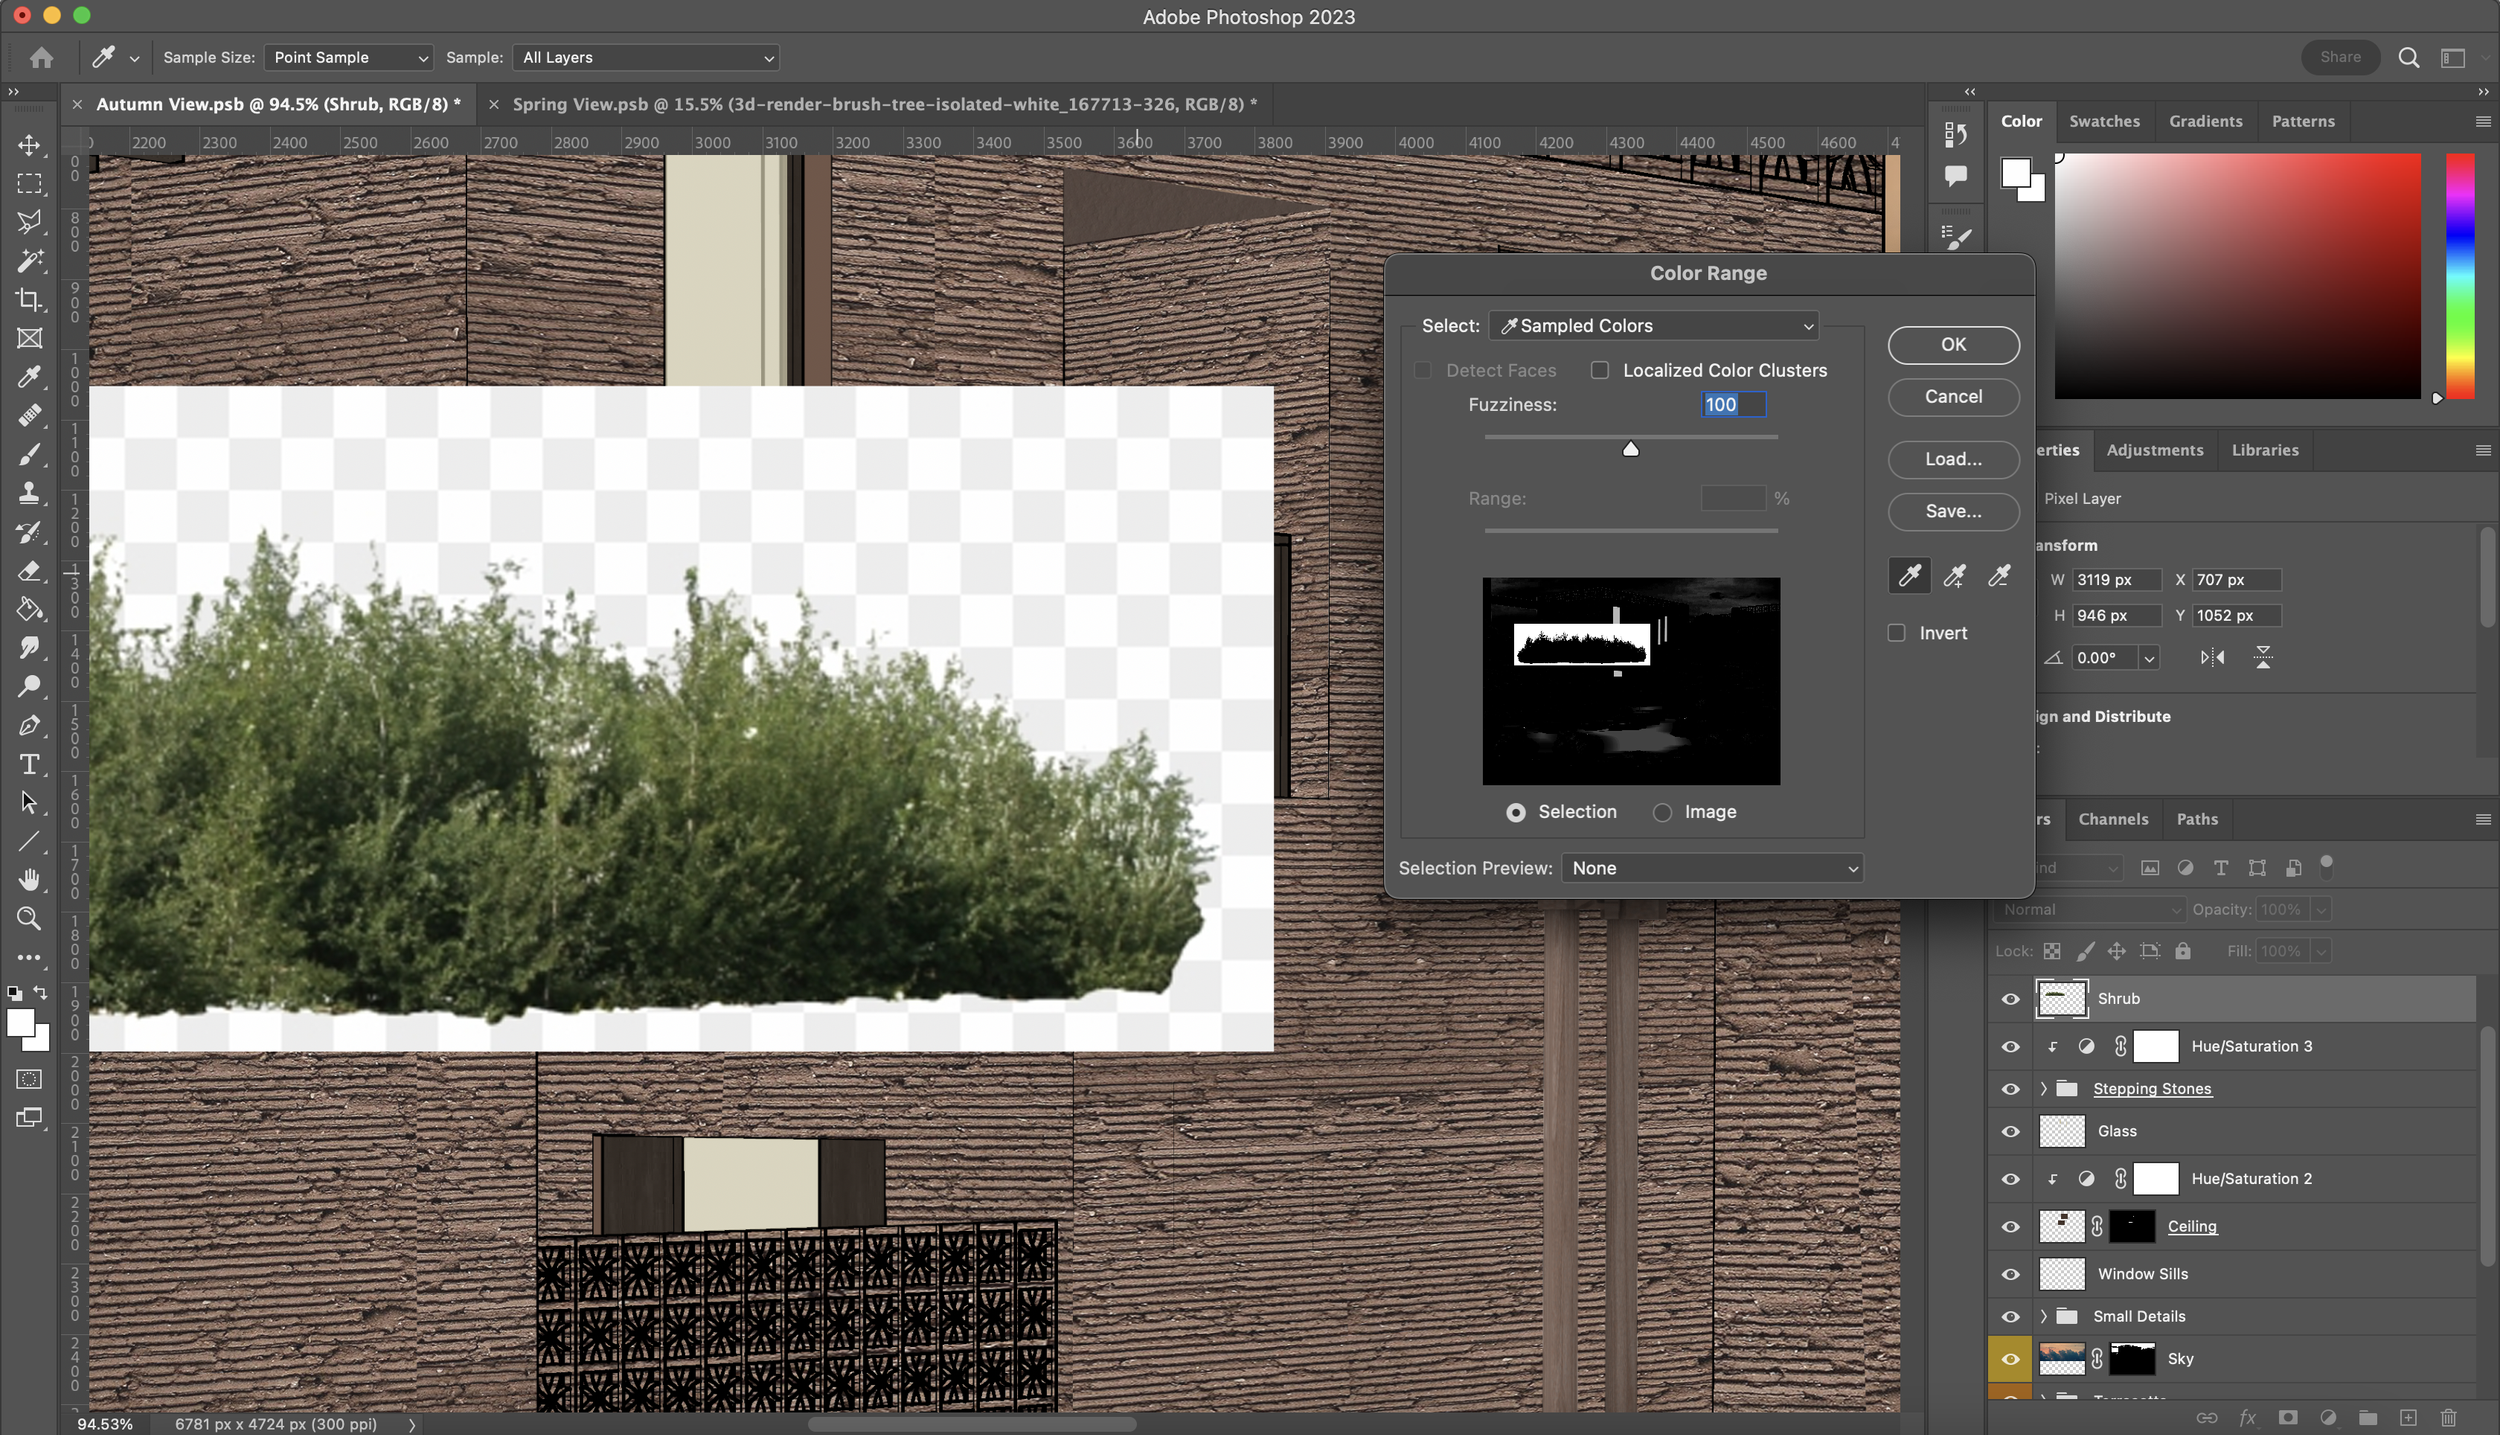
First, find yourself a shrub image ideally with a white or one-colour background. If you’ve been blessed and have found a true PNG with a transparent background you can skip to the next paragraph. Paste the image into your Photoshop file and also make sure it’s on a new layer. Whilst selected, go to Select -> Colour Range and a small window should pop up. What this tool allows you to do is select a colour on the image to be selected and you can use the Fuzziness bar to play around with how much of the colour is picked up in the selection. A small preview also shows what will be picked up when you click ok. Once you’re happy, click ok and delete the unwanted background.
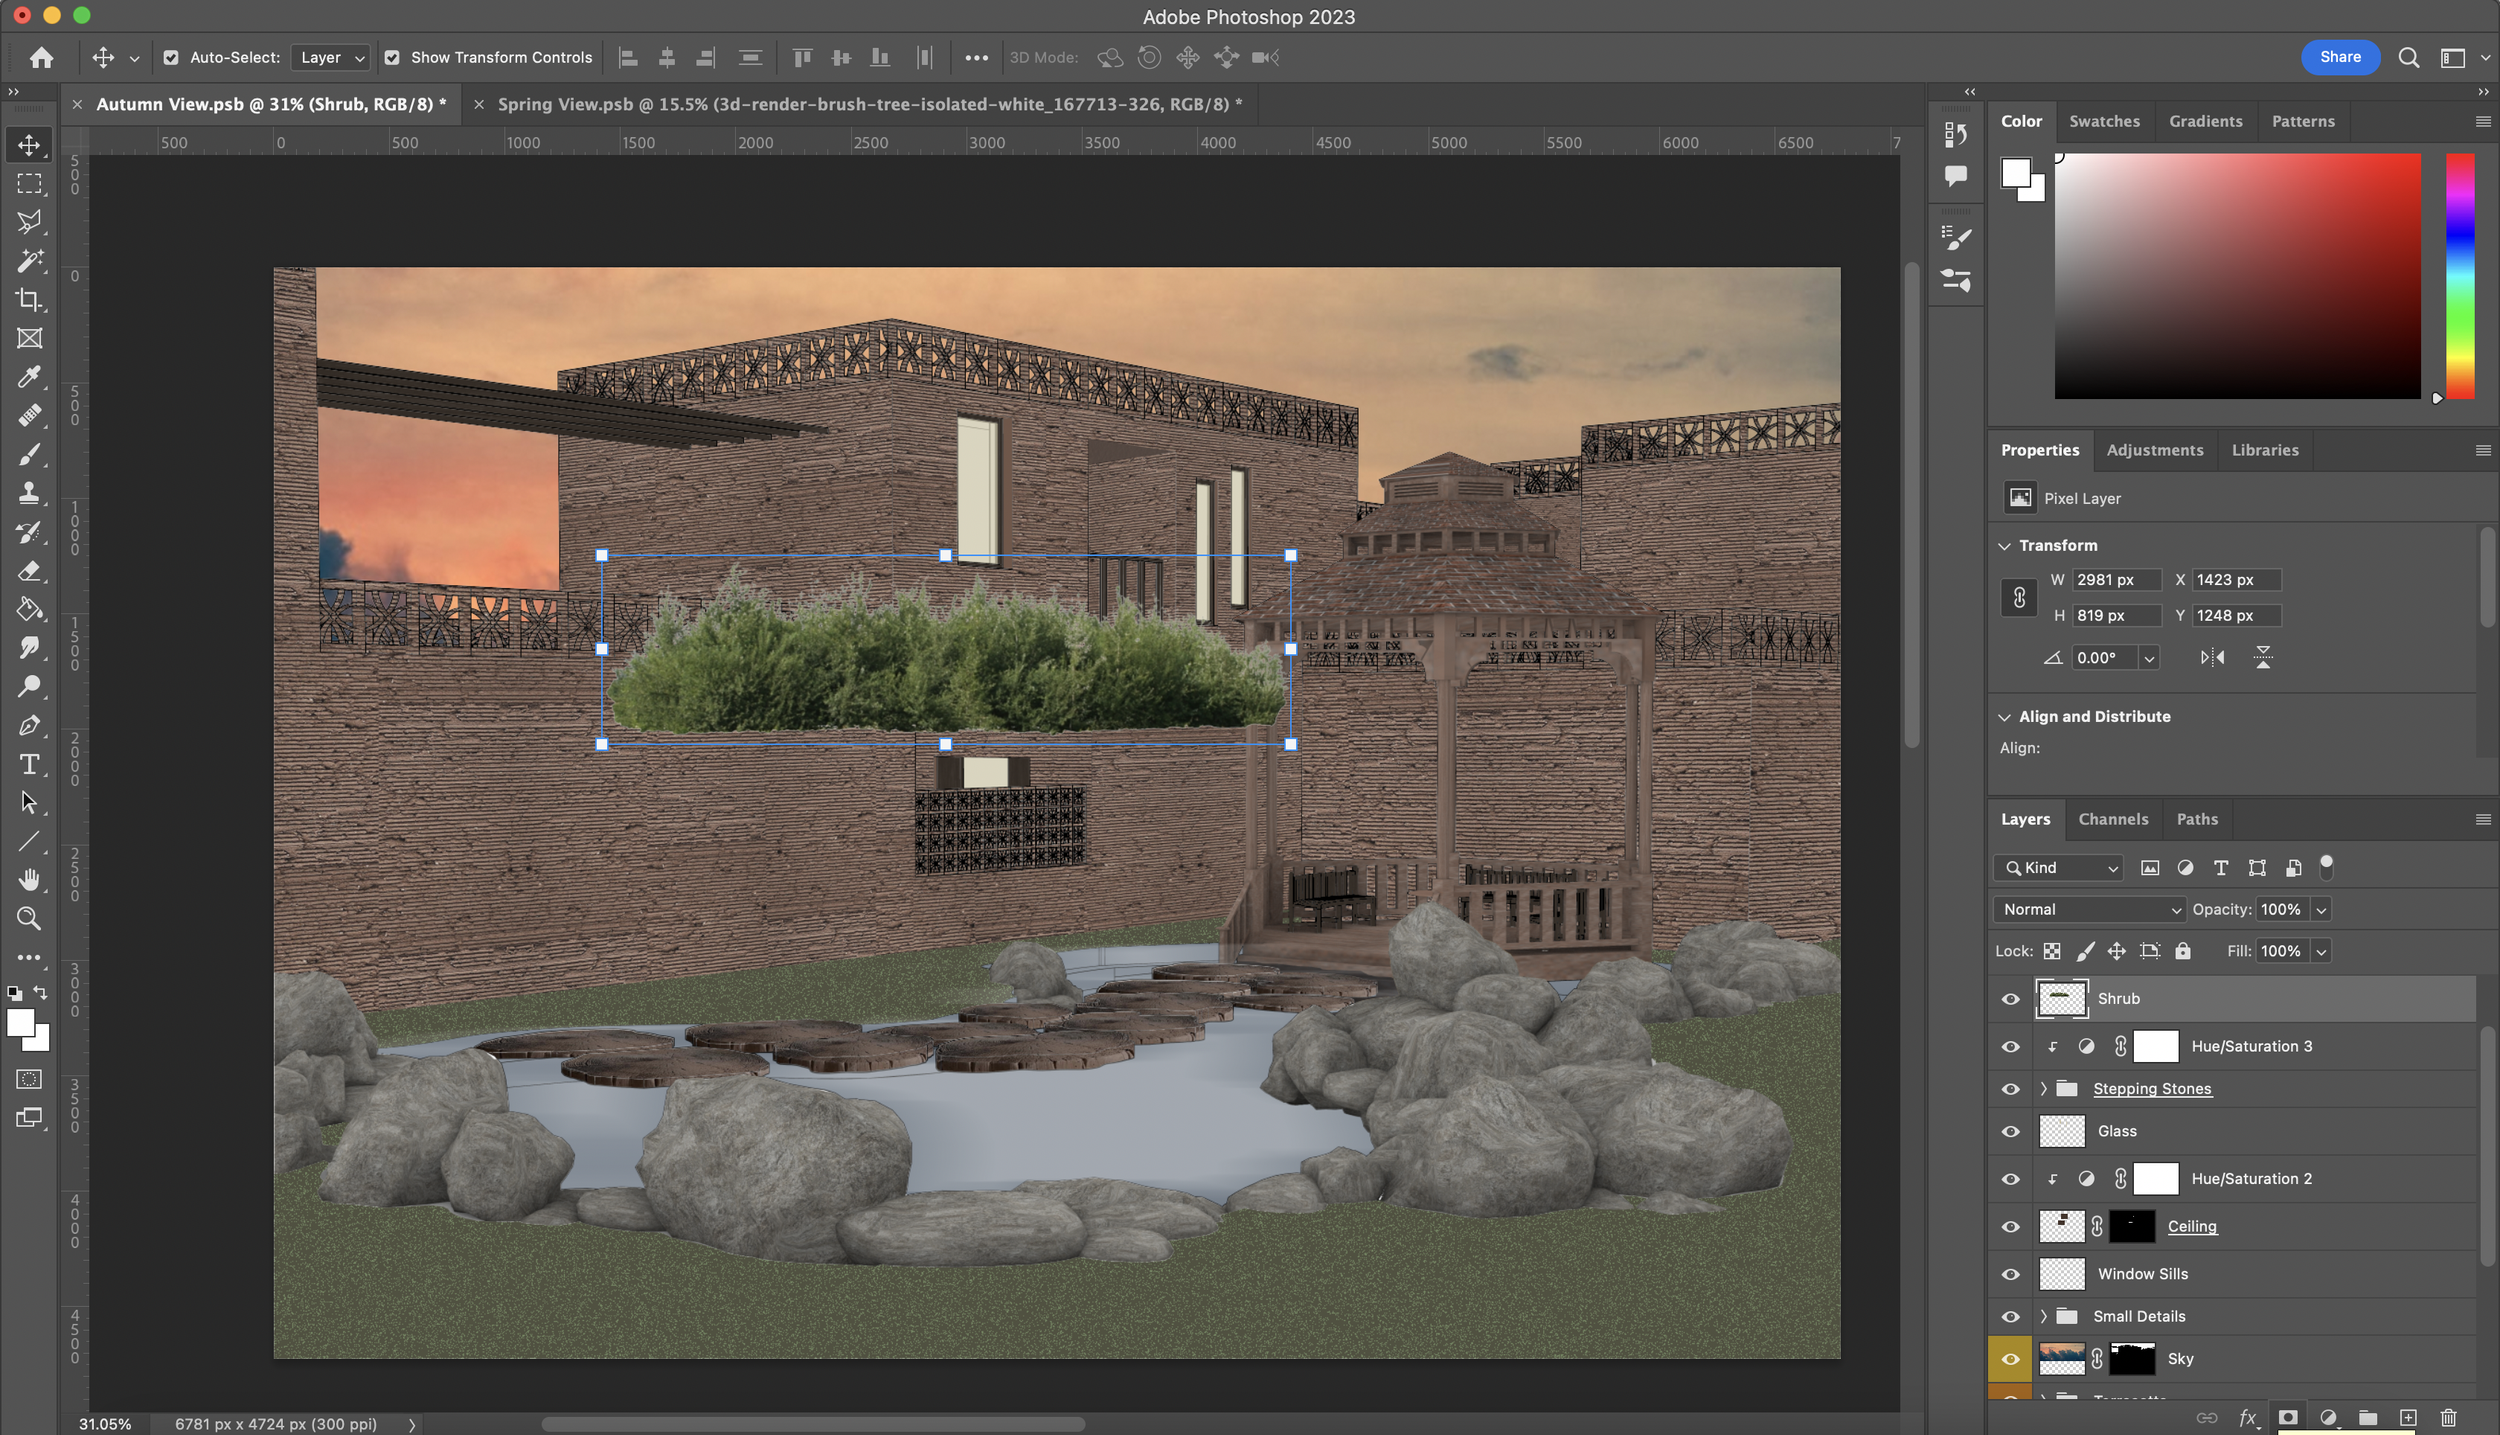
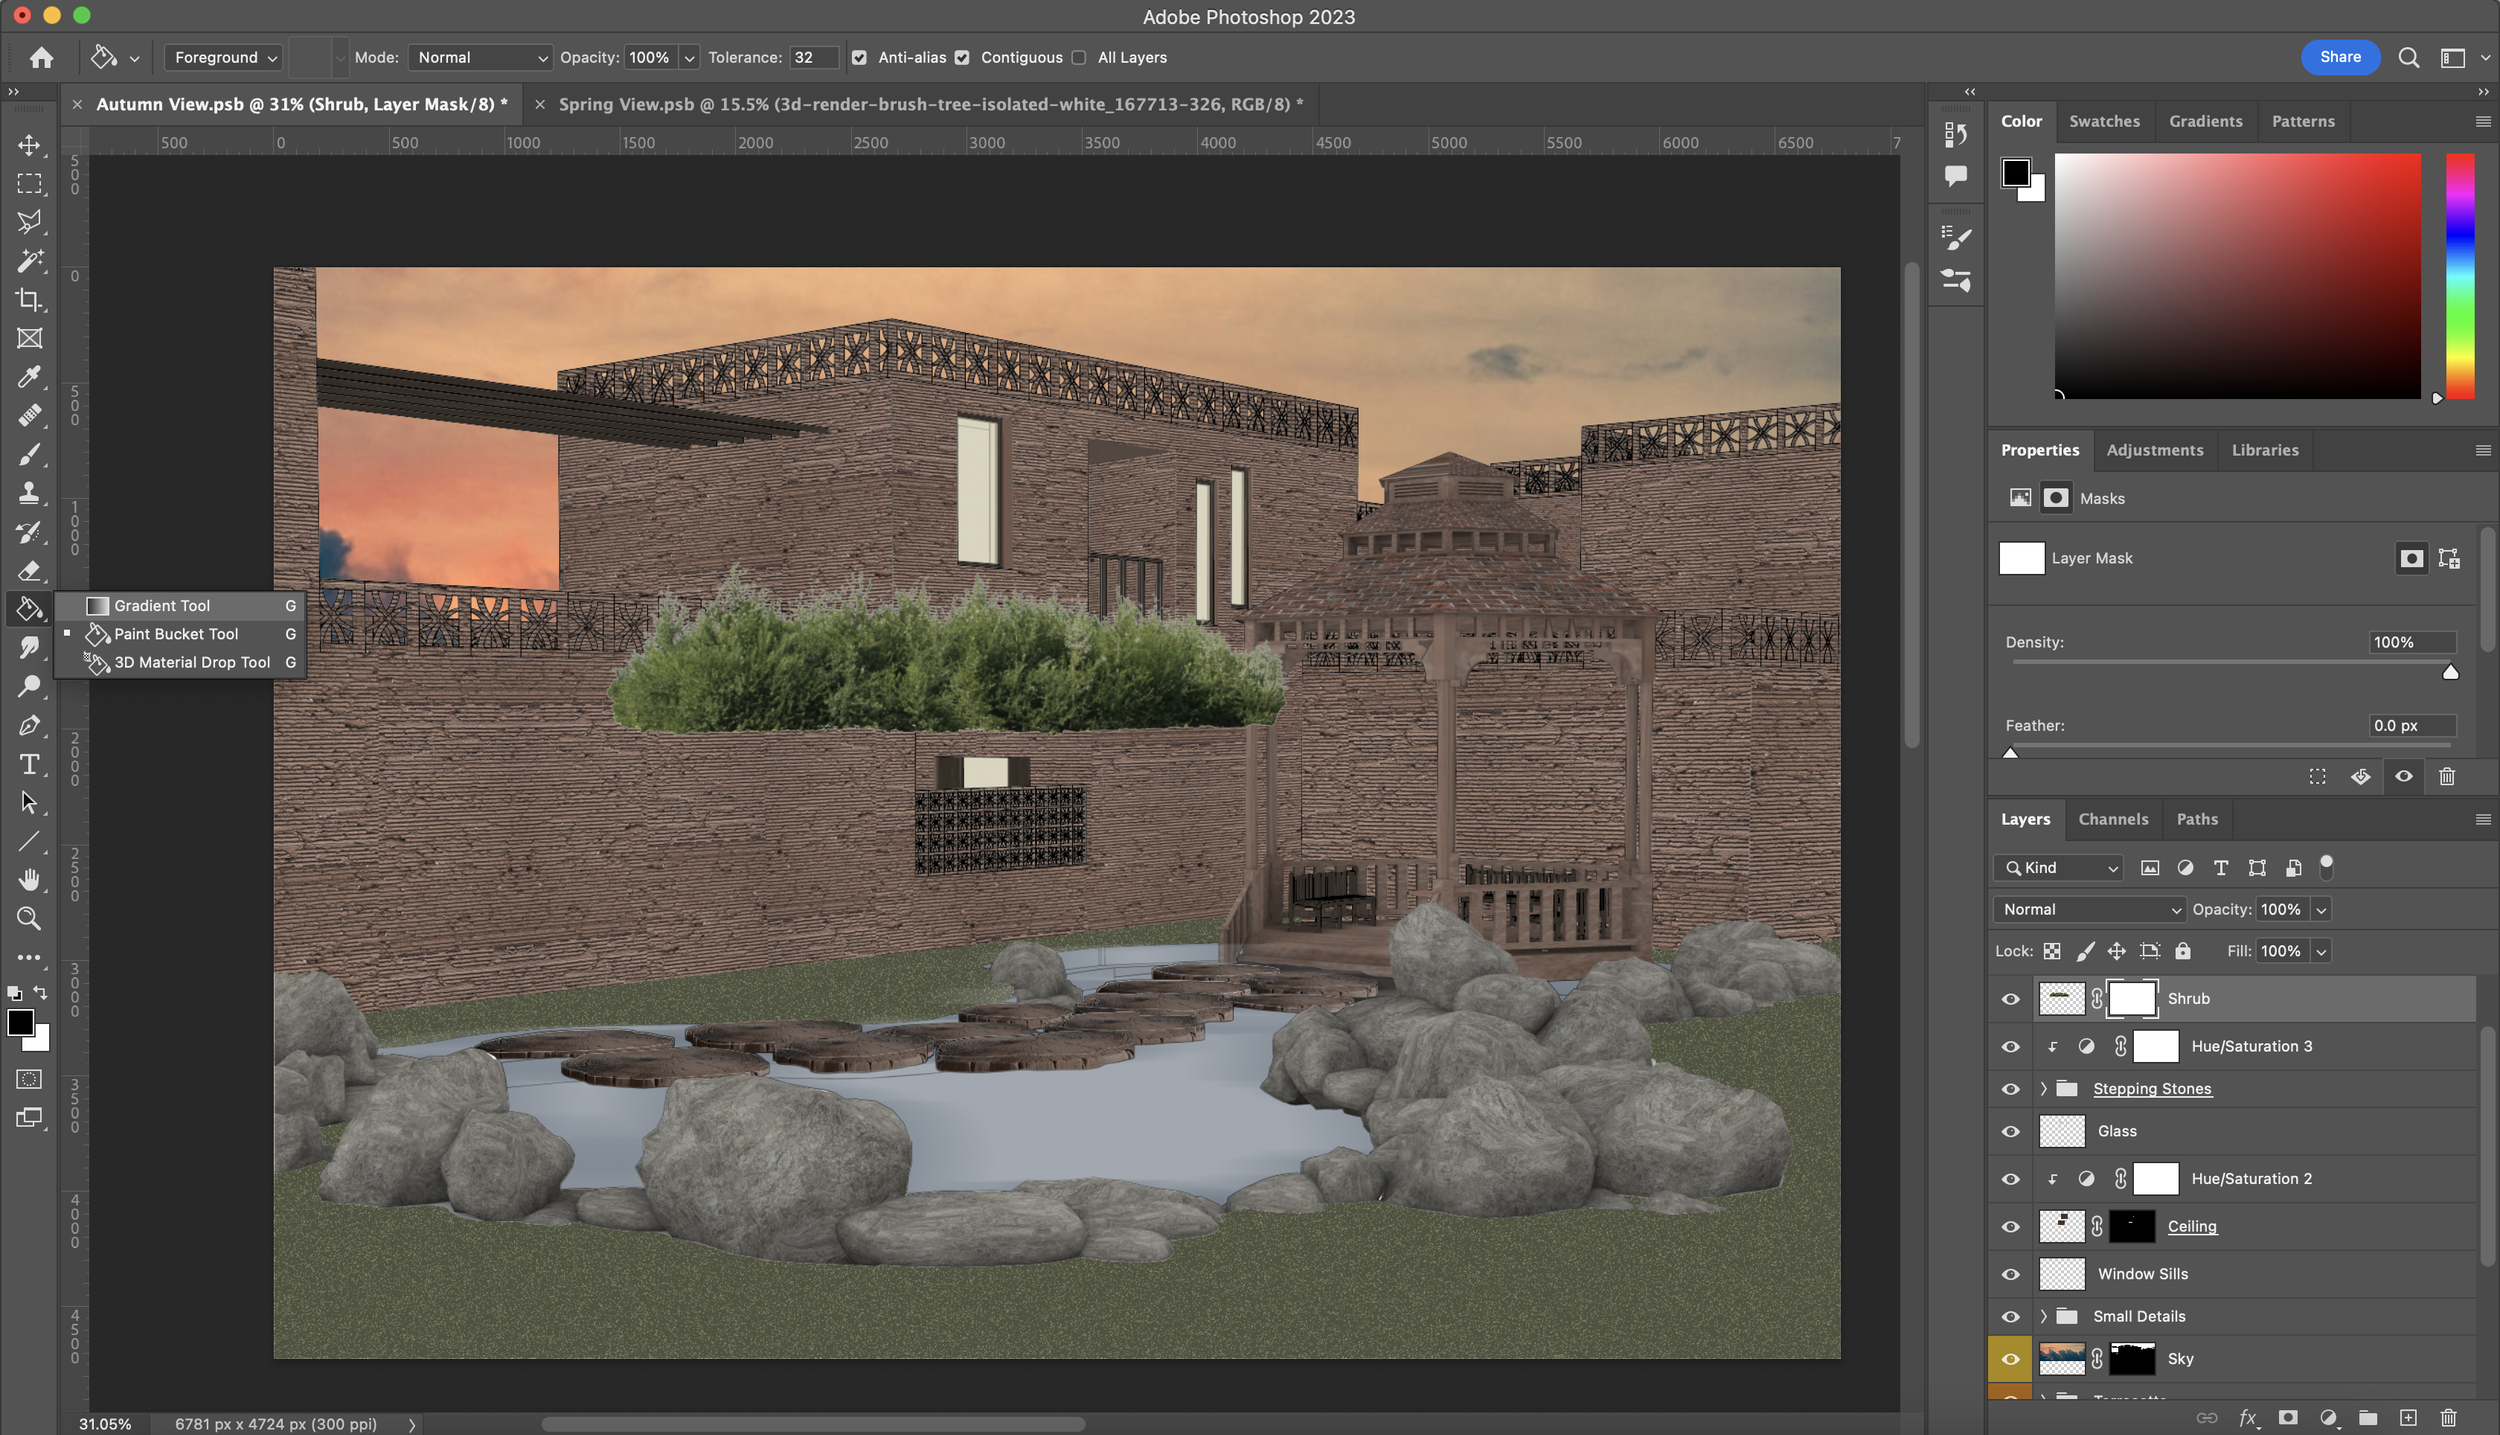
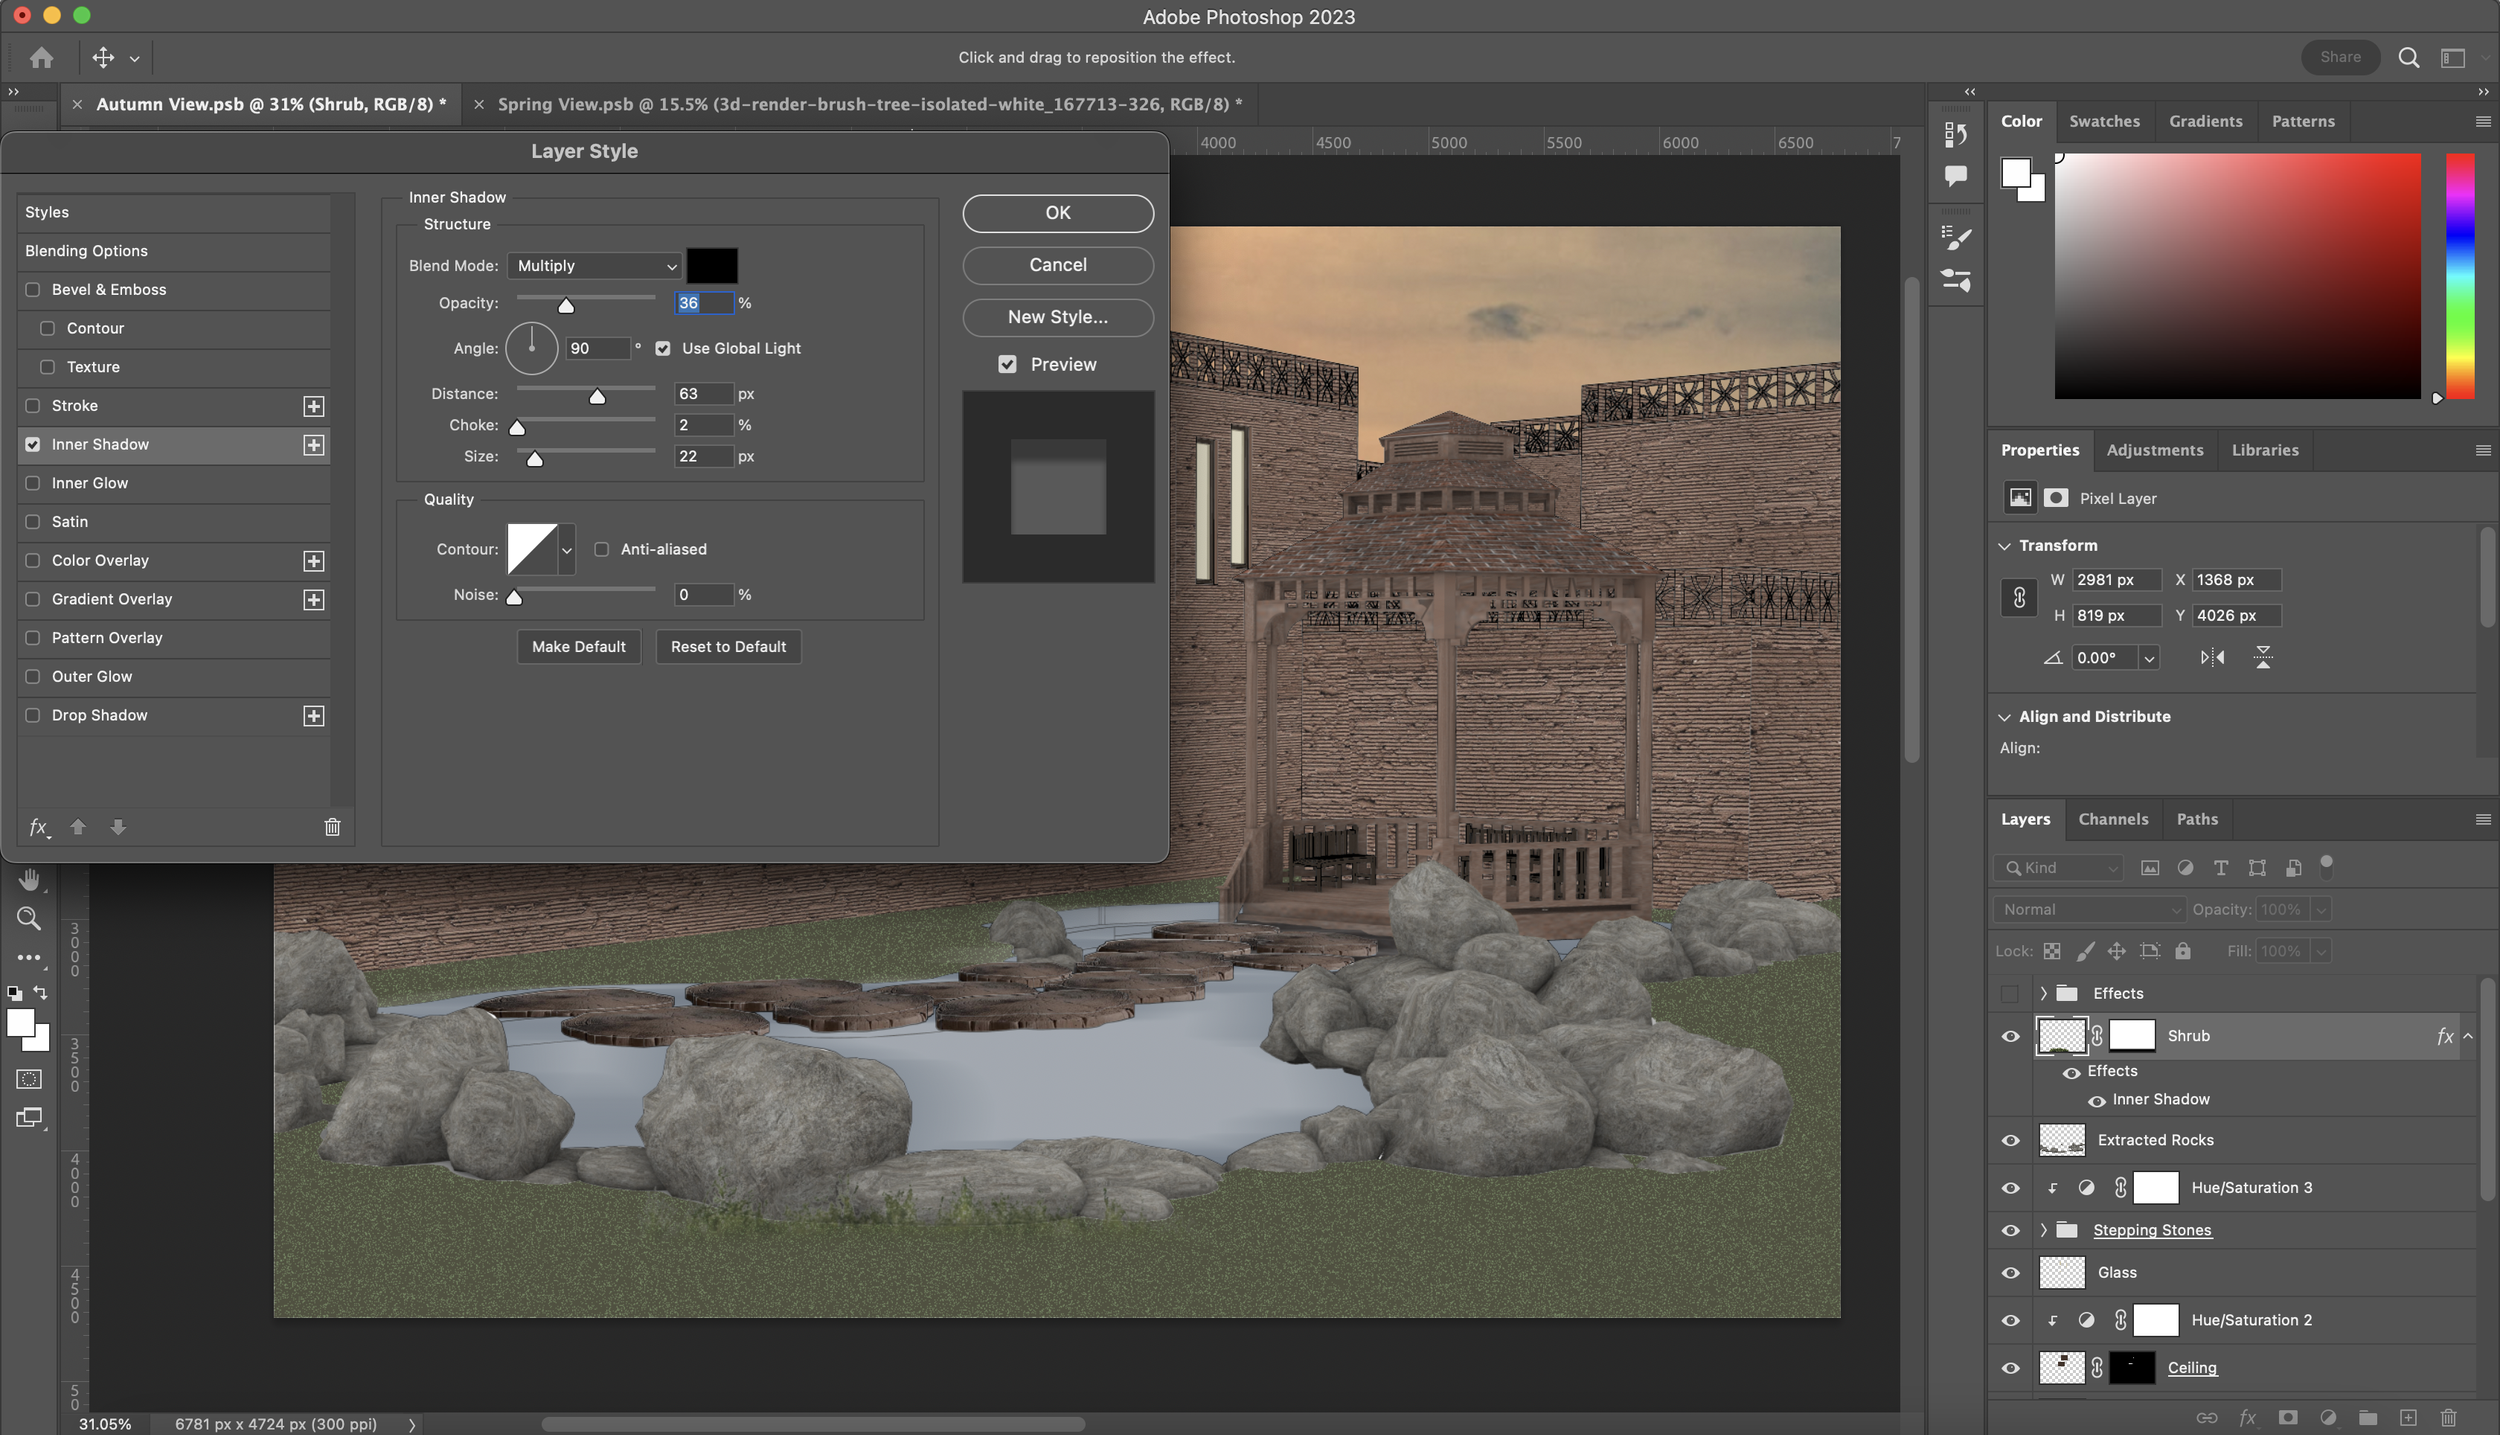
Next, I’ll be showing the gradient trick that I use to imitate grass using shrubs/bushes. Add a layer mask to the shrub layer. Then, go to the bucket tool in your tools panel on the left and select the ‘Gradient Tool’ amongst the trio. You will then drag the gradient tool vertically so you are only able to see the tips of the shrub essentially looking like grass. You may have realised that the ‘Colour Range’ tool was not able to eliminate the greys around the thin branches and to work around this, you can select the shrub layer, click the ‘fx’ button at the bottom of the layers panel and select ‘Inner Shadow’. You can eliminate the light hue around the branches by adding an inner shadow as shown in the screenshots below and when happy, click ok.
Continue to do this until you’re happy with the ground. you’ll realise how much more depth the ground gains when adding shrubbery of different heights.
The Levels Tool
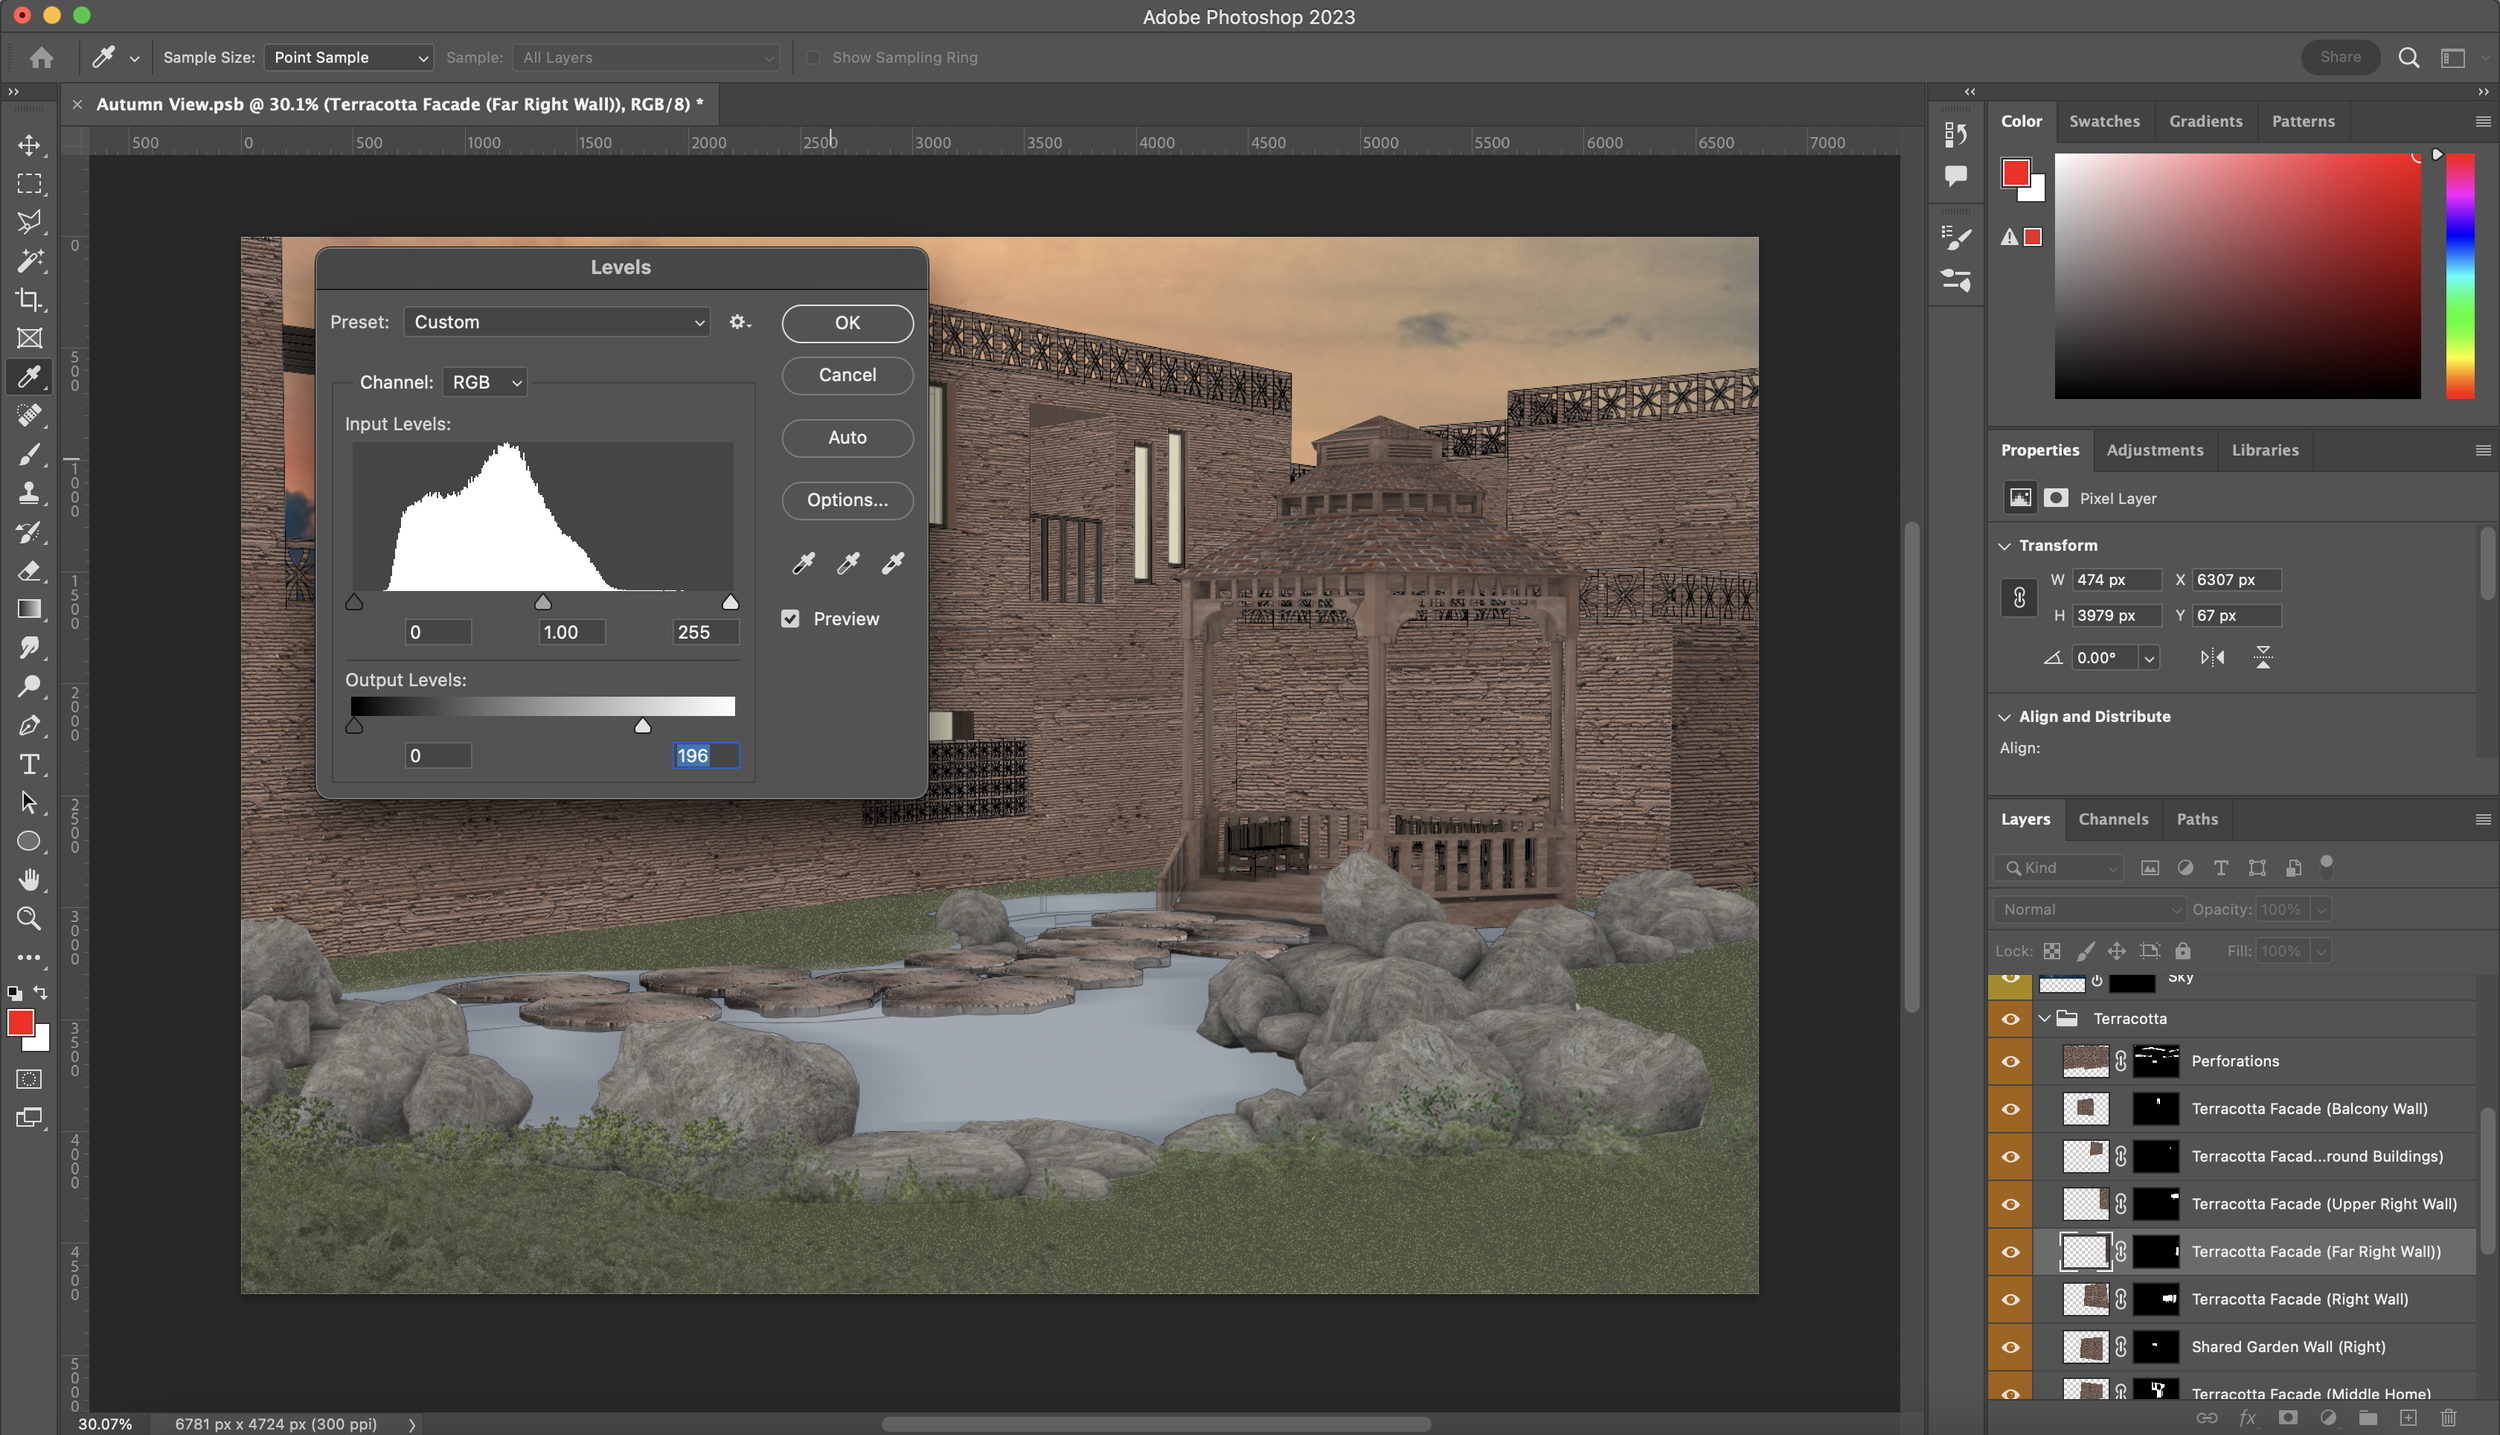
Something I learnt from my tutor in their year was the ‘Levels’ tool in Photoshop which I find very similar to the ‘Exposure’ tool. But to set basic shadow depth, especially for the building walls, I selected each wall (this is why it’s important to add a texture to each wall separately) one at a time and pressed ‘Cmd + L’ or ‘Ctrl + L’ to activate the ‘Levels’ tool and dragged the white tag closer to the darker spectrum in order to darken the whole wall. I did this to each one in order to set a basic understanding of where light is coming from and give the visual some depth as it was looking very flat.

Don’t Repeat What You Have Already Done
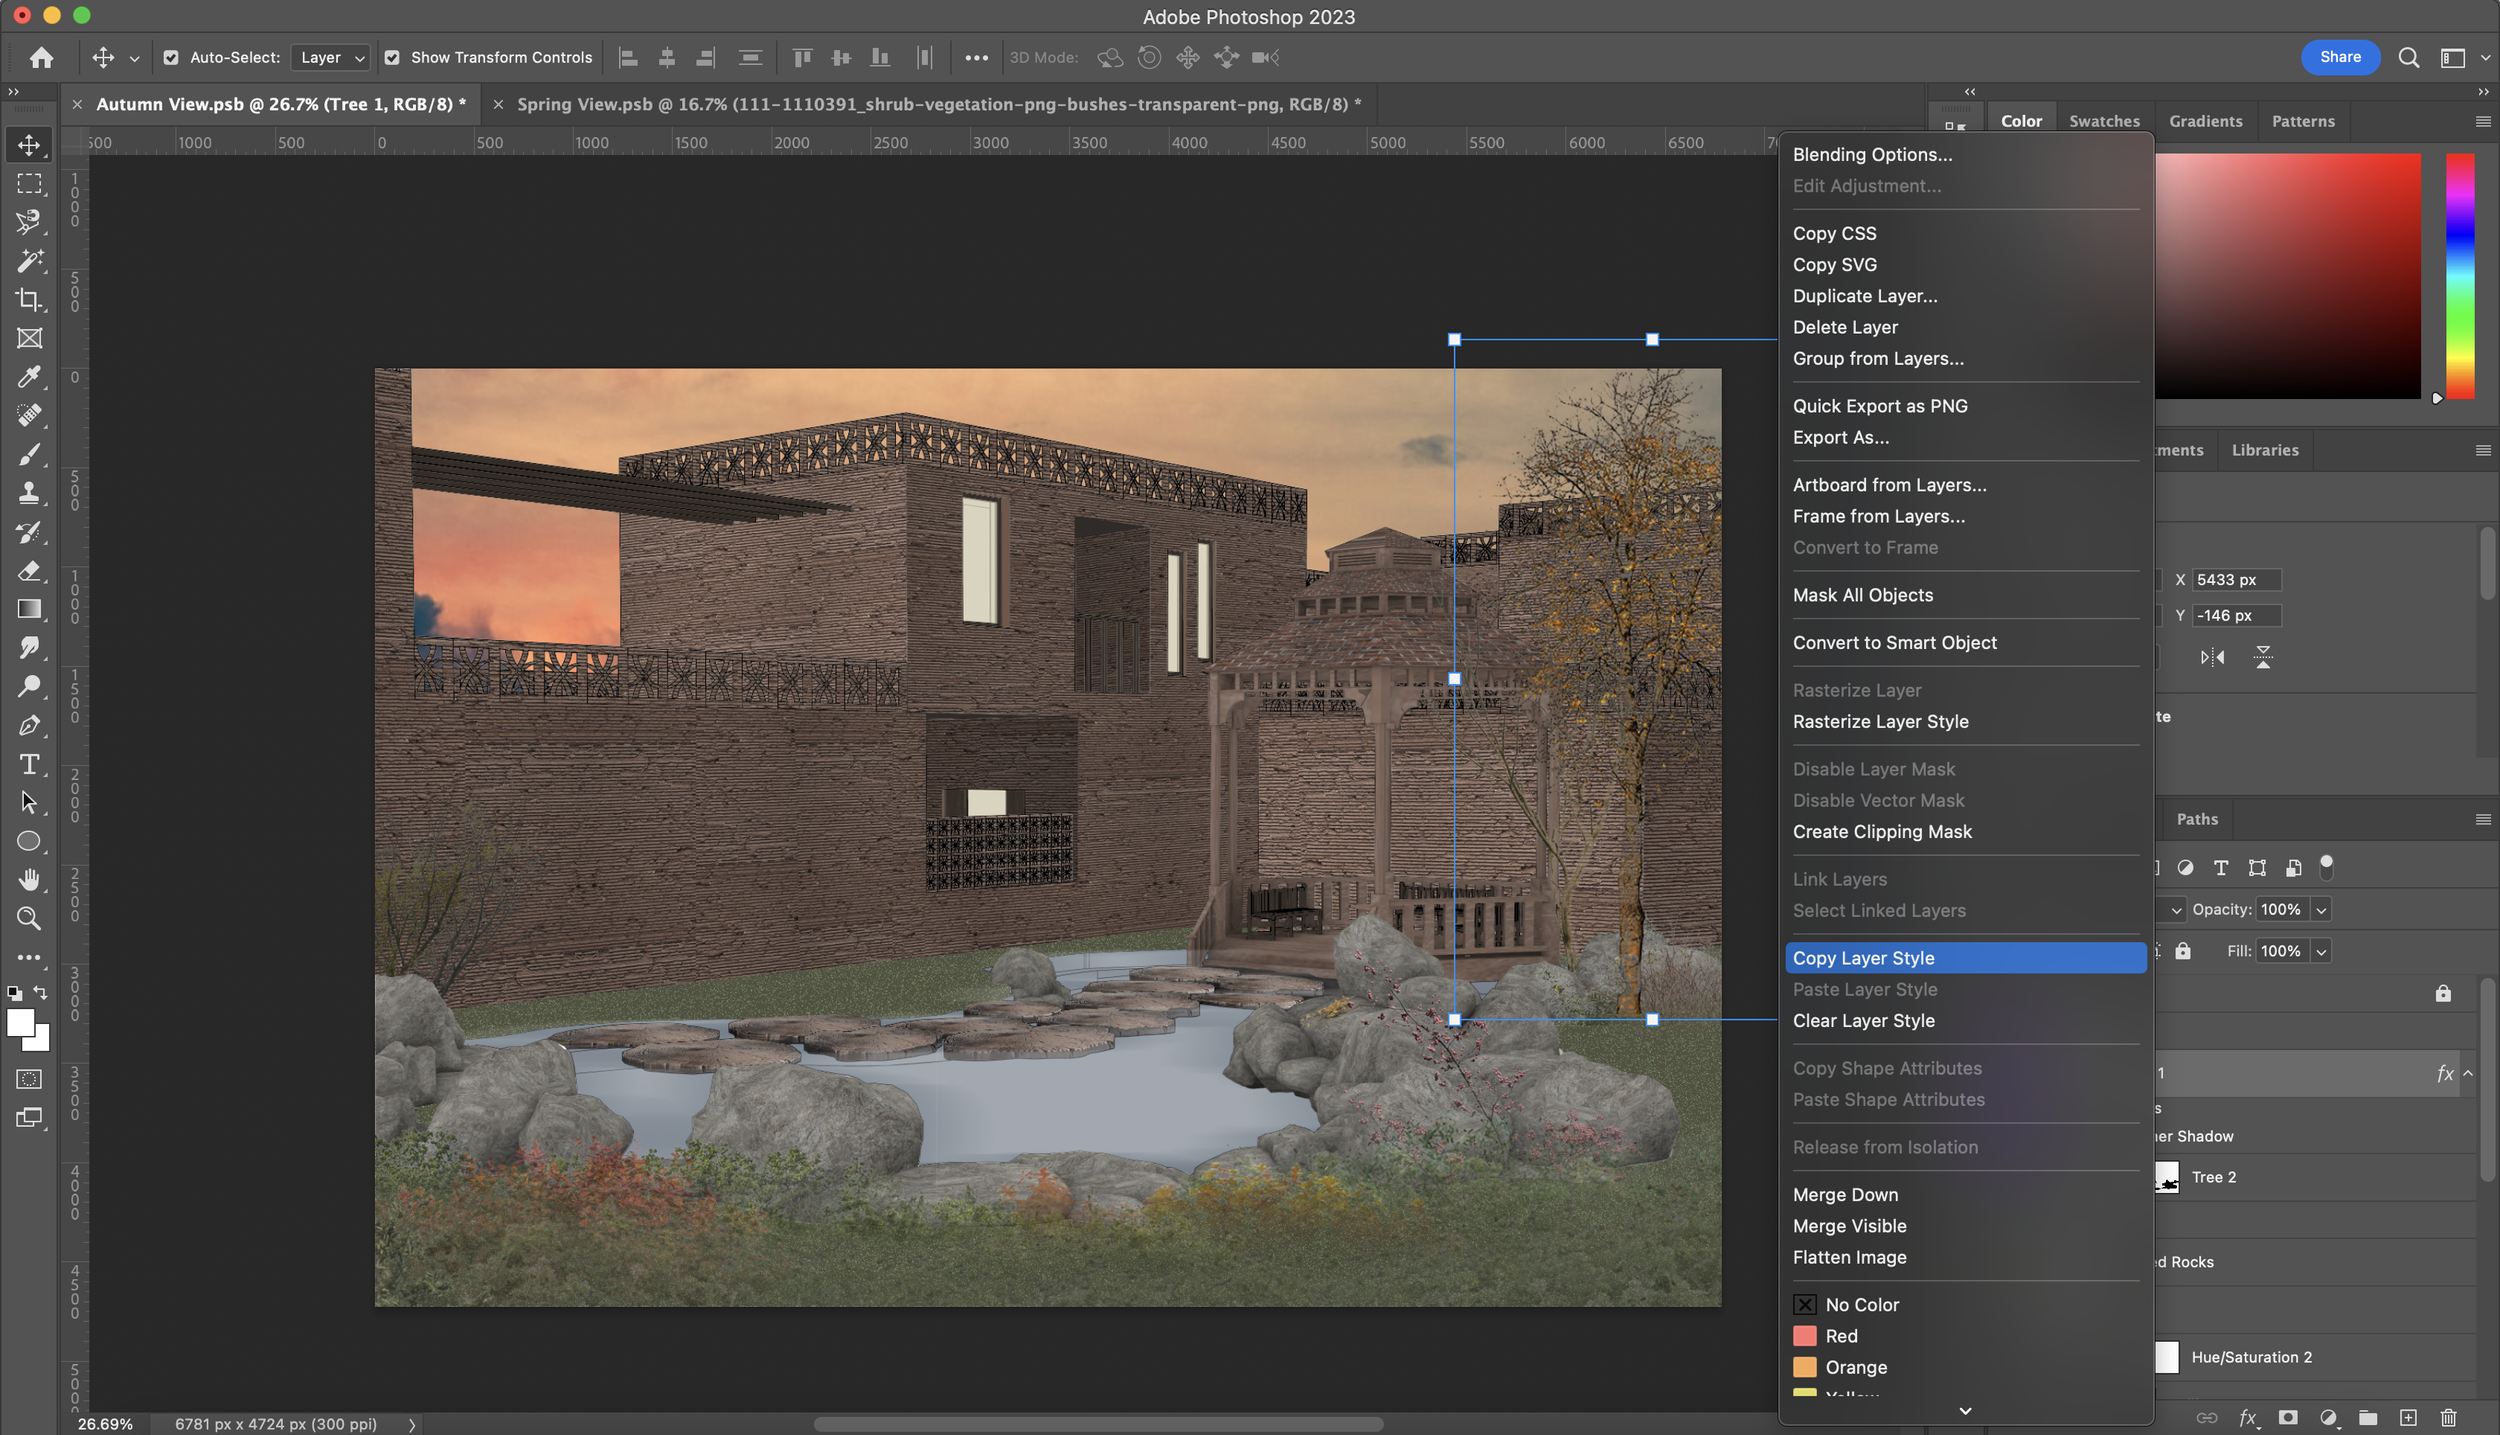
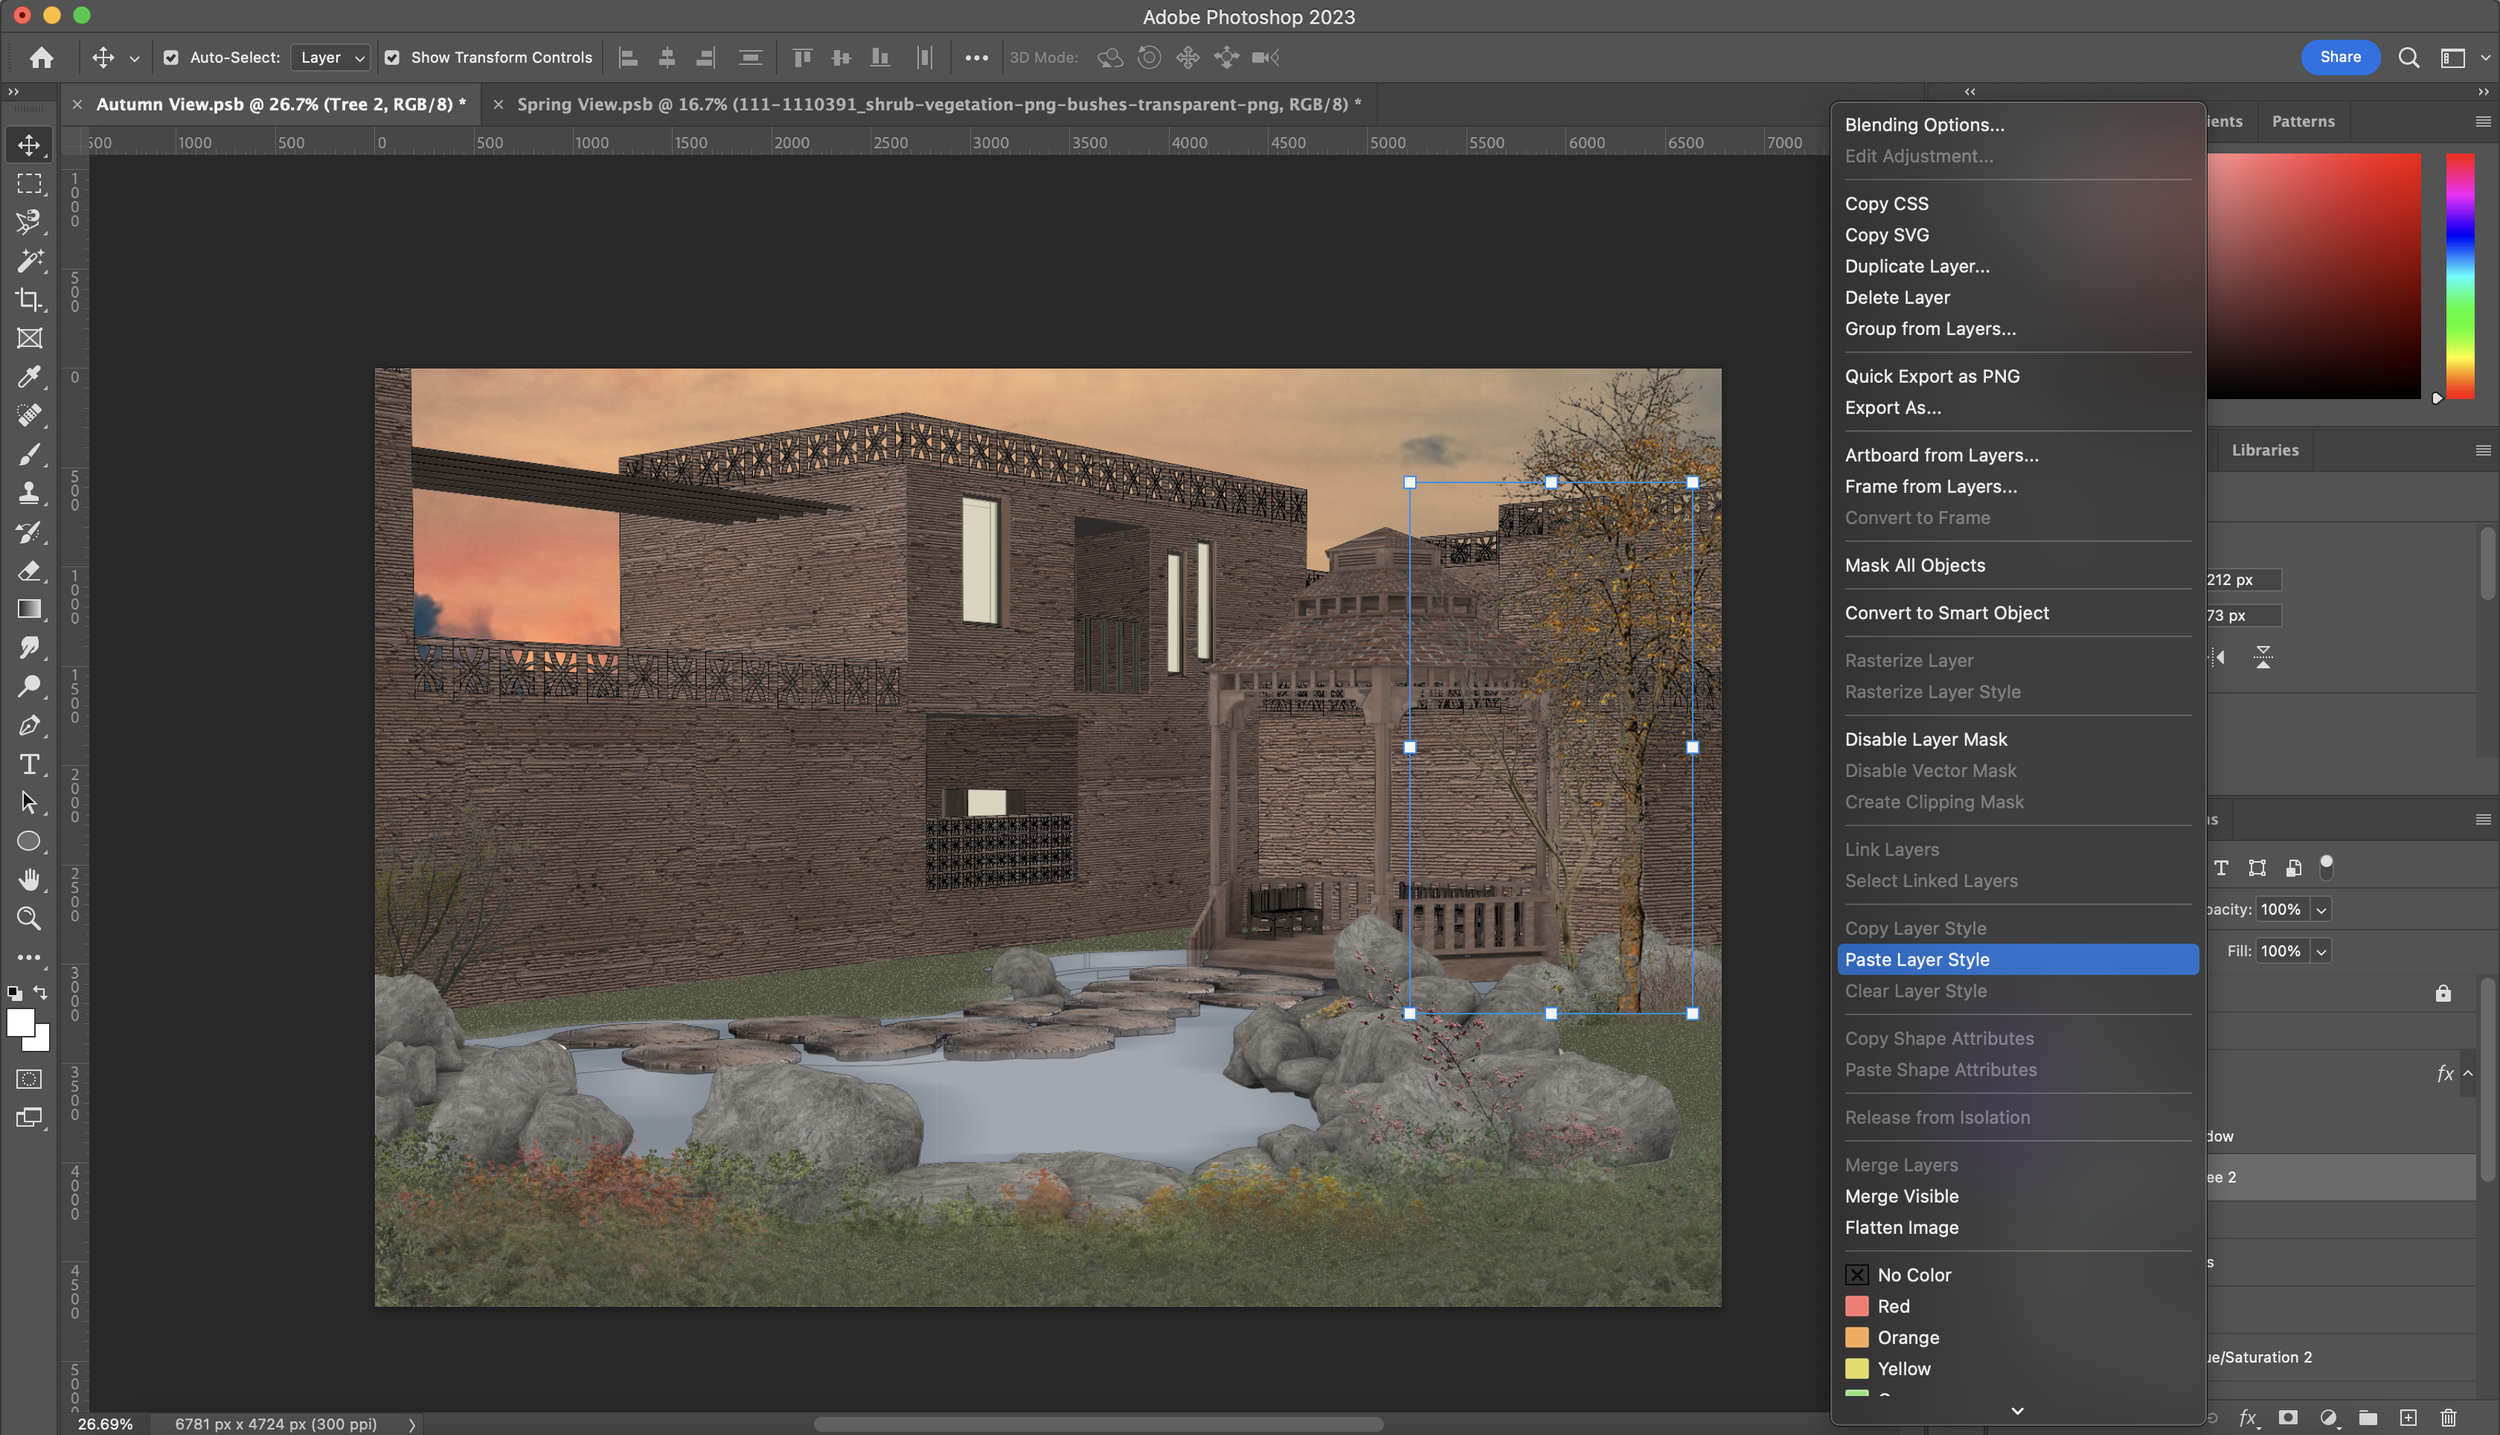
Many fall into the trap of repeating the same effects for each individual object in a Photoshop visual when they can just copy the same layer style and add it to another. Many of the shrubbery, trees and so on will have similar alterations done to them so what you can do is go to a shrub/tree layer that you have to add adjustments to (like the inner shadow trick), right-click the layer and click ‘Copy Layer Style’. Then, right-click on the layer you want to add that layer style to and click ‘ Paste Layer Style’ and voila… that’s less time wasted on repeating the same things.
You’d be surprised at how many people catch themselves repeating the same steps over and over again.
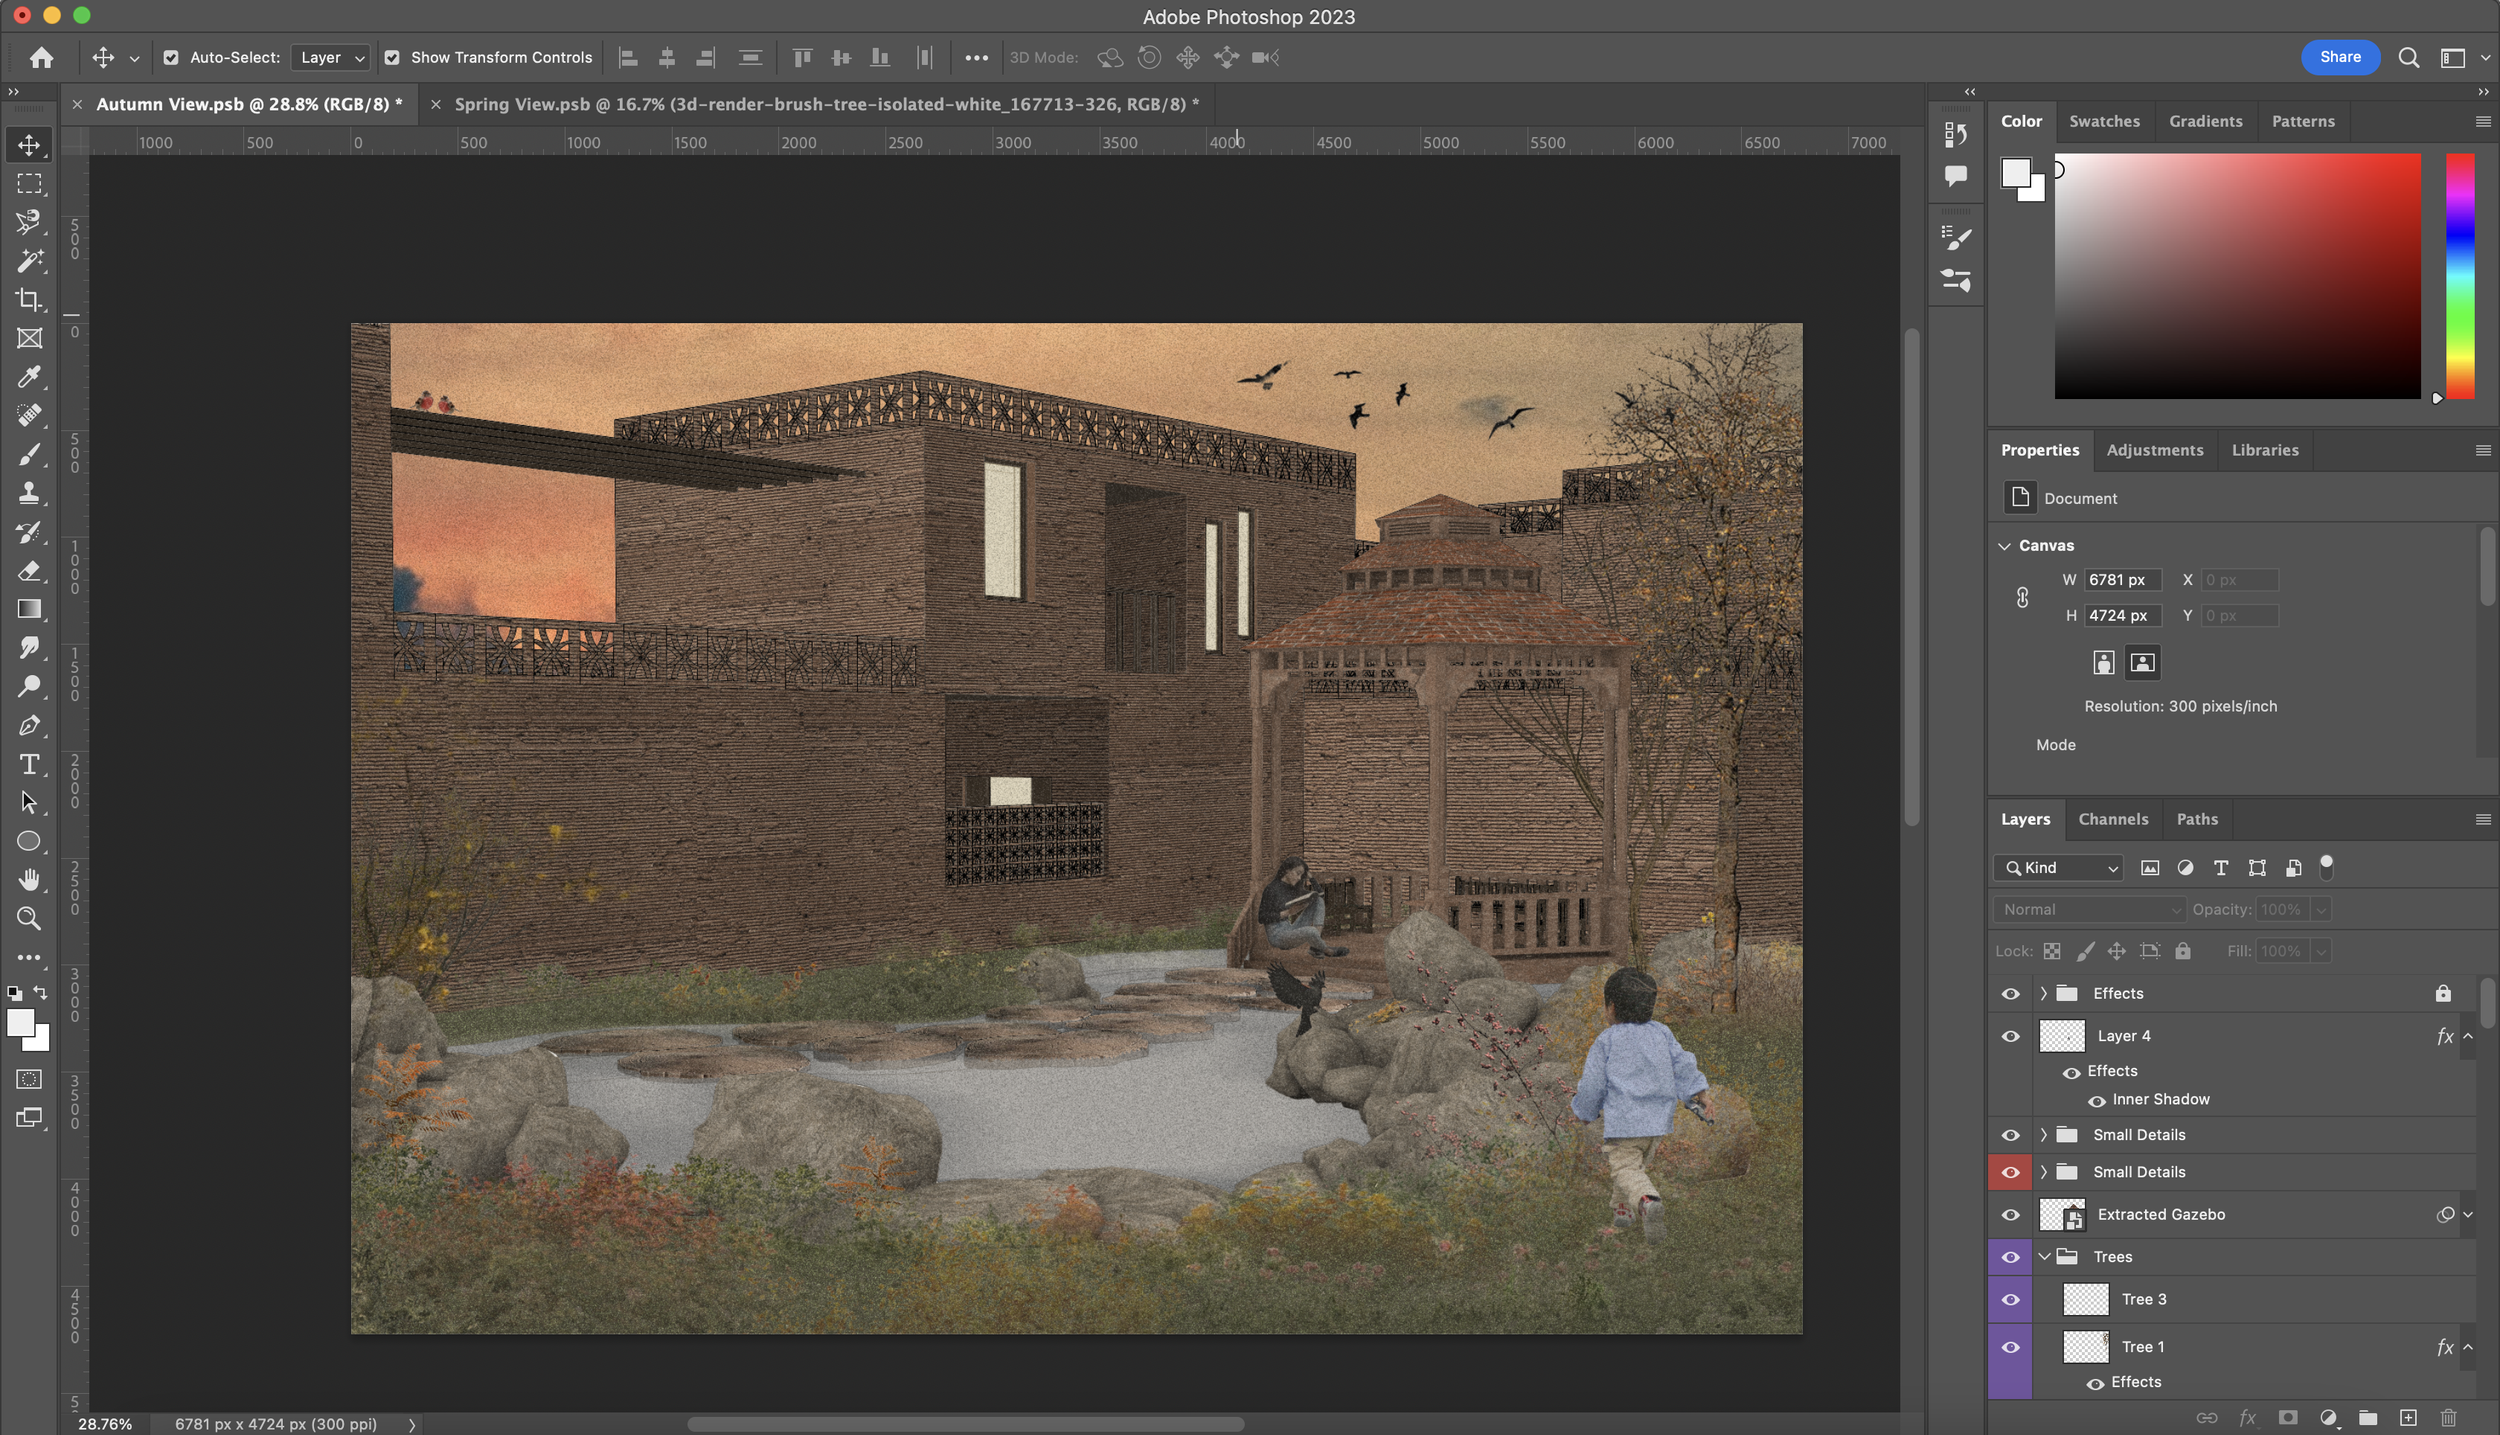
Different Ways of Creating Shadows
There are 3 different ways in which I will be adding shadows in this tutorial.
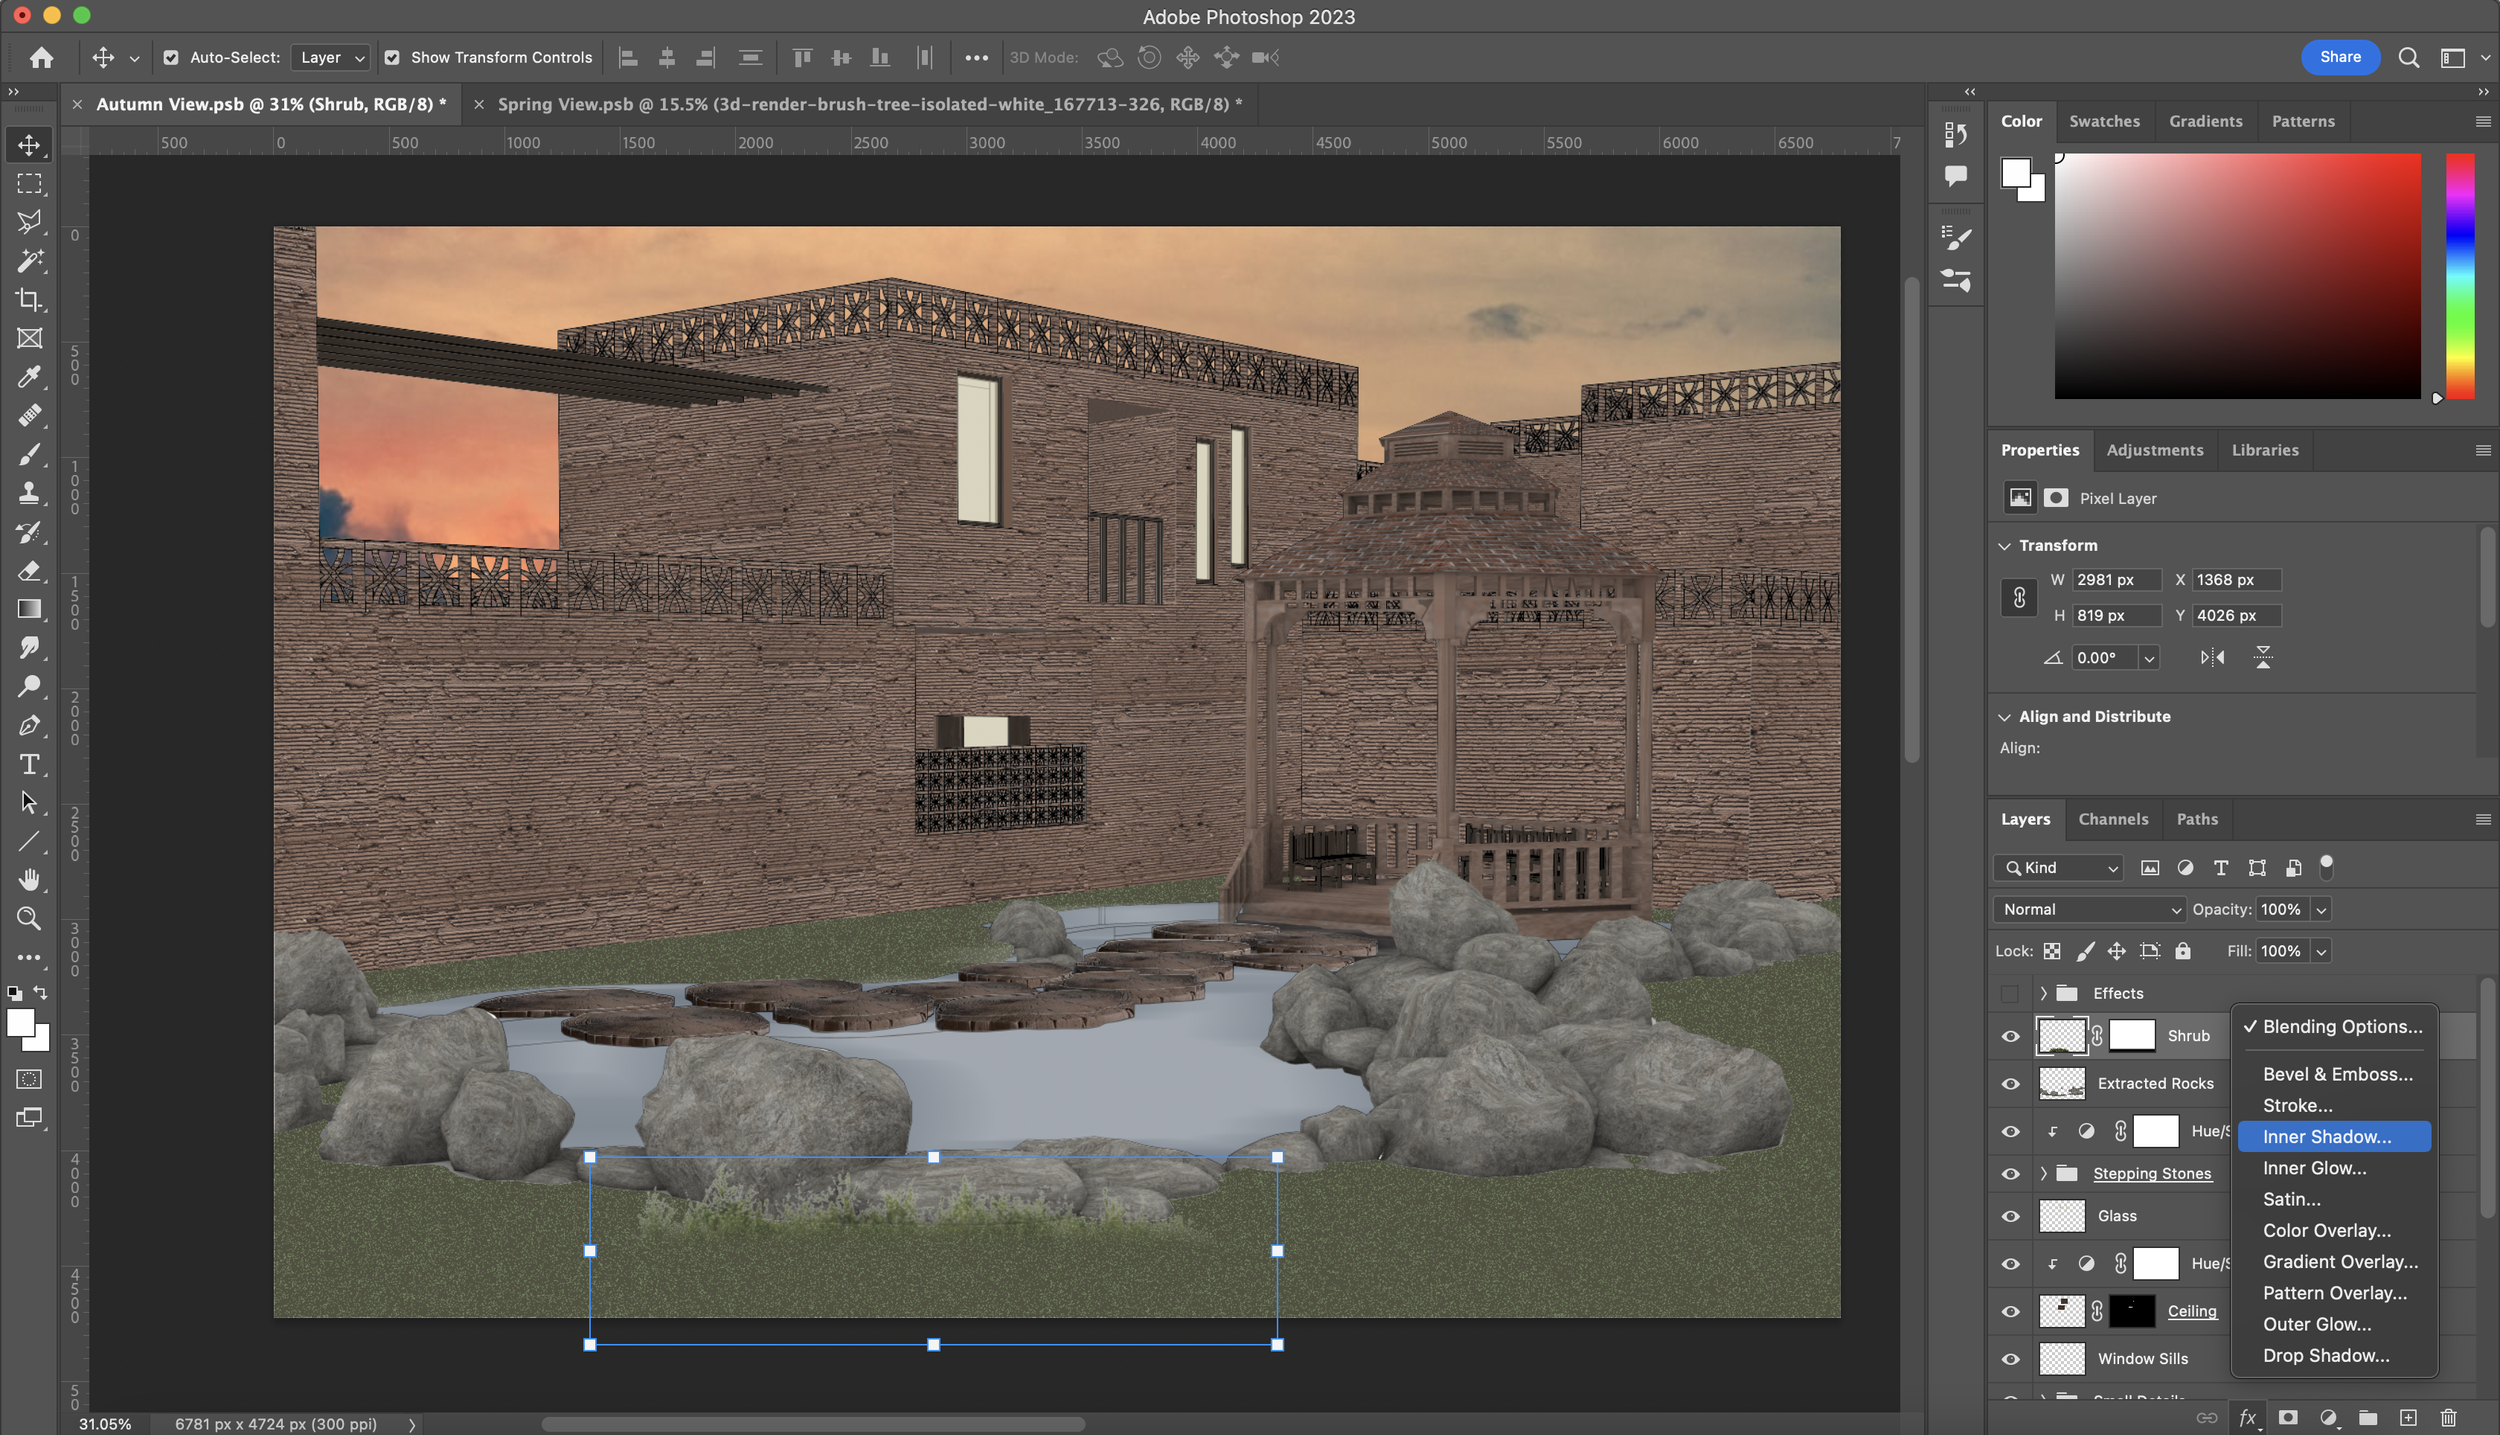
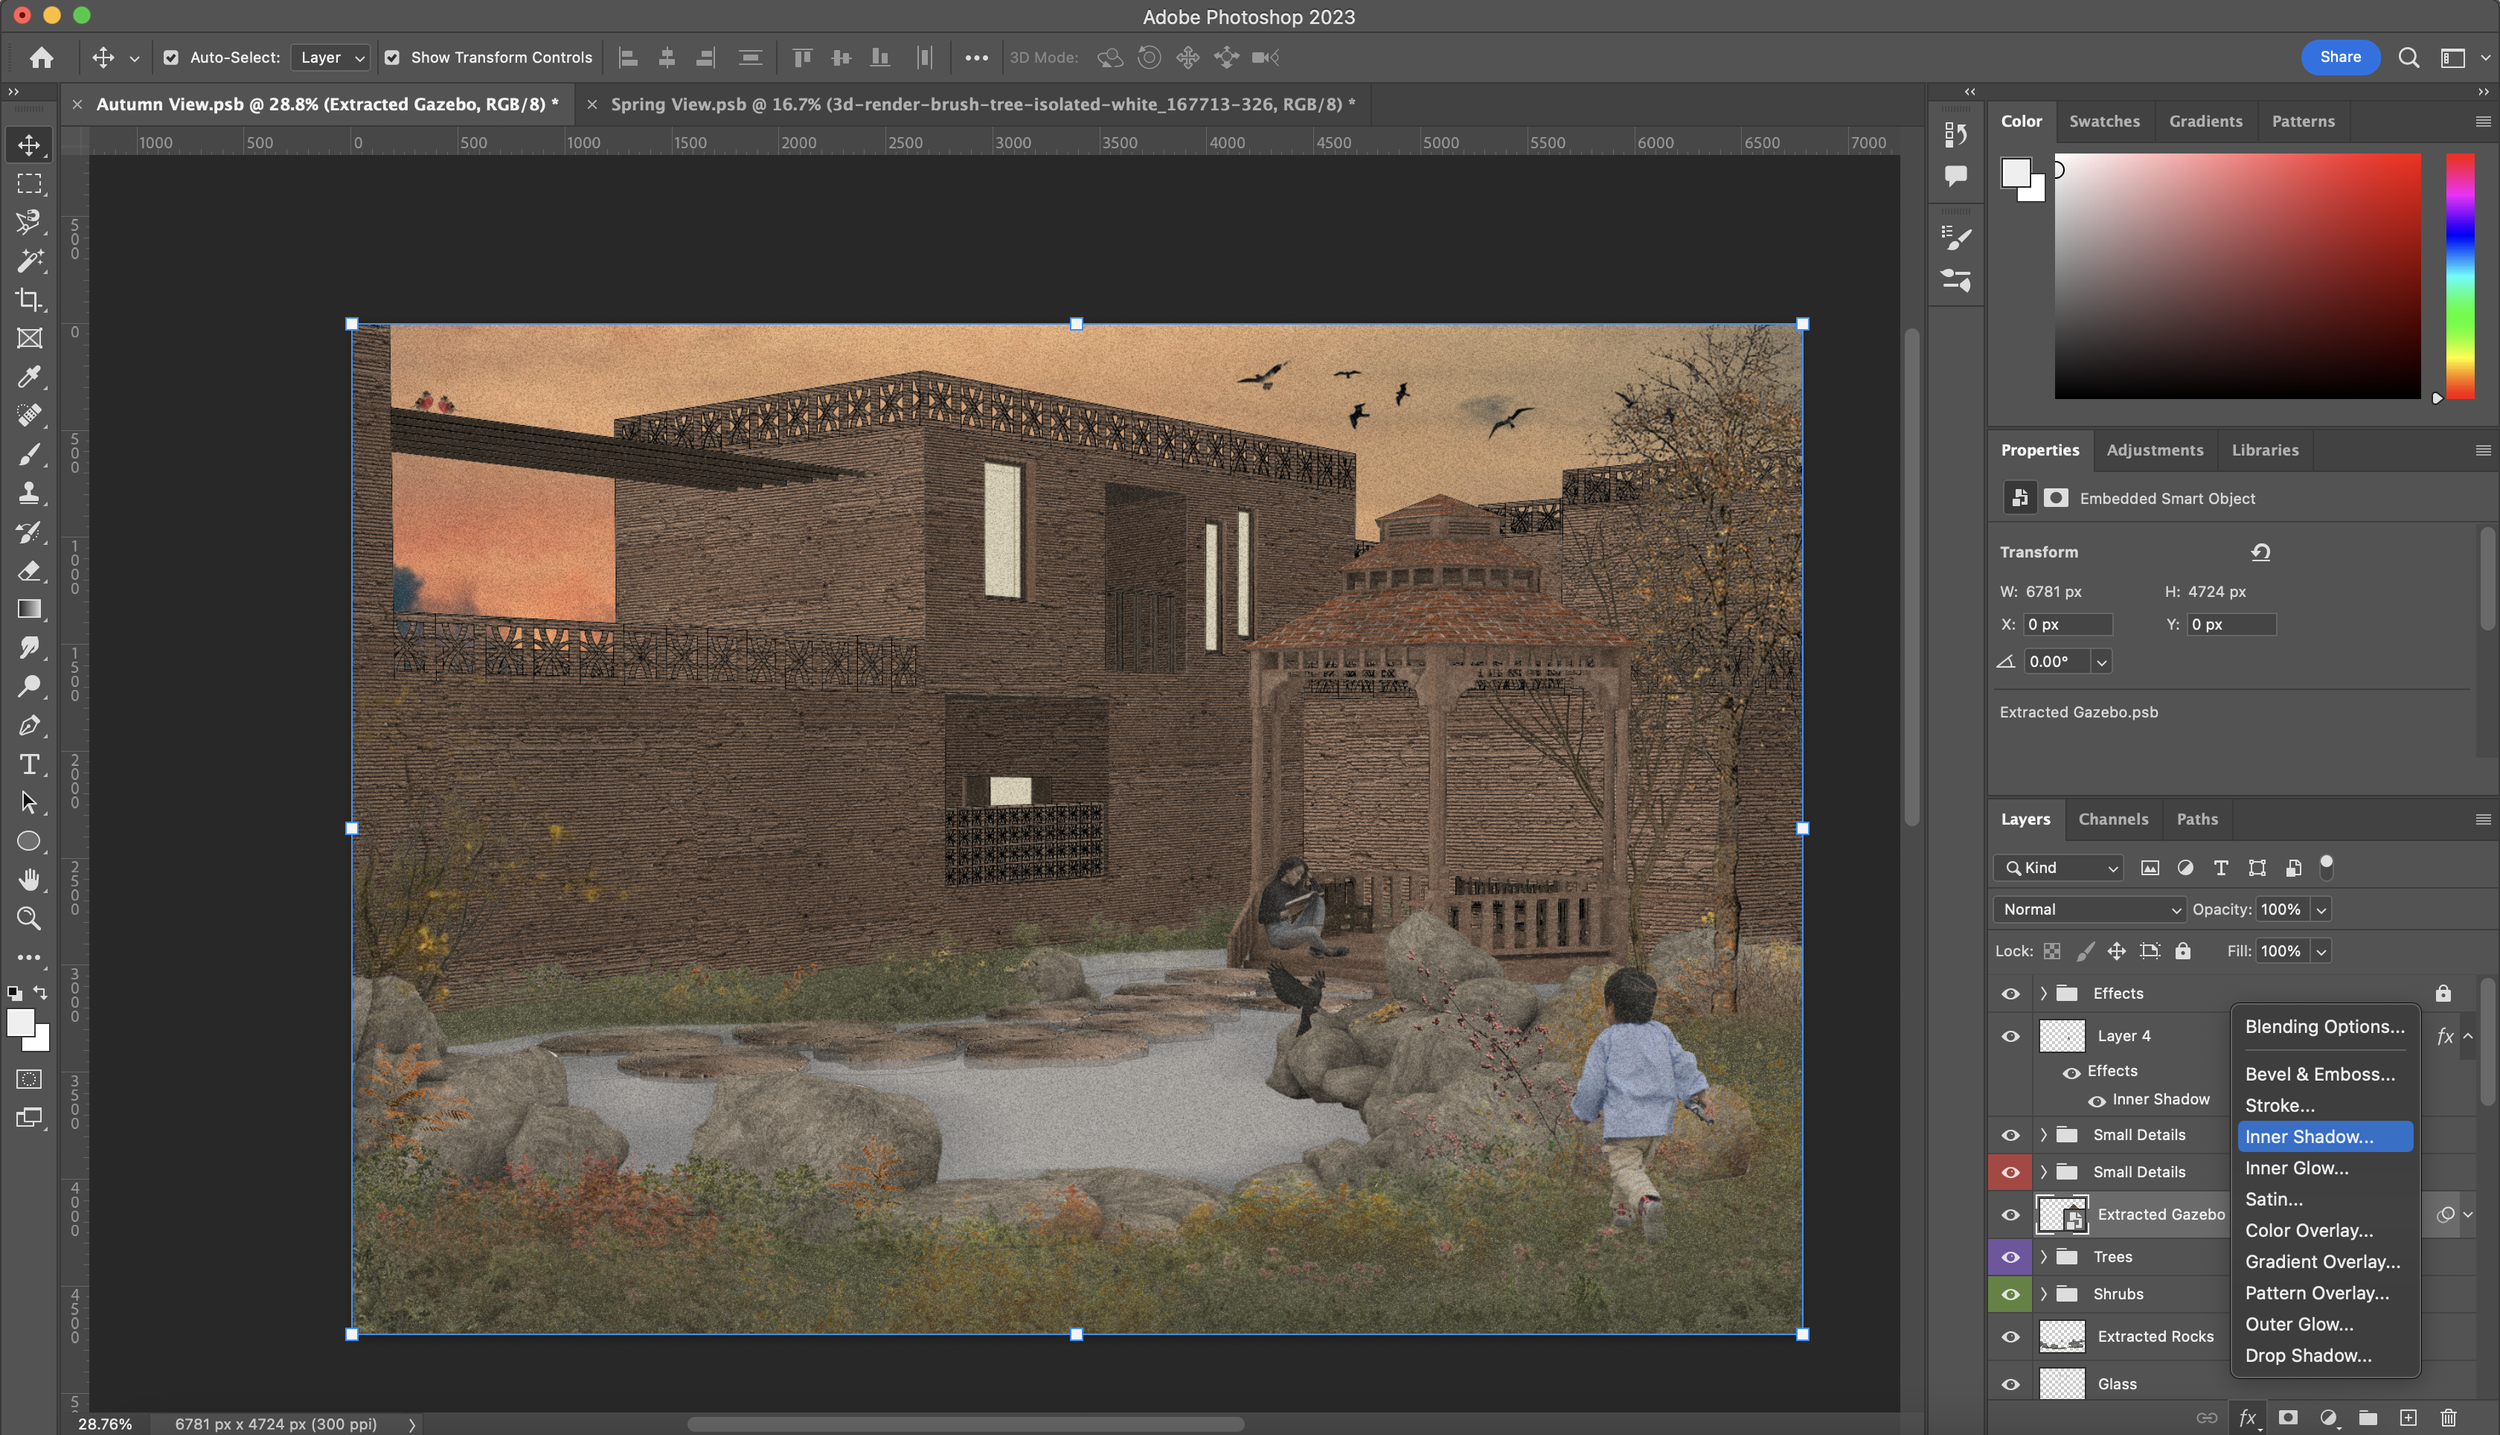
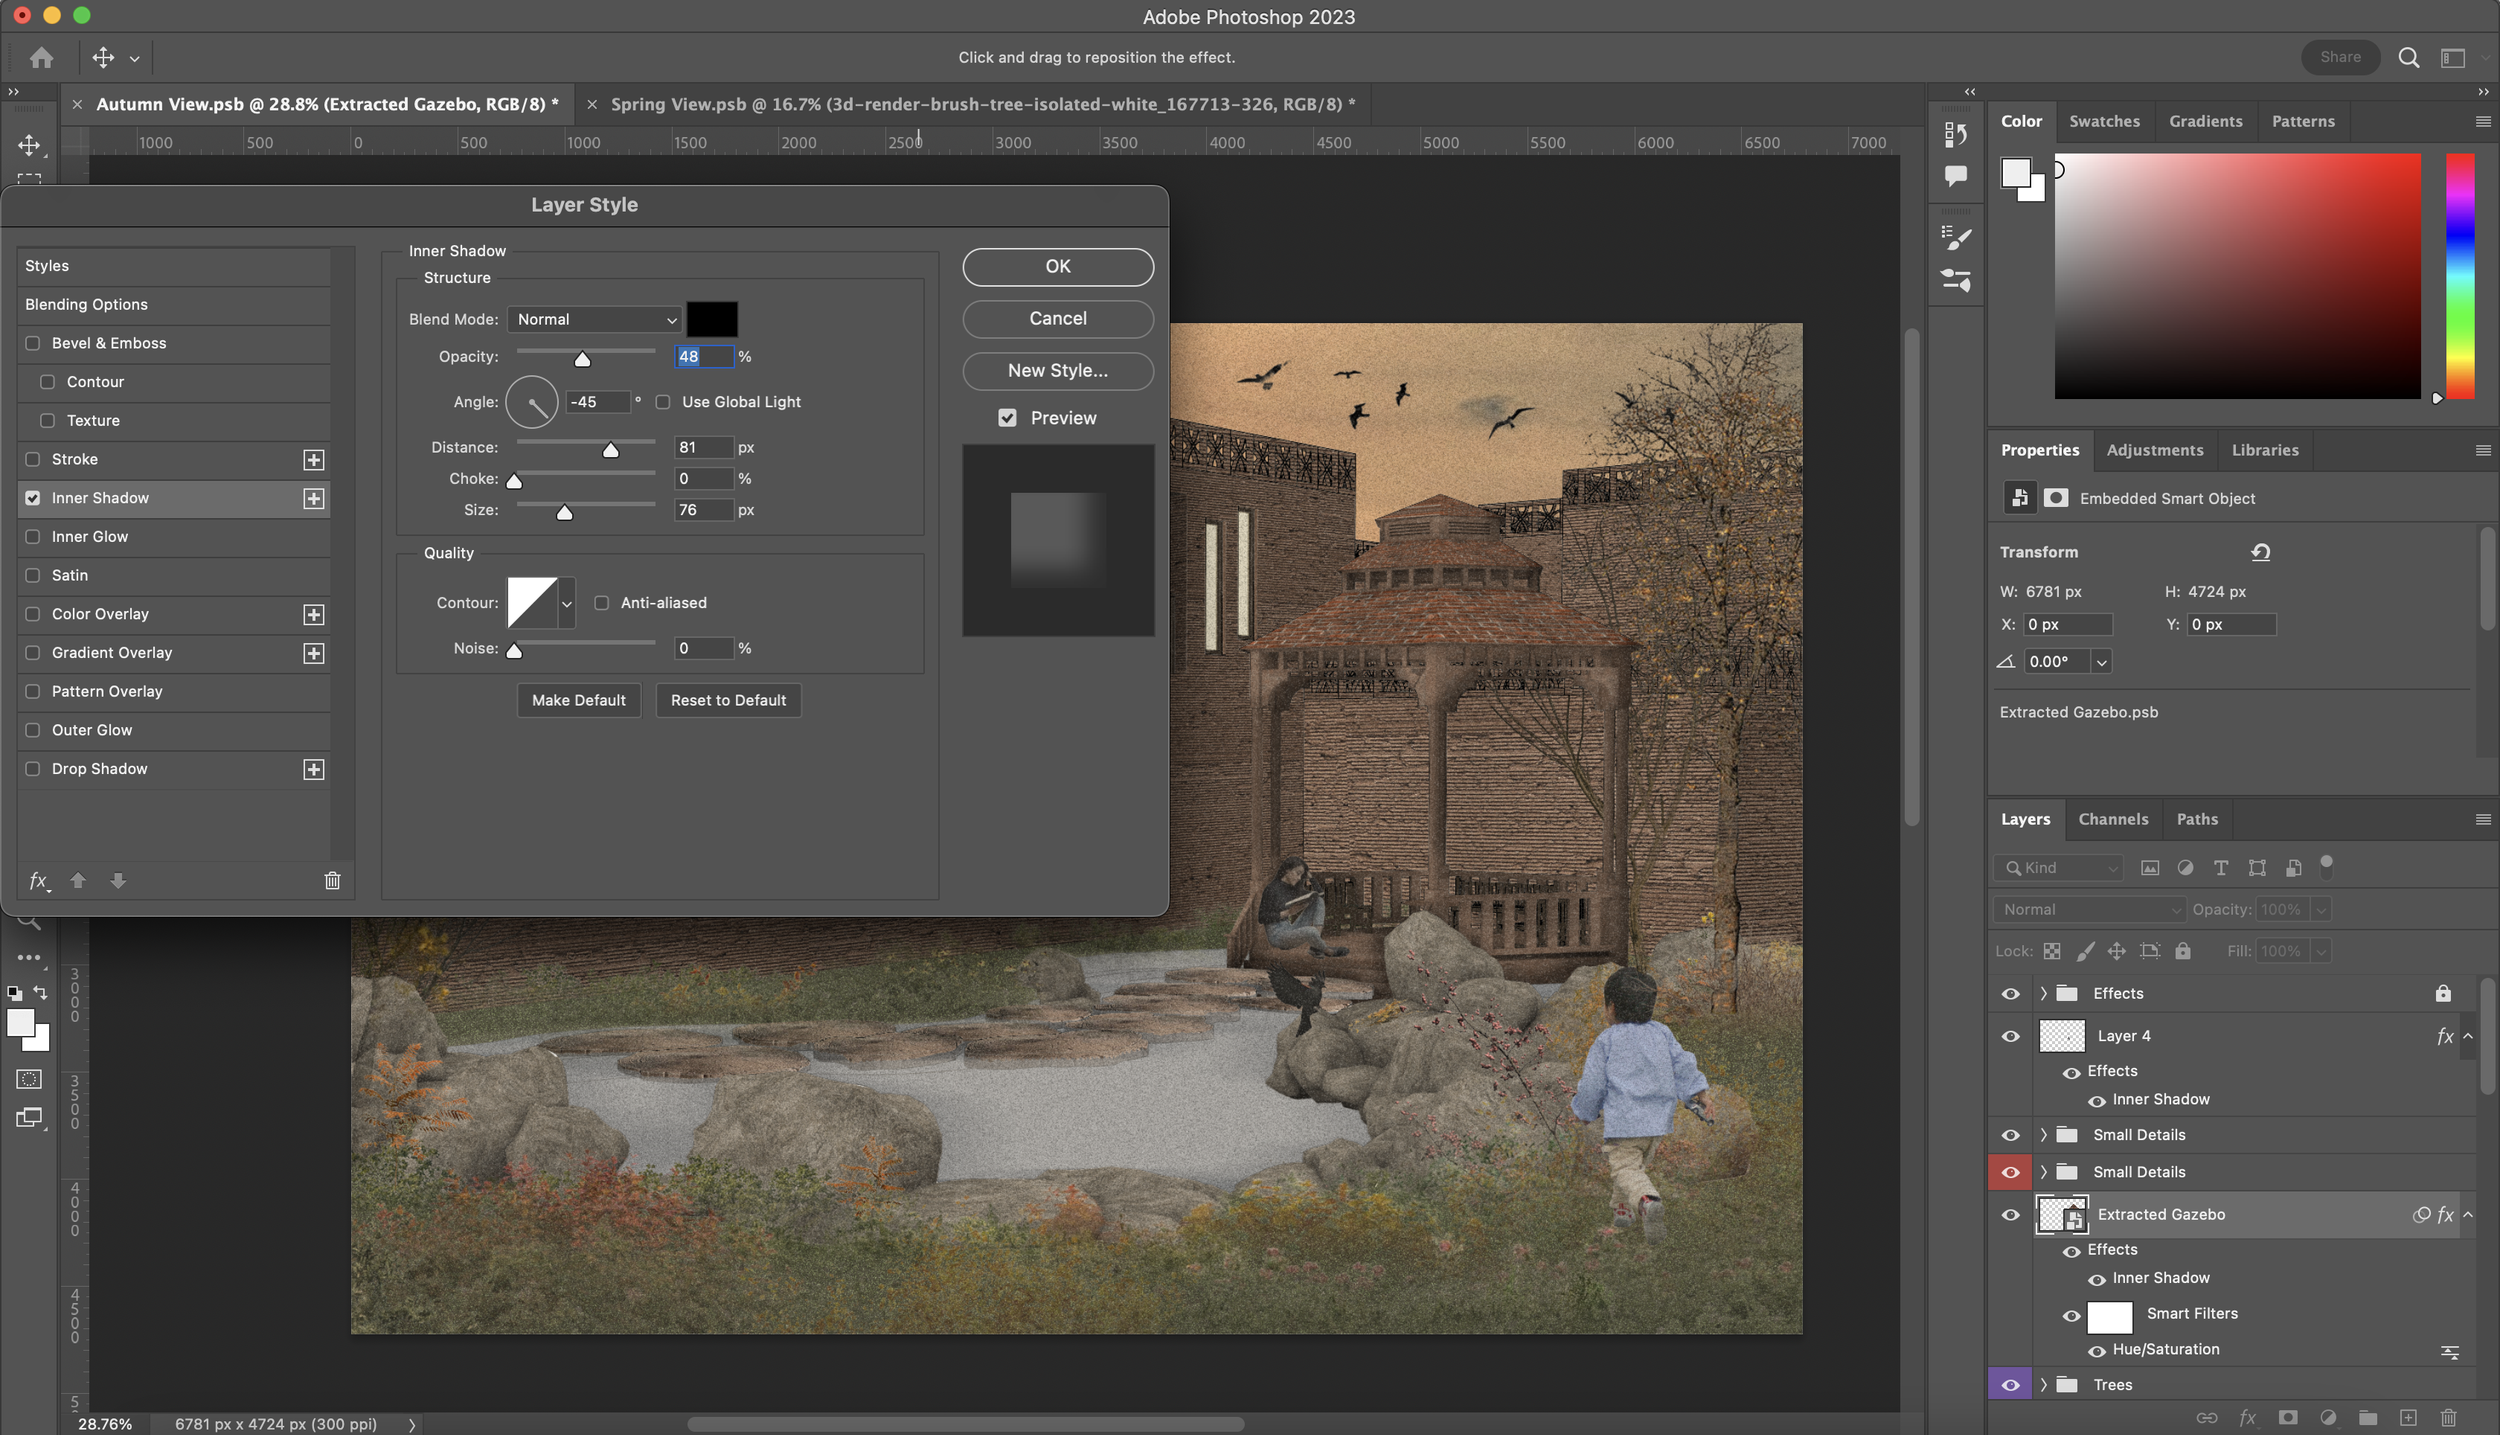
For the gazebo, there are very minimal hints of shadow but overall looks very flat. The easiest way to bring it to life and have it sit properly in the context is to add an ‘Inner Shadow’. We do this like we have been doing so in the previous steps. Select layer -> Blending Options -> Inner Shadow You can see the settings I have used in the screenshots below.
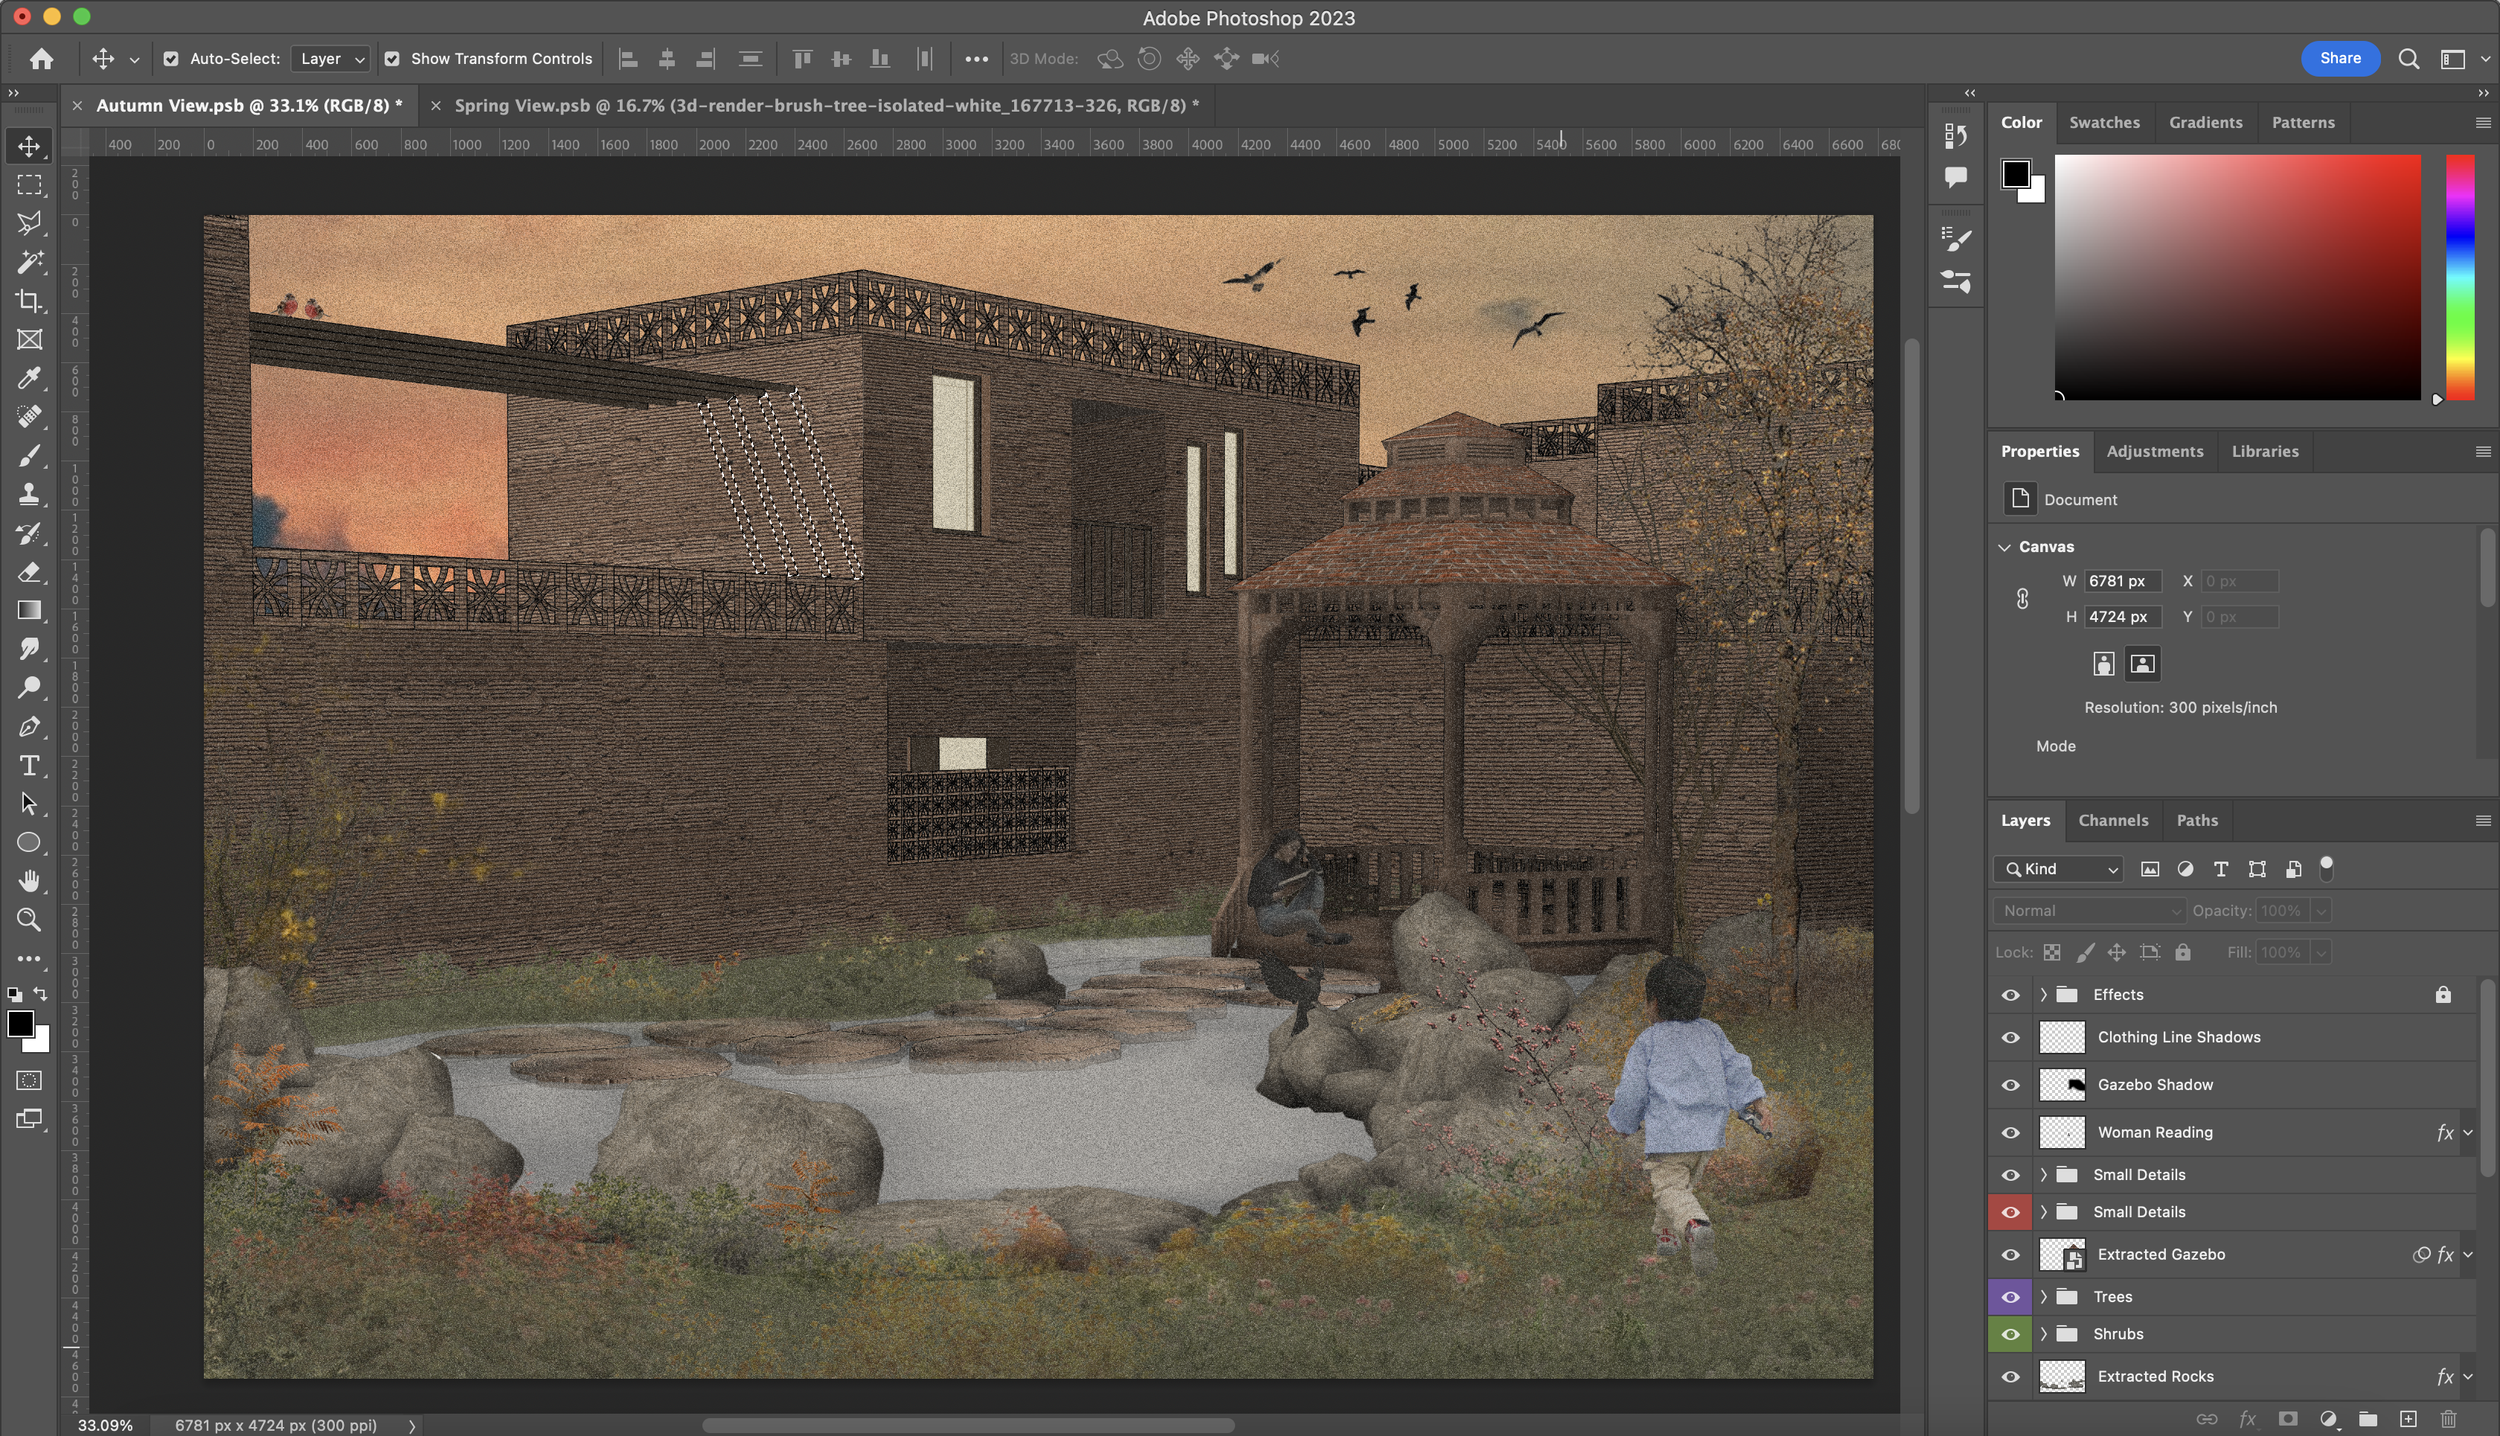
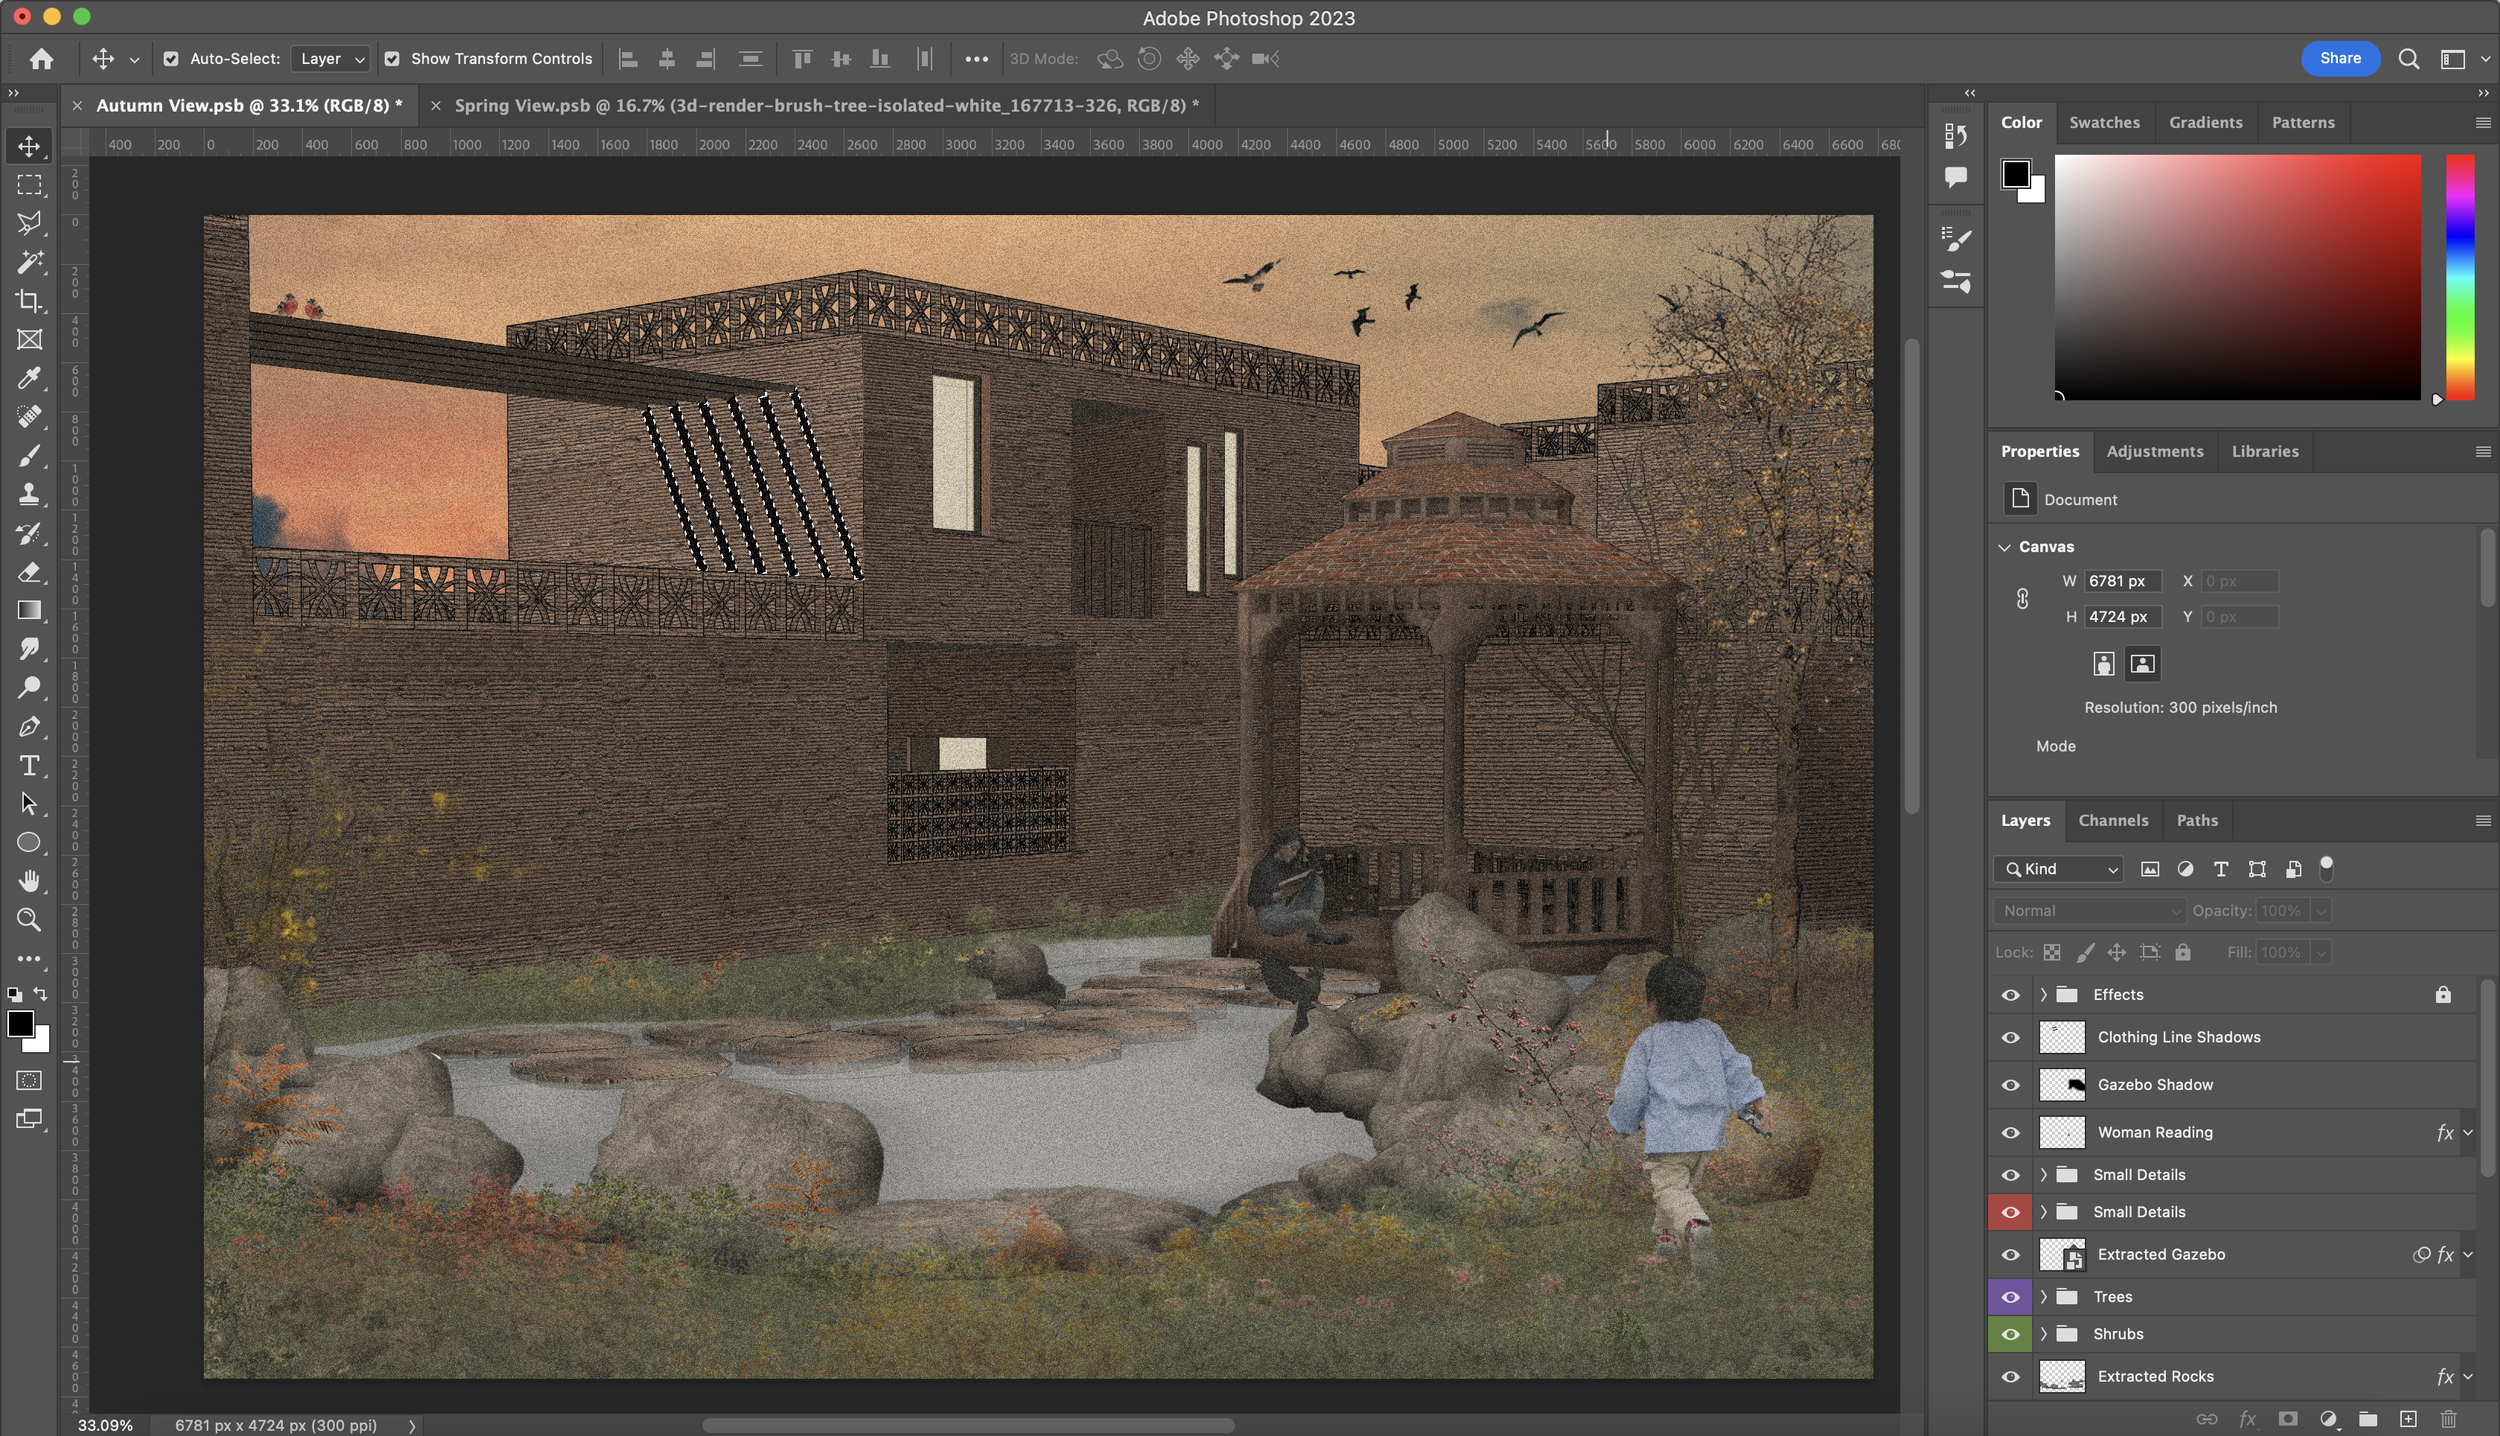
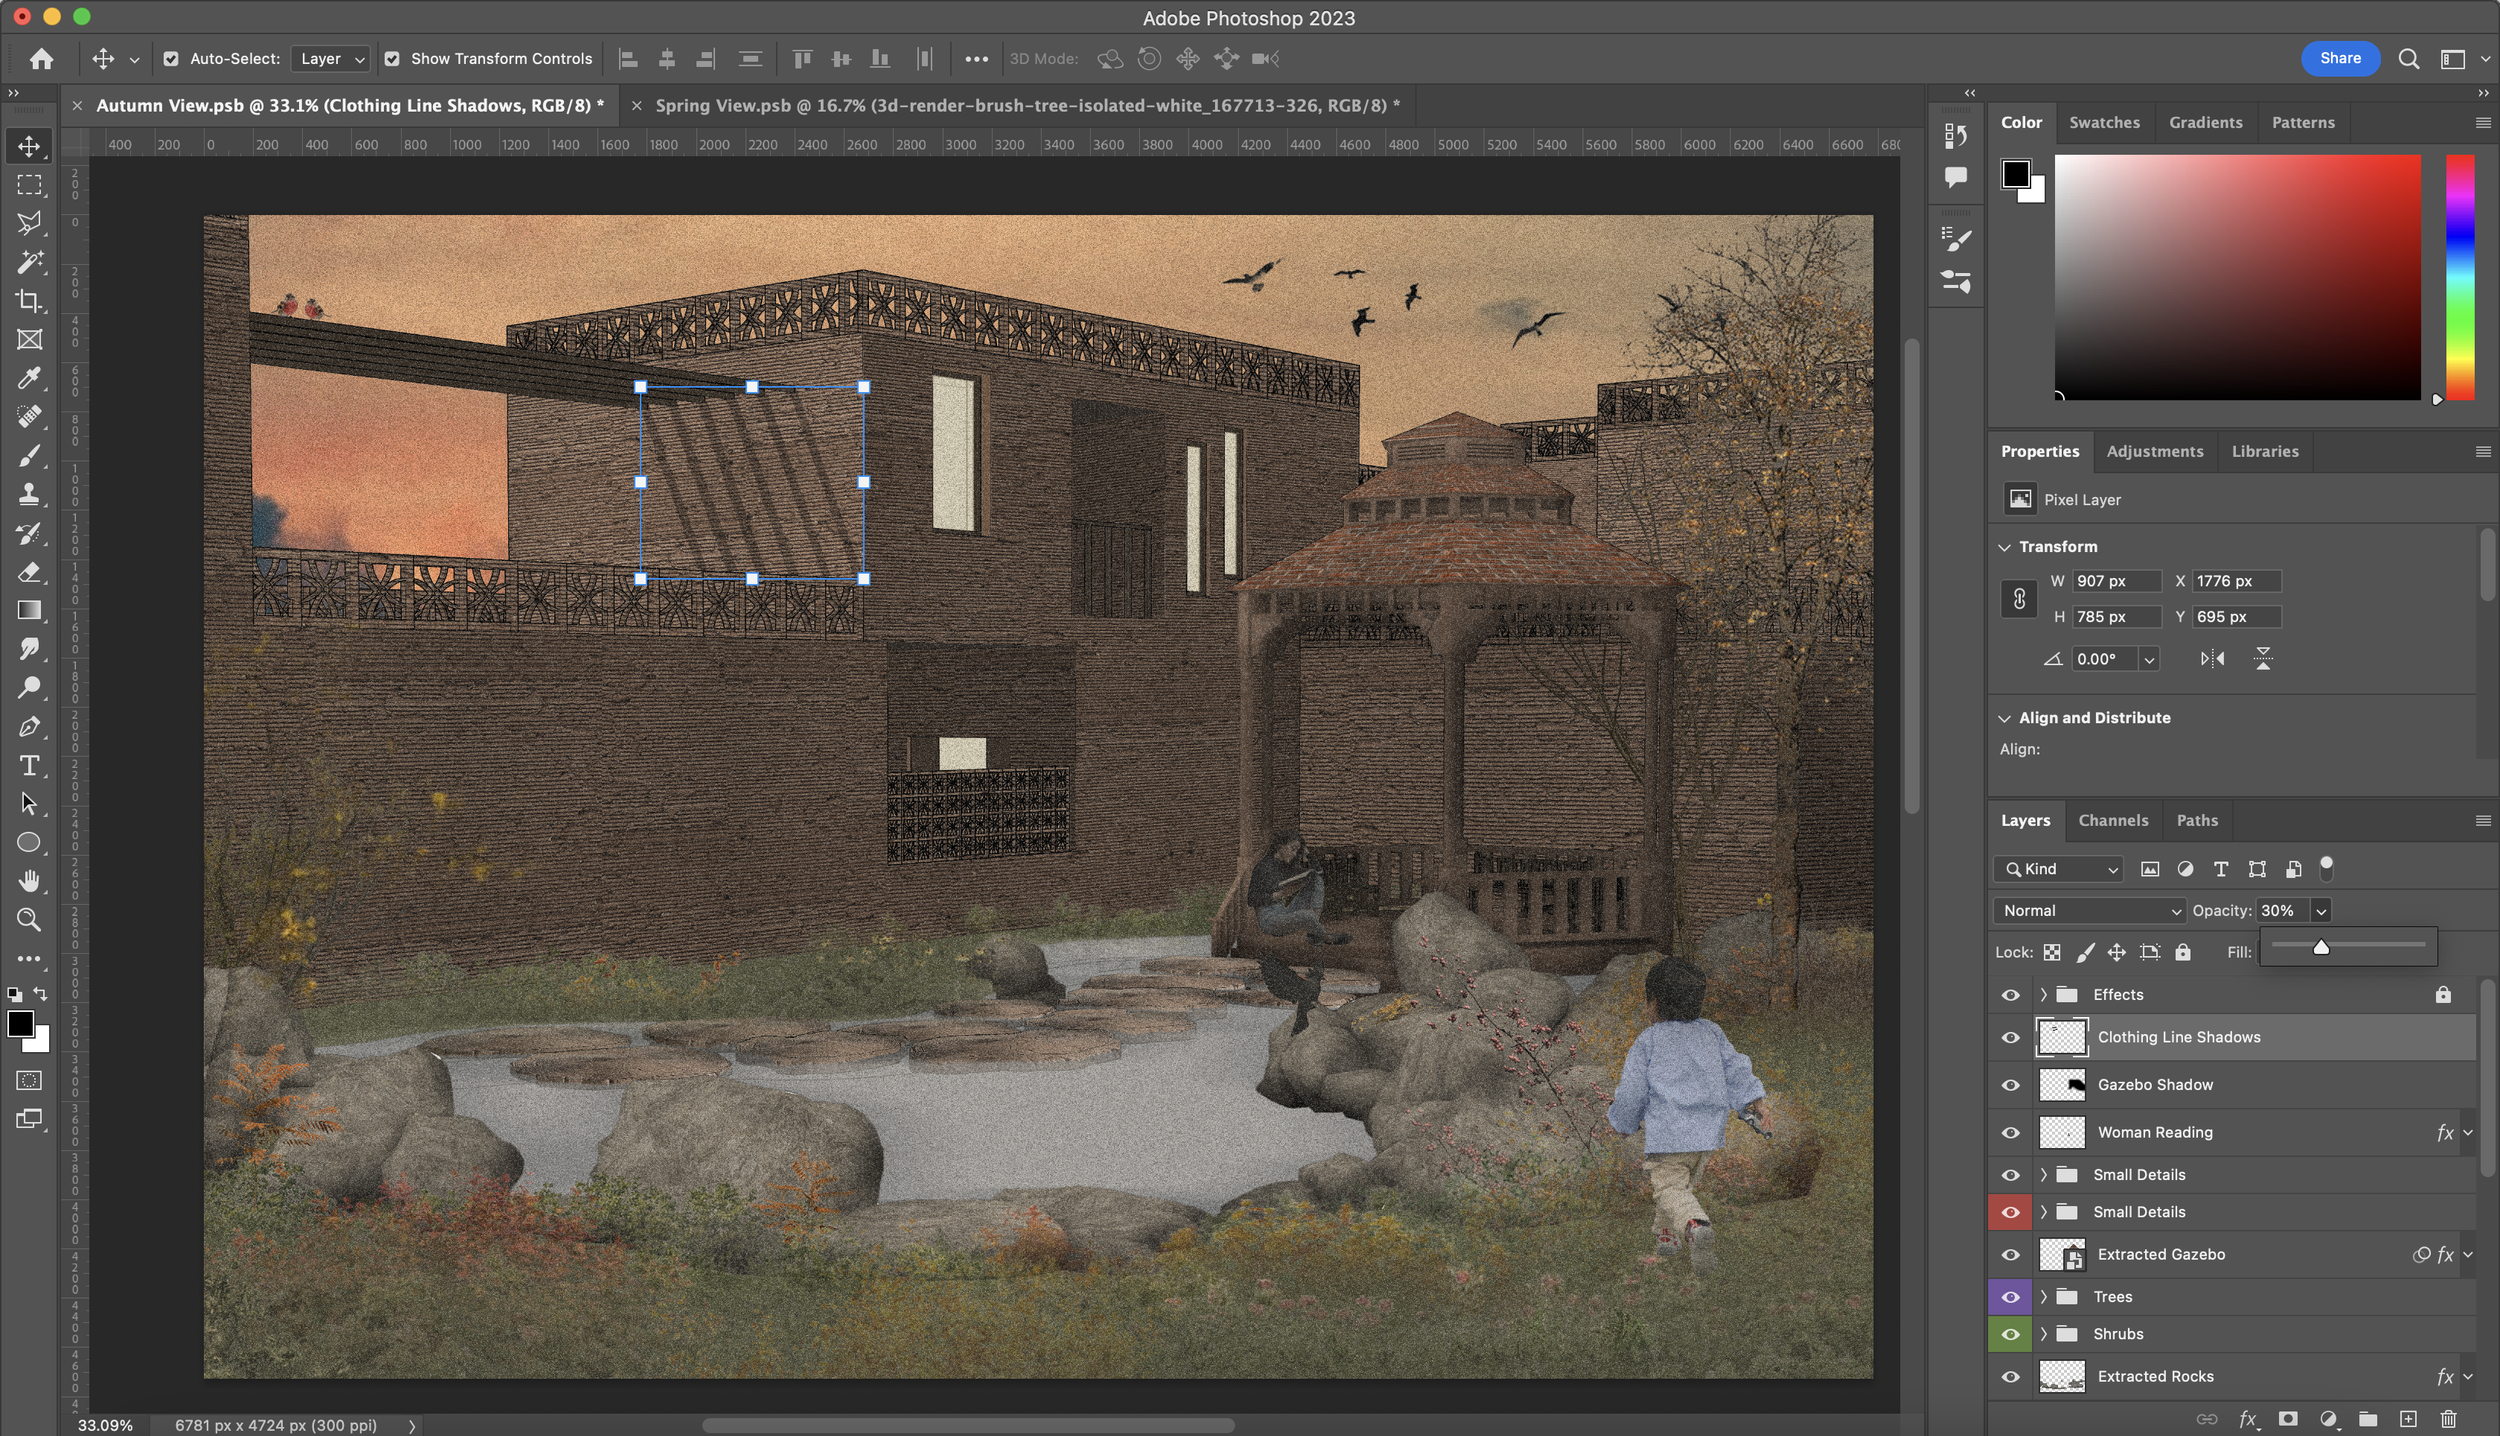
Another way of adding shadows is to them in shapes and then blurring them out so they seem less harsh. Using, once again, the ‘Polygonal Lasso Tool’, I have drawn out a general offset of where the shadows will be that is coming from the gazebo, next fill it in with black and lower the opacity to 10-20%. Additionally, you can also use our water blur effect on the shadow to lessen the harsh lines. Scroll back up to remind yourself how we did that! Using the same method, I created the shadows coming from the clothing lines up above :)
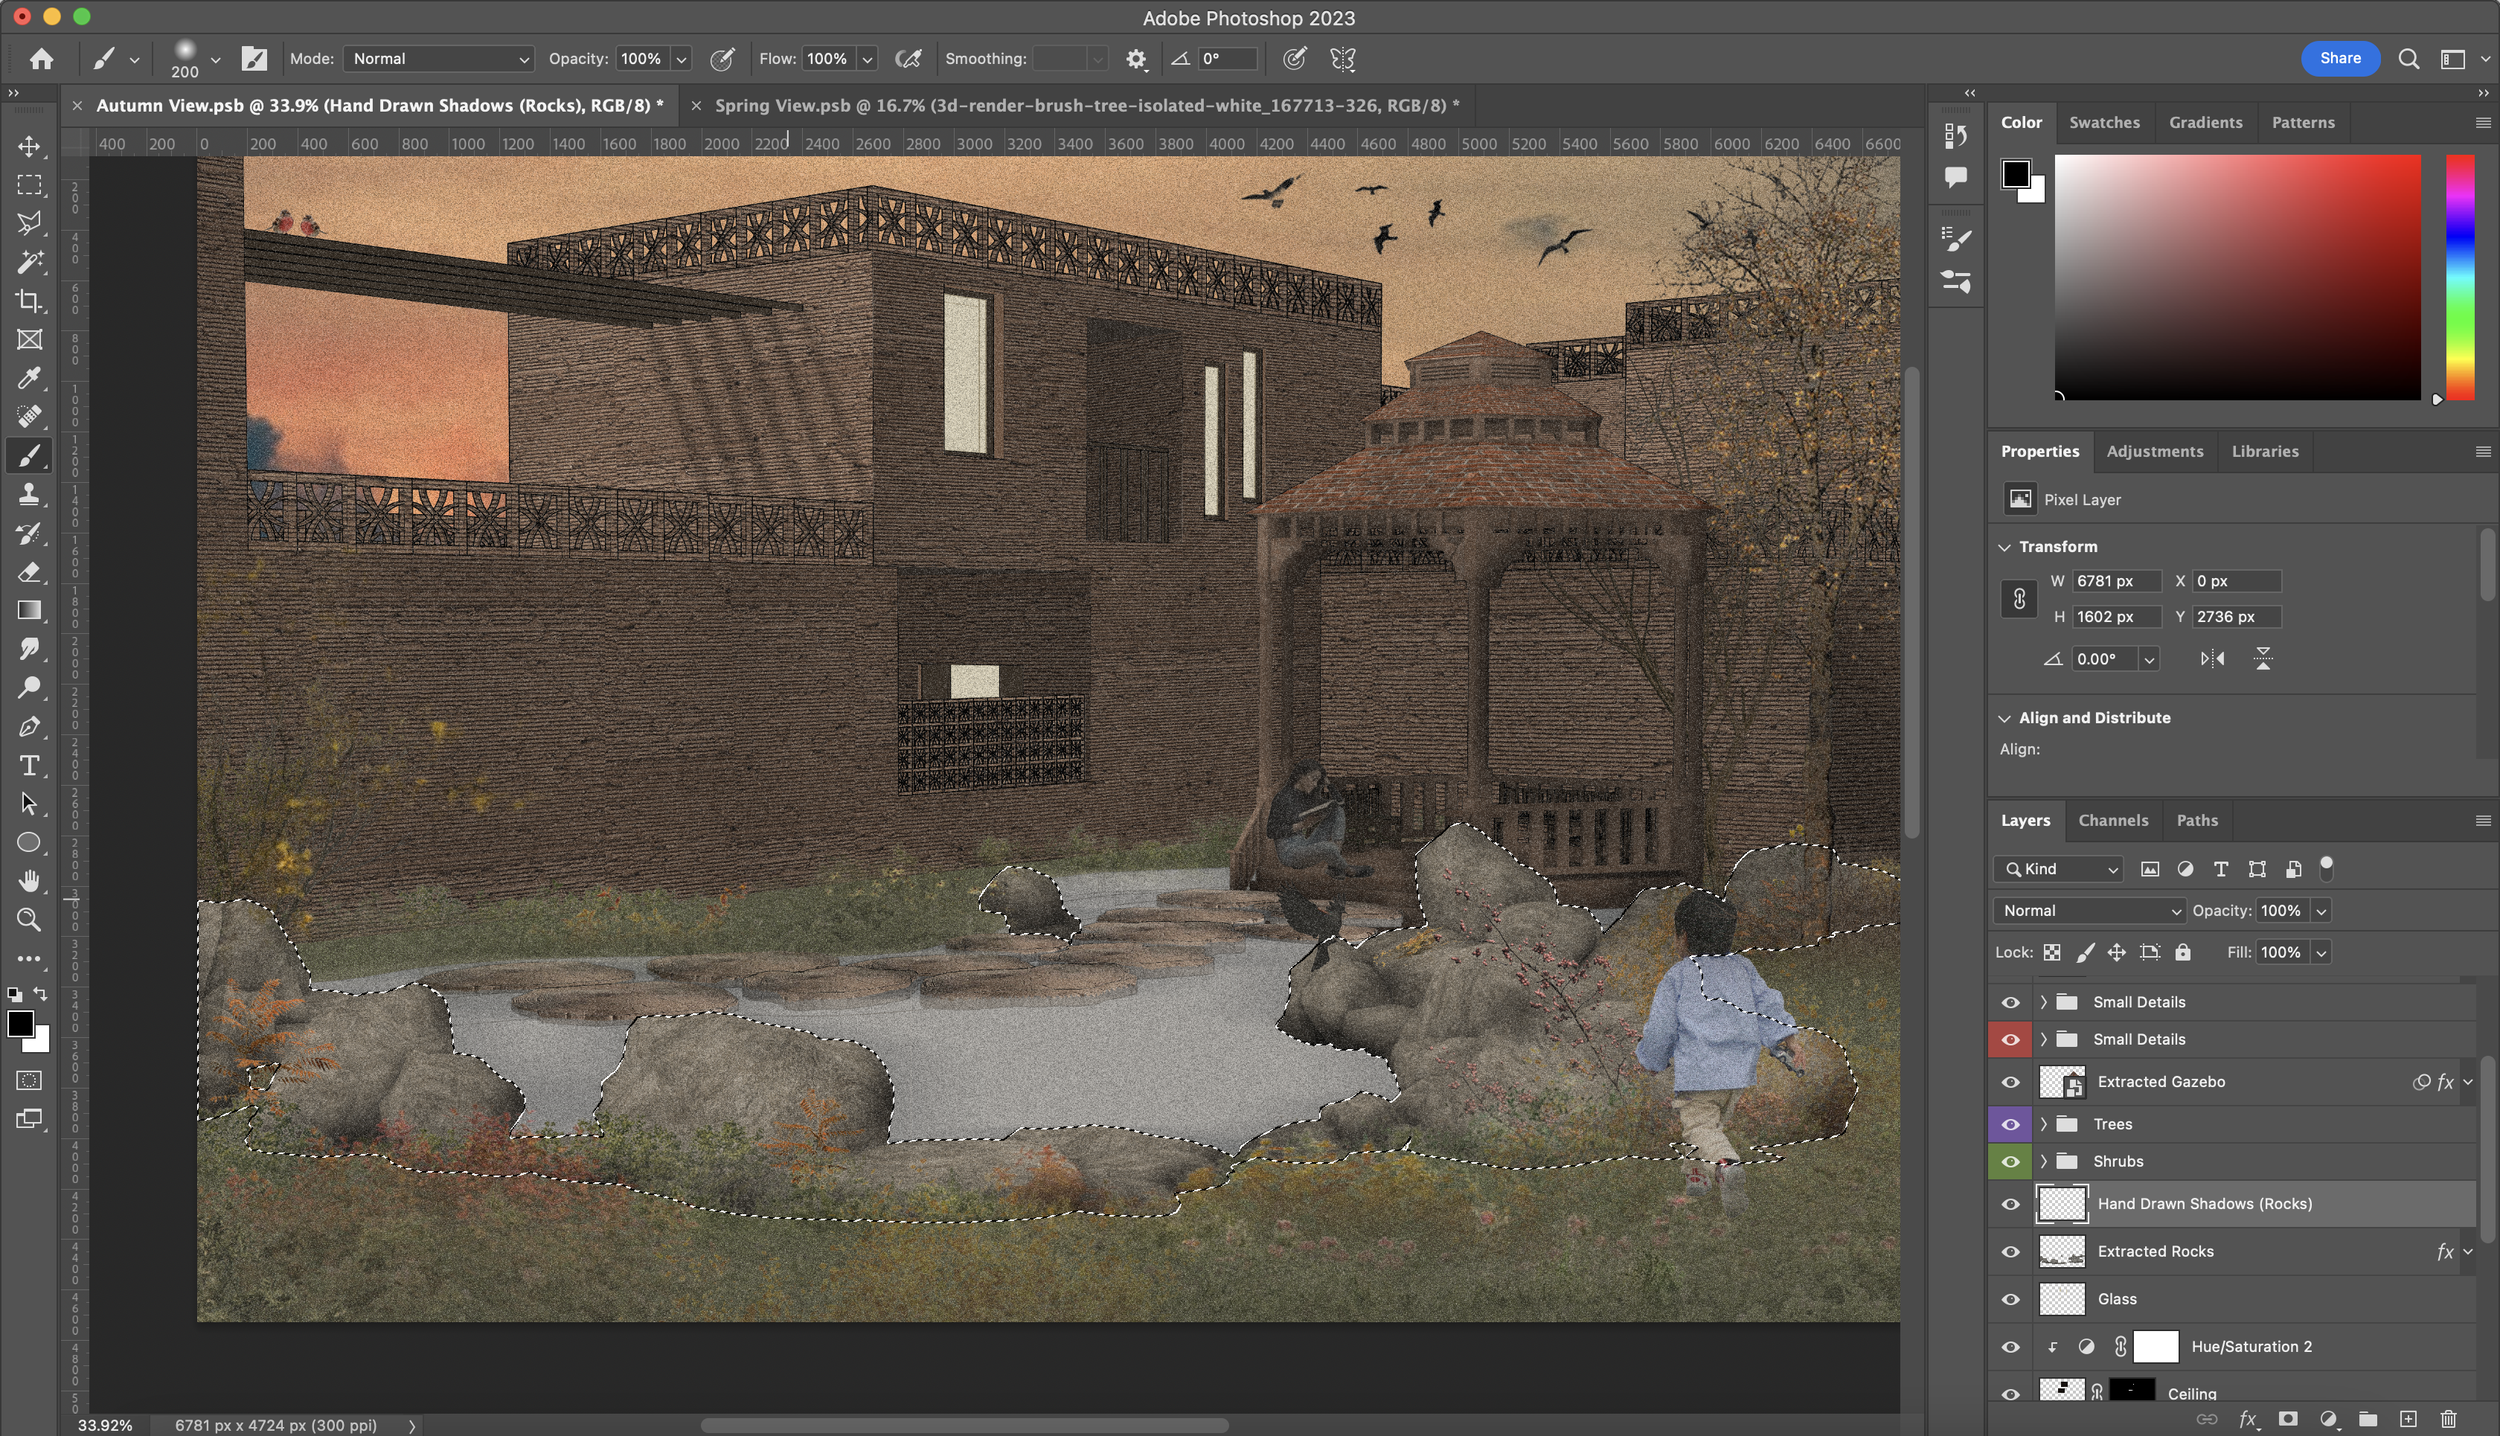
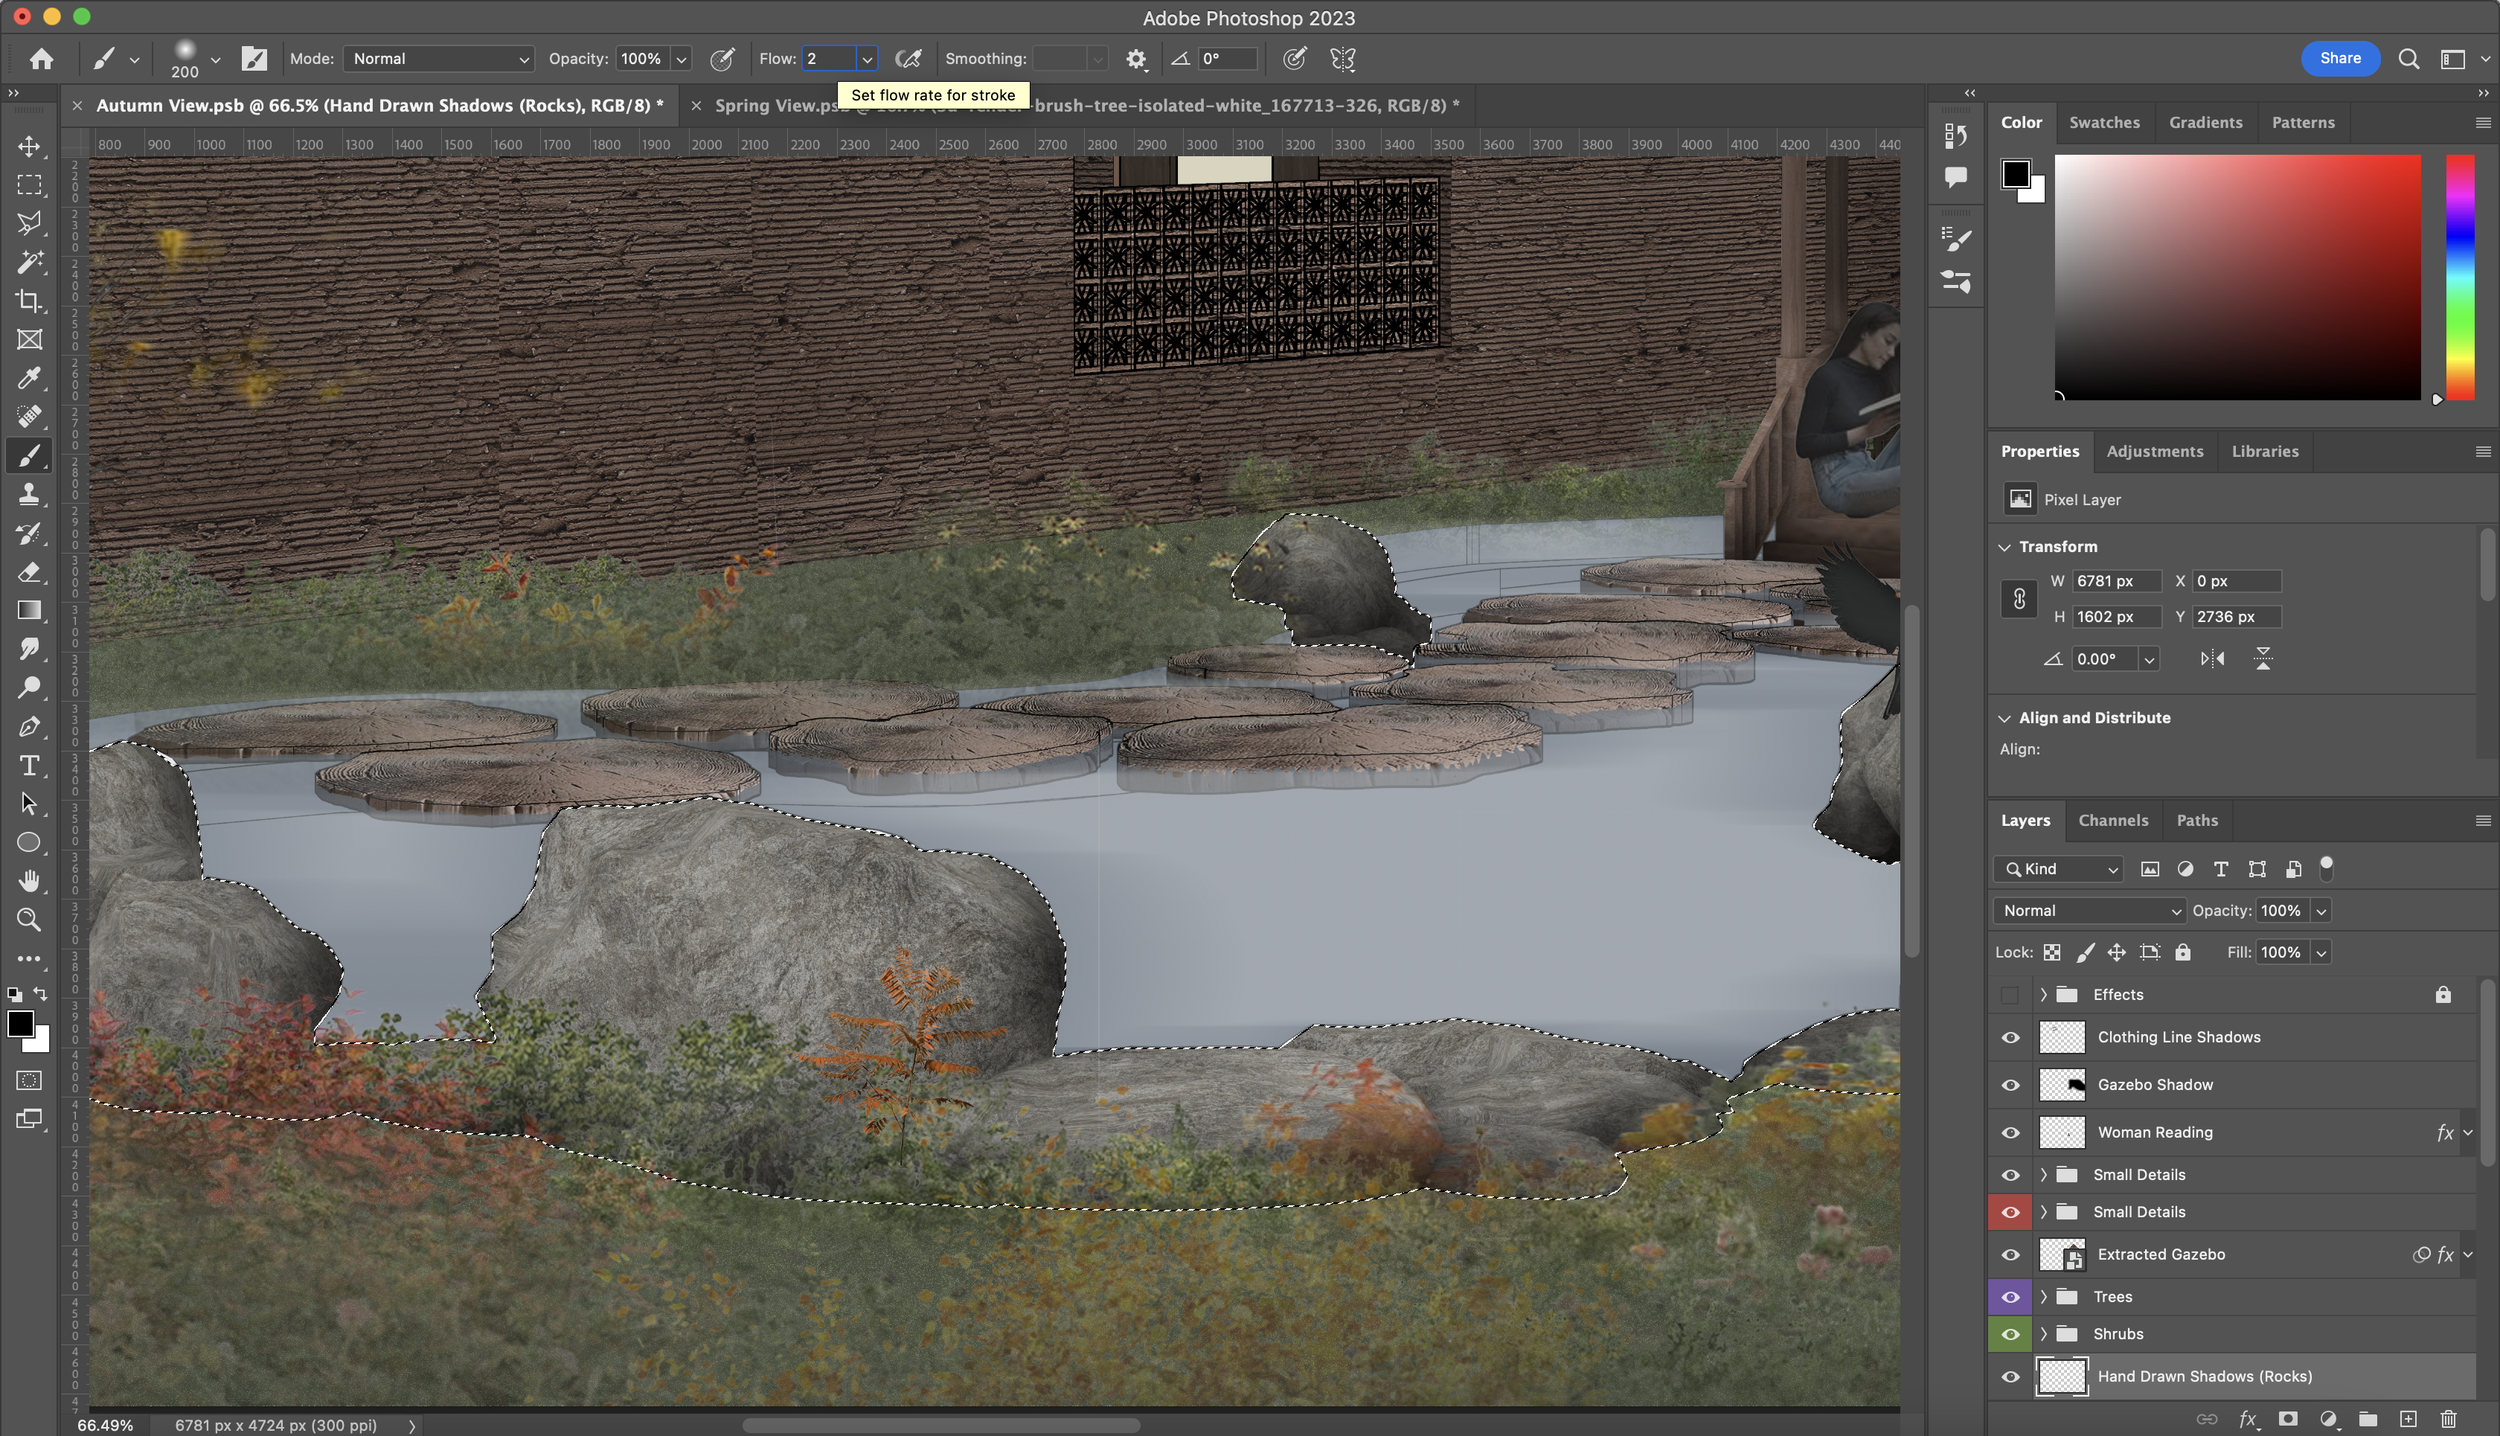
The next set of shadows are hand drawn using the ‘Brush Tool’ with the Soft Round Brush at 2% flow. Anyone who knows me well will know how much I swear by adding shadows with the ‘Brush Tool’. Select the parameter you want to hand draw shadows into using the ‘Cmd + Left Click’ on any preview box and use the ‘Brush Tool’ on a new layer to add in the manual shadows. Make sure to have the flow set to 2% (seen at top of the screen) because you want to build this up rather than doing harsh black spots to the visual. You can see below how I have done this for the rocks in the screenshots below. The same step is repeated for other areas in the visual: ground, buildings, and gazebo.
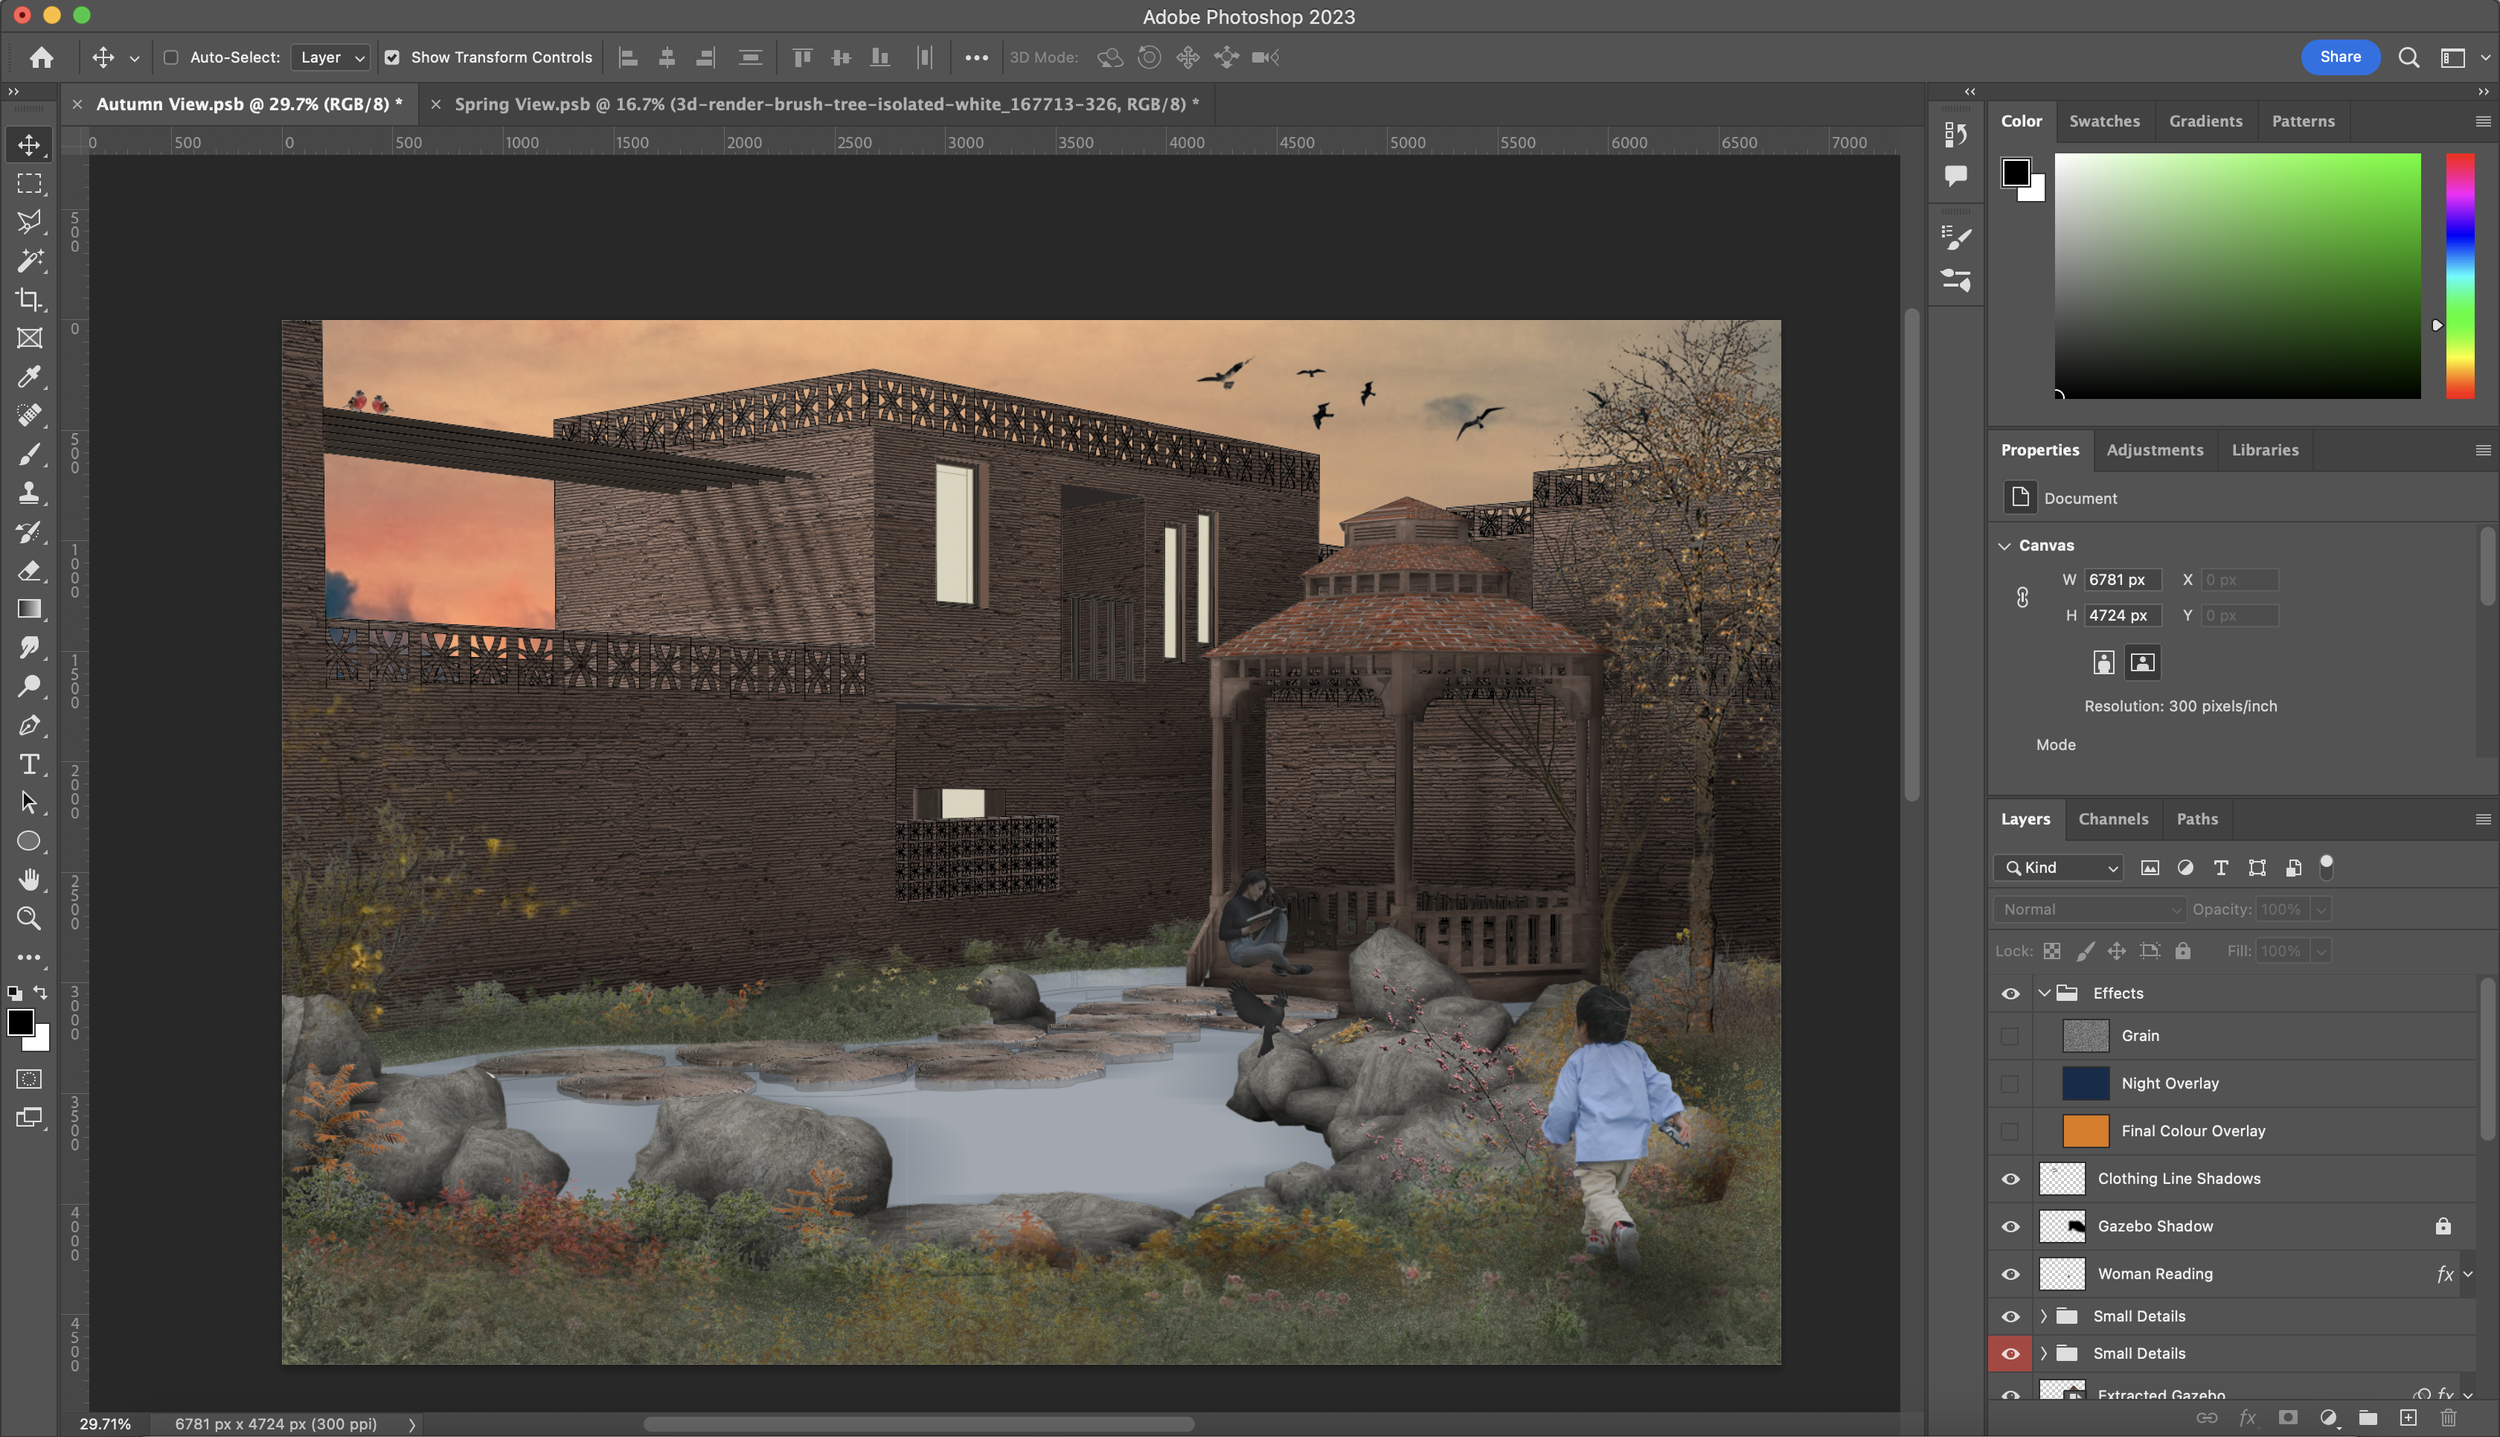
Final Effects
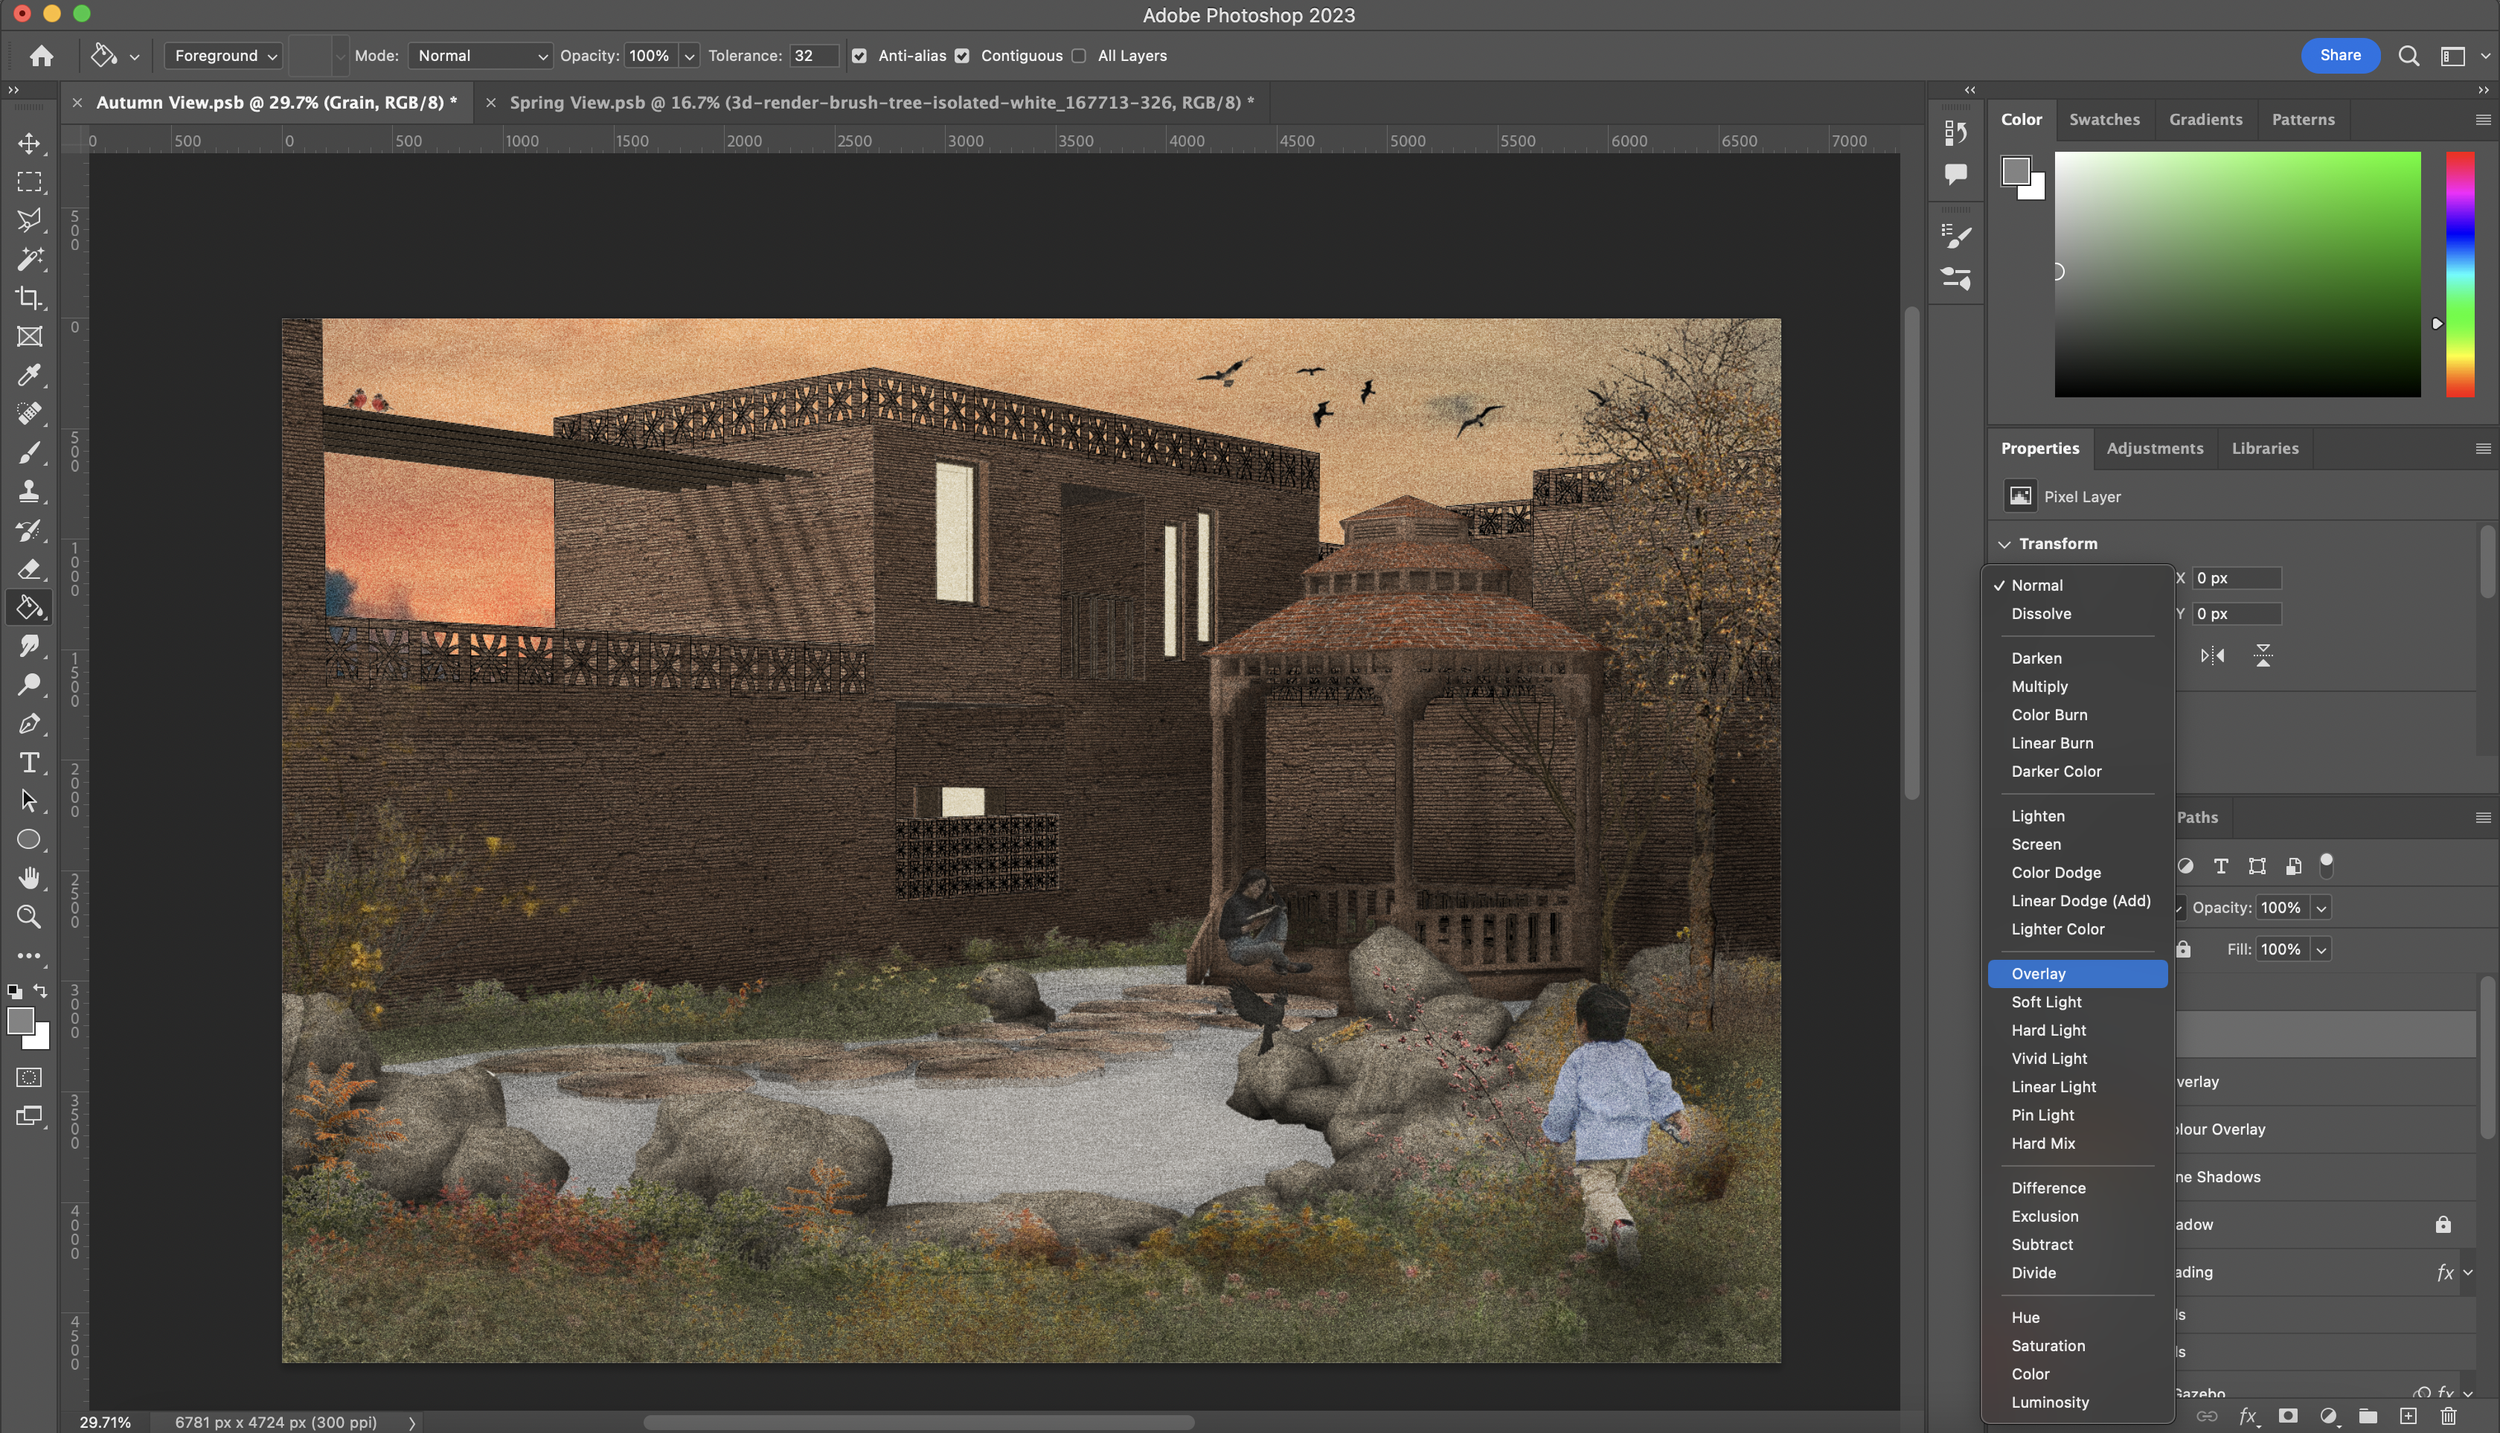
You may have realised that I have had an ‘Effects’ folder roaming about in my Layers panel for the past couple of steps of which it was switched on in some cases. I’ll be showing how to get a grain effect on your visuals as well as the important of overlaying a hue on your visual too.
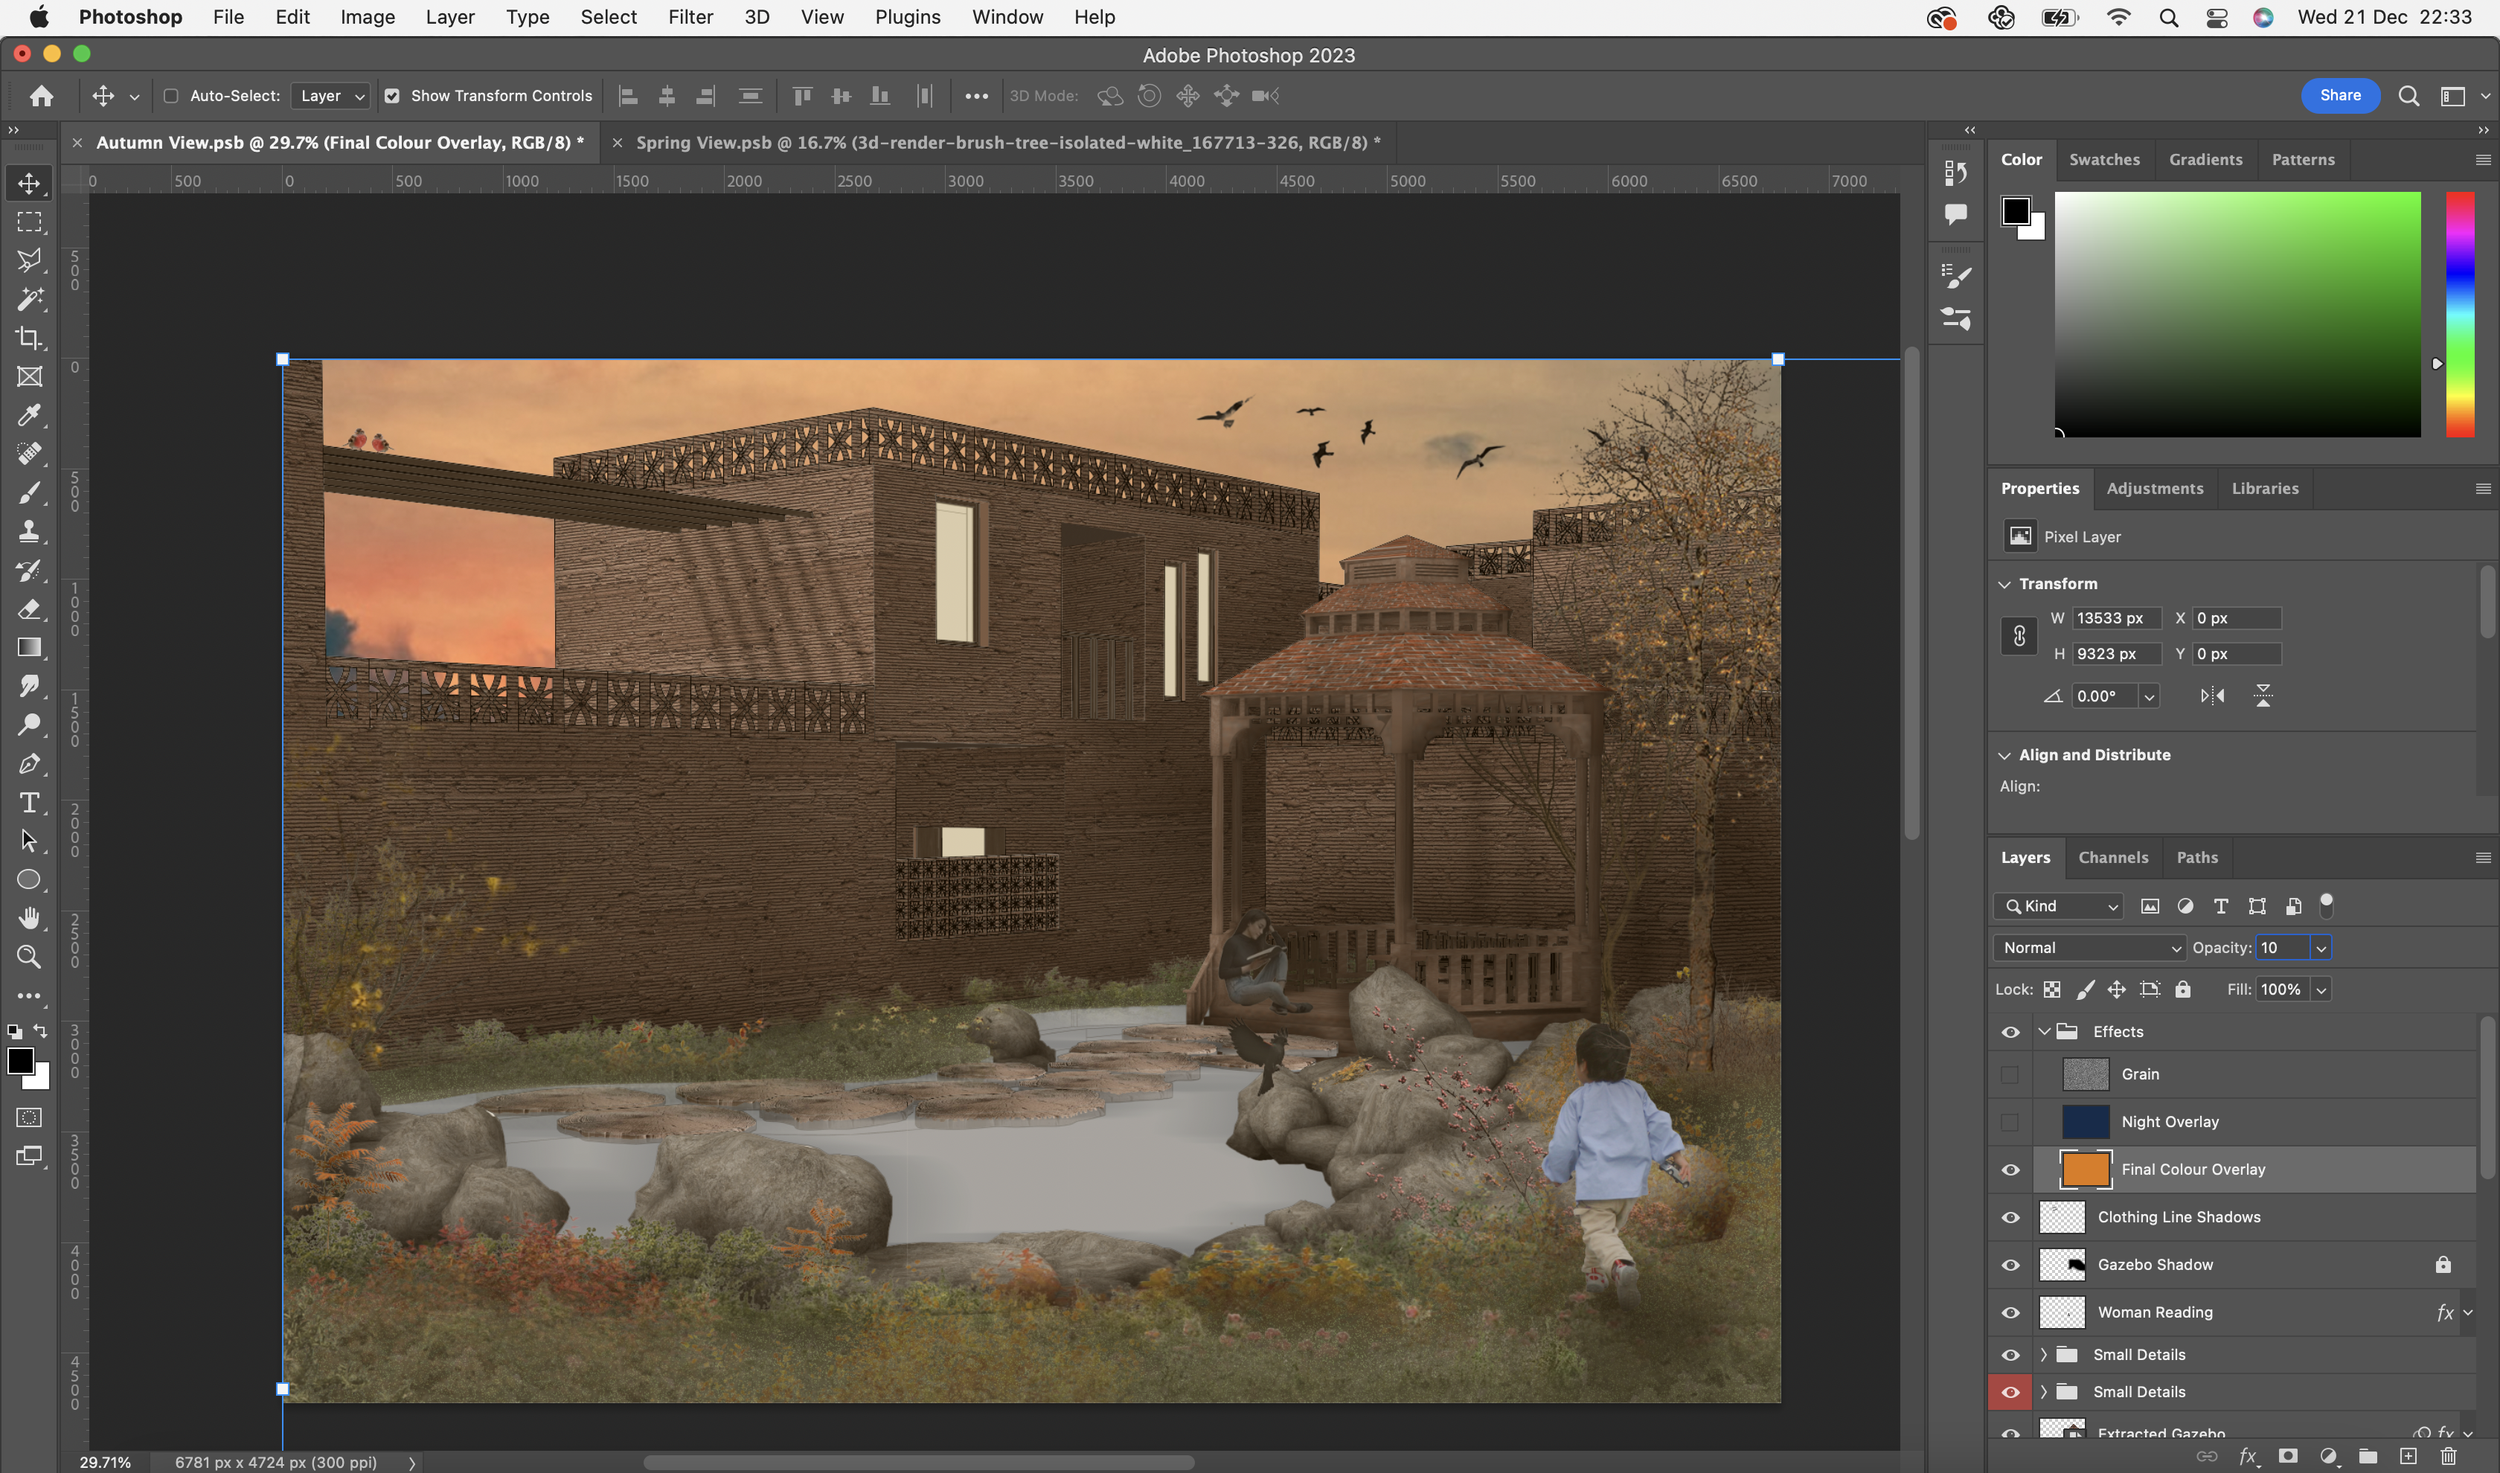
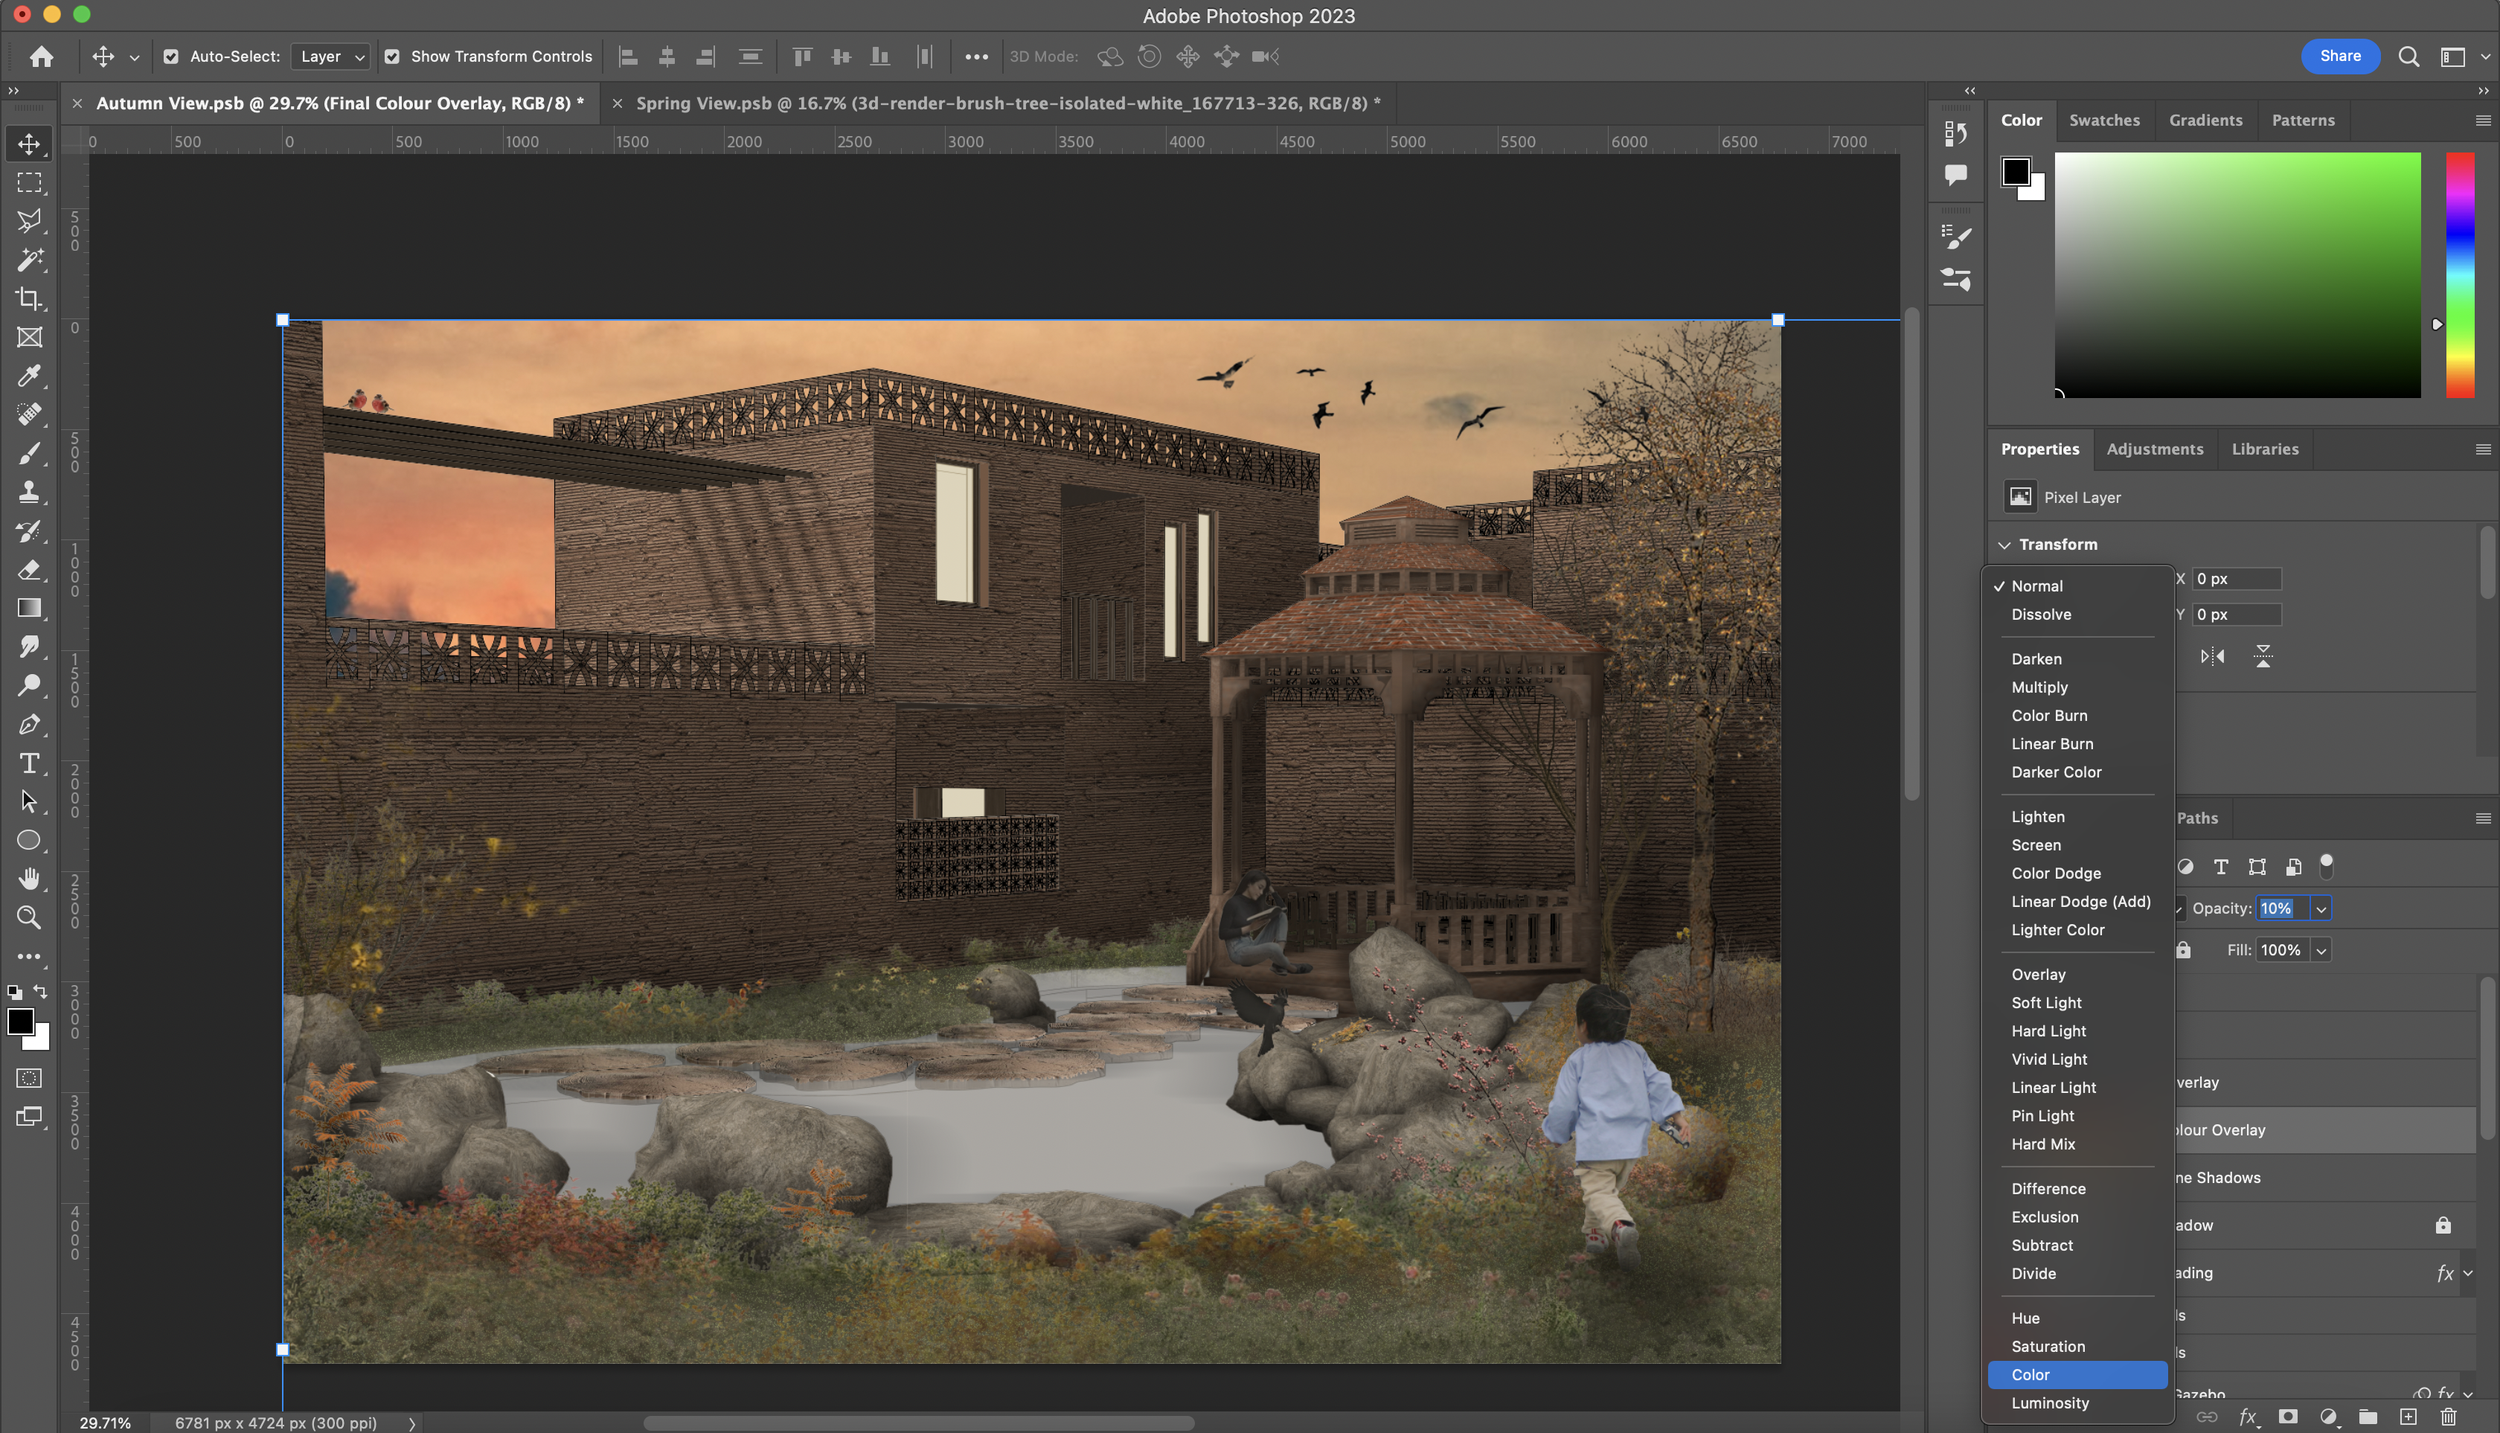
To start off, a hue overlay helps with concentrating the visual towards a specific colour. You may remember that I mentioned that this view is of an autumnal garden so it makes sense for a yellow/orange hue to overlay on top of everything. To do this is very simple. I made a new layer and used the bucket tool to fill it with a rich orange. I then dropped the opacity to 10% and changed the blend mode to ‘Colour’. That’s it for the hue. If you want to change the colour, you can simply select a different colour in the Colour Panel and use the bucket tool to change the hue.
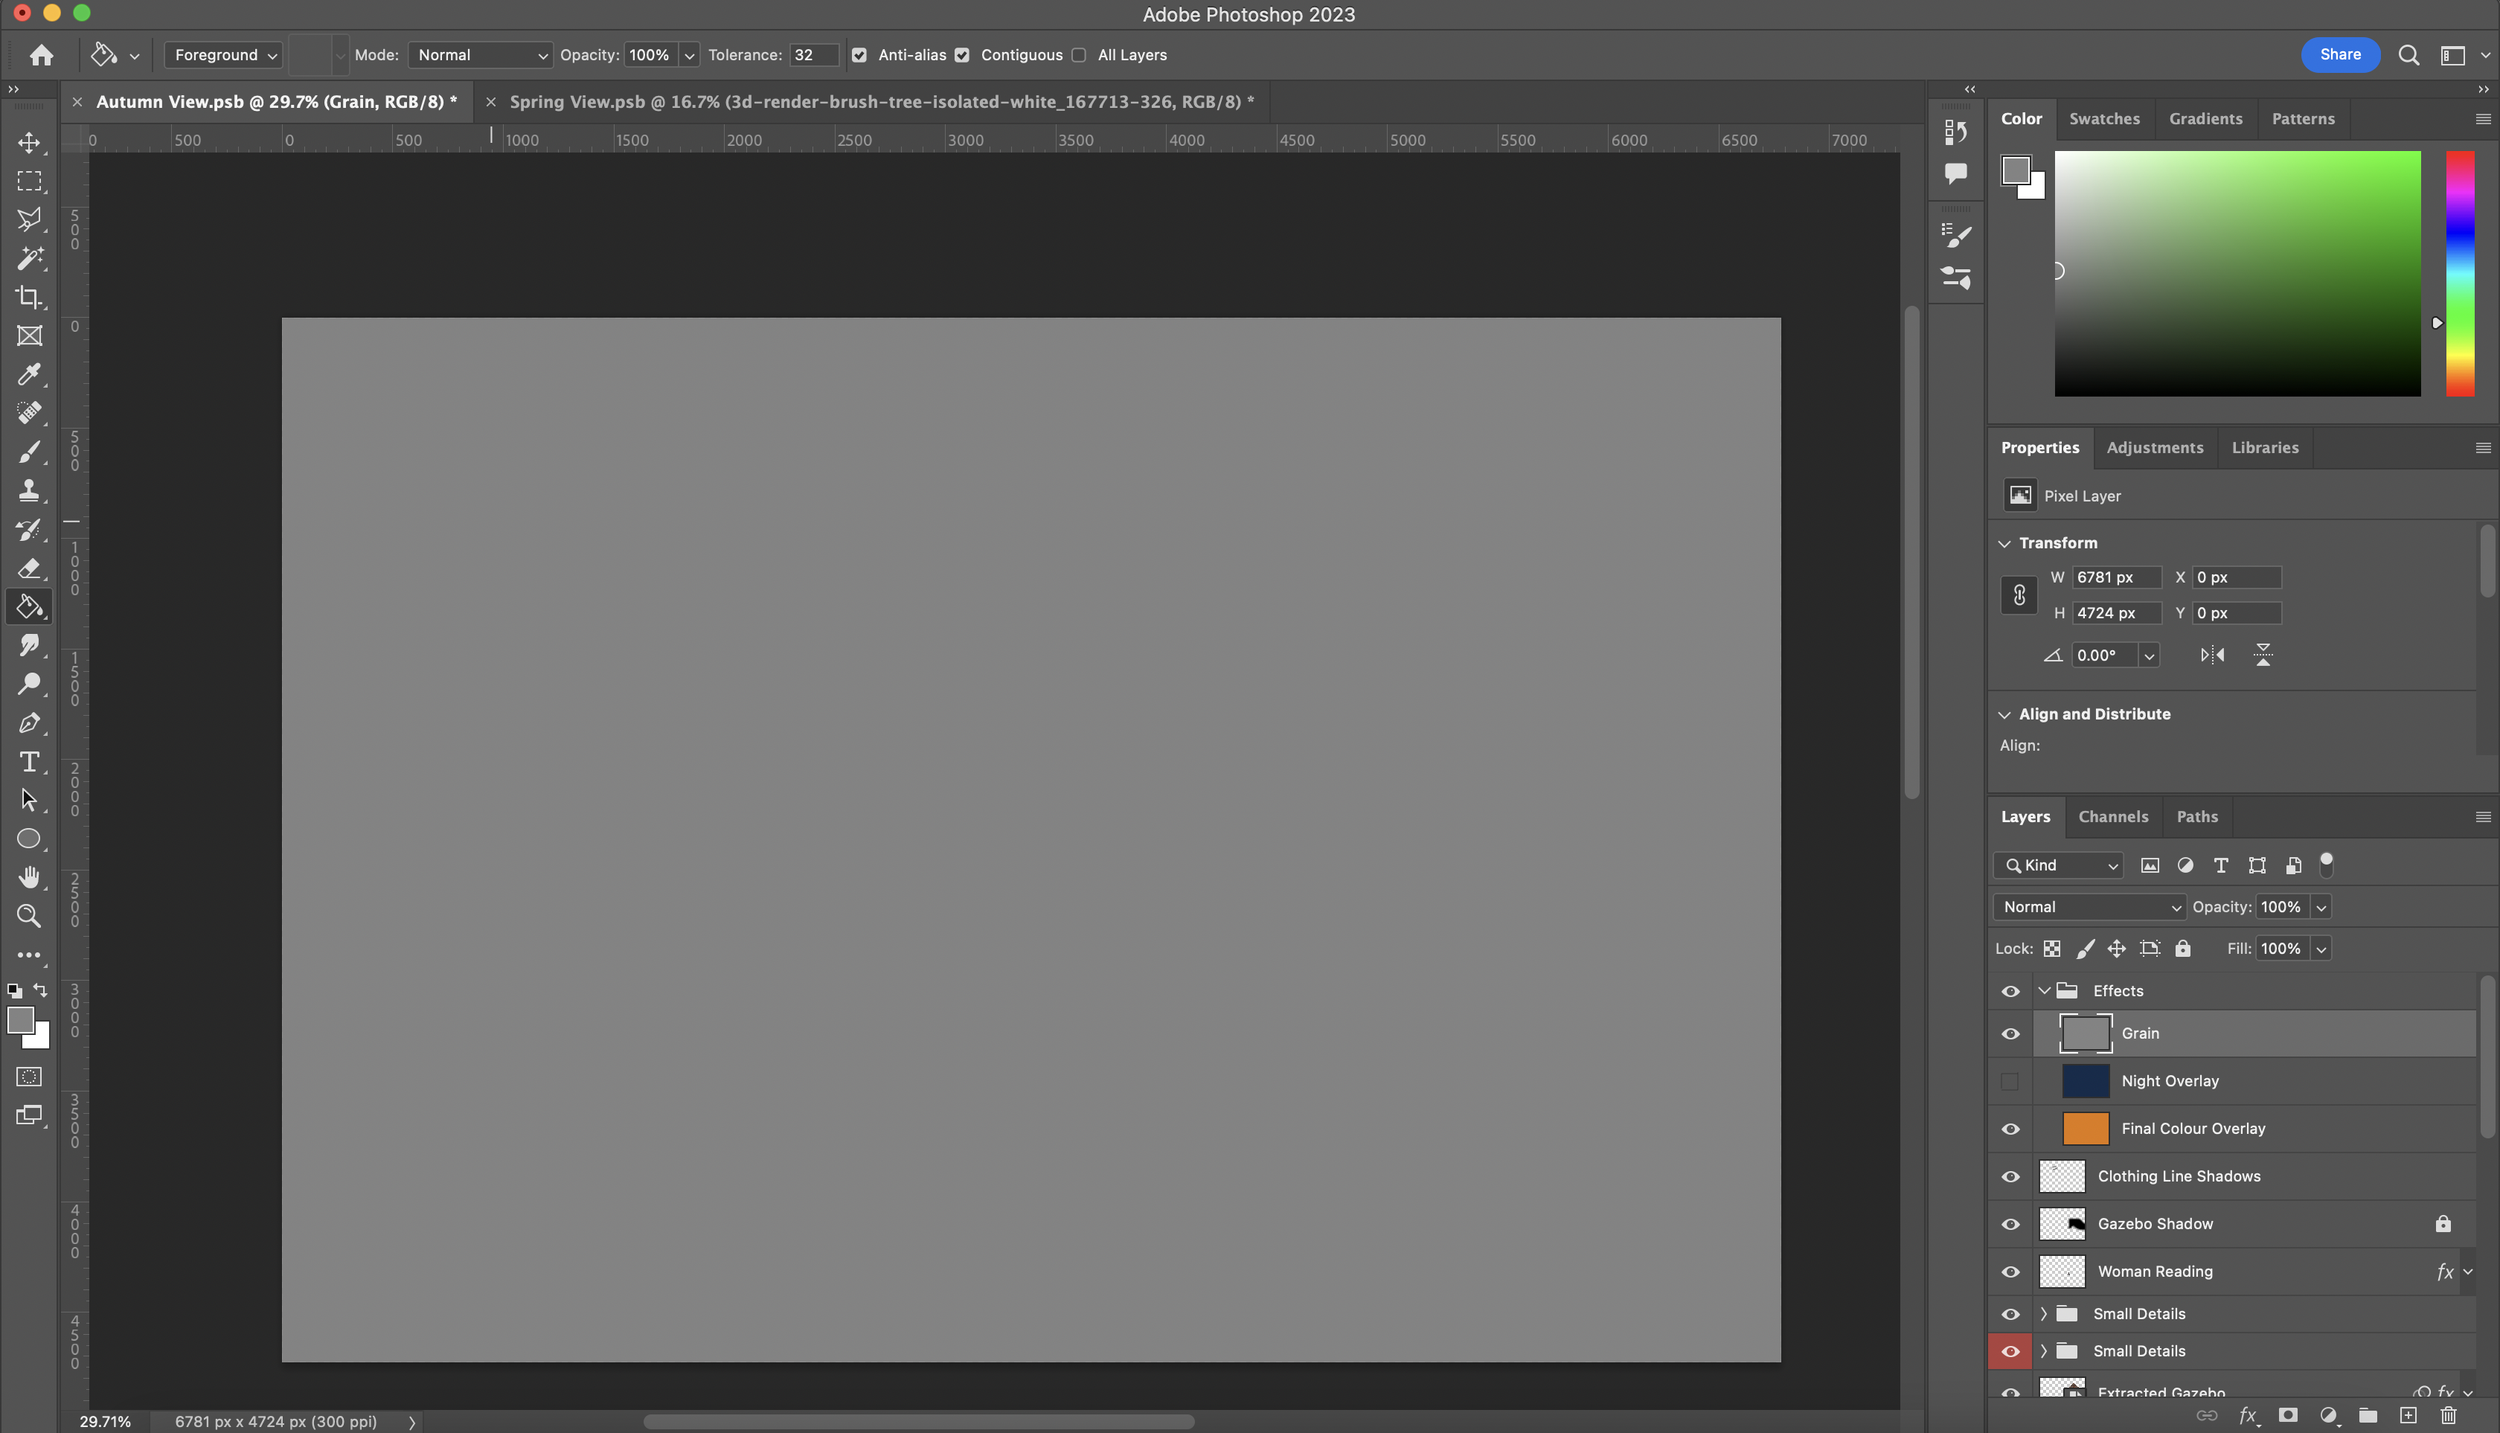
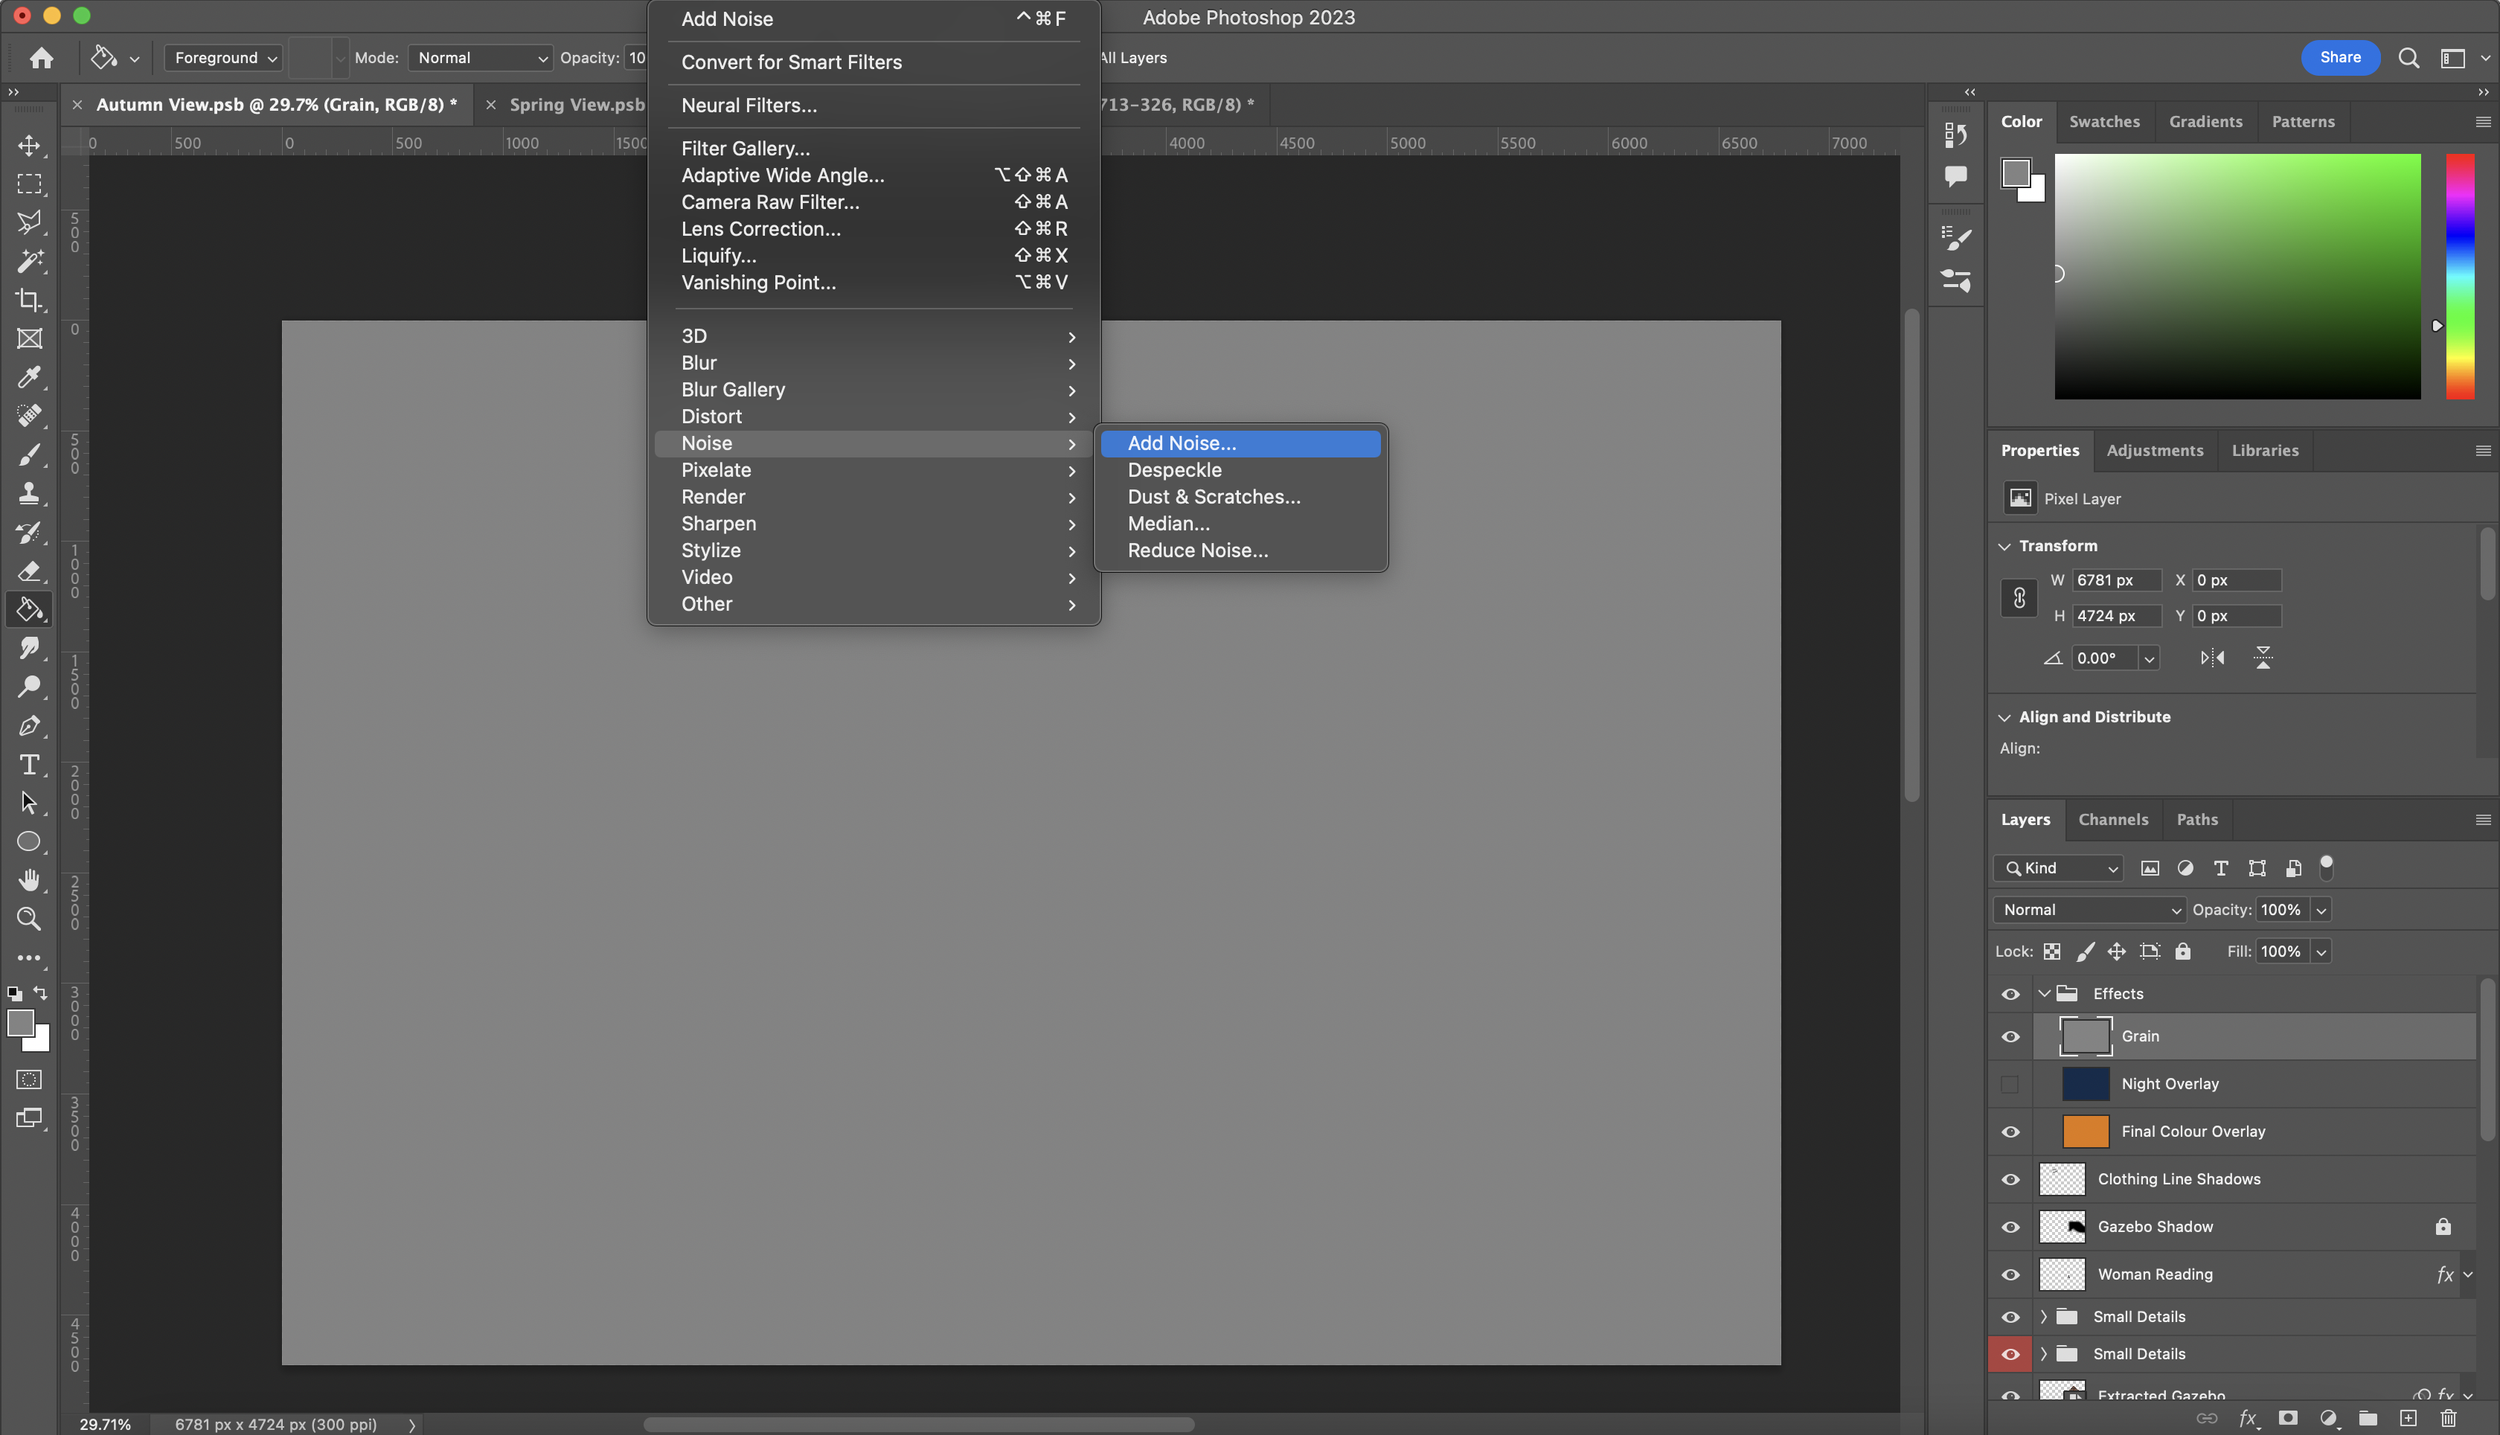
For the grain, you can do this in different ways and I’ll be sharing how I do it. So I do the same as the hue overlay but instead, use a grey to fill the layer. Then go to Filter -> Noise -> Add Noise and set the noise to around 250. Click ok and change the blend mode of this layer to ‘Overlay’ and you’re done!
If you’ve made it this far, give yourself a pat on the back! 👏
This will sadly be our last post of 2022 and in the meantime, we’ll be working hard on producing new content to come in the new year. We’d also love to see your visuals using the techniques from this post as we know many of you who are students will be improving your final images for design projects over the Christmas break which is why we wanted to dedicate time to an in-depth walkthrough on achieving a good visual representation of space, light and materiality.
Remember to always tag us on Instagram and use our hashtag #dabblefeature in order to have your work shared within the community :)
Have a great Christmas everyone and Happy New Year in advance, make sure to keep yourselves notified about our return in 2023 by following our Instagram