
Post Production using Rhino & Illustrator
When progressing from first year to second year, many of us were relieved to transition from hand-drawn orthographics to digital architectural drawing. But with this new skill set comes a new workflow, and when it comes to digital drawing there are so many ways to produce your plans, sections and other drawings using a range of software. Today, I’ll be introducing you to my personal workflow on producing orthographics in Rhino and Illustrator.
How you think through your design process and the way you model your proposal both affect the way you use Rhino to draw your orthographics. For some, the more common process of progressing through 2D iterations is translated directly into the digital world. This entails drawing lines and curves directly onto your Rhino workspace, as you would if you were drawing manually in real life. For others, thinking through making may be a more fruitful process, so the models may come before the drawings themselves. Programmes like Rhino allow you to produce your orthographics directly from models by simply slicing through the digital model wherever you want your plan or section cuts to retrieve a base drawing. These can then be exported and developed in other programmes like Illustrator and Photoshop. The latter workflow is the one I’ll be covering in this post.
Modelling your proposal
The way you model your proposal is important when it comes to producing Rhino orthographics from a 3D model. You have to make sure that you model cleanly and the geometries can be easily worked with once you retrieve the base drawings and export them. Breaks in consistent walls, odd intersections that make your drawings hard to read or stray curves are some examples of things you should avoid when modelling your proposal. You also have to be conscious about what’s efficient to model and what’s best left as something to add to your drawing when you have the 2D base down. This decision is based on how much time you have, where you’re more skilled (2D digital drawing vs 3D modelling) and the level of detail that you need to include in your representation. I recommend working in 1:1 on a metres file in Rhino, which will then allow you to scale your drawing to any scale and paper size later on when you draw your proposal.
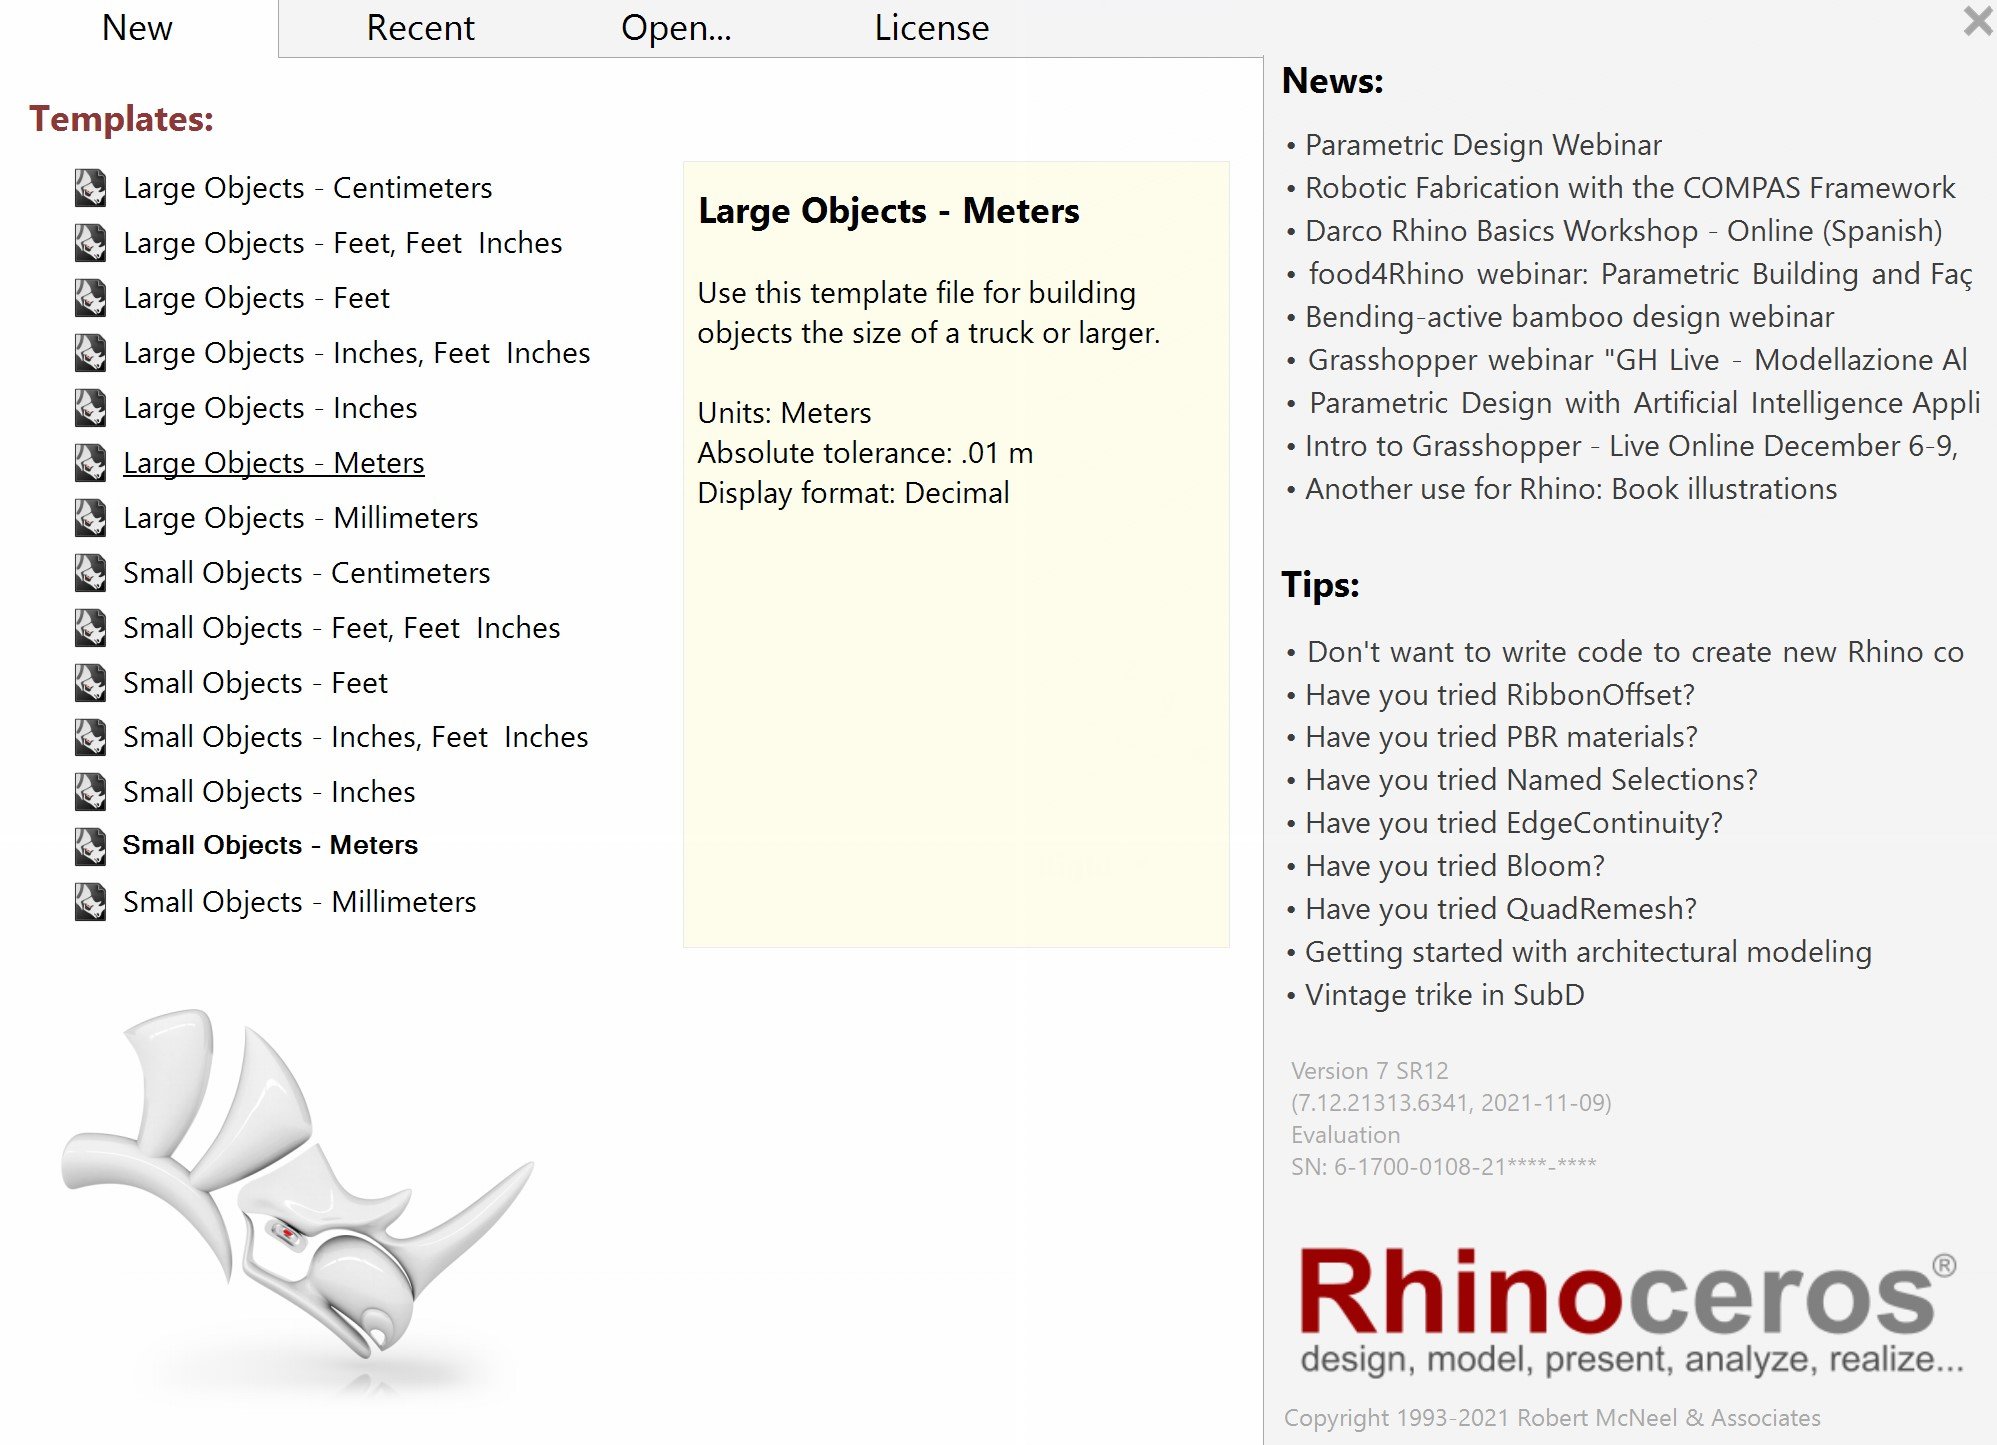
Step 1:
When you open up Rhino, go to ‘New’ and select the ‘Large Objects - Meters’ Template option.
Step 2:
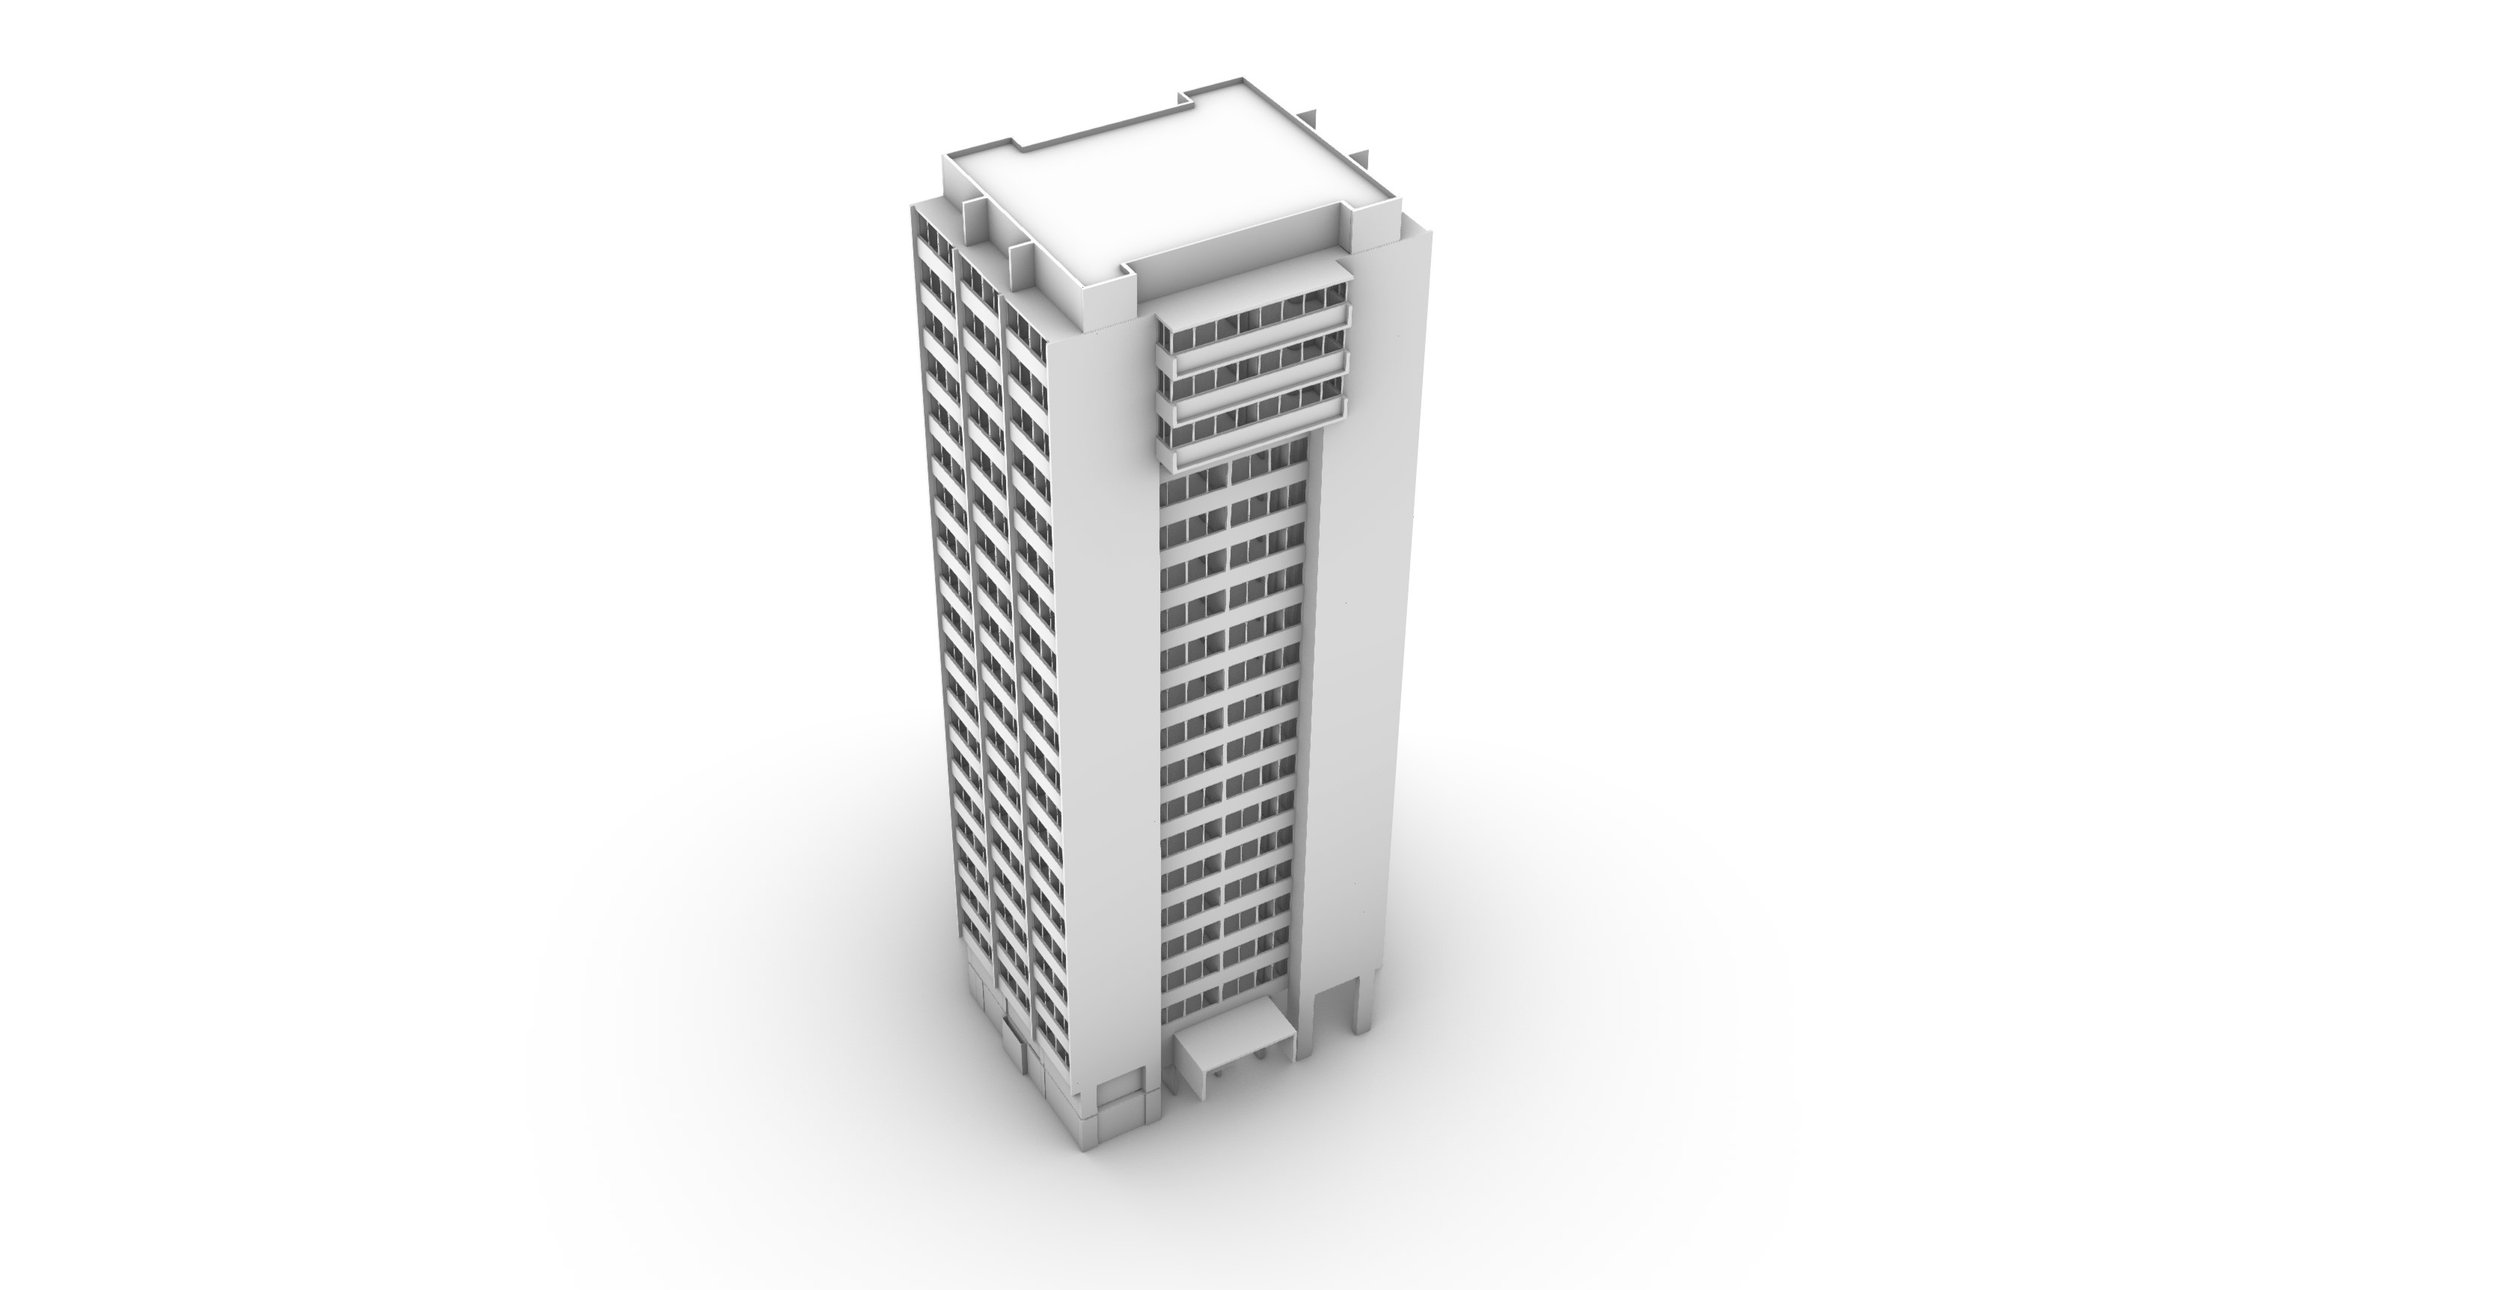
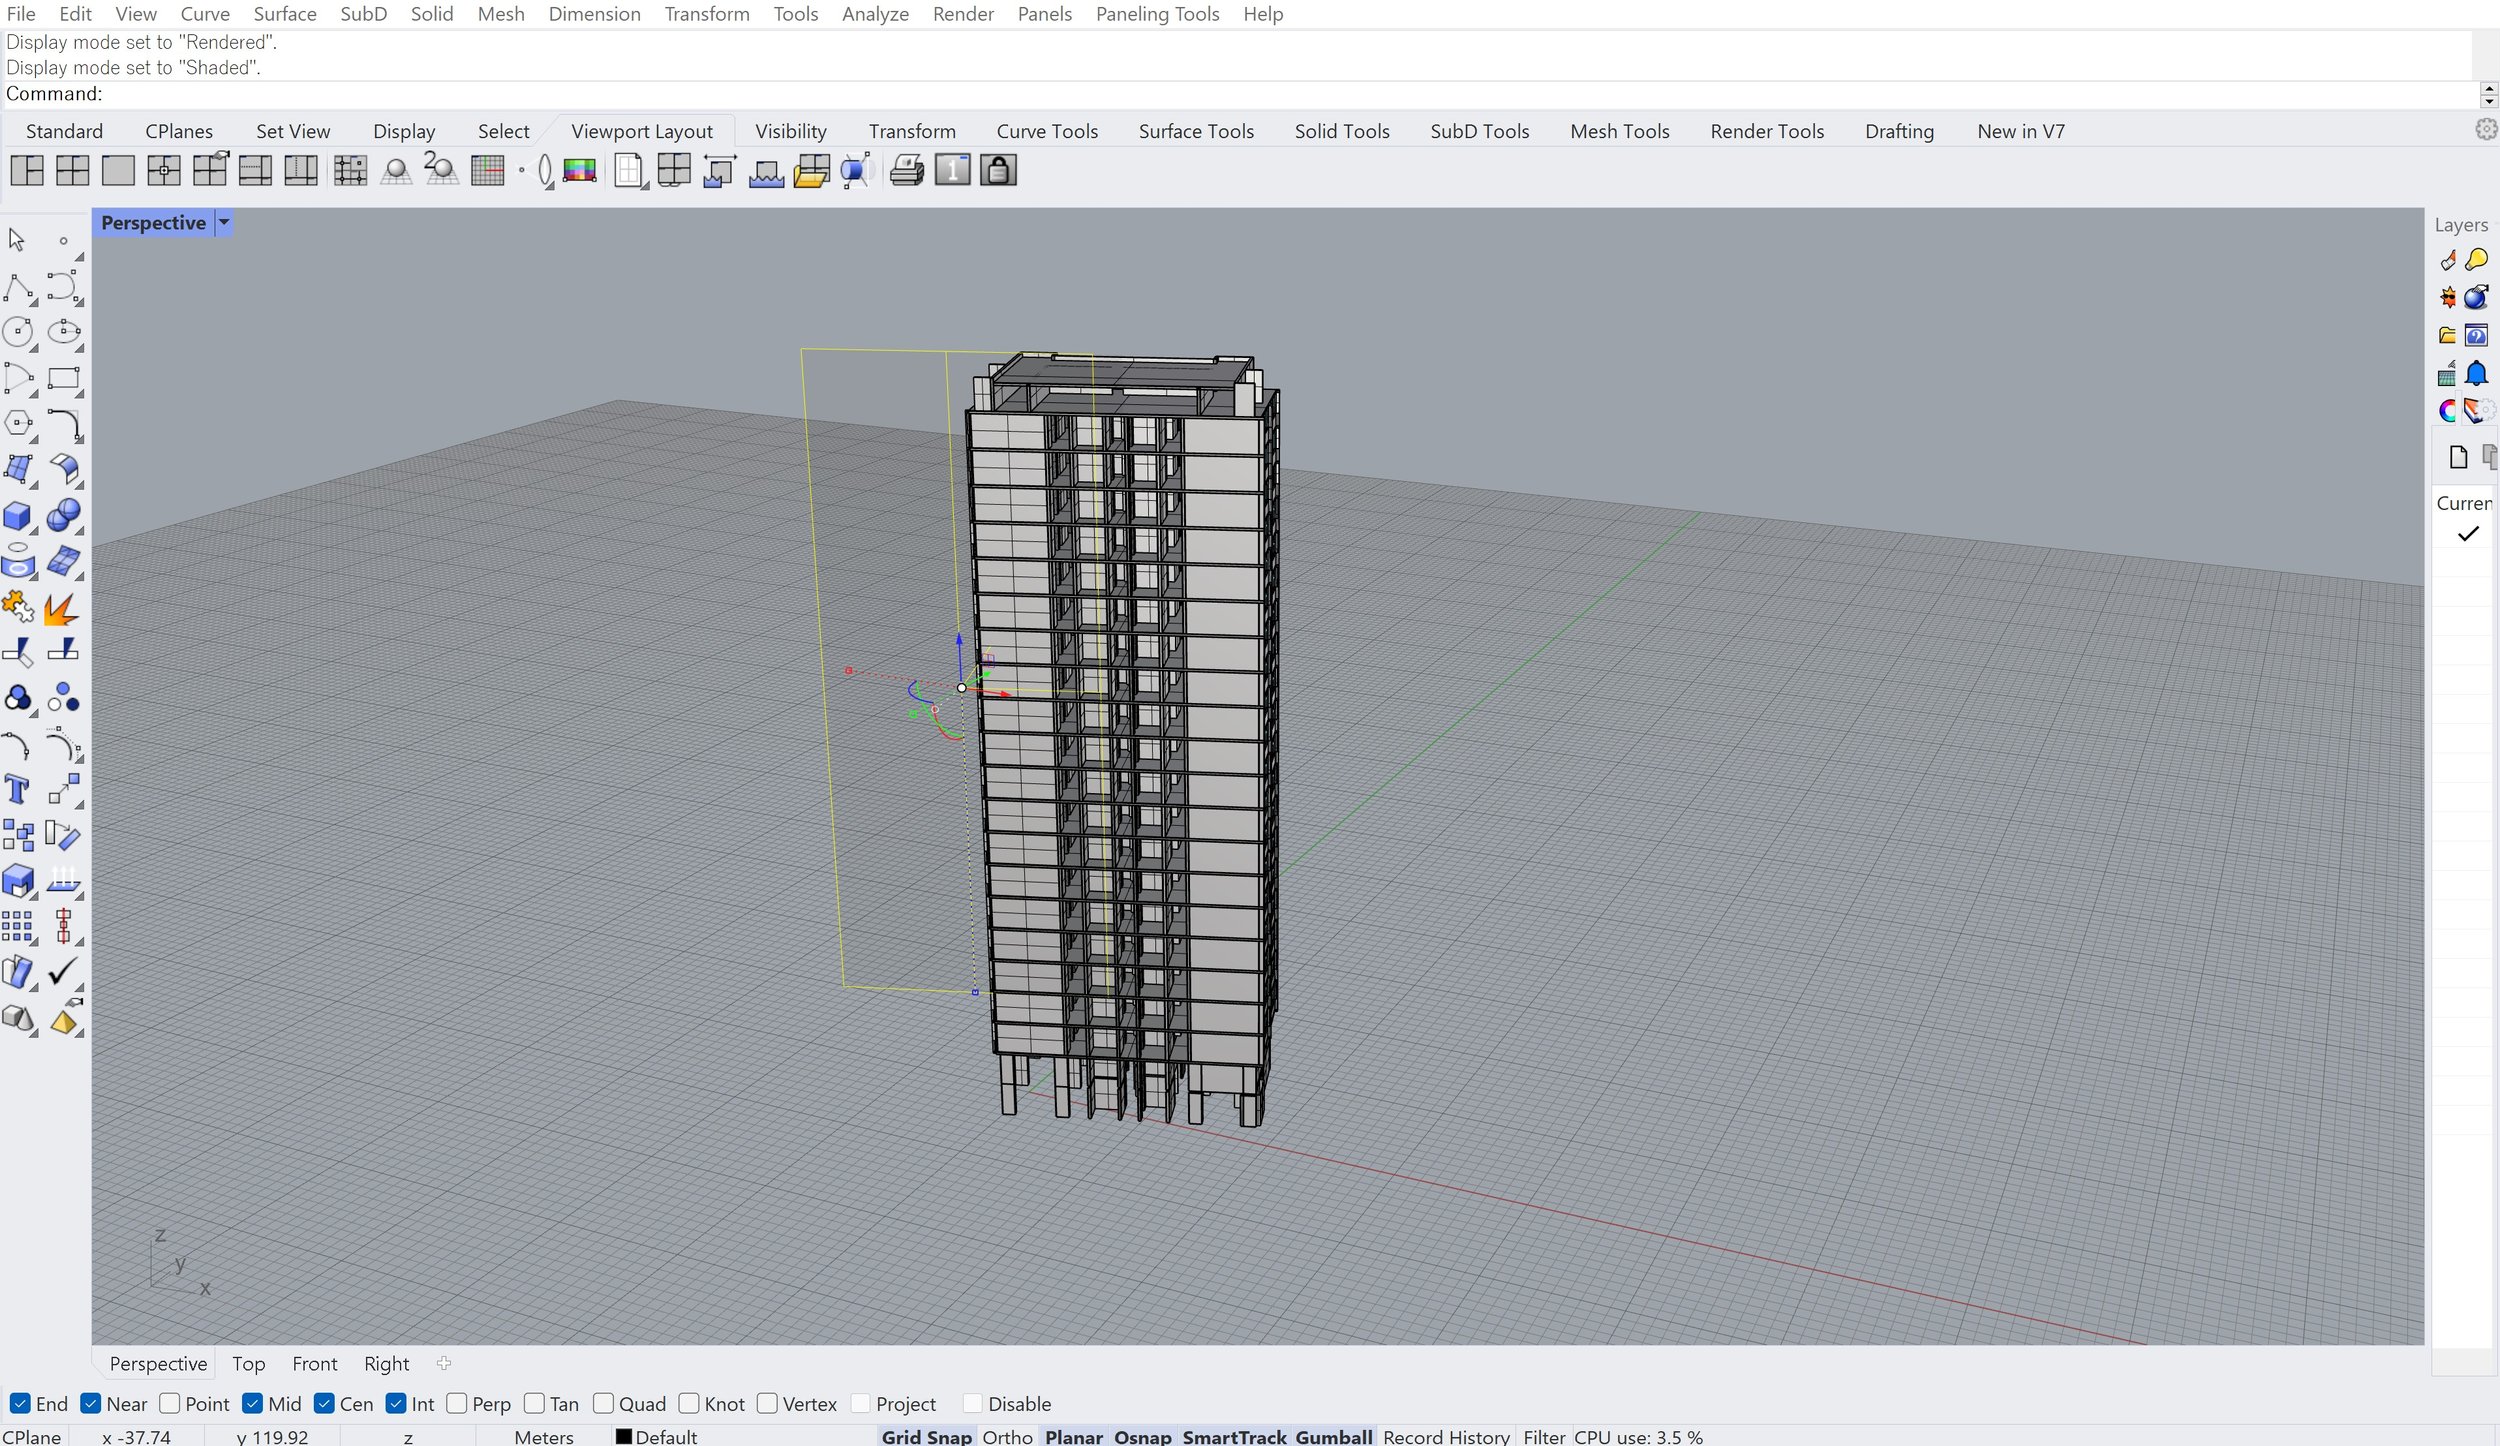
Model your building as cleanly as possible. Here, I’m using the Marylebone Halls of Residence as an example.
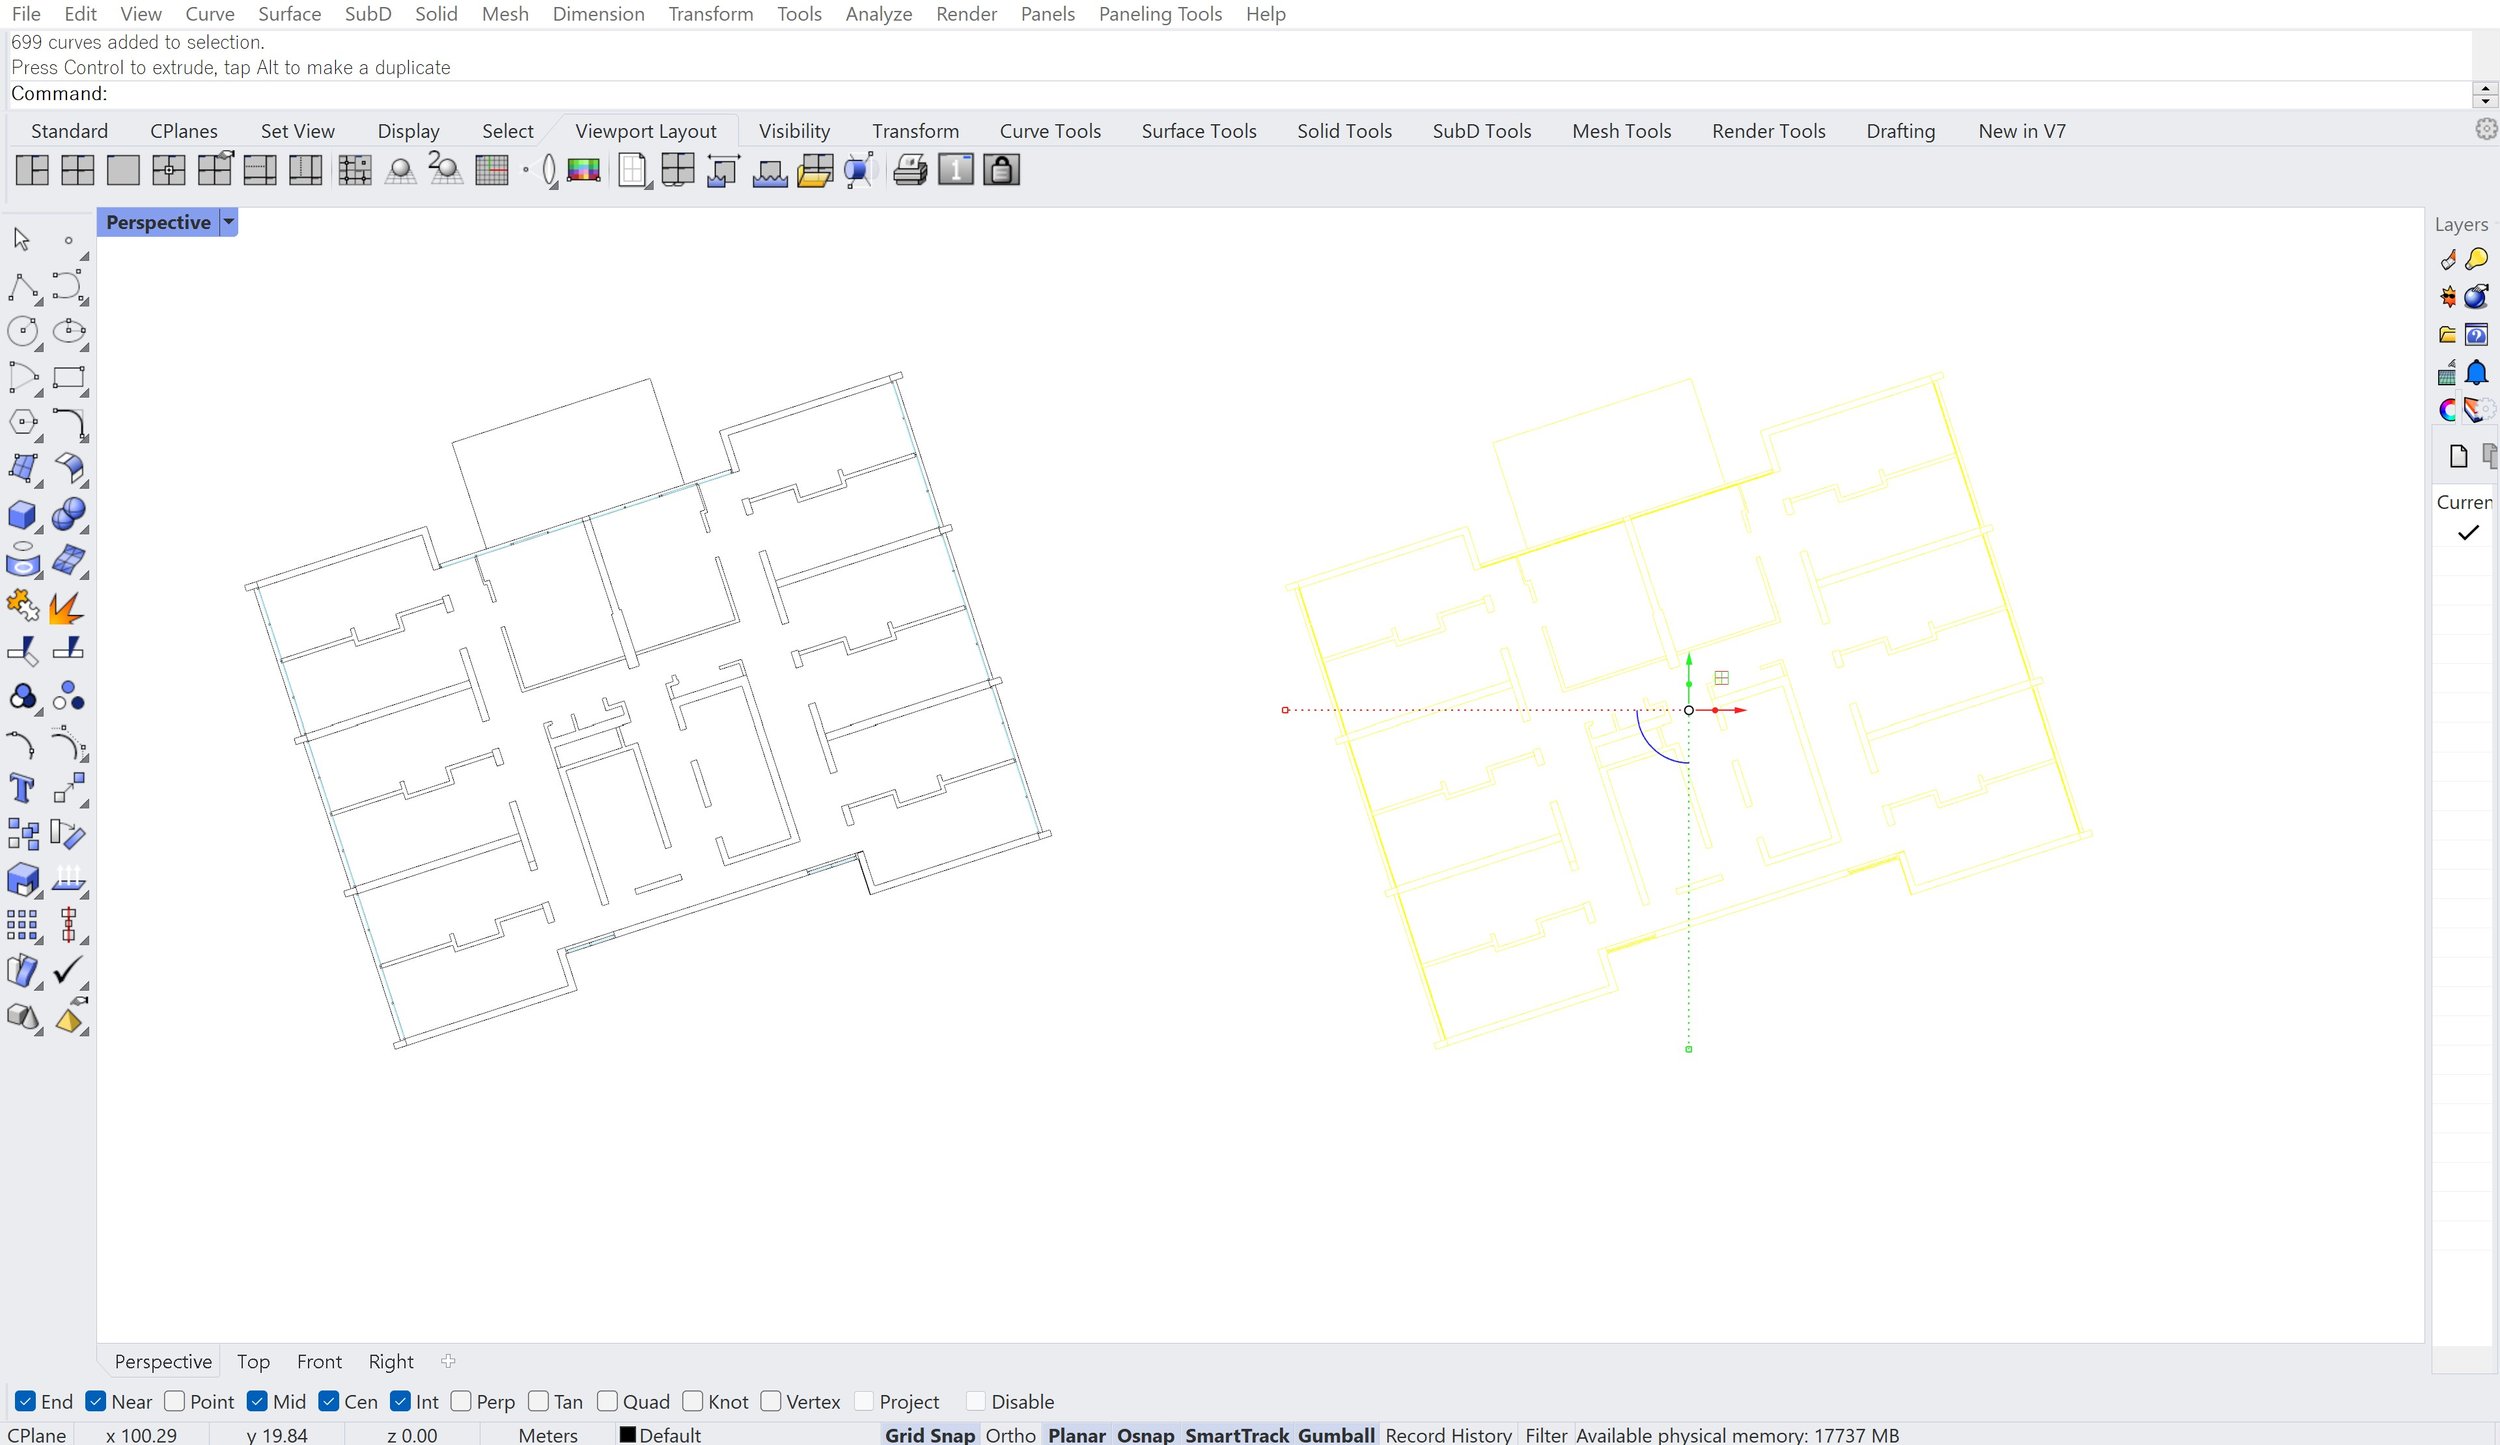
Clipping your model
Clipping planes allow you to position the cut-lines of your proposal and adjust it easily before you finalise the cut height or position for your drawing. The gumball tool even lets you rotate the clipping plane so you can quickly interchange between seeing your model cut in plan and section, helping you to visualise how your drawings would work together to describe your whole proposal.
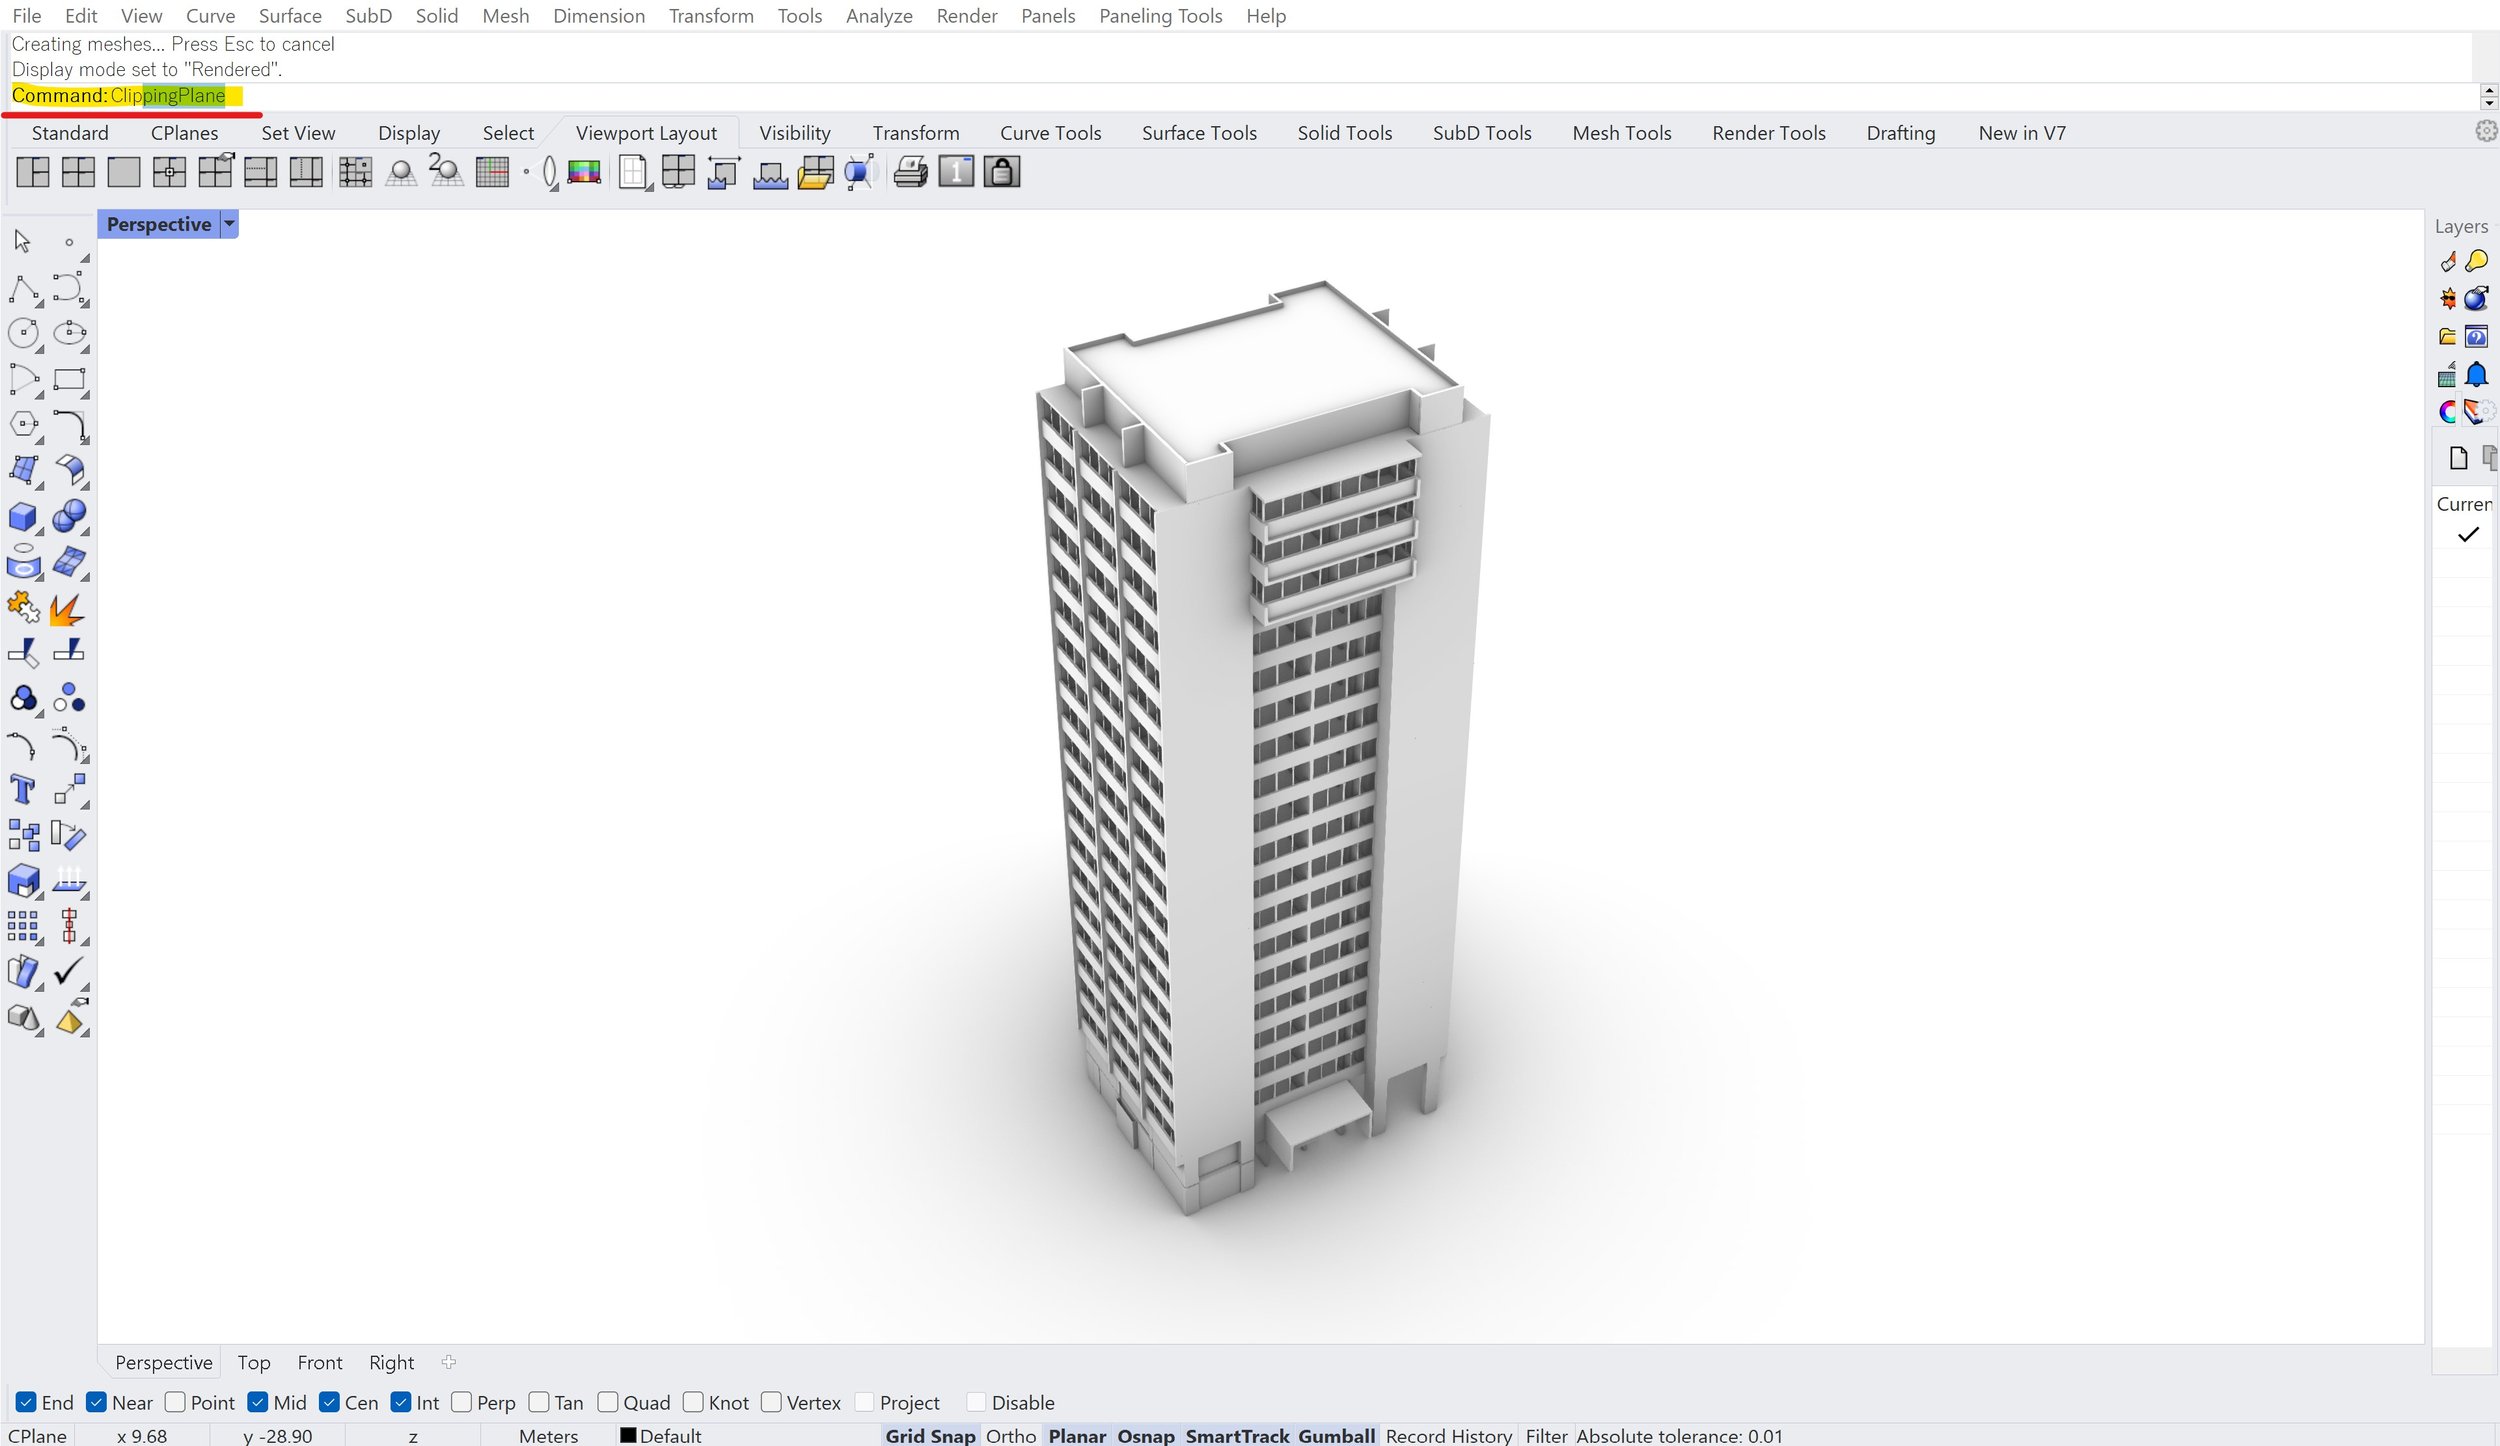
Step 3:
Enter the ‘ClippingPlane’ command in the command bar above your workspace.
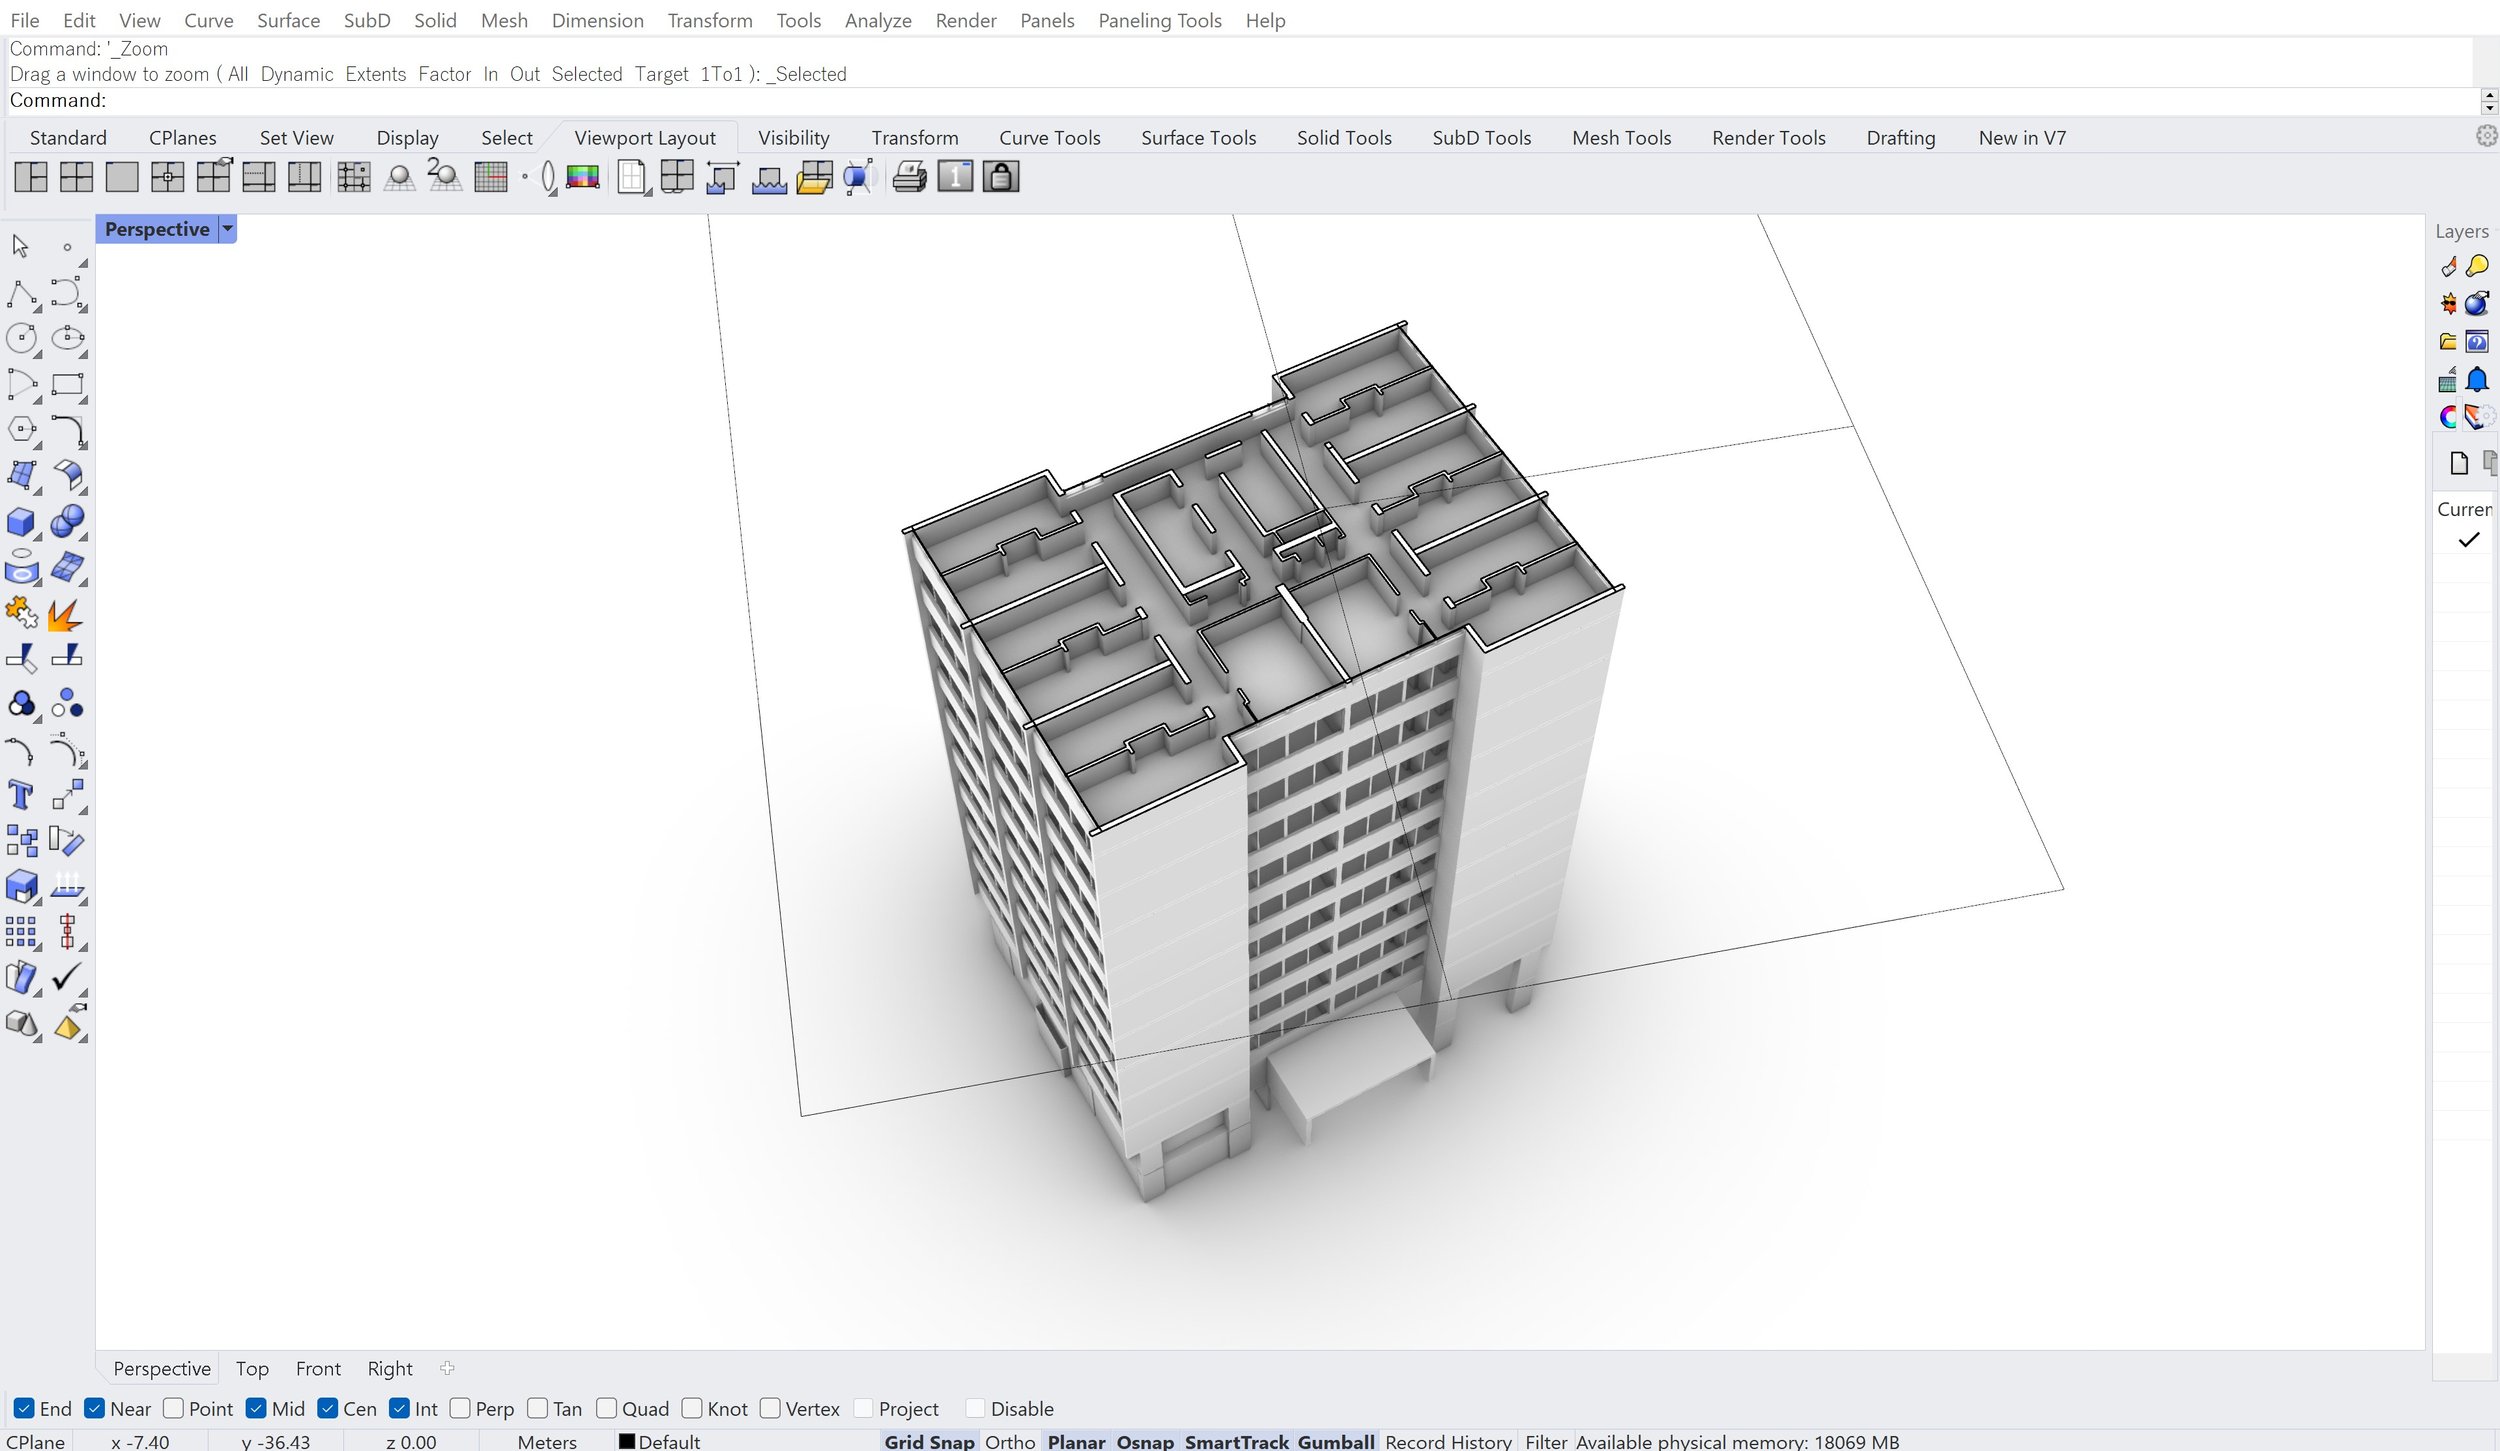
Draw the clipping plane according to where you want the cut of your orthographic to be. By default, the clipping plane draws horizontal rectangles which is useful for plans, but you can select the ‘Vertical’ option for section cuts or ‘3-Point’ for other clipping plane orientations.
Alternatively, you can select the clipping plane once you’ve drawn it and use the gumball to rotate it or drag it to where you need to place the cut line.
Sometimes, it helps to draw a single line across where you want to cut your model as a guide to draw your clipping plane.
Retrieving the base drawing
Retrieving the initial base drawing entails positioning the camera view at the correct angle and creating a 2D view of the cut model that covers the extents of your model.
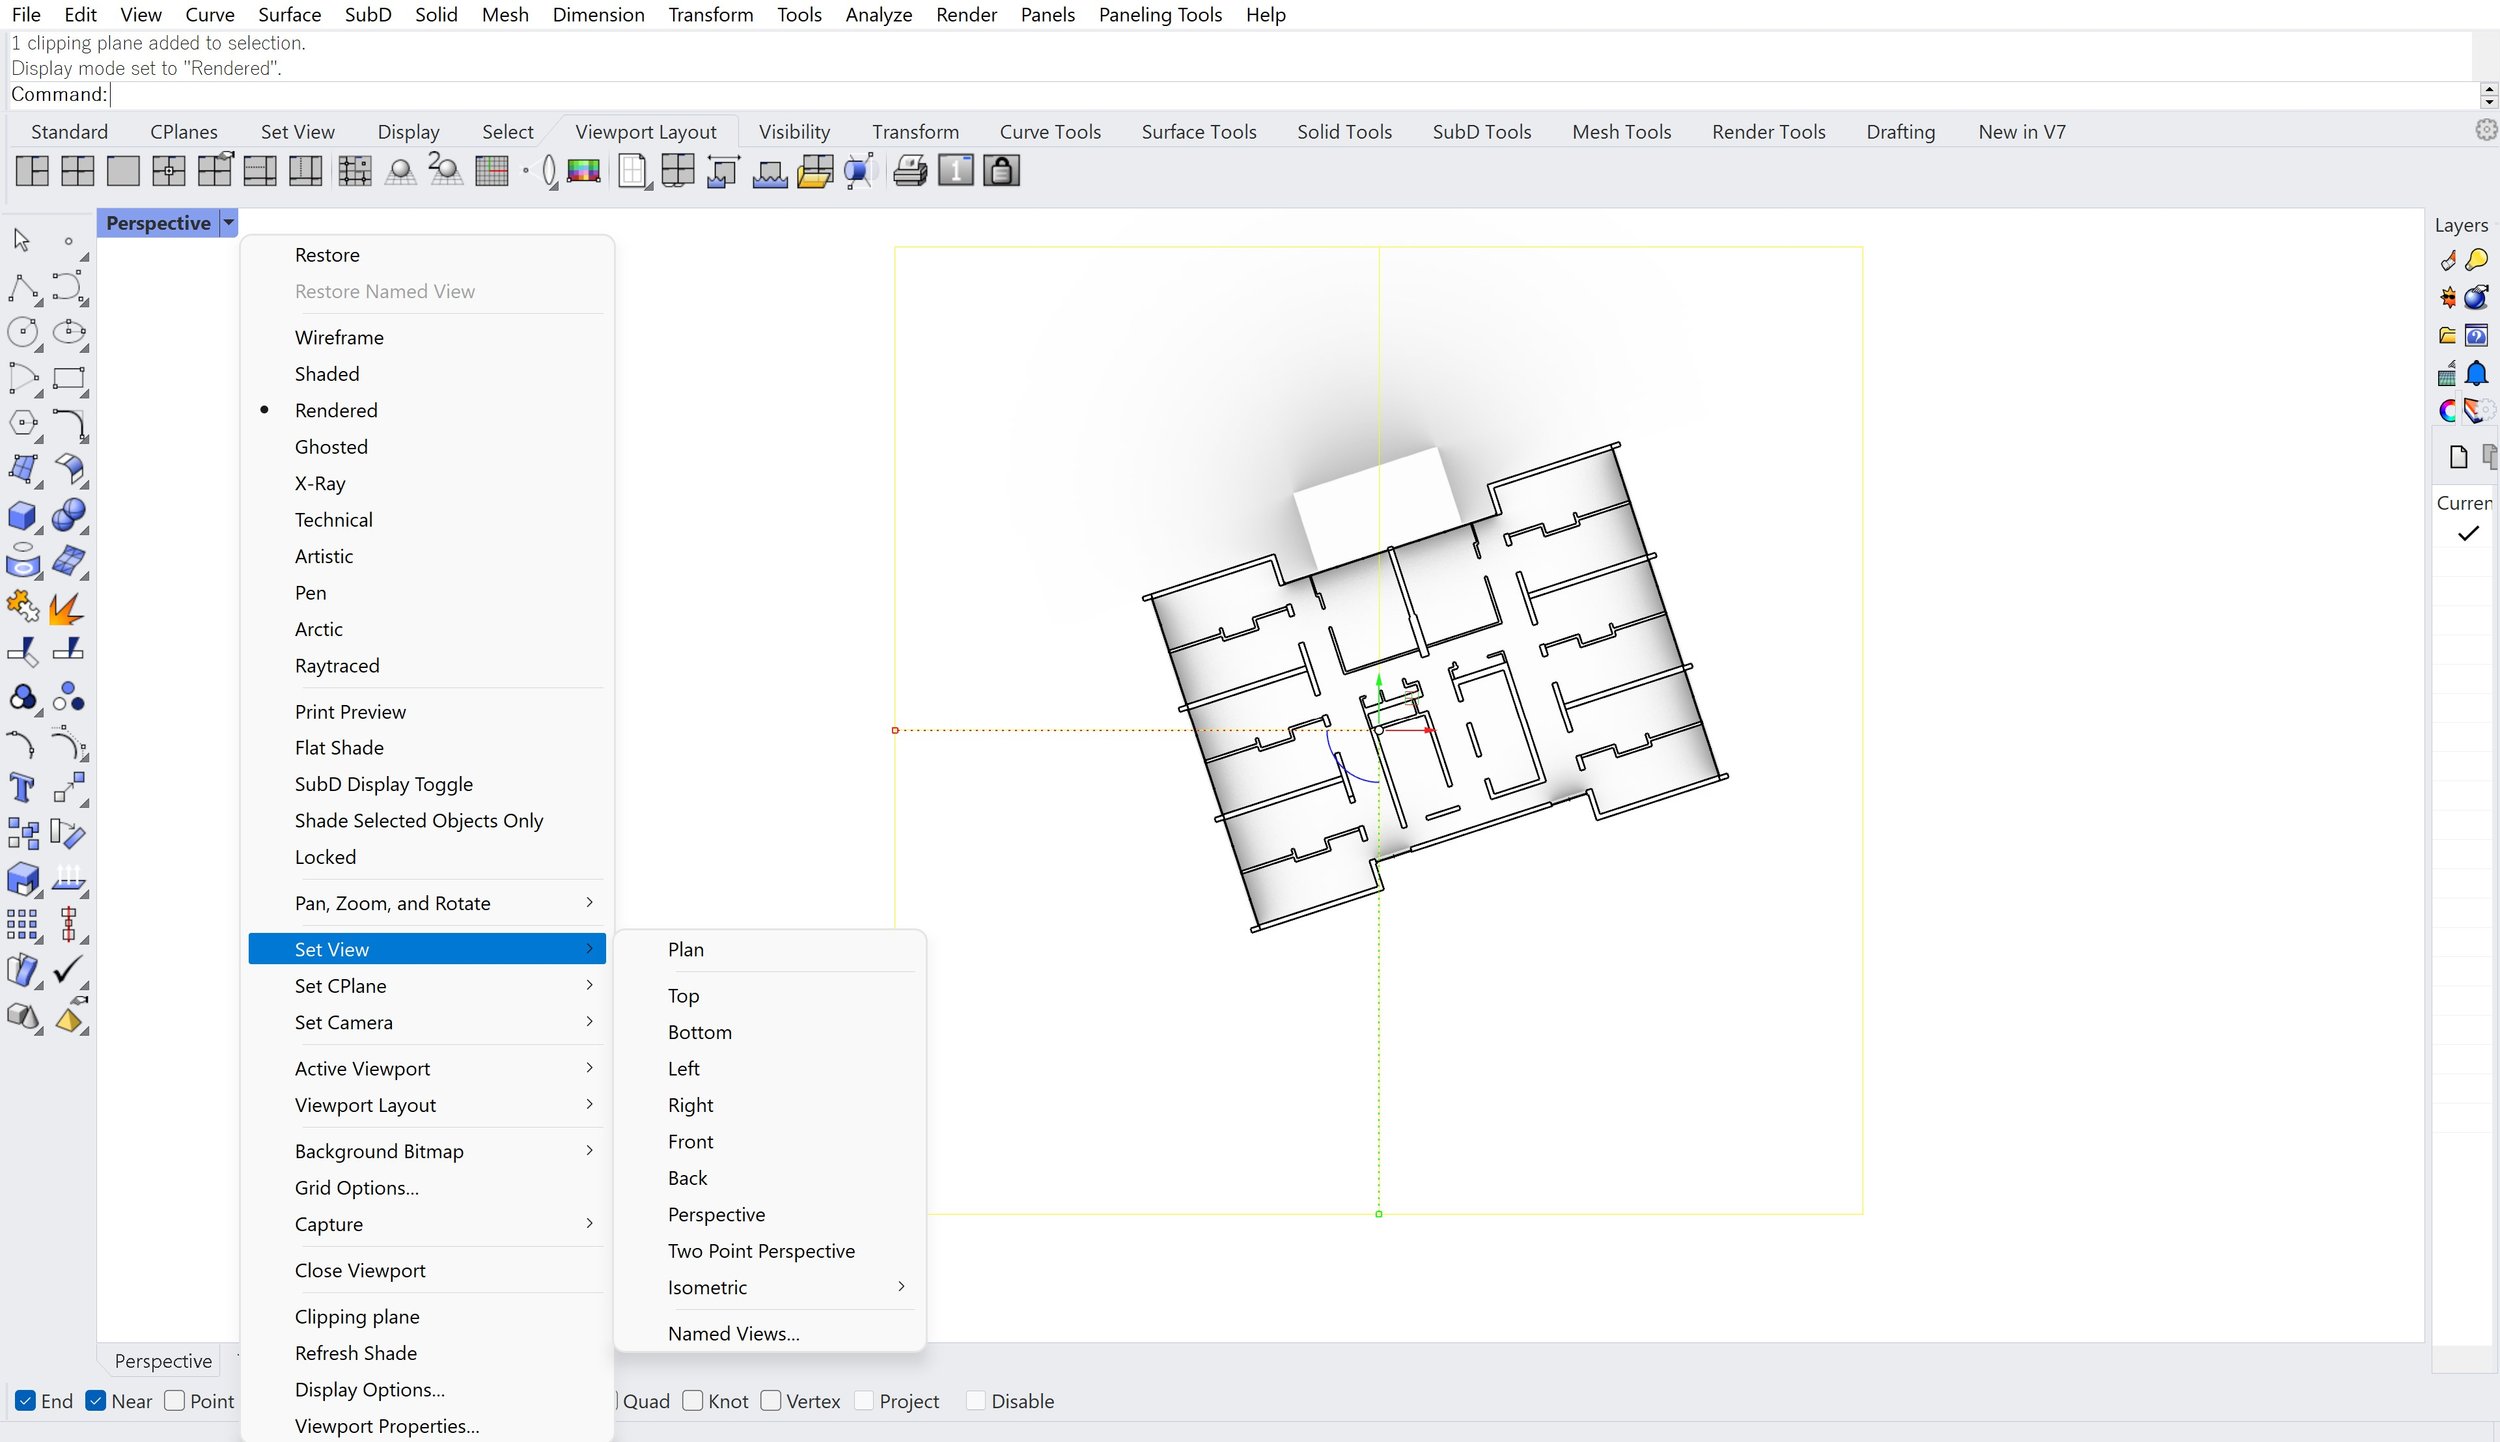

Step 4:
Click on the Viewport tab in the top-left corner of your workspace. Set your view to ‘Plan’ or ‘Top’.
Step 5:
Select everything you want in your drawing except the clipping plane. To deselect it, hold shift and click on the clipping plane border.
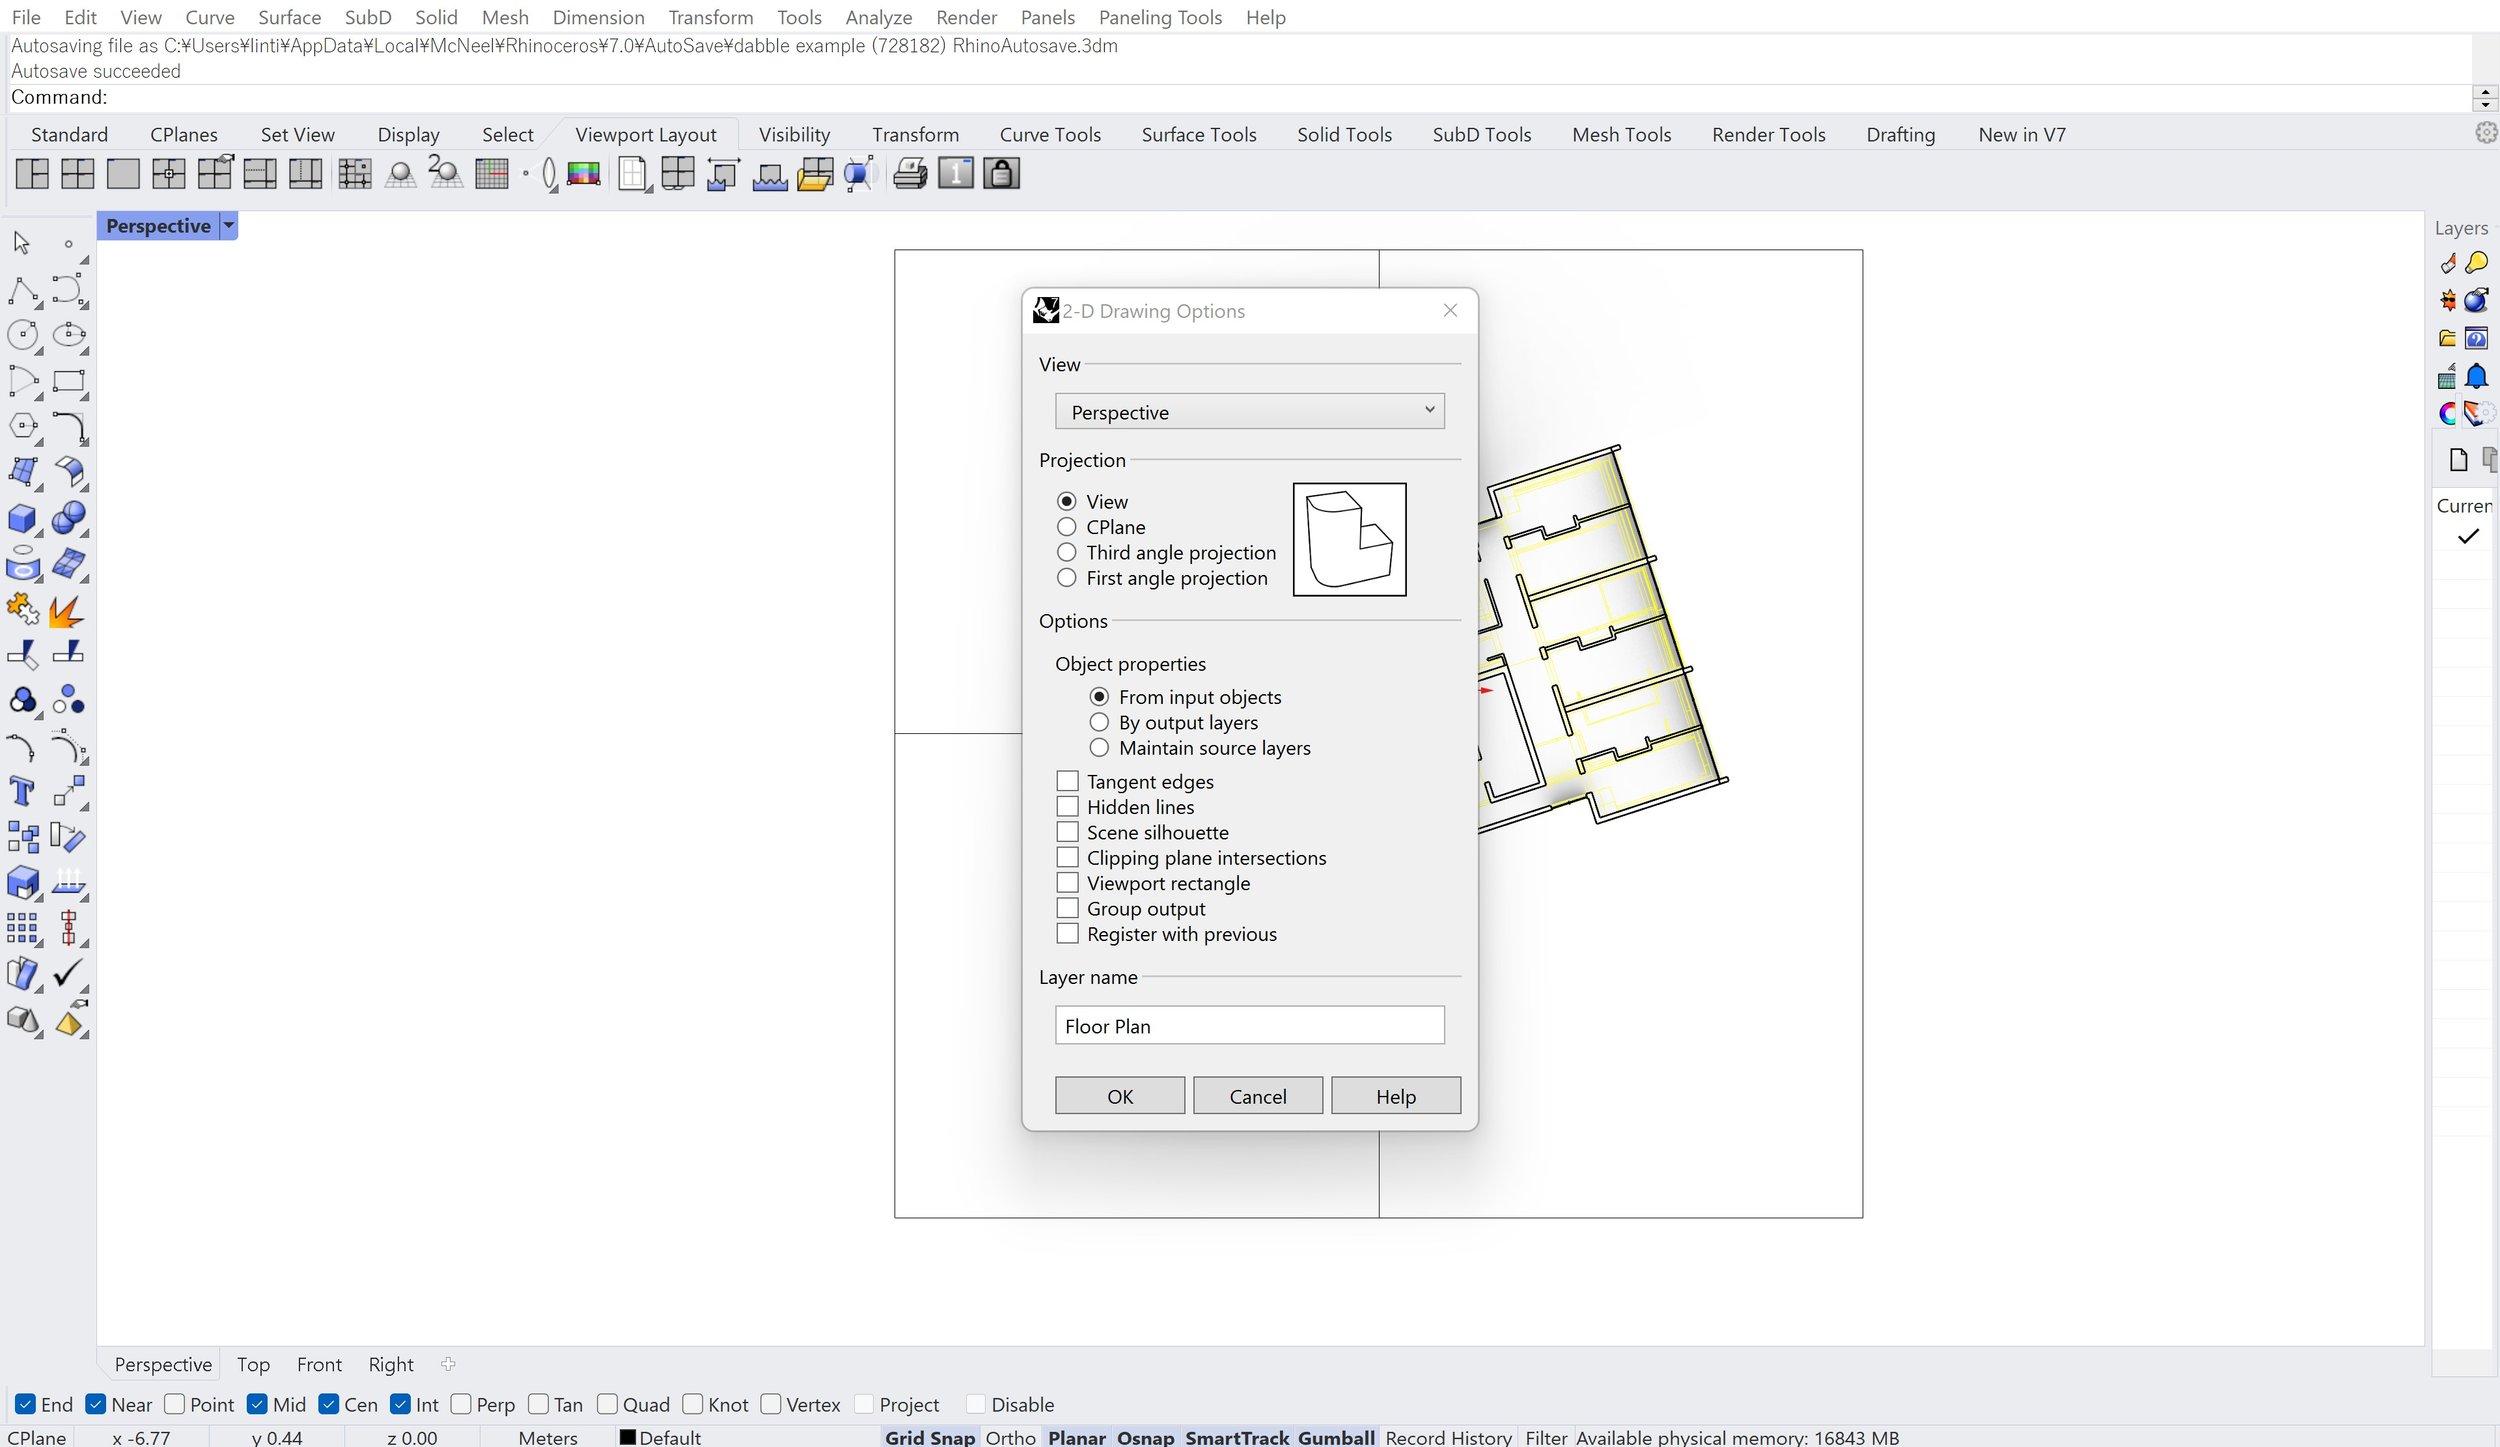
With everything selected, type in ‘Make2D' in the command bar.
Select the options you want and name the layer in which your drawing will be located.
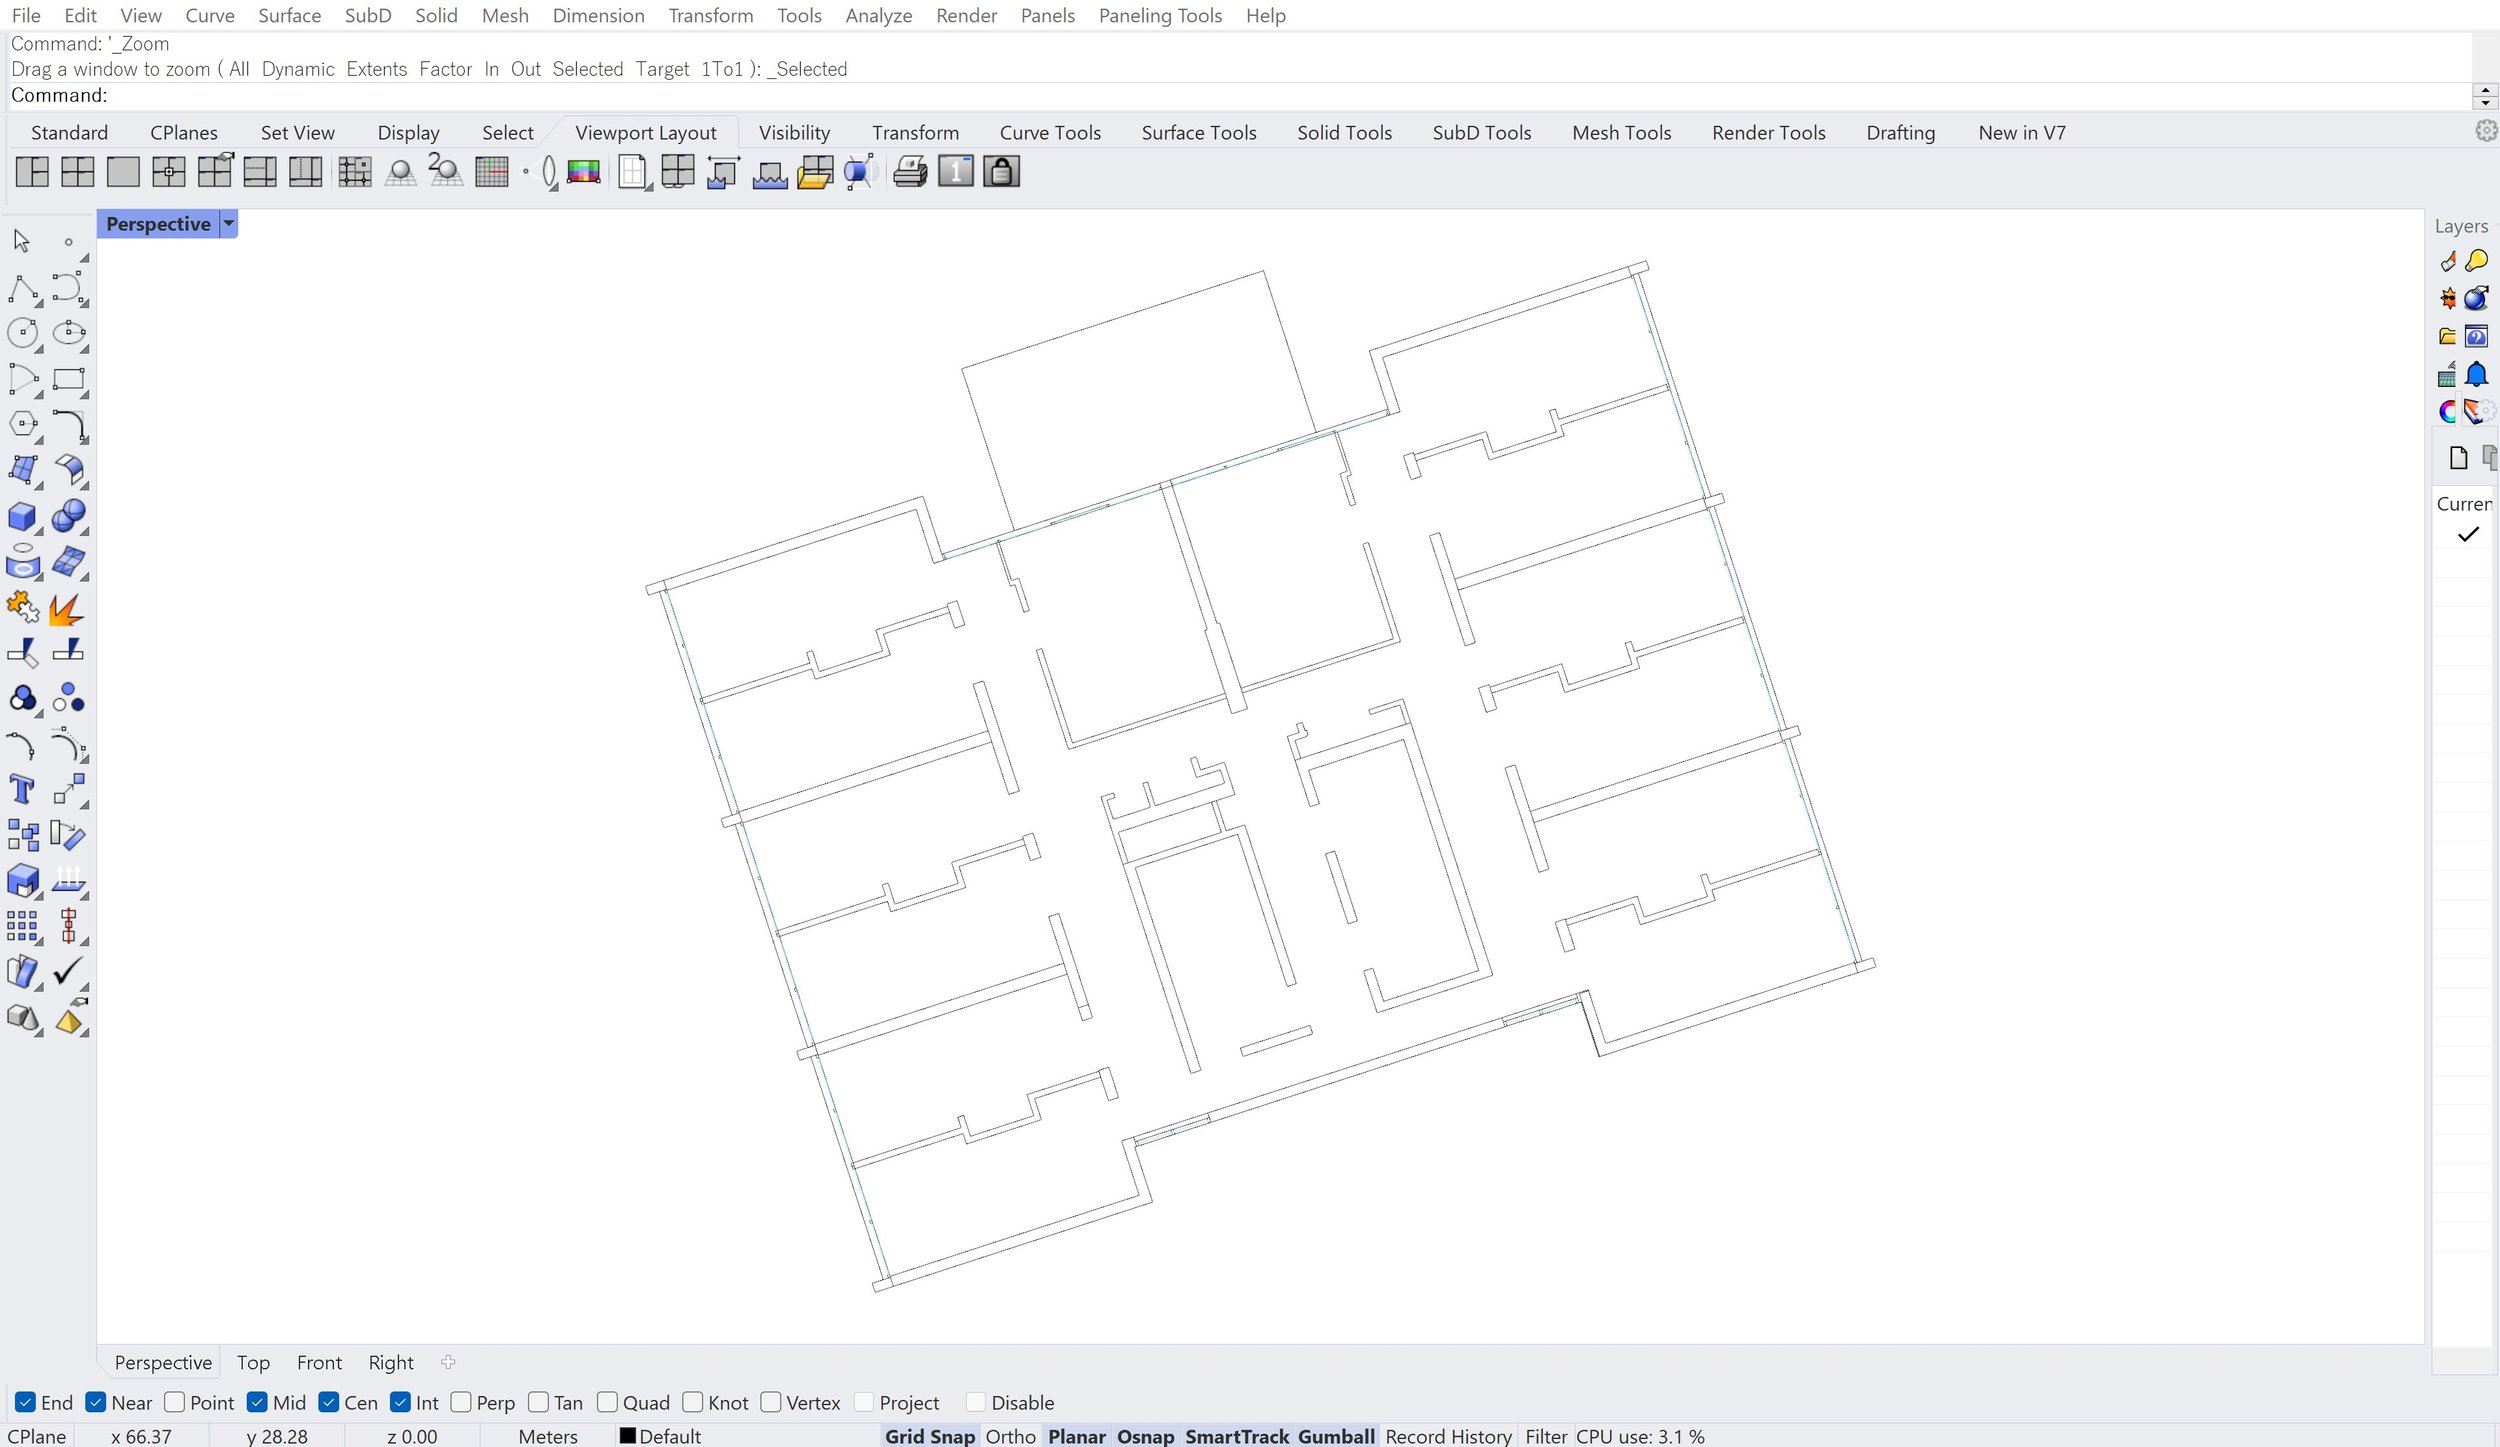
Press ‘OK’. Without clicking anywhere, use the shortcut ‘ZS’ to zoom into the base drawing you created.
Once you have the 2D base drawing on your workspace, make sure that the drawing is clean, lines are joined up where they need to be and there are no extra curves that’ll cause you problems later on in Illustrator. The extent to which you develop your drawing in Rhino is up to you. The main purpose of Adobe Illustrator is to adjust the line-weights of your drawing which you can’t do in Rhino. However, adding hatches, furnishing and populating your drawing can all be done in both Rhino and Illustrator or even Photoshop. The more work you do in Rhino, the quicker your post-production process will be. Personally, I recommend importing any DWG files like CAD people or furniture in Rhino if you’re using existing files. If you want to draw your inhabitation in from scratch, I find that it’s more intuitive to draw in Illustrator, as you’d either be constructing geometries in Rhino or modelling them in a lot of detail that might 1) be obscured after the Make2D process and 2) be too time-consuming for the worth of the output (it might be smarter to import existing furniture models than spend time modelling something that isn’t a huge priority in your proposal).
Exporting
The good thing about exporting from Rhino is that you can do so in scale straight away, then import it directly into Illustrator to fix your line-weights without having to resize the drawing.
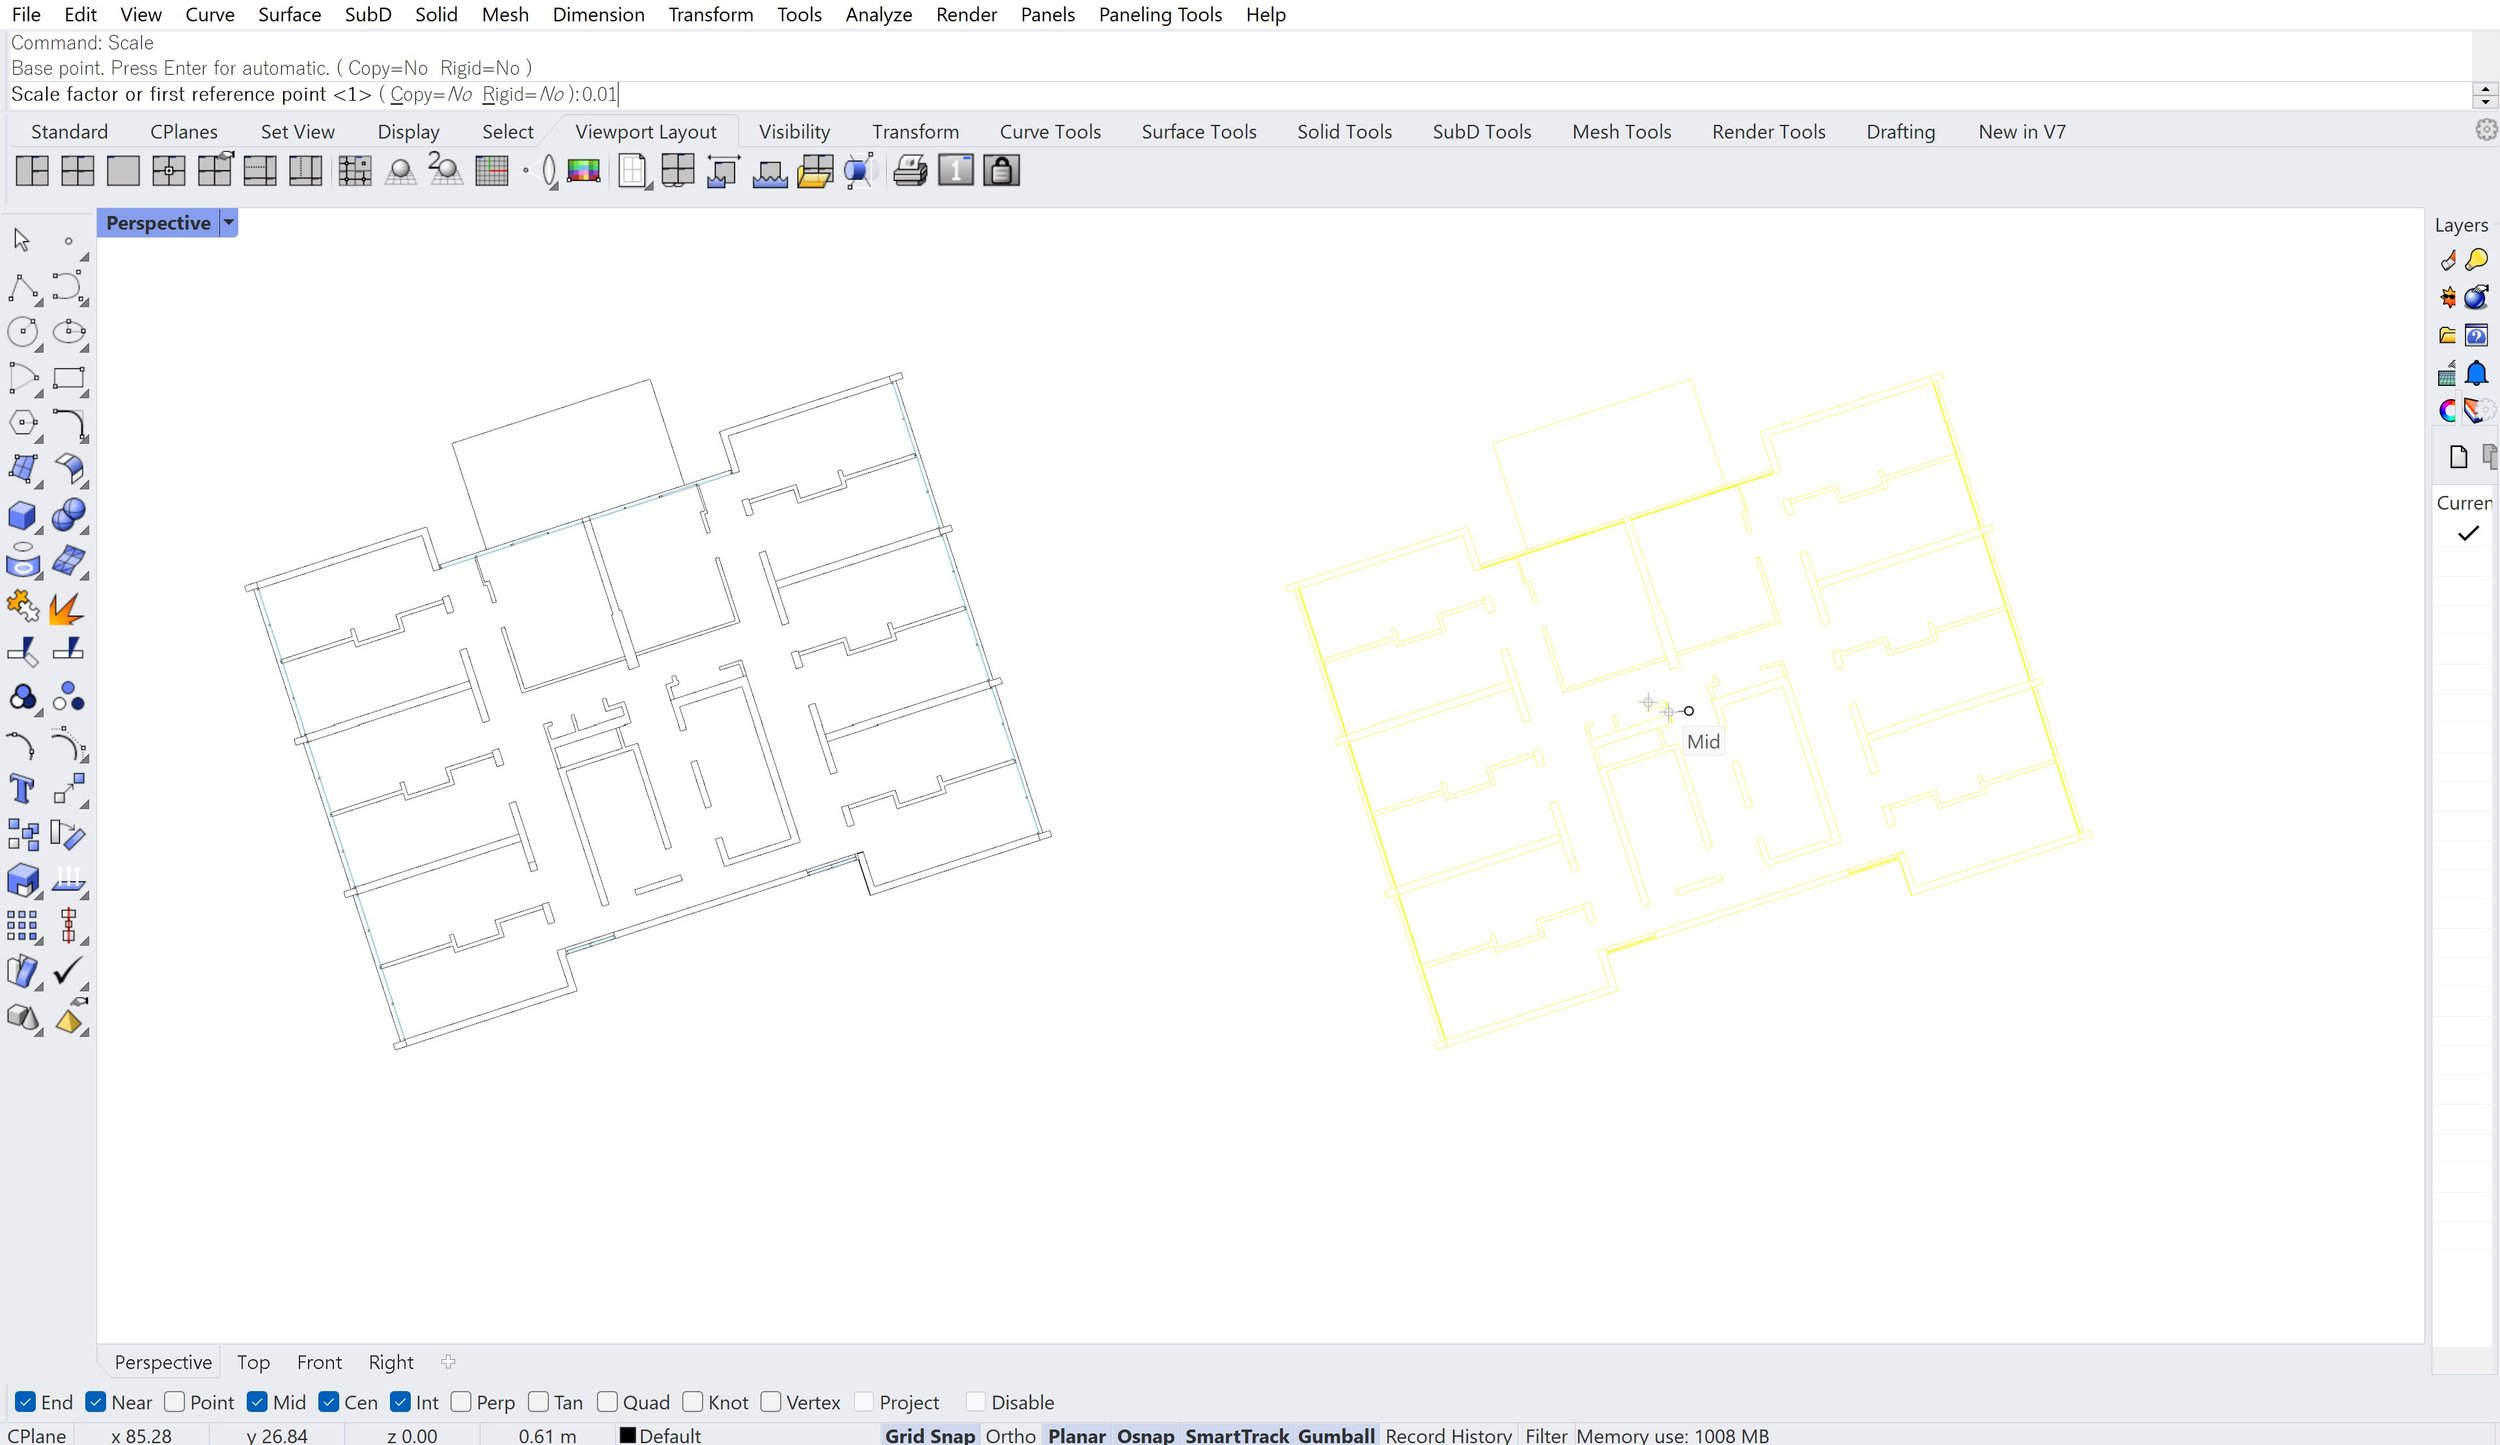
Step 6:
Make a copy of your drawing by selecting the whole thing, and holding alt whilst clicking and dragging the drawing to one side.
Type in ‘Scale’ in the command bar, set the base point and multiply by the number needed to scale your drawing down to your chosen paper size. For example, if you want 1:100 at A2, you’d set the scale factor as 0.01. Hit ‘enter’ and press ‘ZS’ to zoom into your scaled drawing.
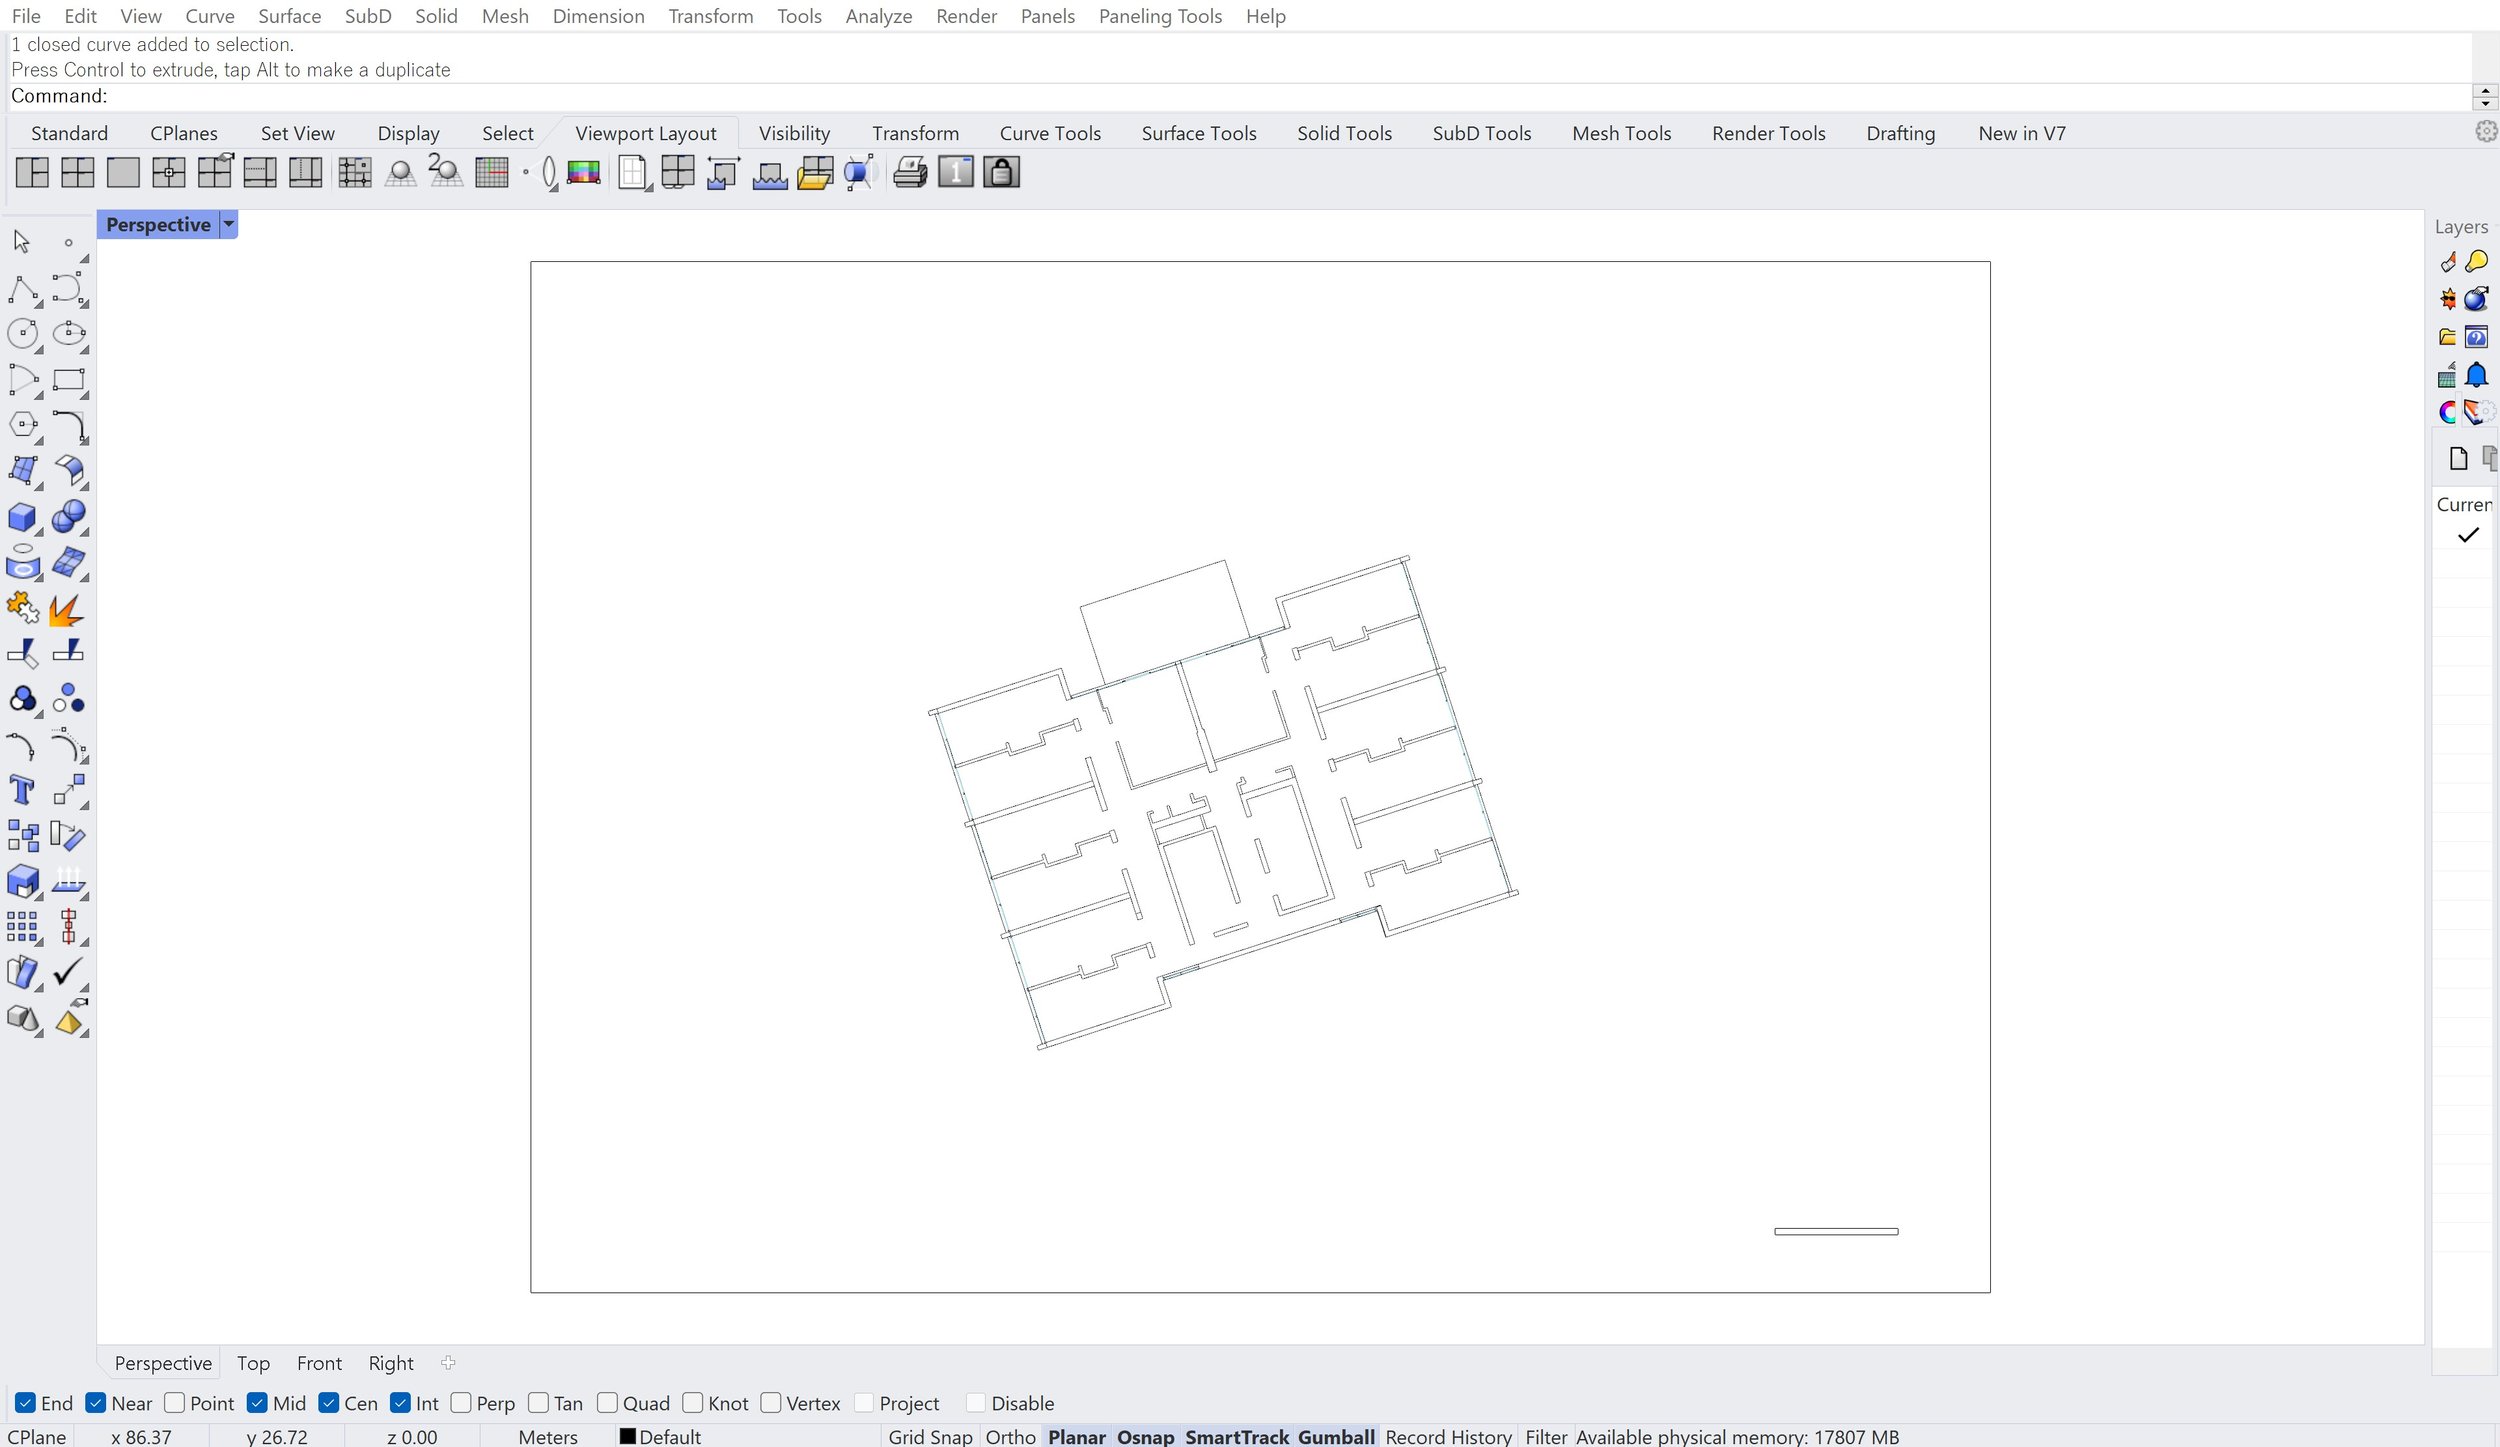
Step 7:
Modelling in 1:1 means that you can draw your paper size and see exactly how your scaled drawing will fit onto your page. Draw a rectangle the size of your page. I’ve typed in 0.594 and 0.42 for the dimensions of my page to set it to A2. Place the drawing in the rectangle to position it where you’d want it on your A2 portfolio page. Or, you could simply place the rectangle over the drawing to include the parts you want if your drawing is bigger than the page, or if it has lots of context. Ideally, you want the main proposal centred on the page.
You can also add a scale bar for reference for when you export into illustrator (this can be stylised at any point after you draw it, it doesn’t have to be your final scale bar).
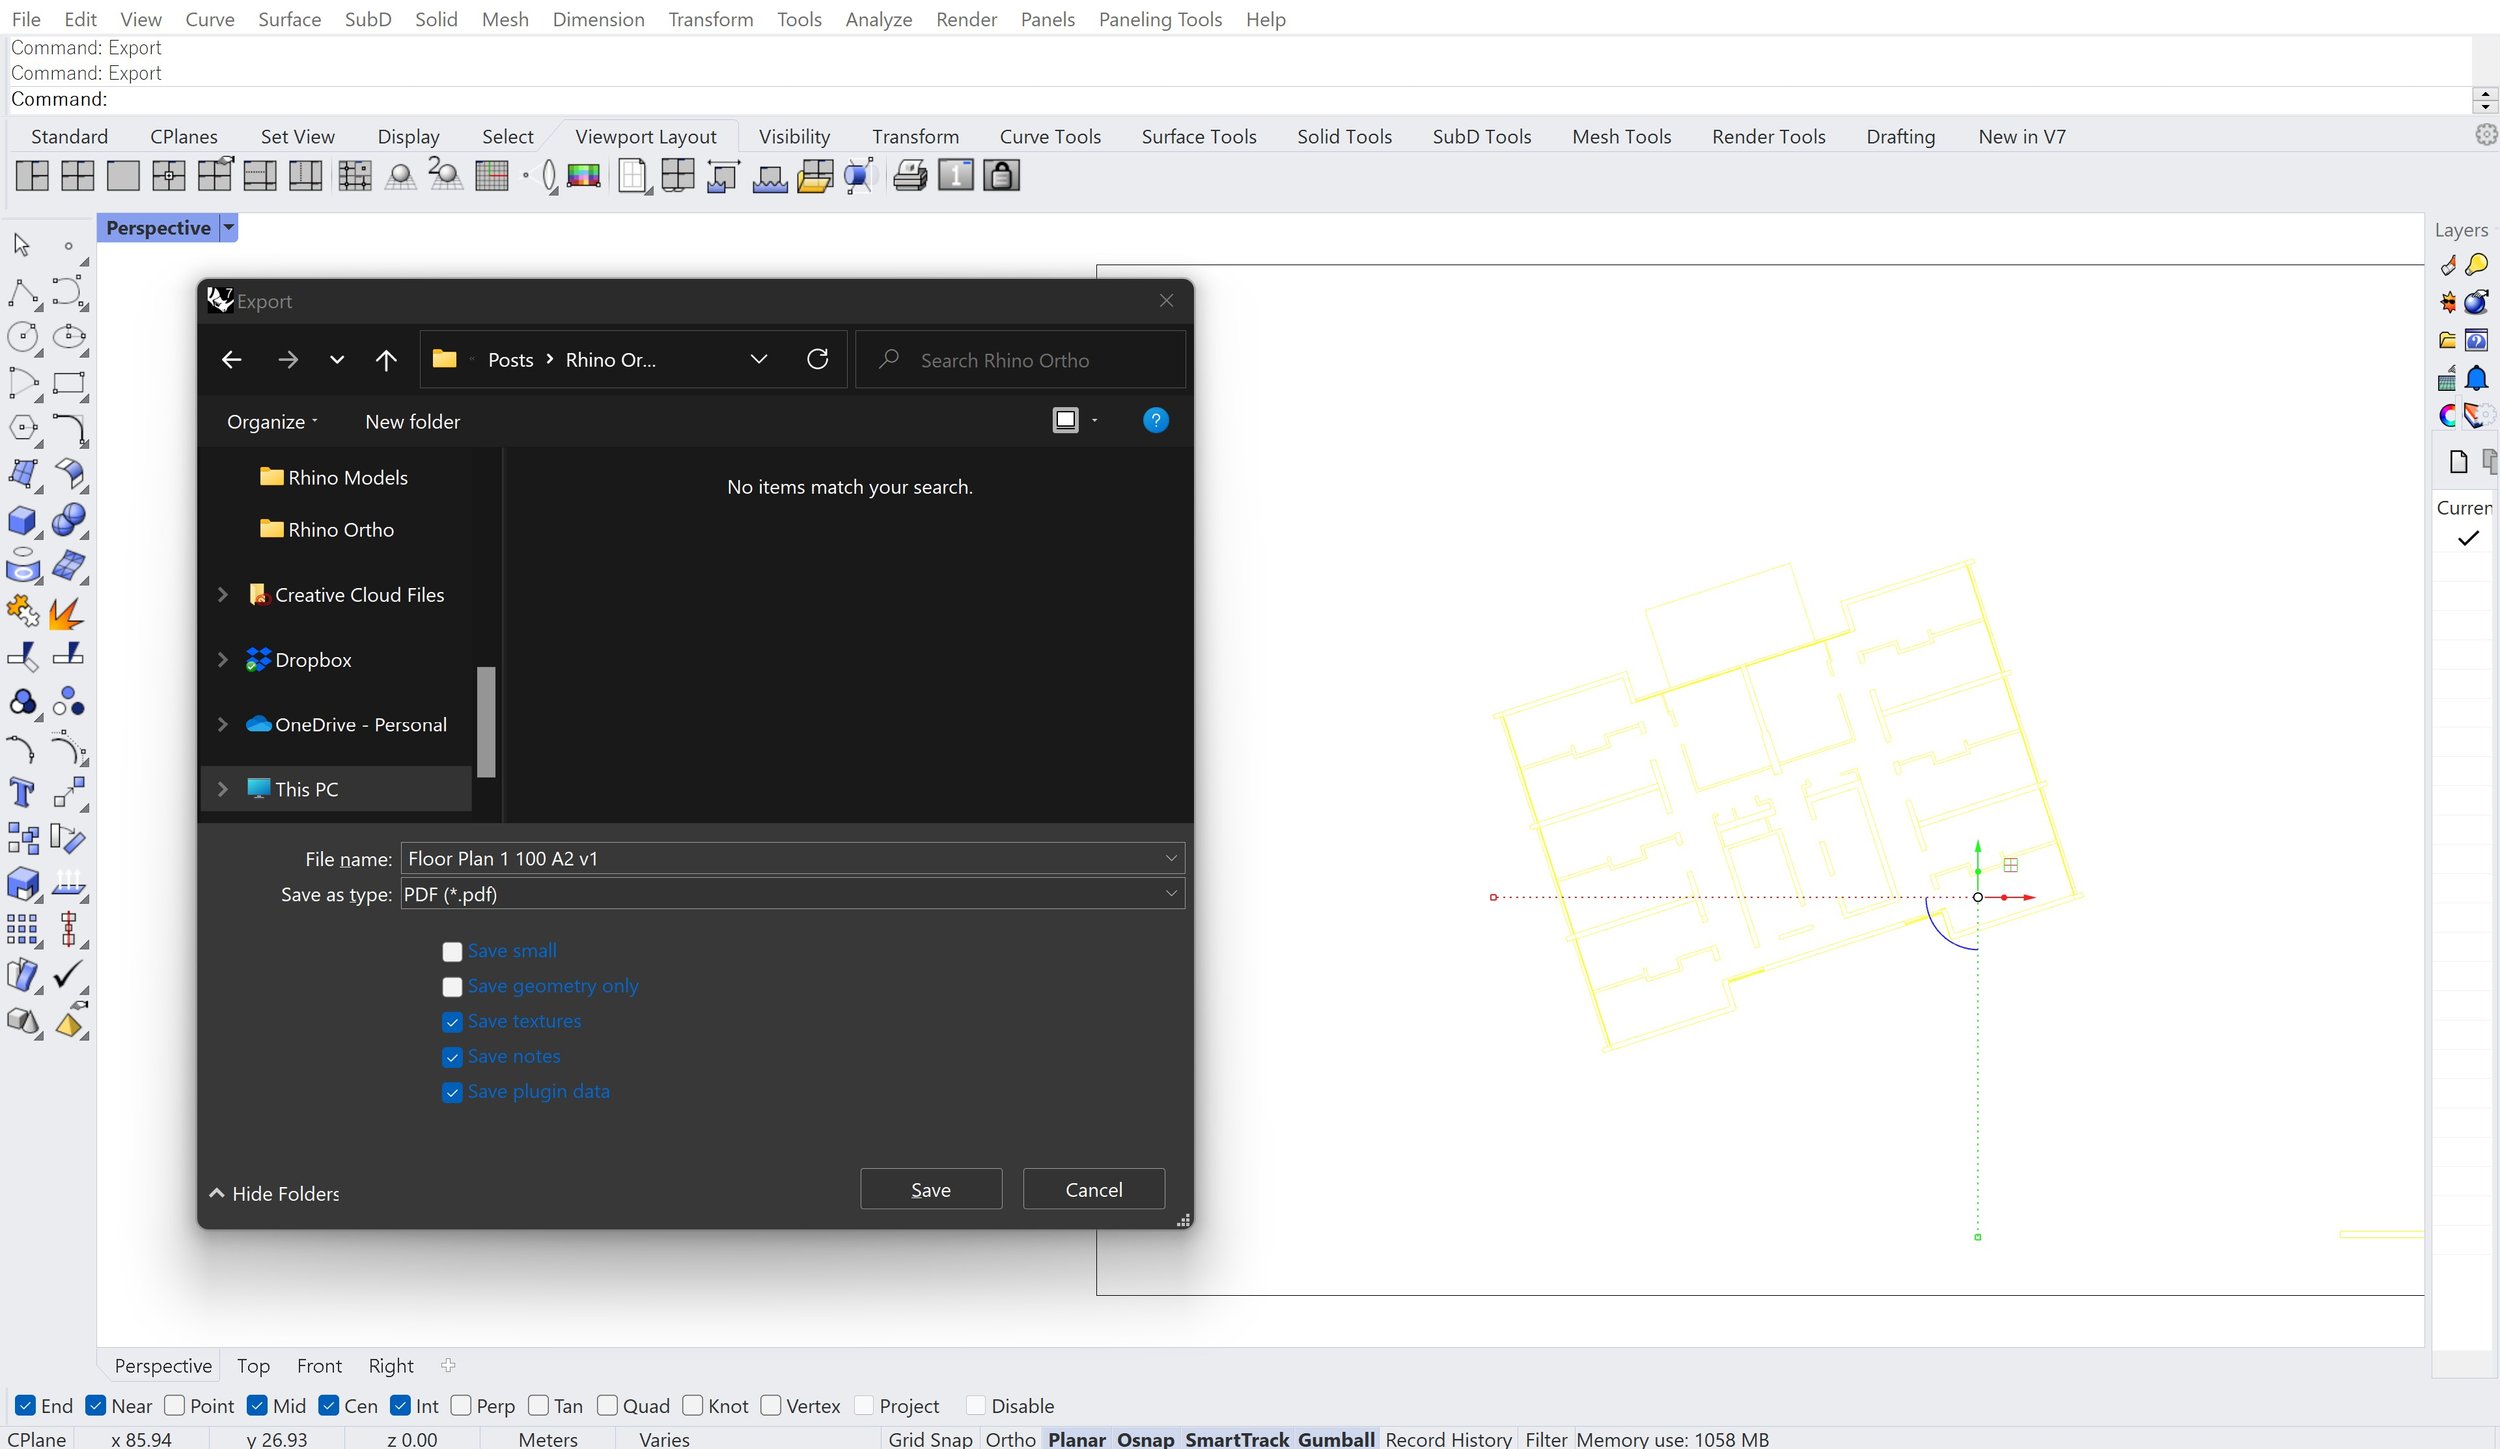
Step 8:
Select the contents of the drawing, but not the rectangle. Type in ‘Export’ in the command bar.
Choose a file location, file name and save your file as a PDF.
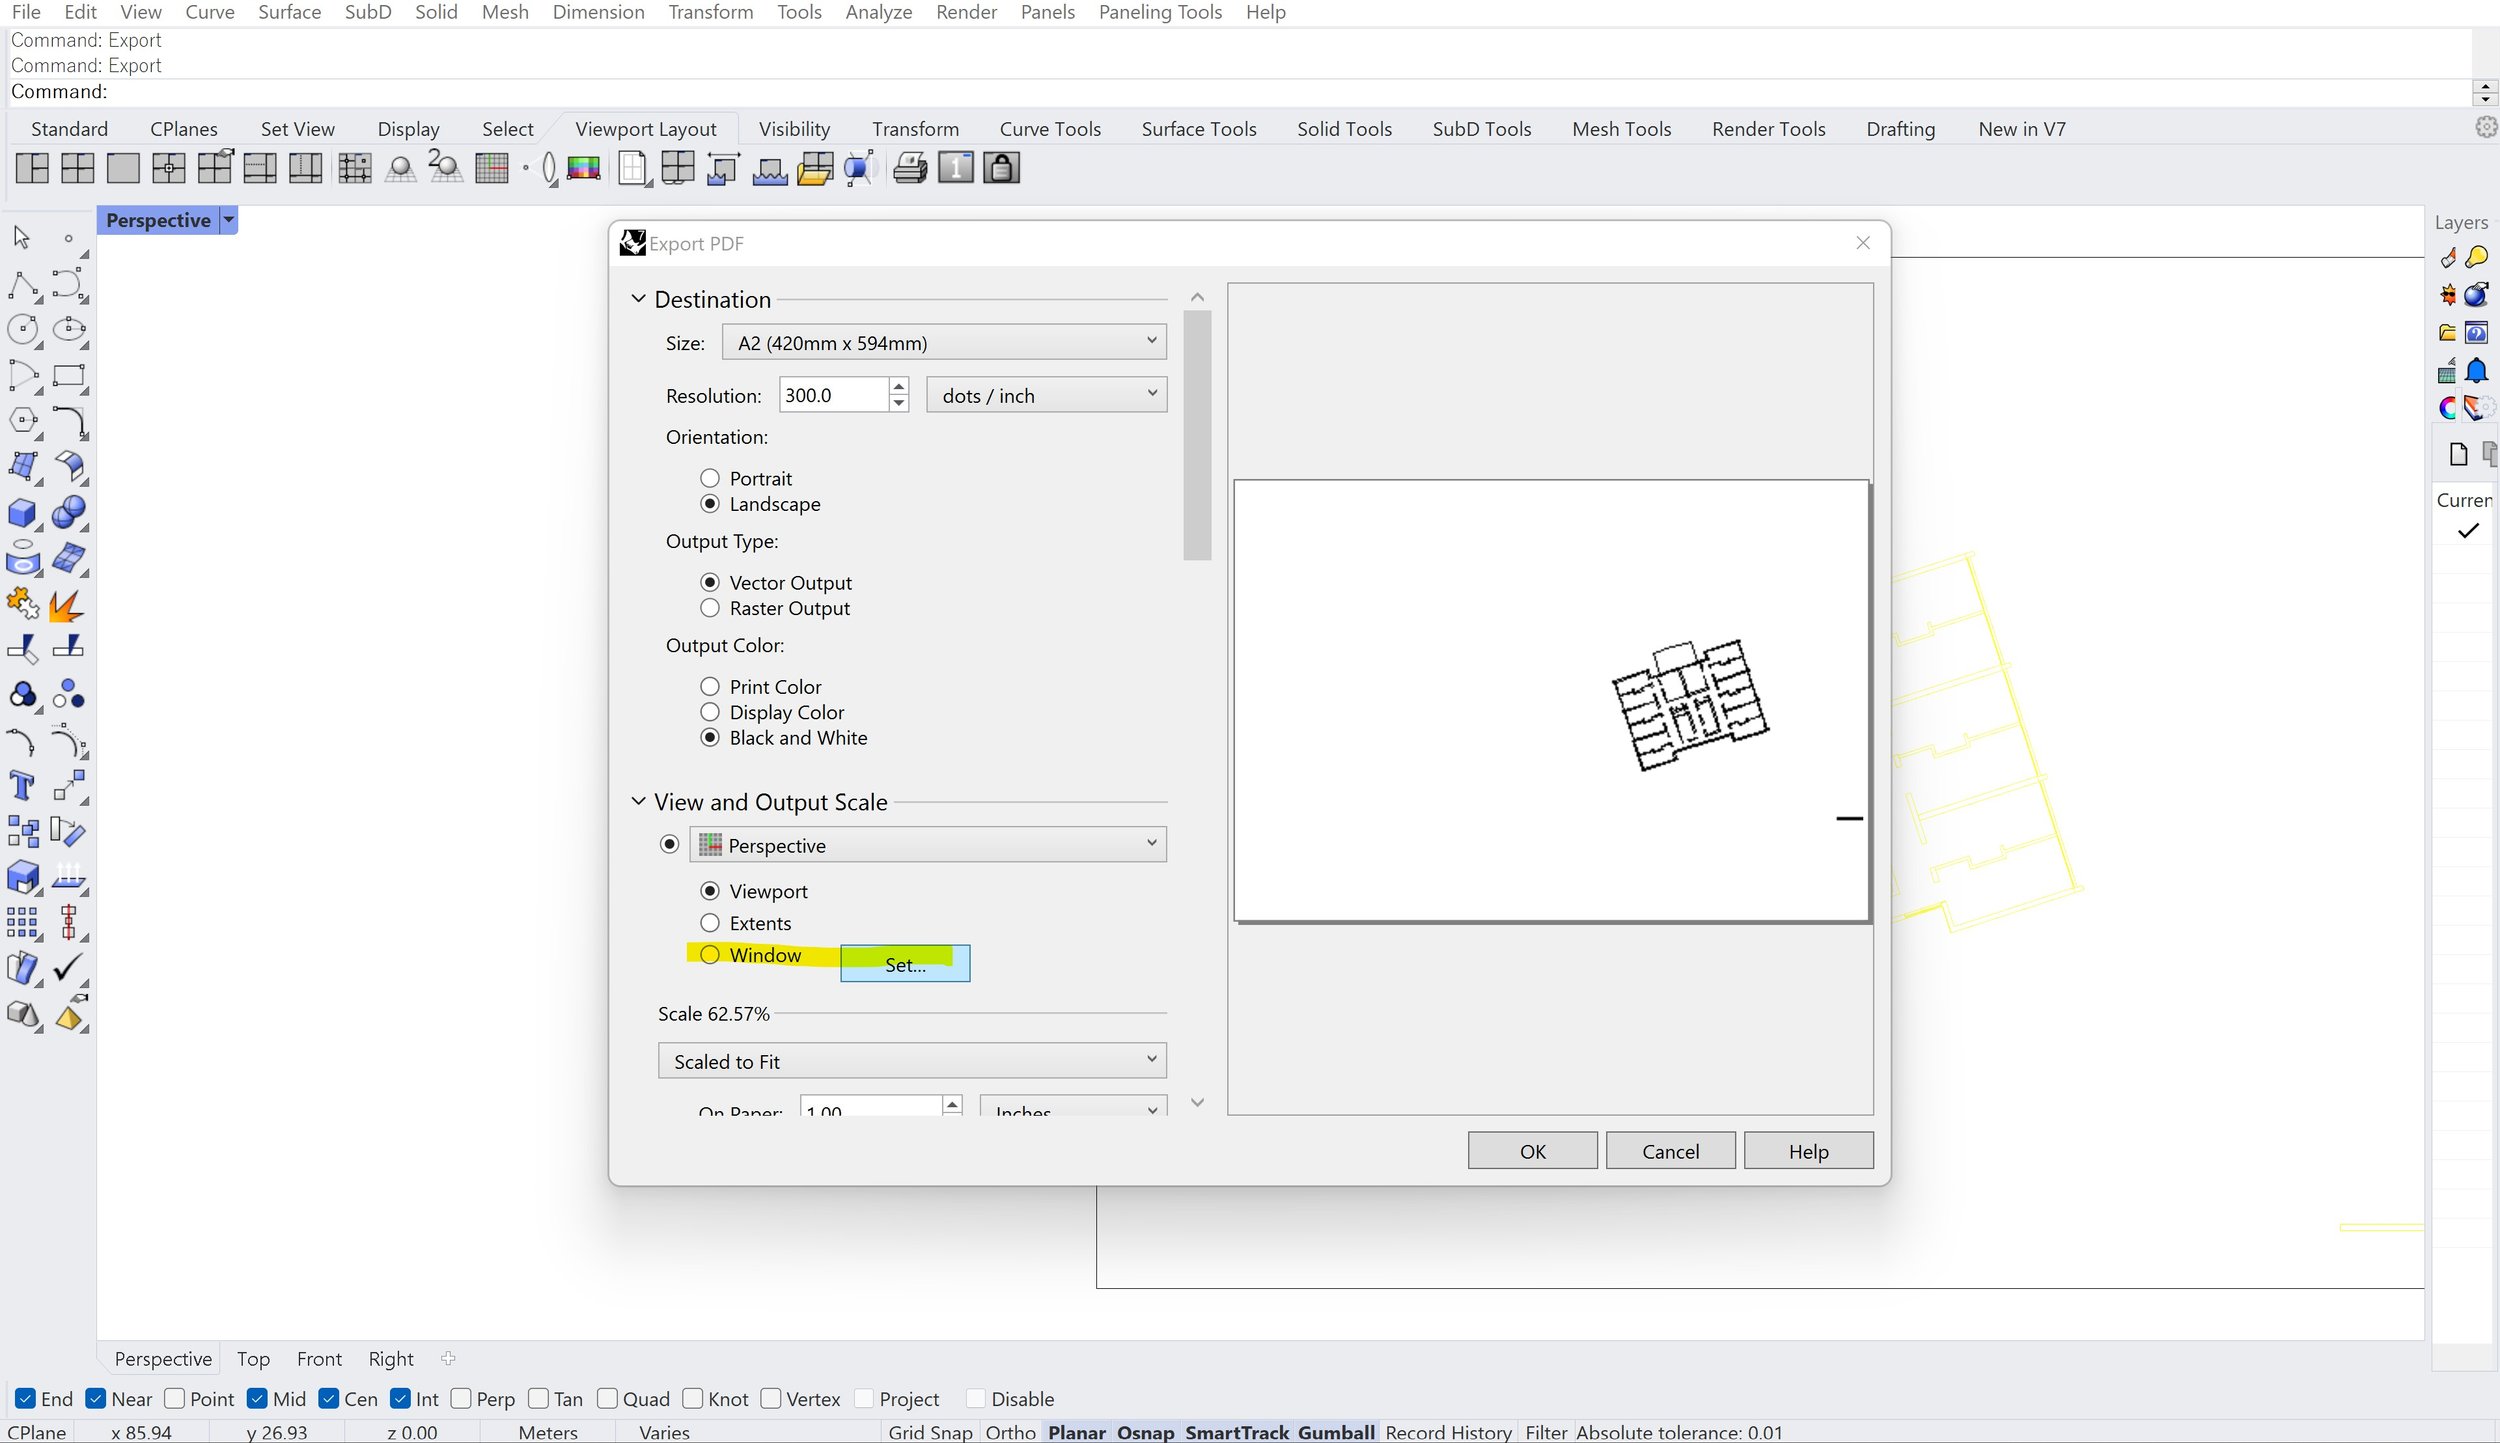
Set the settings at the correct paper size, orientation etc. and make sure you select vector output.
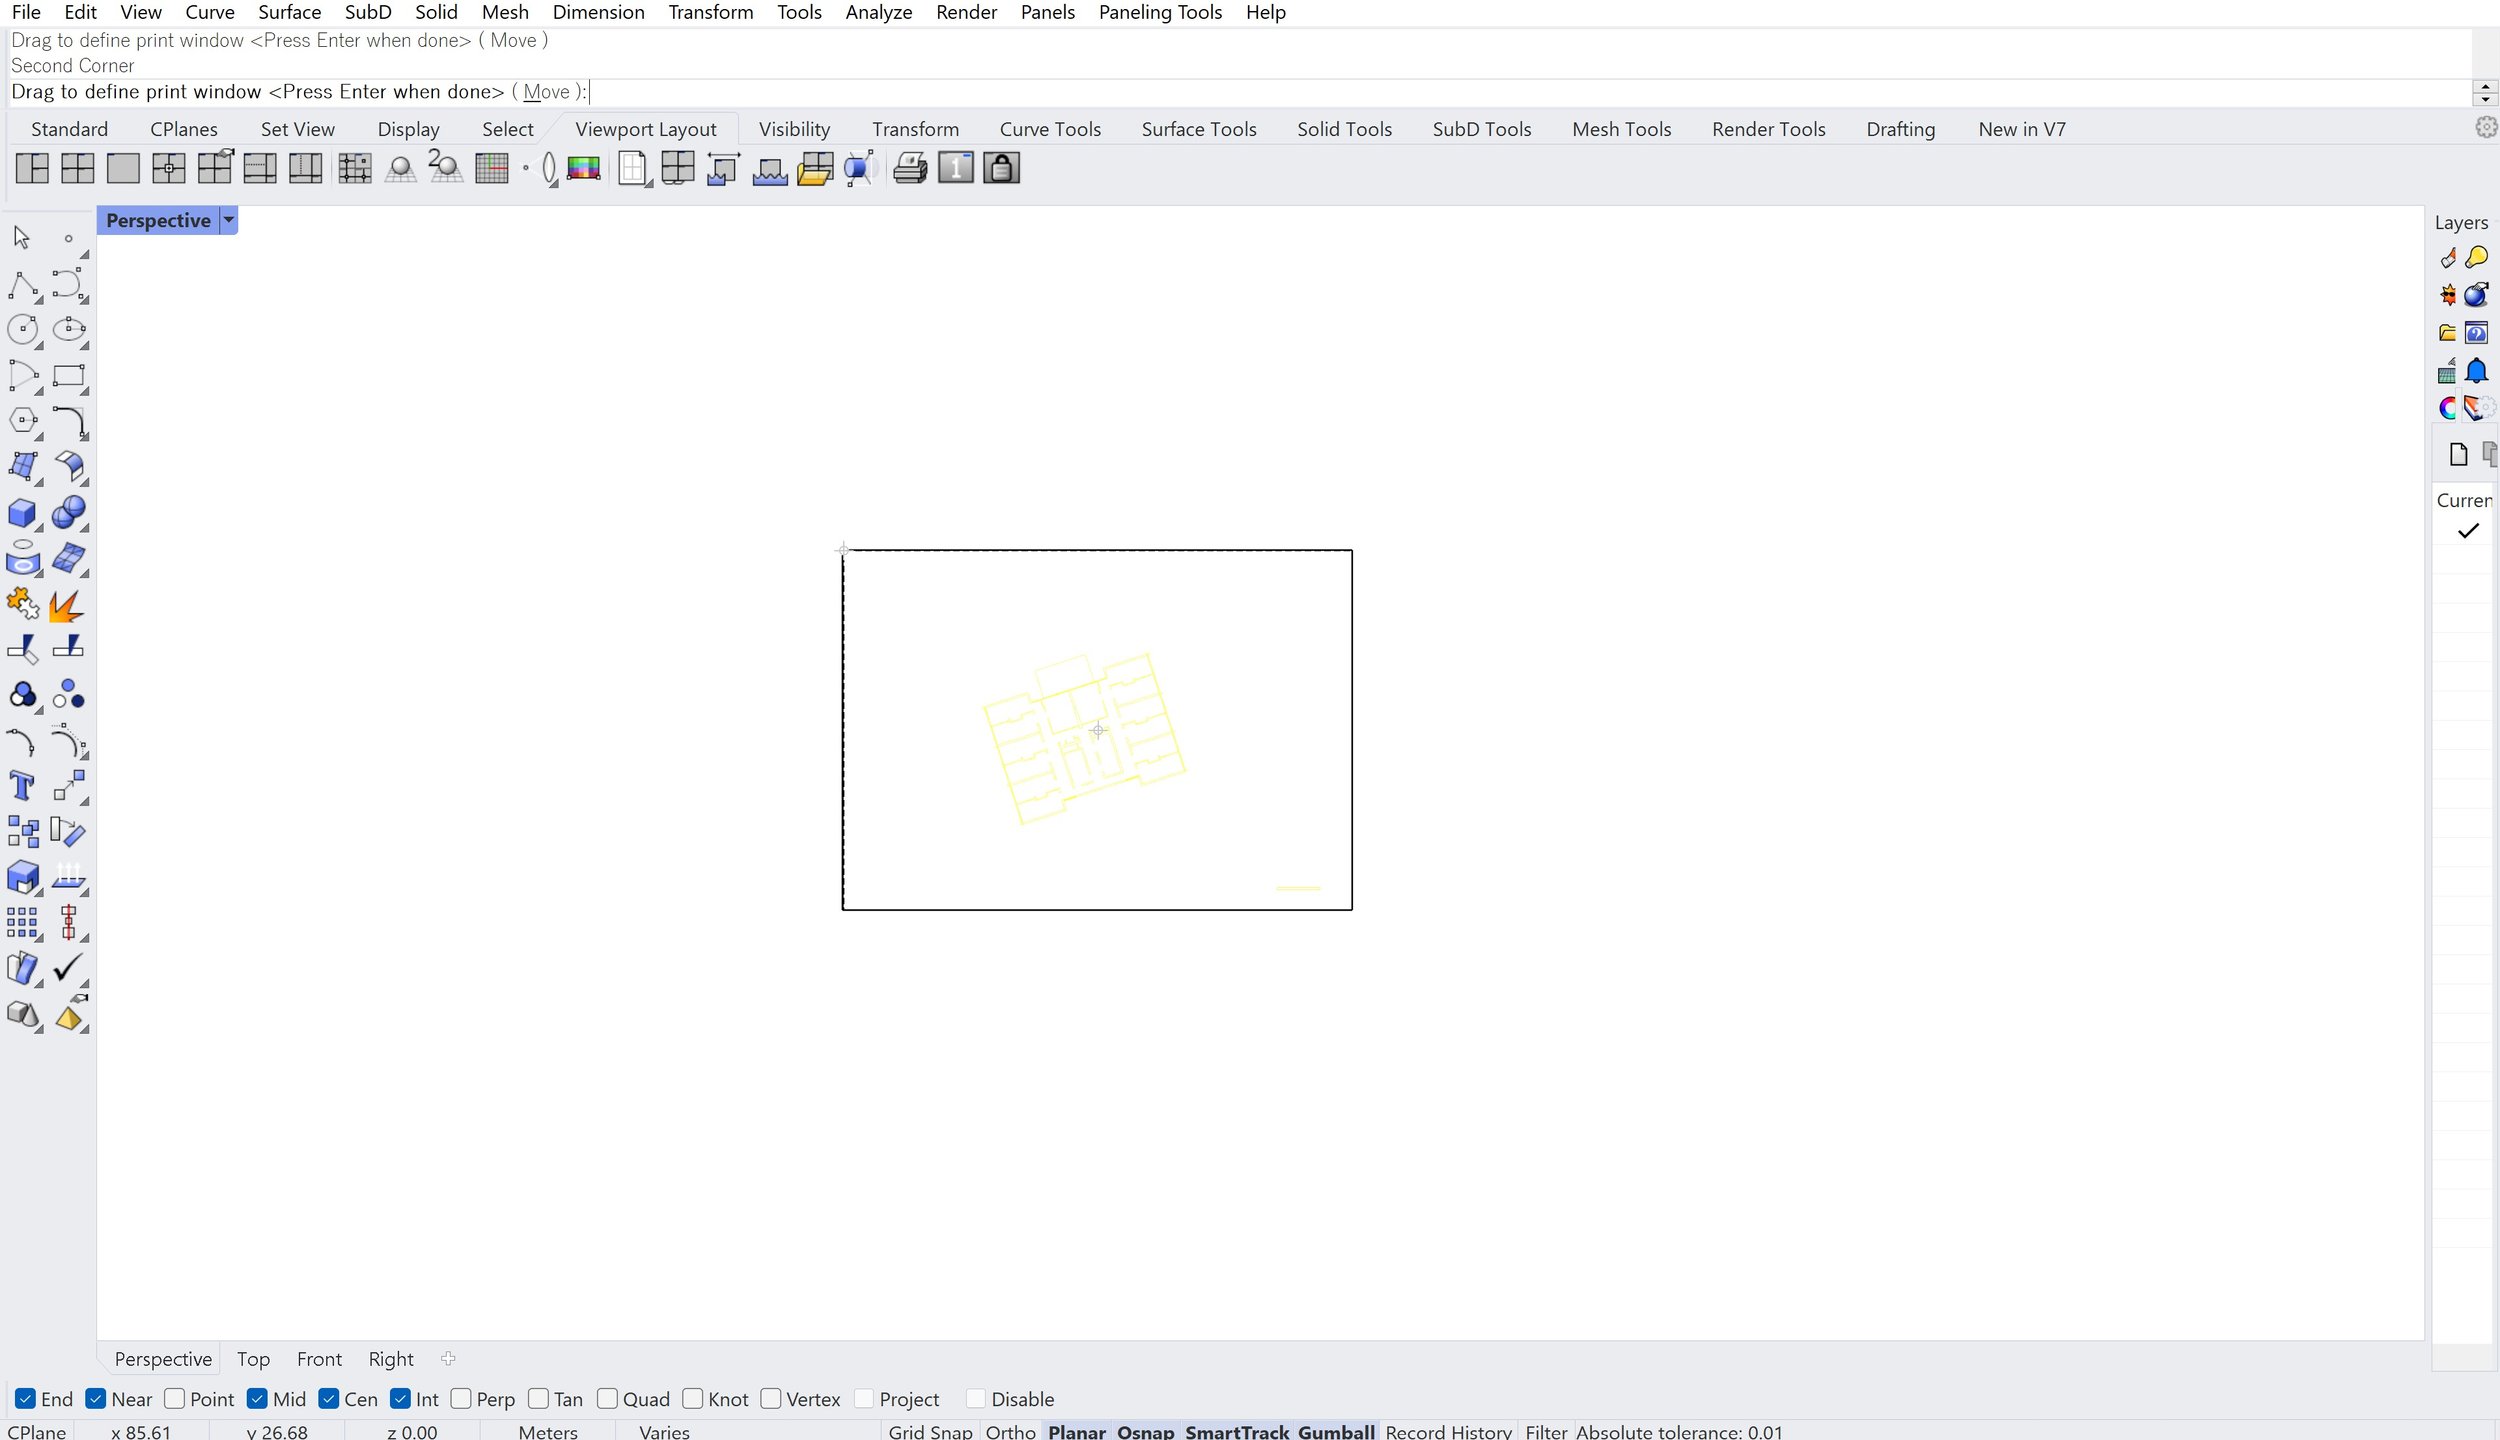
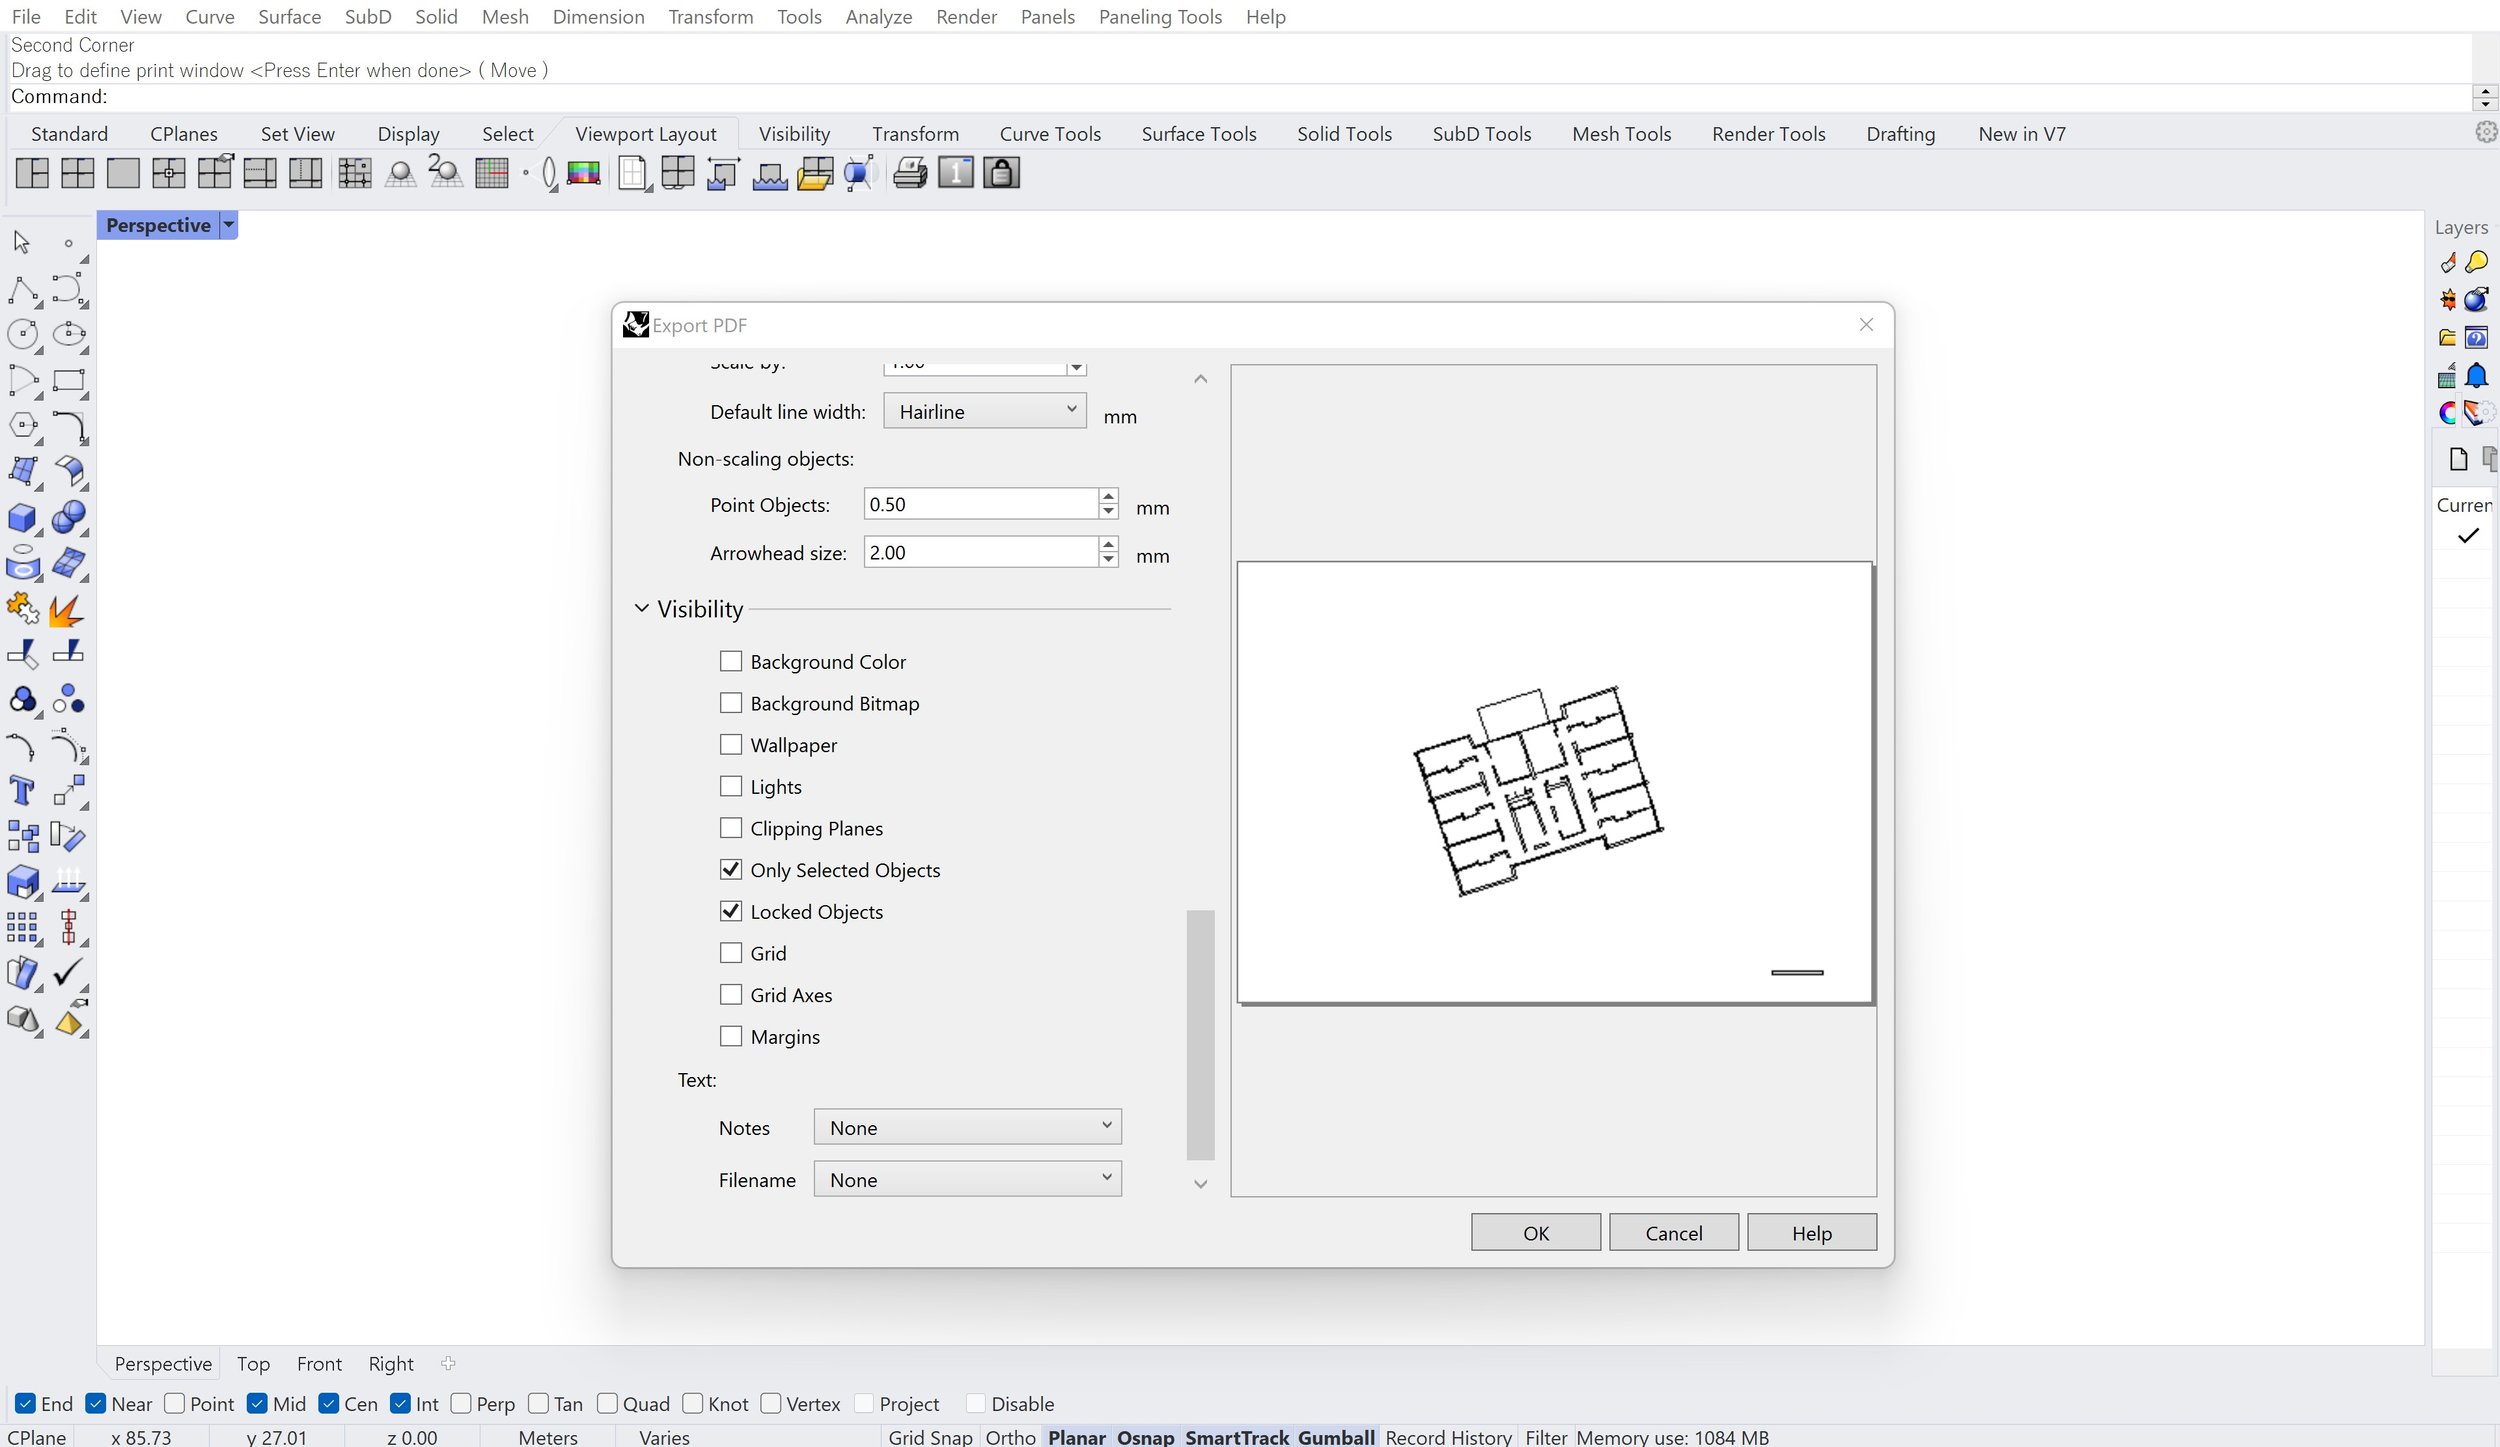
Select ‘Window’ in ‘View and Output Scale’ and click ‘Set’. Draw the window overthe rectangle you drew, and make sure nothing unwanted is ticked in the visibility panel like clipping planes or objects you haven’t selected. Click OK.
Pro-Tip: A smart way to use this workflow is to work with and export different layers of the drawing according to line weight. For example, having your cut lines as one layer, doors and window details separate, and furnishings/people on another layer. This allows you to change the line weights of the whole layer in one go rather than individual elements of your model. However, it requires you to be organised with your modelling process so it might take some time if you’re still developing your digital modelling skills in Rhino. Once you become comfortable with this workflow, you’ll understand how to construct your drawing more efficiently and find quicker ways of developing your 2D representations in Rhino and minimise the extra work in Illustrator.
Post-Production in Illustrator
Illustrator works with vectors, so it is a good next step for the post-production of your orthographics when working with a base drawing produced in Rhino. Whilst most people primarily use Photoshop for post-production, there are a lot of features that are available in both Photoshop and Illustrator which means you don’t have to change software multiple times when working on your drawing.
Line Weights:
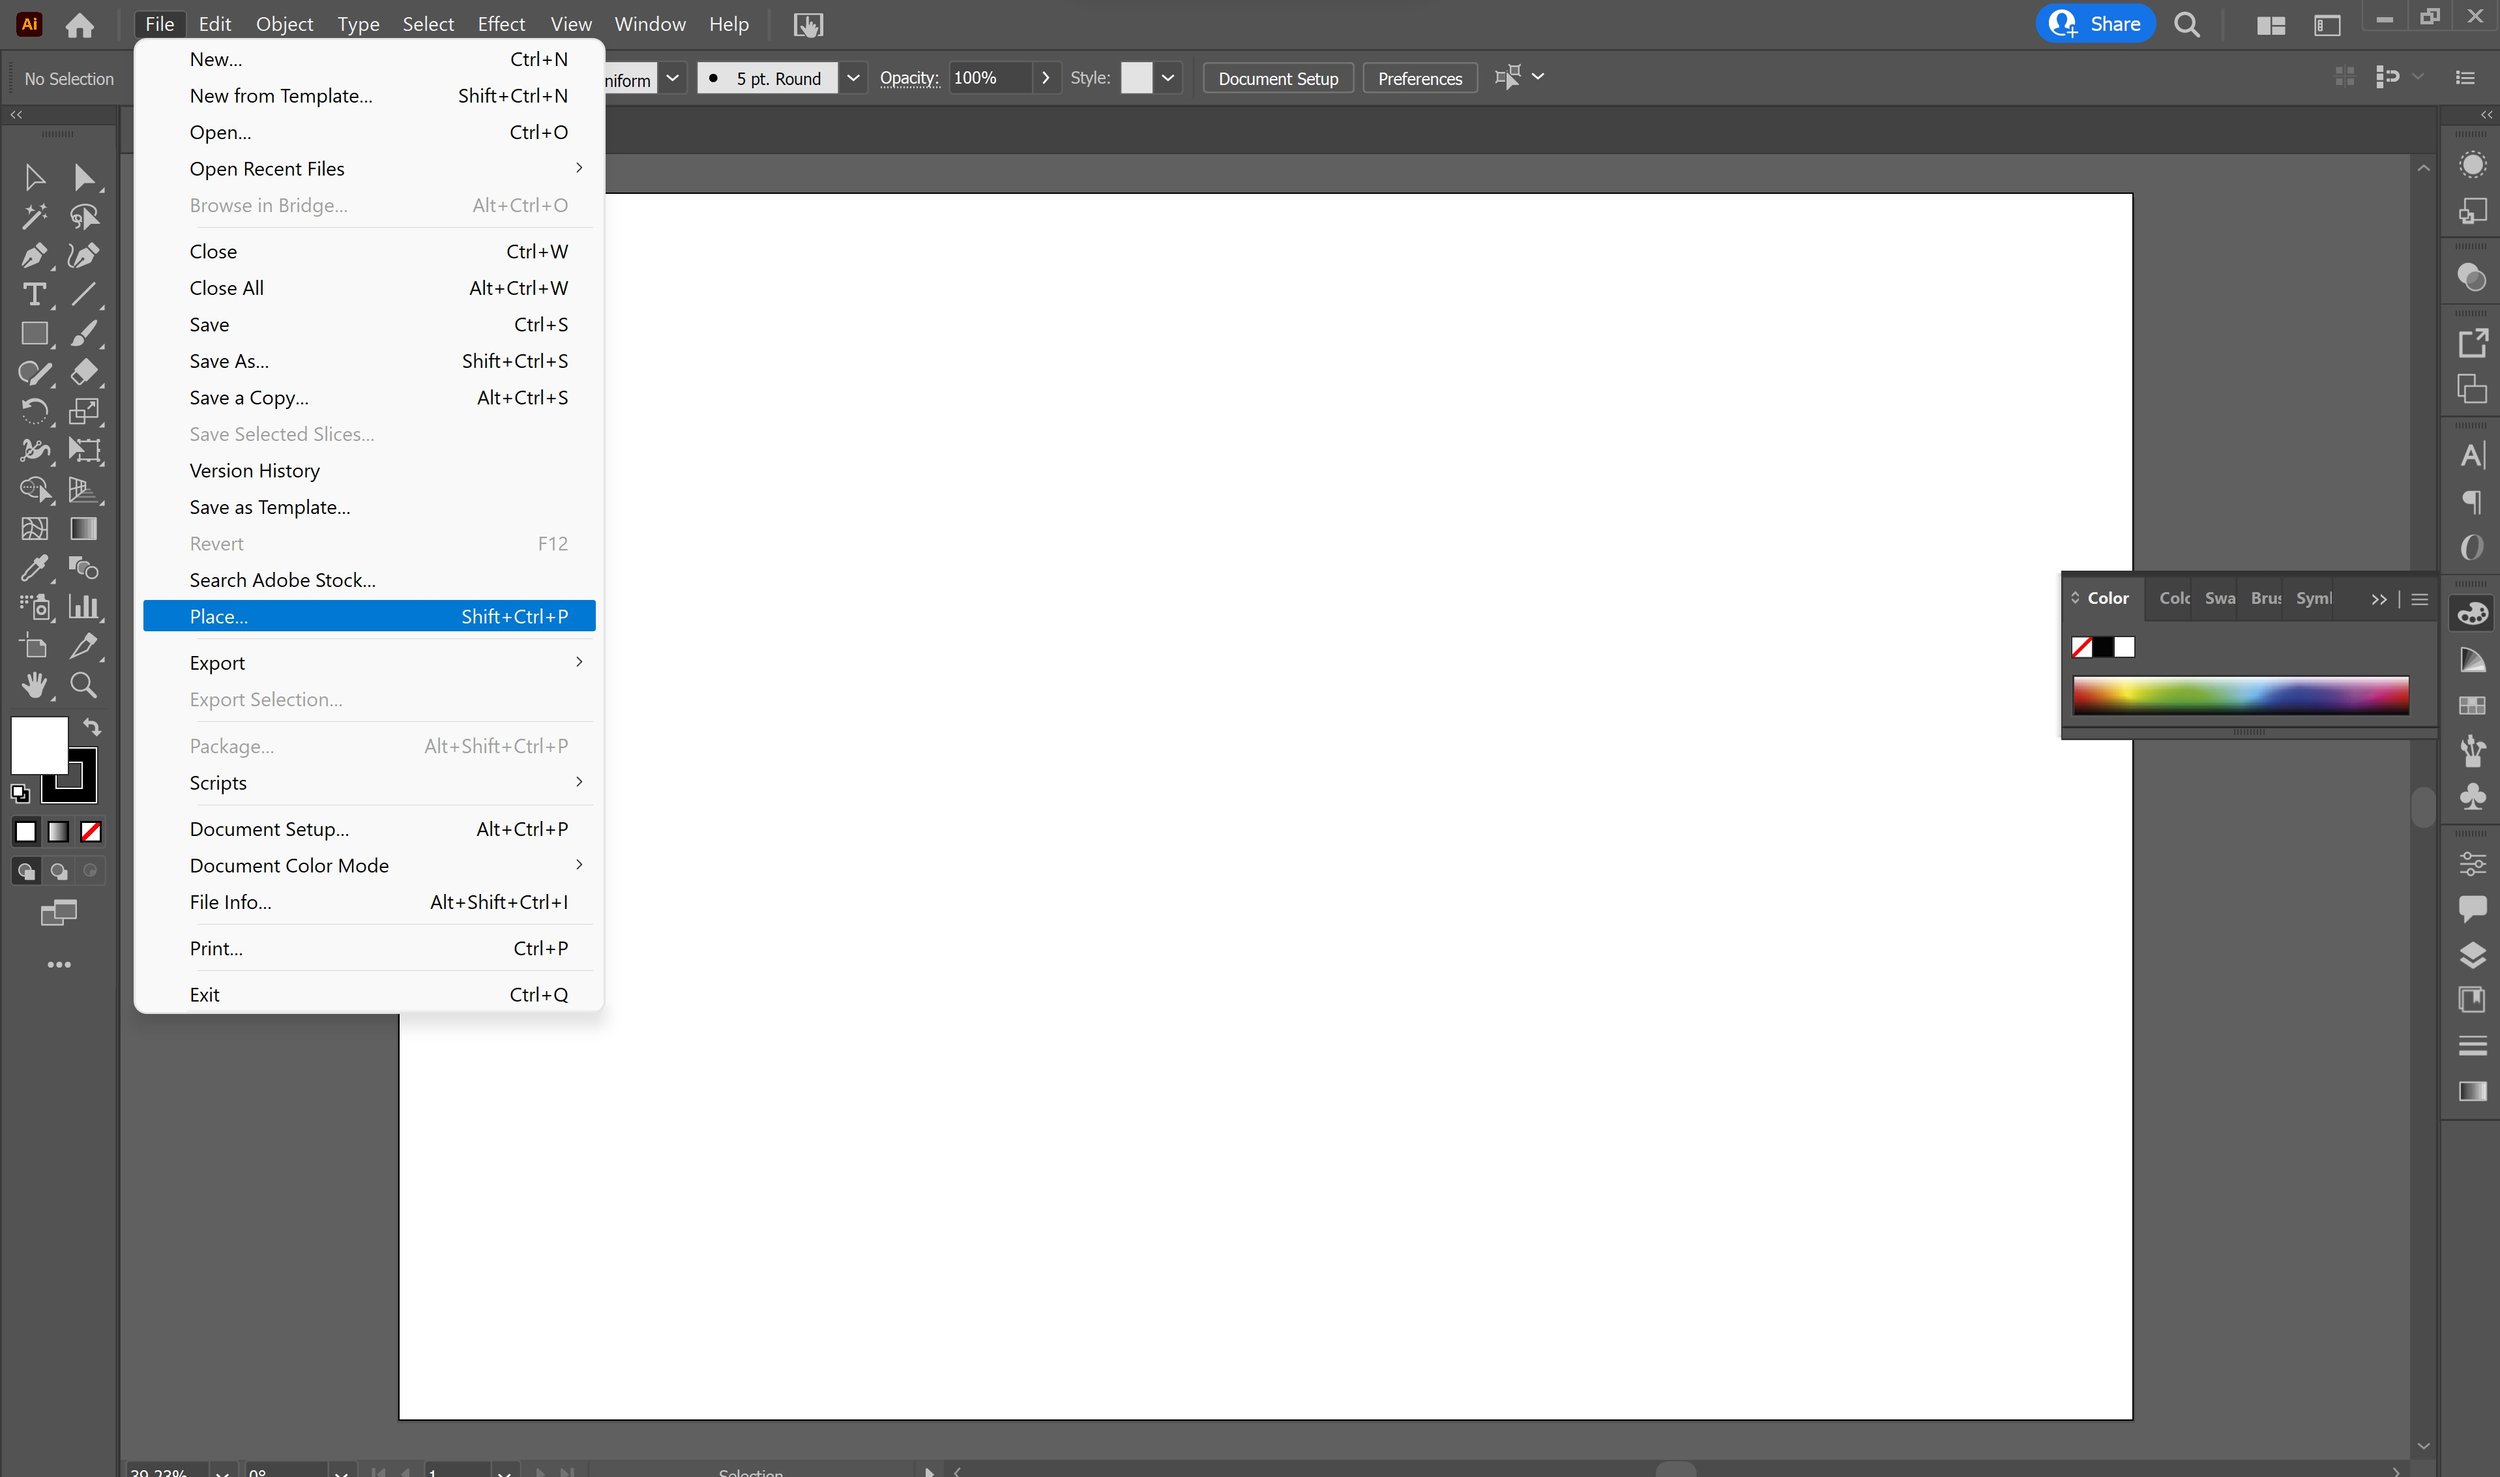
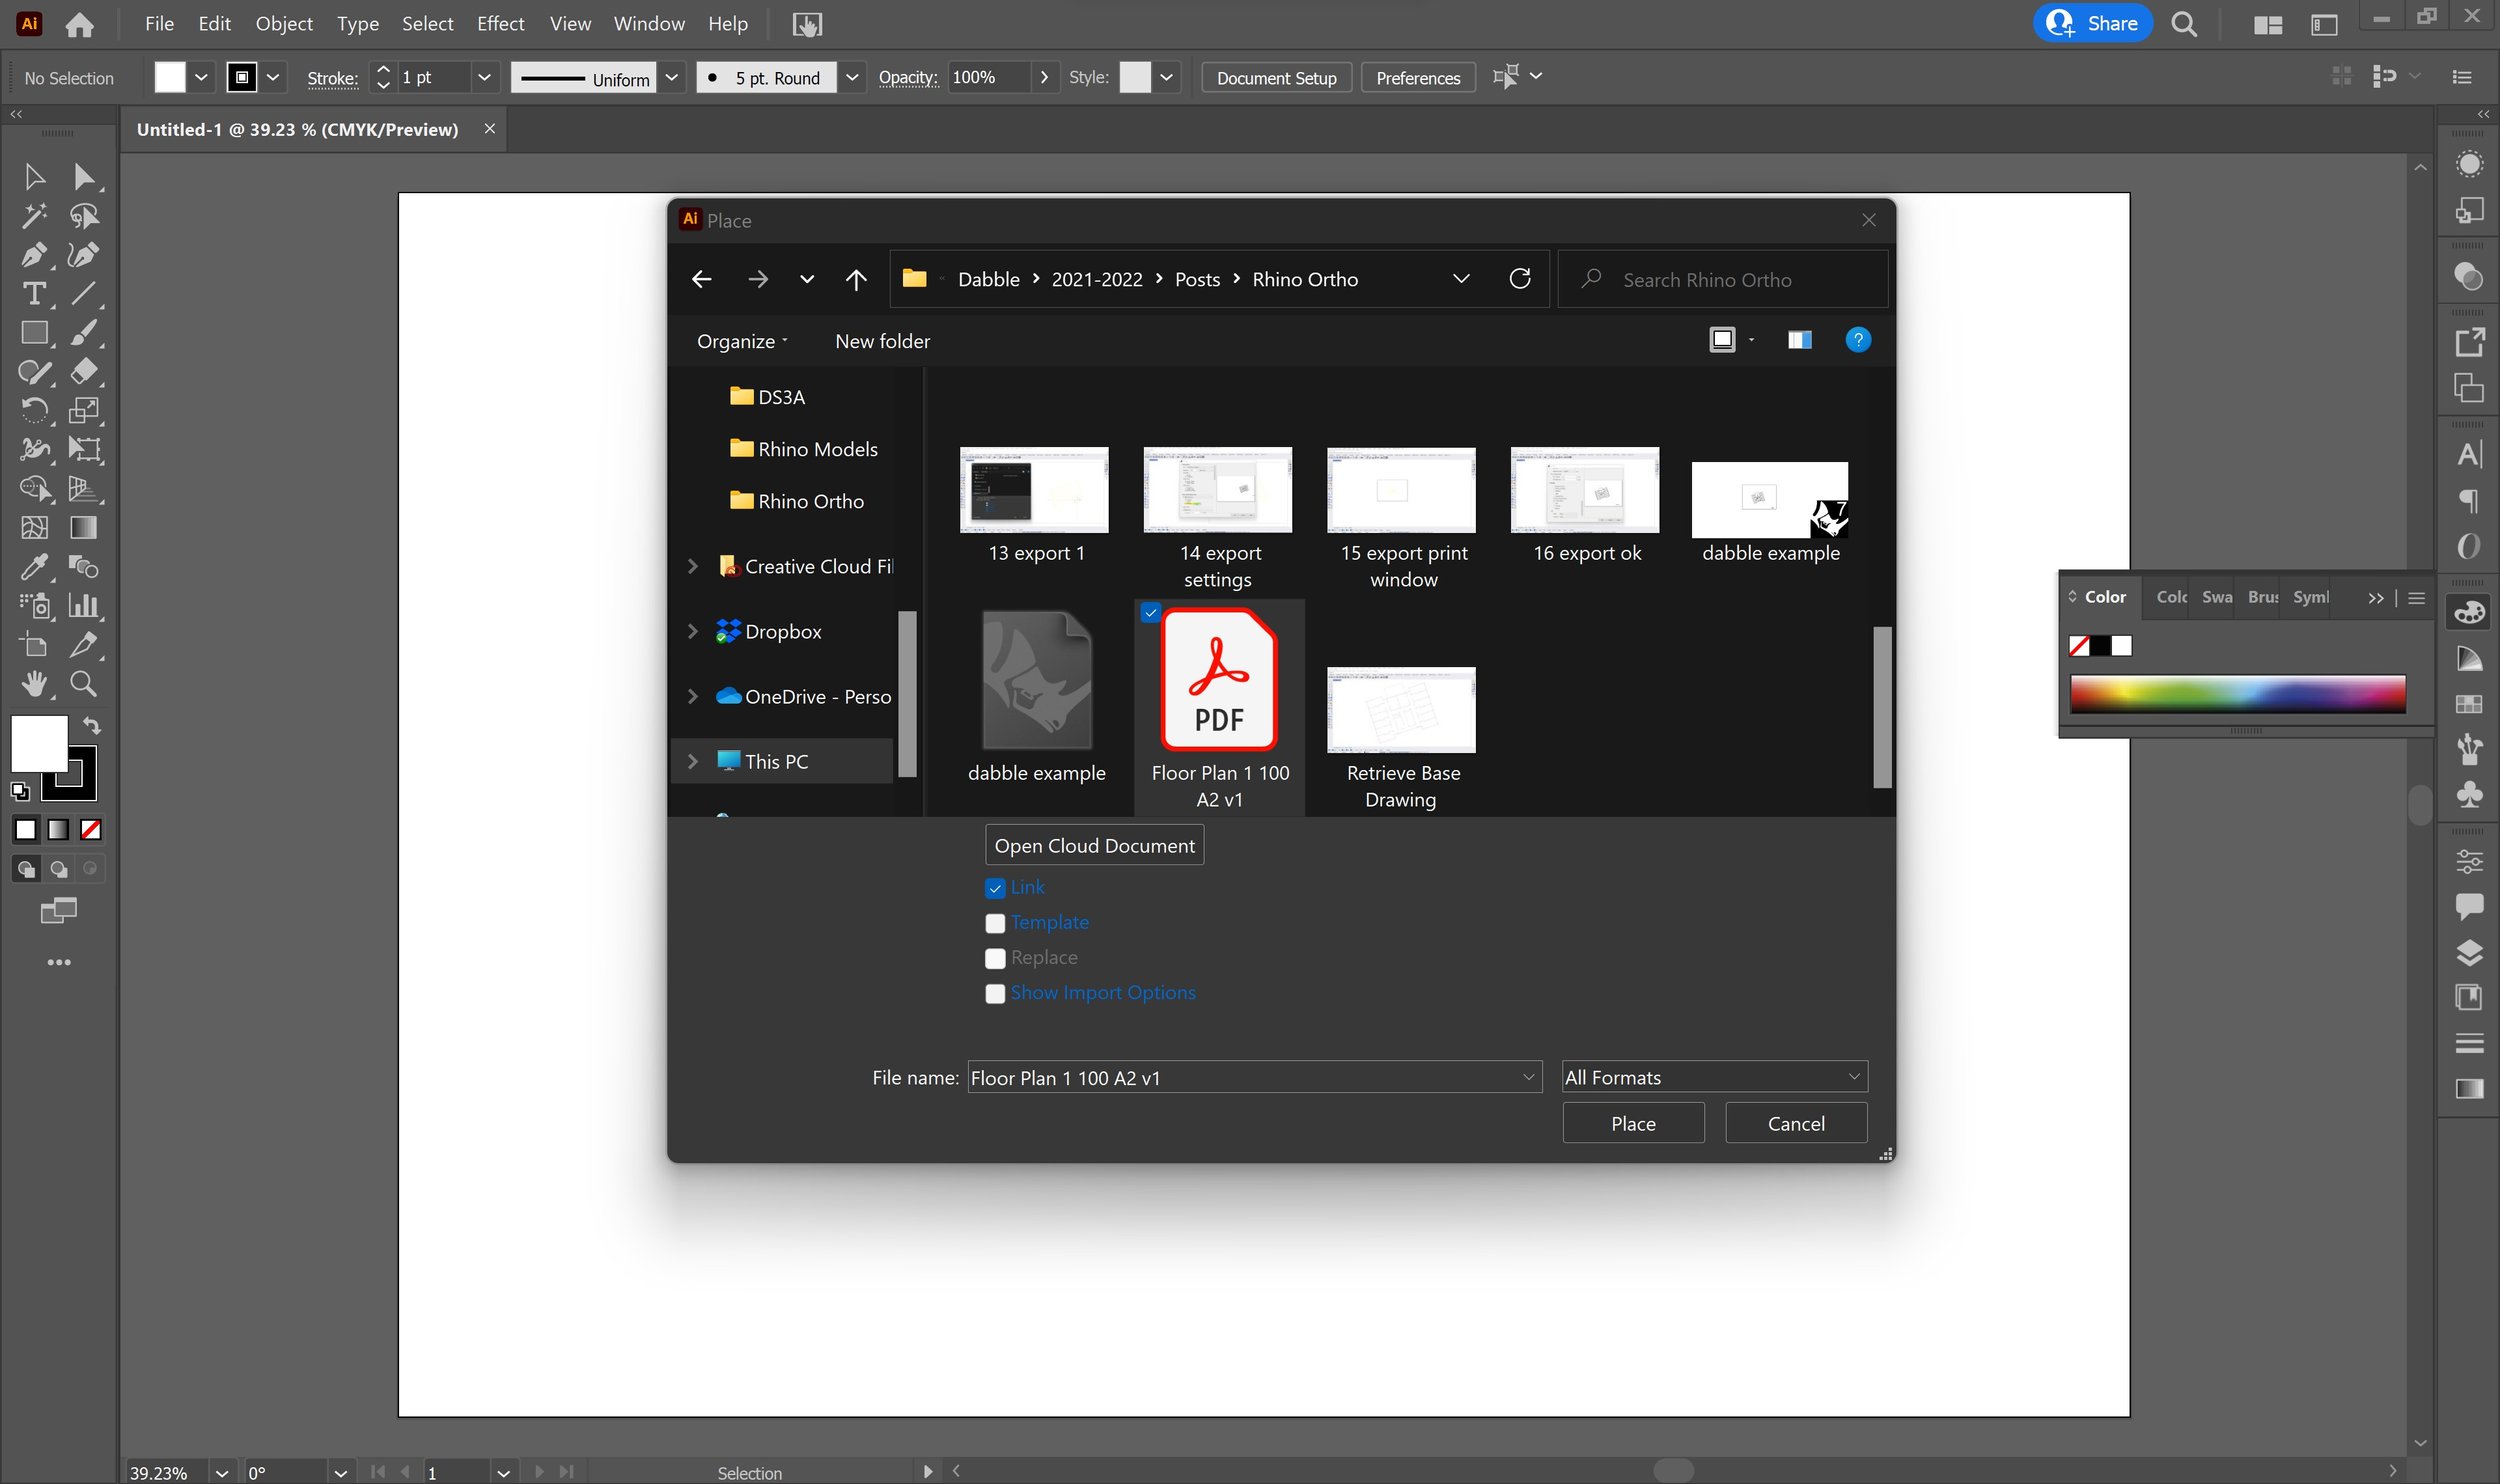
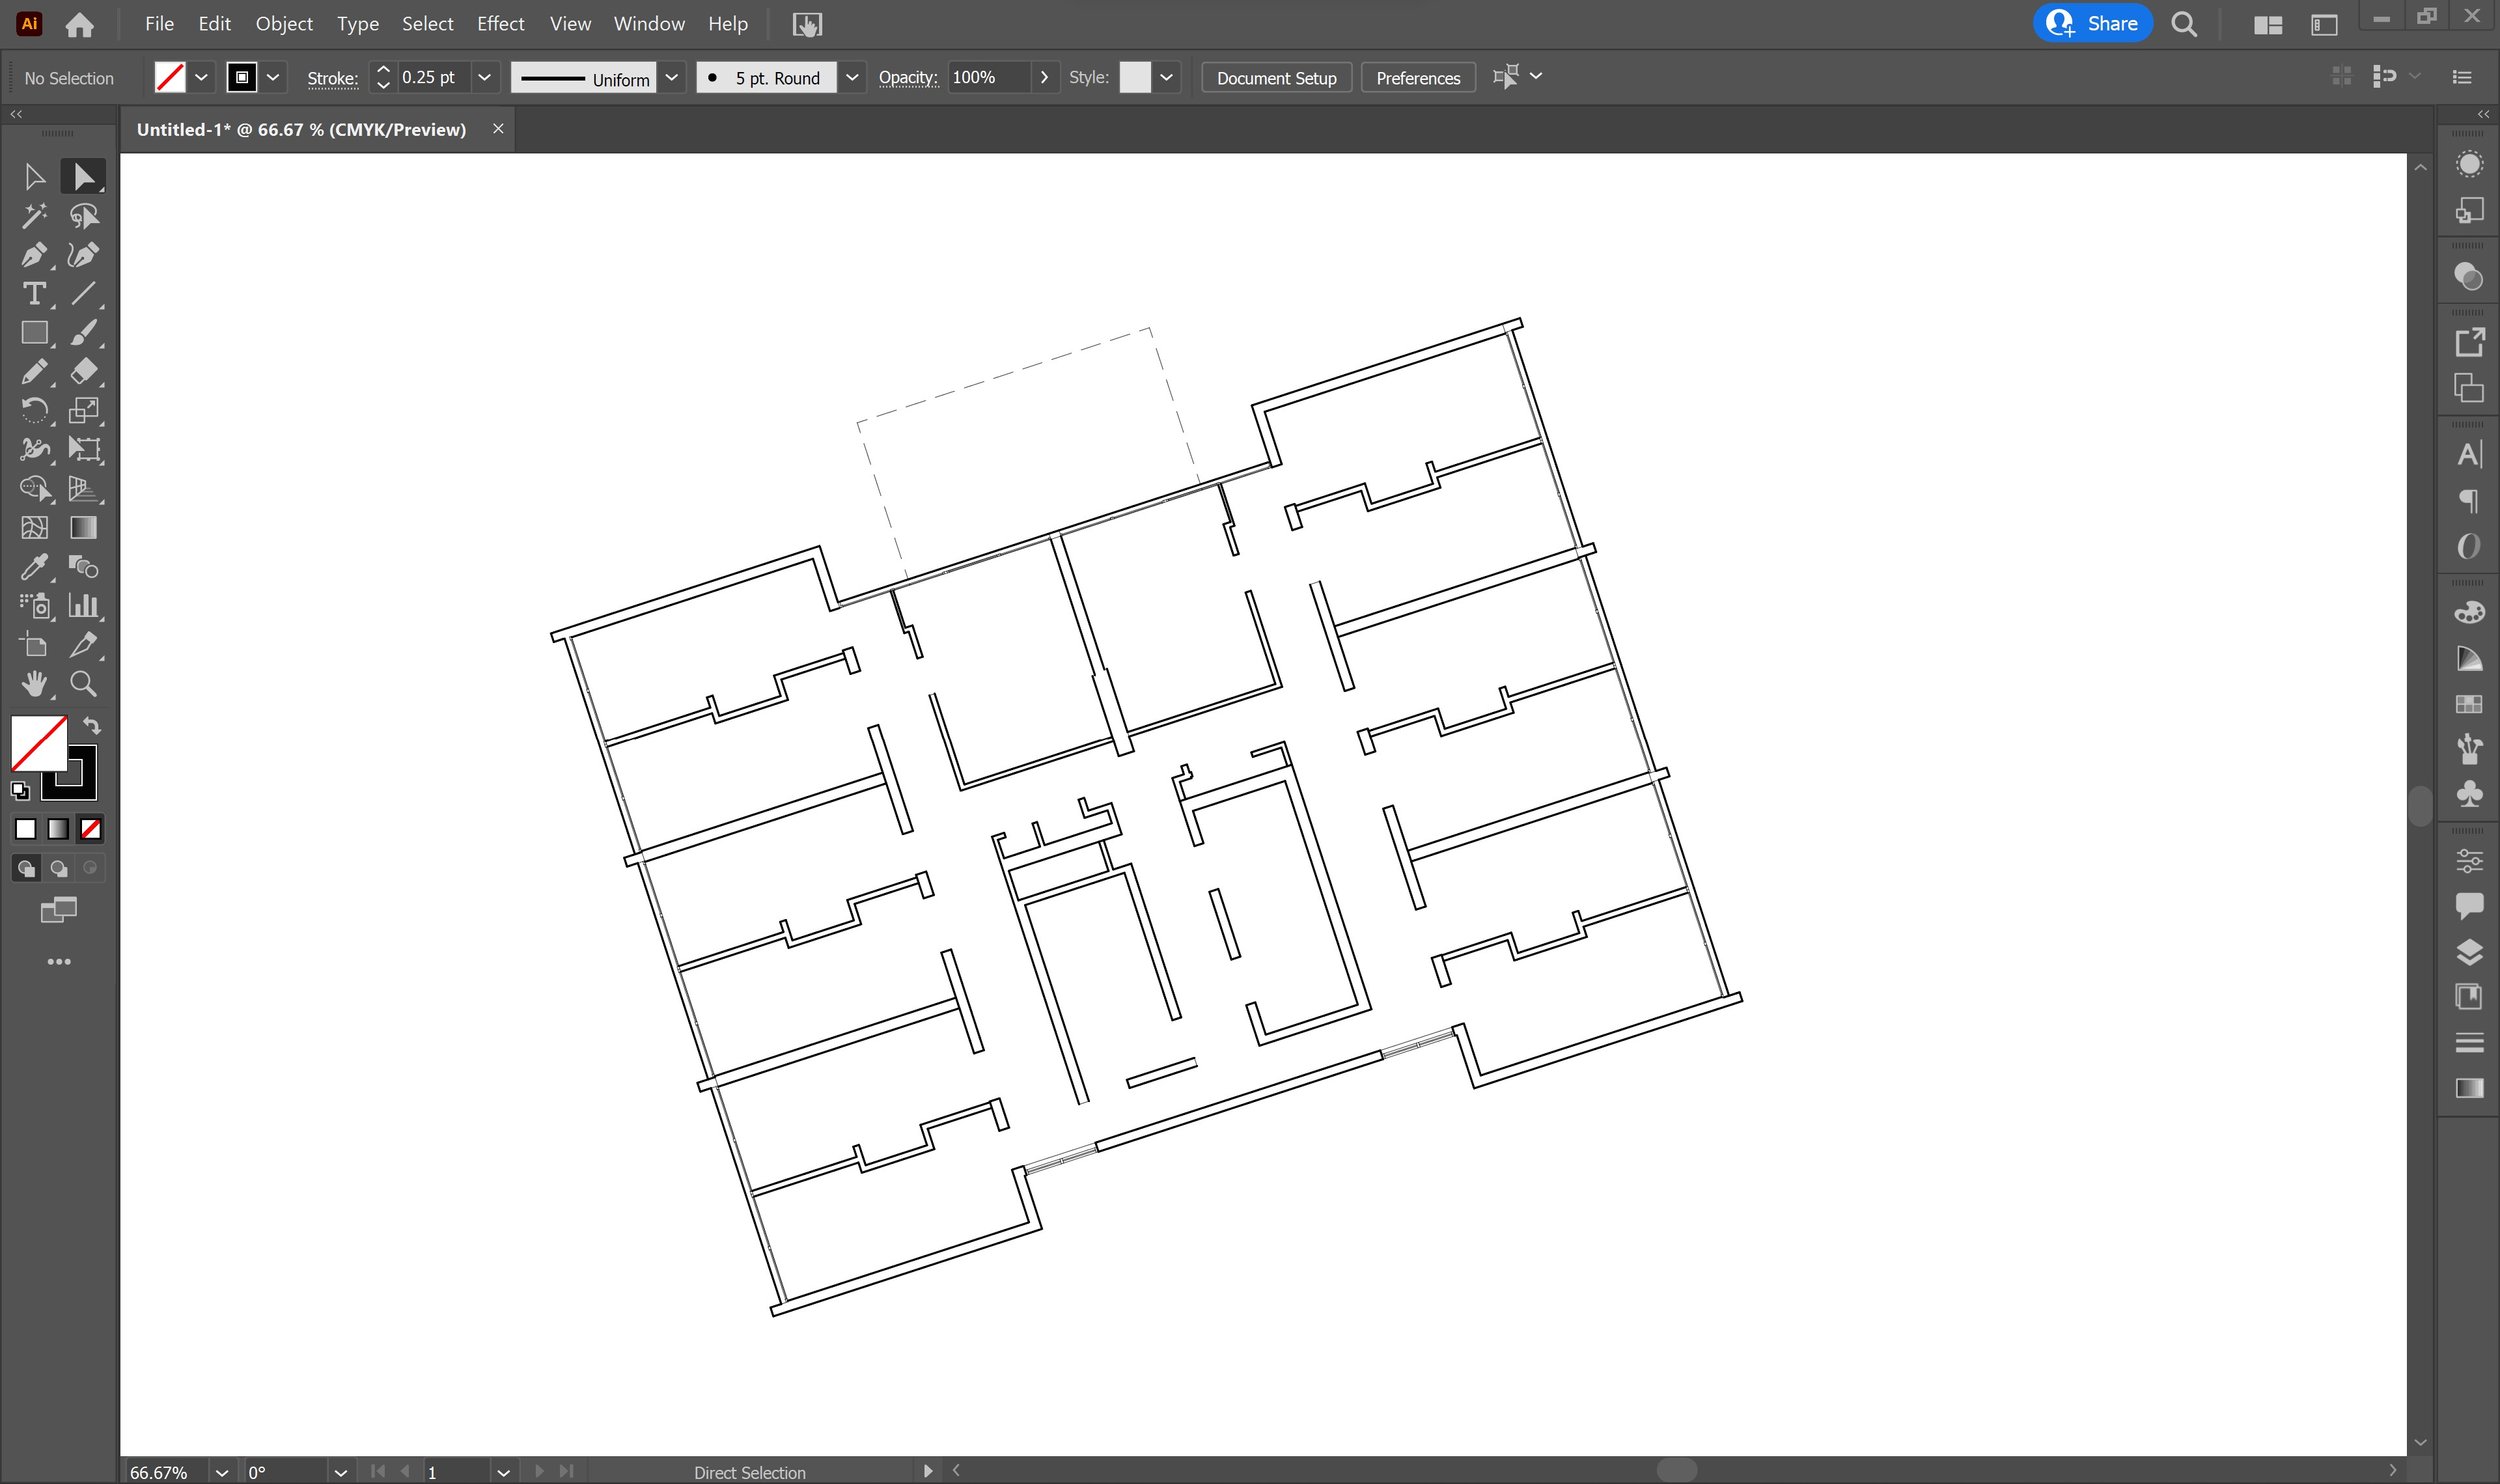
Open up a new A2 sized Illustrator document, then go to ‘File’ > ‘Place’ or use the shortcut Ctrl+Shift+P (Windows) / Command+Shift+P (Mac).
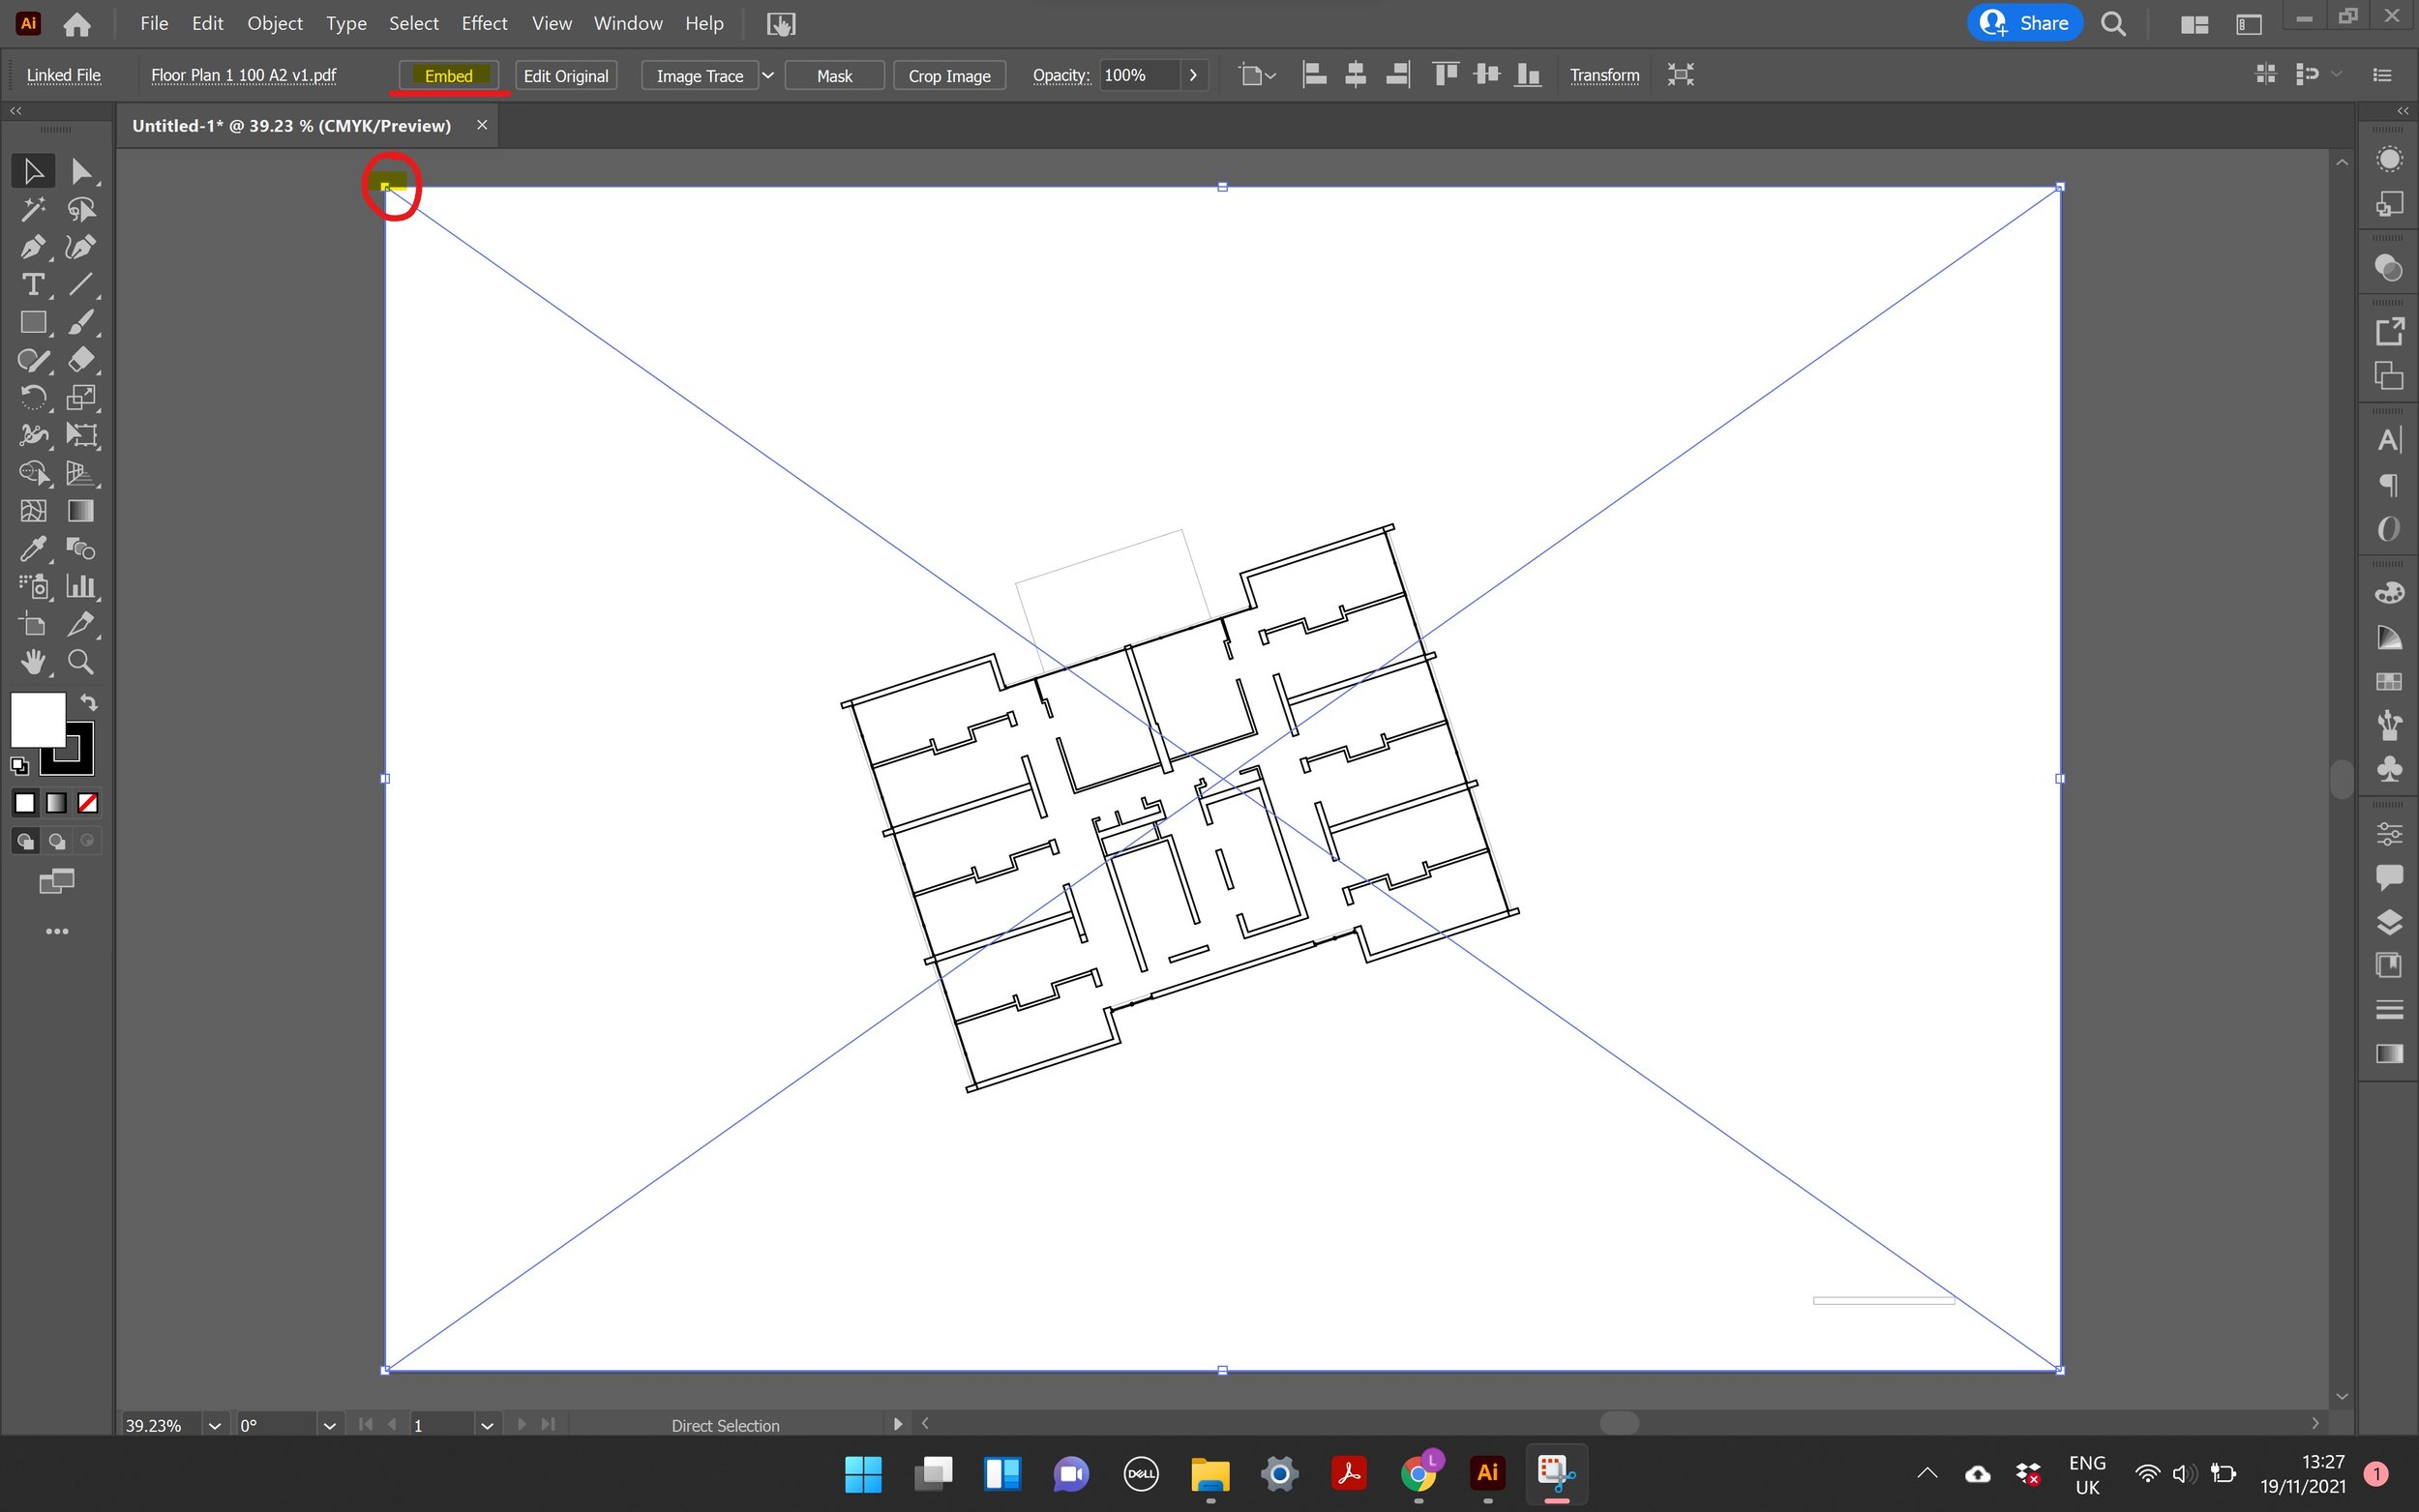
Locate and place your file in the document from the top left corner of your page. Click ‘Embed’ to set the drawing in the document.
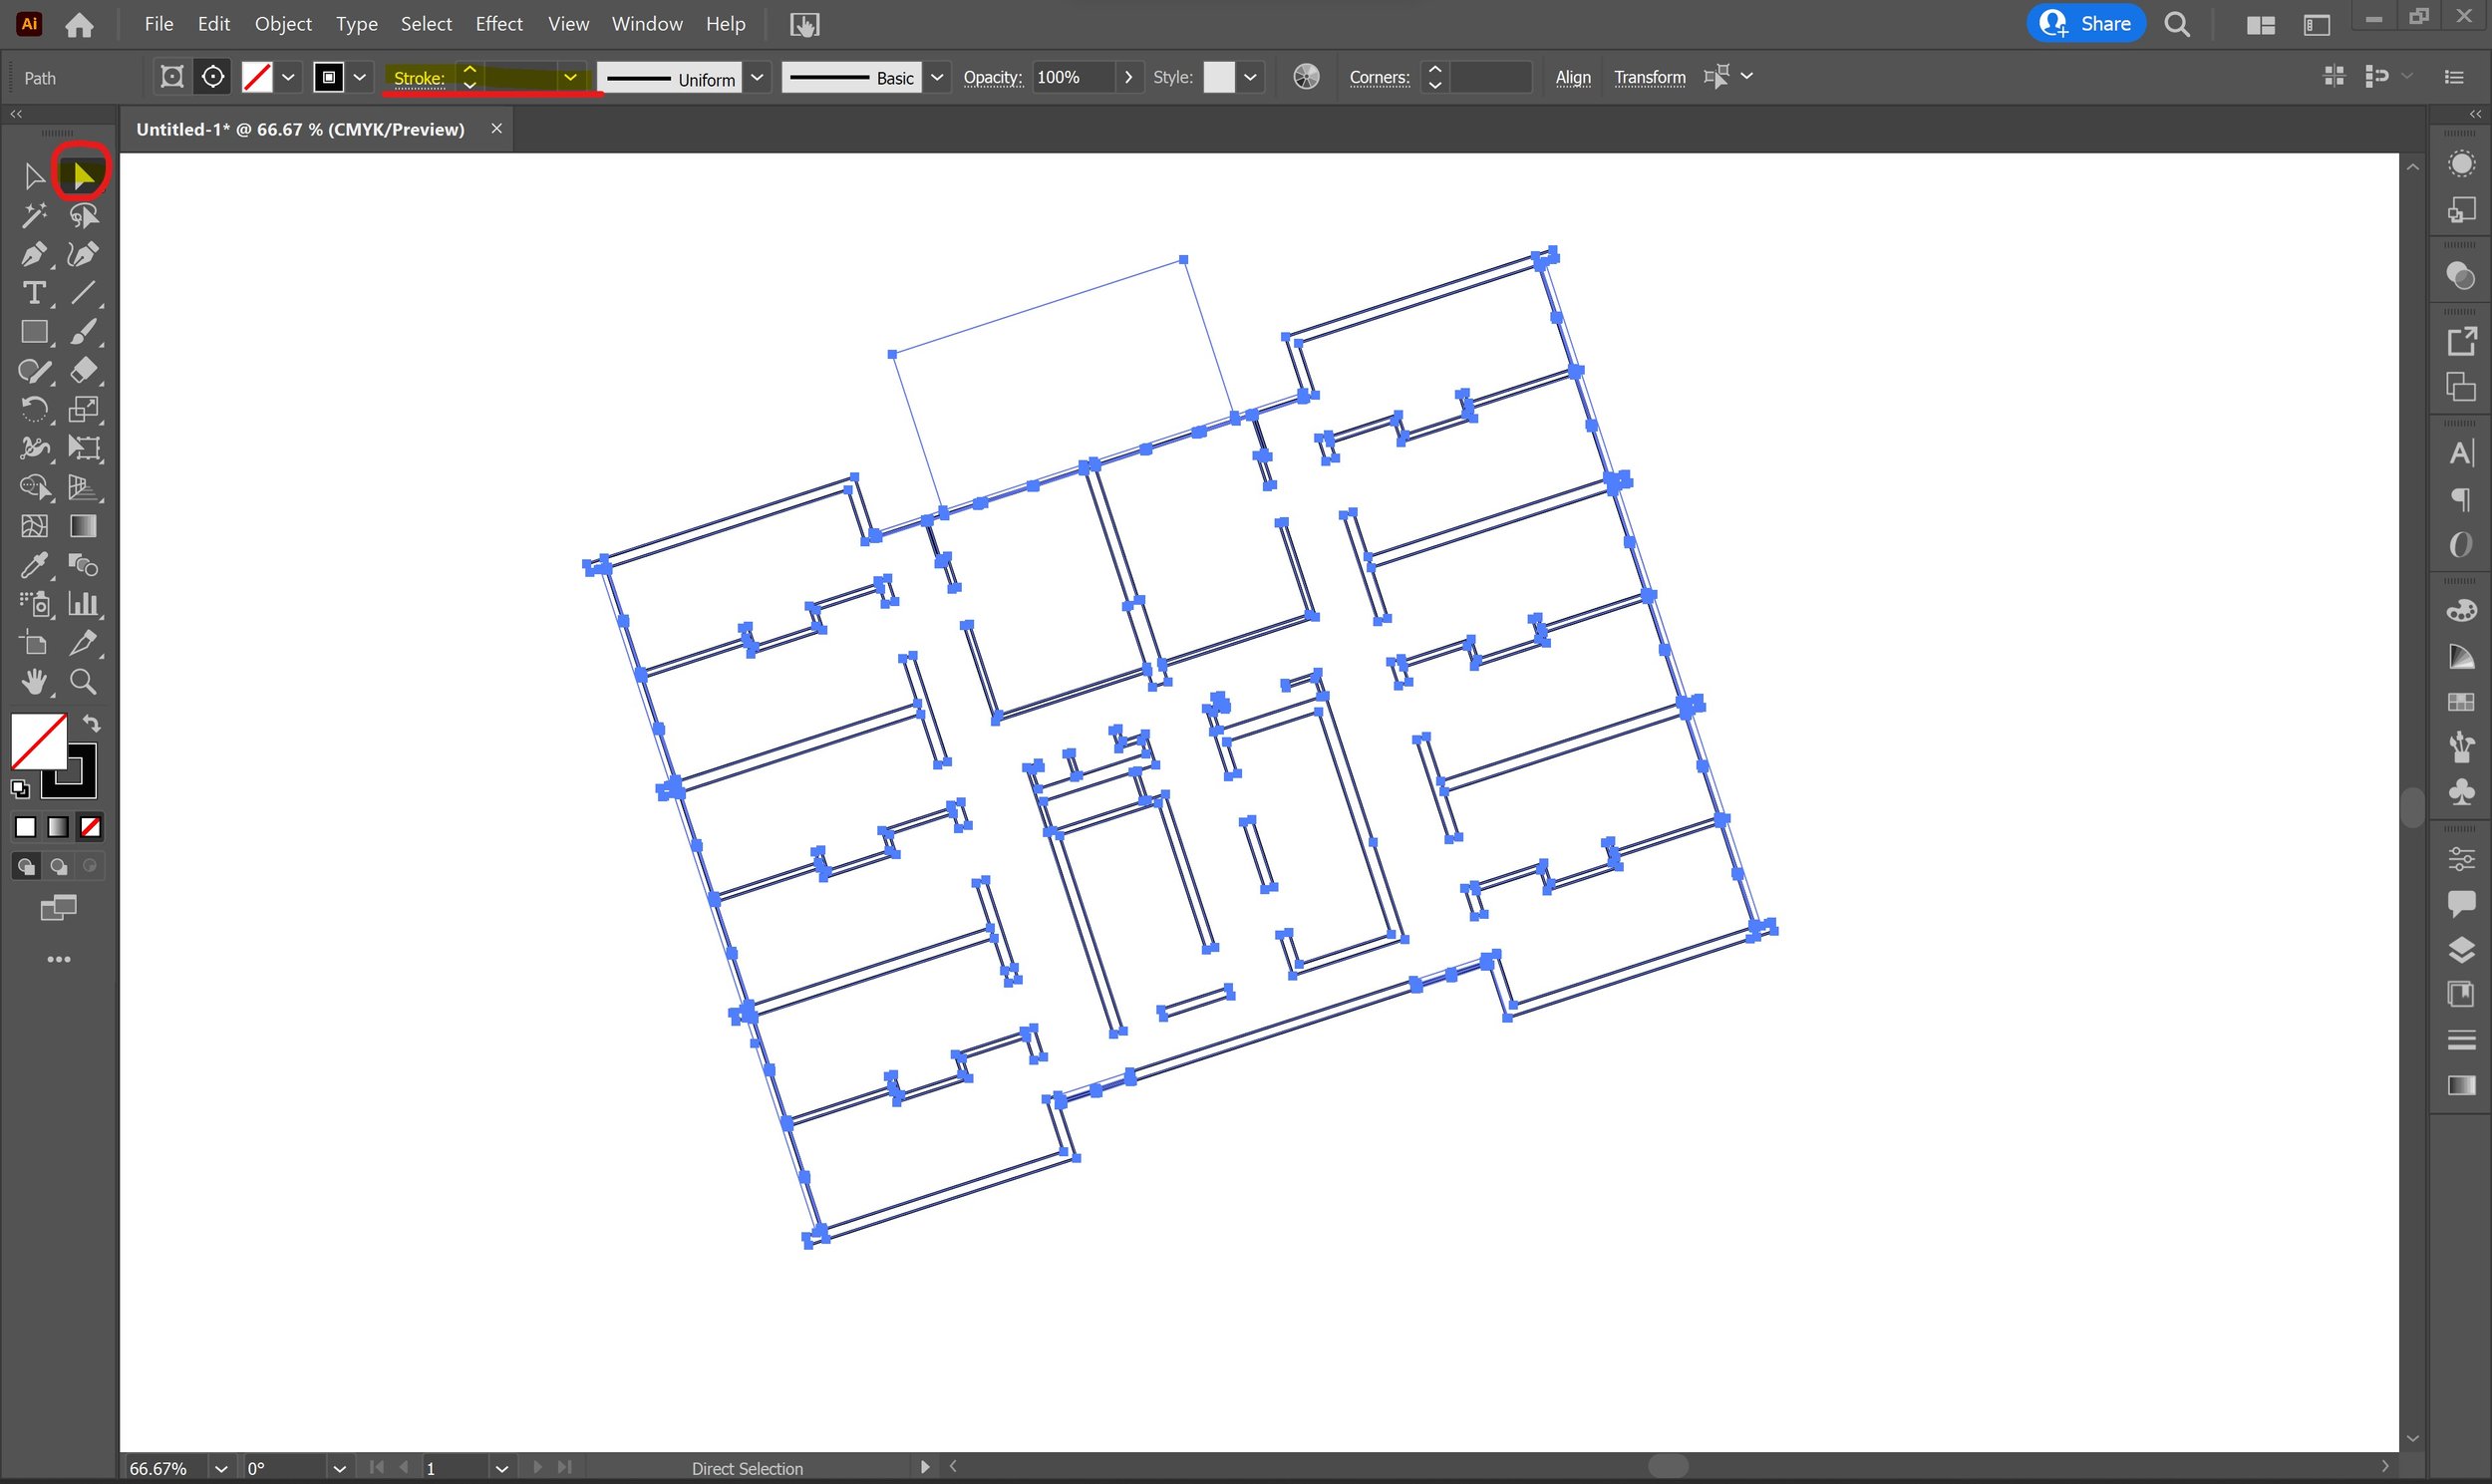
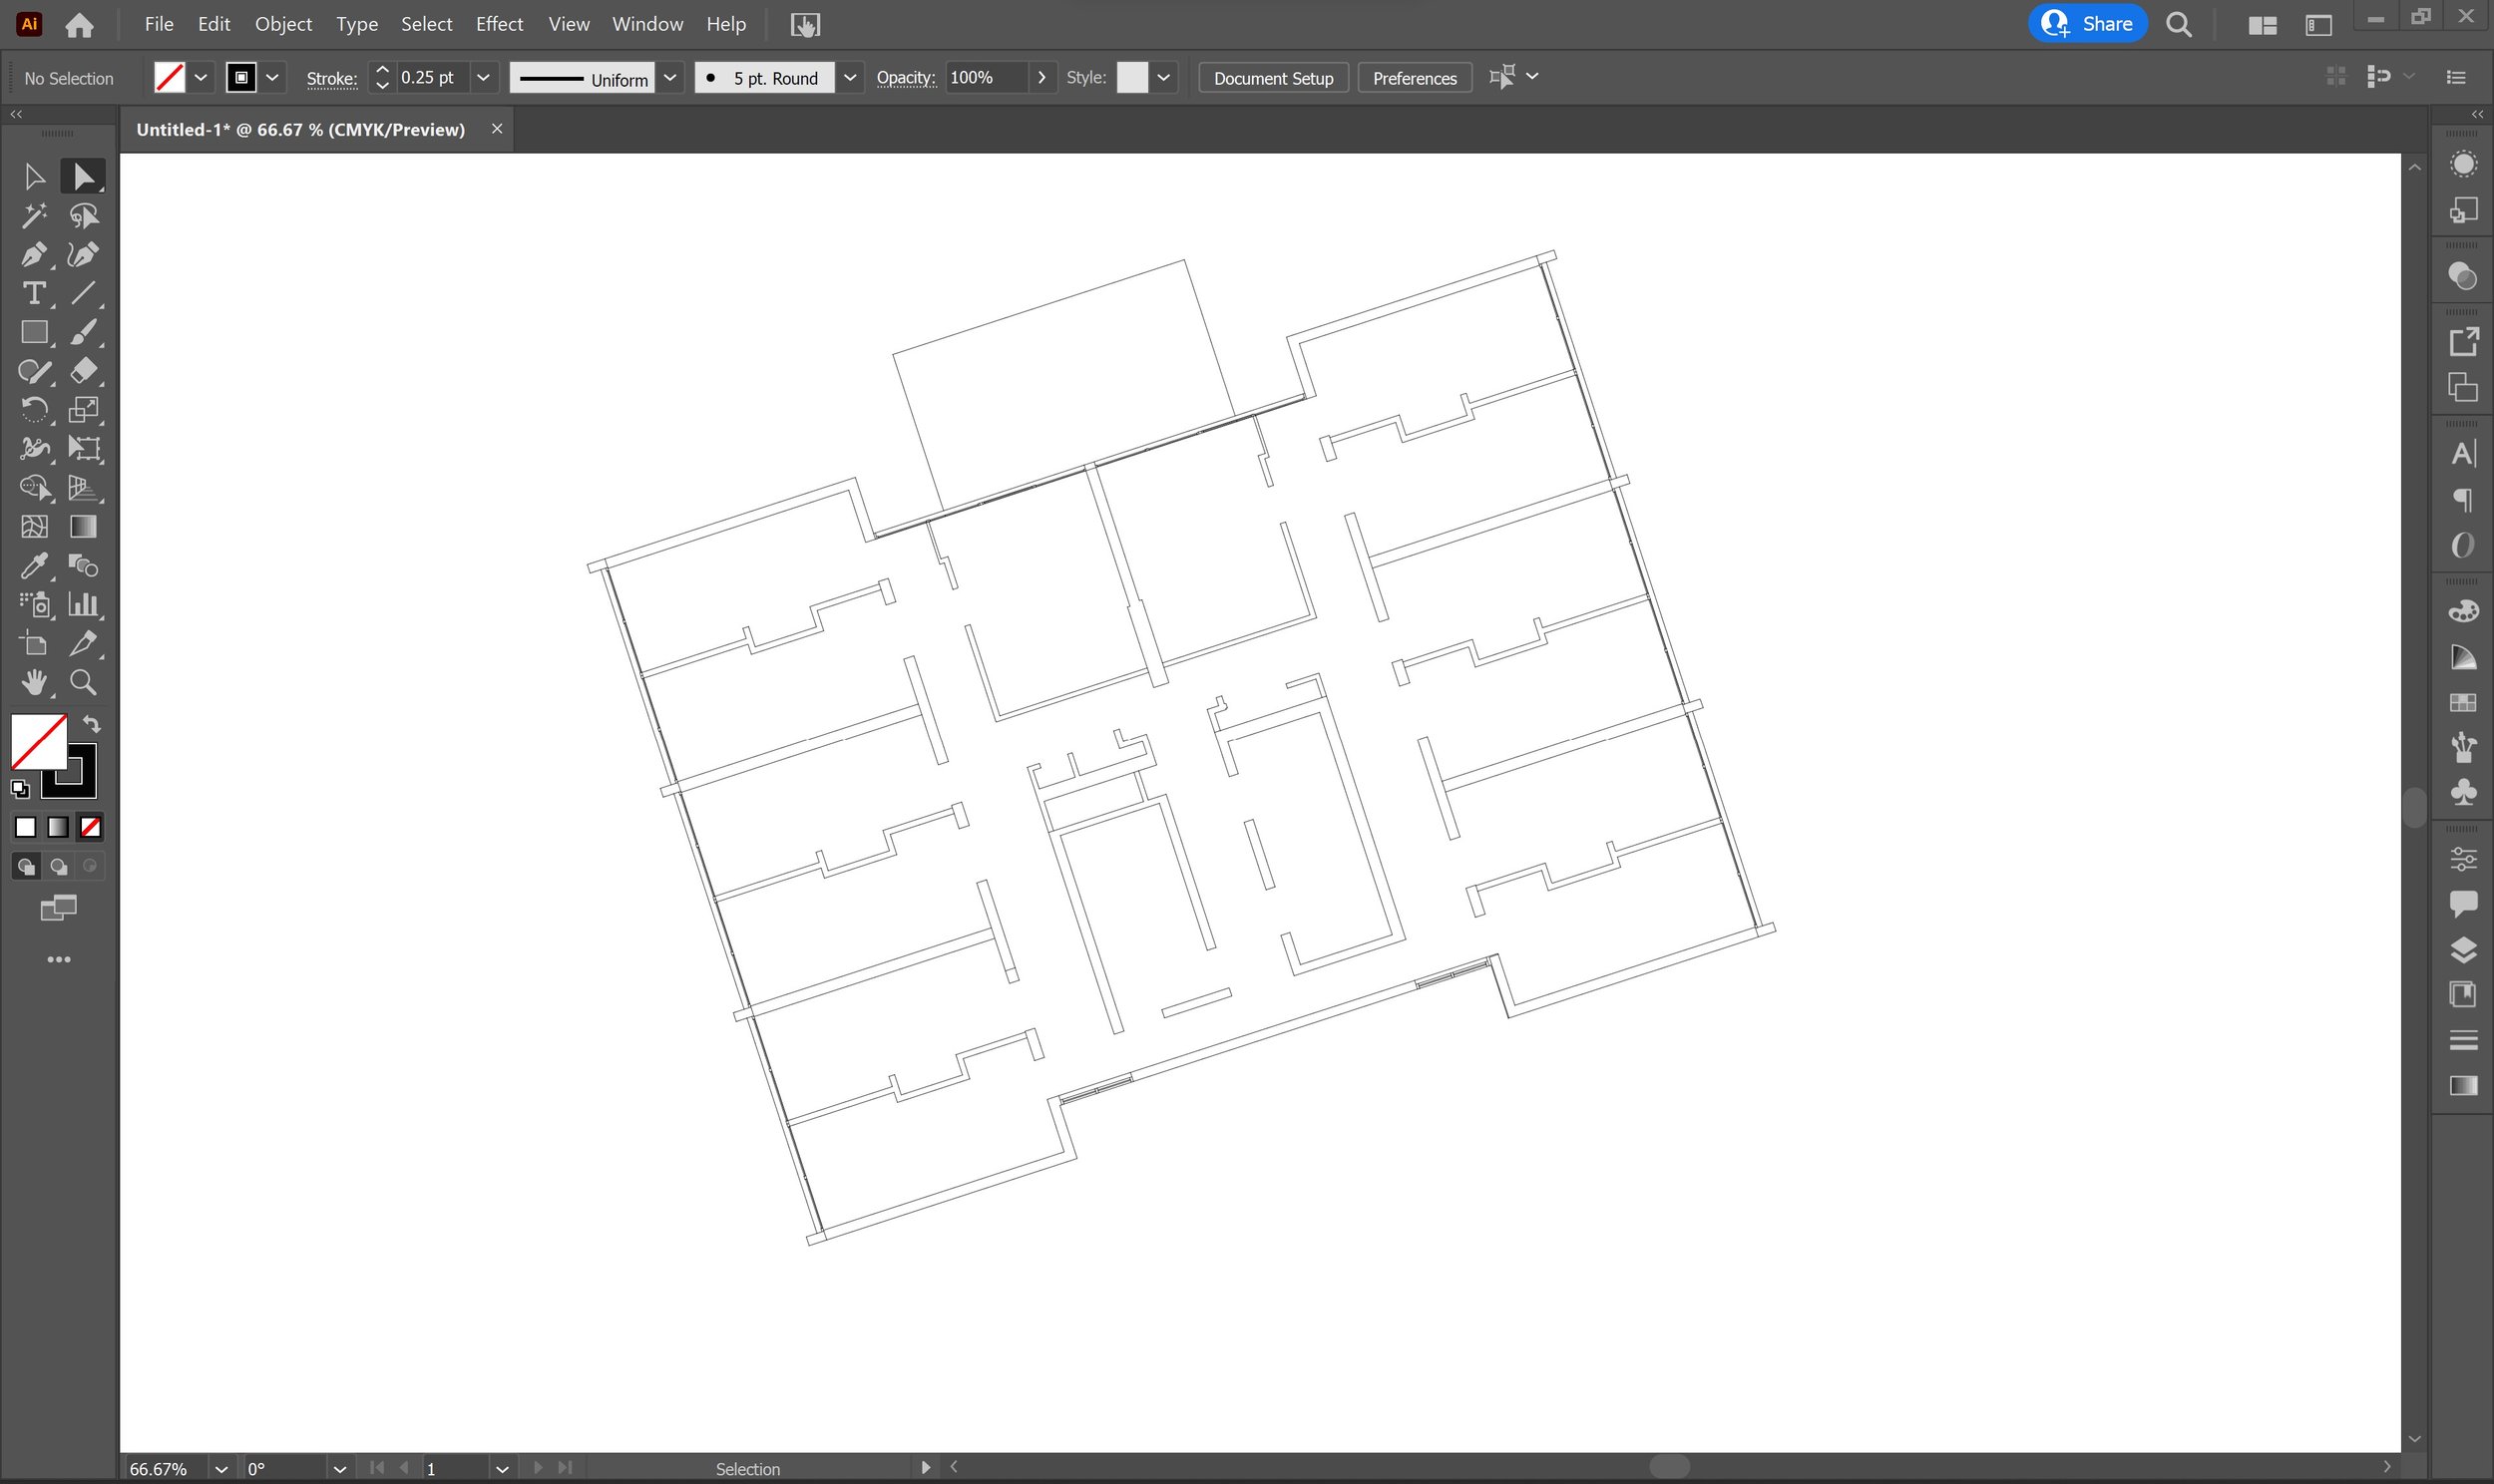
Use the direct selection tool and select the extents of your drawing. Go to ‘Stroke’ at the top of your page - you might see that there is no value as all the line weights are different. Click in the box and input a thin line weight - personally, I use 0.25pt as my thinnest line weight and work my way up the thicknesses. Choosing the same value allows you to see all the lines clearly - you shouldn’t make it too thick as lines may overlap and you might not notice overlapping lines or ones that are very close to each other.
As you can see, some areas of the drawing are darker after the line weights have changed because they’re close together, which affects the drawing hierarchy. If this obscures the drawing too much, you may need to choose an even thinner value for these areas or simplify the drawing so it’s clear when you present your page.
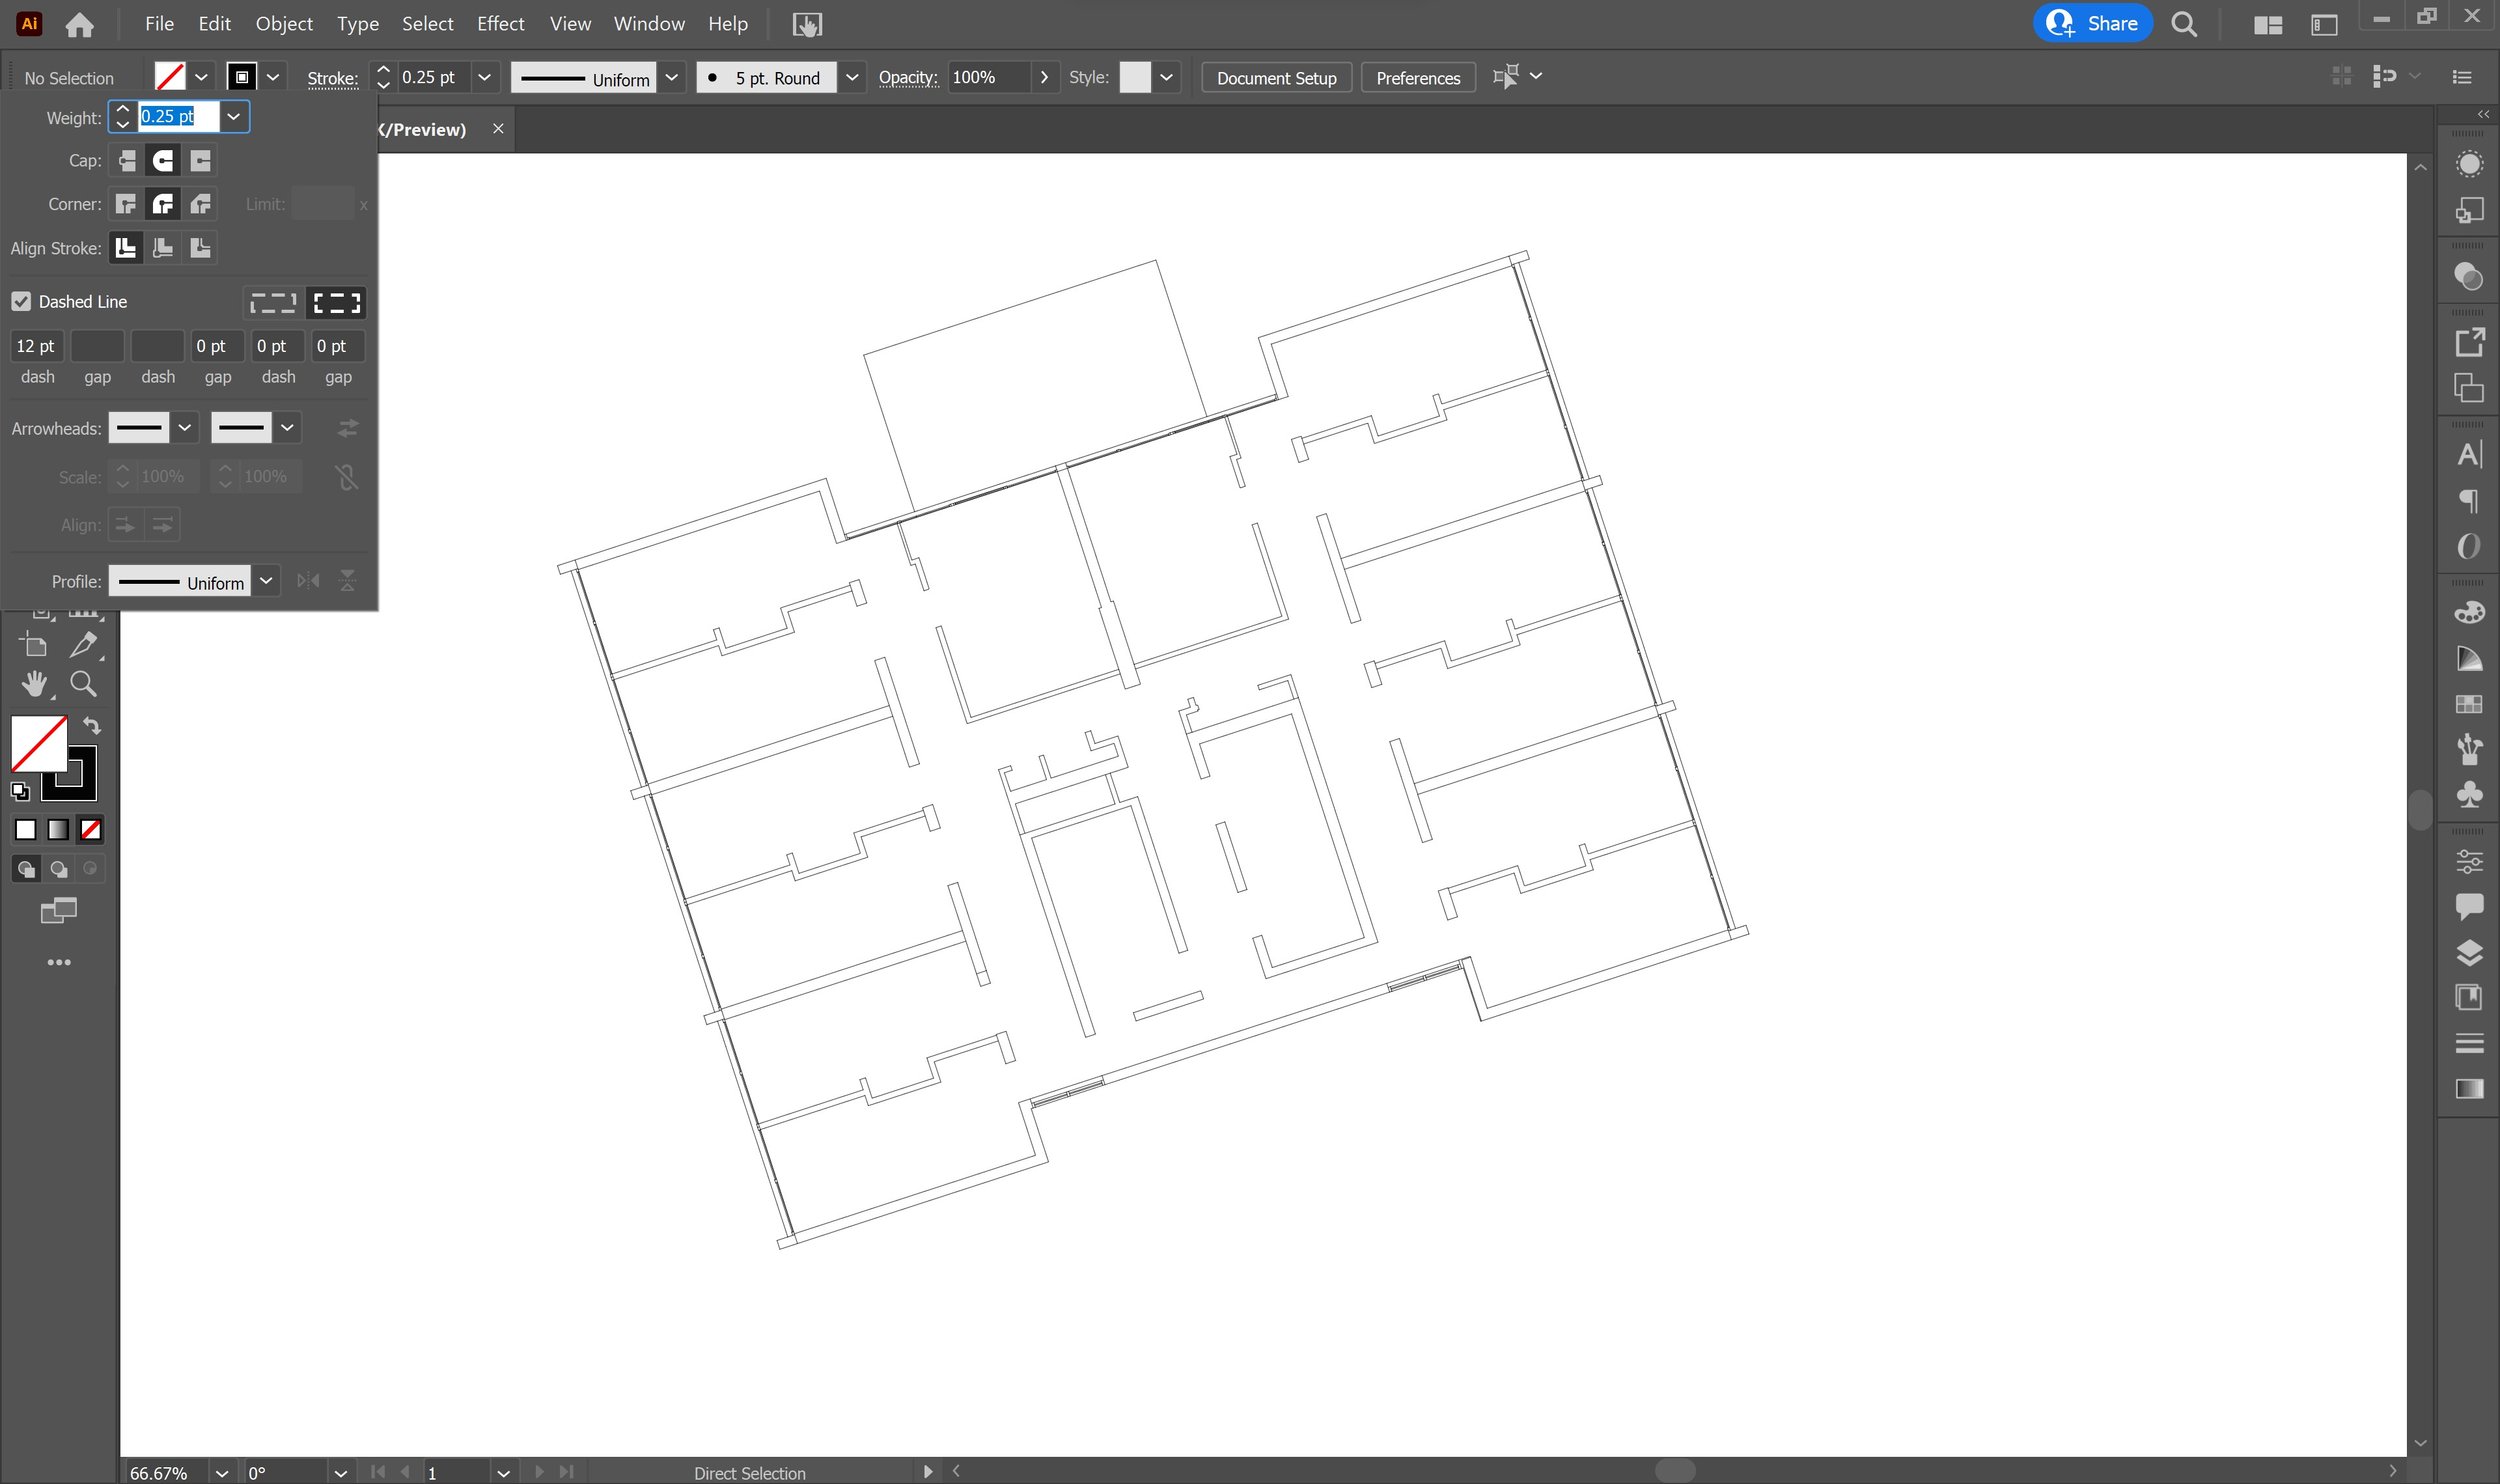
Stroke style:
You can also make lines dashed, add arrows and change other attributes of the stroke to add more layers of information and perfect the style of your drawing.
Click on the word 'Stroke’ next to the box where you inputted the stroke value to reveal these options.
Shading:
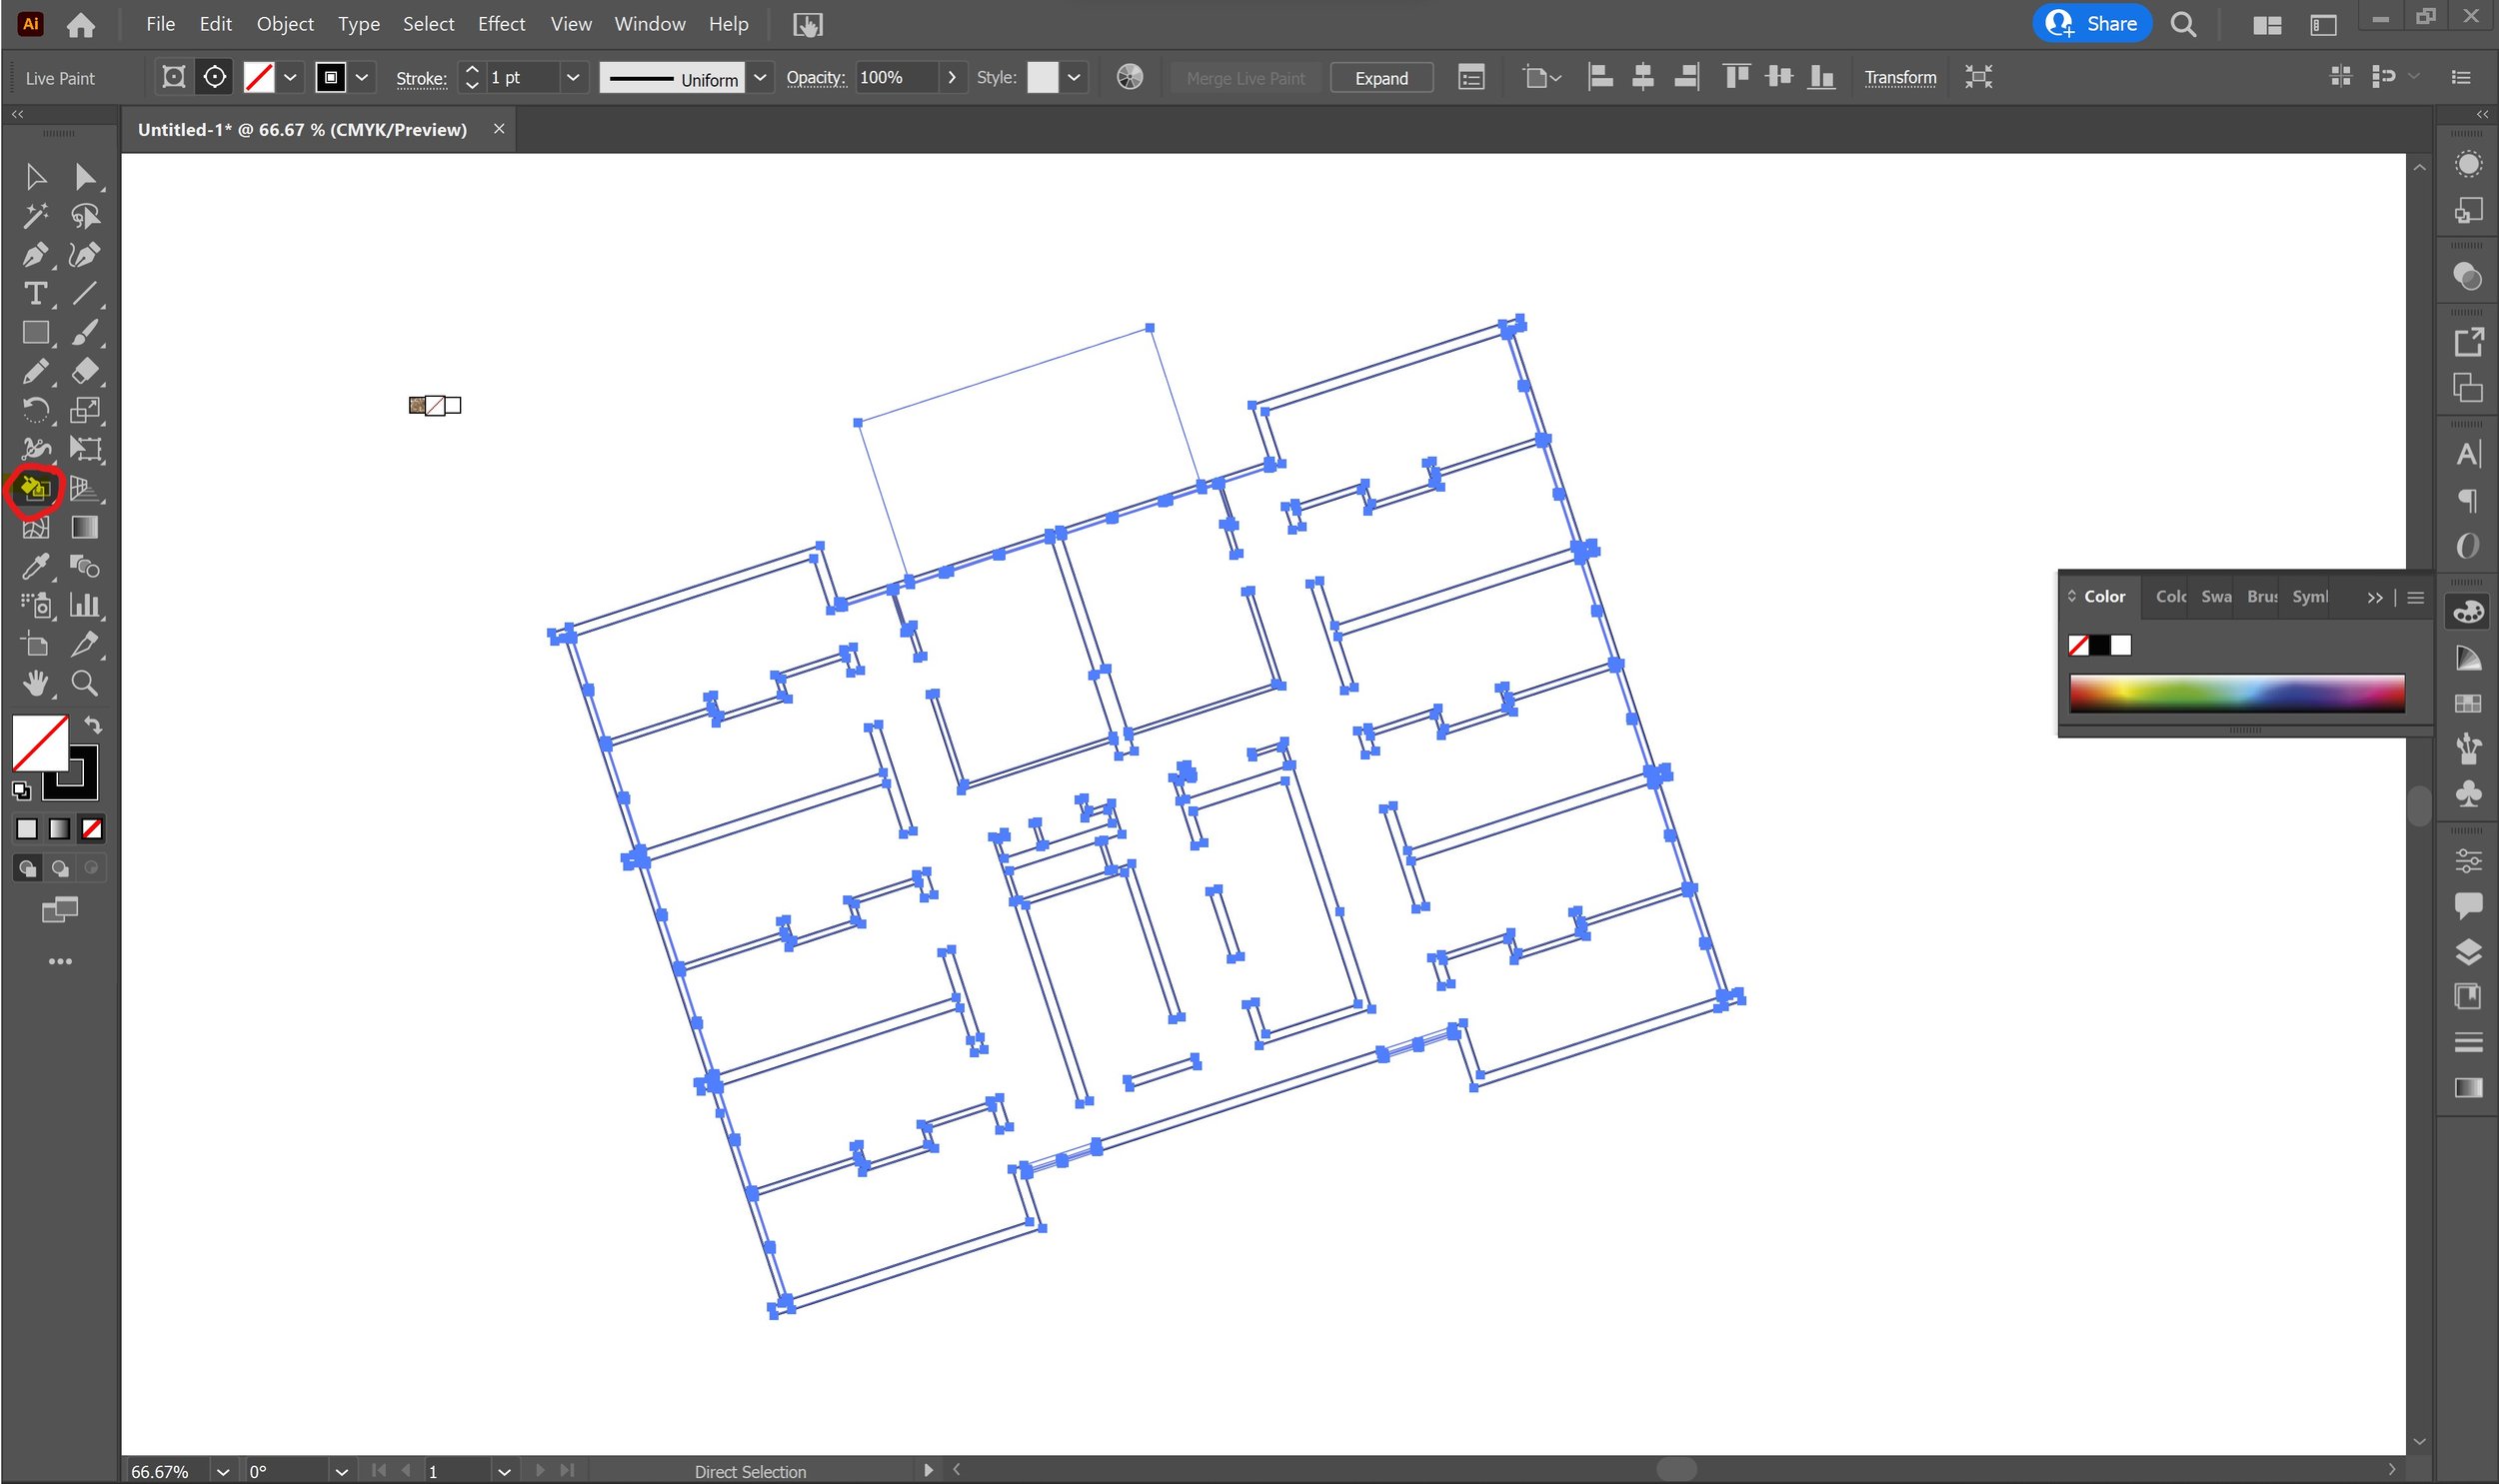
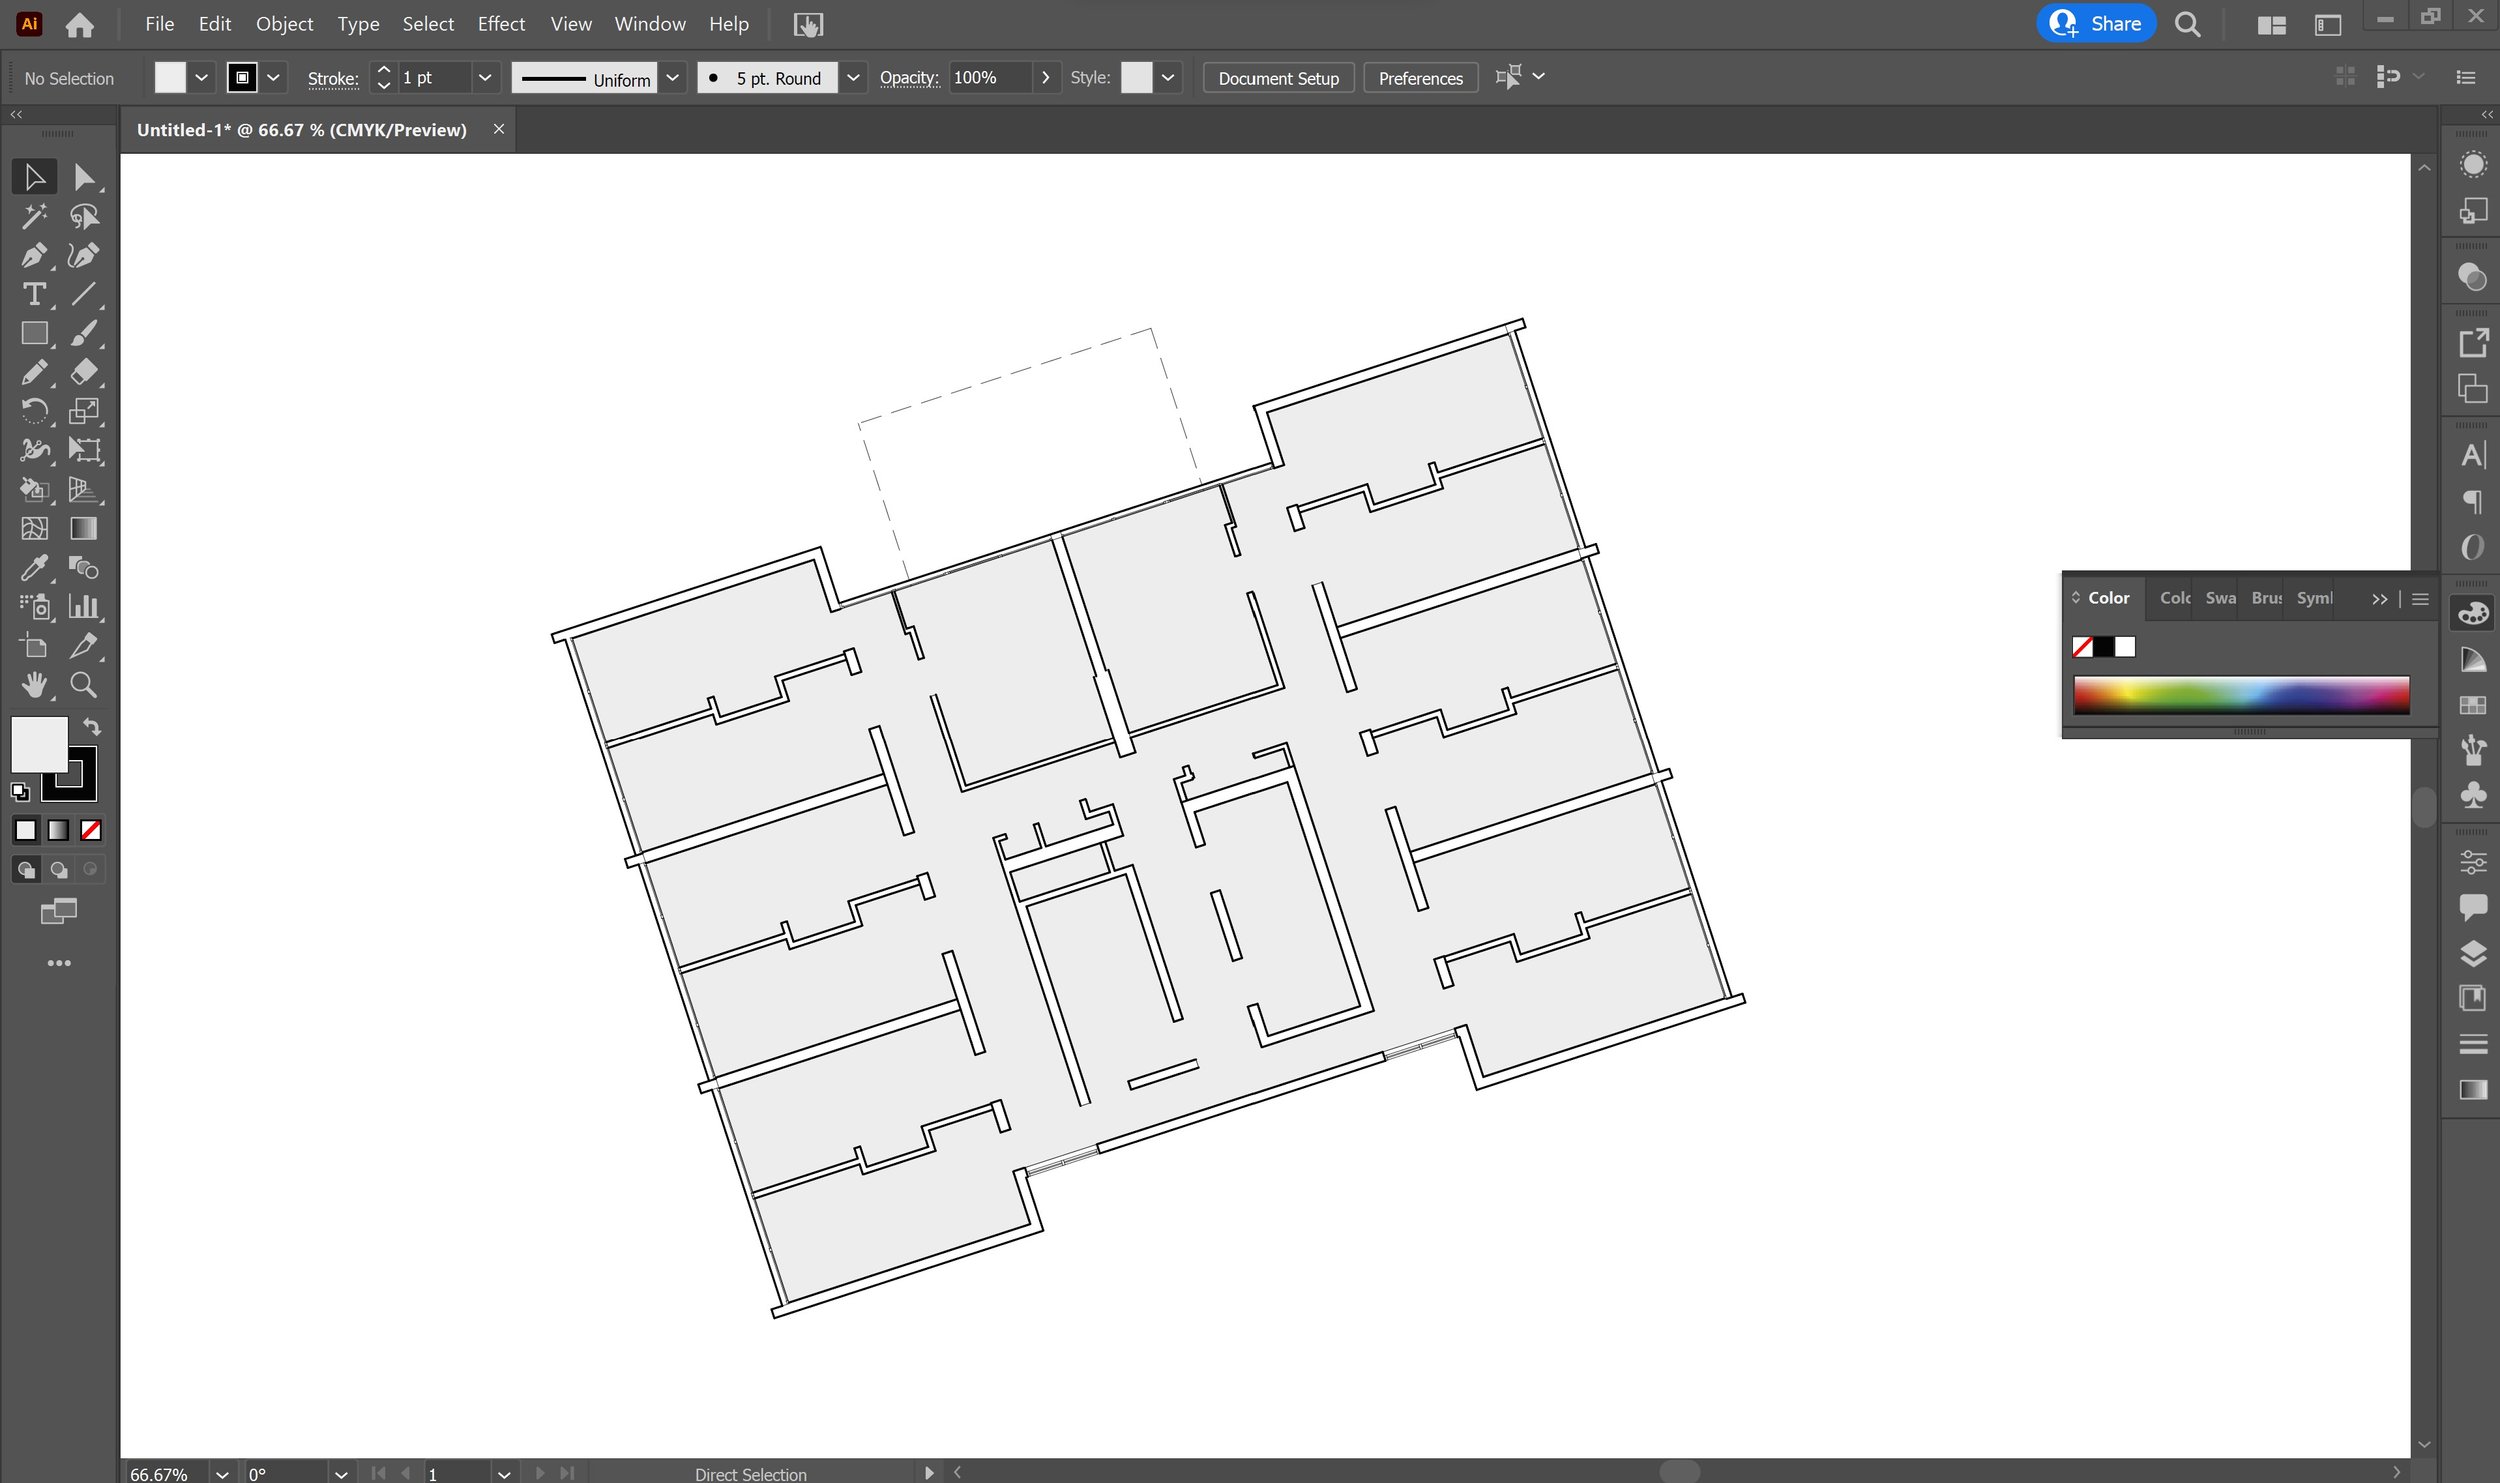
Like in Photoshop, you can also use the paint bucket tool to add colour to large areas of your drawing to stylise it.
Once again, direct select your drawing and choose the ‘Live Paint Bucket’ tool (or press ‘K’ for the keyboard shortcut).
Select the outline and fill colour in the colour options on the left side of your page (you might also have a panel on the side of your page which you need to expand to access this).
Click to fill in the areas of your drawing you want to shade in with a certain colour. This is why it’s important for your drawing to be produced from a well made model and cleaned up before you develop the base of it, as you may not be able to fill problematic areas of your plan or section with the live paint bucket tool.

Textures:
This technique is especially useful for elevations or collages where conveying materiality is more of a priority. Here, I’ll be demonstrating how to add texture in plan to a single room in illustrator.
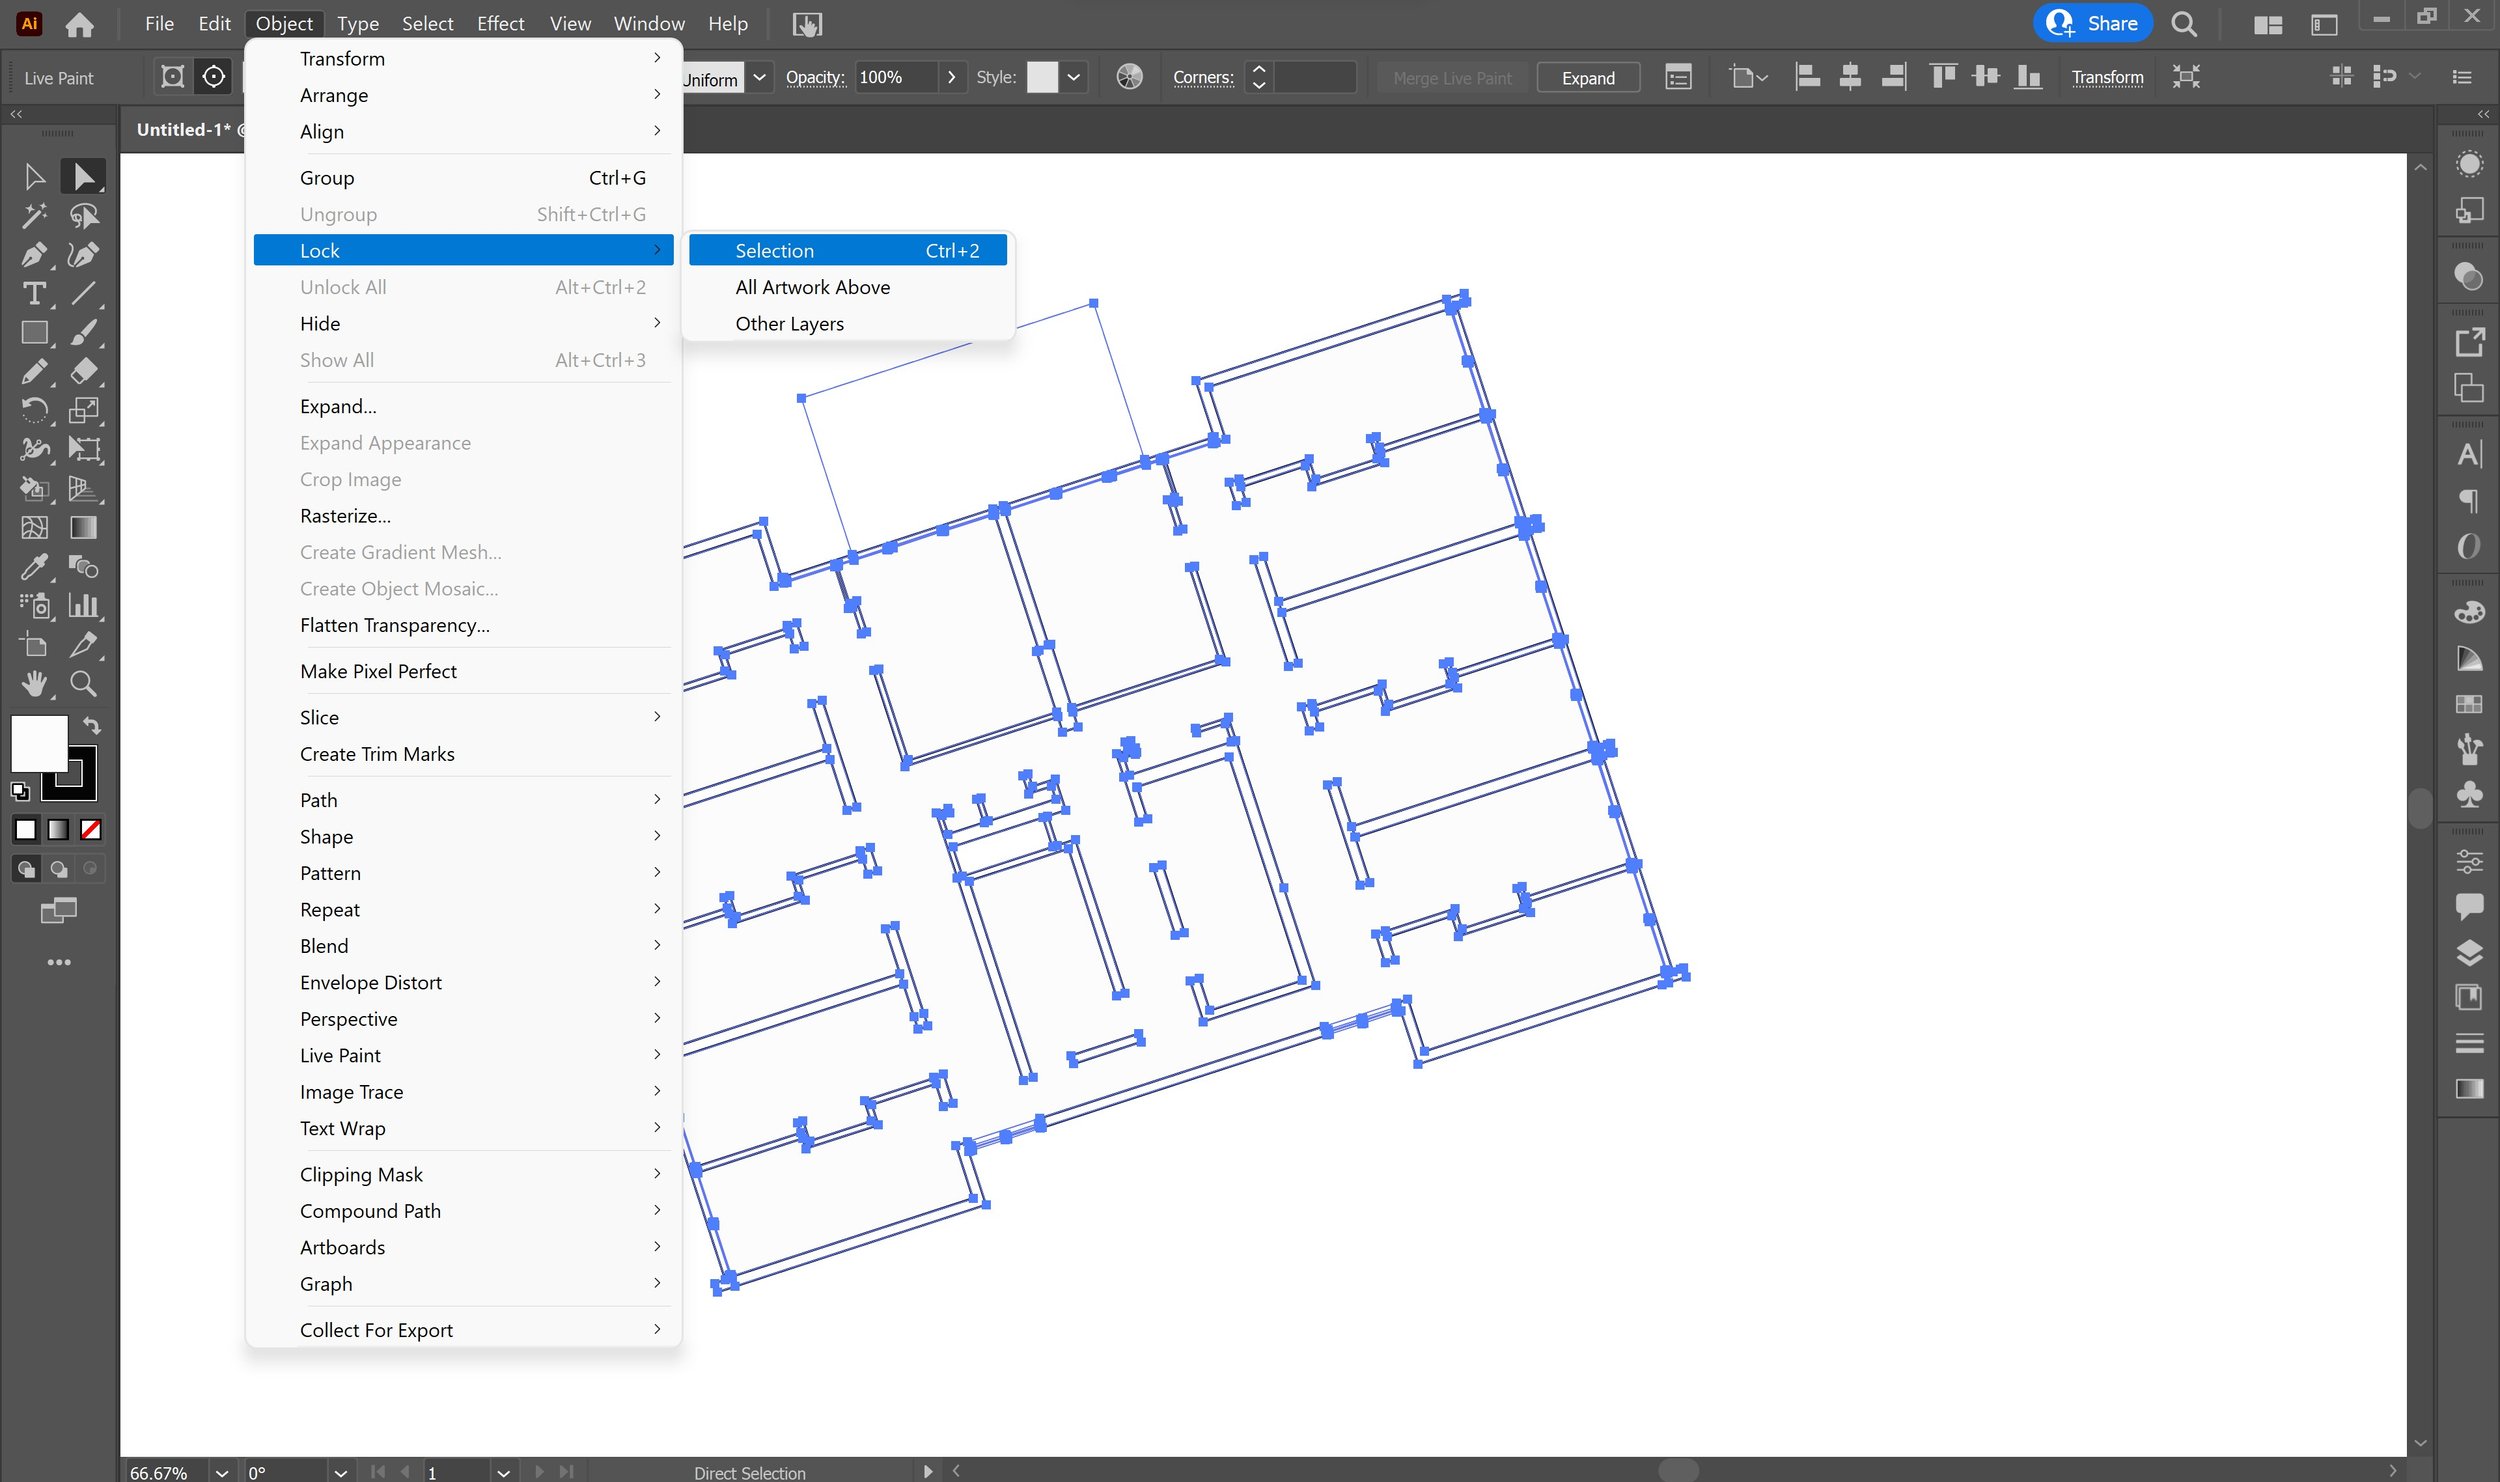
First, direct select your drawing and lock the selection as shown in the first screenshot, which can be accessed from the ‘Object’ drop down menu at the top of your screen. You can also use the keyboard shortcut Ctrl+2 or Command+2.
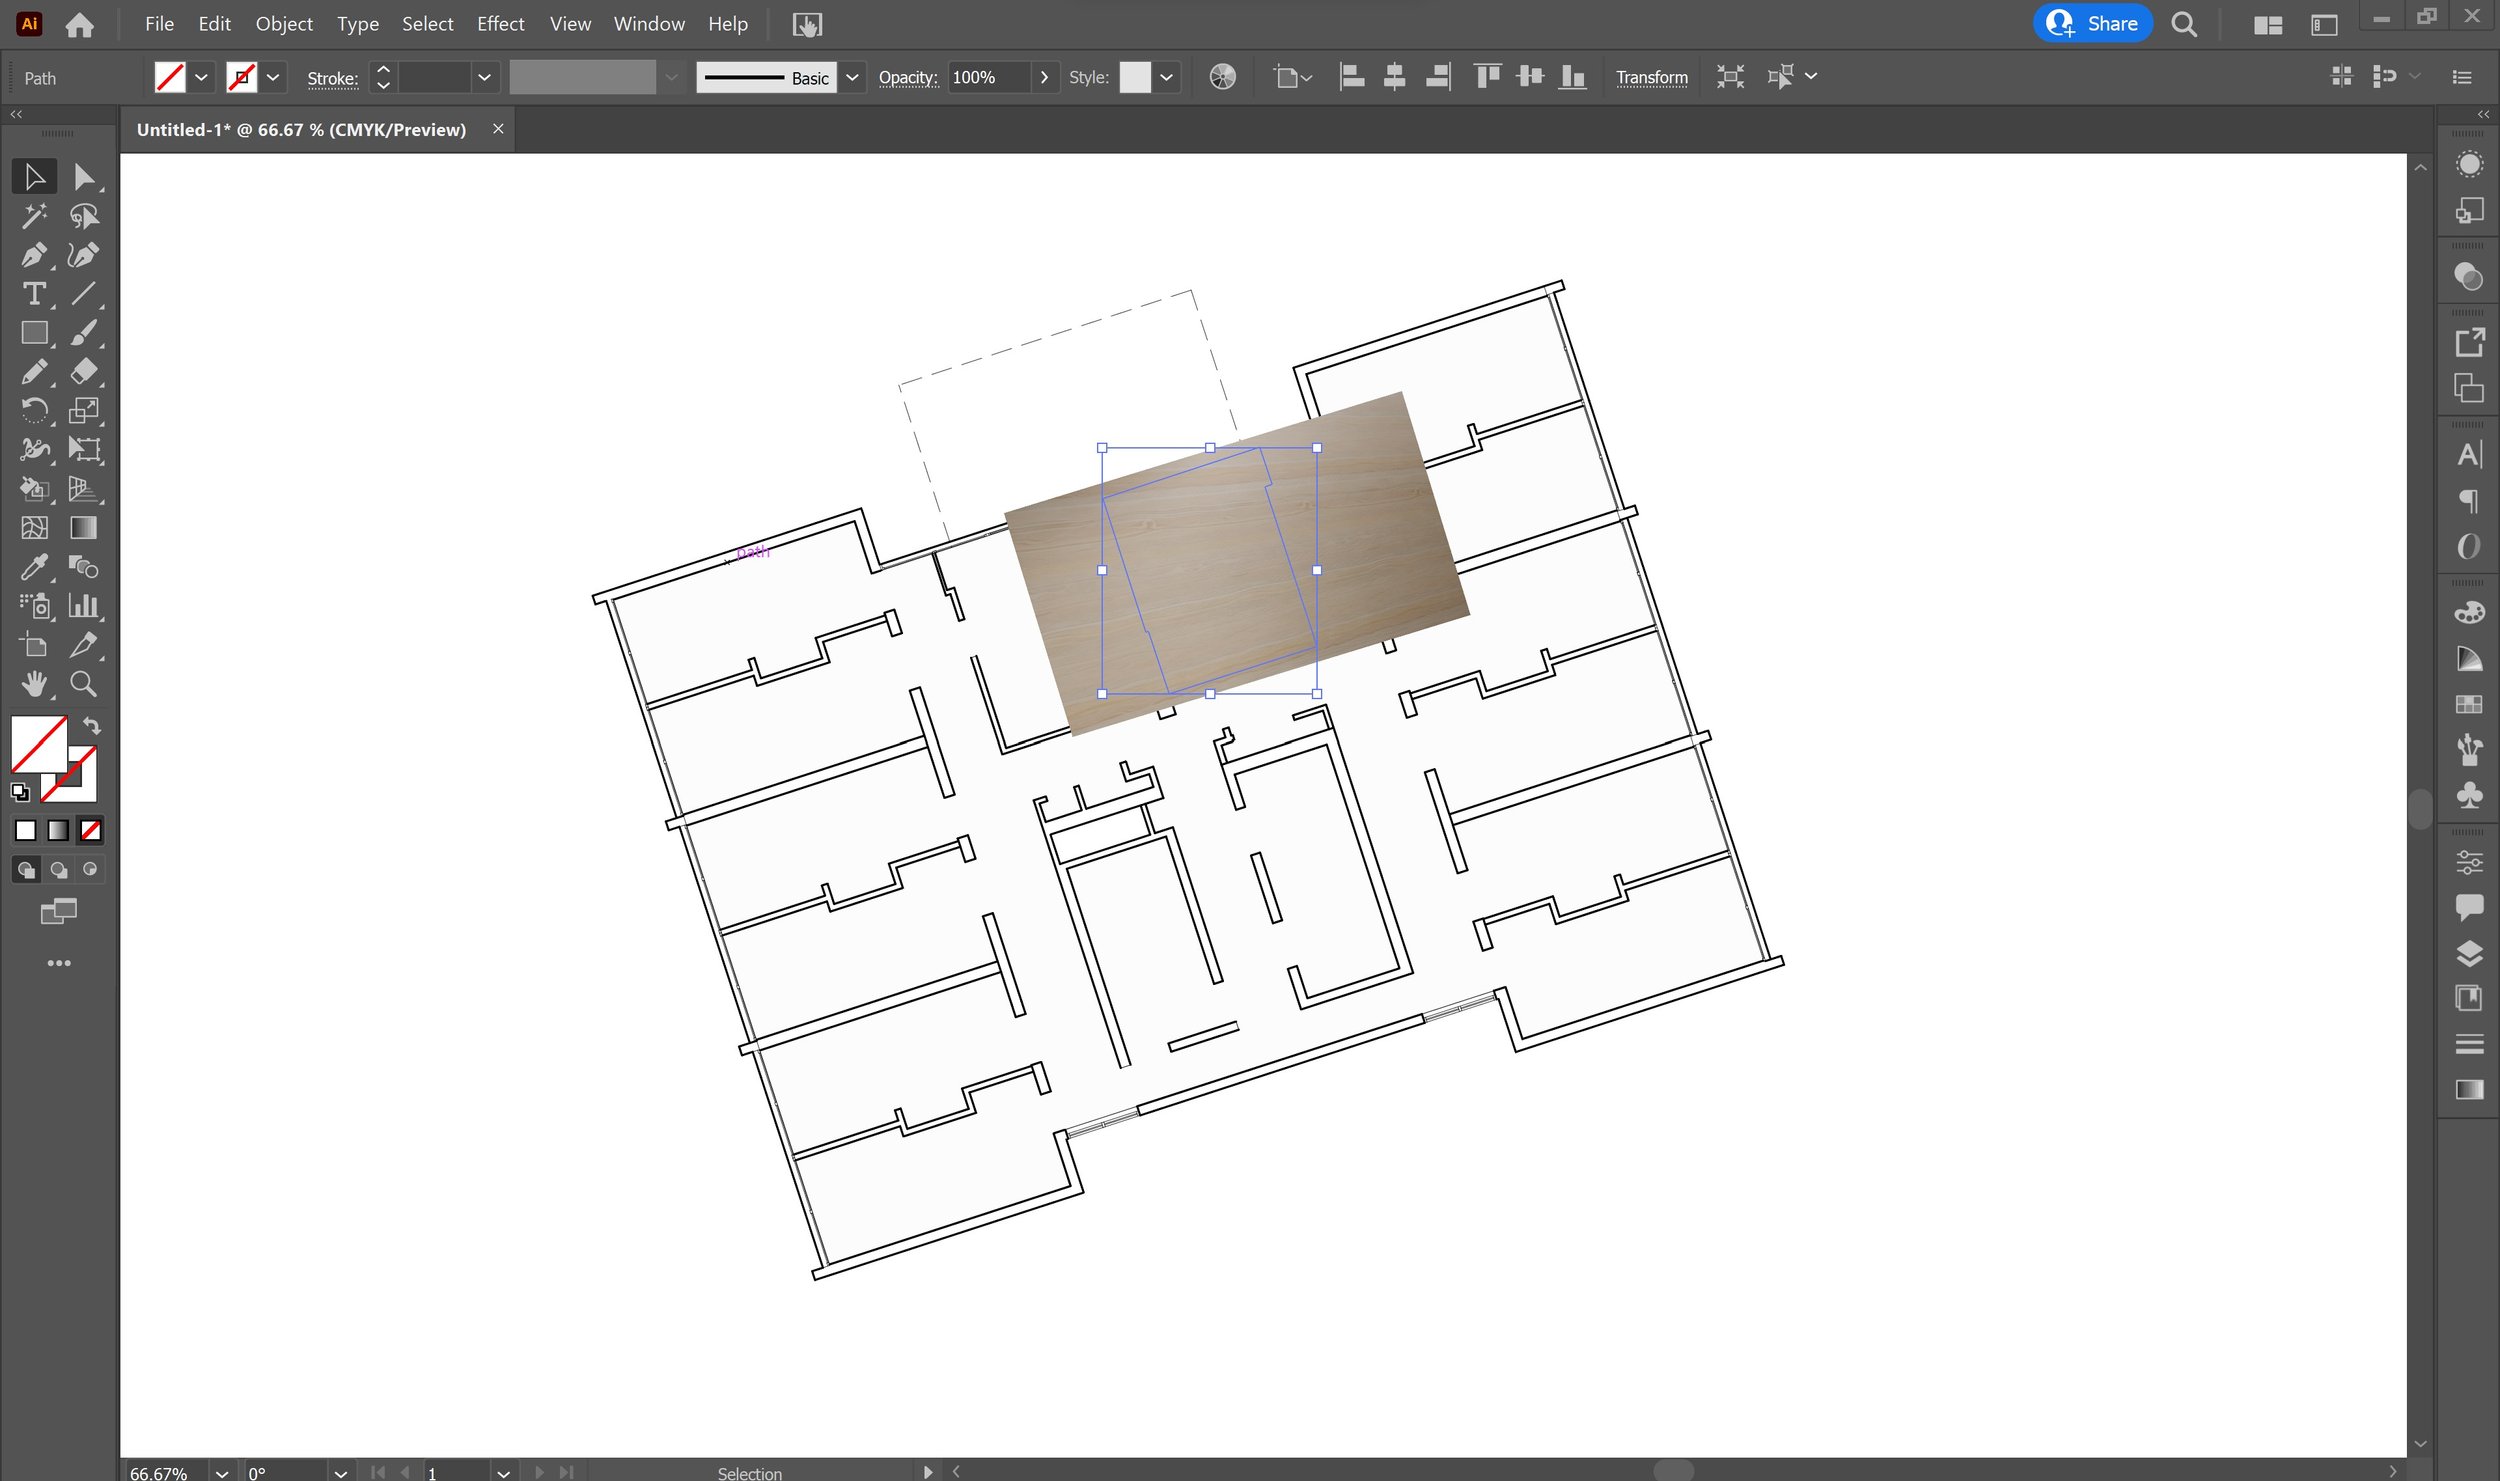
Draw in the area that you want to add a texture to using the pen tool, which can be activated with the keyboard shortcut ‘P’. I have filled this shape in to show you the area I’m working with, but make sure that this shape has no fill colour and no outline colour once you have drawn it.
Import or place in a texture image file behind this shape, making sure that the shape you drew is on the next layer above your texture. I’ve downloaded and imported a timber texture from textures.com, but you can use any high-quality image file to do this.
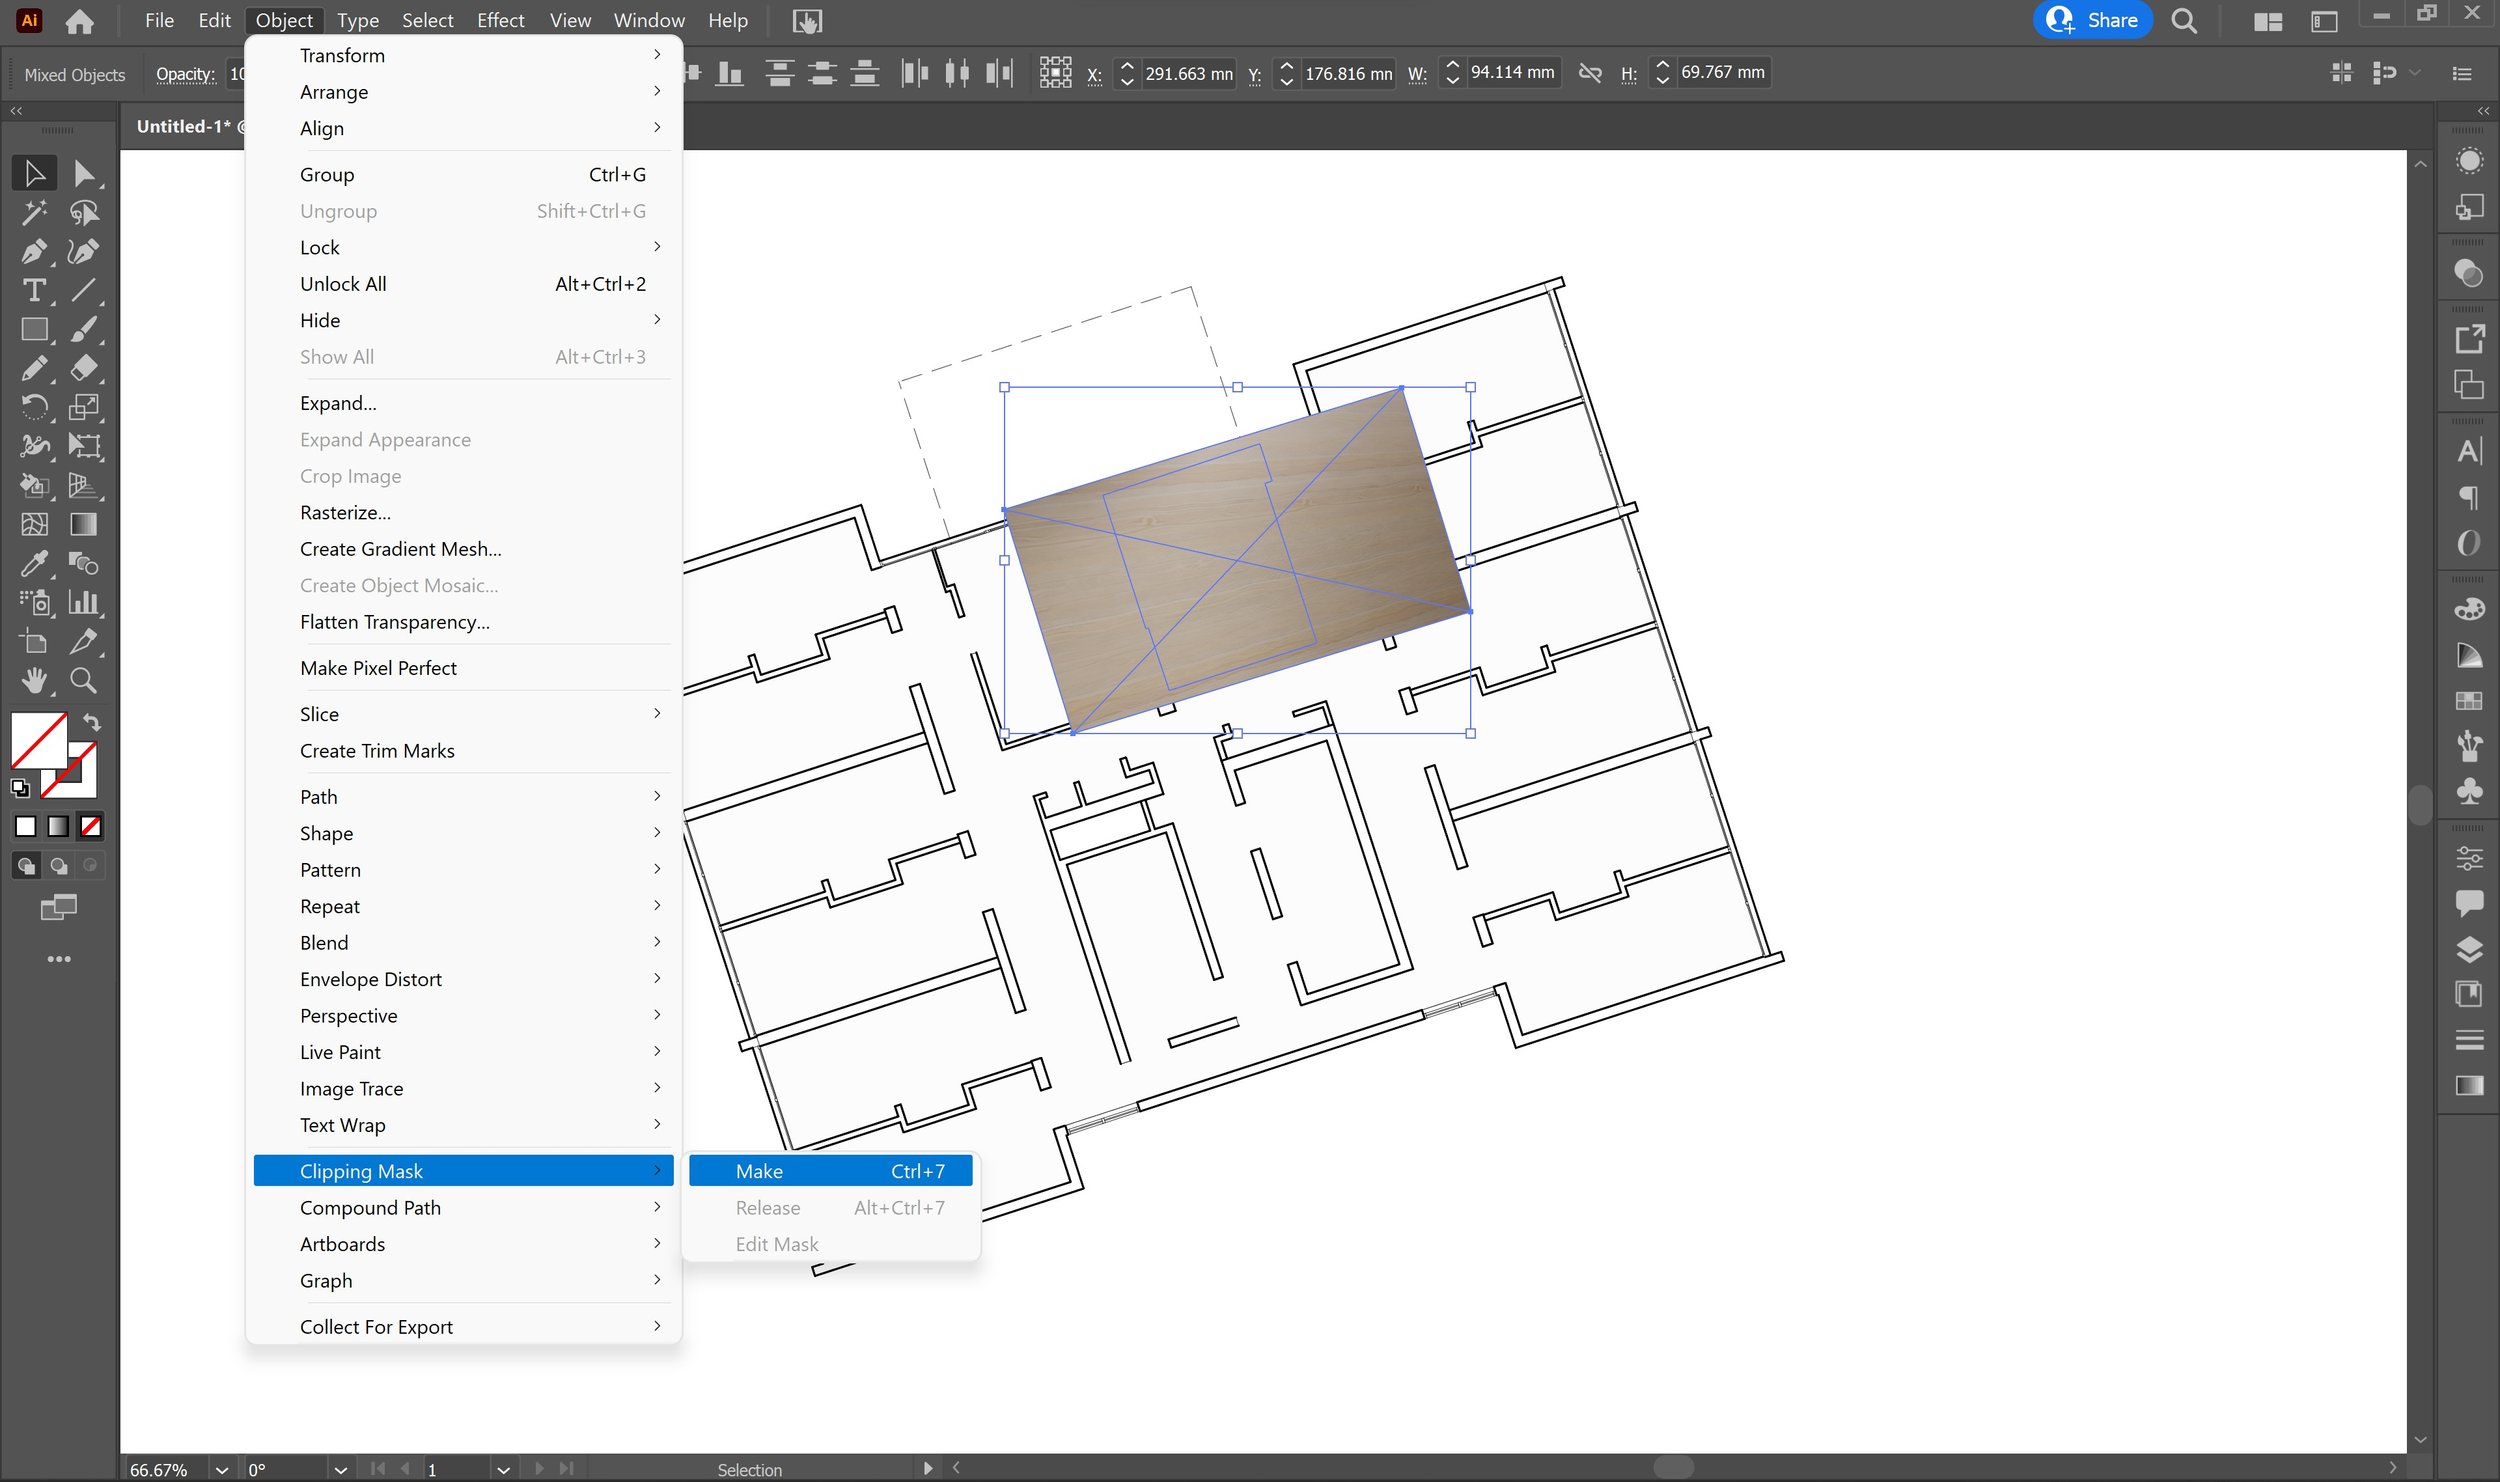
Select both the shape and the texture, go to ‘Object’ > ‘Clipping Mask’ > ‘Make’. You can also use the Ctrl+7 or Command+7 to do this.
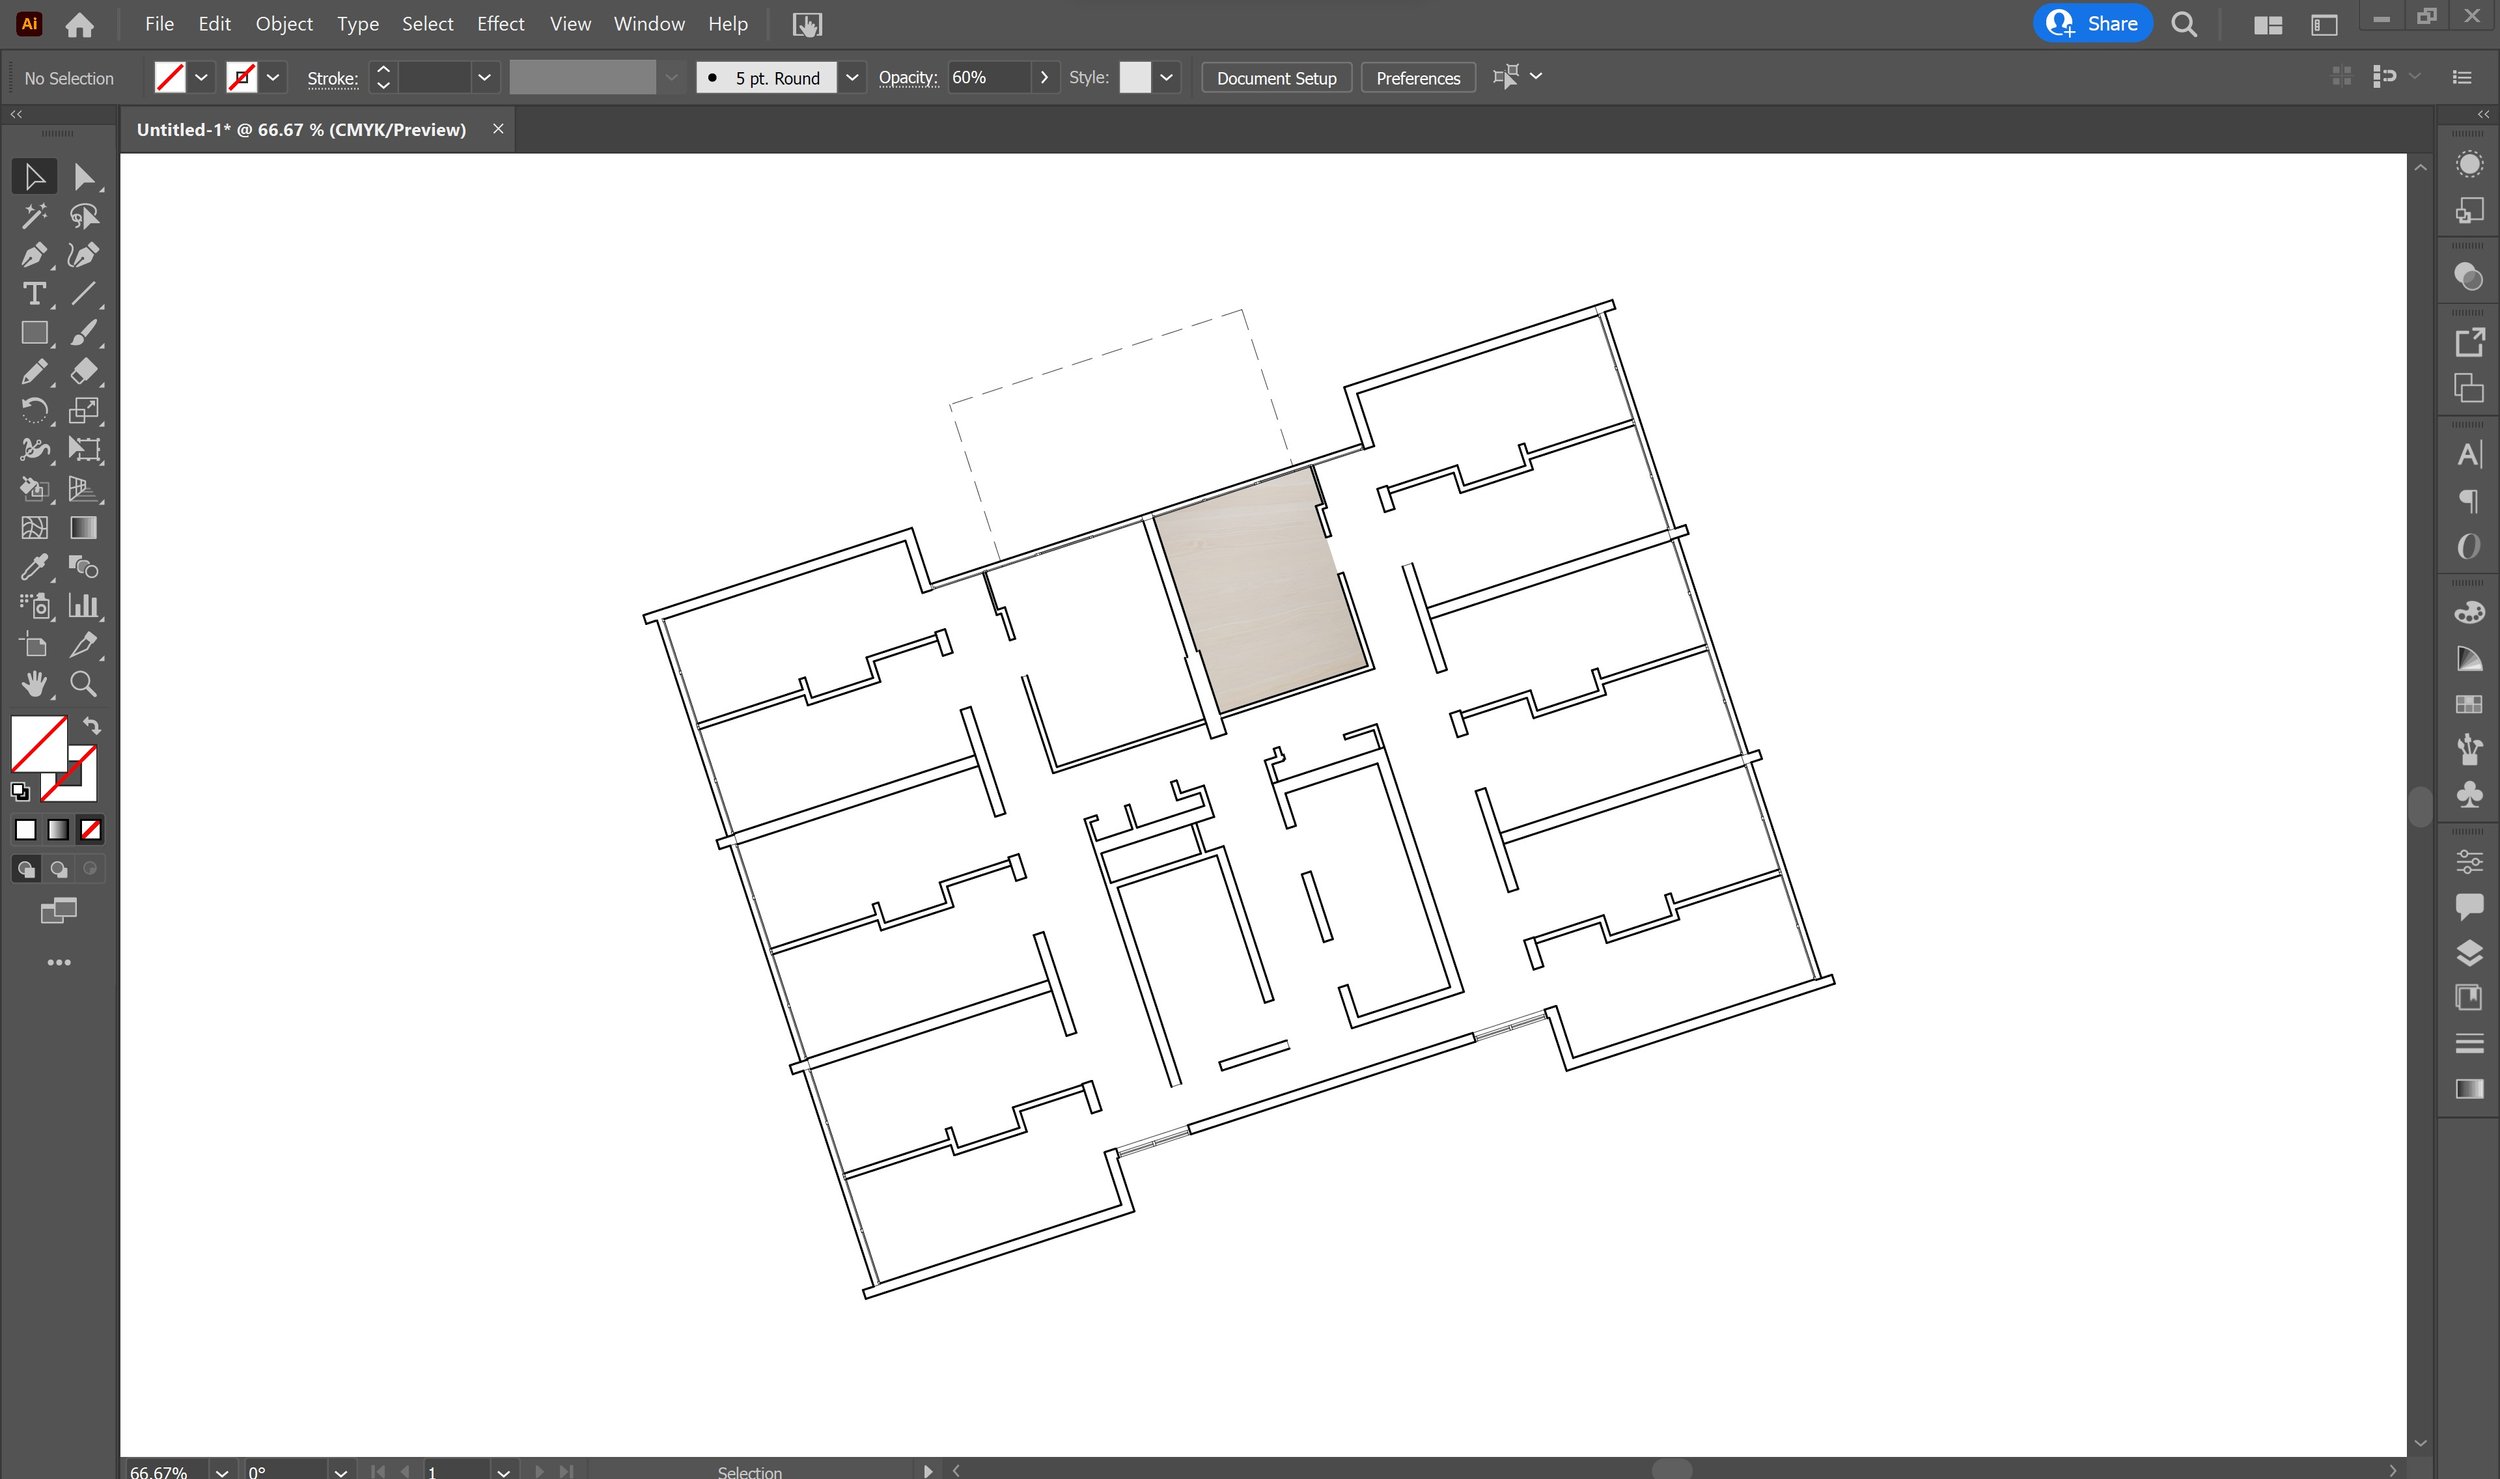
Bring this layer behind your drawing layer so it doesn’t overlap with the orthographic lines. I’ve also reduced the opacity to make it less imposing in the drawing.
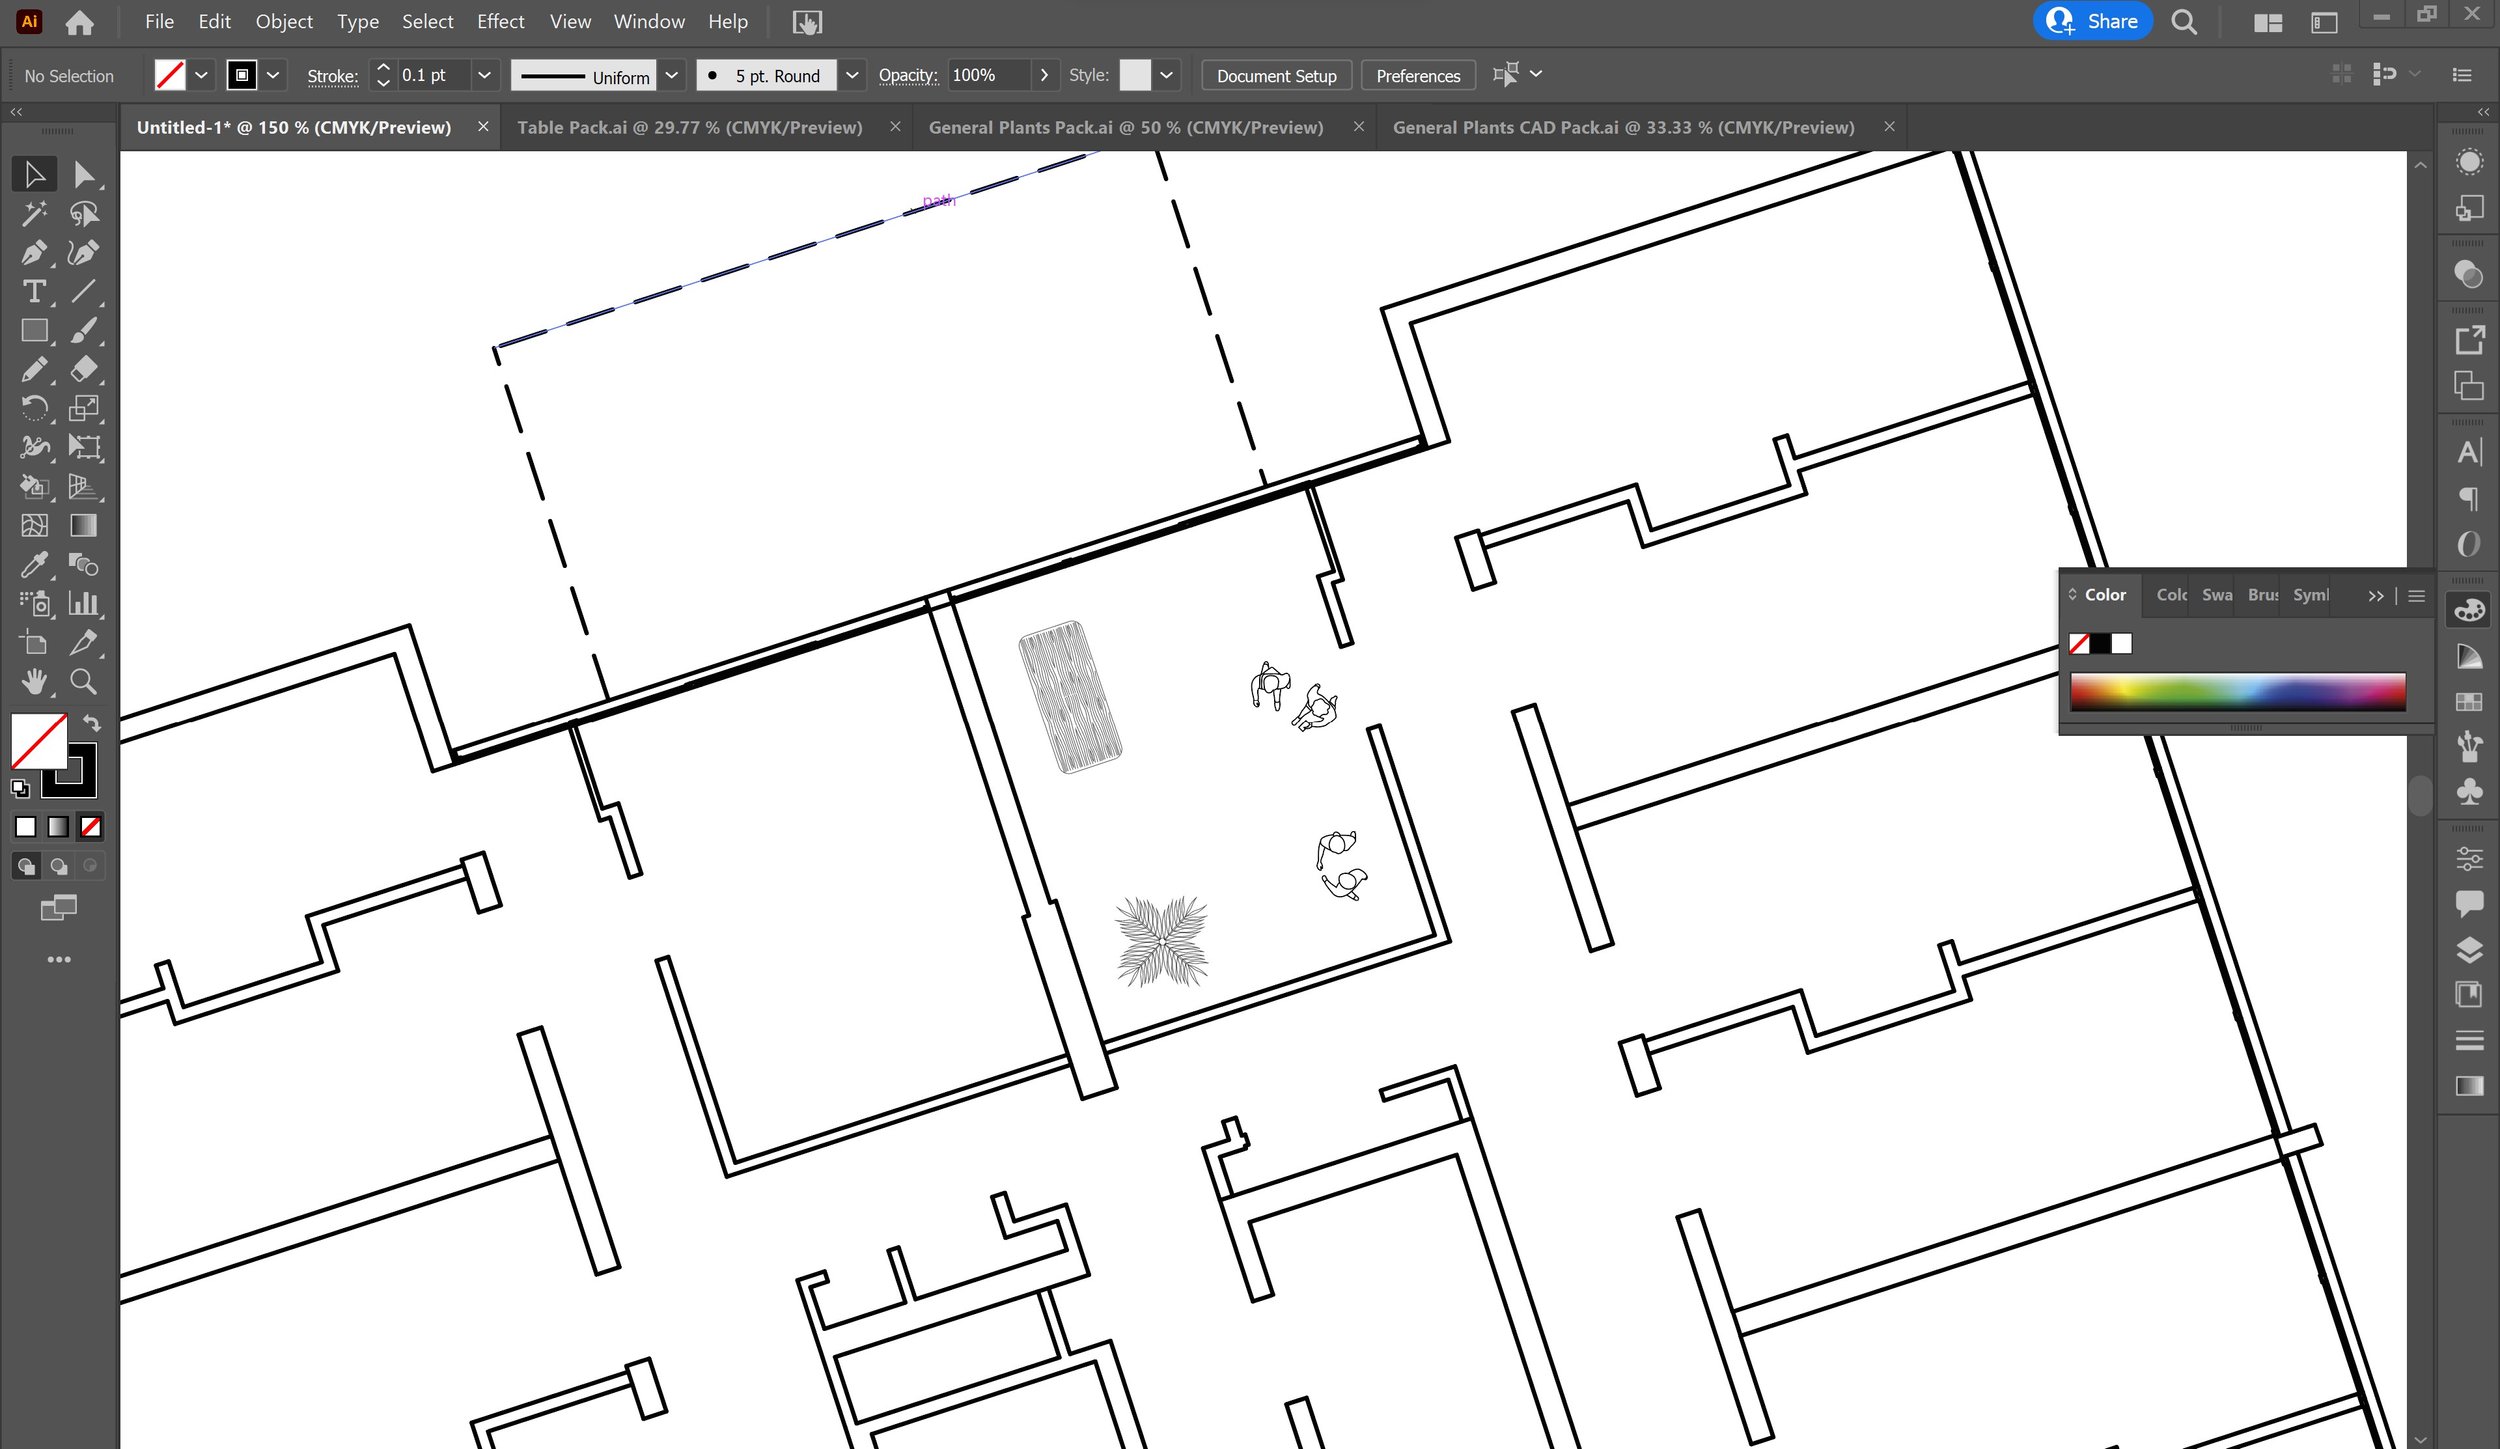
Importing DWGs:
Bringing inhabitation into your drawing brings your orthographics to life as you show how the spaces you’ve designed are being used.
You can place .dwg into your drawing as with any other file (including our CAD Blocks over on our CAD Store). In this drawing, I’ve used the Tables Pack, General Plants Pack and Pedestrian Pack from our store to populate the drawing.
Make sure any files you import to populate your drawing are scaled to your orthographic so everything is in proportion with each other. You can experiment with different blocks and styles, as well as change the attributes of your CAD blocks.
If you want to populate your orthographics with your own drawings, you can use the pen tool or brush tool to draw in people, plants, furniture and context manually. Make sure that the line-weights are thin enough so as not to distract from the focal points of the drawing, and that they’re thinner than the cut lines. You can also make the lines grey to preserve the line weights and making the hierarchy of the lines clear by changing the stroke colour of these CAD Blocks.
Note: It’s good practice to test out how your drawing will look when you present it. If you’re pinning up your drawing as a physical sheet, print out a draft version of your drawing to see if the line-weights are clear enough or if you need to thicken/thin down certain unclear lines. Likewise, if you’re presenting digitally, test out your drawing on a page in presenter mode on InDesign or Adobe Acrobat as an exported PDF/Image file, as the digital presentation of line weights can also be obscured through the exporting process which can make them unclear for digital presentations.
That brings us to the end of this week’s tutorial post on one way to work from a Rhino 3D model to produce digital orthographic’s. Remember that there are plenty of different ways to draw plans and sections using various software, and this is just one of many examples!
If you found this post useful, or want to share your own workflow tips with drawing digitally using different programmes, let us know on our Instagram @archidabble, where you can also keep an eye out for our informative Monday posts and updates on CAD block releases.
See you next week for another blog post!